Website update
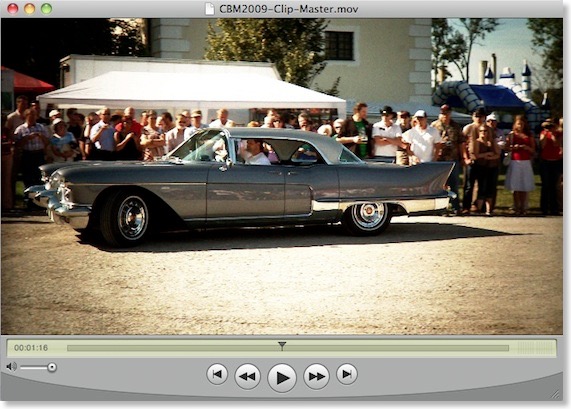
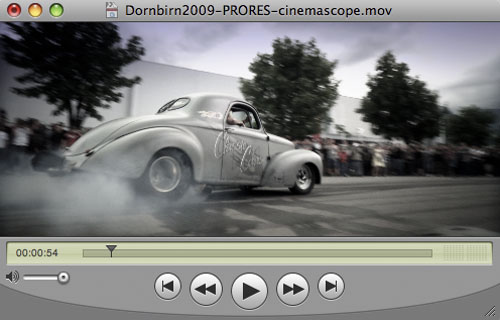
Cadillac BIG Meet 2009 - The Video
I did some filming at the 2009 event and posted the video in the video section of the Cadillac BIG Meet. Enjoy this nice short clip with some fantastic cars.
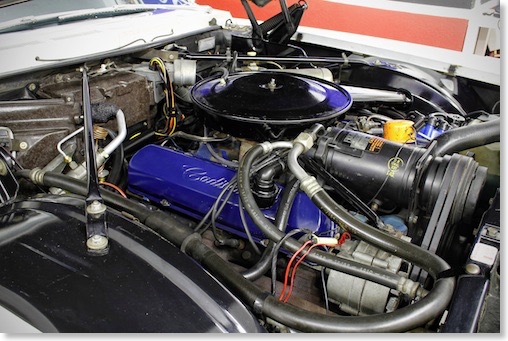
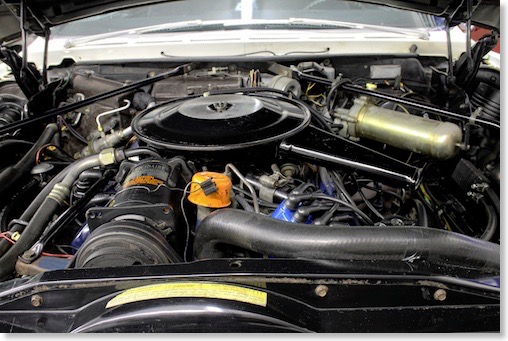
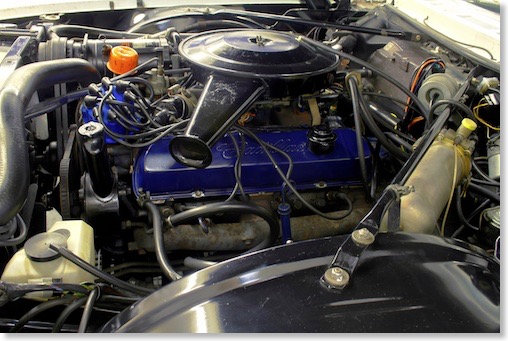
Cleaning the 1967 Eldorado´s Engine Bay
Below you can find some pictures of the now clean engine bay.
The 67 Eldorado´s Automatic Climate Control System is back in working order
I suspected a vacuum leak somewhere in the system. Troubleshooting began with going through all the vacuum hoses. I replaced some which were a little worn out at the connectors. I also cut off the ends of most hoses, as they were all becoming a little loose during the last 40 years. I then plugged them in again.
Not much did change though.
When I came to the hose of the hot water valve and the delay relay, I had the first success. At least the blower motor would stay on in all “Auto” modes, even when the car was idling - but would still go off in “Fog” and “Ice”. I then suspected a leak in the power servo or in the dash controller. So I installed the power servo from my 67 DeVille where everything works perfectly, to be able to rule out any problems. Nothing changed though - the blower would still come on and off depending on the throttle position.
I then soon found the culprit of the whole issue - it was the master vacuum switch - which seems to have a problem with the internal electric switch. As I had a spare one around I installed it - and voilá - everything worked as it should. It always looked good when I checked it before.
I´m very happy that everything is back in working order. The only thing which I still have to repair is the fast idle diaphragm which completely dried out and is no longer functioning. Fortunately I do have a spare 429 engine in the garage from where I can grab and use this part - so I will repair it soon.
I then need a new condenser which is already on the way across the Atlantic coming from Old Auto Air.
By the way - Cadillactim has an excellent trouble shooting guide for the ACC on his website.
The evaporator had to be replaced as well along with the heater core. This is a pretty big task as you can see on the pictures below. You even have to remove the hood to get access to the whole unit. The fiberglass AC enclosure had to be repaired at my car as well as the previous owner tried to repair the evaporator and missed a screw and made a tear into the enclosure. The restoration shop repaired this professionally and it looks like new now.
The best troubleshooting guide for 1967 and 1968 Cadillac´s Automatic Climate Control Systems I got today from Gary Sisk - owner of a 1968 Cadillac.
This is a very easy to follow explanation which will save you a lot of time and you do not even need any special tools.
It was written by Lynn Nicholls and can be found on Stampies Cadillac page - here is the direct link to it.
Below you can find some pictures of my system:
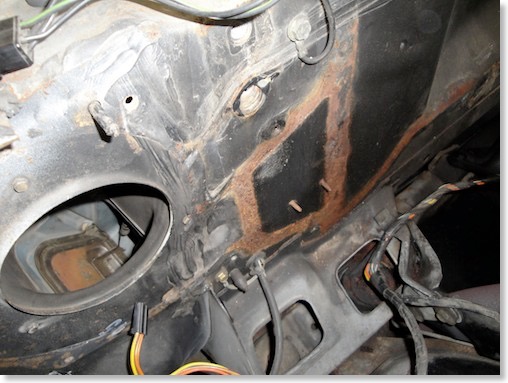
The whole AC unit has to be removed to get access to the evaporator and heater core... The slight surface rust that showed up where the gaskets were, was removed as well of course...
The big hole on the left is where the blower motor is installed.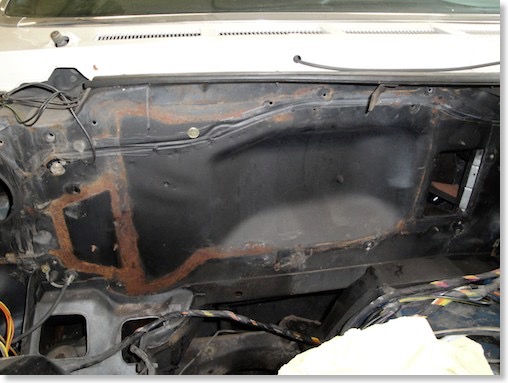
This is where the AC box usually is installed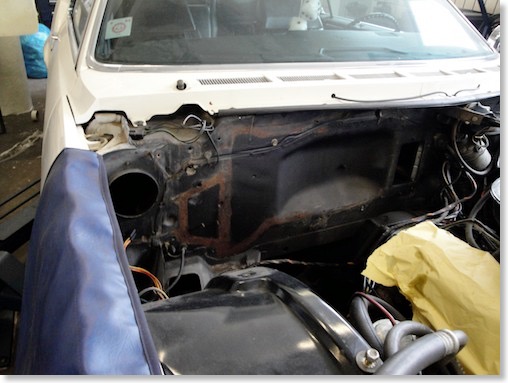
You can see how much has be removed just to get to the evaporator and heater core...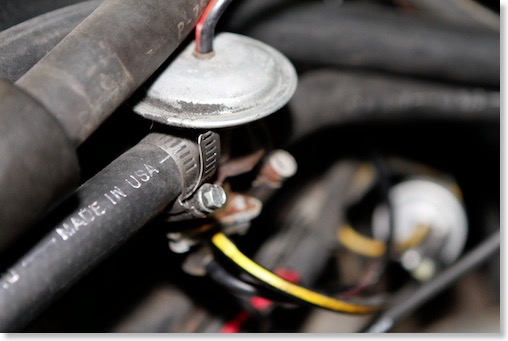
I discovered the first issue at the hot water valve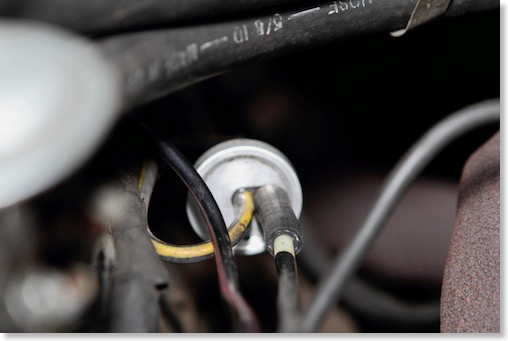
The hoses around the time relay delay were leaking a little bit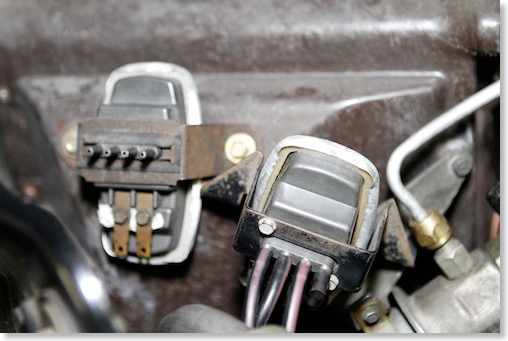
For testing purposes I hung a spare master vacuum switch into the car - this solved the problem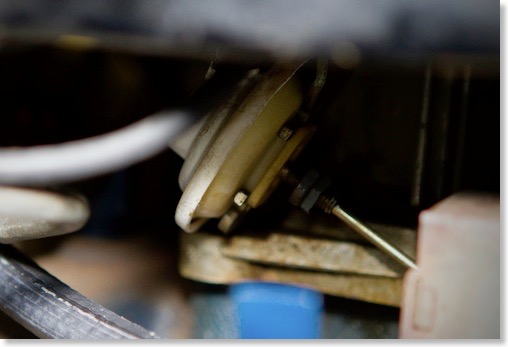
The old fast idle diaphragm was leaking and brittle and was replaced with a better one...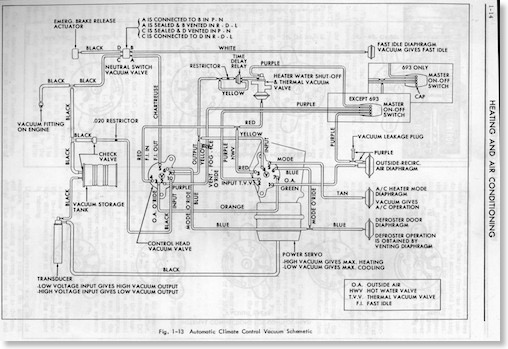
The 1967 Cadillac Automatic Climate Control Vacuum Schematic from the shop manual -
1968 is almost identical BTW... Click on the image for a larger view!
Here is a video about the Master Switch that a gentleman posted on youtube
The 67 Eldorado´s vacuum hoses - Blower issue
During the rebuild of the whole AC system I found out that I´m also having a little issue with the blower which does not always come on at full heat. So as a first step I started to go through the numerous vacuum hoses in the car yesterday. I soon found some old and brittle ones which fell apart when I just touched them. The two hoses that fell apart were the ones going to the right headlight doors.
Original color coded hoses seem no longer available anywhere. Thats why I had to buy regular black ones and paint the red and green stripes on them. Looks almost perfect - I did not think that it would turn out this nice.
Will go through the rest of the hoses soon. With the replaced hoses the headlight doors now work 100% simultaneously, whereas before one was slower.
I still have to find the issue with the blower motor - but I now suspect either the AC controller or the power servo. It works perfectly in full cold - only when I set a higher temperature the blower will cut out. Another problem to solve over the winter... I had almost the same problem with the 67 DeVille before which I could successfully repair.
BTW - if you know of any source for the GM OEM style color coded vacuum hoses please let me know.
You can find a vacuum diagram for the headlight doors here!
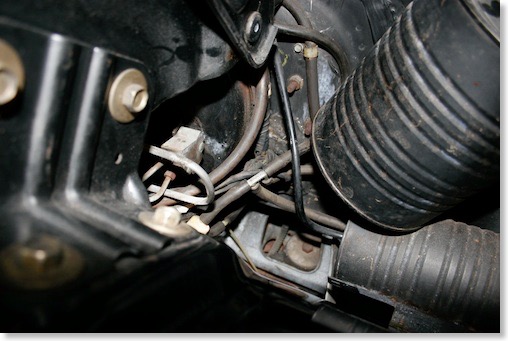
There are lots and lots of vacuum hoses in the Eldorado to check - here are only a few going to the storage tanks...
I will also give them a good cleaning during the winter.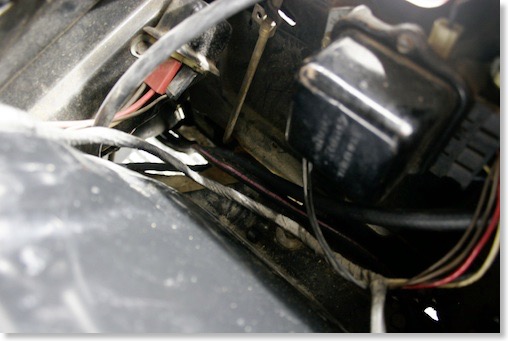
The new hose with the painted red stripe is already in place - looks some kind of original...
The 67 Eldorado passed the inspection
The completely rebuilt AC will get a recharge next week and I can then pick up the car and put it into winter storage together with the other Cadillacs. Can´t wait for the next cruising season.

These are the documents which now allow me to register the car in Austria.
Visiting the 67 Eldorado at the restoration shop
Here are some pictures of what is going on in the shop. You can also see all the restoration pictures here!
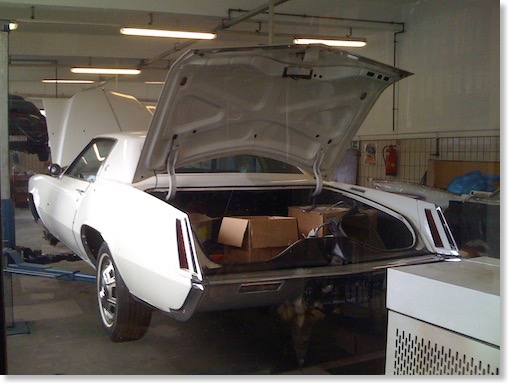
The 1967 Eldorado at the lift - the trunk is full of parts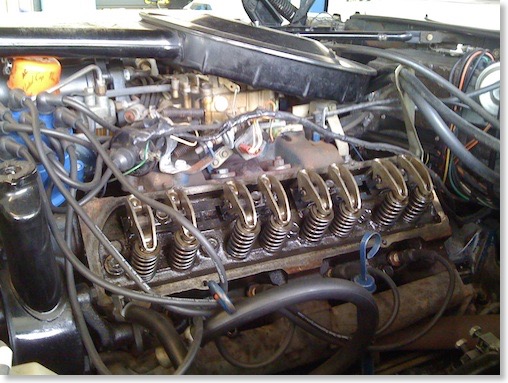
Look how clean the 429 engine looks inside - it only has 27k miles on it - the valve covers will get a repaint and new gaskets will be installed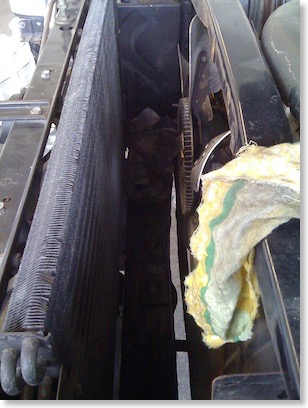
The radiator is out for re-coring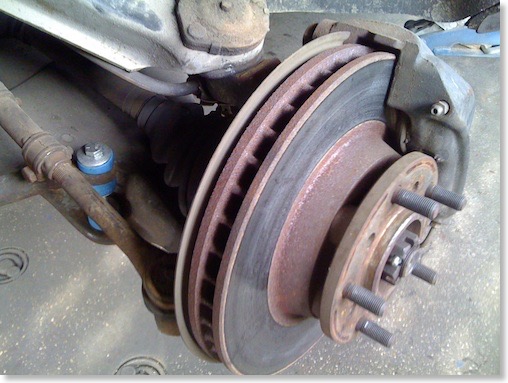
The left front disc brake is sticking a little - it will be completely overhauled as well soon.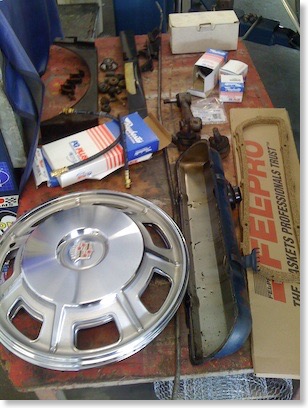
Some of the parts - the old ball joints are out. New brake hoses and brake parts are waiting for installation.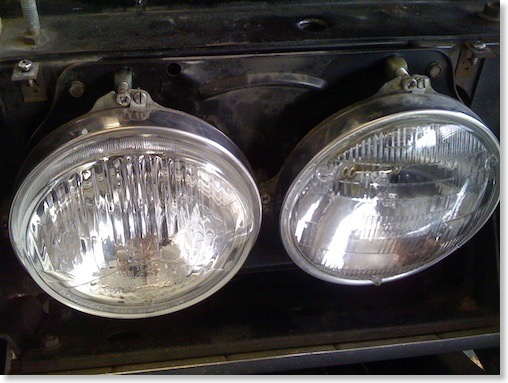
New H4 headlights had to be installed as the original T3 headlights are not street legal in Austria
A short in the 1958 Eldorado power vent window wiring
So there was no other way than hooking up the charger. Two hours later, the battery was strong enough to start the car. I checked all electric components and everything seemed to work - so I was wondering what drained down a fully charged battery over night? This was the moment when I noticed a clicking noise coming from the passenger door. I opened all windows including the power vents . When I opened the passenger door the vent window started to close itself! So even when the vent window was fully closed, the window motor would still draw current. At a test drive with the door closed (of course)- the window would eventually start closing itself again.
So I had to remove all the window switches and unscrew the kick panels. Of course some of the cables behind there were broken or had the isolation coming of at the areas where they had to bend each time the door was opened or closed. I replaced one section of a cable and isolated the other ones.
So far everything seems to be working o.k. now. After an extensive test drive and opening the doors multiple times - everything seems to be well.
It is really a pain to get access to all these cables and trying to repair them. Some smaller hands would be very handy in this cases.
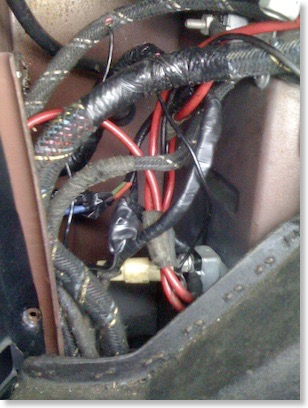
Thats the area behind one of the 1958 Eldorado kick panels where the cables have to bend all the time. After 51 years they seem to get tired.
The 67 Eldorado is now at the shop to get an Austrian license
The cars have to be safe and in very good condition. They check the brakes, all the suspension parts, rust, emissions and everything else what is important. The regulations are very strict - so basically everything has to be in perfect order. We even have to change the lighting system. Its obligatory to have amber rear turning signals, which makes it impossible to keep the rear lighting system in original condition (at least for the time of the inspection...). Often there is no other way than to install additional amber turn signals somewhere on the rear bumper or trunklid. (!)
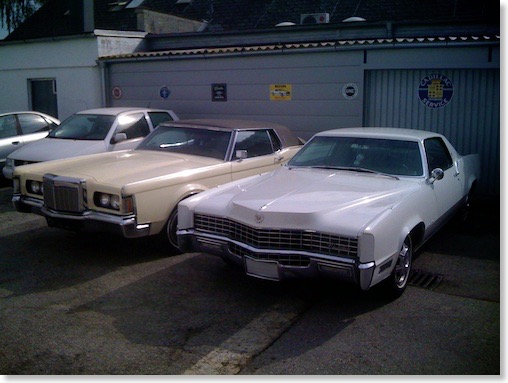
The 1967 Eldorado is now at the restoration shop - here it is on the side of a nice low mileage 1971 Lincoln Mark III.
As I finally want to be able to drive the Eldorado on our roads, today I delivered the Eldorado to my restoration shop, where they will do some of the necessary conversions and repairs. They already helped me with my 67 Deville and the 58 Eldorado.
The Eldorado will now get a new radiator as the original one is leaking badly. Actually I will have the original one recored and repaired. The front disc brake will get an overhaul due to a partly sticking piston, together with all new brake hoses. The fuel line will be replaced as it started to leak as well. The lower ball joints and the idler arm will get exchanged along with some rubber bushings. Besides of this list of repairs the rear lights will be converted for the inspection.
After the Eldorado is back in perfectly working condition, the inspector will check the car and hopefully approve it... Unfortunately until all this will be done it will take some time, and the winter is just around the corner - so it will go right back in winter storage after this procedure.
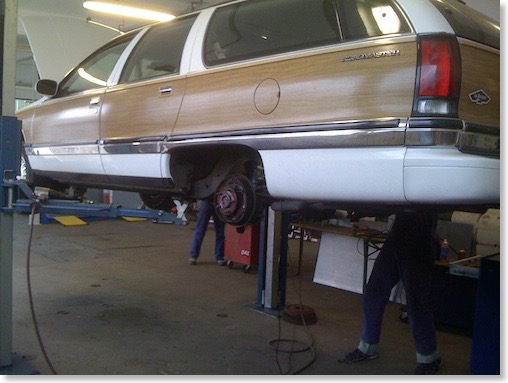
The 1996 Buick Roadmaster - new rear wheel cylinders
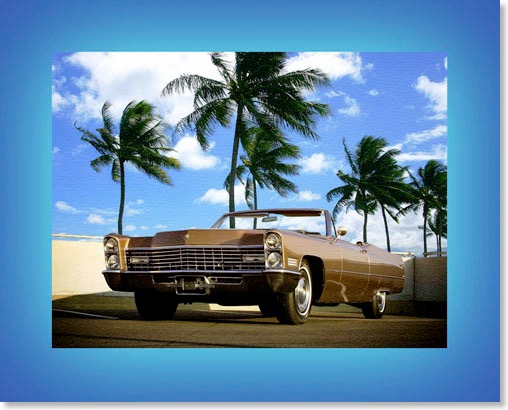
As our 96 RMW did not pass the technical inspection 3 weeks ago I had to order new rear wheel cylinders which were installed today as well. It then passed the annual inspection and can be driven for another year.My 67 DeVille under palm trees...
“Hi, Gerald....I saw your photos on Flickr. I snagged one of the photos of your 67 and made a Photoshop creation of it. Be looking for it.”
And here is the picture he sent - my 67 under palm trees, something I have never seen before as those huge palm trees are not existent over here in Austria! What a cool photoshop creation and idea - Thanks Scott!
1967 Eldorado - the headlights and the ALC work again
I also got a new control valve for the ALC compressor from Arizona Vintage Parts (a company I highly recommend). With this new valve the ALC is back in working order and the car is now raising its rear to the correct riding height again.
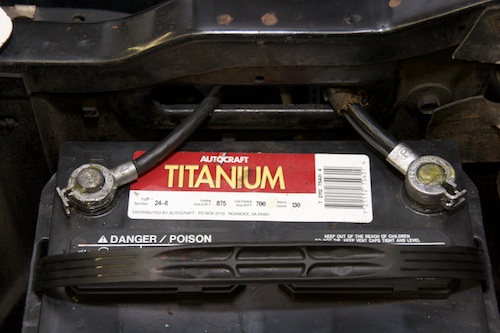
the new original style spring clamp battery cables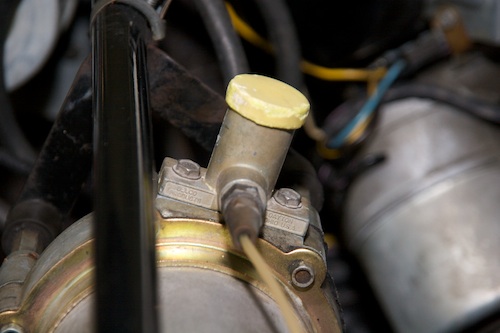
a new used ALC control valve is also in place.
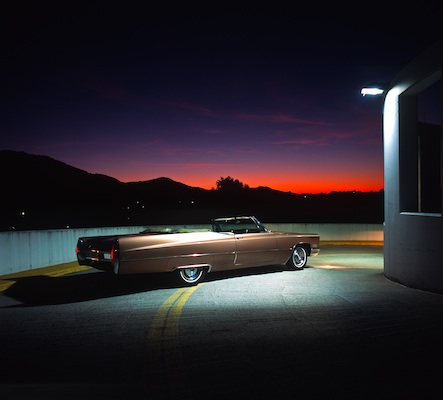
A night photoshooting with the 67 DeVille
I also took some "making of" pictures of her in action.
Click on the image below to go to the gallery with all the pictures.
The Cadillac BIG Meet was a huge success!
http://www.cadillac-meeting.com/english/pictures/pictures.html
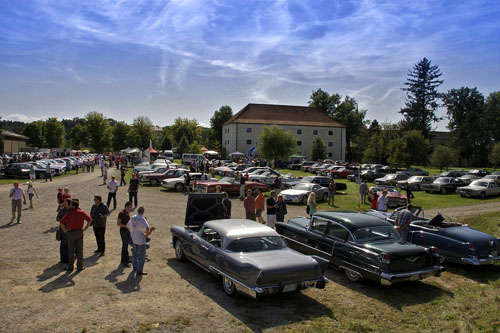
on the picture above you can see the venue - in the front there is my all-time favorite car - the 1957 Eldorado Brougham. This one was in perfect condition.
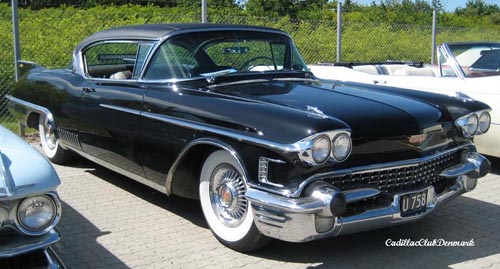
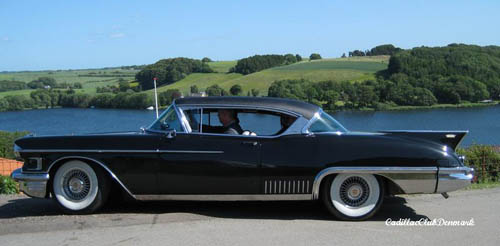
A great 1958 Eldorado Seville for sale!
“I want to sell my 1958 Eldorado Seville. The car is 100% complete and in very fine condition. Everything is working and it drives like a new car. The interior is 100% original and in super condition.”
If you are interested please contact Per Rubien in Denmark directly! Phone: +45 98134480 or mail:
He is asking around € 35.000.- - which is a very reasonable price for a car like this!
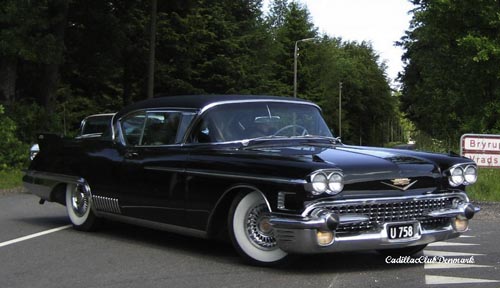
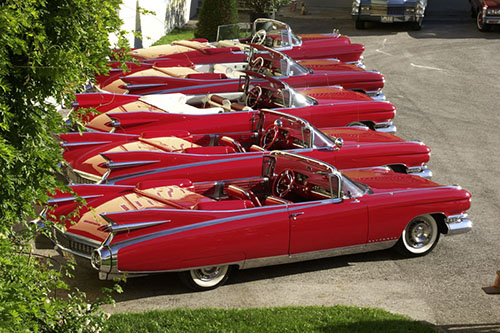
The Cadillac BIG Meet - This Weekend!
Its held for the 6th time this year at the Kremsegg Castle in Kremsmünster in Austria. This is the biggest Cadillac Meeting held in Europe and about 150 Cadillacs are expected.
For more info click on the image below - which was taken at the show. This years theme is “The Cadillac Fin” and the 50th birthday of the 1959 Cadillacs. I will take my 1958 Eldorado Seville to the show, as it is the only Cadillac I own which has fins.
The first 1967 Eldorado parts arrived
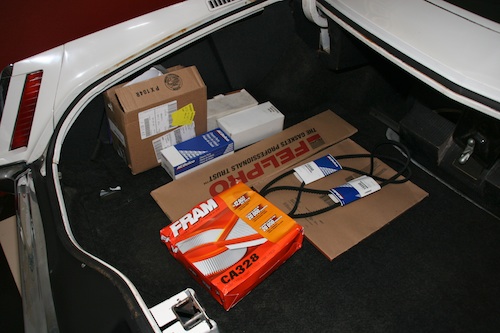
The first few parts that arrived - belts, filters, gaskets, caliper repair kits, dryer, pitman arm, air filter and some other stuff....
1967 ELDORADO HEADLIGHT ISSUE - ONE STEP FURTHER
Glen wrote the following:
“If you take the panel under the steering column off I think you can reach up and disconnect the connector from the light switch. Or you maybe able to get a meter probe up there to check voltage. The battery connection to the switch for the headlights is on the 14 gauge yellow wire. This only supplies the headlights and front parking lights. If you have 12 volts there then your problem is in the switch. There is a circuit breaker in the switch and it may be bad or the contacts in the switch are bad. IIRC these switches have a vacuum switch on the side that operates the headlight doors. This makes them hard to find. They do not interchange with the 68 Eldorado because in 67 the parking lights only come on when the switch is pulled out to the first position while in 68 the parking lights come on with the headlights also. If you do not have voltage on the yellow wire then you should check the fusible link on the starter. It is an 18 gauge dark green wire that changes to a 14 gauge red with white tracer before it gets to the connector. Check for 12 volts at the connector and check the contacts in the connector. “
Glen was spot on with his diagnose and it turned out that the green 18 gauge fusible link was the culprit for my headlight problem as it came apart for unknown reasons.
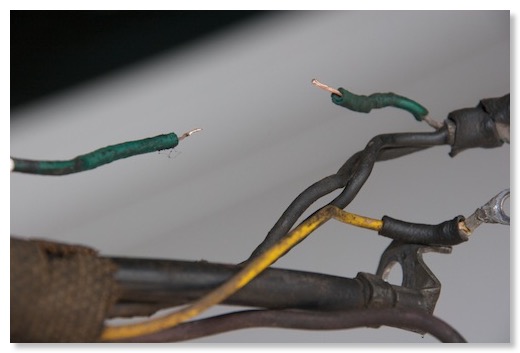
the green wire once was a fusible link - it fell into pieces when I slightly pulled on it
As a follow-up Glen recommended the following:
“You might want to look closely at the break in the link. See if it is melted or did was it broken by mechanical means. If it was just pulled apart or cut then you have to check what caused that.
To trouble shoot this if it was actually melted due to over current, I would unplug the headlights and front parking lights, and temporarily connect a headlight or other big light bulb, in place of the fusible link. You can then try things without blowing fuses. With the troubleshooting light in place it will light up brightly if there is a direct short. With the headlights and front parking lights disconnected the test light should not light up at all under any condition. You should be able to move change the position of the headlight switch, switch from high to low beam (light switch in the headlight position); wiggle the wire harness anywhere and not light up the test light. If it does you have found the short.”
I did this procedure today but it did not show any shorts. I then reconnected the front lights and everything did work again. I will now have to find a replacement fusible link which is very uncommon over here in Europe. I will replace it together with the positive battery cable where the clamp is almost falling apart. I hope the issue wont come back. It looks like the fusible link maybe only fell apart due to age as it did not show any signs of burning. Its located very close to the starter and the exhaust manifold - so maybe 42 years of dirt and heat just made it crumble into pieces....
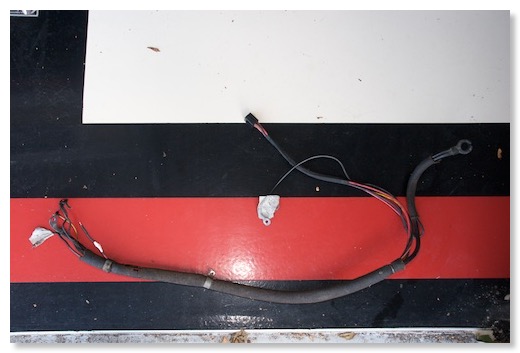
the completely removed positive battery cable harness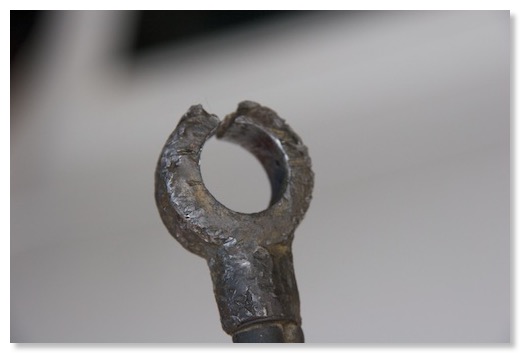
the original battery clamp - its already missing the spring part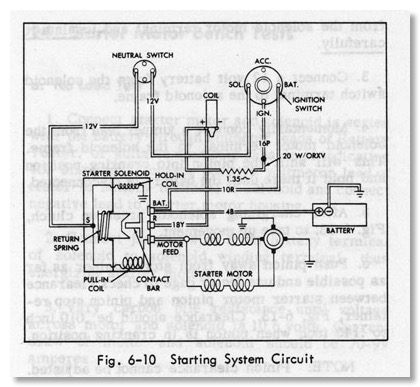
The starting circuit diagram is showing the battery cables - Click for larger picture!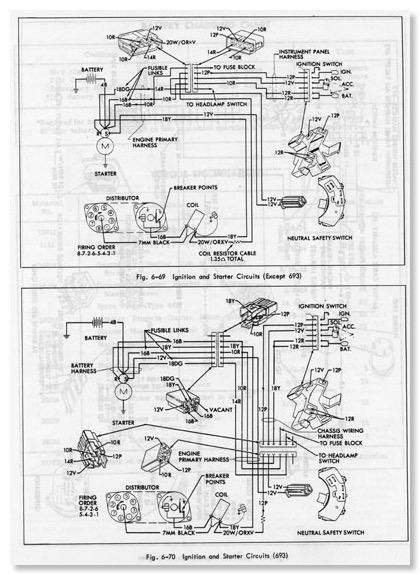
The Iginition and Starter Circuit Diagram for the Eldorado (693) and the other Cadillacs of 1967.
Click for larger version!
New pictures of my 1967 Eldorado on my website
You can find them in the Eldorados gallery.
1967 Eldorado Inspection - ALC issues and dead headlights
When I arrived there the headlights did no longer work. They did not have any problem before.
When the inspector wanted to turn them on - the headlight doors did open but the lights did not come on.
Also the parking lights and high beams do no longer work. The taillights did come on though and the cornering lights and turn signal do work as well.
Very strange… Checking the fuse panel I found out that there is no fuse for the headlights. My guess is now that it must be the headlight switch - can this be repaired? The shop manual mentions a 25amp circuit breaker in the switch but it does not mention how to repair it or check it.
The other thing which stopped working yesterday was the Automatic Level Control. The vacuum operated compressor in the engine bay seems to work as I can hear a ticking noise, but the car does not raise. I also added some pressure (100psi) to the service valve at the compressor but the rear of the car did not raise at all. When I depressurized the compressor the car did not come down any further either. Very strange… I really need to get this fixed - non working parts are making me crazy!
The car lost the yellow plastic cap which is located on the top of the regulator valve while driving it into the shop. Unfortunately it landed directly below one of the tires and was crushed to tiny little pieces. I will have to try to find a replacement. I have no idea how this could have come loose.
The car did not pass the inspection for some other reasons as well , like a sticky front disc brake, worn ball joints and pitman arm and some other minor things . It will keep me busy repairing all this for a while. Whats worrying me most is the headlights and the ALC as I do not have any clue at all.
On the positive side - the car was a pleasure to drive the 60 miles to the shop - its so much different to the “regular” Cadillacs - Big, silent and powerful and no big boat ride ;-)
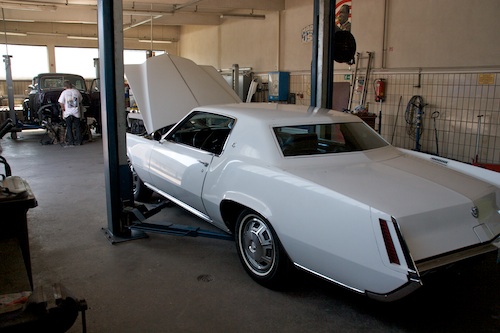
in the shop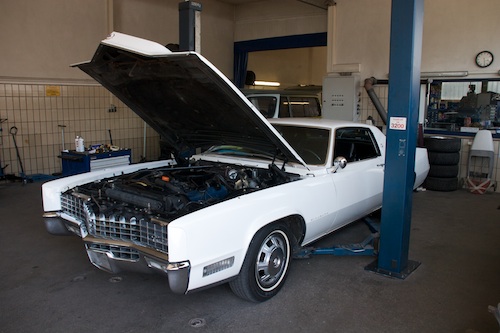
67 DeVille Brakes finally fixed
As I replaced the complete front end including the entire front brakes last year, I did not think that the drum brakes might only need a simple re-adjustment. As it turned out the front brakes were out of the range where the star-wheel can adjust itself while driving the car backwards and applying the brakes.
I now adjusted the front brakes pretty tightly and the pedal is now pretty firm again. I hope it will stay like this. If not - there must be something wrong with the automatic self adjuster, but I´m very optimistic that the problem is now solved. I also gave the rear drums a check - they turned out fine. I just wished the DeVille had front disc brakes like my 67 Eldorado...
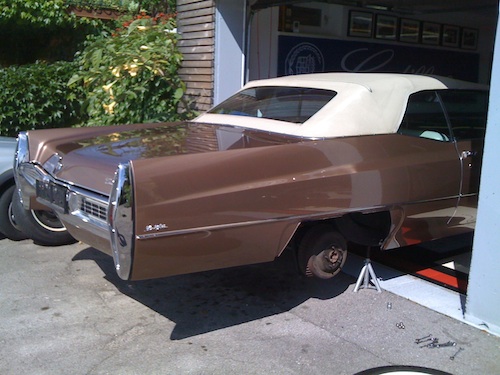
checking the rear drums - crappy cell phone picture...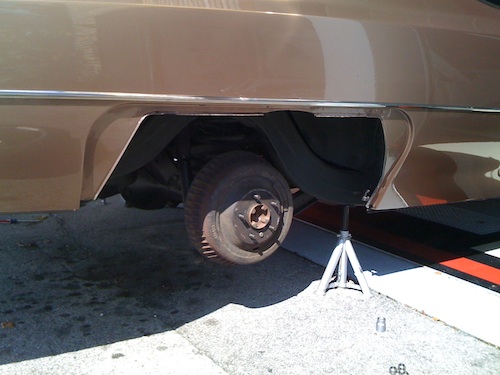
the rear drums
Music video with our Roadmaster in the background
We shot this “no budget“-production on a rainy sunday morning in a storage facility - the cars in the background were the perfect backdrop for the band. The musicians are a great bunch of guys and we had lots of fun during the shoot. Our Buick Roadmaster also served as a background props for the shooting - thats why I´m posting this video on my website.
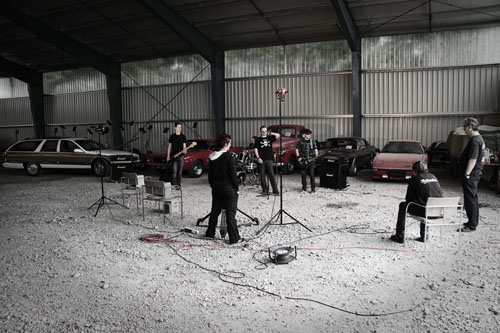
The shooting location with our Roadmaster in the background
The finished video
1967 DeVille got new brake booster and power cylinder
Everything went pretty smoothly at first - only bleeding the brakes was a little complicated and it did not help either that I spilled some brake fluid into the engine bay. Some harm was done to the black paint which had to be repainted immediately. So it took us some unplanned time to get everything back in working order. As it was raining heavily we could not even test the brakes. In the meantime I did a test drive and found out that the pedal travel is way too long. Looks like the push rod in the booster needs adjustment... D*mn this means removing the master cylinder once again... I hope I will find the time to do this soon.
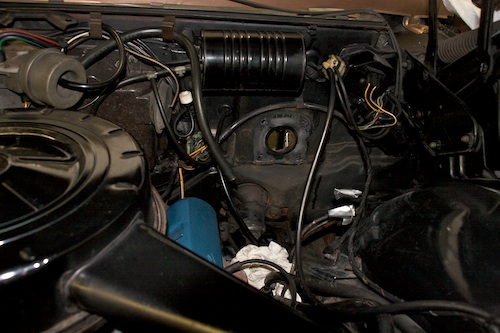
the removed brake booster - the hole in the firewall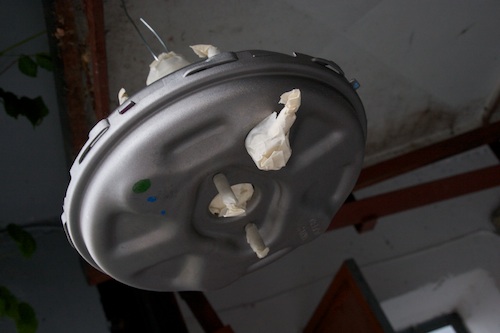
the new booster needed some paint before installation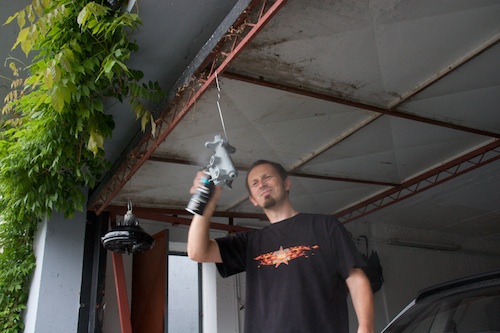
painting the master cylinder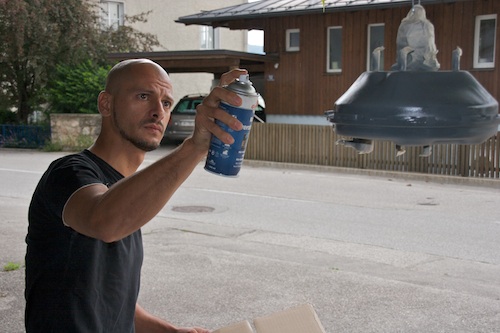
Tayfun painting the primered booster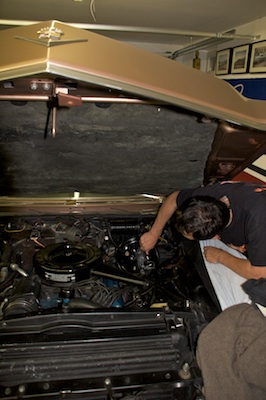
reinstalling the whole unit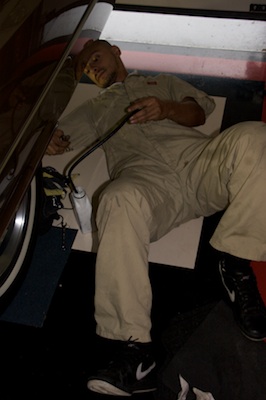
Tayfun bleeding the brakes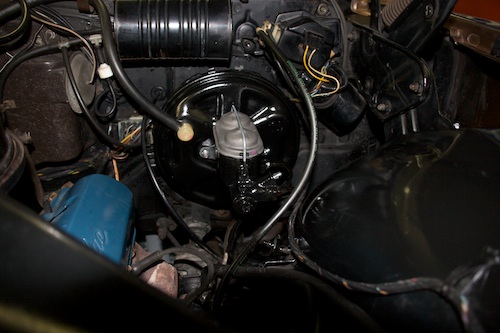
finished - looking good
1967 Eldorado detailing
The Eldorado got a wet cleaning treatment of the carpet and trunk and a full detailing of the interior - which looks like from a new car now. We also started to clean and polish the original paint but ran out of time. We only finished the hood - but the before and after difference is amazing. More work will be done soon.
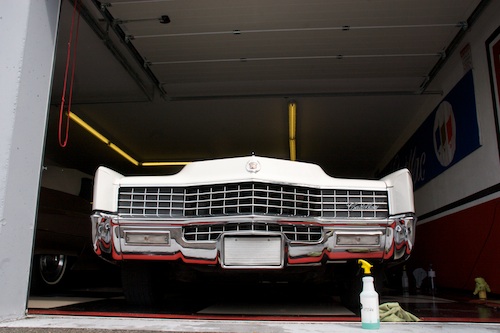
The Eldorado is lurking out of the garage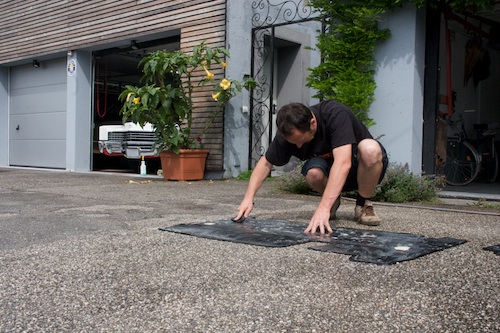
washing and brushing the original rubber floormats...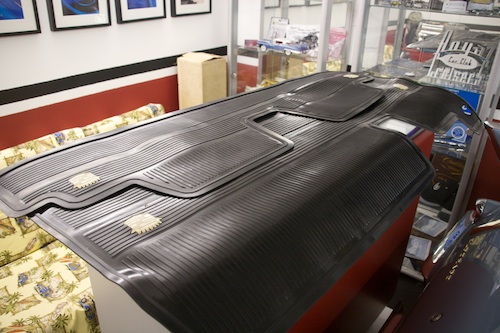
...they turned out as if they just left the factory - awesome - this Meguiars rubber treatment is more than fantastic!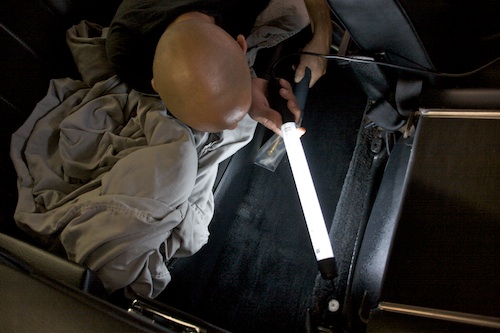
Tayfun - wet cleaning the carpet and trunk - looks like new now as well - the low miles are showing on the interior pretty well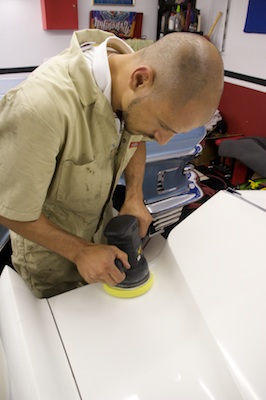
My buddy Tayfun polishing the hood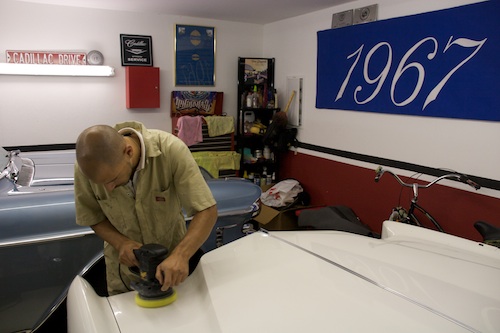
Tayfun at work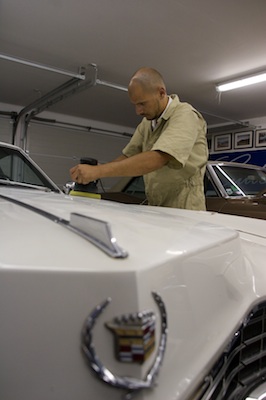
The hood´s paint came out really fine and smooth - unfortunately we ran out of time and could not finish the rest of the paint
1967 Cadillac Eldorado radio replacement attempt
Today my wife helped me trying to replace it. It is always a pain to get the old radios out, as the electrical connectors are pretty hard to reach if you have big hands like me... After some fiddling and lots of bad cursing, the radio eventually came out. During this procedure I found out that somebody messed around with the speaker cables which go to the rear speakers and installed new ones - which were connected directly to the front speaker. They cut the wire going to the front speakers and spliced in the rear speakers. Not very well done...
When I finally managed to install the “new” AM/FM radio I found out that it does not fit at all... It either comes from a 66 or a 69 Cadillac?
So I installed the old AM radio coming from my convertible where I did the same procedure 2 years ago - only to find out that non of the 2 speakers seem to work anyways...
I now have to find a good used 1967 AM/FM radio and 2 speakers - the list of things I need is getting longer everyday. I will also have to repair the wiring of the rear speaker back to original.
Thanks to my wife Afra for helping me!
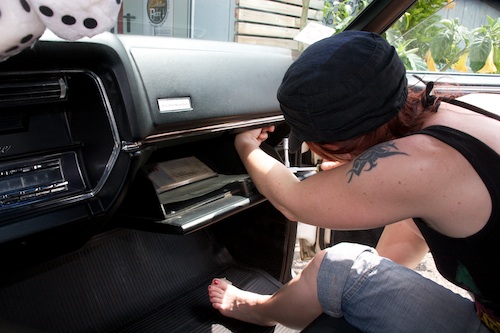
removing the dash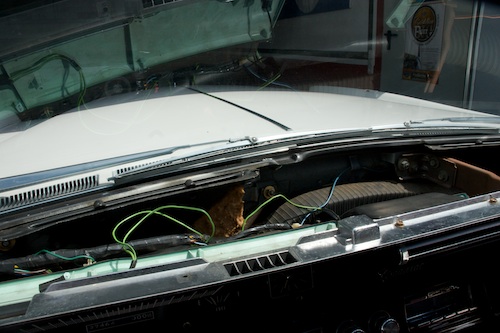
the removed dash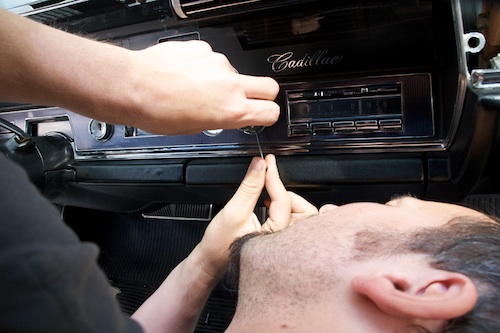
removing the radio buttons was the easiest part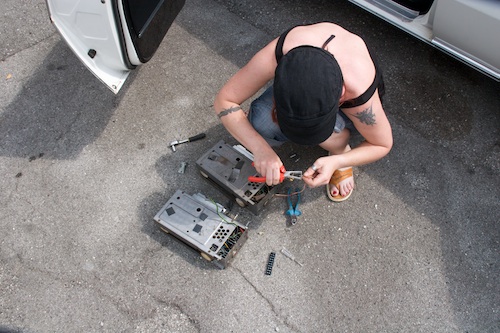
Afra repairing the wiring of the old radio
US-CAR-SHOW Dornbirn 2009 - Film online
I always exhibited one of my Cadillacs at the indoor show in the past years, but this year I decided to take the Roadmaster for the trip and just take part as a regular visitor.
The show itself is a class of its own. You can find hundreds of Hotrods, Classics and Muscle Cars there which you do not see at any other shows in Austria. We really had a great time there and are looking forward to the next edition of the show in 2011.
I shot 2 hours of footage at the 2 days of the show, which my wife Afra and I edited down to a 11 minute film, which is now available.
It features some great Cadillacs like a 53 Eldorado, 57 Biarritz or a 1959 Biarritz and many other great cars.
Cleaning the engine bay
I hope though, that I will ever be able to get my hands clean again as well... I guess I should wear a pair of gloves next time...
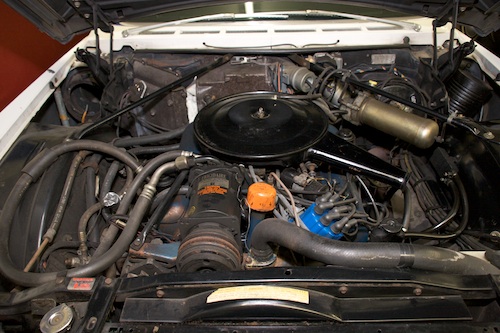
This is how the engine bay of my 1967 Eldorado looked before cleaning - I will also have to install the new evaporator later, reinstall the blower motor, connect all the AC hoses and recharge the AC... lots of work ahead
.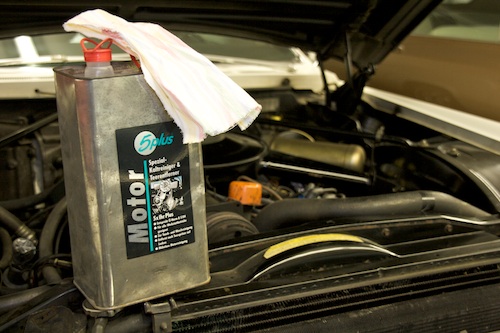
The engine degreaser is pretty aggressive on the oily gunk and dirt.
Time to change the engine oil
I had to drive one after each other over the pit...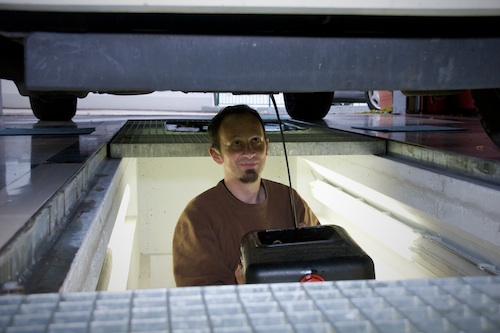
somehow its always a mess to change the oil...
The first pictures of all 3 Cadillacs side by side
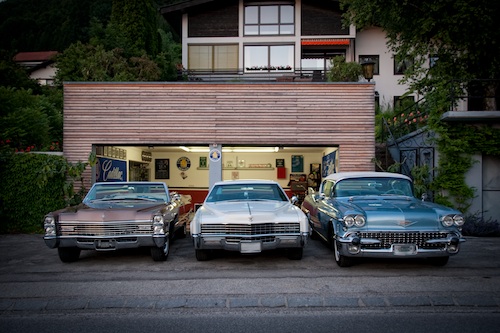
The Cads lined up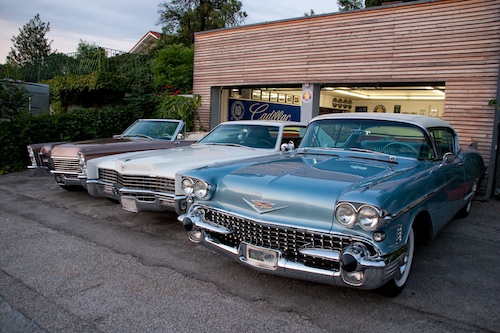
The 67 Eldorado arrived!
The truck arrived at 3 pm with the 67 Eldo and the 69 DeVille which I bought for a dealer here in Austria. Both cars had empty fuel tanks and dead batteries so we could not start them and had to push and pull them from the truck, what took as quite a while. This was very exhausting work, but eventually we had the cars parked in front of the garage. I poured some gas into the tanks and installed batteries from my other Cadillacs. I then turned the keys and the cars roared back to life without any problem. The 67 is a very nice survivor with only 27k miles on the odometer. It drives like a dream - I´m very impressed. The biggest surprise for me was that it has disc brakes on the front - I always thought it would come with the basic drums and not with this very rare option.
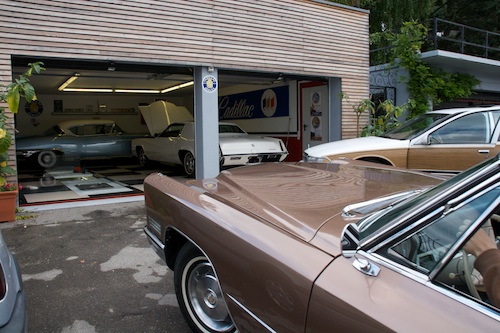
The cars got a quick wash and were then parked inside the garage.
Tired and exhausted, but very happy I finally went to bed thinking about all the work I will do in the upcoming weeks. Stayed tuned!
If you are interested about the cars history and how I found it visit my history page!
Here are some pictures of when the car arrived:
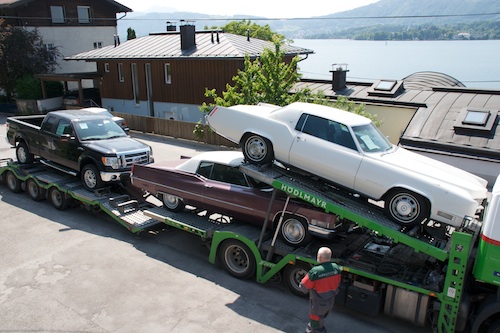
the truck as it arrived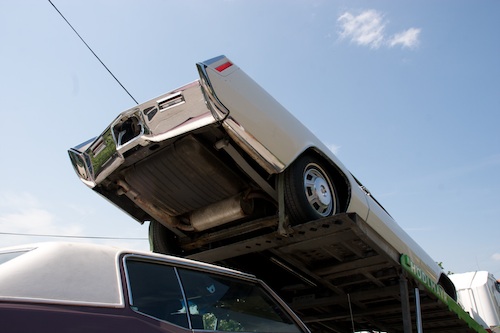
the 67 proudly rode on top...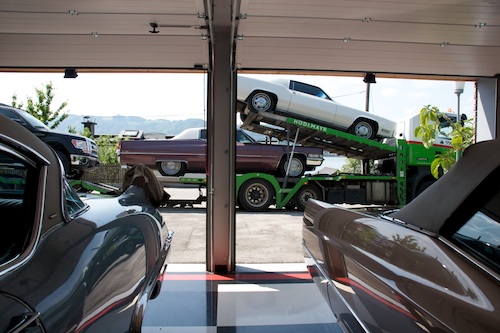
the old Cadillacs watching the new one arrive...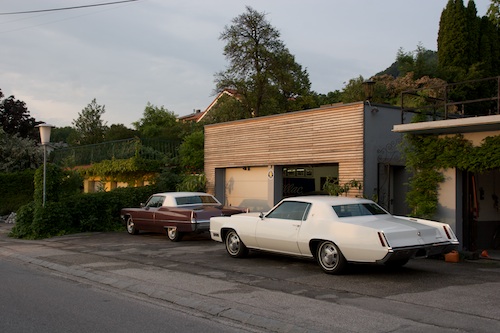
finally unloaded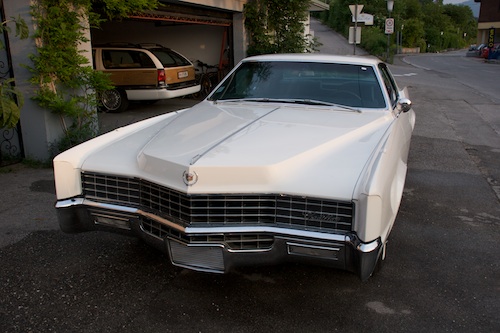
after a quick foam bath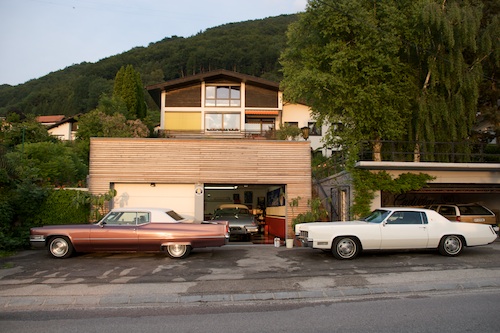
looking a little cleaner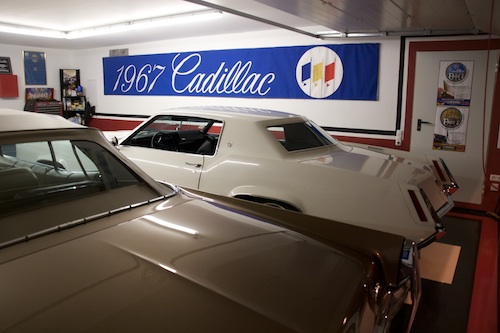
yes - they all fit in...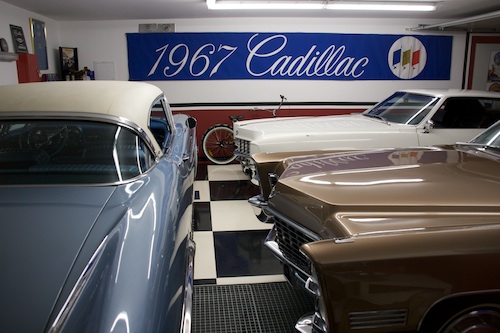
nice sight in front of the original 1967 Cadillac banner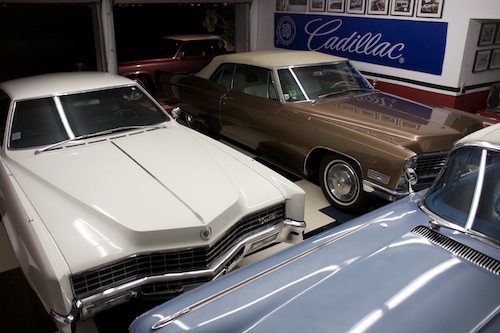
its narrow - but they do fit in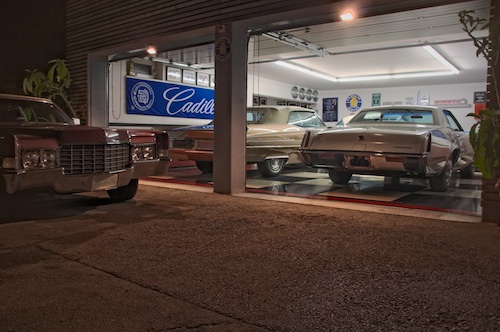
looking into the garage - nice view...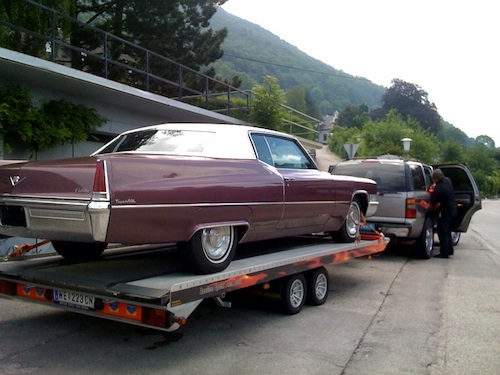
the mauve 69 was picked up by its new owner - a dealer in Austria - it will be for sale there soon. Its a really nice car which I would like to keep if my funds would allow it. Whoever will buy this car, will get a nice Cadillac in a stunning color combination!
Dornbirn Car Show - Picture Gallery
I always exhibited one of my Cadillacs at the indoor show in the past years, but this year I decided to take the Roadmaster for the trip and just take part as a regular visitor.
We met with some friends and drove there in a 7 car convoy. It took us a 7 hours to get there as we also stopped at a very cool diner along the route.
The show itself is a class of its own. You can find hundreds of Hotrods, Classics and Muscle Cars there which you do not see at any other shows in Austria. We really had a great time there and are looking forward to the next edition of the show in 2011.
You can find a huge selection of pictures of this trip in the image gallery. Most pictures were taken by my wife Afra as I did the filming part this time. The black and white one were shot on real "old fashioned" analog film with a medium format camera. Afra also shot two roll of slides which were scanned after development.
Enjoy! A very cool High Definition film will follow in a couple of weeks. So stay tuned.
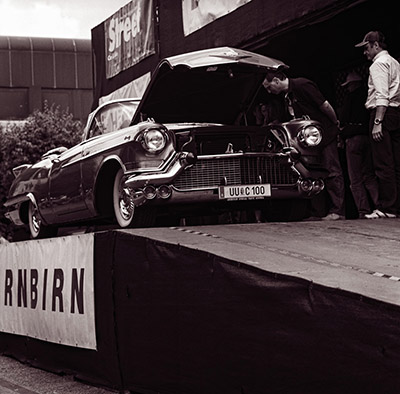
a great 1957 Cadillac Eldorado Biarritz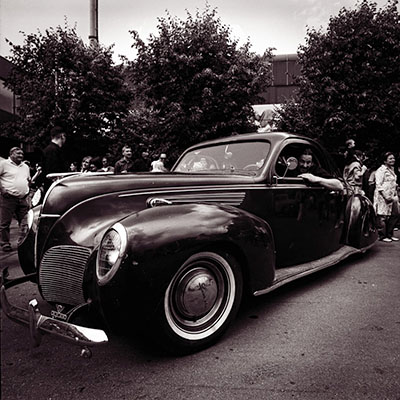
Sepps Lincoln Zephyr - Aweseome and rare car. Click on the images to go to the gallery for more images like this.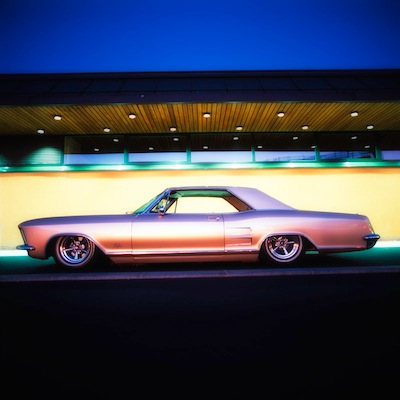
Alex´s 1963 Riviera shot during the night cruising on Saturday
The 67 Eldorado arrived in Rotterdam
Details about the 67 Eldorado shipment
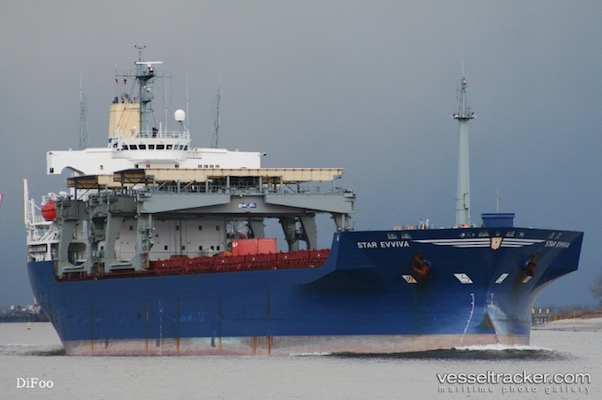
the ship my 1967 Eldorado will sail on across the Atlantic Ocean
The 67 Eldorado was picked up
I bought a 1967 Eldorado
More details when the car arrives!
1967 Cadillac banner installed
It looks great!
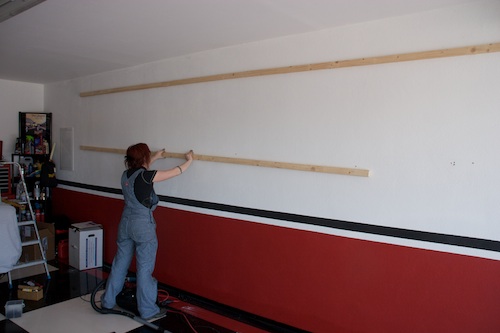
building the frame with my wife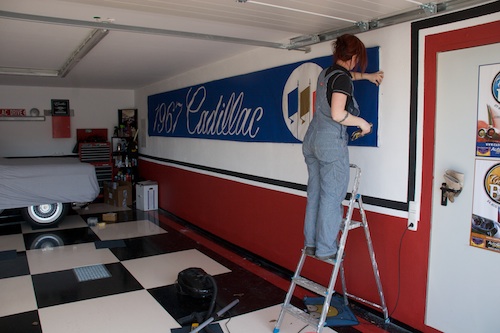
mounting the banner on the frame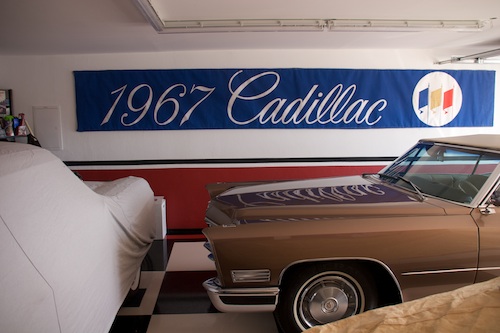
finished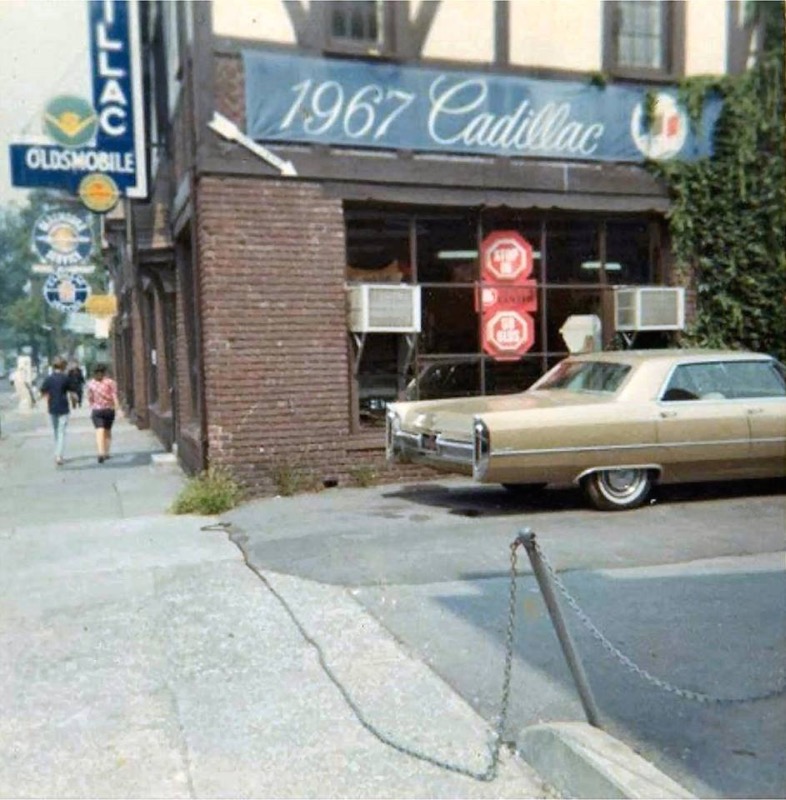
here is a picture of how these banners were used from 1966 to 1967. This pictures was taken sometimes in the fall of 1966 or in 1967.
Detailed seats are finally back in the 67
If you compare the new pictures to the “before” pictures below - you can clearly see the difference.
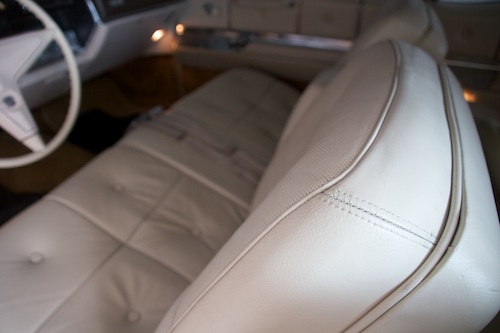
Thats the area which showed the most wear - looking perfect now!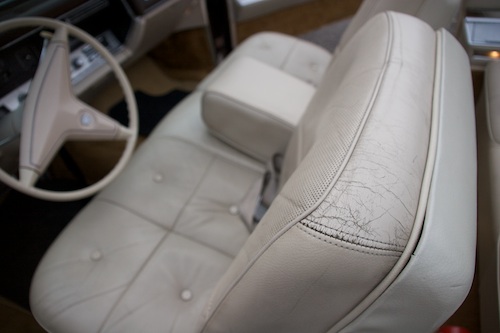
the same area before detailing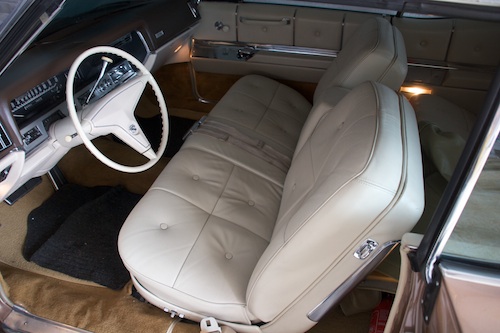
the interior is back together and now waiting for the cruising season
Cruising 2008 - The Video
Very cool new garage decoration arrived
Its unused and still in the original box. Its almost 7 meters long.
I do not yet know where in the garage I will hang it, but as soon as it is getting warmer I will take care of this cool new decoration item. The best thing is that I got it pretty cheap.
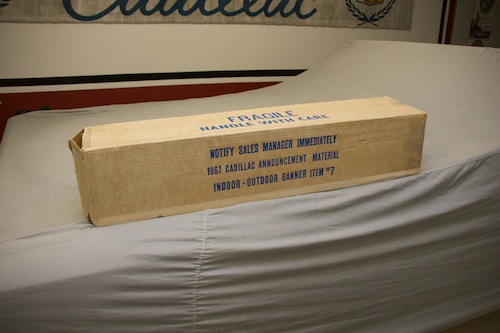
the original box from Cadillac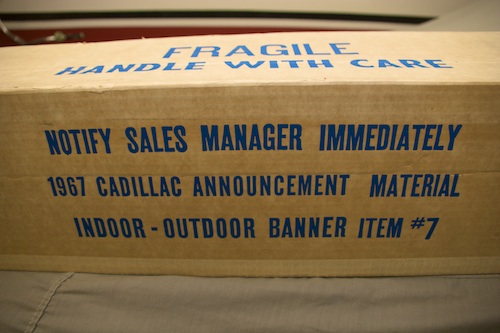
The original box coming from Cadillac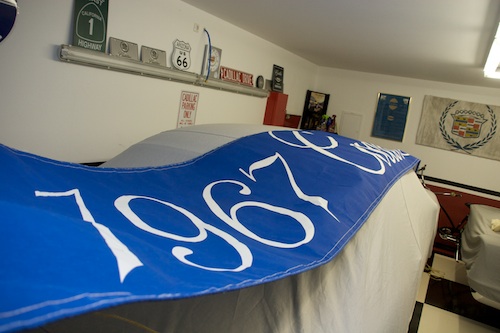
the banner is pretty long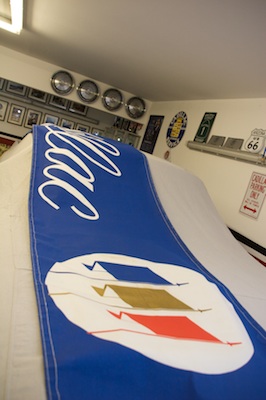
cool banner
Leather seats are back from detailing!
They look like brand new leather seats now!
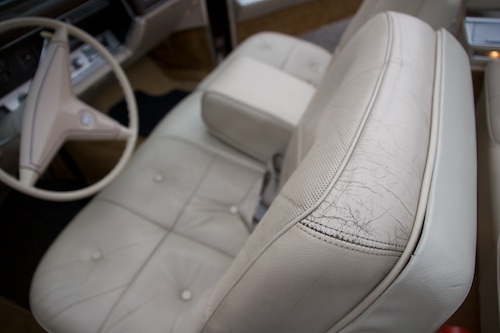
the front seat before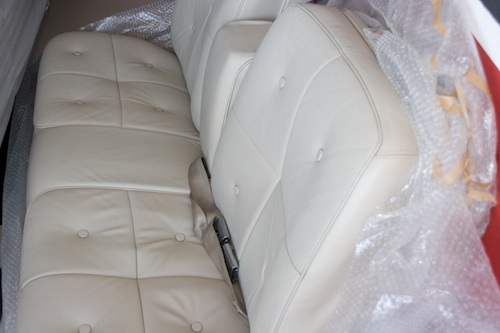
the front seat now - before installation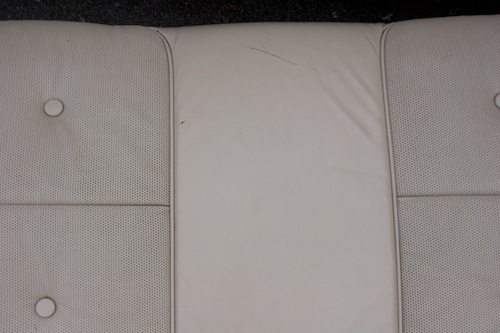
the rear bench before the repair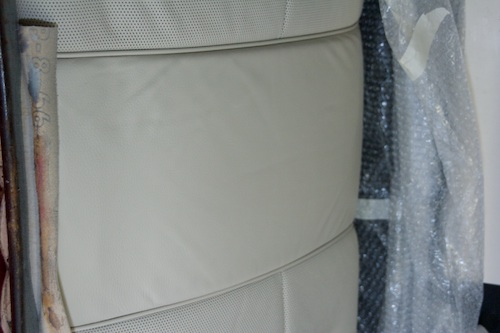
after the repair - all the tears and cracks are gone!
1966 Cadillac Coupe deVille (16)
1967 Cadillac DeVille (54)
1967 Cadillac Eldorado (73)
1971 Lincoln Continental Mark III (24)
1974 Cadillac Coupe deVille (46)
1978 Cadillac Eldorado Biarritz (25)
1996 Buick Roadmaster (20)
Cadillac BIG Meet (2)
Car Shows (55)
Cruising (4)
CT6 (1)
For Sale (3)
Garage Stuff (32)
Pacer (1)
Restoration (140)
Various (55)
Video (20)
Website News (31)
- 6 way power seat
- 8-track
- 10 Ohm
- 429
- 1932
- 1957
- 1958
- 1958 Cadillac Eldorado Seville
- 1958 Cadillac Repair Tip
- 1959 Cadillac Eldorado Seville
- 1964
- 1965
- 1966
- 1966 Cadillac Coupe deVille
- 1966 Cadillac Repair Tips
- 1967
- 1967 Cadillac DeVille
- 1967 Cadillac Eldorado Repair Tip
- 1967 Cadillac Repair Tip
- 1967 Eldorado
- 1968
- 1970 Cadillac Eldorado
- 1971
- 1971 Lincoln Continental Mark III
- 1974
- 1974 Cadillac Coupe DeVille
- 1974 Cadillac Repair Tip
- 1976
- 1977
- 1978
- 1978 Cadillac Eldorado Biarritz
- 1978 Cadillac Repair Tip
- 1980 Cadillac Eldorado Biarritz
- 1996
- 2012
- 2014
- 2017
- 2018
- 2019
- 2022
- 2023
- 2025
- 3063206
- 7027235
- 7800483
- 7805675
- 7805676
- 12355706
- 17058531
- 17059968
- 17059969
- 22010515
- 22010661
- A.I.R
- A6
- AC
- AC Compressor
- AC Electrical Diagram
- ACC
- Accelerator Pump
- Accelorator pump
- Accident
- Actuators
- Adriatic Blue Metallic
- Ads
- Aftermovie
- Air Pump
- Aircondition
- AIRPUMP
- ALC
- Alternator
- AM
- AM-Transmitter
- Antenna
- Anti Rattle Clips
- Antique Gold
- Arizona Vintage Parts
- Arrival
- Article
- ASC
- Ash Tray removal
- ATC
- Atlantis Blue Firemist
- Austria
- Austro Classic
- Autolite SP-459
- Automatic Seat Back Release
- Award
- Banner
- Barn Find
- Battery
- Battery Tray
- Beach Race
- Bearing
- Bendix
- Biarritz
- Bigfoot
- Bill Hirsch Engine Enamel
- Bleeder Screws
- Bleeding
- Blower
- Bodywork
- Bolts
- Book
- Borg
- Brake Booster
- Brake Fluid
- Brake Gray
- Brakes
- Broken Bolt
- Brougham
- Bucket seats
- Buick
- Bumper End
- Bushings
- Cadillac
- Cadillac BIG Meet
- Cadillac BIG Meet
- Cadillac birthday cake
- Cadillac Blue
- Cadillac Color Selections Dealer Book
- Cadillac Coupe deVille
- Cadillac Dealer
- CADILLAC GRAND EUROPEAN
- Cadillac Meeting
- Cadillac Mini Meeting
- Camaro RS
- Caorle
- Car Show
- Carburetor
- Card
- Carpet
- Carter AFB
- Cavalry Twill Vinyl
- CB
- CBM
- CCCD
- Choke
- Christmas
- Citizens Band
- Classic Cadillac Club Deutschland
- Clay Towel
- Cleaning
- Clock
- Clockwork
- Clutch
- Clutch Coil
- Collector
- Colonial Yellow
- Color Coded Springs
- Commercial
- Compound
- Compressor
- Condenser
- Continental Mark III
- Control Head
- Conversion
- Convertible top
- Coolant
- Corona
- Cowl
- Cruise Control
- Cruising
- CT6
- CV Boots
- CV JOINTS
- D6230
- Dash Trim
- Decal Removal
- Decals
- Decoration
- Dehumidifier
- Delco Moraine
- Der Standard
- detailing
- Deville
- Diagnosis Chart
- Diagram
- Dial
- Digital Rotary Drum Clock
- Diner
- Disc Brakes
- Distributor
- Diverter Valve
- Door Jamb Switch
- Door Rubber Conduit
- Dornbirn
- Dot3
- Drive Shaft
- Driving tour
- Drum brakes
- Dry Ice Blasting
- Dry Ice Cleaning
- DVD
- Eastwood
- Eldorado
- Electric Choke Thermostat
- Electrical schematic
- Elvis
- Engine Bay
- Ep
- Epoxy floor
- Europe
- Evaporator
- Exide
- Factory Markings
- Fender Skirt
- Floor
- Flushing
- Flyer
- Foam
- For Sale
- Front AXLE
- Front brakes
- Front bumper filler
- Front Floor
- Front wheel bearing
- Fuel Filter
- Fuel Pump
- Fuel Sending Unit
- Fusible Link
- Garage
- Garage Cabinets
- Gasket
- GE
- Gear indicator
- General Time
- Glove box light
- Grand European
- H4
- Haus of Hot Rod
- Headlight Actuator
- Headlight doors
- Headlights
- Heater Core
- Heater Hose
- Heater Valve
- High Idle
- History
- Holley
- Honest John
- Hood
- Hood Emblem
- Hood Ornament
- Hose Clamp
- Hot Choke
- Hot Water Valve
- HotRod
- How to
- Hödlmayr
- Ignition Diagram
- Illuminated Entry
- John D‘Agostino
- John Foust
- Klassikwelt Bodensee
- Kremsmünster
- LaSalle
- Leather seats
- Light Switch
- Limited
- Lincoln
- Lincoln Mark III Repair Tip
- Low Mileage
- Magazine
- Marilyn Monroe
- Mark III
- Master Cylinder
- Master Switch
- Master Vacuum Switch
- Media Blasting
- Meeting
- Meguiras
- MK II
- Mobile
- Model
- Moldings
- Mom
- Mopar Nationals
- Mostkost Kustom
- Movie
- Munich
- Neon
- NOS
- Oberösterreicher des Tages
- oilchange
- ORF
- Overspray
- Pacer
- Paint
- Paint correction
- Paintjob
- Part Number
- Parts
- Patch Panel
- Perfect Circle
- Permabag
- Persian Lime
- Photo shooting
- Photoshooting
- Pictures
- PinUp
- POA Valve
- Power Antenna
- Power Servo
- Power Vent Windows
- Power Window
- Printed Circuit Board
- Programmer
- Pulley
- Quadrajet
- Quarter Panel
- Quartz Conversion
- R134
- Radiator
- Radio
- Rattle
- Rear brakes
- Rebuild
- Recalibrate
- RediRad
- Reed Switch
- Relais
- Relaunch
- Removing Overspray
- Repaint
- Repair
- Restoration
- RIP
- Roadhouse
- Roadmaster
- Rochester
- Rocker Arm Cover
- Rocker Panel Extension Clips
- Rostio
- Rotary Valve
- Rotterdam
- Rupes
- Rust removal
- Rust removal gel
- Sabre Wheels
- Sand Blasting
- Sandblasting
- Screed
- Season Greetings
- Seasons Greetings
- Seat Back Locks
- Seat Padding
- Seat Transmission
- See through ornament
- Self adjusters
- Self Starter
- Sepp's Garage
- Seville
- Sheetmetal
- Shocks
- shop manual
- short
- Sign
- Solenoid
- Spark Plug Wire Routing
- Speakers
- Special Award
- Speed Bleeder Screws
- Splash Guard
- Starter Diagram
- Starter Motor
- Steering Column
- Storage
- suction throttling valve
- sunroof
- suspension
- Swirl Mark removal
- Switzerland
- T3
- Taillight Cover
- Texan´s Choice Award
- Thermostat
- Tilt and Telescope
- Time capsule
- Tomsclub
- Torque Specifications
- Tower Hose Clamp
- Towtruck
- Trailer
- Transducer
- Transmission
- transmission control selector
- transmission control selector indicator light
- transmission shift indicator
- Treadle Vac
- Treffen
- Tri-Band
- Troubleshooting
- Trunk Cardboard Kit
- Trunk lid
- Trunk lining
- Trunk to bumper cover
- Turn Signal Switch
- TV
- Typisierung
- Ultimate Garage
- Underbody
- Undercarriage
- Undercoating
- Undercoating Removal
- Vacuum Booster
- Vacuum diagram
- Vacuum hoses
- Vacuum Master Switch
- Vacuum Schematic
- Vacuum Valve
- Valve Cover
- Various
- Vent Window Switch
- Vibration
- Vibrator
- Vicodec roof
- Video
- Vinegar
- Vinyl Roof
- Visitor
- Washer Fluid Float
- Washer Fluid Low Level Indicator
- Water Pump
- Wax
- Weatherstripping
- Website News
- Westclox
- Wheel Bearings
- Wheel Housing
- Wiesbaden
- Windlace
- Winter
- Wiring
- Wiring Diagram
- Wonderbar
- Workbench
- Zurzach
 GERALD´S CADILLACS - NEWS