LINCOLN MARK III CARBURETOR REBUILD
CLICK BELOW TO READ MORE
READ MORE...
DETAILING THE ENGINE BAY AND REMOVING A BROKEN BOLT FROM THE AIR PUMP OF THE 1974 CADILLAC
During the restoration of the battery tray of my 74 Coupe deVille I noticed that the belt from the AIR Pump was a little loose. While I tried to find out how to properly tension it, I noticed that one of the bolts going through the pulley into the pump seemed to stick out a little bit at a strange angle. When I touched it, it immediately broke off… Great…
So I had to remove the pump to be able to get to the broken pulley bolt and replace it with a good new one. It was very common on GM cars from the 70s which used this air pump, that the bolts broke off. GM used 3 very cheap and weak bolts to hold the pulley in place.
Before I took any bolts out to remove the pump, I sprayed every nut and bolt with penetrating oil to make sure I could open them without damage.
I anyway had to take out the AC compressor as well for another winter project. After that I removed the generator and then the air pump including all the brackets.
You can see the at the diagram below where the bolts are hiding.
With these parts removed I now have access to many parts of the engine which I can freshen up to the original factory fresh look. I will remove the surface rust on the block, clean everything and re-paint in the original Cadillac Blue paint.
I can clean the air pump, the generator and will blast the brackets and re-paint them. While the AIR Pump is out you might also want to check the diverter valve atop the smog pump to be sure the vacuum canister holds and hasn't ruptured at the vacuum diaphragm. If the diverter valve does not respond to vacuum, it can lead to all of the positive pressure from the pump being injected into the exhaust stream which can cause a backfire through the exhaust.
Many people also plug the AIR Pump and remove everything inside, so they do no longer have to bother with it. Rebuilt pumps are still available, but you can´t get the diverter valve anywhere.
So it is now officially my winter project to freshen up the engine bay…
The air pump is very fragile btw. It's not allowed to put it into a vise. Luckily I could remove the broken bolt with a bolt extractor. I just had to drill into the remains of the stuck bolt a little bit and could then remove it using the left turning extractor tool.
I have now to find replacement bolts now. They seem to be SAE bolts with the following dimensions: 1/4"(diameter)-20(threads per inch) and 1/2" (without the head) long. The original bolts were of the lowest grade material, the new ones I am going to install will be grade 5 or grade 8.
While cleaning the block I decided to also remove the fan and water pump pulley to be able to clean them as well. The pulley was pretty rusty and I had to soak it in rust removing liquid for 48 hours before the rust was gone and I had to paint it immediately as this material develops flash rust immediately.
UPDATE - OCTOBER 28th 2016:
I now also removed the power steering pump to get better access to the front of the engine block. I will also remove the radiator to be able to remove the surface rust underneath. I will then have the entire engine bay dry ice blasted to properly clean everything.
UPDATE - NOVEMBER 5th 2016
I took out the radiator today to be able to clean the surface rust underneath.
I also finished painting all the brackets and the power steering pump which I took down to bare metal before.
You can find much more pictures of this project in my 74 restoration gallery.
As this project is still going on - I will update this posting here soon.
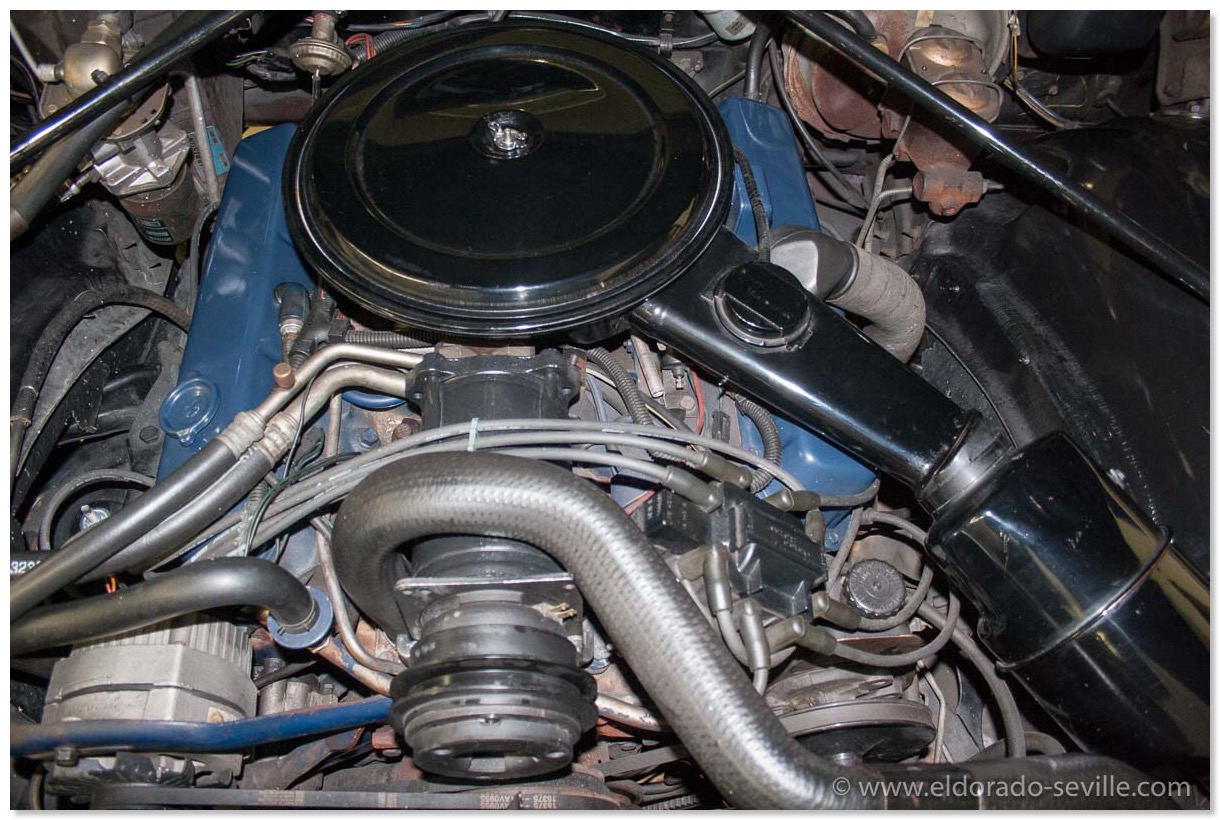
The engine bay before the start of the project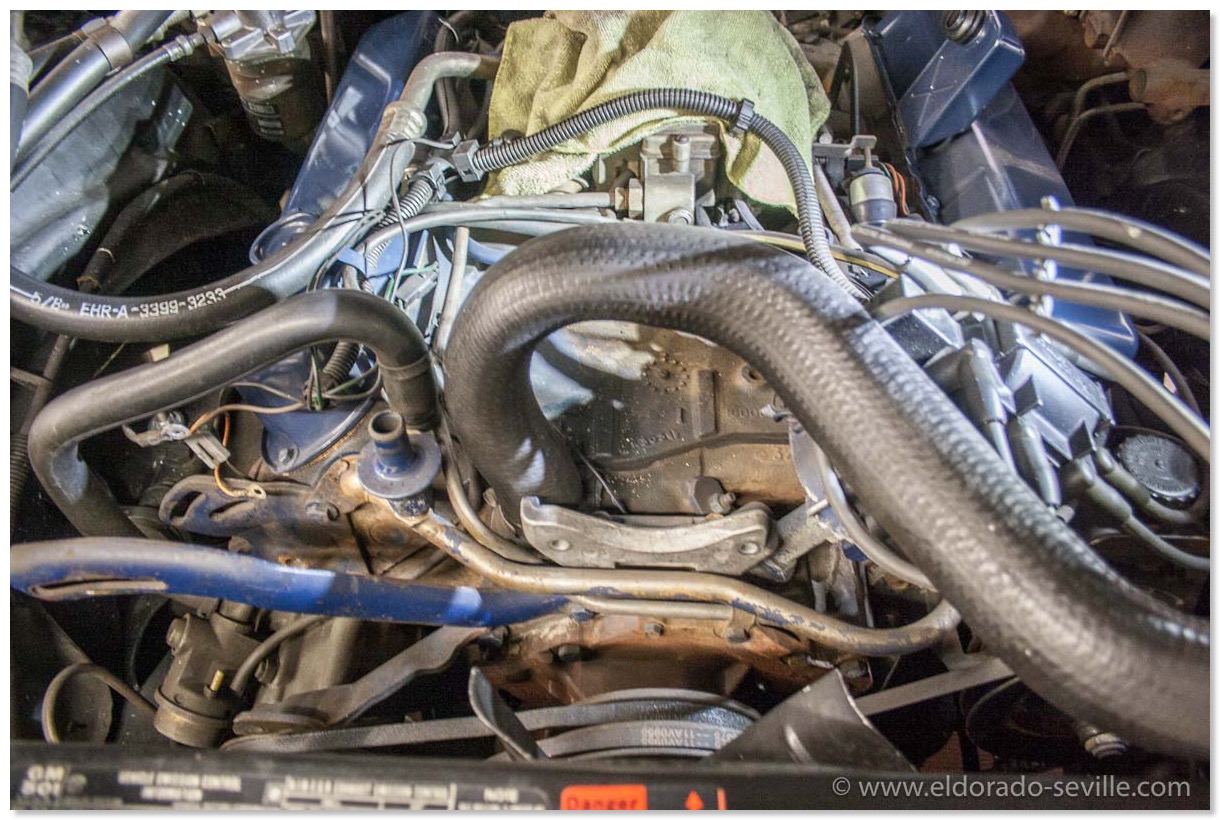
AC compressor and generator removed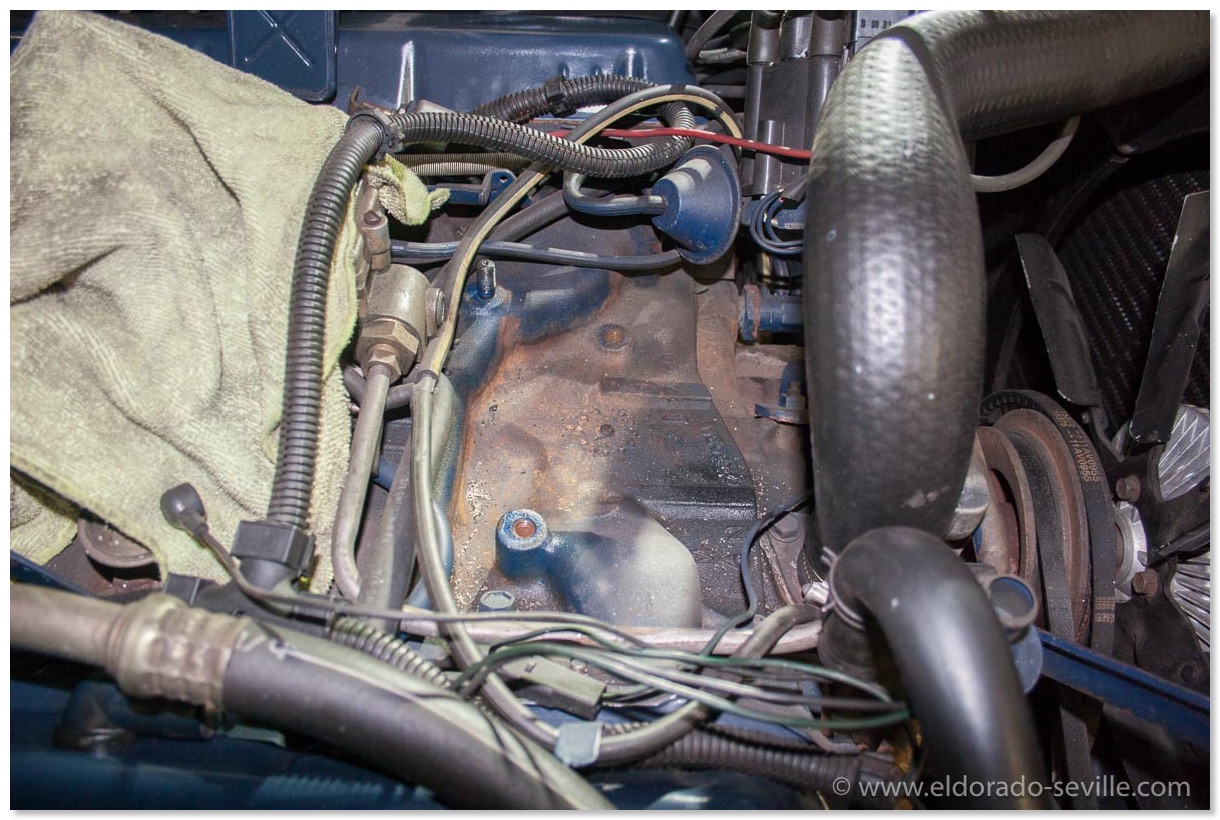
The area below the AC compressor will need some good de-rusting, cleaning and detailing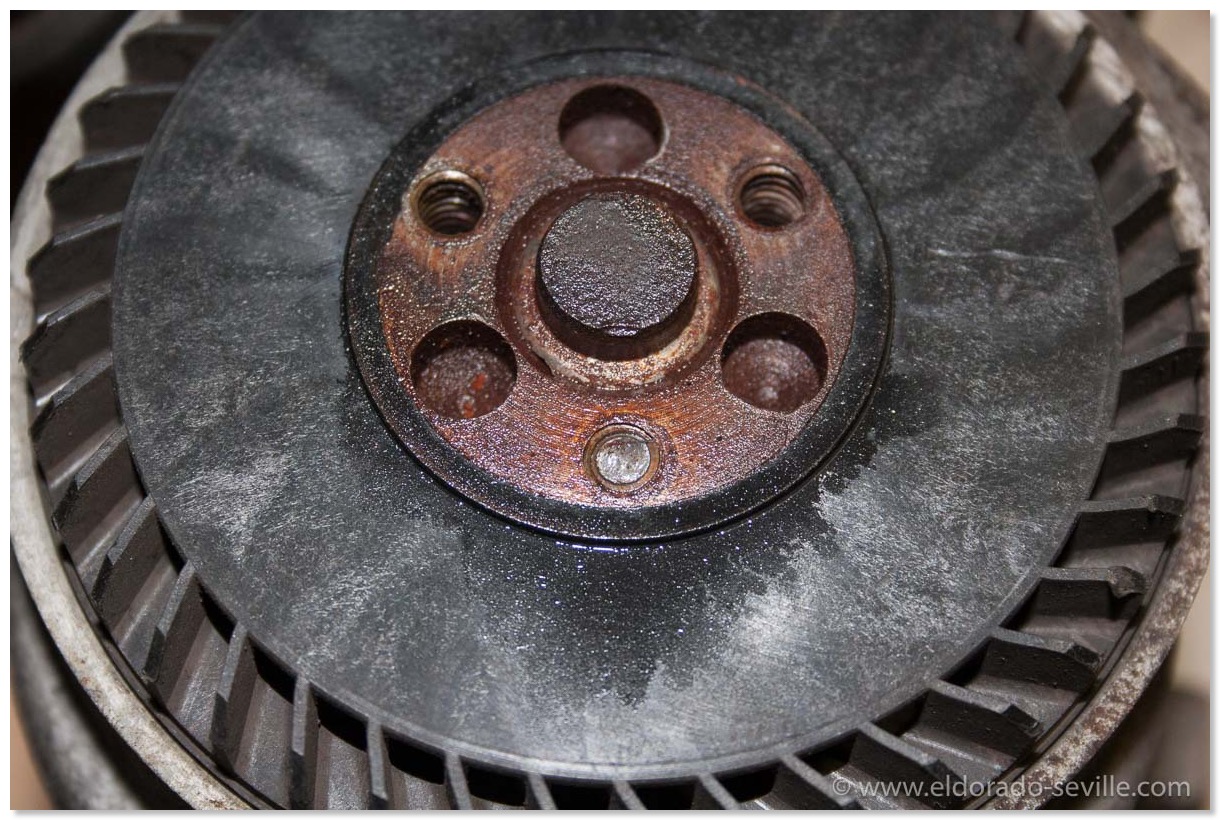
Here you can see the remains of the broken bolt in the AIR pump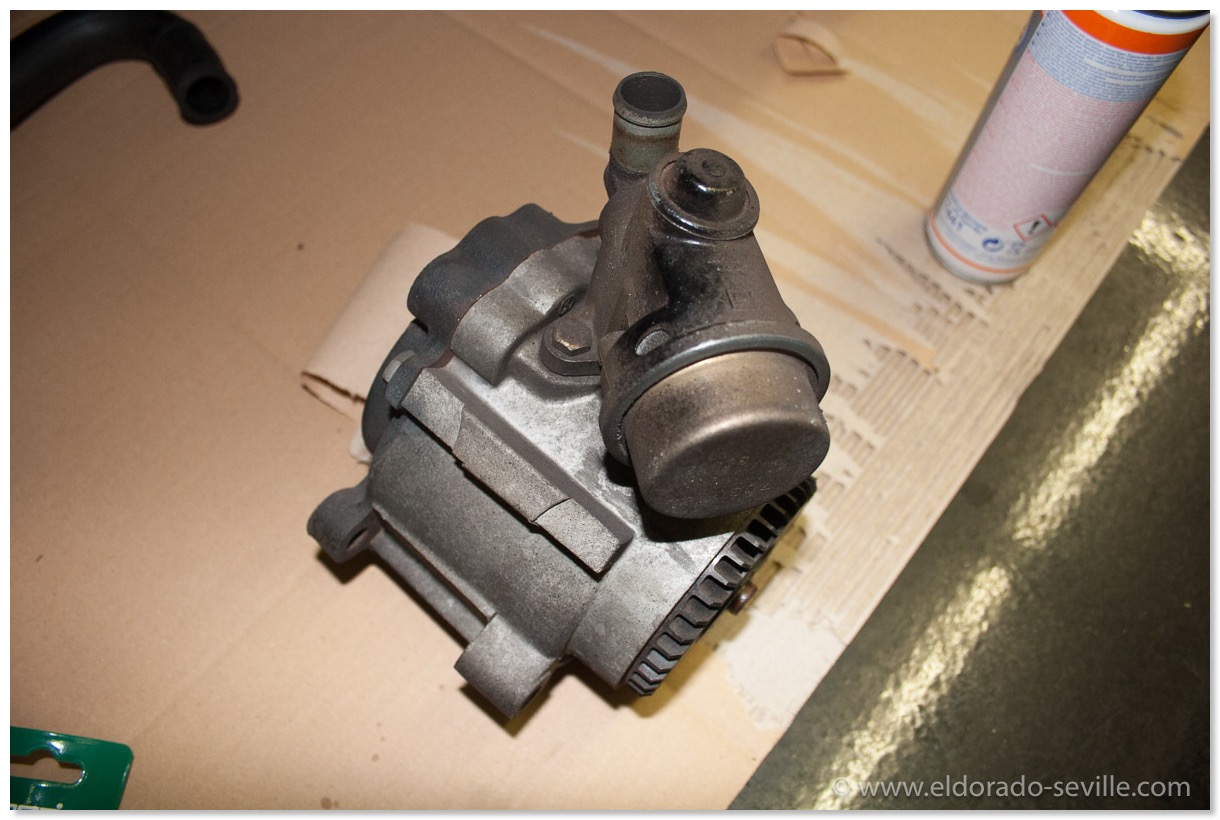
The AIR pump before cleaning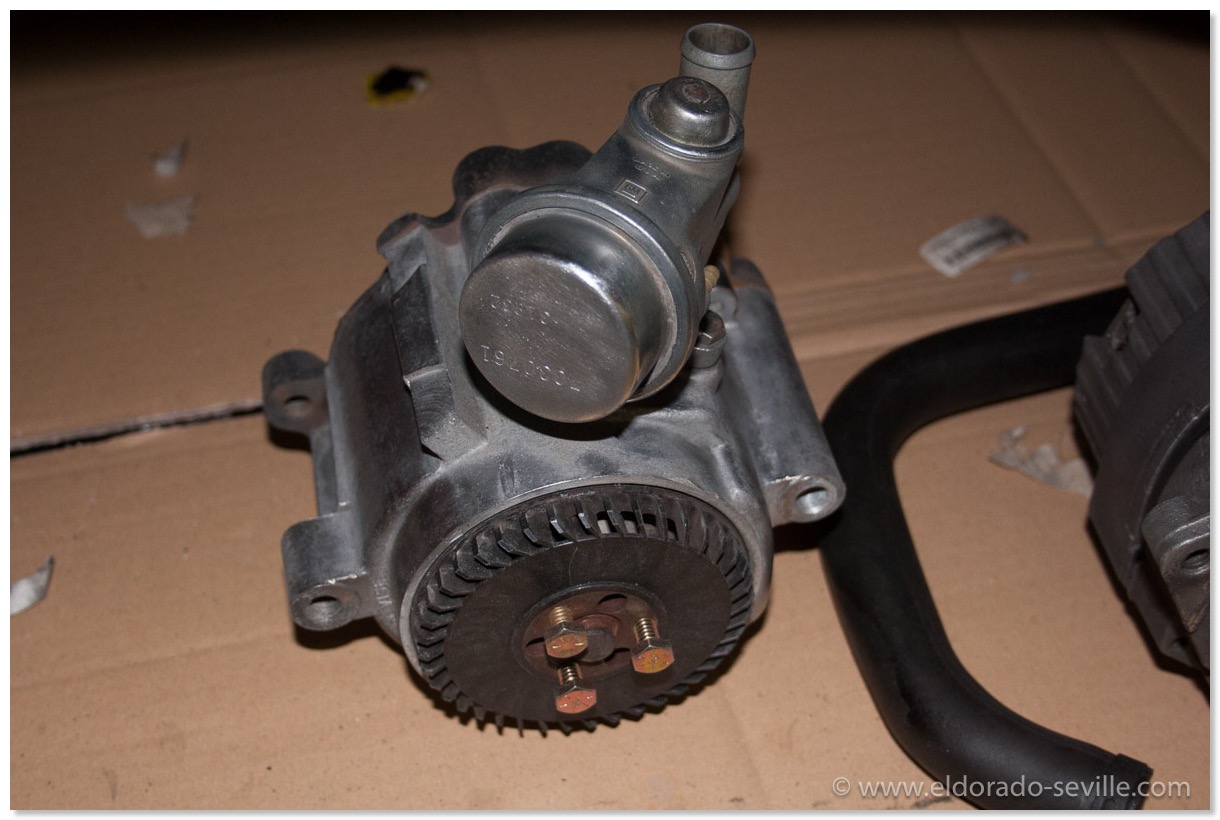
The AIR pump after cleaning - some details will still have to be done.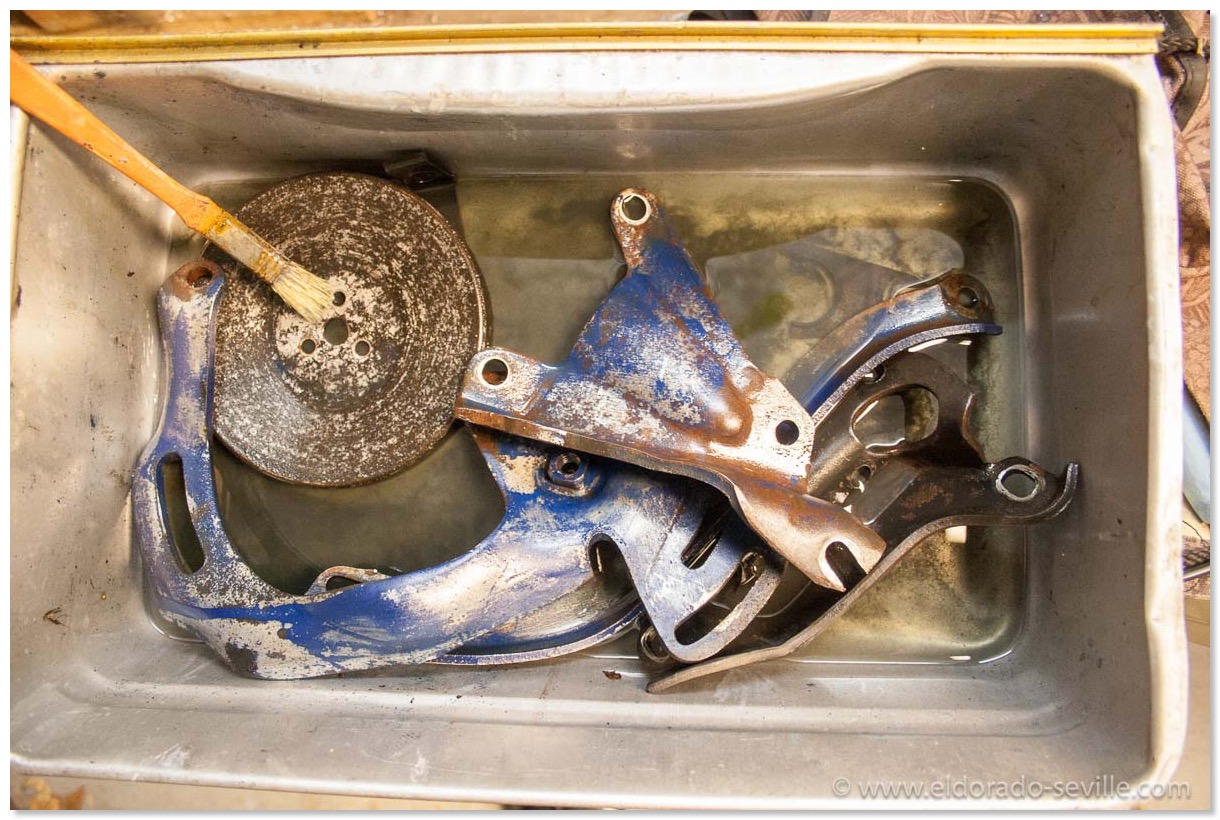
First I soaked the removed brakets in acetone to remove the dirt, grime and paint.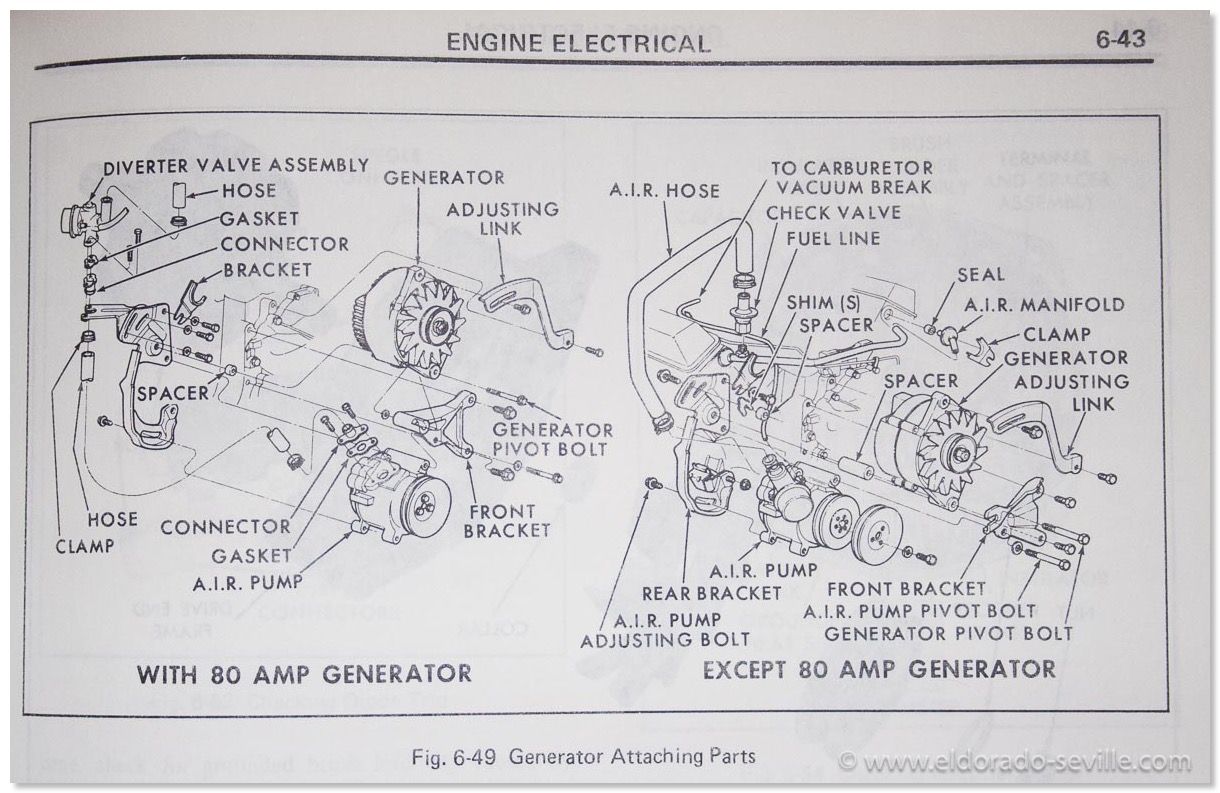
This shows the brackets in the shop manual.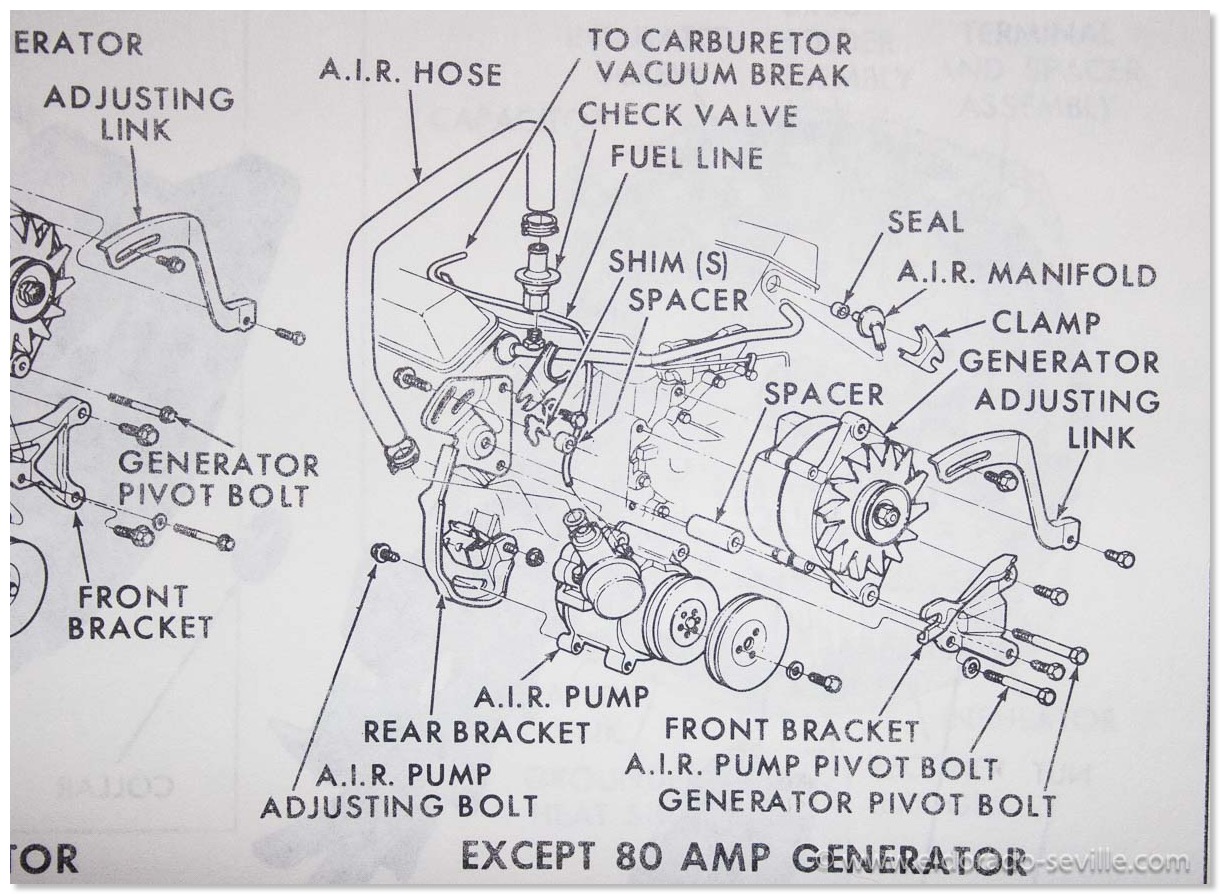
This shows the brackets in the shop manual.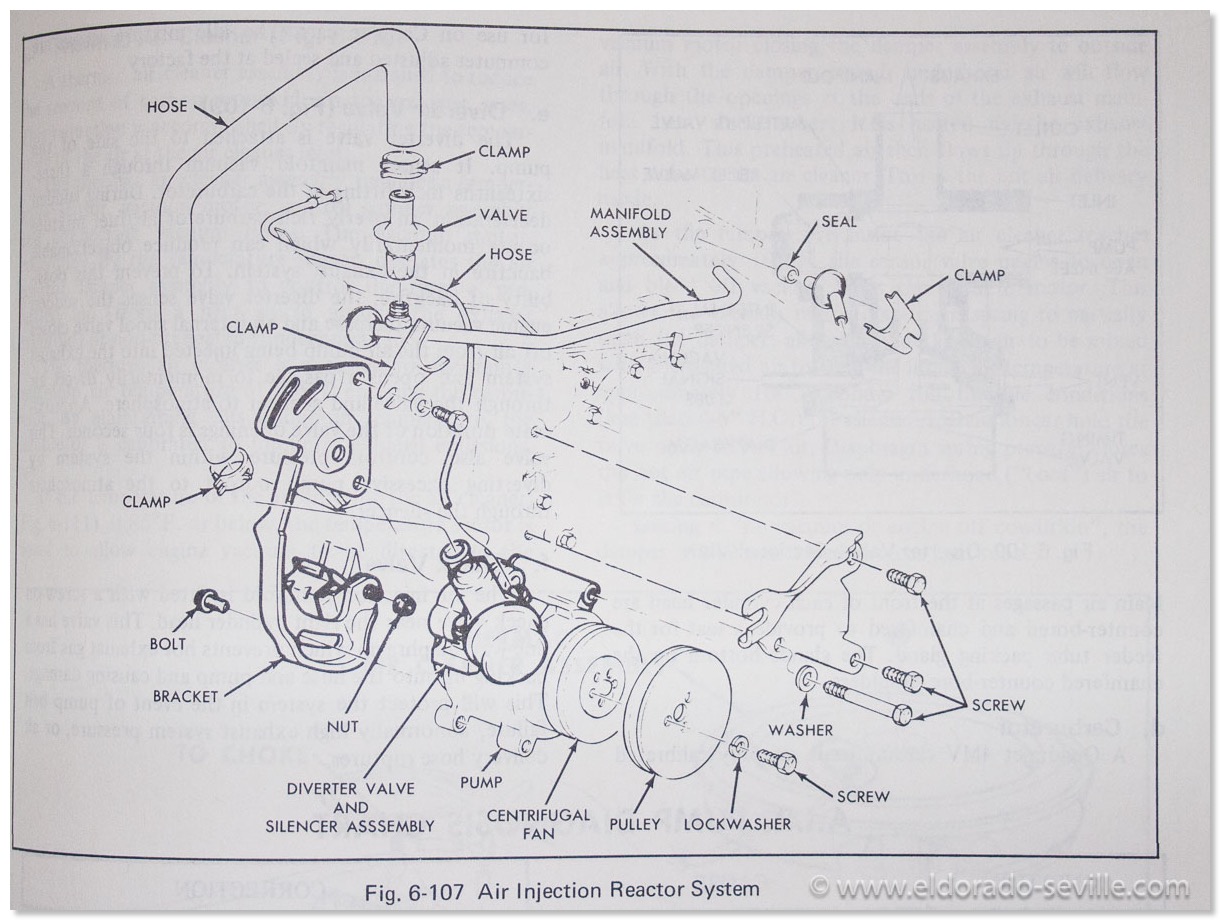
This shows the brackets in the shop manual.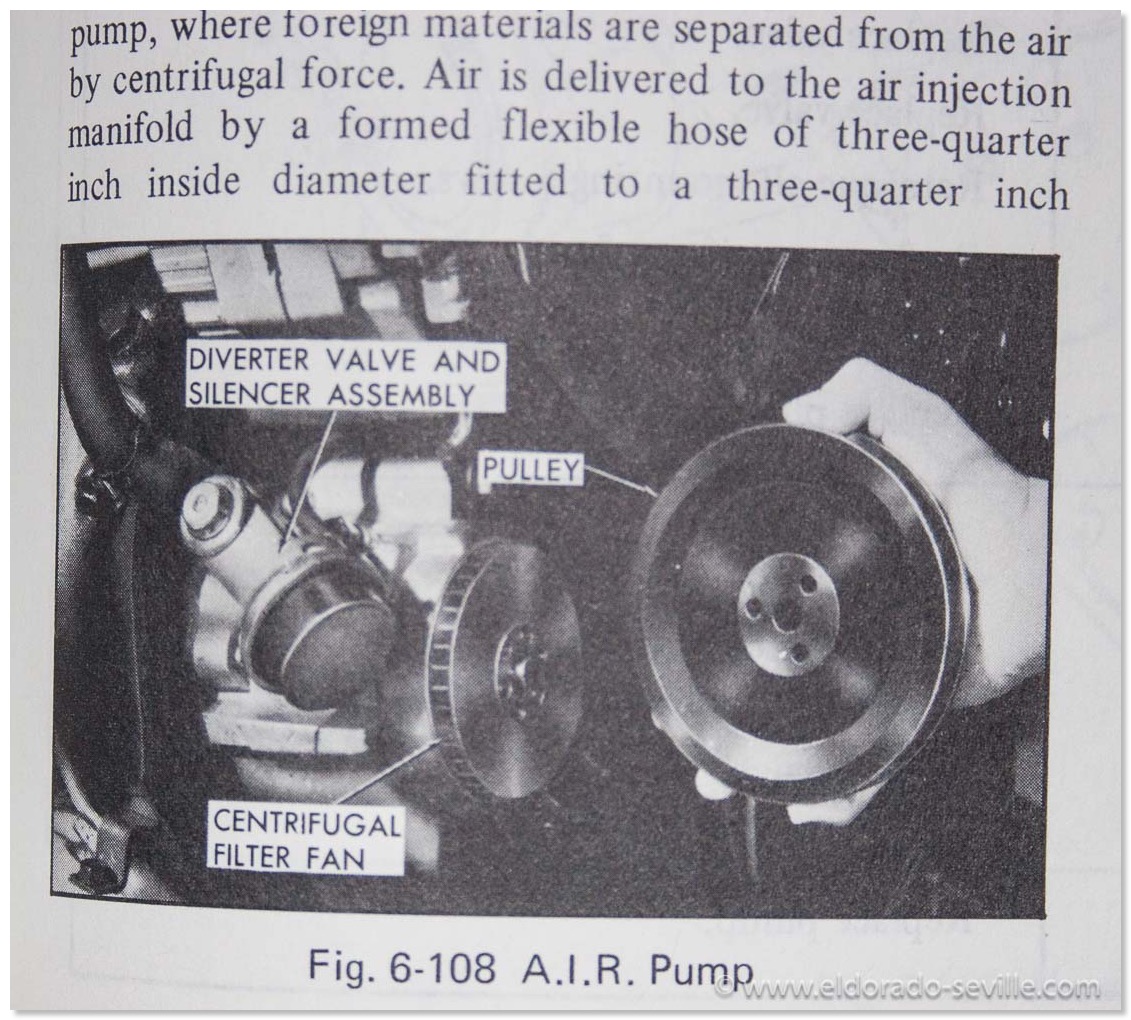
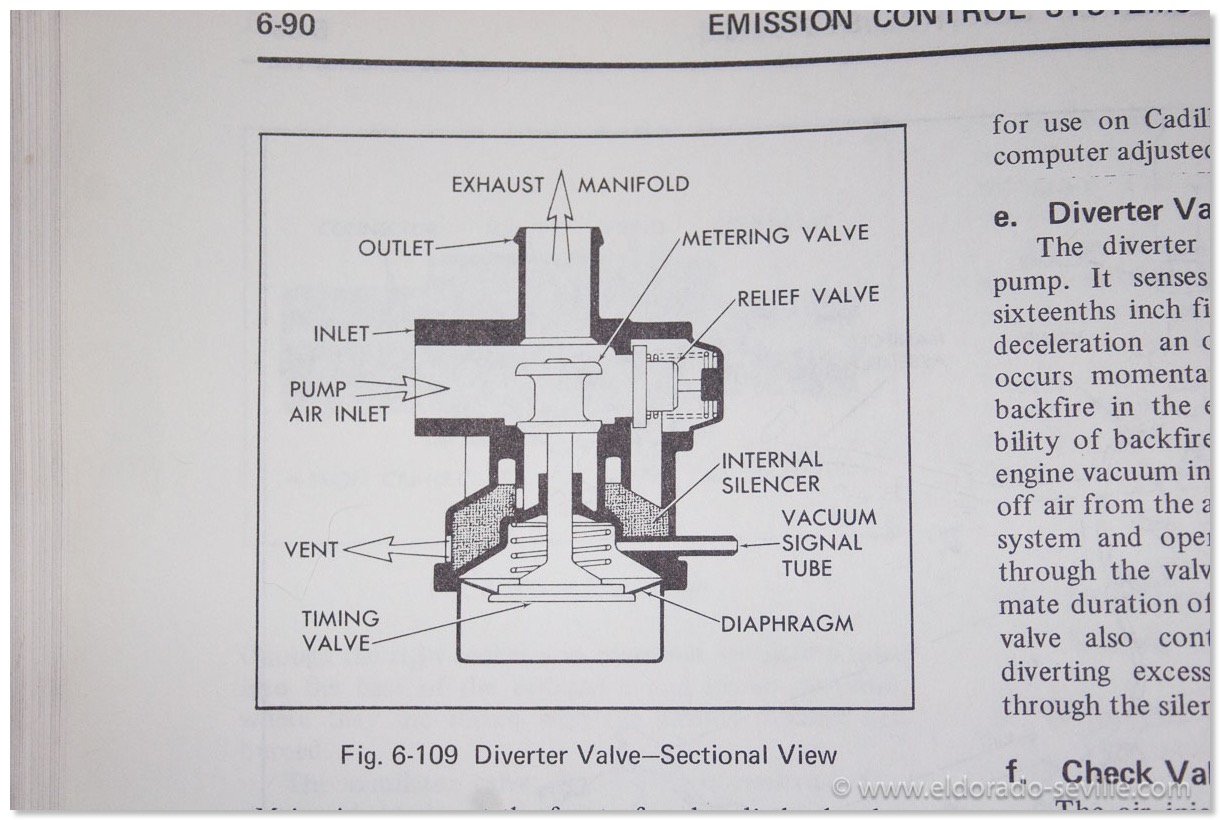
The divert valve which is no longer available. Check the vacuum diaphragm inside while it is out.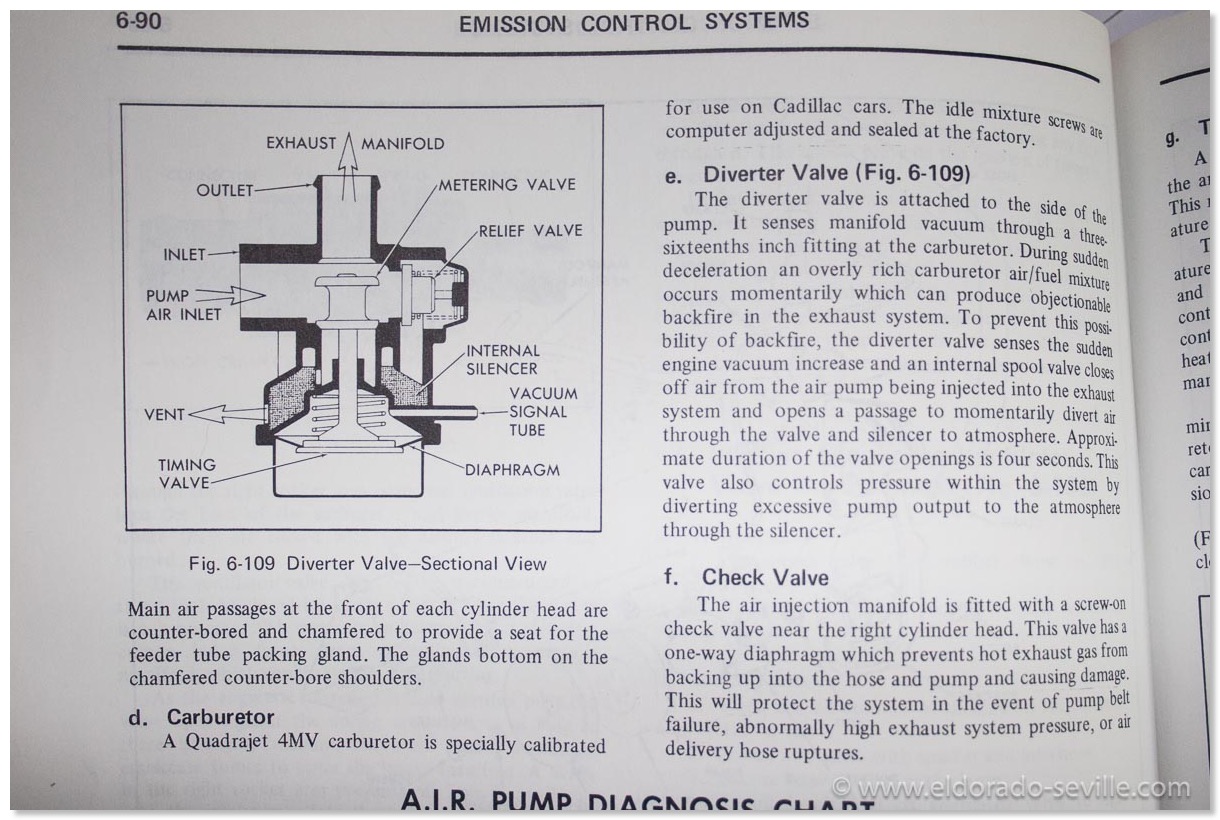
The divert valve which is no longer available. Check the vacuum diaphragm inside while it is out.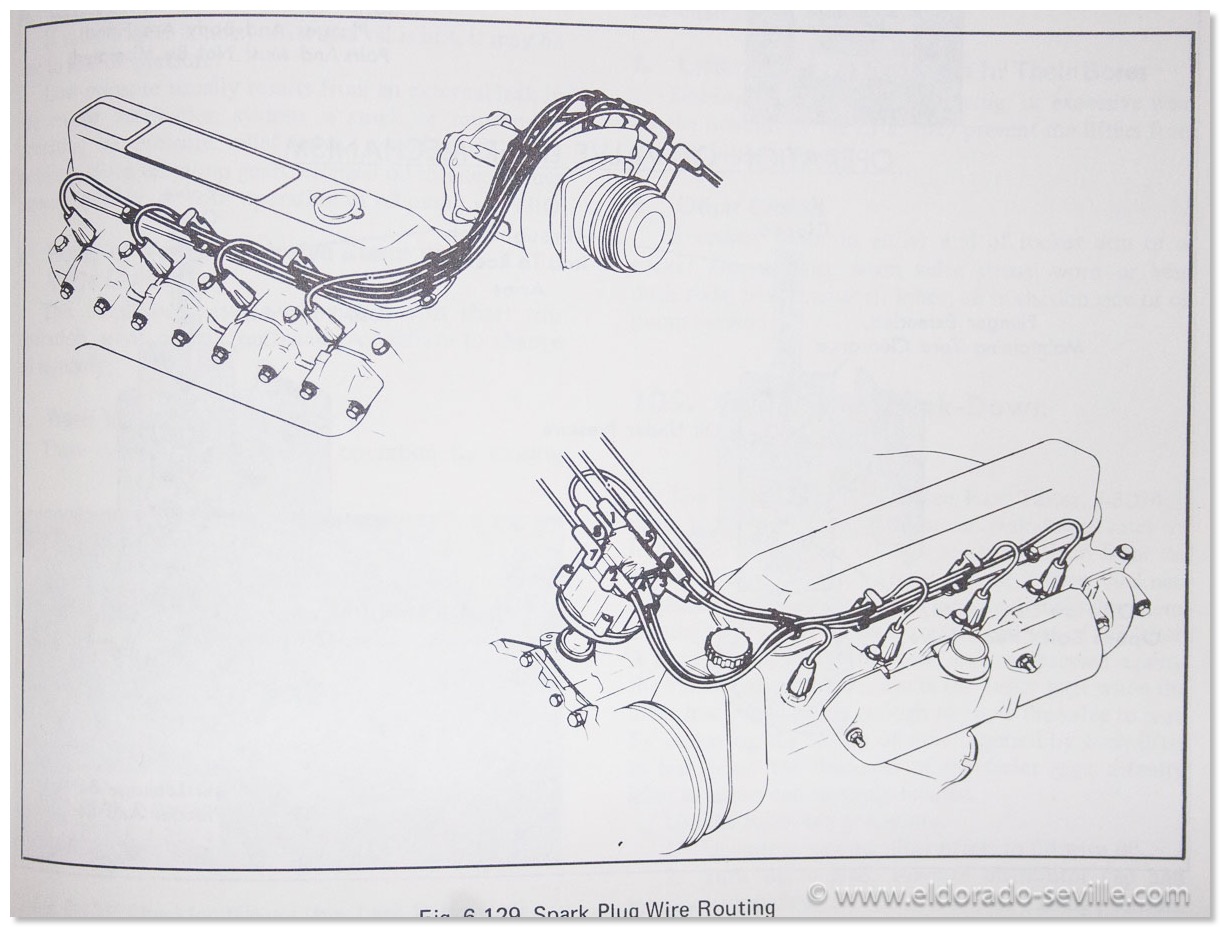
I had to remove the spark plug wires - this is how to put them back correctly.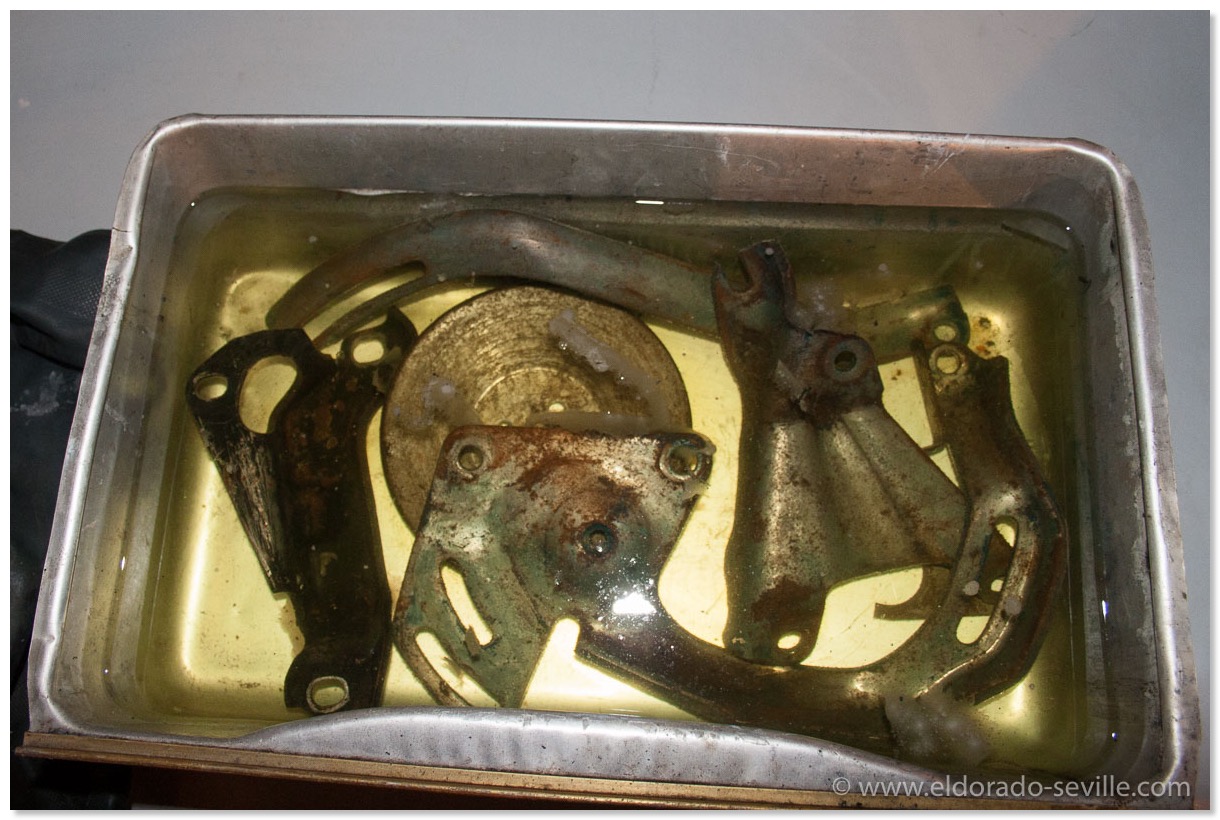
The brackets after I removed the paint - soaking in rust removing liquid until all the rust is gone.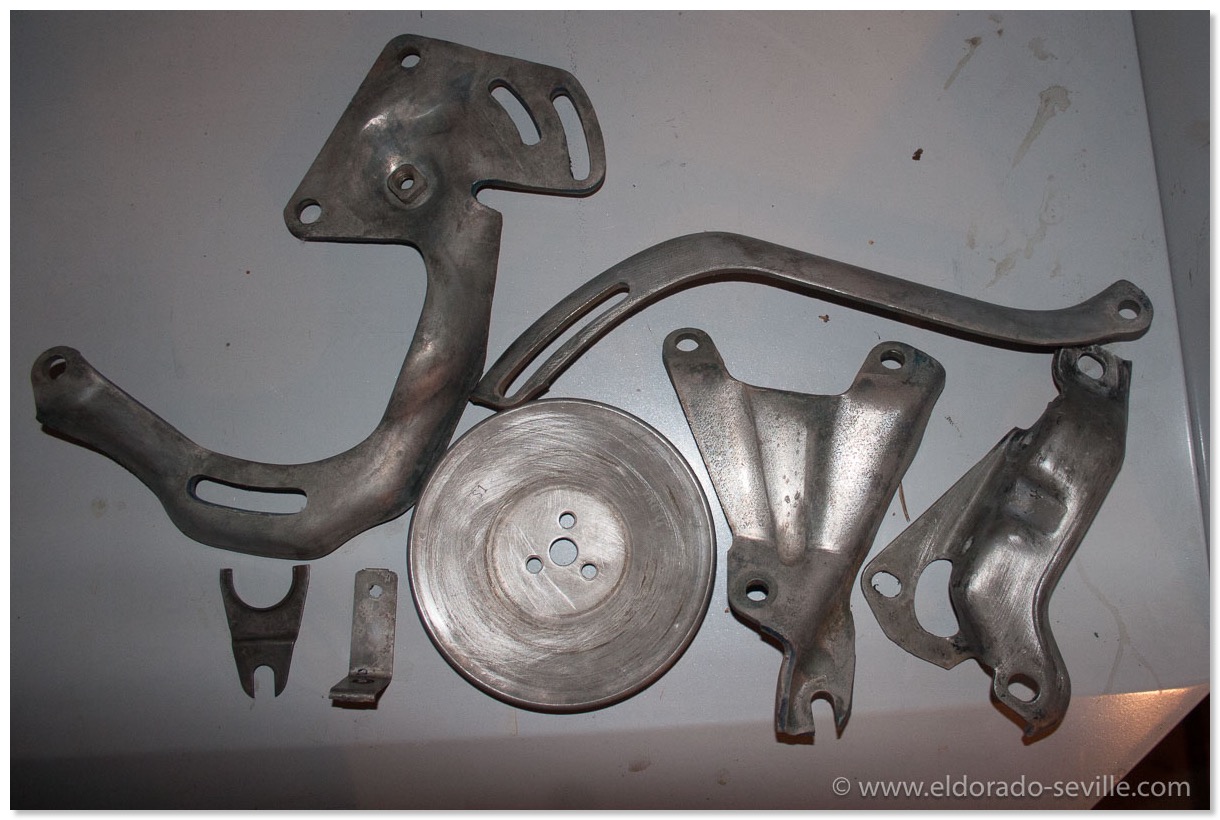
All the brackets and the pulley are now clean, rustfree and ready for paint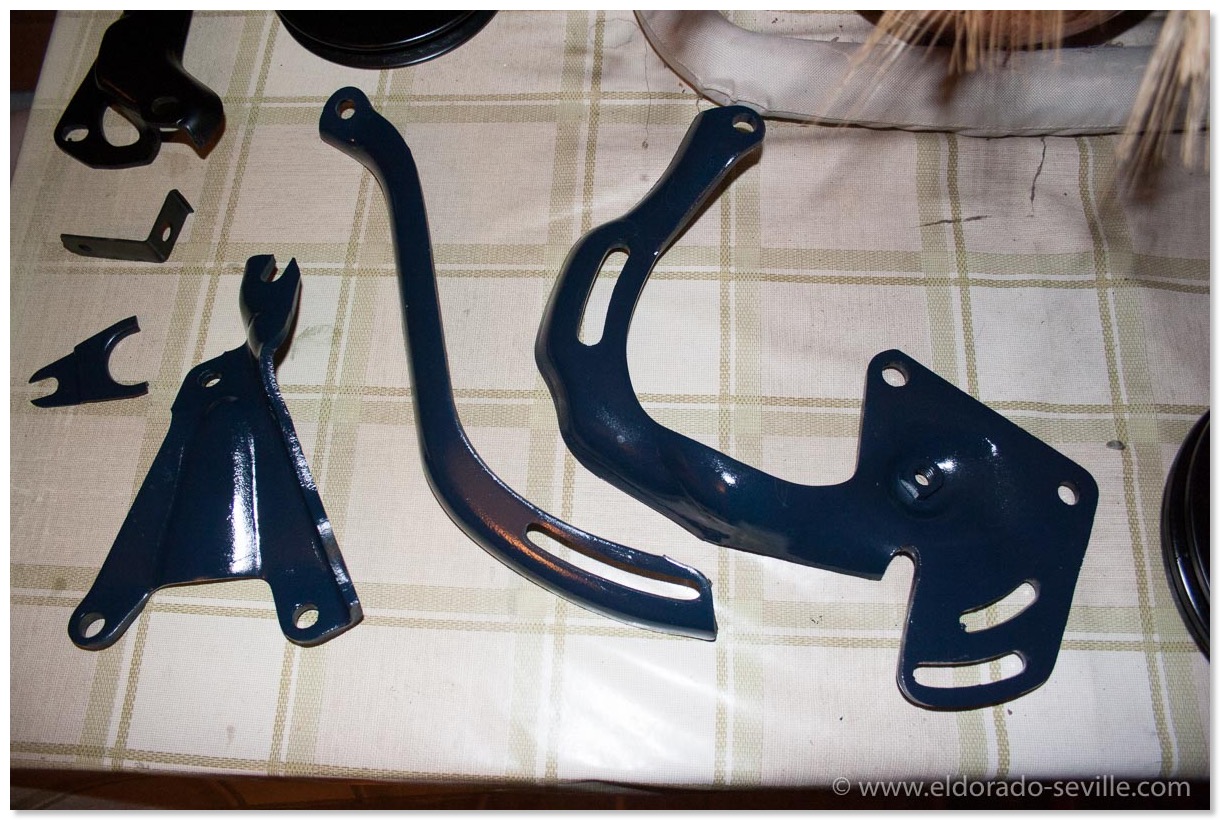
The brackets after painting.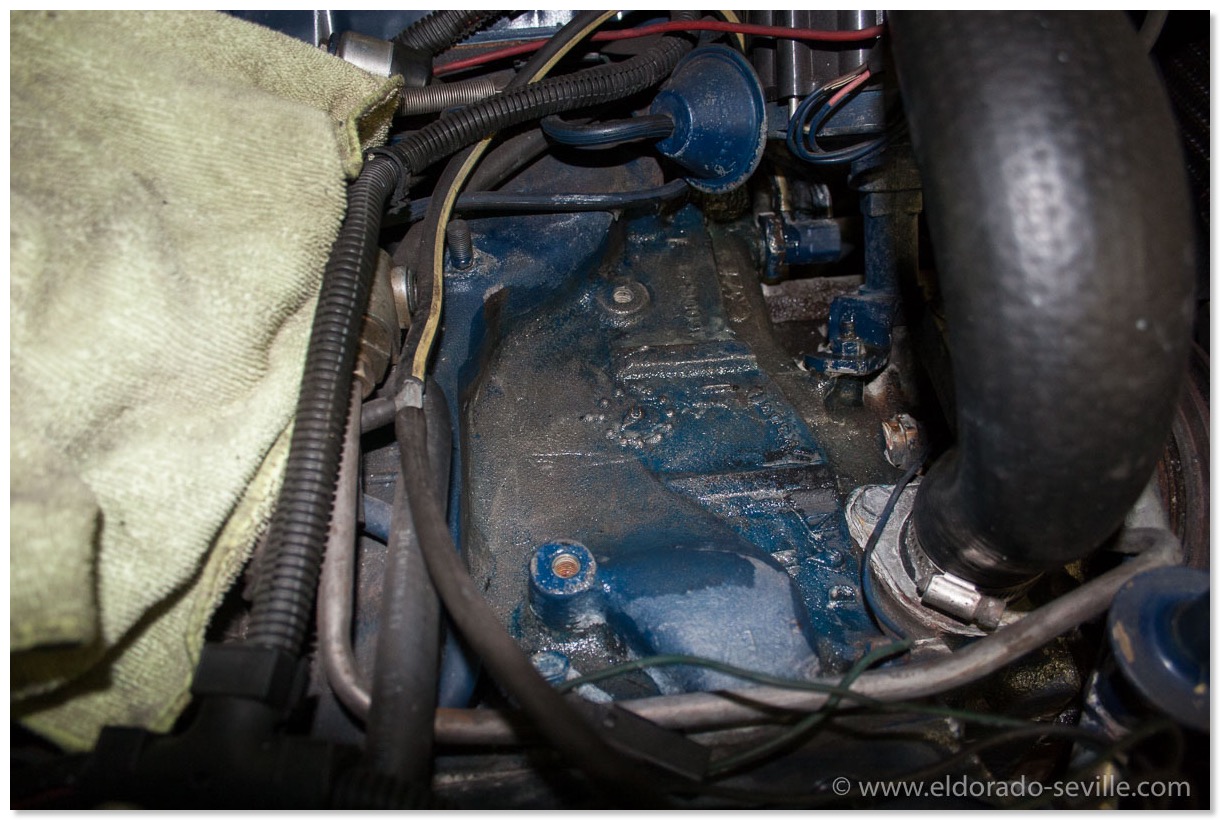
Rust removing gel in action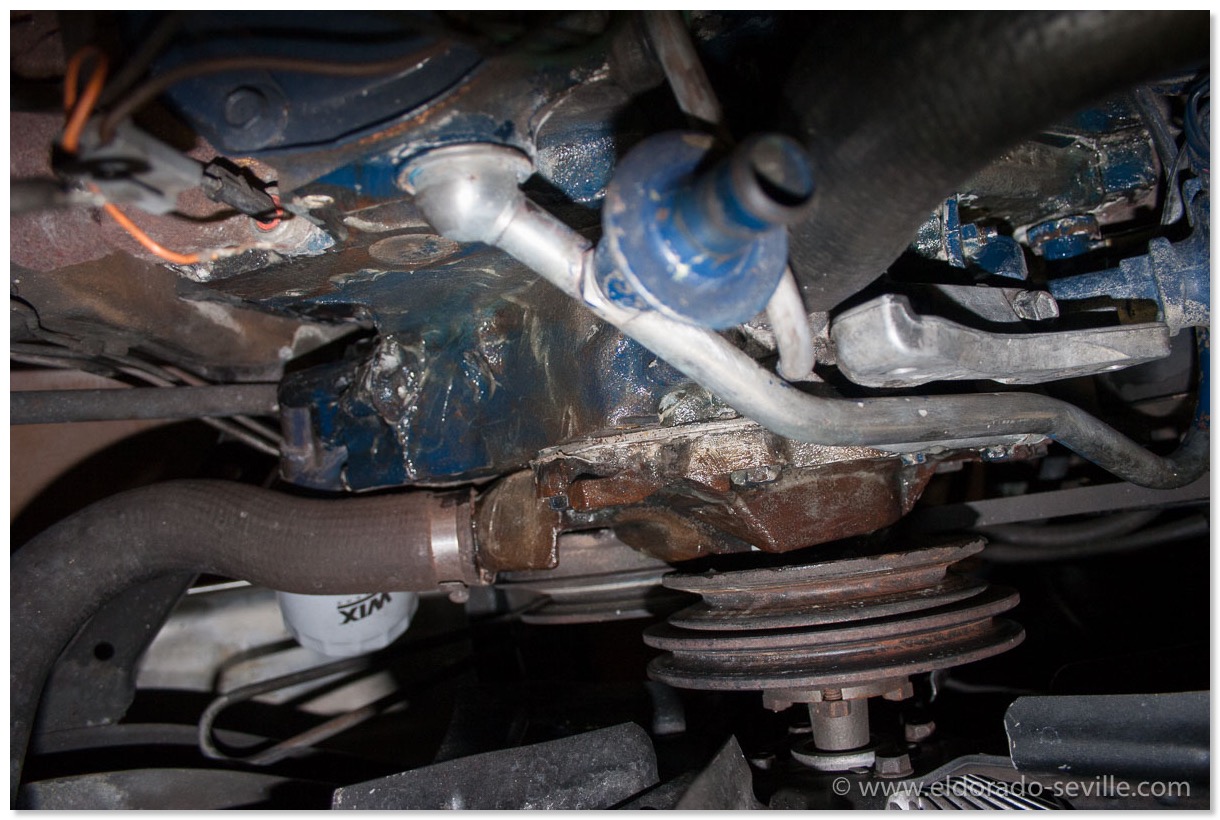
Rust removing gel in action - I decided to remove the waterpump pulley and the fan as well after I took this picture.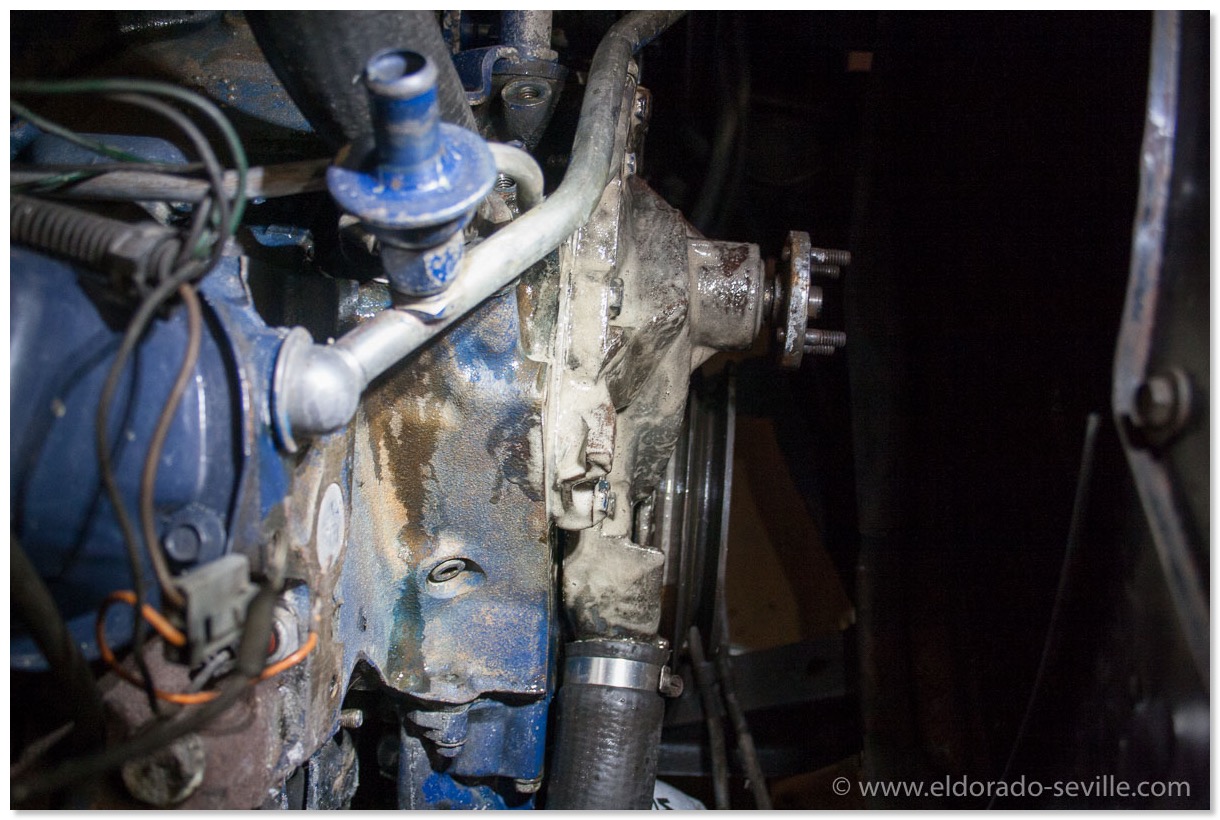
Rust removing gel in action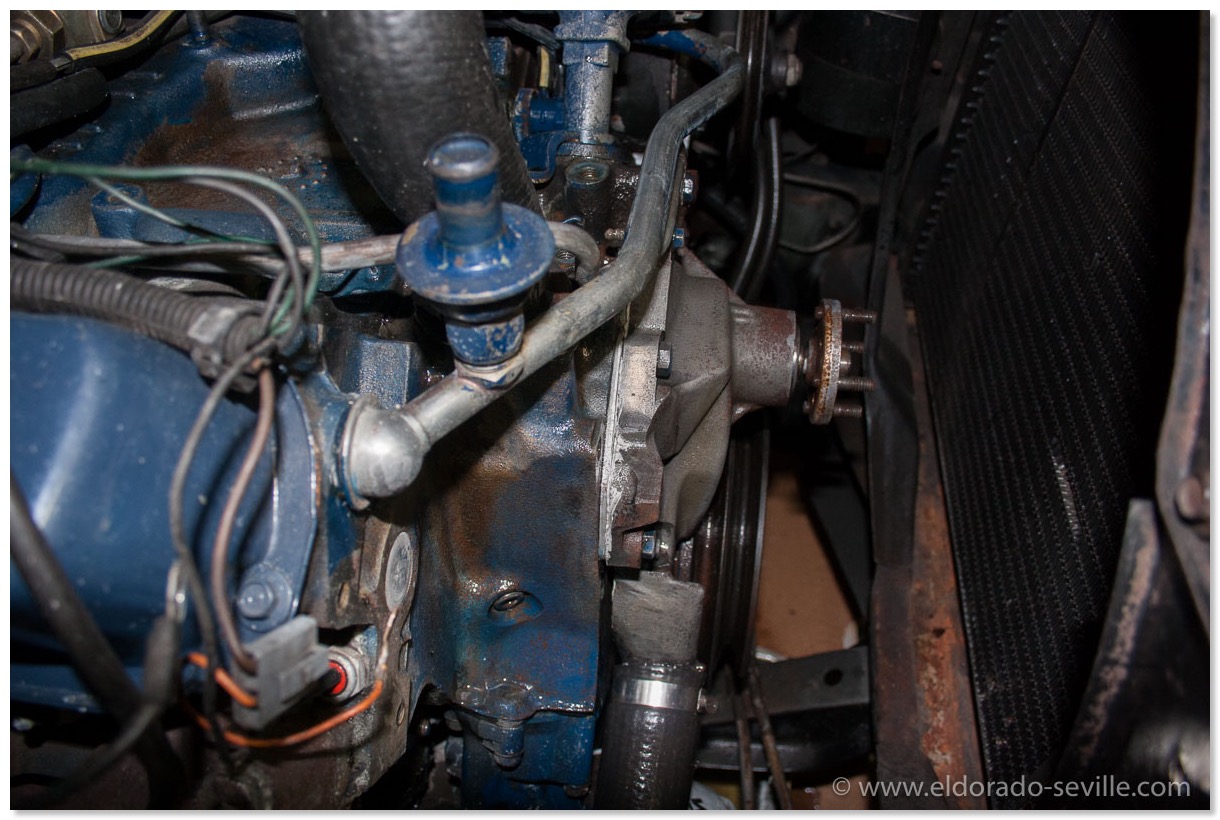
Almost clean - one more treatment will be necessary before it is ready for paint. The waterpump was not painted and therefore was pretty rusty.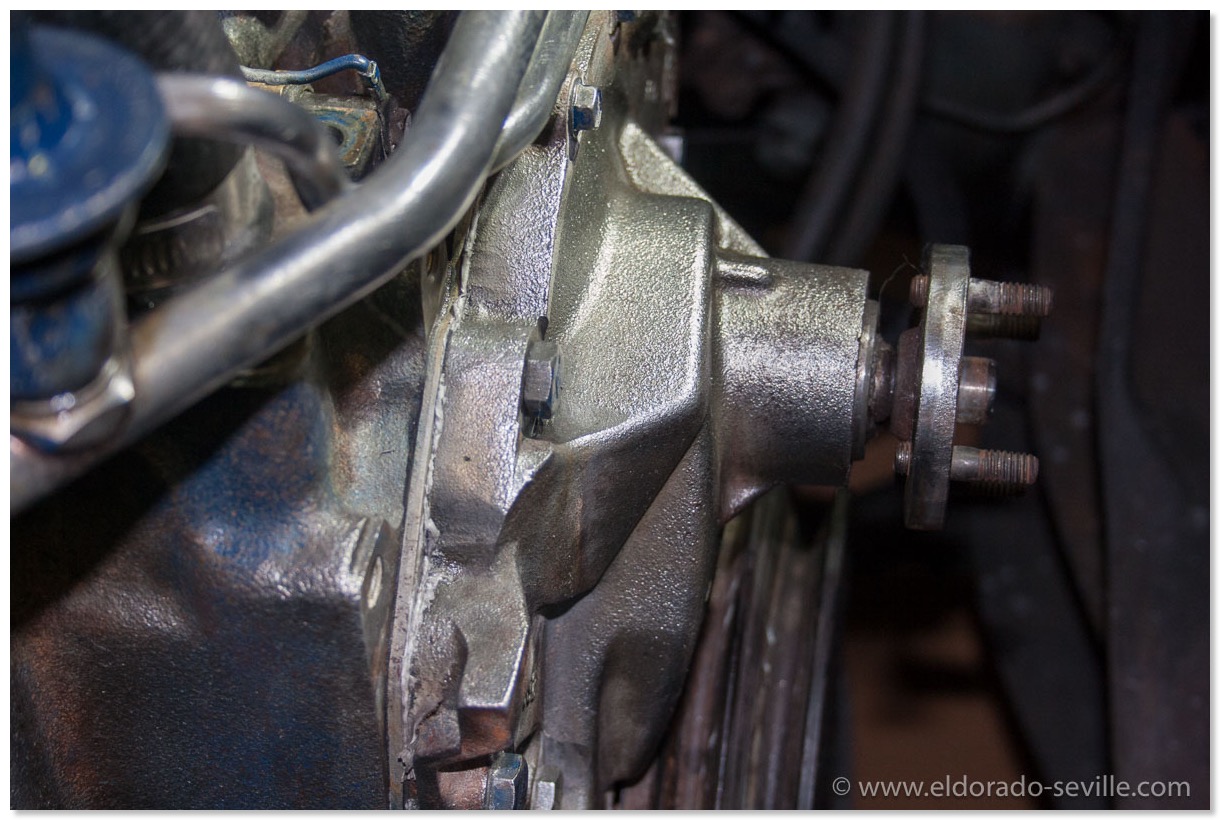
The water pump is now completely rust free and ready for paint.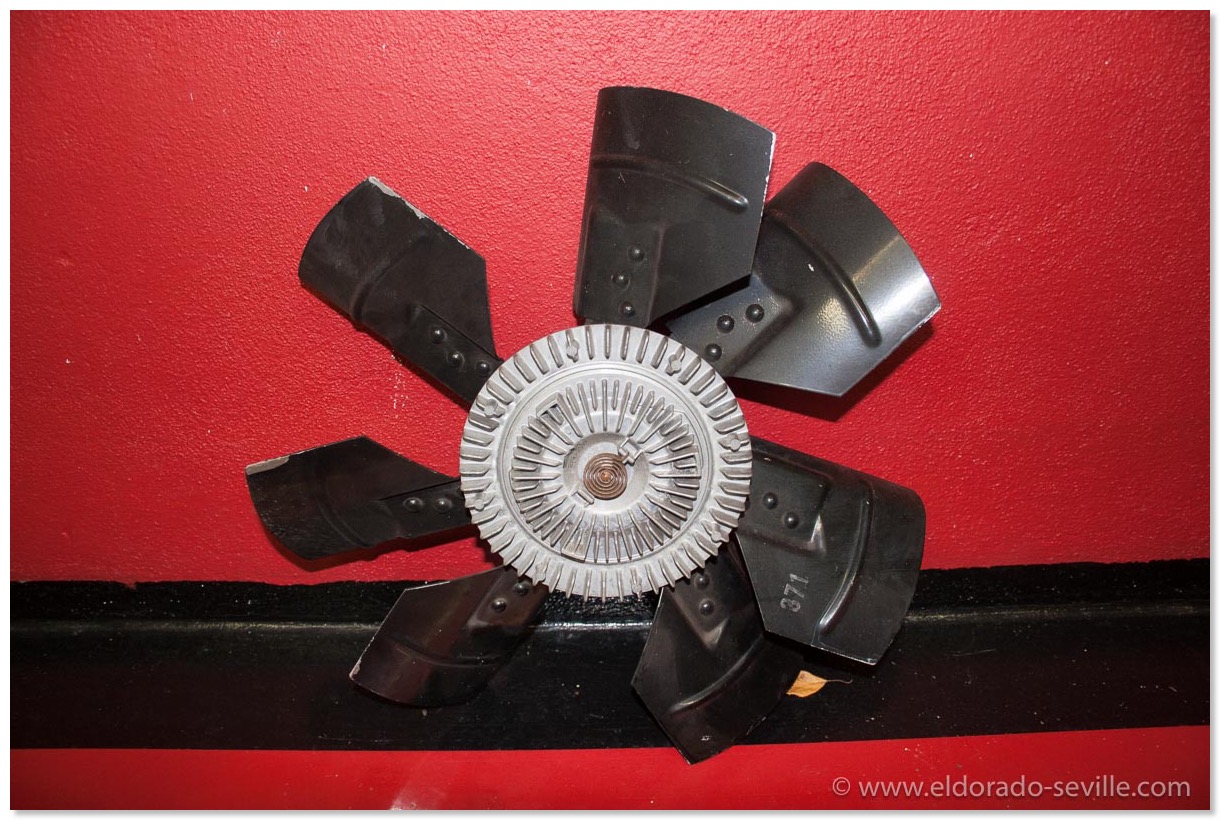
I can now fully clean and detail the fan as well. It even still carries the factory stencil.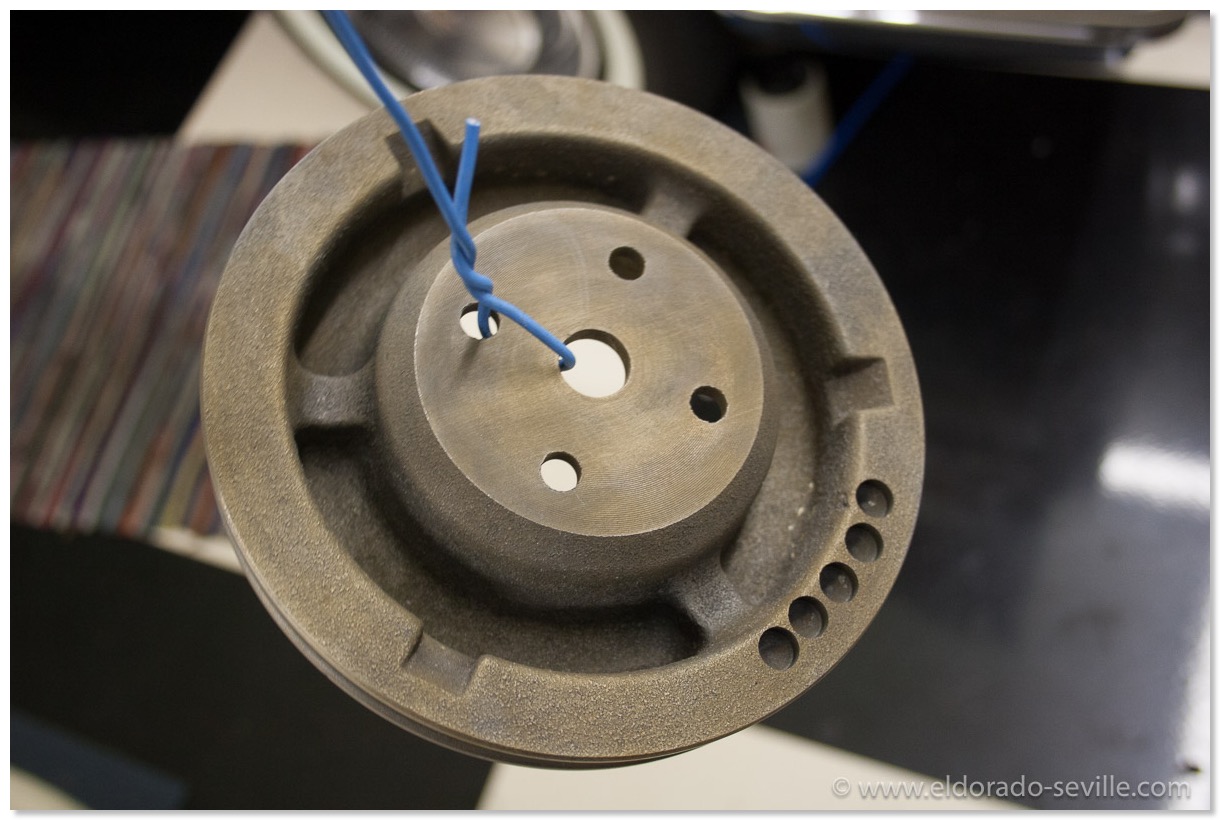
The water pump pulley after rust removal. I had to paint it very quickly because it developed flash rust immediately after removing it from the rust removing liquid.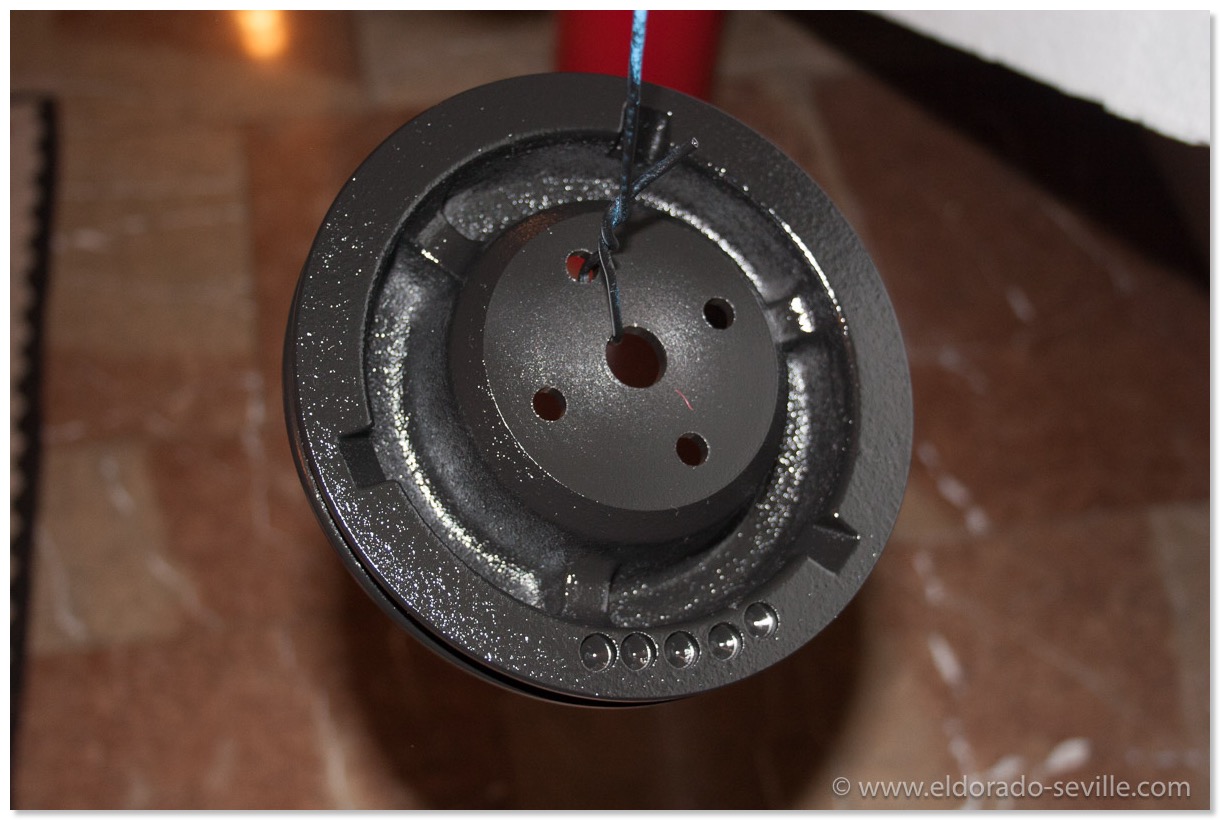
The water pump pulley after rust removal. I had to paint it very quickly because it developed flash rust immediately after removing it from the rust removing liquid. Here it is in black primer to stop it from rusting.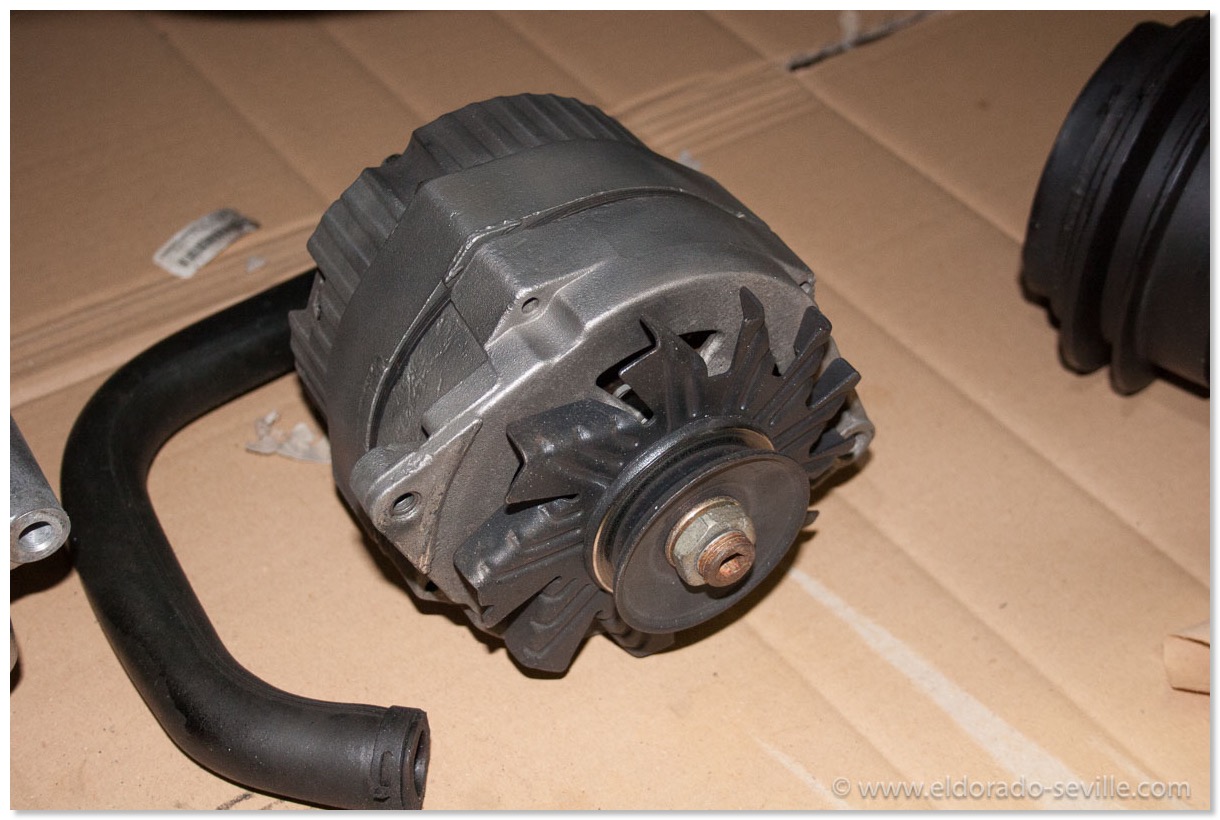
The alternator housing after cleaning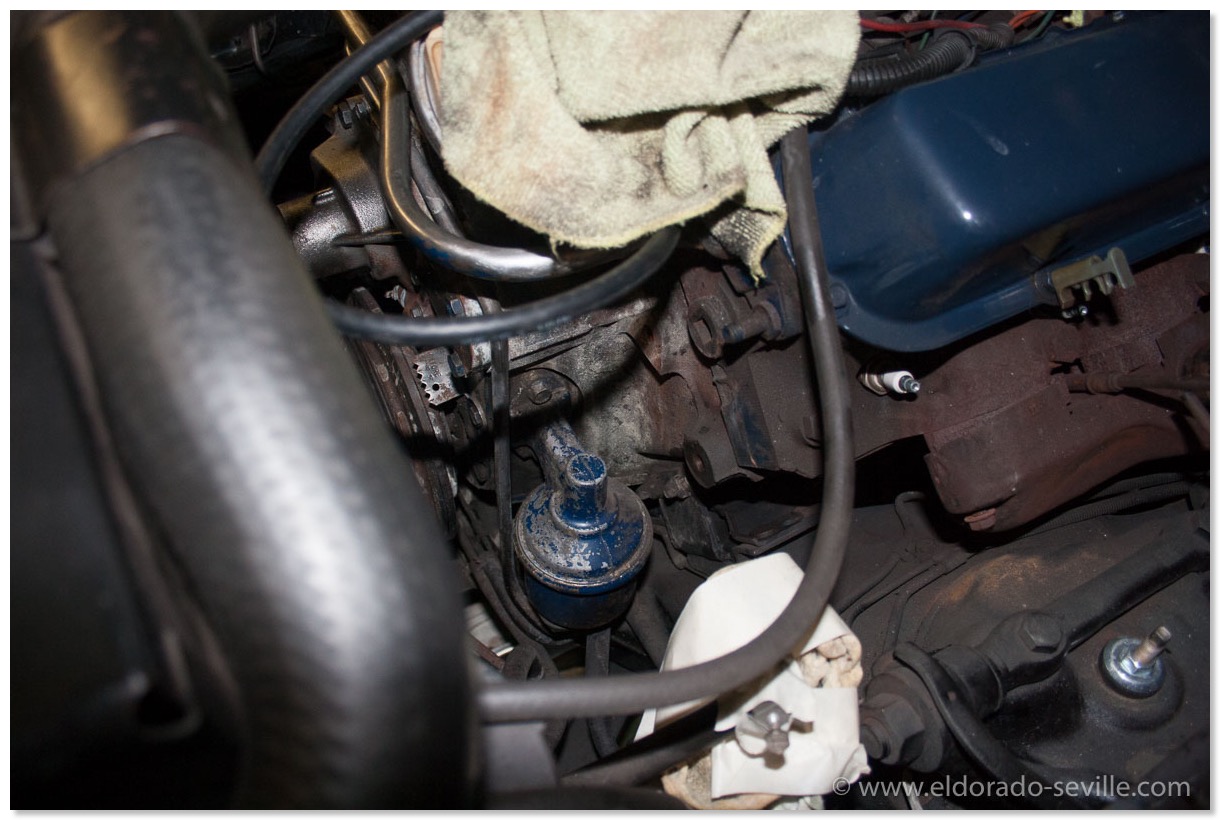
The power steering pump removed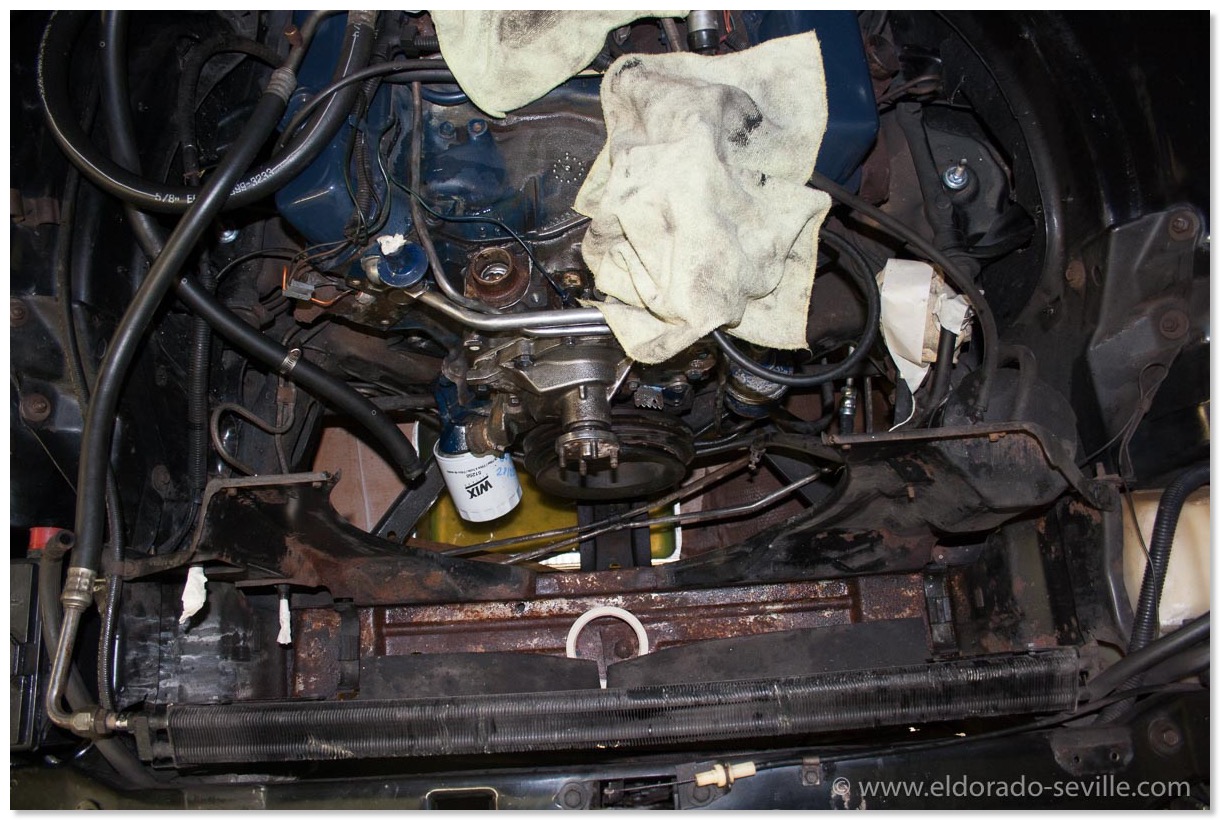
I took out the radiator to clean up the surface rust underneath…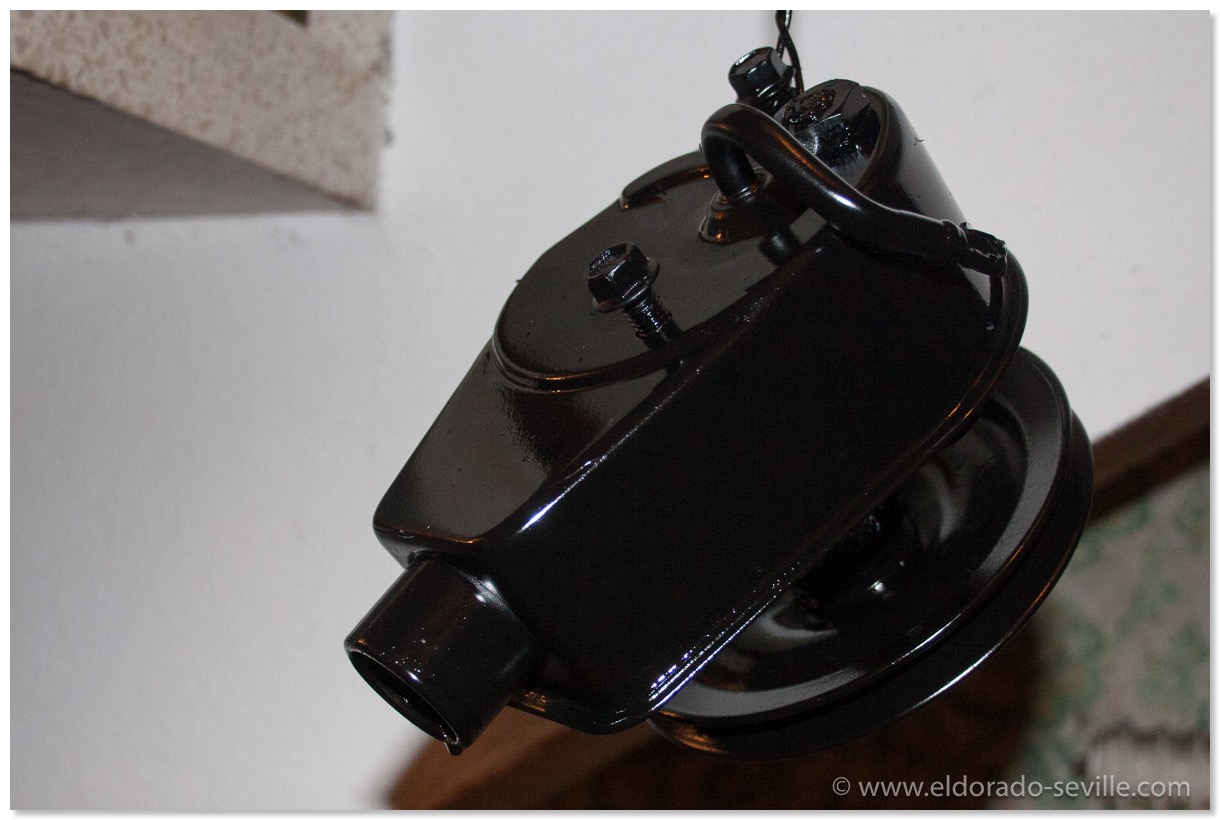
The power steering pump right after painting with wet paint... I took it down to bare metal before painting, but I forgot to take a picture...
1966 Cadillac Coupe deVille (16)
1967 Cadillac DeVille (54)
1967 Cadillac Eldorado (73)
1971 Lincoln Continental Mark III (24)
1974 Cadillac Coupe deVille (46)
1978 Cadillac Eldorado Biarritz (25)
1996 Buick Roadmaster (20)
Cadillac BIG Meet (2)
Car Shows (55)
Cruising (4)
CT6 (1)
For Sale (3)
Garage Stuff (32)
Pacer (1)
Restoration (140)
Various (55)
Video (20)
Website News (31)
- 6 way power seat
- 8-track
- 10 Ohm
- 429
- 1932
- 1957
- 1958
- 1958 Cadillac Eldorado Seville
- 1958 Cadillac Repair Tip
- 1959 Cadillac Eldorado Seville
- 1964
- 1965
- 1966
- 1966 Cadillac Coupe deVille
- 1966 Cadillac Repair Tips
- 1967
- 1967 Cadillac DeVille
- 1967 Cadillac Eldorado Repair Tip
- 1967 Cadillac Repair Tip
- 1967 Eldorado
- 1968
- 1970 Cadillac Eldorado
- 1971
- 1971 Lincoln Continental Mark III
- 1974
- 1974 Cadillac Coupe DeVille
- 1974 Cadillac Repair Tip
- 1976
- 1977
- 1978
- 1978 Cadillac Eldorado Biarritz
- 1978 Cadillac Repair Tip
- 1980 Cadillac Eldorado Biarritz
- 1996
- 2012
- 2014
- 2017
- 2018
- 2019
- 2022
- 2023
- 2025
- 3063206
- 7027235
- 7800483
- 7805675
- 7805676
- 12355706
- 17058531
- 17059968
- 17059969
- 22010515
- 22010661
- A.I.R
- A6
- AC
- AC Compressor
- AC Electrical Diagram
- ACC
- Accelerator Pump
- Accelorator pump
- Accident
- Actuators
- Adriatic Blue Metallic
- Ads
- Aftermovie
- Air Pump
- Aircondition
- AIRPUMP
- ALC
- Alternator
- AM
- AM-Transmitter
- Antenna
- Anti Rattle Clips
- Antique Gold
- Arizona Vintage Parts
- Arrival
- Article
- ASC
- Ash Tray removal
- ATC
- Atlantis Blue Firemist
- Austria
- Austro Classic
- Autolite SP-459
- Automatic Seat Back Release
- Award
- Banner
- Barn Find
- Battery
- Battery Tray
- Beach Race
- Bearing
- Bendix
- Biarritz
- Bigfoot
- Bill Hirsch Engine Enamel
- Bleeder Screws
- Bleeding
- Blower
- Bodywork
- Bolts
- Book
- Borg
- Brake Booster
- Brake Fluid
- Brake Gray
- Brakes
- Broken Bolt
- Brougham
- Bucket seats
- Buick
- Bumper End
- Bushings
- Cadillac
- Cadillac BIG Meet
- Cadillac BIG Meet
- Cadillac birthday cake
- Cadillac Blue
- Cadillac Color Selections Dealer Book
- Cadillac Coupe deVille
- Cadillac Dealer
- CADILLAC GRAND EUROPEAN
- Cadillac Meeting
- Cadillac Mini Meeting
- Camaro RS
- Caorle
- Car Show
- Carburetor
- Card
- Carpet
- Carter AFB
- Cavalry Twill Vinyl
- CB
- CBM
- CCCD
- Choke
- Christmas
- Citizens Band
- Classic Cadillac Club Deutschland
- Clay Towel
- Cleaning
- Clock
- Clockwork
- Clutch
- Clutch Coil
- Collector
- Colonial Yellow
- Color Coded Springs
- Commercial
- Compound
- Compressor
- Condenser
- Continental Mark III
- Control Head
- Conversion
- Convertible top
- Coolant
- Corona
- Cowl
- Cruise Control
- Cruising
- CT6
- CV Boots
- CV JOINTS
- D6230
- Dash Trim
- Decal Removal
- Decals
- Decoration
- Dehumidifier
- Delco Moraine
- Der Standard
- detailing
- Deville
- Diagnosis Chart
- Diagram
- Dial
- Digital Rotary Drum Clock
- Diner
- Disc Brakes
- Distributor
- Diverter Valve
- Door Jamb Switch
- Door Rubber Conduit
- Dornbirn
- Dot3
- Drive Shaft
- Driving tour
- Drum brakes
- Dry Ice Blasting
- Dry Ice Cleaning
- DVD
- Eastwood
- Eldorado
- Electric Choke Thermostat
- Electrical schematic
- Elvis
- Engine Bay
- Ep
- Epoxy floor
- Europe
- Evaporator
- Exide
- Factory Markings
- Fender Skirt
- Floor
- Flushing
- Flyer
- Foam
- For Sale
- Front AXLE
- Front brakes
- Front bumper filler
- Front Floor
- Front wheel bearing
- Fuel Filter
- Fuel Pump
- Fuel Sending Unit
- Fusible Link
- Garage
- Garage Cabinets
- Gasket
- GE
- Gear indicator
- General Time
- Glove box light
- Grand European
- H4
- Haus of Hot Rod
- Headlight Actuator
- Headlight doors
- Headlights
- Heater Core
- Heater Hose
- Heater Valve
- High Idle
- History
- Holley
- Honest John
- Hood
- Hood Emblem
- Hood Ornament
- Hose Clamp
- Hot Choke
- Hot Water Valve
- HotRod
- How to
- Hödlmayr
- Ignition Diagram
- Illuminated Entry
- John D‘Agostino
- John Foust
- Klassikwelt Bodensee
- Kremsmünster
- LaSalle
- Leather seats
- Light Switch
- Limited
- Lincoln
- Lincoln Mark III Repair Tip
- Low Mileage
- Magazine
- Marilyn Monroe
- Mark III
- Master Cylinder
- Master Switch
- Master Vacuum Switch
- Media Blasting
- Meeting
- Meguiras
- MK II
- Mobile
- Model
- Moldings
- Mom
- Mopar Nationals
- Mostkost Kustom
- Movie
- Munich
- Neon
- NOS
- Oberösterreicher des Tages
- oilchange
- ORF
- Overspray
- Pacer
- Paint
- Paint correction
- Paintjob
- Part Number
- Parts
- Patch Panel
- Perfect Circle
- Permabag
- Persian Lime
- Photo shooting
- Photoshooting
- Pictures
- PinUp
- POA Valve
- Power Antenna
- Power Servo
- Power Vent Windows
- Power Window
- Printed Circuit Board
- Programmer
- Pulley
- Quadrajet
- Quarter Panel
- Quartz Conversion
- R134
- Radiator
- Radio
- Rattle
- Rear brakes
- Rebuild
- Recalibrate
- RediRad
- Reed Switch
- Relais
- Relaunch
- Removing Overspray
- Repaint
- Repair
- Restoration
- RIP
- Roadhouse
- Roadmaster
- Rochester
- Rocker Arm Cover
- Rocker Panel Extension Clips
- Rostio
- Rotary Valve
- Rotterdam
- Rupes
- Rust removal
- Rust removal gel
- Sabre Wheels
- Sand Blasting
- Sandblasting
- Screed
- Season Greetings
- Seasons Greetings
- Seat Back Locks
- Seat Padding
- Seat Transmission
- See through ornament
- Self adjusters
- Self Starter
- Sepp's Garage
- Seville
- Sheetmetal
- Shocks
- shop manual
- short
- Sign
- Solenoid
- Spark Plug Wire Routing
- Speakers
- Special Award
- Speed Bleeder Screws
- Splash Guard
- Starter Diagram
- Starter Motor
- Steering Column
- Storage
- suction throttling valve
- sunroof
- suspension
- Swirl Mark removal
- Switzerland
- T3
- Taillight Cover
- Texan´s Choice Award
- Thermostat
- Tilt and Telescope
- Time capsule
- Tomsclub
- Torque Specifications
- Tower Hose Clamp
- Towtruck
- Trailer
- Transducer
- Transmission
- transmission control selector
- transmission control selector indicator light
- transmission shift indicator
- Treadle Vac
- Treffen
- Tri-Band
- Troubleshooting
- Trunk Cardboard Kit
- Trunk lid
- Trunk lining
- Trunk to bumper cover
- Turn Signal Switch
- TV
- Typisierung
- Ultimate Garage
- Underbody
- Undercarriage
- Undercoating
- Undercoating Removal
- Vacuum Booster
- Vacuum diagram
- Vacuum hoses
- Vacuum Master Switch
- Vacuum Schematic
- Vacuum Valve
- Valve Cover
- Various
- Vent Window Switch
- Vibration
- Vibrator
- Vicodec roof
- Video
- Vinegar
- Vinyl Roof
- Visitor
- Washer Fluid Float
- Washer Fluid Low Level Indicator
- Water Pump
- Wax
- Weatherstripping
- Website News
- Westclox
- Wheel Bearings
- Wheel Housing
- Wiesbaden
- Windlace
- Winter
- Wiring
- Wiring Diagram
- Wonderbar
- Workbench
- Zurzach
 GERALD´S CADILLACS - NEWS