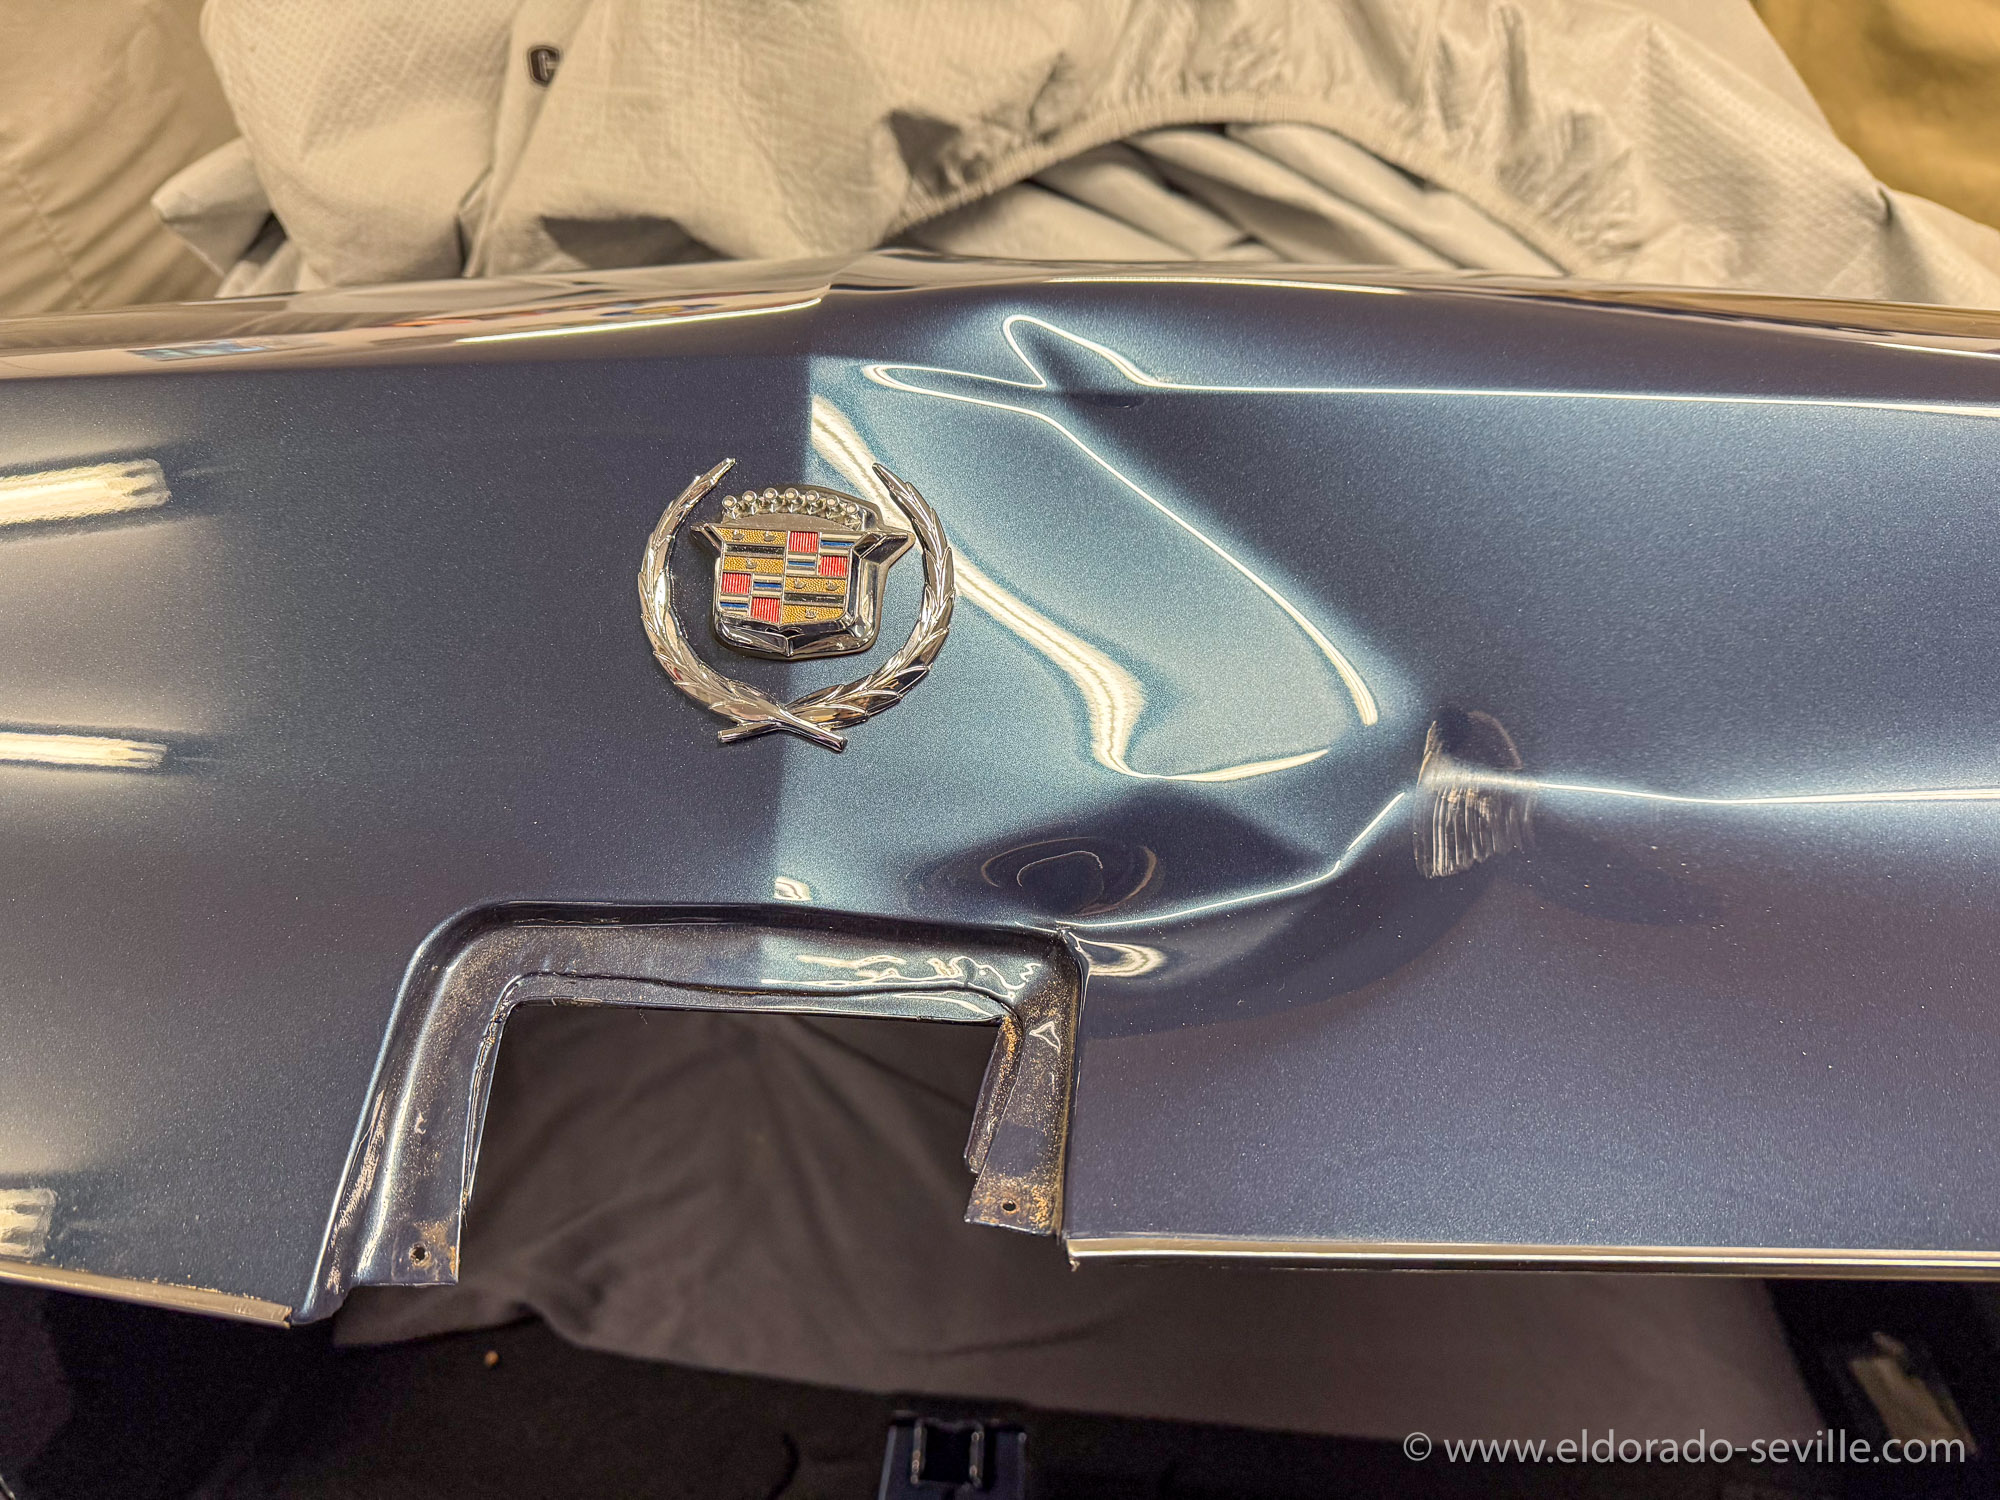
A TERRIBLE ACCIDENT WITH MY 67 ELDORADO
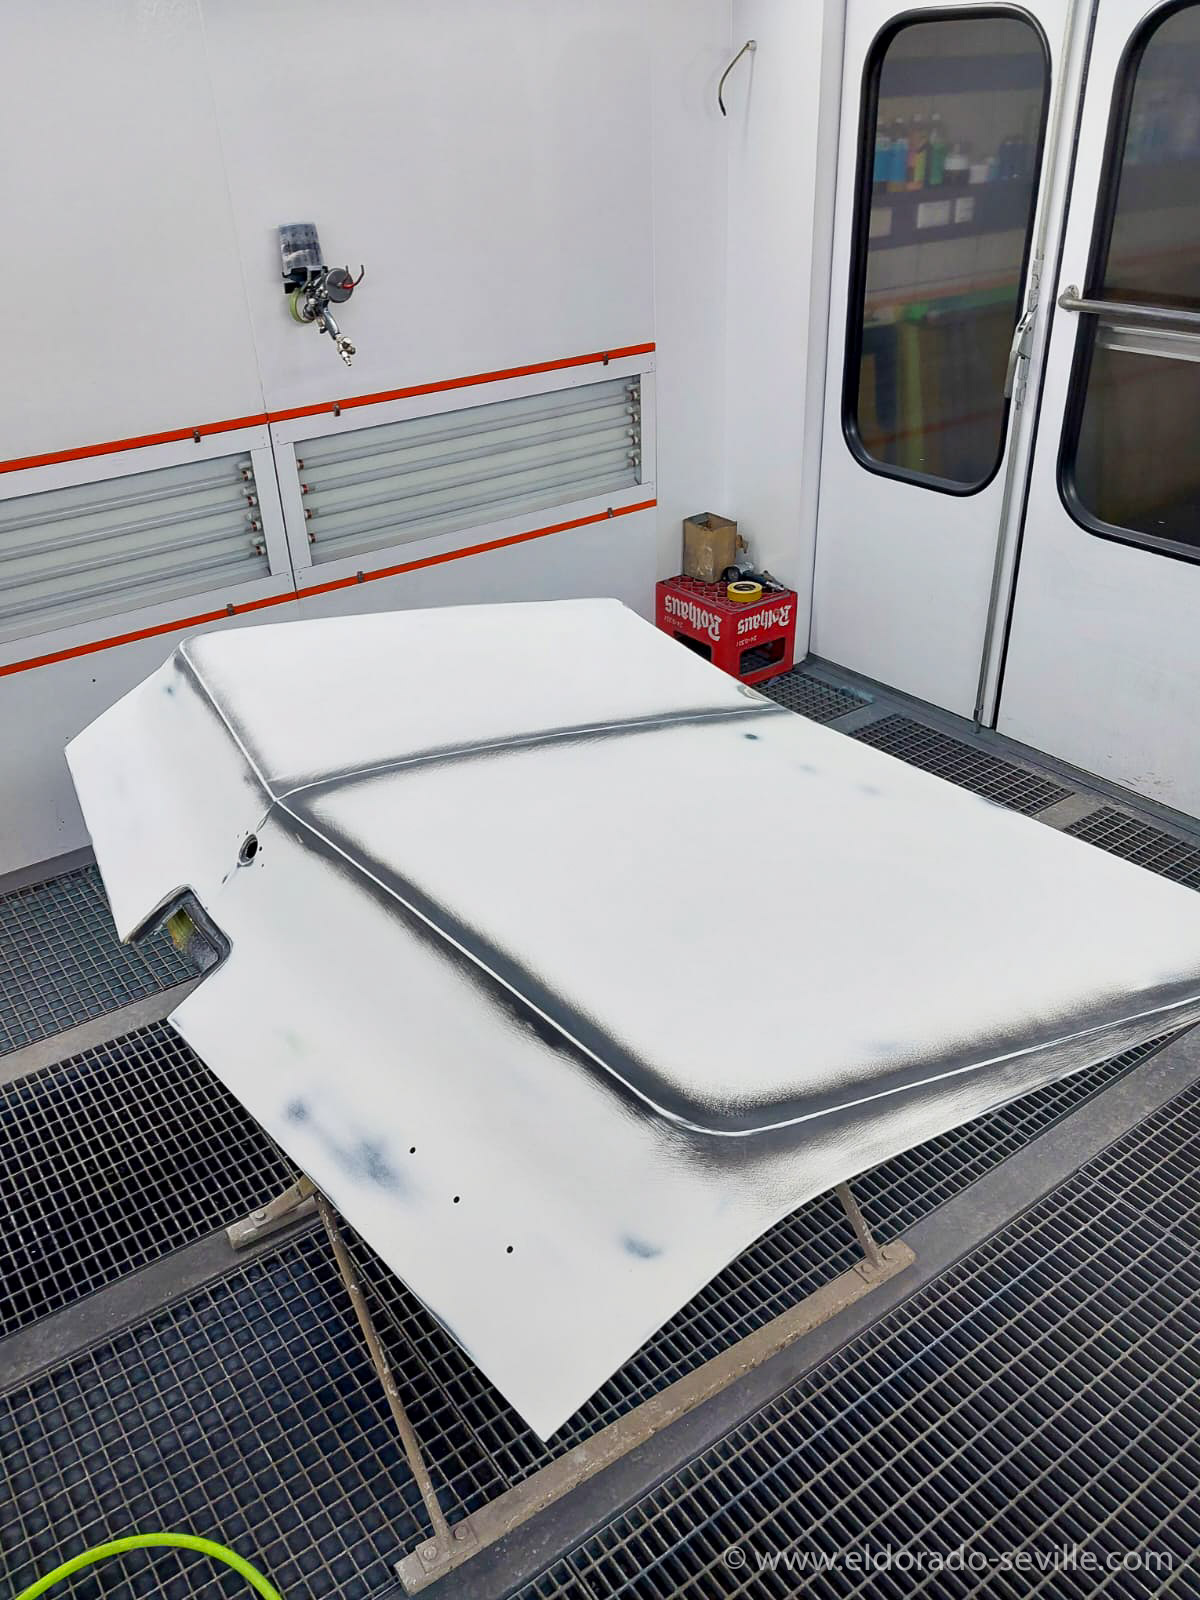
I now had to source a new trunk lid and found one in Arizona on Craigs List.
As we were planning to travel Route 66 this summer anyways I contacted the seller and we visited him in his warehouse in the middle of nowhere.
The lid looked great and rust free and it was advertised as a 68 lid which is completely identical to 67.
Getting it over to Europe was another challenge...
THE 67 ELDORADO RESTORATION IS IN ITS FINAL STAGE
The restoration shop on the other side did a fantastic job so far. There are some minor details they still want to address and the car should be ready for pick up sometimes in May.
Here is a short video I took with my phone at the shop when I delivered the bumper, showing the almost finished car. Make sure to watch in HD to see all the details
The almost finished car still in Bernds Restoration Shop
THE 1967 ELDORADO RESTORATION - WHAT WE HAVE LEARNED SO FAR...
Whenever you restore a car you can learn a lot about it. The ongoing restoration of my 67 Eldorado is taking a little break now, and here is a summary of things we have learned so far during the restoration process:
There seems to be a design and/or a problem at the front windshield which causes rotten floors and rust in the A- pilar:
Although my car is a low mileage car (28k miles) with no other real rust issues, the front floor of my car had to be replaced as we found out when the carpet was removed. I have heard some similar stories from fellow Eldorado owners who had the same problem with their cars. Some of them owned very low mileage texas cars and had rotten floors and/or rust in the A-pillar. The water seems to enter at the A-pillar and often causes rust through holes there. It can then seep into the car, where it ends on the front floor, from where it cant evaporate due to the rubber insulation used underneath the carpet. When the windshield on my car was re-installed, we made sure that it seals perfectly and we used some modern material to make sure there wont be any future issues. The front floor on my car had to be replaced as you can see on the pictures of my restoration gallery.
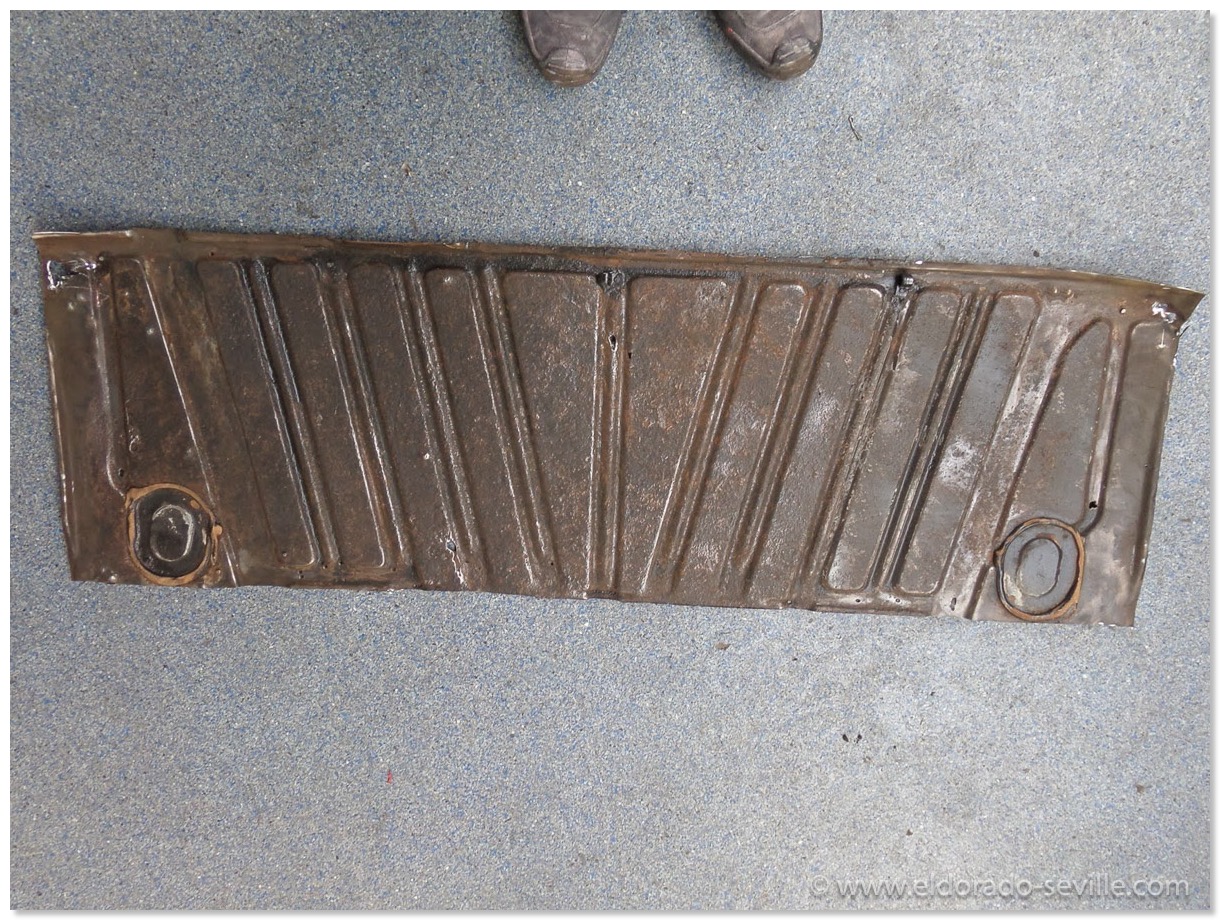
The cut out front floor.
THE 1967 ELDORADO HAS NEW PAINT!
Today was especially exciting. I saw the Eldorado in its new paint for the first time!
Doesn't she look spectacular in its fresh coat of "Atlantis Blue Firemist! ?
Bernd and his team did an awesome job so far as you can see in the restoration gallery.
There is still tons of work left - but everything looks very promising so far.
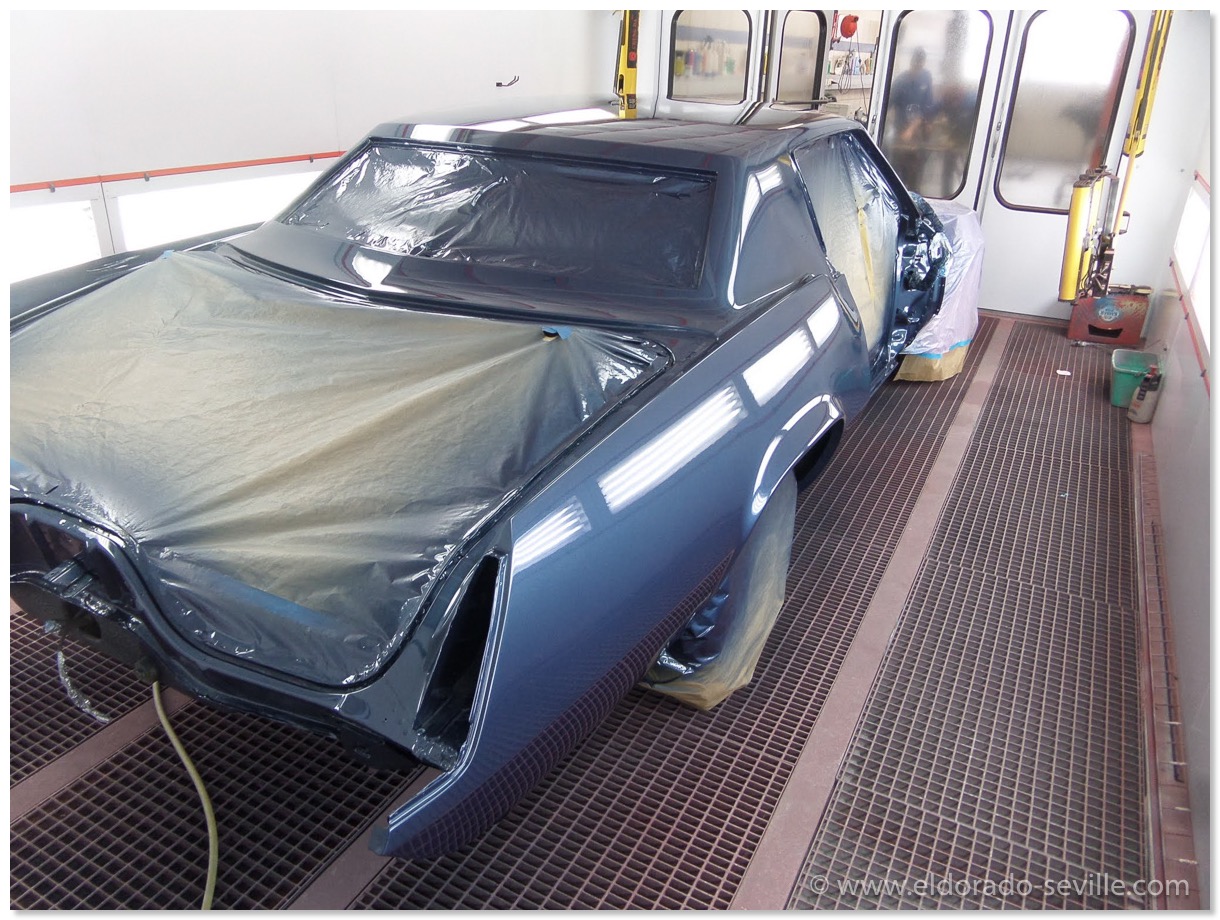
In the paintbooth with fresh paint.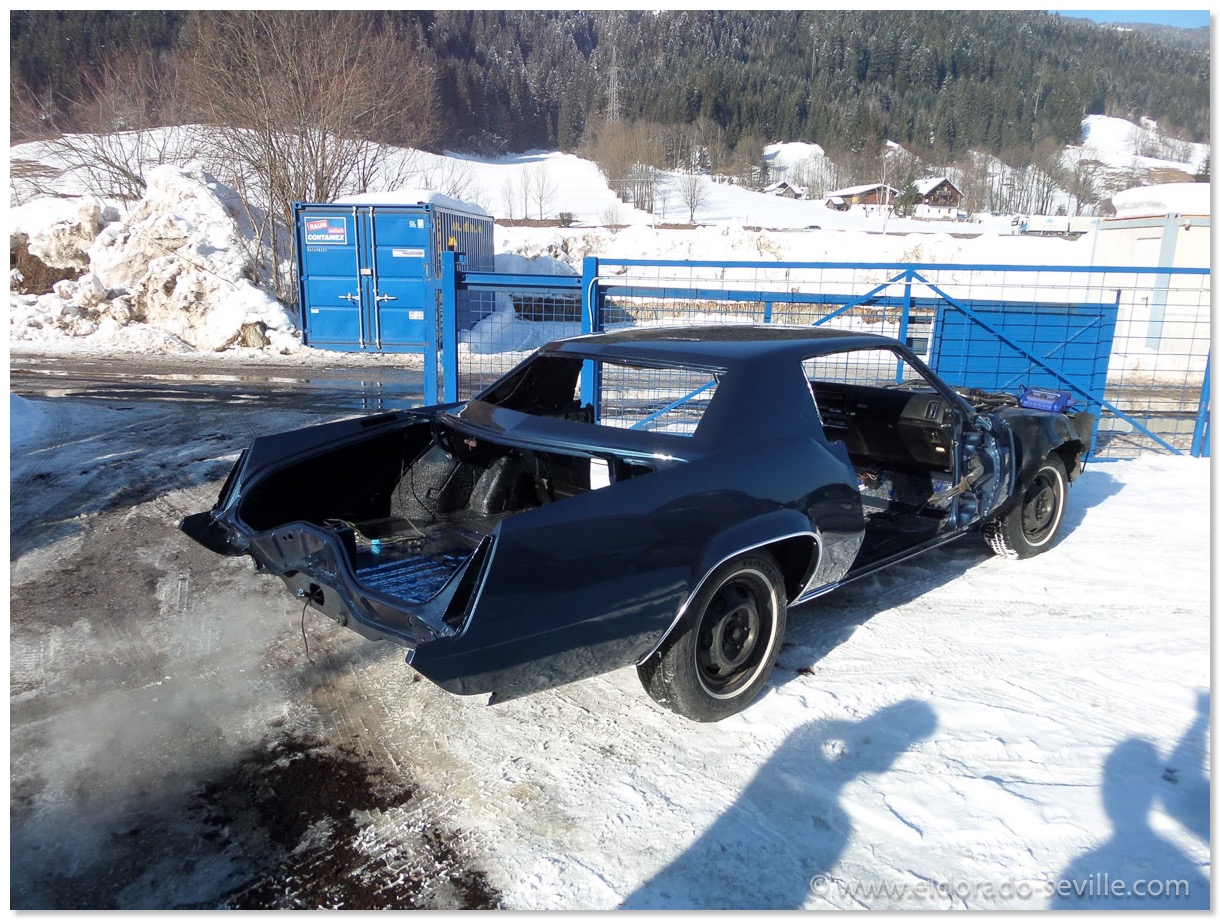
First time in the sunlight, with the first trim parts already installed.
THE 1967 ELDORADO HAS NEW PAINT!
Today was especially exciting. I saw the Eldorado in its new paint for the first time!
Doesn't she look spectacular in its fresh coat of "Atlantis Blue Firemist! ?
Bernd and his team did an awesome job so far as you can see in the restoration gallery.
There is still tons of work left - but everything looks very promising so far.

In the paintbooth with fresh paint.
First time in the sunlight, with the first trim parts already installed.
REPLACING THE FRONT FLOOR OF THE 67 ELDORADO
While the exterior of the car did not have much rust I was surprised that the front floor of the car had quite a bit of rust.
Some of the previous owners seems to have tried to stop the rust on the floor sometimes in the past by applying a good amount of rust converter, or whatever the black paint was , he applied over the rusty floor.
It seems that it did not help but just made the sheet metal oxidize underneath this sticky mess.
The restoration shop now started to remove this paint just to find some weak metal with some holes in it.
This is when they decided to cut the entire front floor out and replace it with some fresh metal instead.
They had to make a patch panel from scratch as no new panels are available for this car anywhere. The new custom made replacement floor was now welded in.
Like on the factory rubberized undercoating was reapplied underneath the car and the welding seams were sealed with seam sealer.
You can see all the detailed pictures in the restoration gallery here.
I hope this was the last unpleasant surprise for a while…
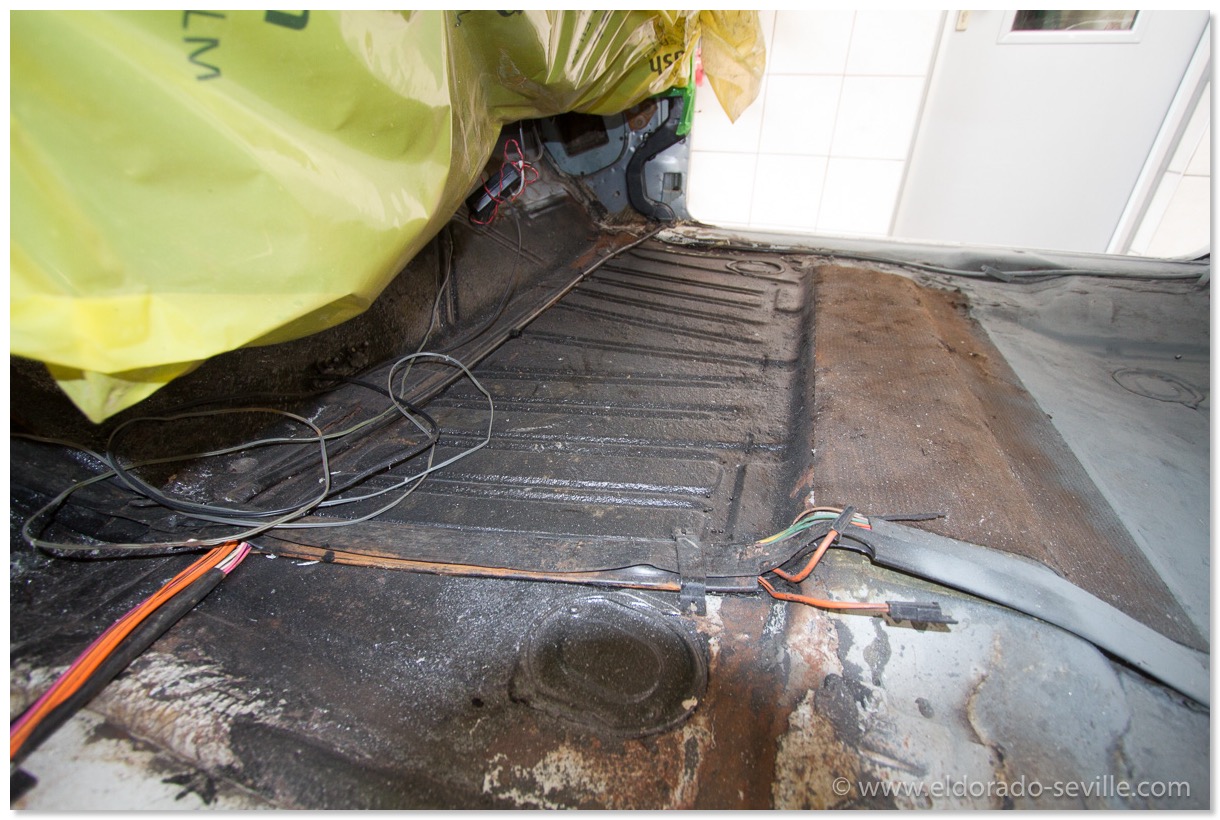
This showed up when the carpet and the seats were removed…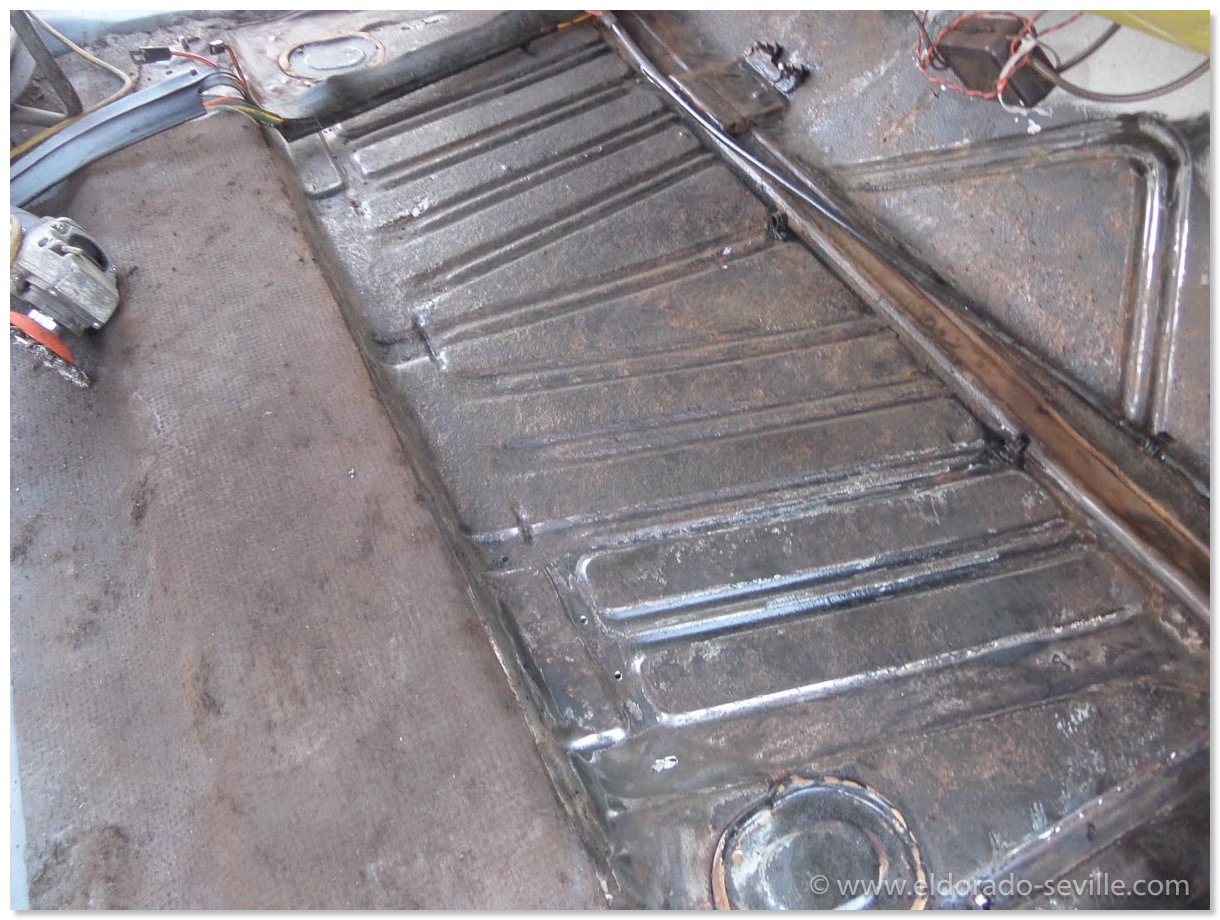
After removing the black mess, the weak metal and some rust holes showed up.
Unfortunately the original floor had to be cut out…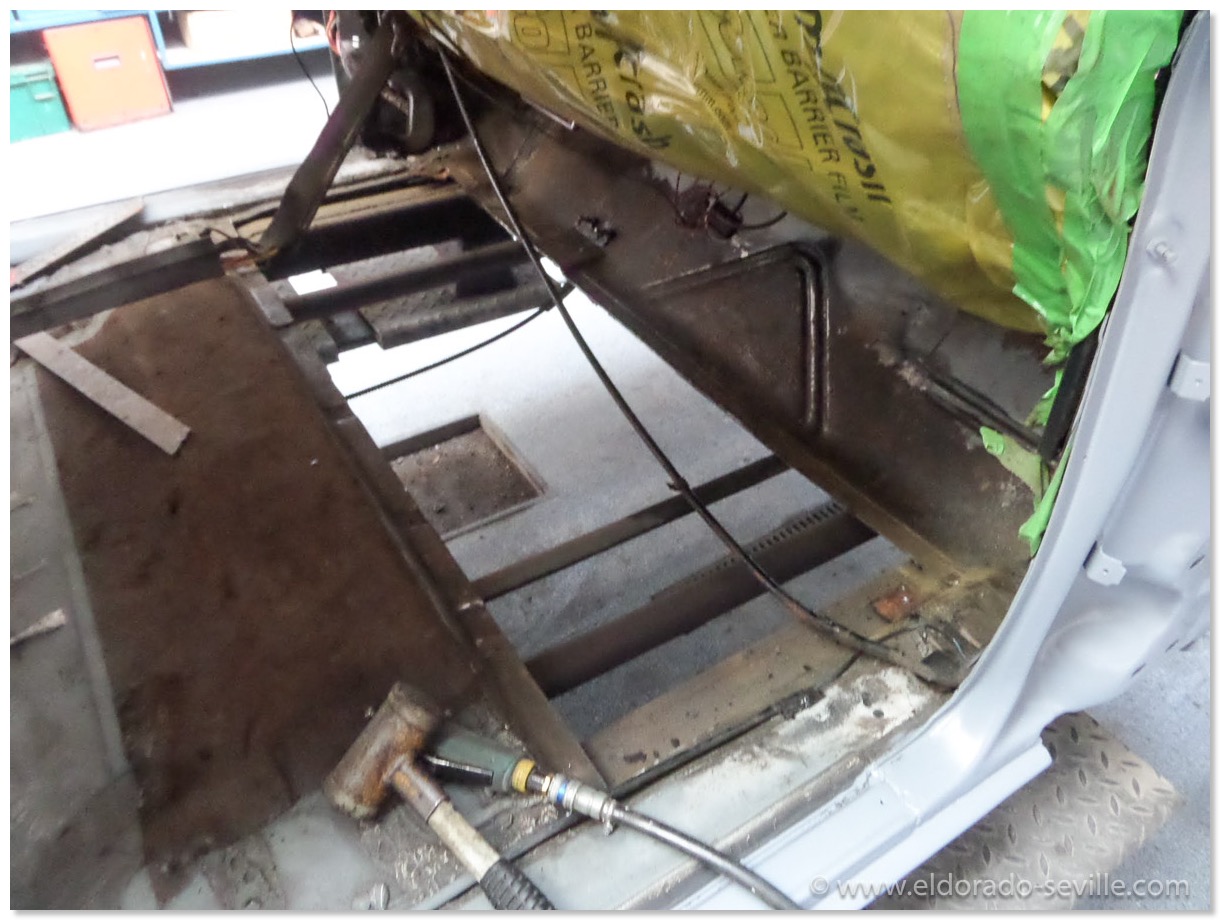
Big hole in the floor.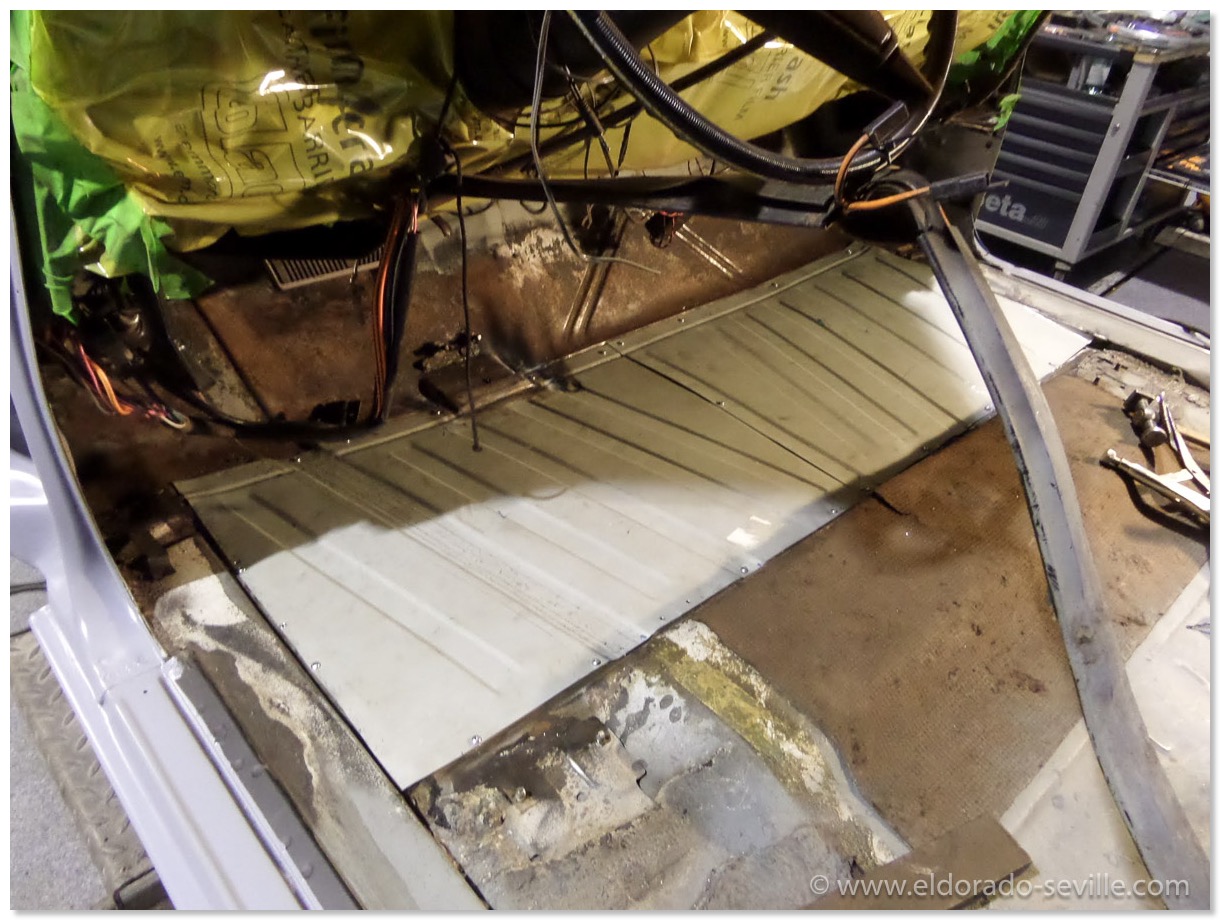
A new custom made patch panel is fitted and will be welded in.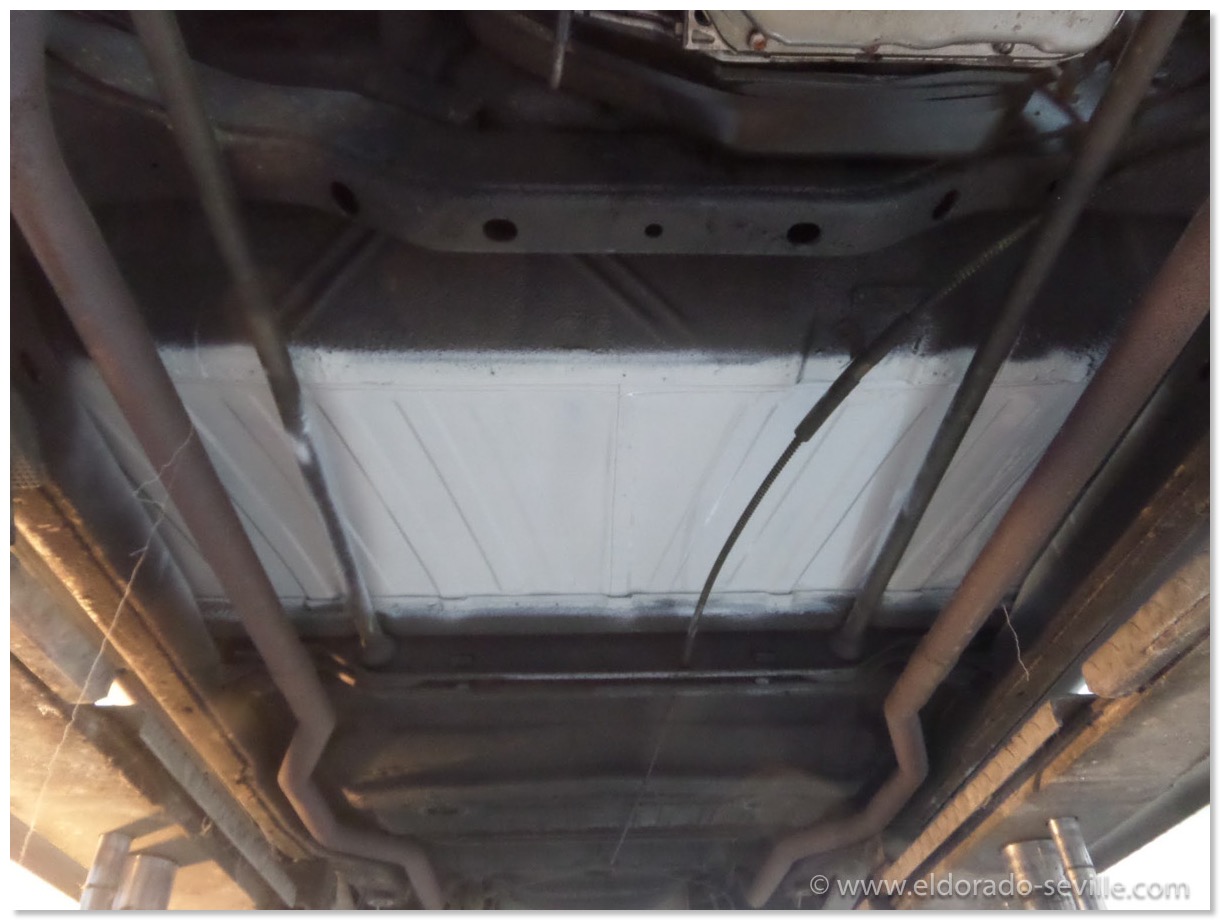
The new custom made patch panel as seen from the underside.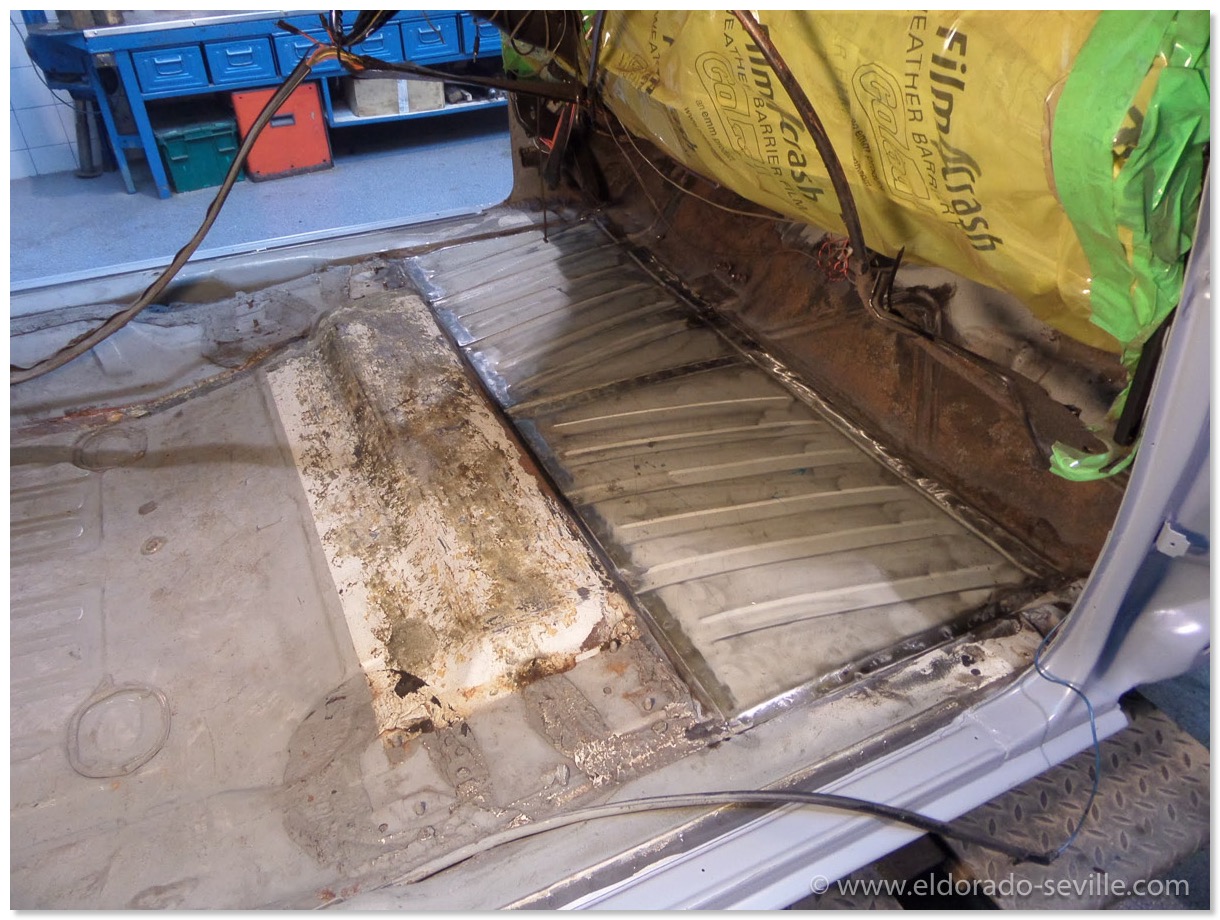
The new panel is completely patched in.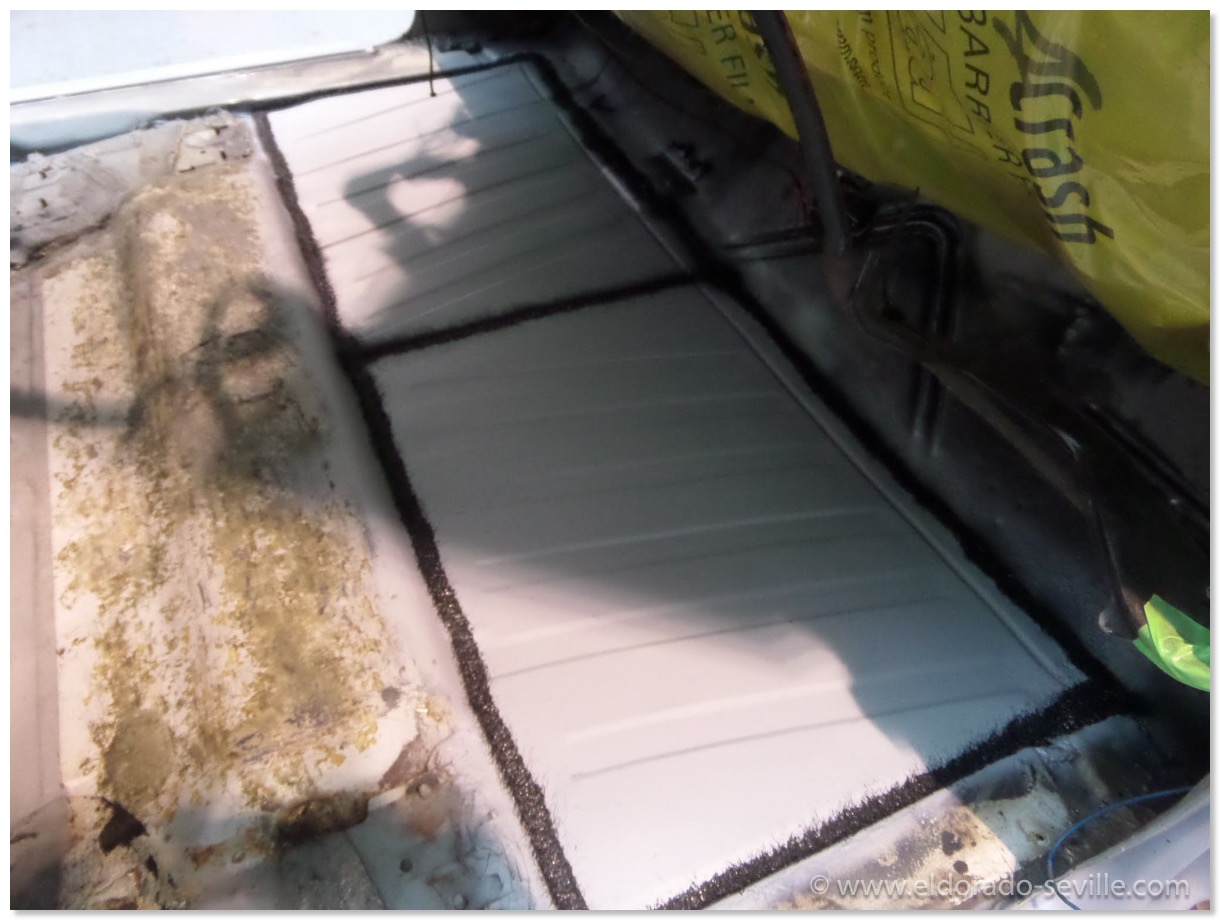
Seam sealer was applied like it was done at the factory. In the factory they just painted over the seam sealer. We will do the same here.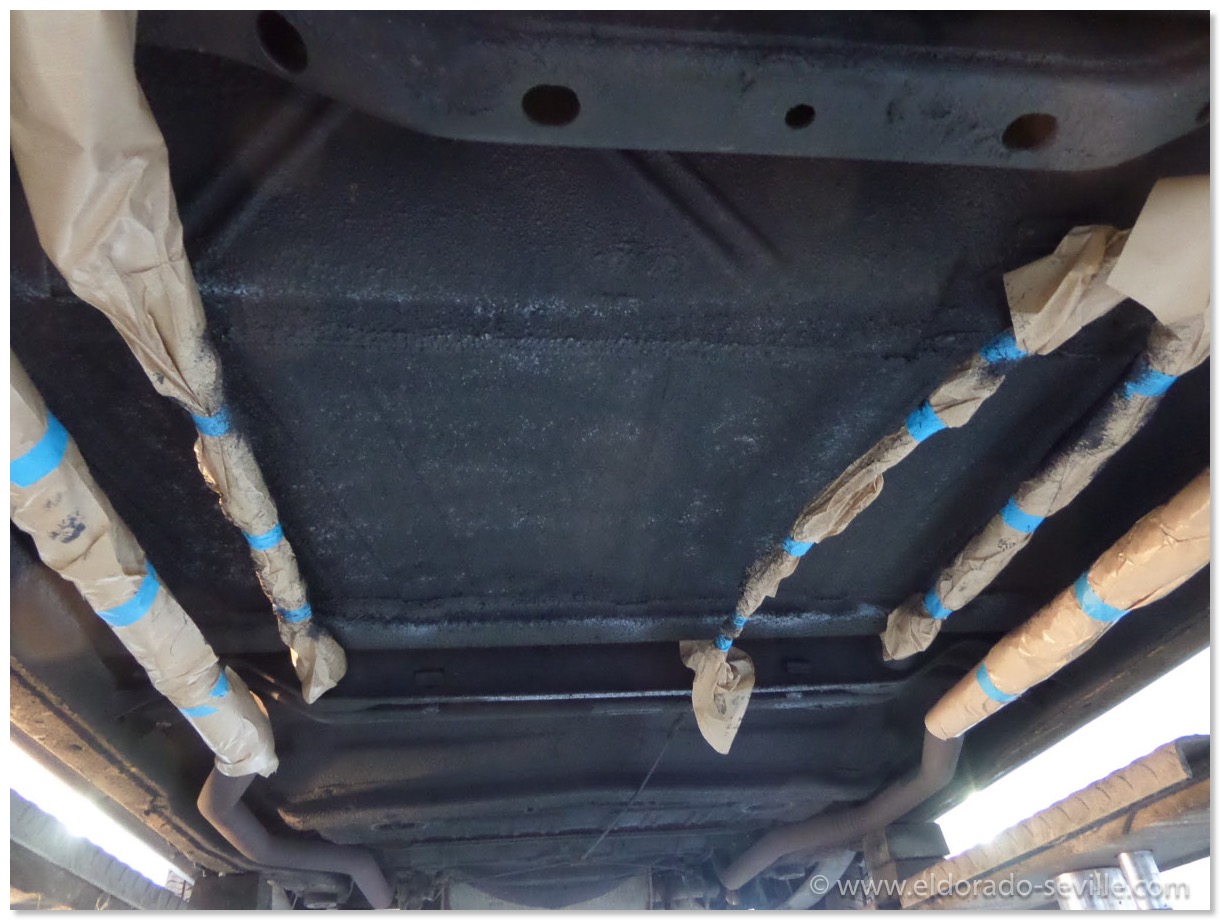
This car came with factory applied rubberized undercoating which was re-applied over the patched floor.
THE 1967 PAINTJOB PROJECT HAS STARTED
The restoration shop is sending me detailed pictures of the process. They are really doing a great job. Very exciting times.
Of course there are the first unpleasant surprises to be seen - there is a little more rust around the rear window than I expected, but still nothing serious. After disassembly we could see that the car is in fantastic shape.
You can find all the pictures of the restoration here on my website as high res pictures.
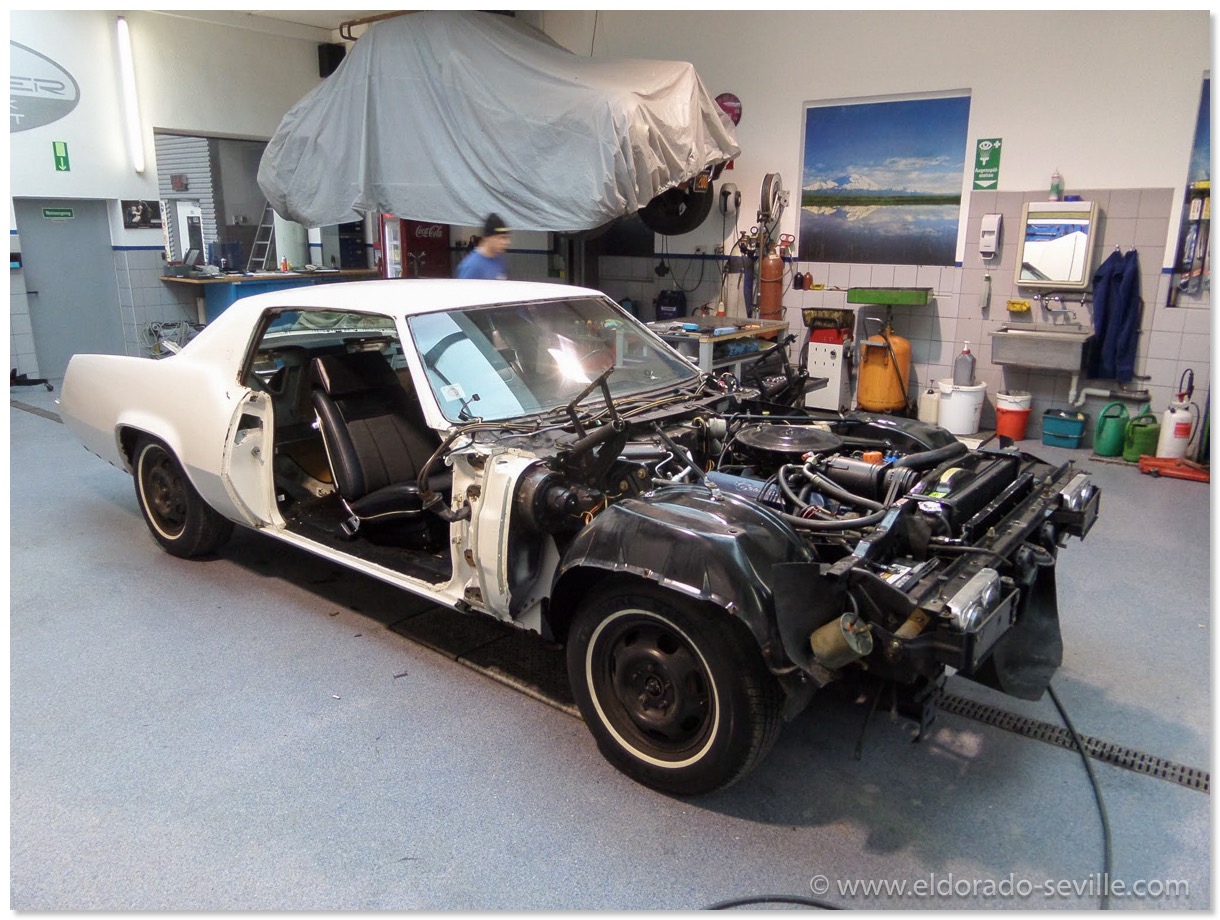
In the shop - disassembly began. They are cleaning everything up now.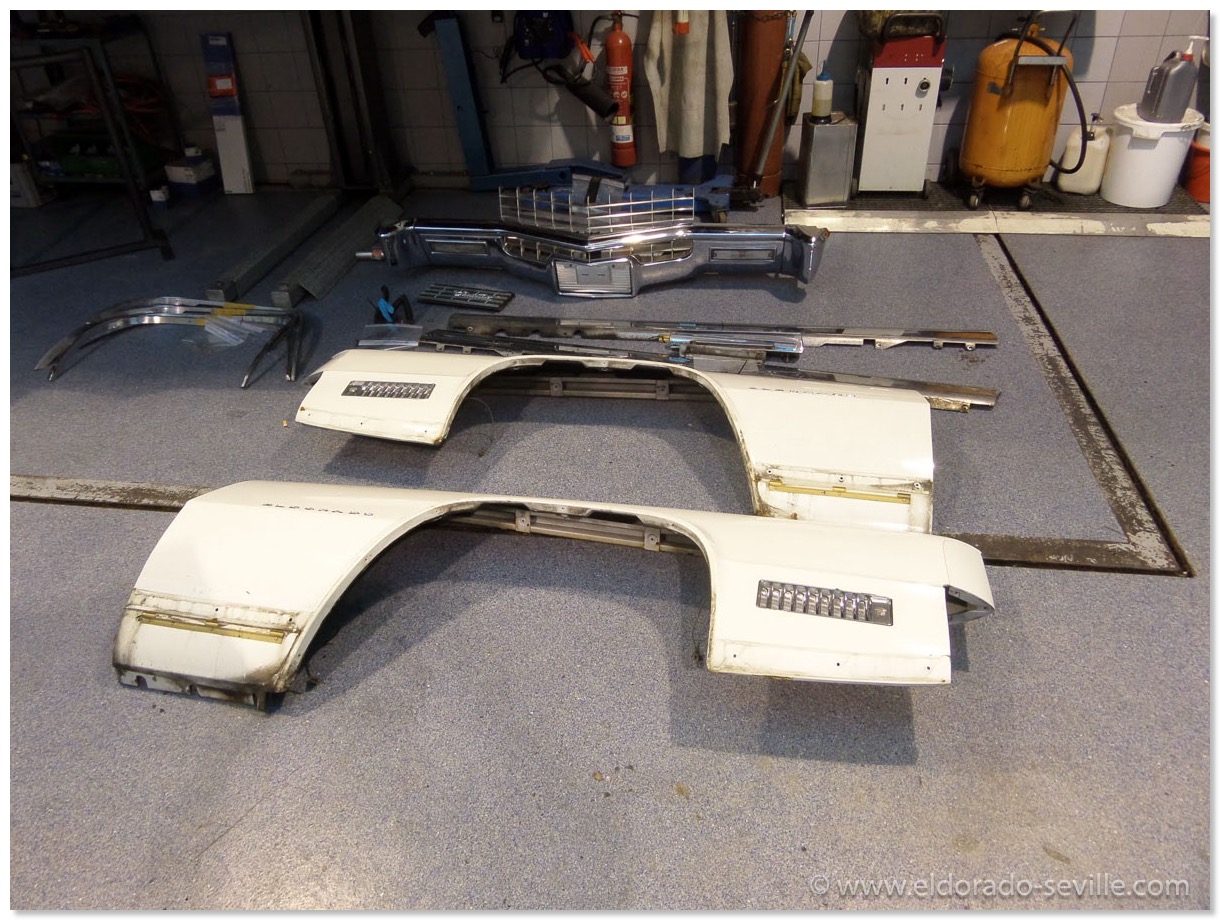
Removal of all the trim and sheet metal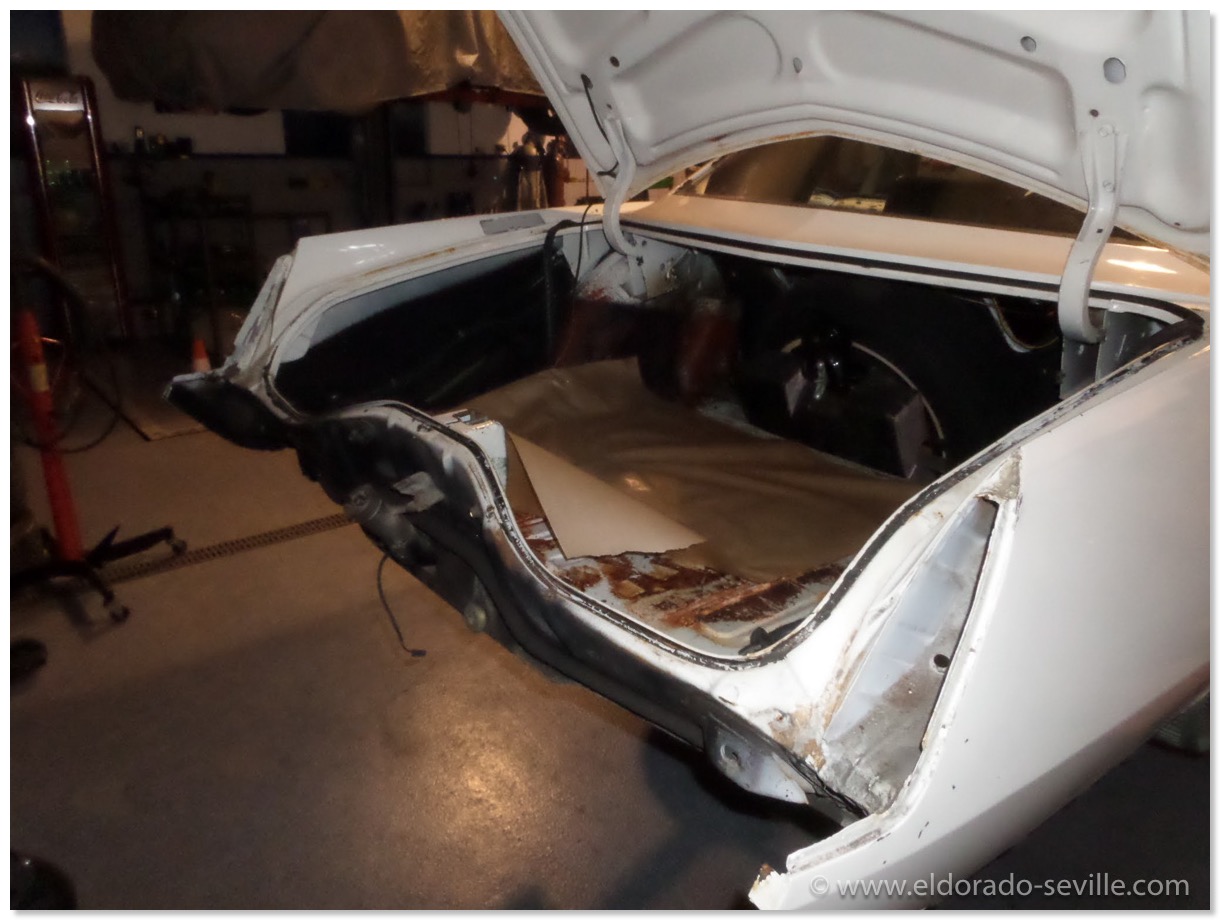
I will also redo the trunk.
NEW PAINTJOB FOR MY 1967 ELDORADO
One of the previous owners of this car tried to touch up the paint in some areas but it was not done properly…
I bought the car in 2009, and since then I was planning to repaint the car to make it perfect.
Being a perfectionist I had a hard time finding a shop which is up to my quality standards and work ethics. During a photo-shooting I came in contact with a shop about 2 hours from where I live. My wife and I were invited to photograph one of the owners Hotrods and he also owns a Cadillac with a breathtaking paint job. While we were there I was extremely impressed by the cleanliness of his shop and the quality of the work I saw there and especially about the attitude of the owner Bernd. A couple of years later 3 of my cars needed some little paint touch ups which made me pretty nervous. But Bernd did the most excellent job on my cars, so that I asked if he could also do my 67 Eldorado.
Unfortunately a couple more years went by where I did not have the financial means to do the job.
Last year - out of nowhere I was contacted by an uncle I had not had any contact for the last 42 years after my dad was killed at a work accident. To make a long family story short - he "inherited" me a very generous amount of money - almost as much as I´ll need for the paint job of my 67 Eldorado.
Yesterday I delivered the car to the restoration shop.
After a long and thorough inspection by the shop owner, the restoration will start soon. The owner is optimistic that hopefully there wont be too many bad surprises hiding. He measured the paint thickness and found some evidence that some damage might be hiding in the right rear quarter panel. Maybe the car had a fender bender sometimes in its previous life.
The car will be completely disassembled. Front and rear glass will be removed. Fenders, hood, trunk and doors are coming off. The interior will be completely removed, but the body will stay on the frame.
Then everything will be taken down to bare metal by sanding, as its too cold to strip the paint with chemical paint stripper during the winter months.
Every step will be documented with pictures which I will post here on my website as well. So keep coming back to follow the restoration if you are into this kind of entertainment.
I´m so happy that the car will be fixed at this shop. It's the first shop I have no worries about the quality of job done. Bernd - the shop owner - is a perfectionist like me. He only accepts perfect quality and wont take any short cuts.
FINDING THE RIGHT COLOR…
The big question for me now is if I should have the car repainted in its original "Grecian White" color, which I am not exactly a big fan of, or repaint it in one of my favorite 1967 Cadillac Eldorado Colors "Atlantis Blue Firemist" which was a pretty expensive optional paint in 1967When I asked my friends to help me decide, about 80% said I should paint it in "Atlantis Blue Firemist"… If I could go back to 1967 and order one from the factory I would probably order the blue one…
I was also informed that the Cadillac LaSalle club does not deduct any points during judging if you do a color change, as long as it is done in a correct color for a certain year…
Being an originality buff - I´m having a hard time to do a color change though. My little son also wants to keep the car white - my wife would like to have it changed to blue… I´m sure whatever I decide - I will sometimes regret my decision. If I paint it in its original white I will always find the color on the boring side and if I paint it blue I will regret that I changed the original color…
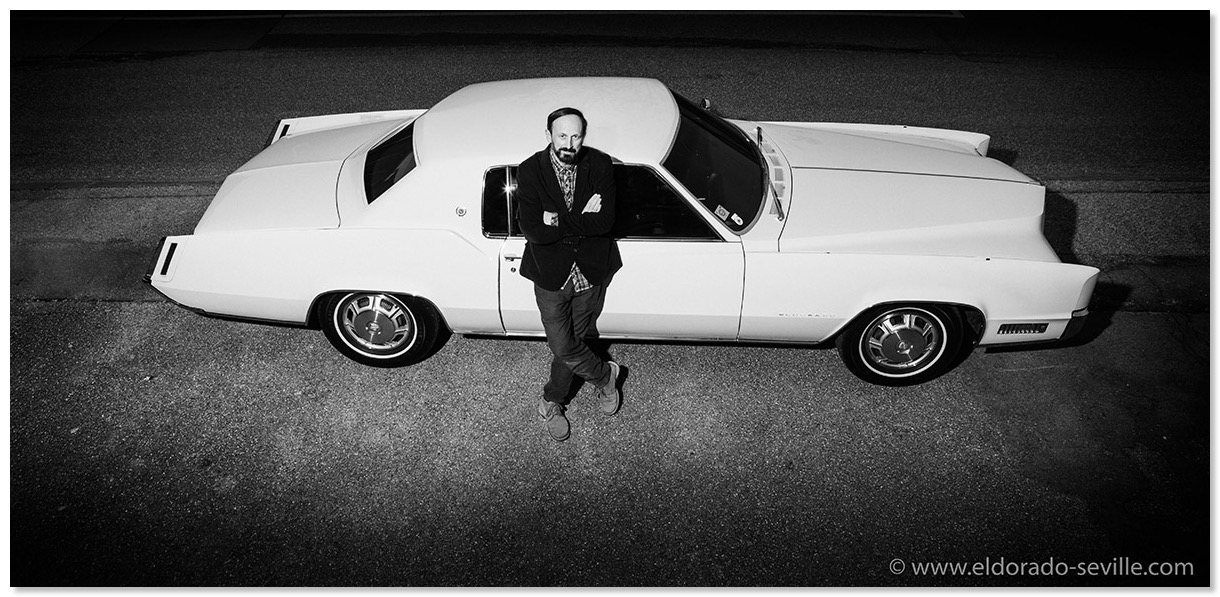 The last The last picture of the 67- still with the original paint.
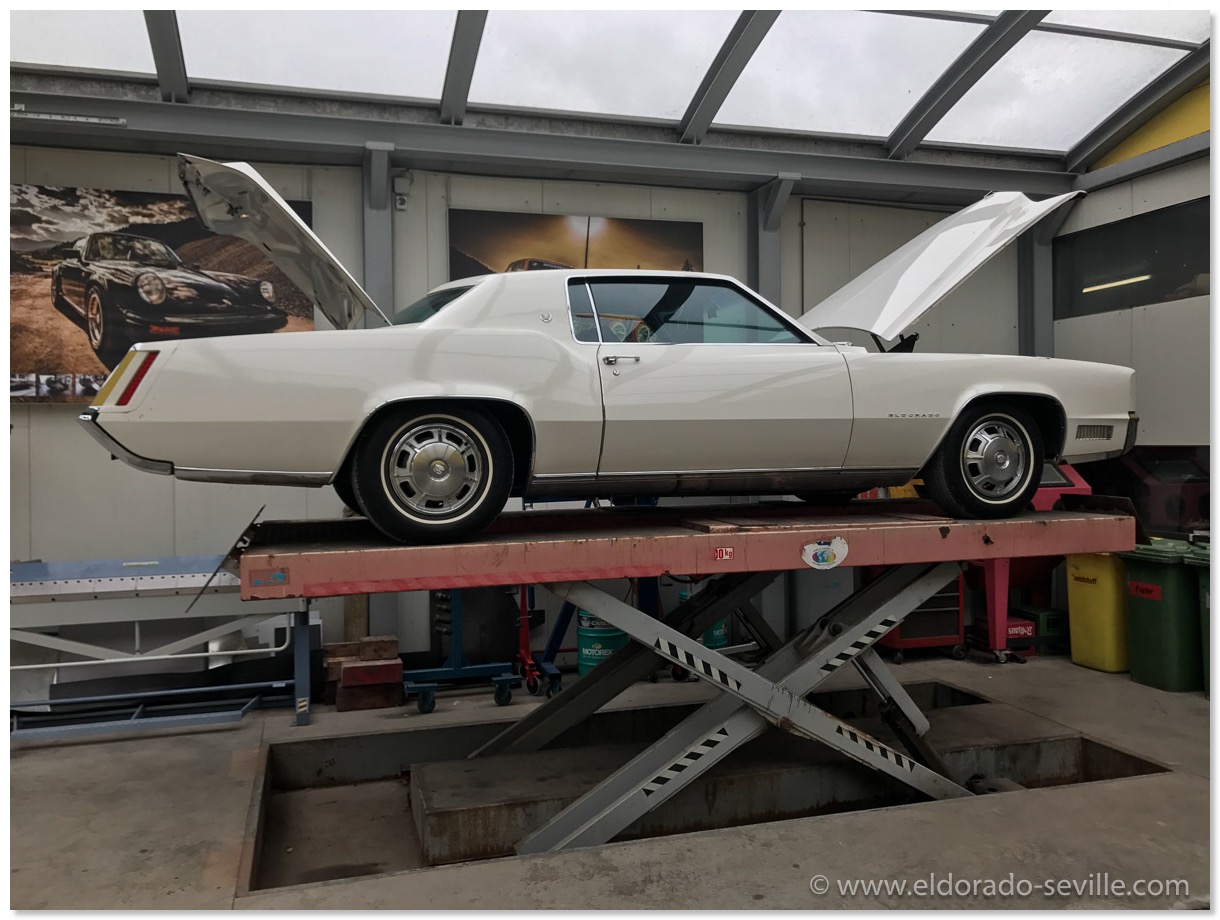
The car at In the restoration shop during the first inspection. The owner of the shop was pleasantly surprised by the condition of the car.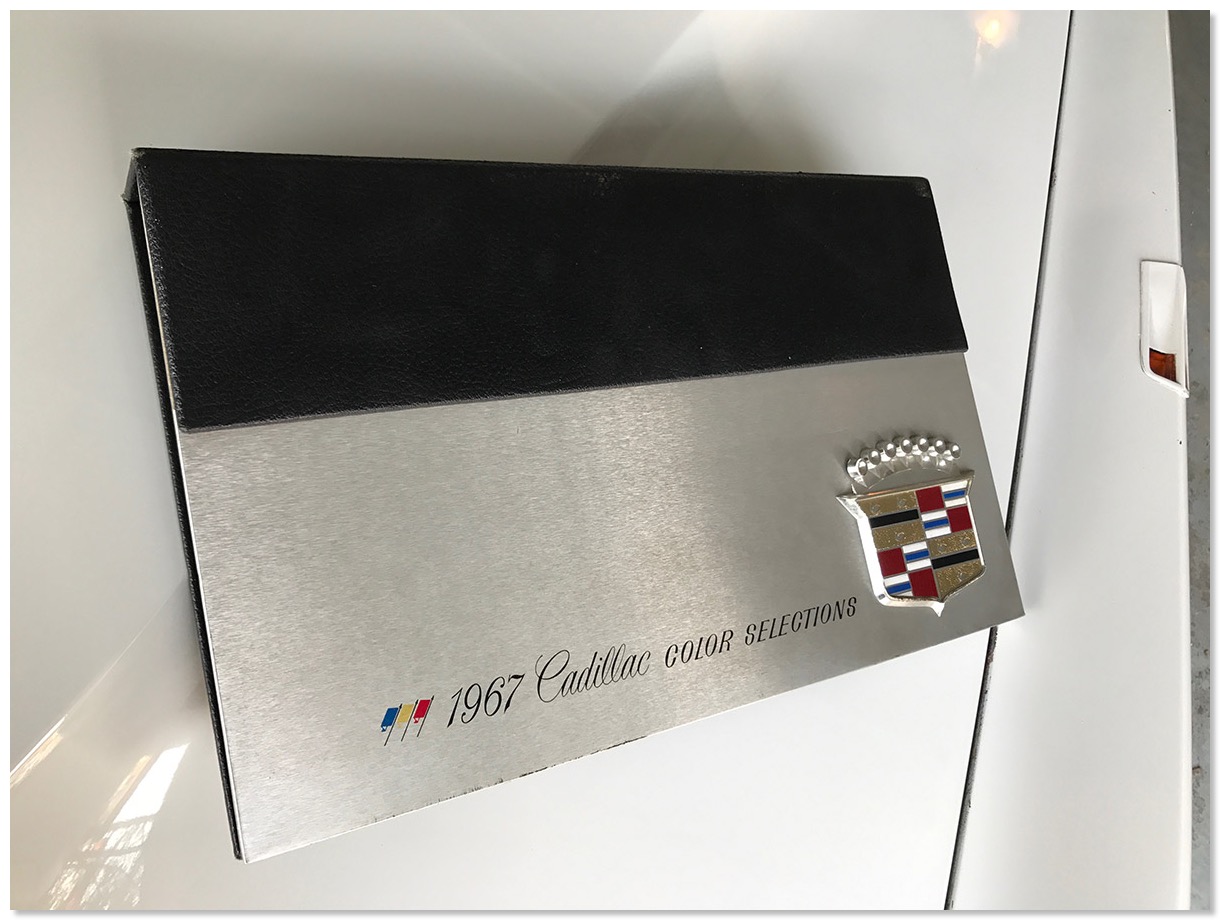
Cadillac buyers had quite a color choice for the 1967 model year. Here is the original 1967 Cadillac Exterior Color Selections Dealer Book
.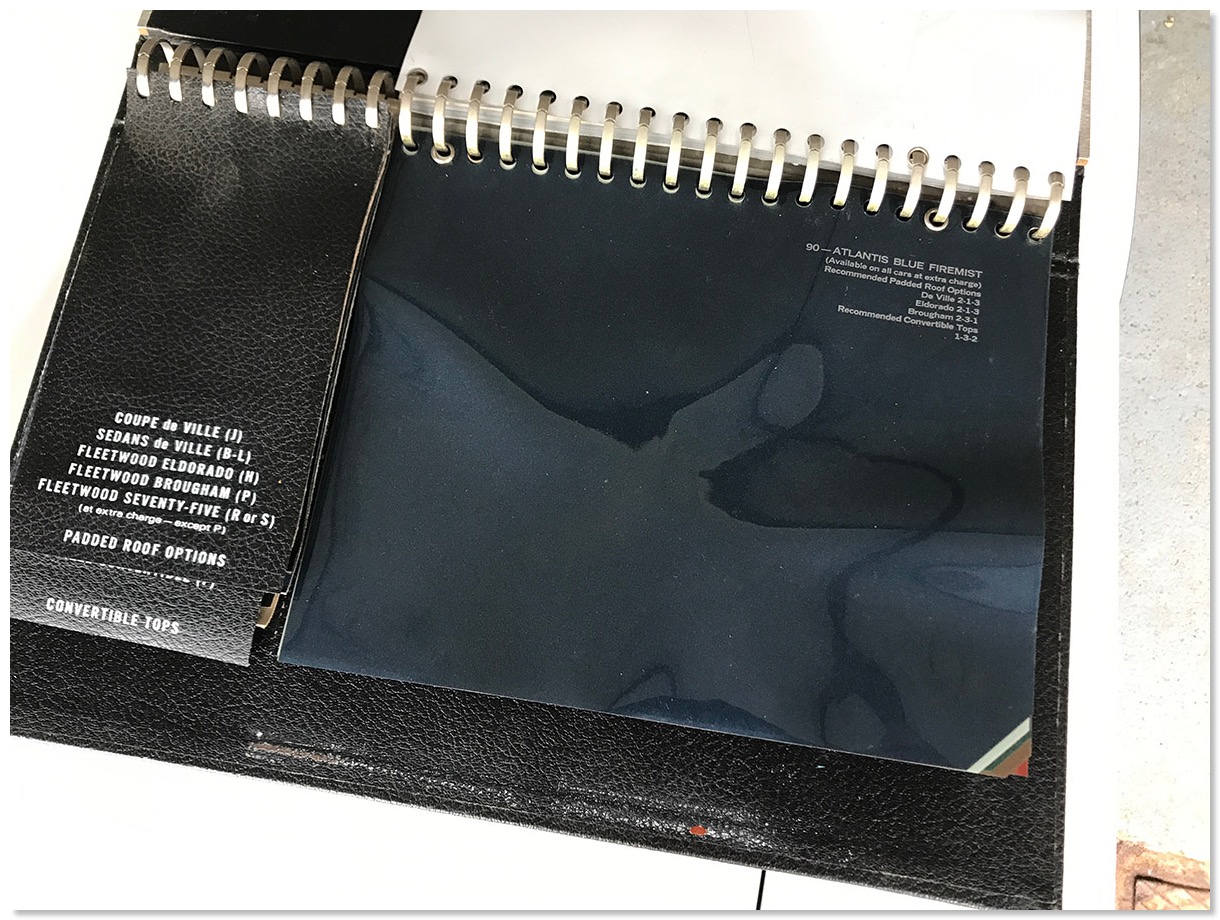
Code 90 - The optional "Atlantis Blue Firemist" is my favorite color for the 67 Eldorado.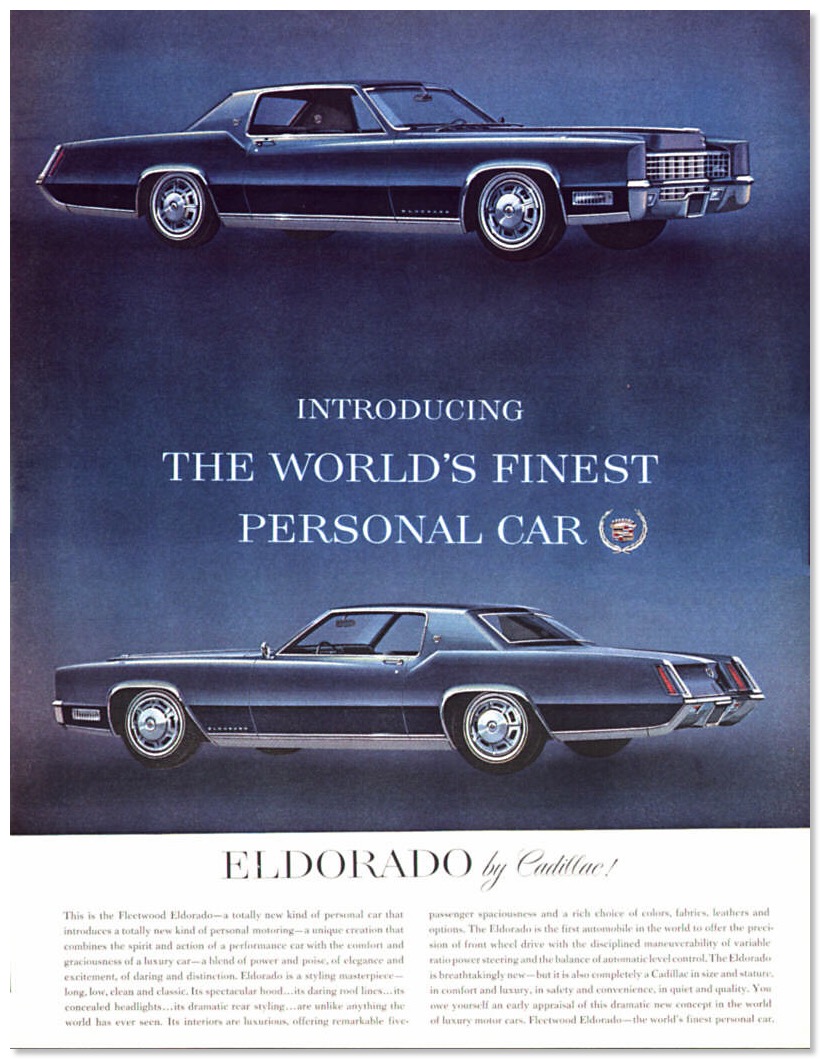
Atlantis Blue Firemist cars were used for advertising the new 1967 Eldorados - Color Code 90. This would be my favorite 1967 Eldorado color…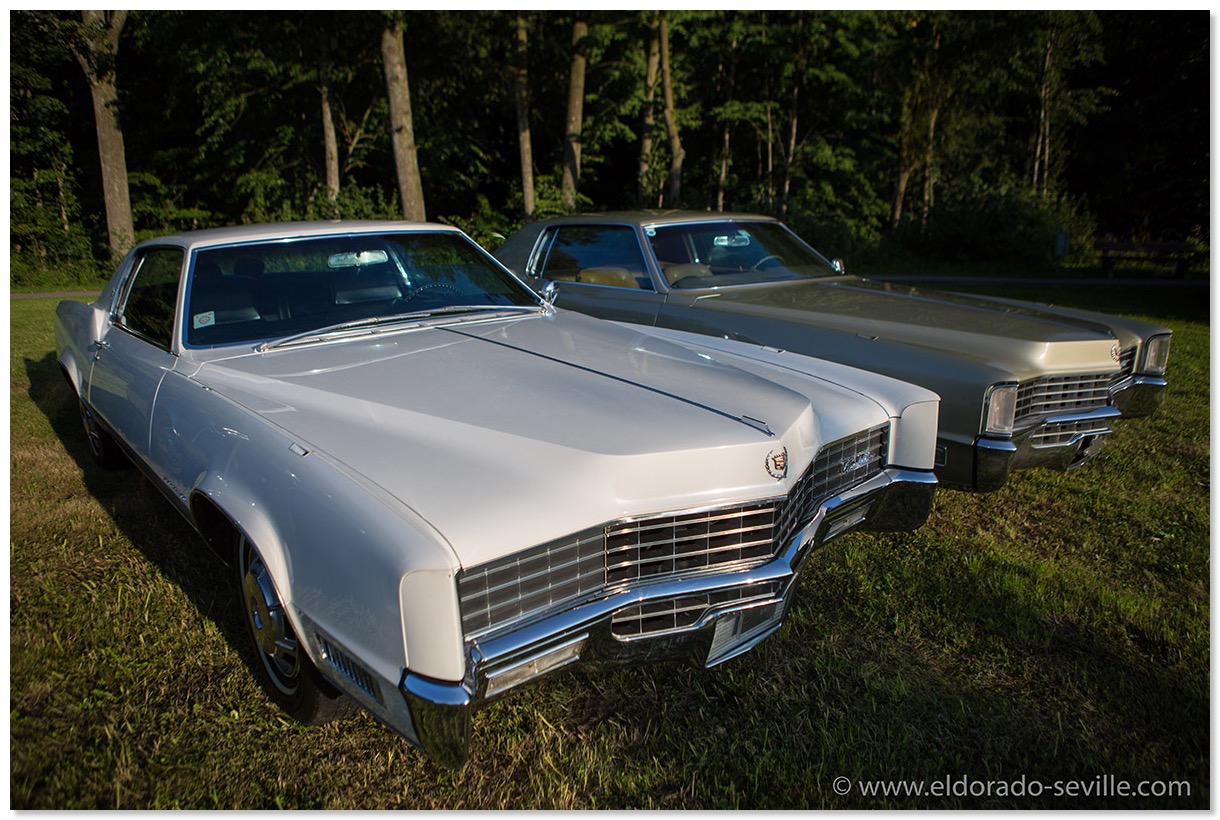
My car still looked flawless on pictures until you looked closer…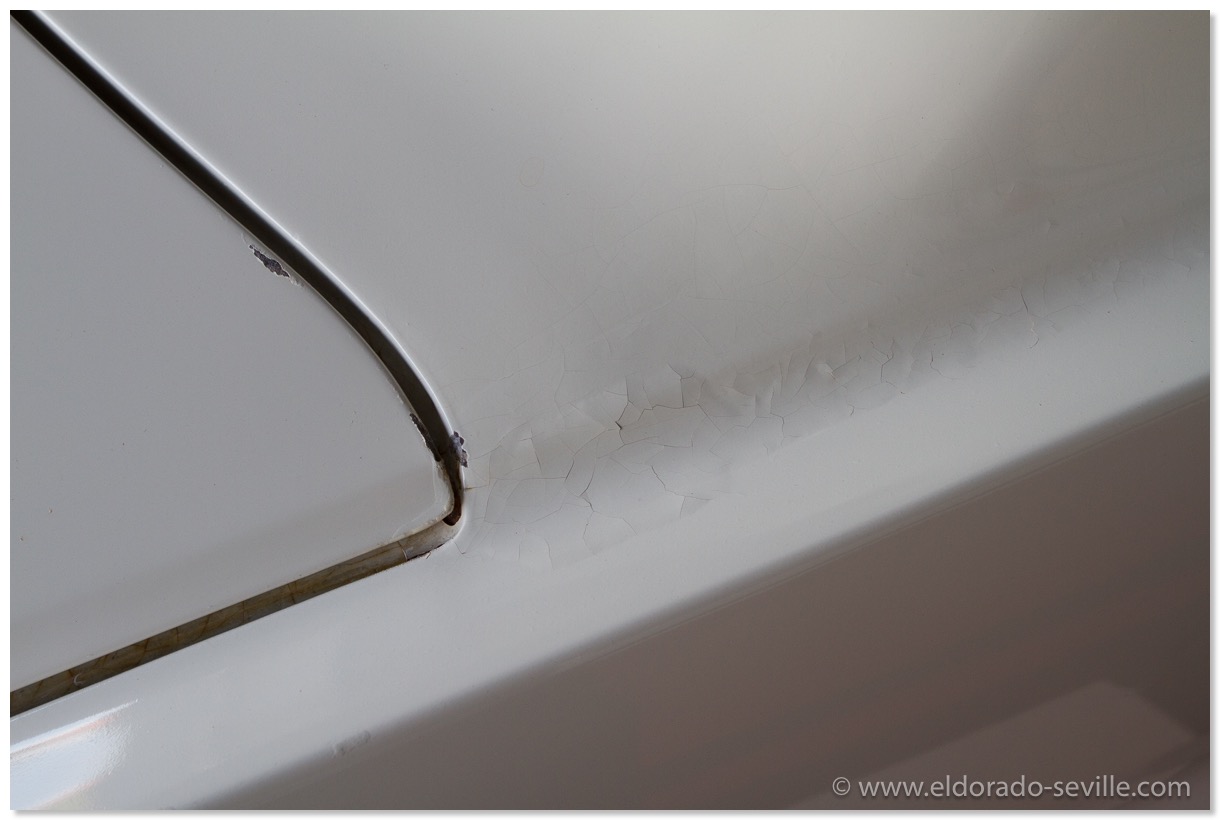
One of the areas where the paint was flaking off.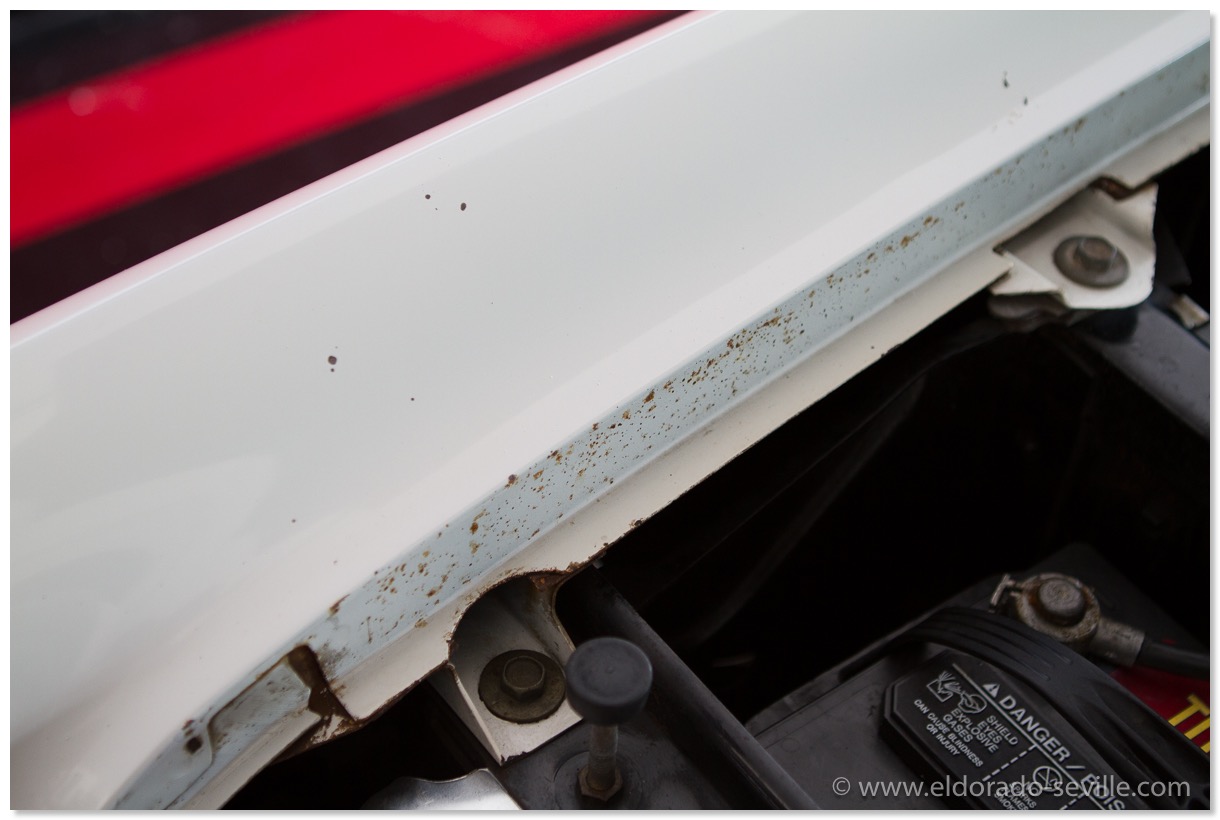
Some of the areas where the paint was pretty worn and surface rust was developing.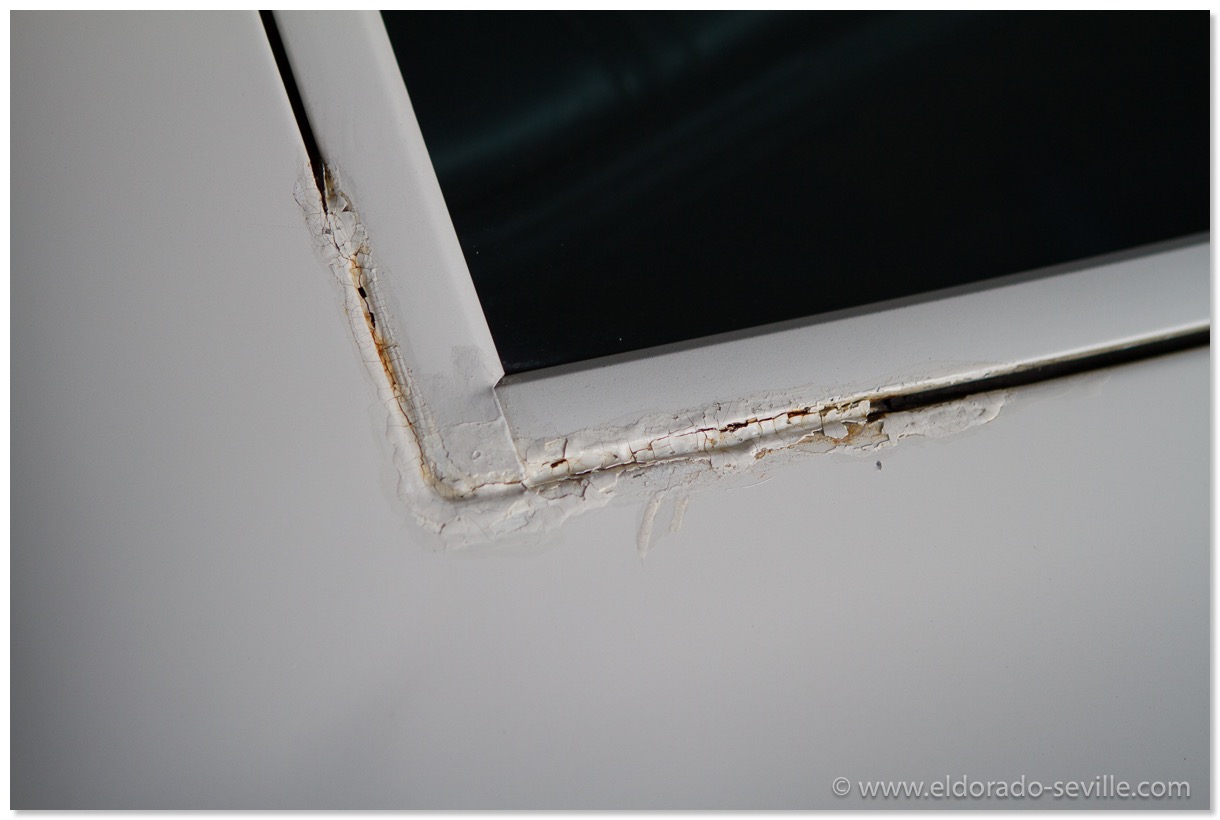
The rear window had to come out to fix this "repair" attempt by one of the previous owners…
1966 Cadillac Coupe deVille (16)
1967 Cadillac DeVille (54)
1967 Cadillac Eldorado (73)
1971 Lincoln Continental Mark III (24)
1974 Cadillac Coupe deVille (46)
1978 Cadillac Eldorado Biarritz (25)
1996 Buick Roadmaster (20)
Cadillac BIG Meet (2)
Car Shows (55)
Cruising (4)
CT6 (1)
For Sale (3)
Garage Stuff (32)
Pacer (1)
Restoration (140)
Various (55)
Video (20)
Website News (31)
- 6 way power seat
- 8-track
- 10 Ohm
- 429
- 1932
- 1957
- 1958
- 1958 Cadillac Eldorado Seville
- 1958 Cadillac Repair Tip
- 1959 Cadillac Eldorado Seville
- 1964
- 1965
- 1966
- 1966 Cadillac Coupe deVille
- 1966 Cadillac Repair Tips
- 1967
- 1967 Cadillac DeVille
- 1967 Cadillac Eldorado Repair Tip
- 1967 Cadillac Repair Tip
- 1967 Eldorado
- 1968
- 1970 Cadillac Eldorado
- 1971
- 1971 Lincoln Continental Mark III
- 1974
- 1974 Cadillac Coupe DeVille
- 1974 Cadillac Repair Tip
- 1976
- 1977
- 1978
- 1978 Cadillac Eldorado Biarritz
- 1978 Cadillac Repair Tip
- 1980 Cadillac Eldorado Biarritz
- 1996
- 2012
- 2014
- 2017
- 2018
- 2019
- 2022
- 2023
- 2025
- 3063206
- 7027235
- 7800483
- 7805675
- 7805676
- 12355706
- 17058531
- 17059968
- 17059969
- 22010515
- 22010661
- A.I.R
- A6
- AC
- AC Compressor
- AC Electrical Diagram
- ACC
- Accelerator Pump
- Accelorator pump
- Accident
- Actuators
- Adriatic Blue Metallic
- Ads
- Aftermovie
- Air Pump
- Aircondition
- AIRPUMP
- ALC
- Alternator
- AM
- AM-Transmitter
- Antenna
- Anti Rattle Clips
- Antique Gold
- Arizona Vintage Parts
- Arrival
- Article
- ASC
- Ash Tray removal
- ATC
- Atlantis Blue Firemist
- Austria
- Austro Classic
- Autolite SP-459
- Automatic Seat Back Release
- Award
- Banner
- Barn Find
- Battery
- Battery Tray
- Beach Race
- Bearing
- Bendix
- Biarritz
- Bigfoot
- Bill Hirsch Engine Enamel
- Bleeder Screws
- Bleeding
- Blower
- Bodywork
- Bolts
- Book
- Borg
- Brake Booster
- Brake Fluid
- Brake Gray
- Brakes
- Broken Bolt
- Brougham
- Bucket seats
- Buick
- Bumper End
- Bushings
- Cadillac
- Cadillac BIG Meet
- Cadillac BIG Meet
- Cadillac birthday cake
- Cadillac Blue
- Cadillac Color Selections Dealer Book
- Cadillac Coupe deVille
- Cadillac Dealer
- CADILLAC GRAND EUROPEAN
- Cadillac Meeting
- Cadillac Mini Meeting
- Camaro RS
- Caorle
- Car Show
- Carburetor
- Card
- Carpet
- Carter AFB
- Cavalry Twill Vinyl
- CB
- CBM
- CCCD
- Choke
- Christmas
- Citizens Band
- Classic Cadillac Club Deutschland
- Clay Towel
- Cleaning
- Clock
- Clockwork
- Clutch
- Clutch Coil
- Collector
- Colonial Yellow
- Color Coded Springs
- Commercial
- Compound
- Compressor
- Condenser
- Continental Mark III
- Control Head
- Conversion
- Convertible top
- Coolant
- Corona
- Cowl
- Cruise Control
- Cruising
- CT6
- CV Boots
- CV JOINTS
- D6230
- Dash Trim
- Decal Removal
- Decals
- Decoration
- Dehumidifier
- Delco Moraine
- Der Standard
- detailing
- Deville
- Diagnosis Chart
- Diagram
- Dial
- Digital Rotary Drum Clock
- Diner
- Disc Brakes
- Distributor
- Diverter Valve
- Door Jamb Switch
- Door Rubber Conduit
- Dornbirn
- Dot3
- Drive Shaft
- Driving tour
- Drum brakes
- Dry Ice Blasting
- Dry Ice Cleaning
- DVD
- Eastwood
- Eldorado
- Electric Choke Thermostat
- Electrical schematic
- Elvis
- Engine Bay
- Ep
- Epoxy floor
- Europe
- Evaporator
- Exide
- Factory Markings
- Fender Skirt
- Floor
- Flushing
- Flyer
- Foam
- For Sale
- Front AXLE
- Front brakes
- Front bumper filler
- Front Floor
- Front wheel bearing
- Fuel Filter
- Fuel Pump
- Fuel Sending Unit
- Fusible Link
- Garage
- Garage Cabinets
- Gasket
- GE
- Gear indicator
- General Time
- Glove box light
- Grand European
- H4
- Haus of Hot Rod
- Headlight Actuator
- Headlight doors
- Headlights
- Heater Core
- Heater Hose
- Heater Valve
- High Idle
- History
- Holley
- Honest John
- Hood
- Hood Emblem
- Hood Ornament
- Hose Clamp
- Hot Choke
- Hot Water Valve
- HotRod
- How to
- Hödlmayr
- Ignition Diagram
- Illuminated Entry
- John D‘Agostino
- John Foust
- Klassikwelt Bodensee
- Kremsmünster
- LaSalle
- Leather seats
- Light Switch
- Limited
- Lincoln
- Lincoln Mark III Repair Tip
- Low Mileage
- Magazine
- Marilyn Monroe
- Mark III
- Master Cylinder
- Master Switch
- Master Vacuum Switch
- Media Blasting
- Meeting
- Meguiras
- MK II
- Mobile
- Model
- Moldings
- Mom
- Mopar Nationals
- Mostkost Kustom
- Movie
- Munich
- Neon
- NOS
- Oberösterreicher des Tages
- oilchange
- ORF
- Overspray
- Pacer
- Paint
- Paint correction
- Paintjob
- Part Number
- Parts
- Patch Panel
- Perfect Circle
- Permabag
- Persian Lime
- Photo shooting
- Photoshooting
- Pictures
- PinUp
- POA Valve
- Power Antenna
- Power Servo
- Power Vent Windows
- Power Window
- Printed Circuit Board
- Programmer
- Pulley
- Quadrajet
- Quarter Panel
- Quartz Conversion
- R134
- Radiator
- Radio
- Rattle
- Rear brakes
- Rebuild
- Recalibrate
- RediRad
- Reed Switch
- Relais
- Relaunch
- Removing Overspray
- Repaint
- Repair
- Restoration
- RIP
- Roadhouse
- Roadmaster
- Rochester
- Rocker Arm Cover
- Rocker Panel Extension Clips
- Rostio
- Rotary Valve
- Rotterdam
- Rupes
- Rust removal
- Rust removal gel
- Sabre Wheels
- Sand Blasting
- Sandblasting
- Screed
- Season Greetings
- Seasons Greetings
- Seat Back Locks
- Seat Padding
- Seat Transmission
- See through ornament
- Self adjusters
- Self Starter
- Sepp's Garage
- Seville
- Sheetmetal
- Shocks
- shop manual
- short
- Sign
- Solenoid
- Spark Plug Wire Routing
- Speakers
- Special Award
- Speed Bleeder Screws
- Splash Guard
- Starter Diagram
- Starter Motor
- Steering Column
- Storage
- suction throttling valve
- sunroof
- suspension
- Swirl Mark removal
- Switzerland
- T3
- Taillight Cover
- Texan´s Choice Award
- Thermostat
- Tilt and Telescope
- Time capsule
- Tomsclub
- Torque Specifications
- Tower Hose Clamp
- Towtruck
- Trailer
- Transducer
- Transmission
- transmission control selector
- transmission control selector indicator light
- transmission shift indicator
- Treadle Vac
- Treffen
- Tri-Band
- Troubleshooting
- Trunk Cardboard Kit
- Trunk lid
- Trunk lining
- Trunk to bumper cover
- Turn Signal Switch
- TV
- Typisierung
- Ultimate Garage
- Underbody
- Undercarriage
- Undercoating
- Undercoating Removal
- Vacuum Booster
- Vacuum diagram
- Vacuum hoses
- Vacuum Master Switch
- Vacuum Schematic
- Vacuum Valve
- Valve Cover
- Various
- Vent Window Switch
- Vibration
- Vibrator
- Vicodec roof
- Video
- Vinegar
- Vinyl Roof
- Visitor
- Washer Fluid Float
- Washer Fluid Low Level Indicator
- Water Pump
- Wax
- Weatherstripping
- Website News
- Westclox
- Wheel Bearings
- Wheel Housing
- Wiesbaden
- Windlace
- Winter
- Wiring
- Wiring Diagram
- Wonderbar
- Workbench
- Zurzach
 GERALD´S CADILLACS - NEWS