THE RESTORATION OF MY 1967 ELDORADO IS FINISHED
The restoration shop let me know that my 67 Eldorado was finished and ready for pick up.
After work my wife and I jumped into the car and drove 2 hours to Radstadt where the restoration shop is located.
I saw the finished car for the very first time.
The job Bernd Preussler and his small team did is amazing. The paint job is the best I have ever seen. Their commitment to details is outstanding.
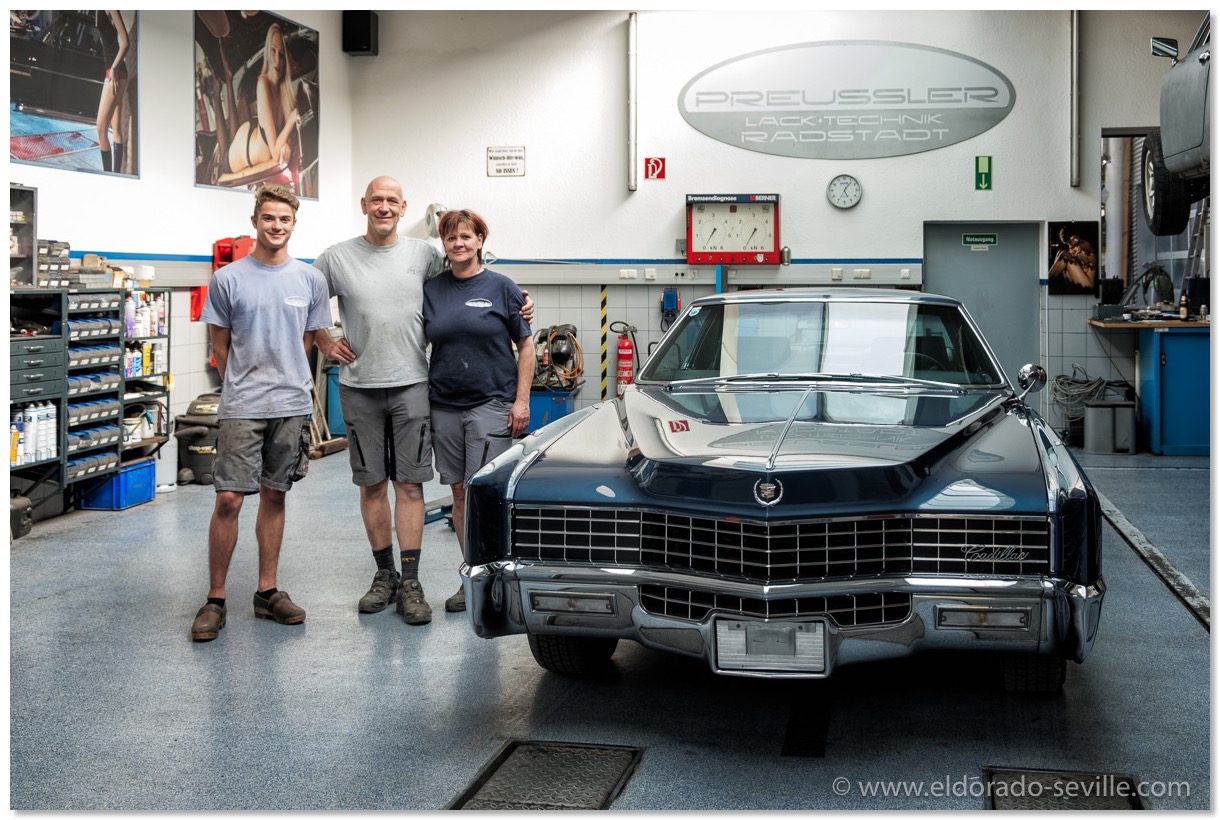
The small team that restored my Cadillac. Thank you so much for your great work! You are my heroes!
Michael Hammer, Bernd Preussler, Angela Steiner (from left to right)
1978 CADILLAC ELDORADO CB ANTENNA
My Eldo comes with a radio with the CB option, so it should have the according tri-band antenna for the 78 Eldorado.
One of the previous owners had replaced the original antenna with a replacement antenna, which worked, but it had very poor CB reception and of course it does not look correctly.
What I have found out is that #22010515 was the original part number for the antenna.
This antenna was also used in the 1977 to 1982 Corvette and is extremely rare...
Replacement antennas had the part number #22010661 on the sticker with a date code below.
When these replacement antennas were no longer available, it seems they switched to a different antenna design as a replacement #12355706 (which I had in my car). This last design came with a special antenna splitter. I do not know if this splitter is essential or of it would also work with the original splitter which is still in my car.
It took me quite a while to find the correct antenna for my car as it seems to be made out of "unobtainium". I did search the net for days and somebody sent me an incorrect antenna which was for a Buick… Suddenly during my daily search, a correct, working antenna showed up on ebay, and I immediately hit the "Buy it now" button. It was not exactly cheap, but I was happy to have finally found it. When it arrived I cleaned it up properly.
I then found out that I would also need the correct antenna bezel on the fender. Various sellers sent me incorrect ones which they claimed would be the correct ones, and eventually I found a good used one from the seller of my antenna and a NOS one from a parts vendor (it has not arrived yet as once again USPS sent it to Australia instead of Austria - don't ask what this little bezel has cost… :-( )
I then also had to replace the thinner replacement antenna lead with an original one going from the antenna splitter behind the glove box to the antenna. I got this one from Arizona Vintage Parts.
I can say now that my car is 100% correct again. Unfortunately this project was an extremely expensive project and I will now try to sell all the not needed parts on ebay. They will fit Eldorados with non CB antennas and the other wrong CB antenna I got will be for Buicks, but could also be installed into the 78 Cadillacs, as the mast itself is exactly the same as on the original antenna and from the outside it would look completely stock. But purist as I am, I just needed the 100% correct antenna ;-)
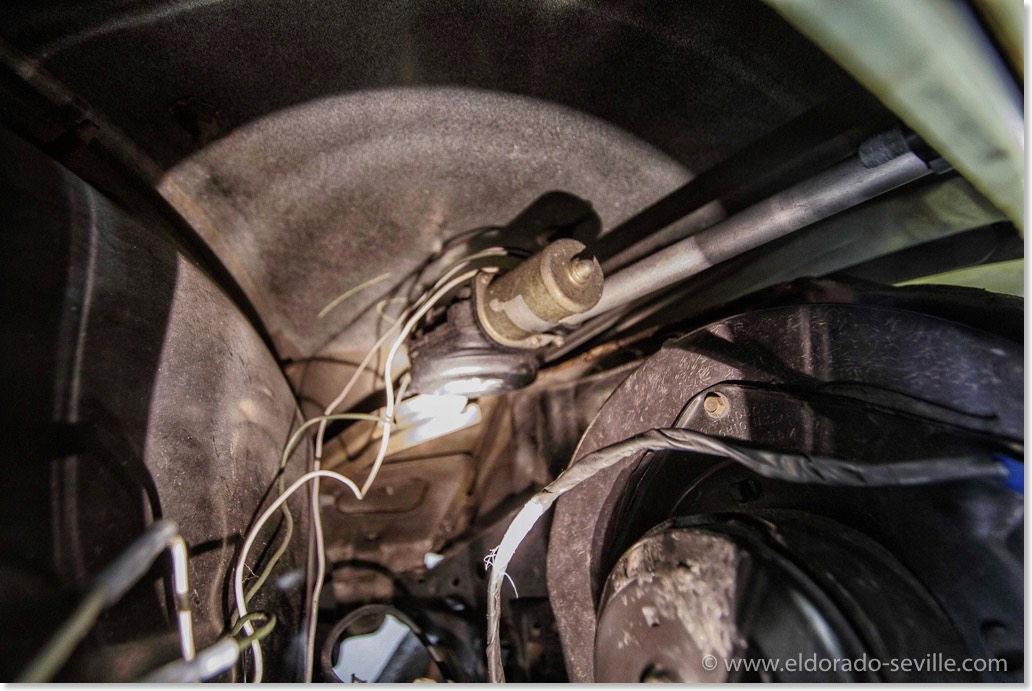
The later style replacement CB antenna which I wanted to replace with an original one.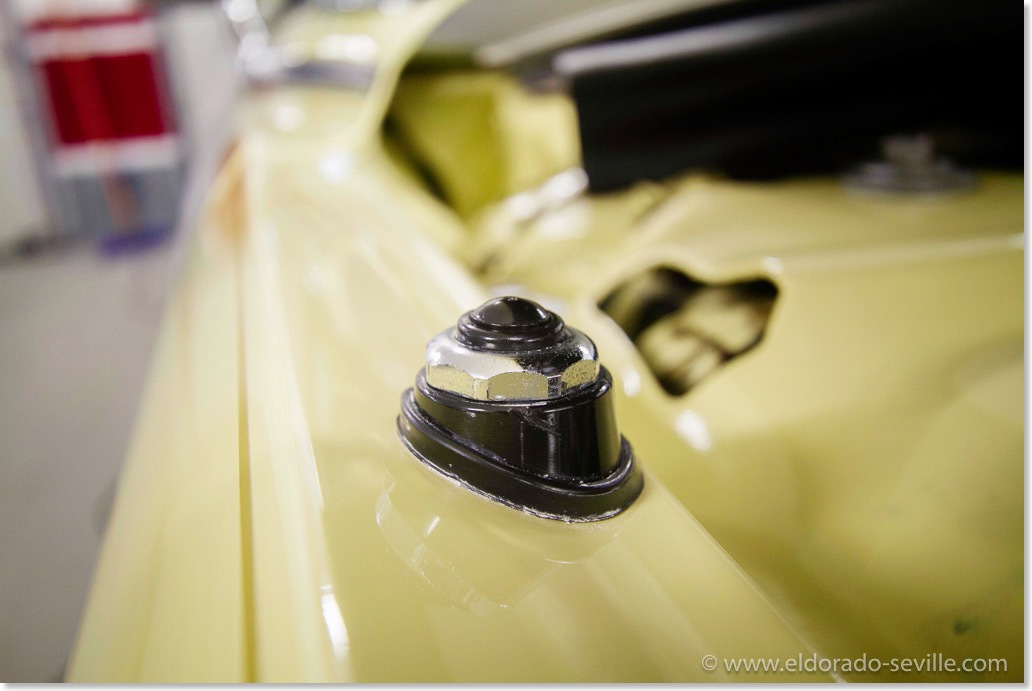
The later replacement style fender bezel looks completely different from the original one.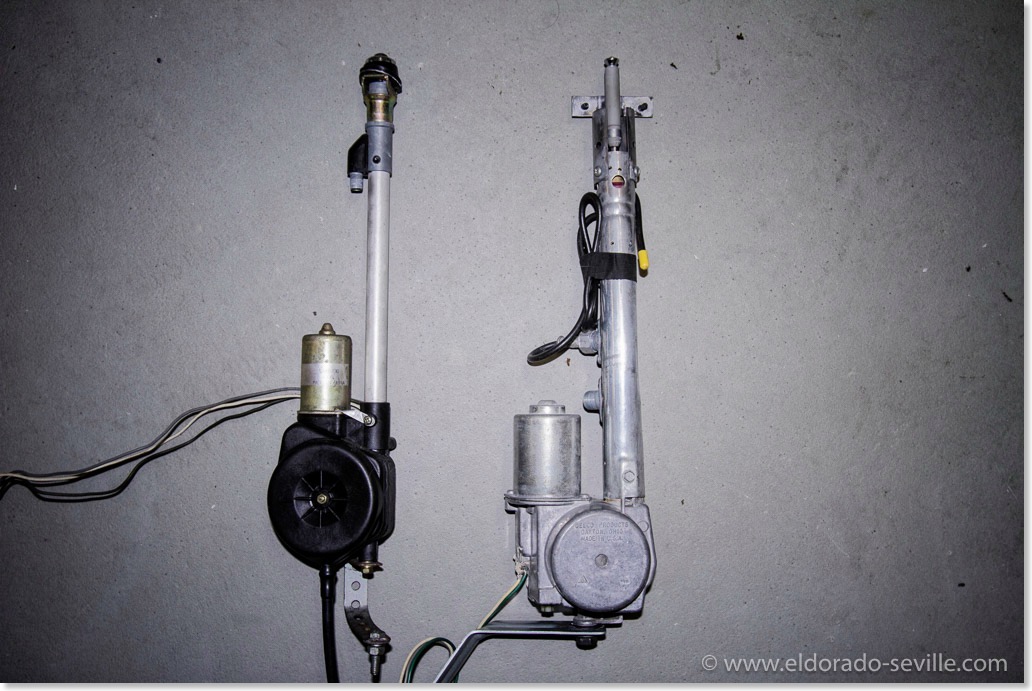
On the left you can see the official later style replacement CB antenna which looks very different. It does not have a load coil and no additional stub antenna. This is part #12355706. On the right you can see the original 1978 CB power antenna with the load coil on the mast and two antenna leads and the additional FM stub antenna. This antenna is nearly impossible to find…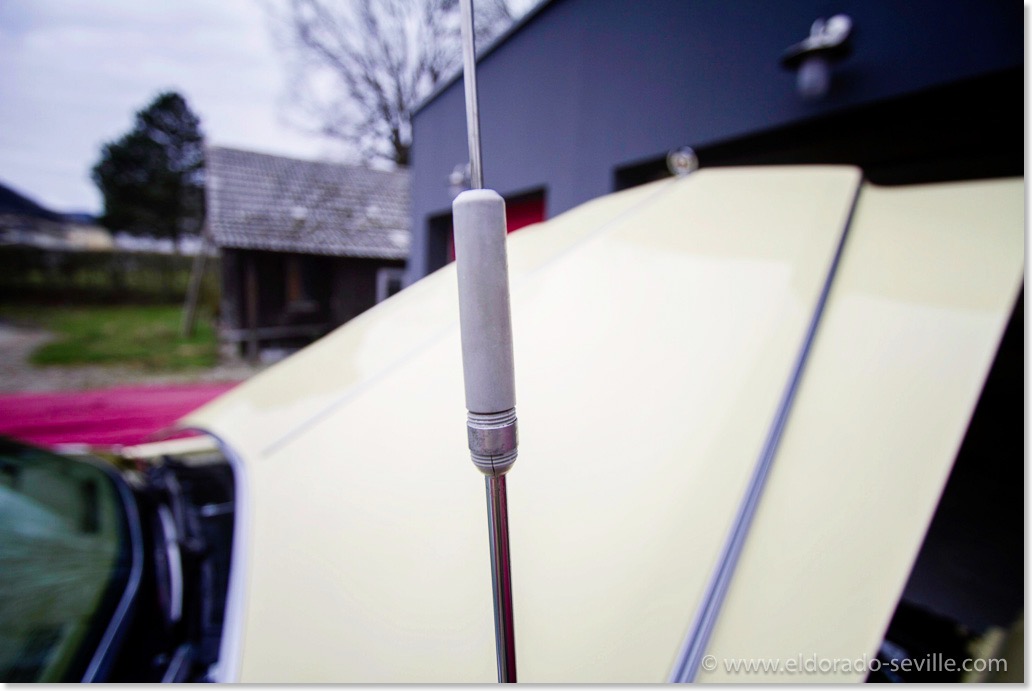
Thats the CB - load coil, which can be adjusted. The plastic unfortunately got very brittle over the years on all antennas of this vintage.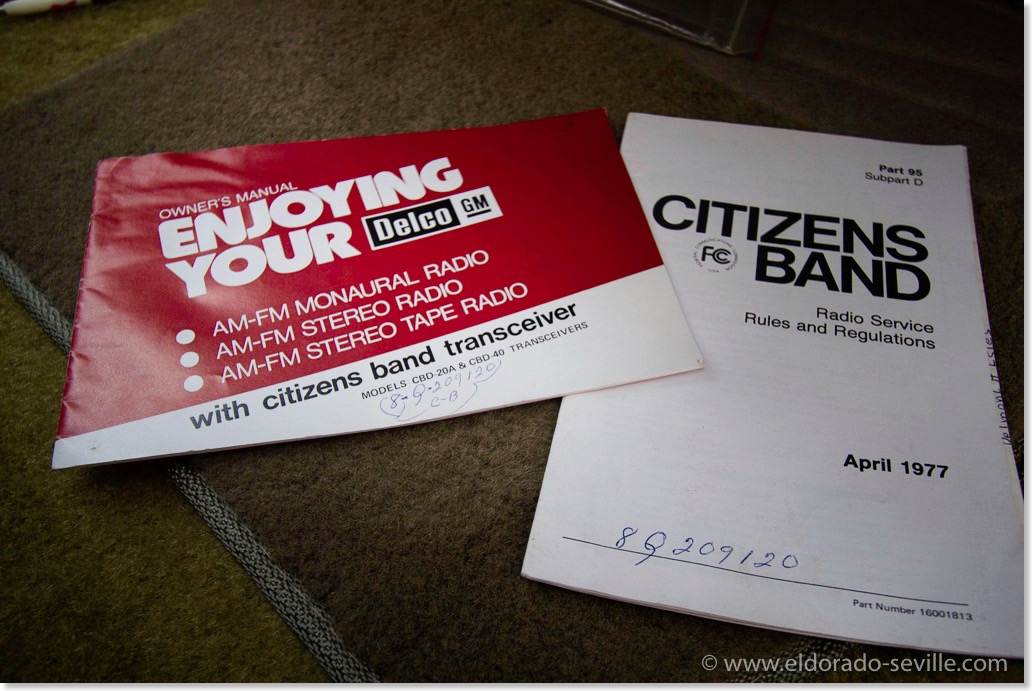
This are the instructions which came with the car, if you ordered the very expensive CB option…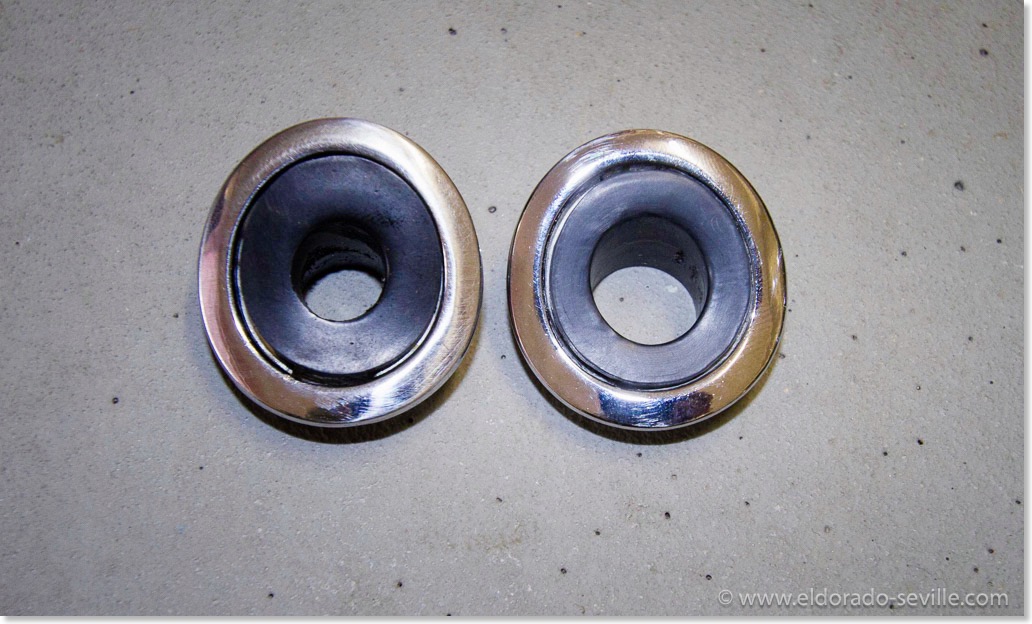
The antenna trim bezels for the 1978 Cadillacs. On the left the one for the regular antenna - on the right the one for the CB antenna with a larger diameter in the plastic part. The chrome ring is exactly the same for both. These two are used ones I found.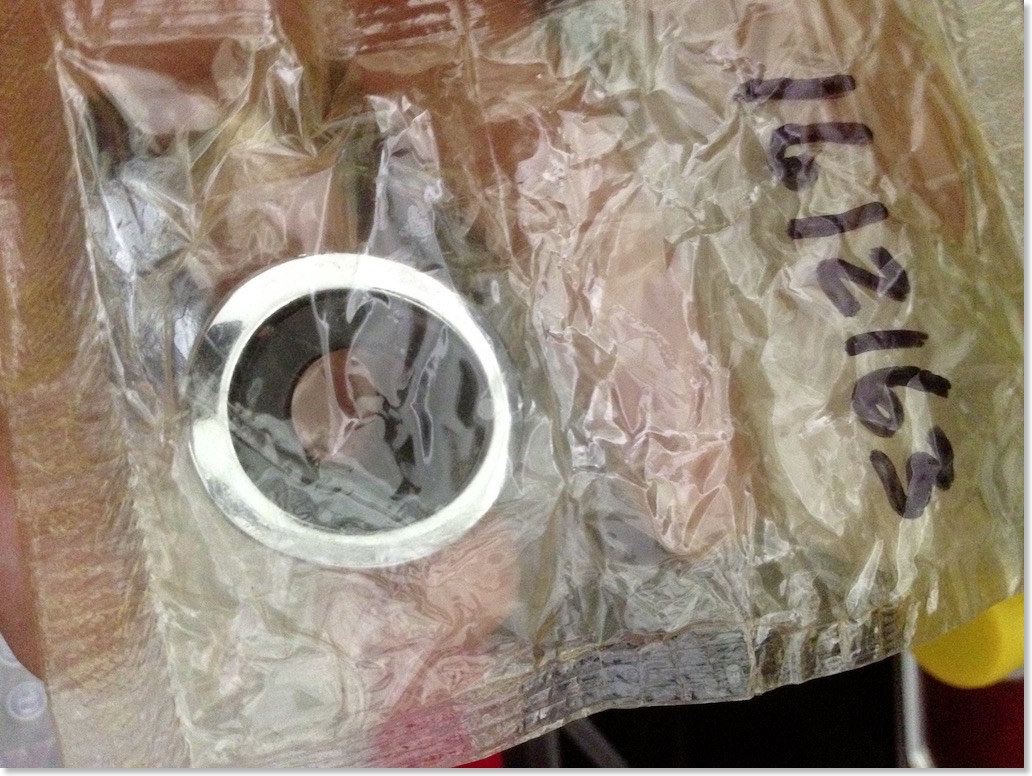
I cant believe that I was lucky enough to find this super rare antenna bezel as a NOS part - still wrapped in its original plastic bag. Not exactly a bargain, but its 100% perfect.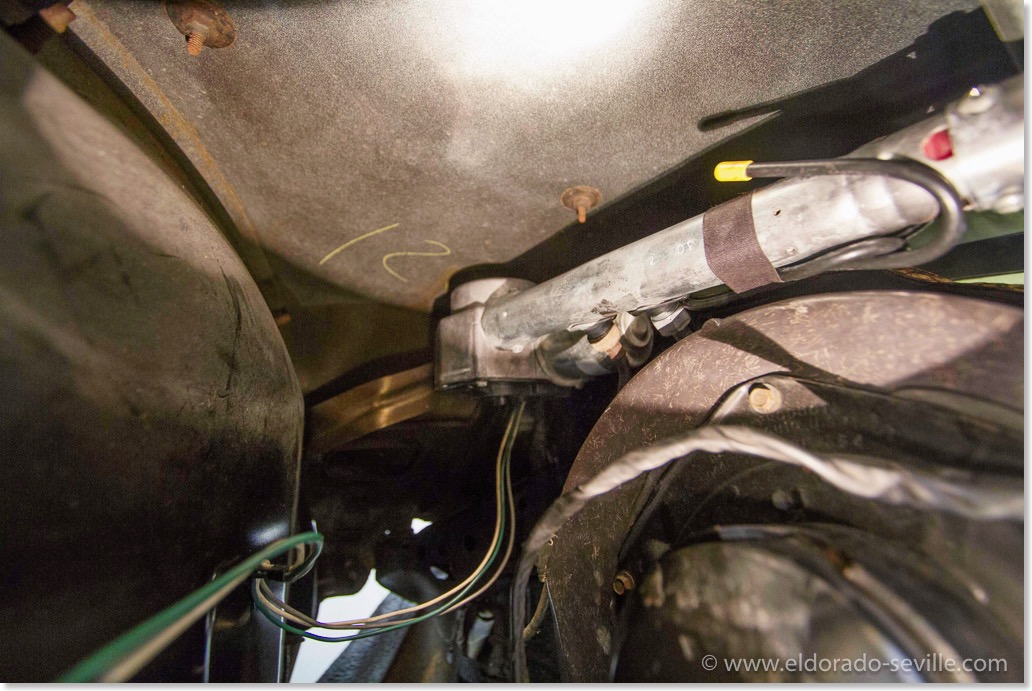
The new, correct antenna installed into the car.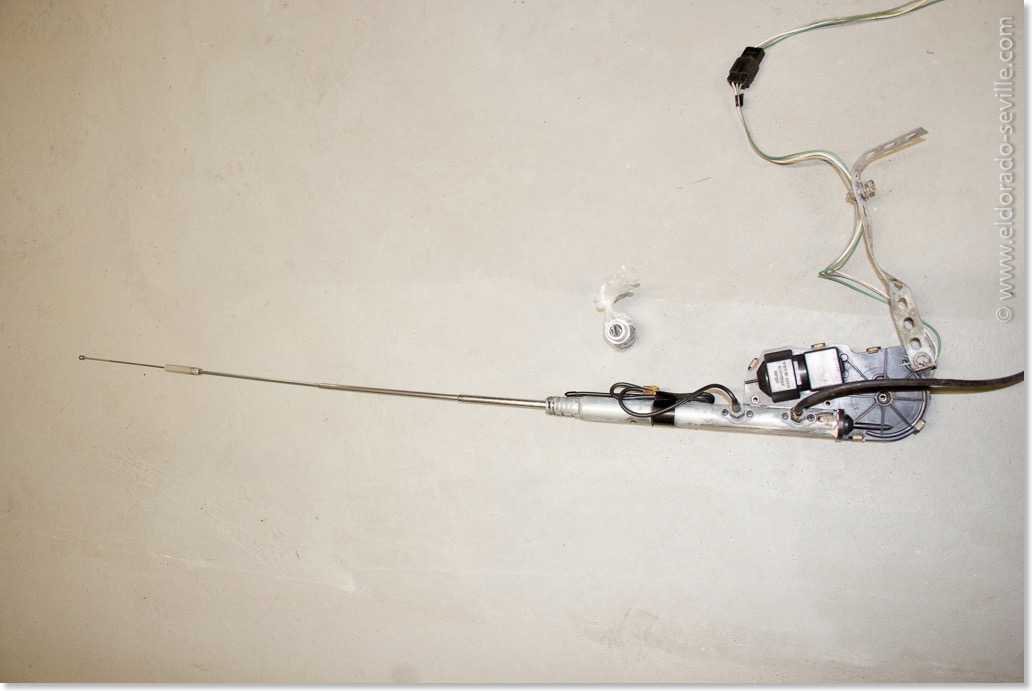
This is the incorrect CB antenna I got. It could be installed into a 78 Eldorado without any problem and would look 100% correct from the outside. It works perfectly smooth, and the chrome mast is in excellent condition. The load coil and the FM stub antenna are all there. The previous owner of this antenna removed it from a 78 Eldorado, but it would normally be correct for Buicks. If you are not such a purist as I am, you can buy it from me for what I paid for it. ($250 + shipping) It comes with all the necessary hardware to install it.
1974 CADILLAC SPEAKER REPLACEMENT
I have to repair my radio anyway (see here) as it does not work properly. My friend Steve who is so kind to repair the radio for me already found out that the radio had a defect which caused the speakers to burn through.
So it was clear that I would need new speakers for my car.
In the past I already had to install replacement speakers in most of my cars. I´m always replacing them with replacement speakers from Turnswitch. They do have some really good reproduction speakers which fit perfectly with only minor modifications necessary. I have dealt with them a couple of times and they are always extremely helpful and friendly and their speakers are great. That is why I can truly recommend them and will use them again if I ever need some speakers in the future.
If you have a stereo/tape radio you need their round 3 1/2" speakers with the block cover to be able to reuse the factory mounting clips for the front speakers in the dash.
The mounting ears have to be cut off and the speaker is then held in with the wire clips used on many GM applications.
The cover blocks are the shape of the original magnet structure and go over the magnets for the wire clip. They are made of wood and you have to glue them onto the speaker in the same orientation as the original magnet. Also make sure that polarity is correct - for some reason it's exactly opposite to the original speakers and you have to connect the positive cable (green or blue) to the speaker lead with the red dot. On the original speakers the wires on the front speakers were soldered on - I re-did it with connectors on the new speakers as they are easier to install and to remove with them.
The new front speakers do not have a dust screen on them, so I carefully removed the screen from the original speakers and glued it to the replacements speakers. So they are protected now and it looks factory correct as you could see the missing screen through the speaker grilles on the dash.
To remove the left speaker and install the new one you have to remove the AC hose to get access to the speaker. The speaker cables are relatively short so be careful not to damage them when you pull the speaker out.
For the rear speakers you need their 6x9 speakers which come with a dust screen already installed.
Here you need to do some more modifications as the original speakers have an additional bracket with a bolt, which holds the insulated cardboard cover in the trunk in place. Without this bracket you cant install this cover.
I carefully drilled out the rivet which holds the original bracket in place and also drilled a hole into the metal frame of the new speaker. I then used a small bolt and nut instead of a rivet to install it onto the new speaker. This works really well, but you have to be extremely careful when you drill this hole as you can easily damage the membrane of the speaker underneath if you drill too deep … (I made this mistake when I drilled out the rivet on the old speaker and immediately had a hole in the old membrane…)
The terminals of the rear speakers were connected with a special connector which you can´t reuse with the new speakers unfortunately, so I had to cut the wire and install a supplied connector instead. On the rear speakers you also have to ground the negative terminal to the car. A short ground cable to do this properly is also supplied with the speakers.
Then you can screw the speakers back into the car and connect them.
Here is some more useful info about replacement speakers from the turnkey website:
"Many replacement speakers now sold by the discount stores, auto parts stores and mail order restoration parts houses are labeled as "4 to 8 ohm compatible" and are in fact 4 ohm speakers. These speakers can damage the older transistor radios. 4 ohm speakers will measure around 3.2 ohms with a DC ohmmeter. An 8 - 10 ohm speaker will measure around 7.4 ohms with a DC ohmmeter. The DC resistance is the critical number for the Delco radios as the output transistor is in series with the speaker. A properly operating Delco radio should have 1.5 volts DC across the speaker voice coil. A 4 ohm speaker will draw twice the current of an 8 ohm and cause the amplifier transistor (the half dollar size device mounted to the black finned heat sink on the back of a Delco radio) to run very hot. The speaker cone should be displaced in an upward (away from the magnet) direction about 1/8" when a Delco radio is turned on. If the cone moves down toward the magnet, the speaker leads need to be reversed".
I´m looking forward to installing the hopefully eventually repaired radio into the car and to test the sound of the new speakers. They should normally sound a little better than the original ones.
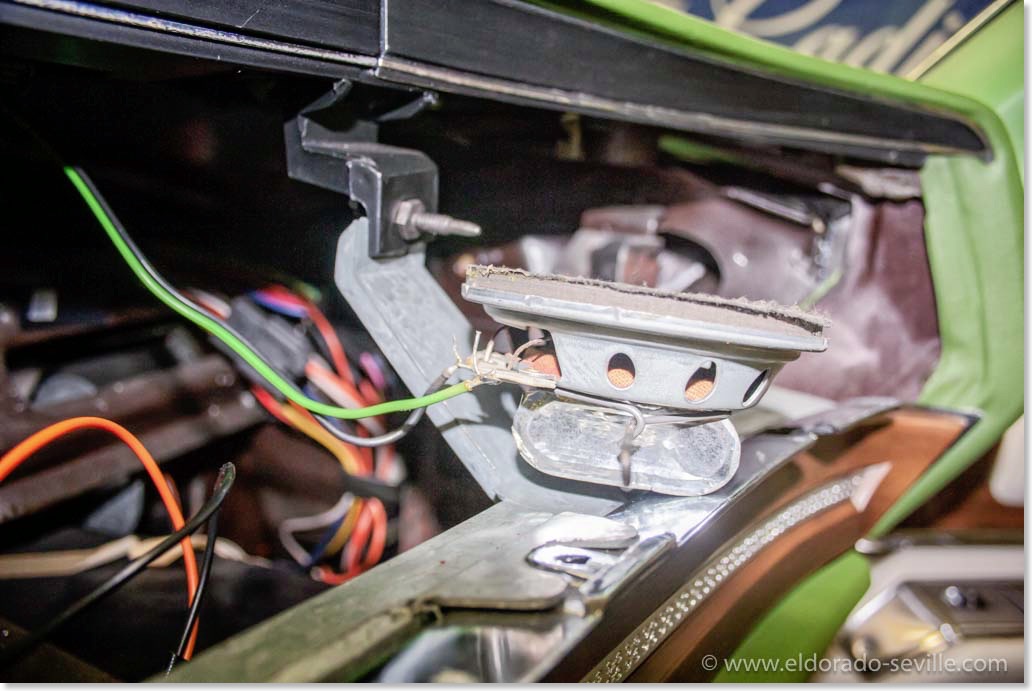
The original right front speaker unclipped from the car.
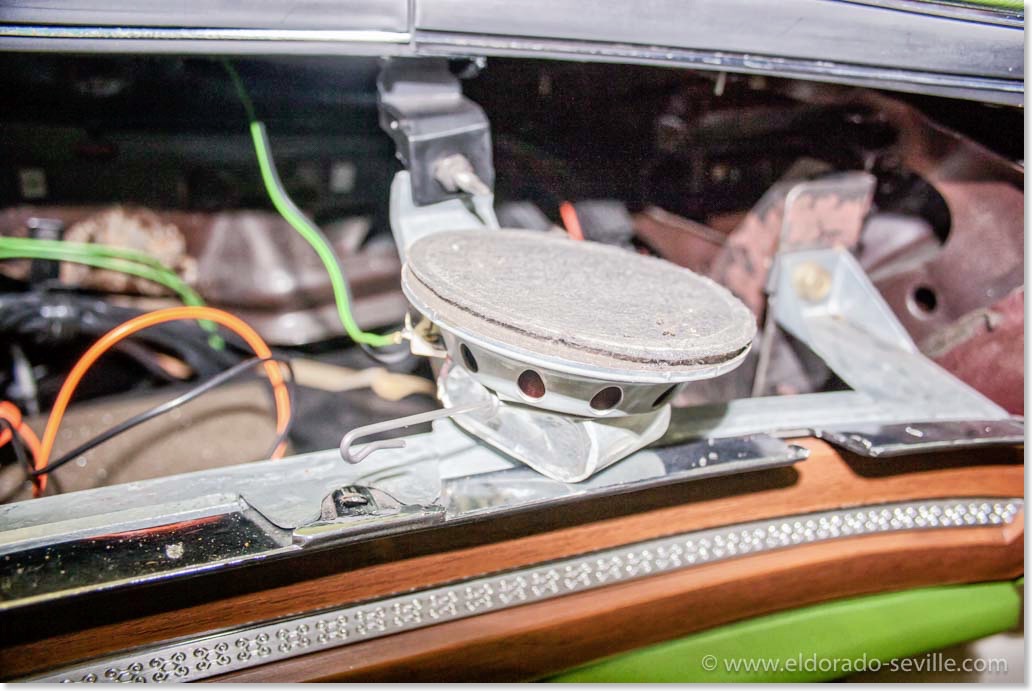
The original right front speaker unclipped from the car. Here you can see the original dust screen which you will have to reuse with the front speakers.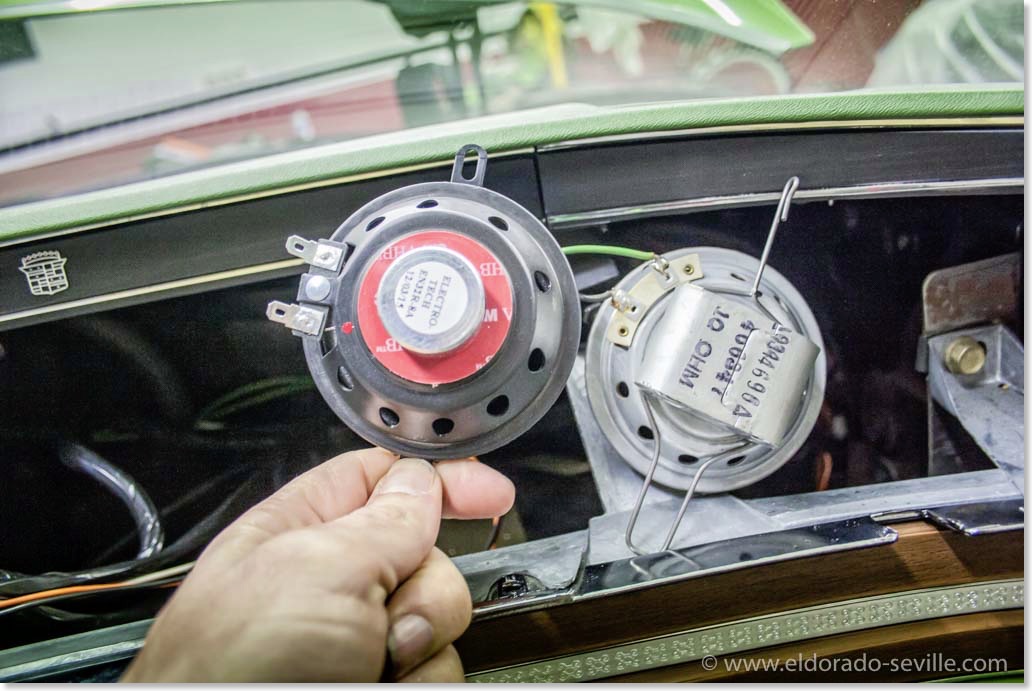
The replacement and the original speaker, as you can see the magnet looks different and you have to cut off the mounting ears.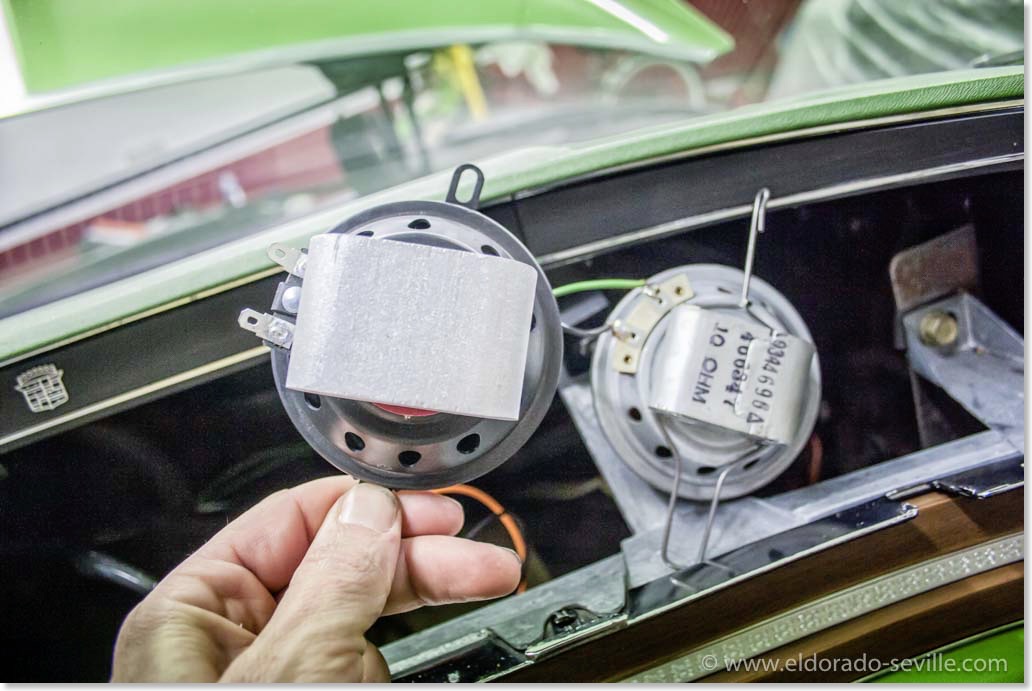
The replacement speaker with the cover block installed. You have to order it separately for your Cadillac.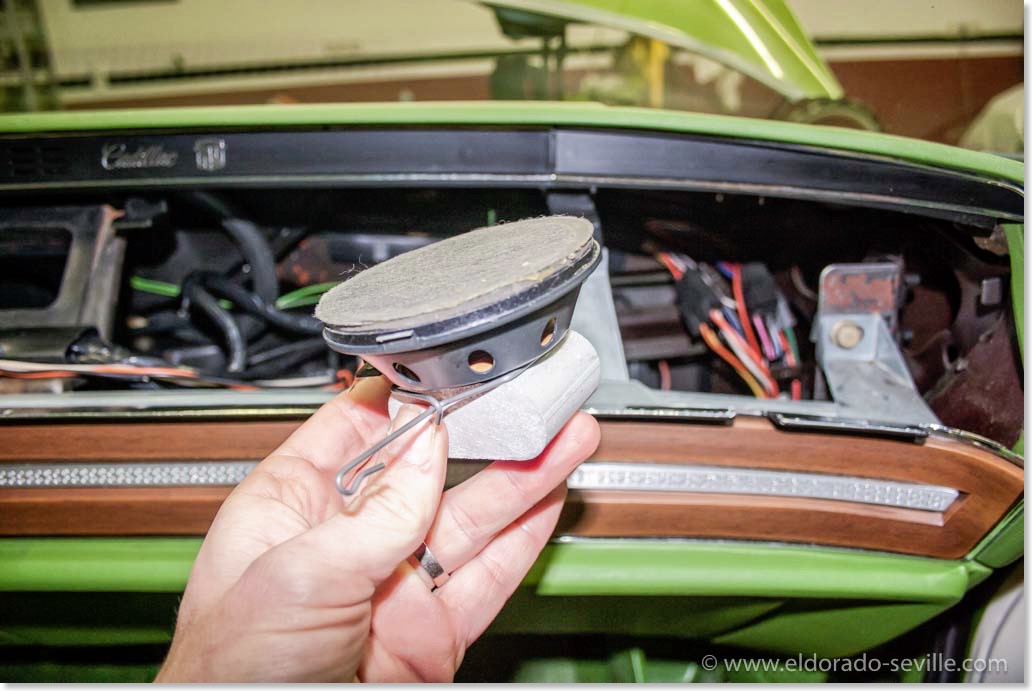
The replacement speaker with the old dust screen installed.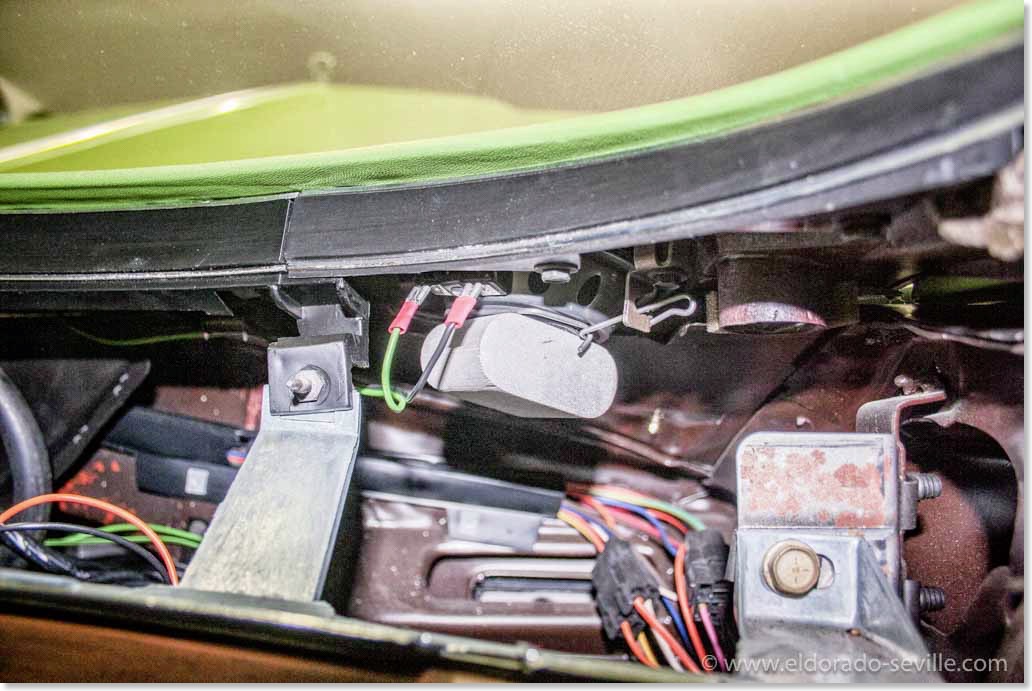
The new speaker back in the car with the supplied connectors.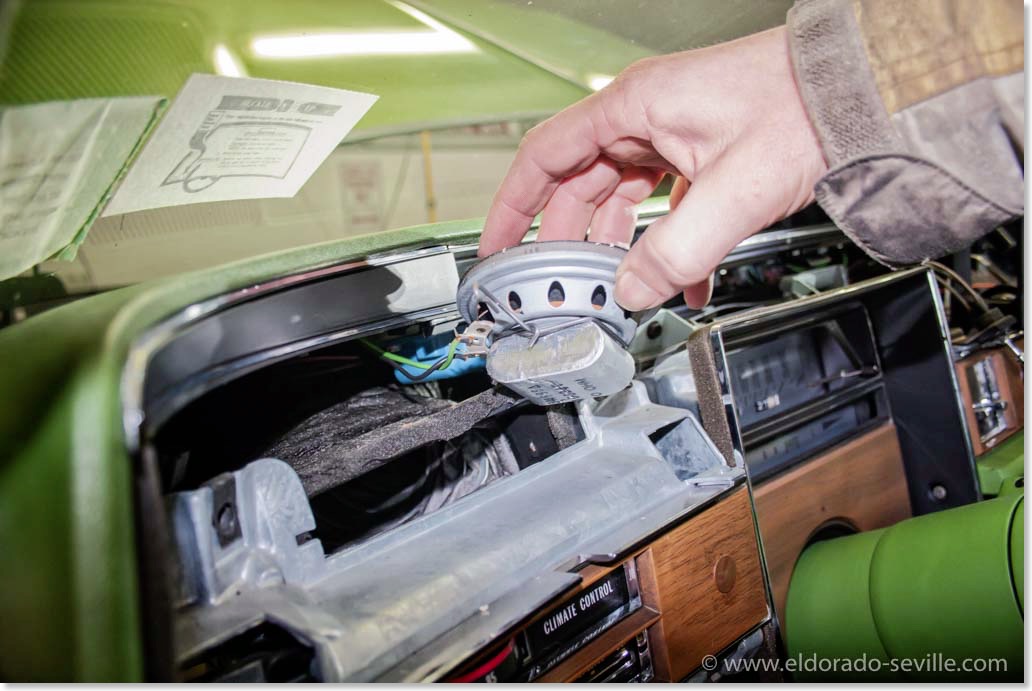
The original left speaker removed - you have to remove the AC hose to get to it.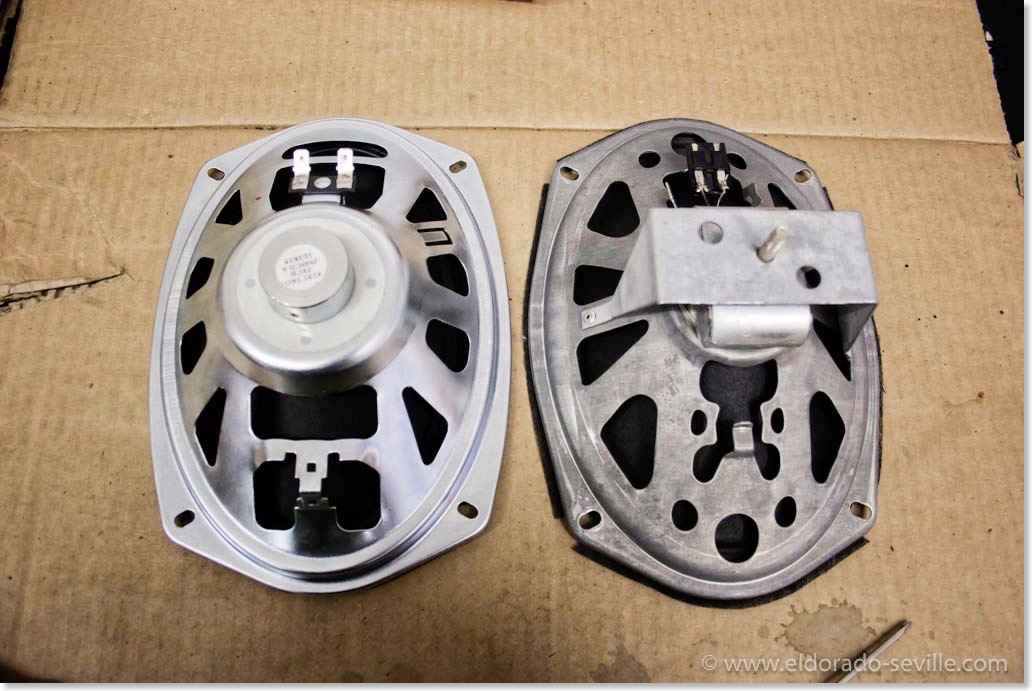
The replacement 6x9 speaker and the factory installed original speaker. Note the bracket - you have to move it to the new speaker and install it there.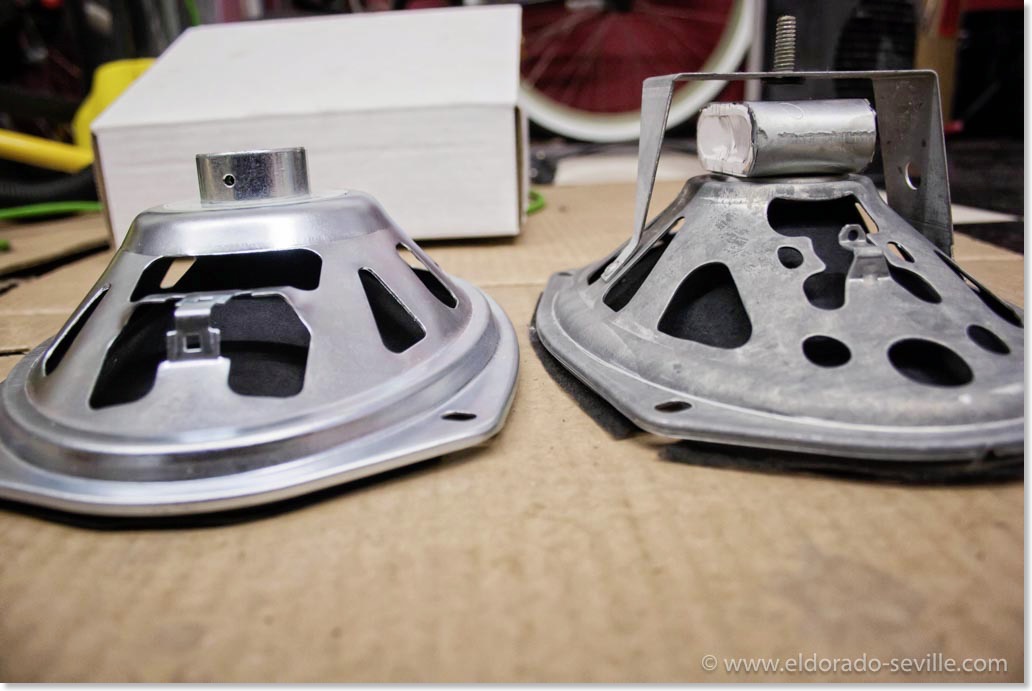
The replacement 6x9 speaker and the factory installed original speaker. Note the bracket - you have to move it to the new speaker and install it there.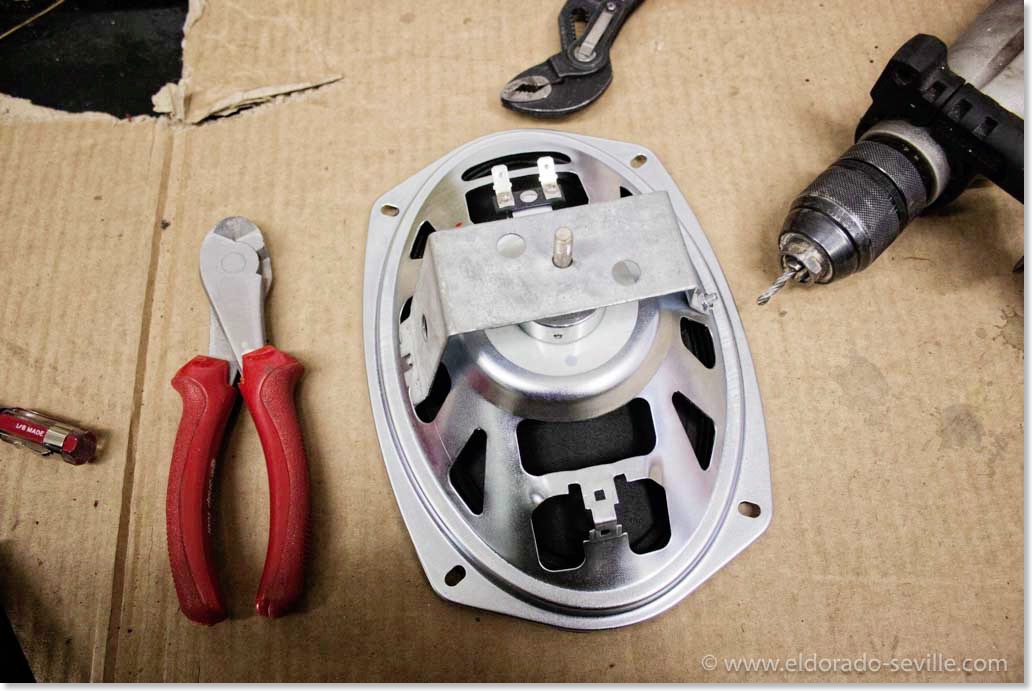
I drilled out the rivet to be able to remove the bracket. Be extremely careful when you drill it out!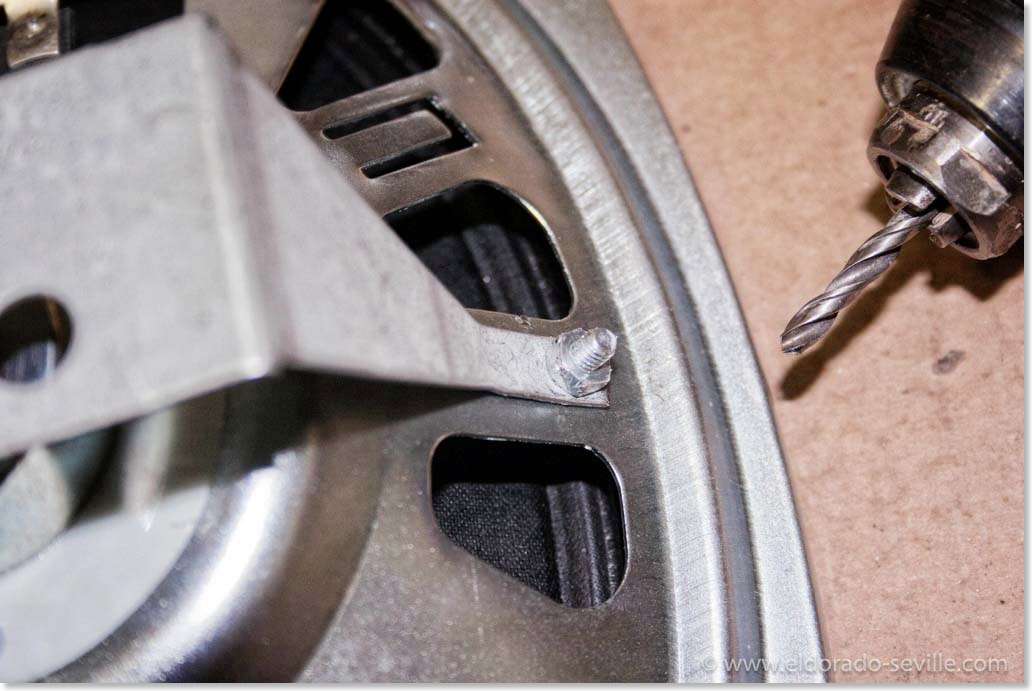
Instead of the original rivet I used a short bolt to install the bracket to the new speaker.
REMOVING THE 1974 CADILLAC RADIO
The first work in 2016 was to remove the radio of the 1974 Coupe DeVille to repair it.
The radio basically works, but the volume dial is a little quirky and sometimes does not work as it should. The radio sometimes only comes to life if the volume is turned to maximum.
The 8 track and AM/FM reception all work like they should. Also 3 speakers do not work at all, and I have to find out if the speakers themselves are defective, or if the radios output has a problem. Its more likely that the speakers are defective after so many years, as the membrane tends to dry out, get very brittle and tear apart. So far I had to change the speakers and/or repair the radios on most of my cars when I got them.
The radio out of the 74 can be removed pretty easily:
- Remove the lower steering column cover - there are 4 screws on top of the cover and 4 screws on the lower edge and one in the door jamb facing the drivers door.
- Then remove the ash tray assembly. There are 4 screws. You have to put your head underneath the dash to get to all of them. For the one on the right side you need a 5/16" nutrunner or socket with 3" extension. Work from lower edge of instrument panel to get to it. Then disconnect the electrical connector and bulb.
- Remove the radio knobs, wave washers, control rings and hex nuts.
- Remove radio to lower instrument panel support brace nut at rear of radio.
- Loosen brace to support screw and rotate brace to the right.
- Slide radio from instrument panel and disconnect antenna cable, speaker connector and power connector.
- Rotate dial side downward and lower the left hand side of the radio.
- Remove through ash tray opening.
Out of my personal experience its easier to remove the radio than getting it back in. Especially connecting the cables again is a pain…
The radio is now out, and I will hand it over to my friend Steve, who will have a look at it, and see what he can do. He already successfully repaired the radio of my 78 Eldorado. He is a genius, and I´m very glad to have such fantastic and talented friends.
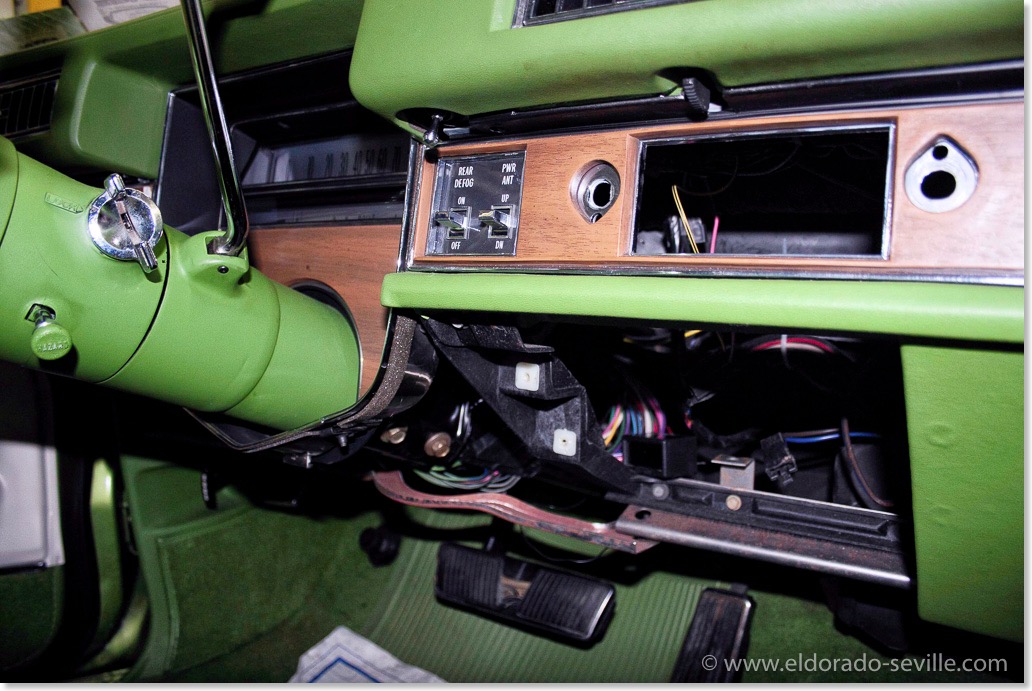
You have to remove the lower steering column cover and the ash tray, to be able to get the radio out. On this picture you can see the removed lower steering column cover and the removed ash tray assembly.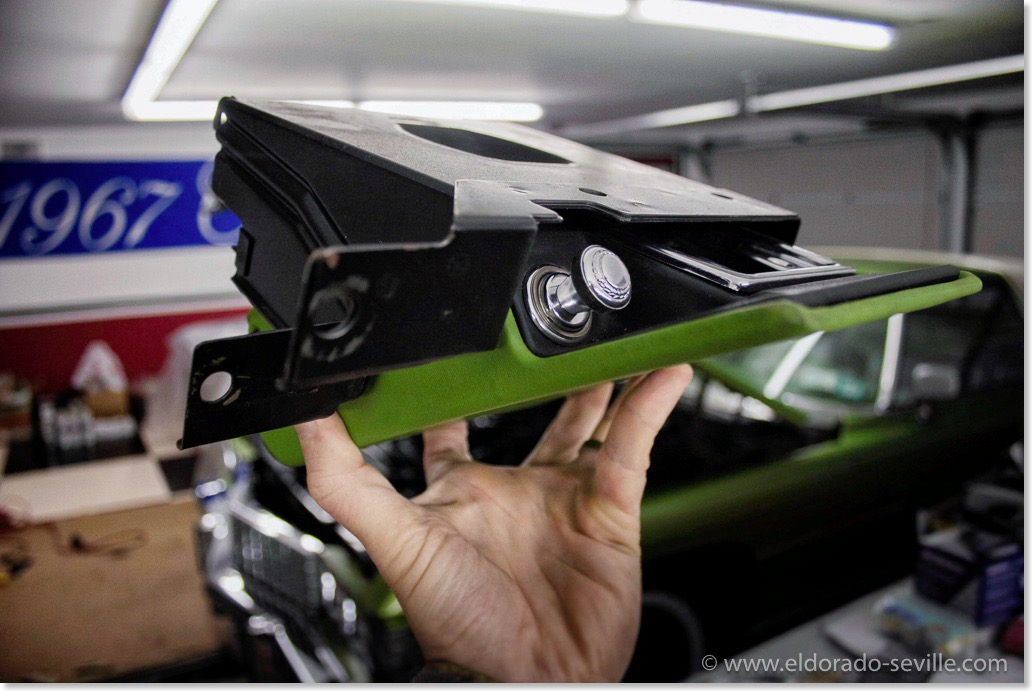
The removed ash tray assembly.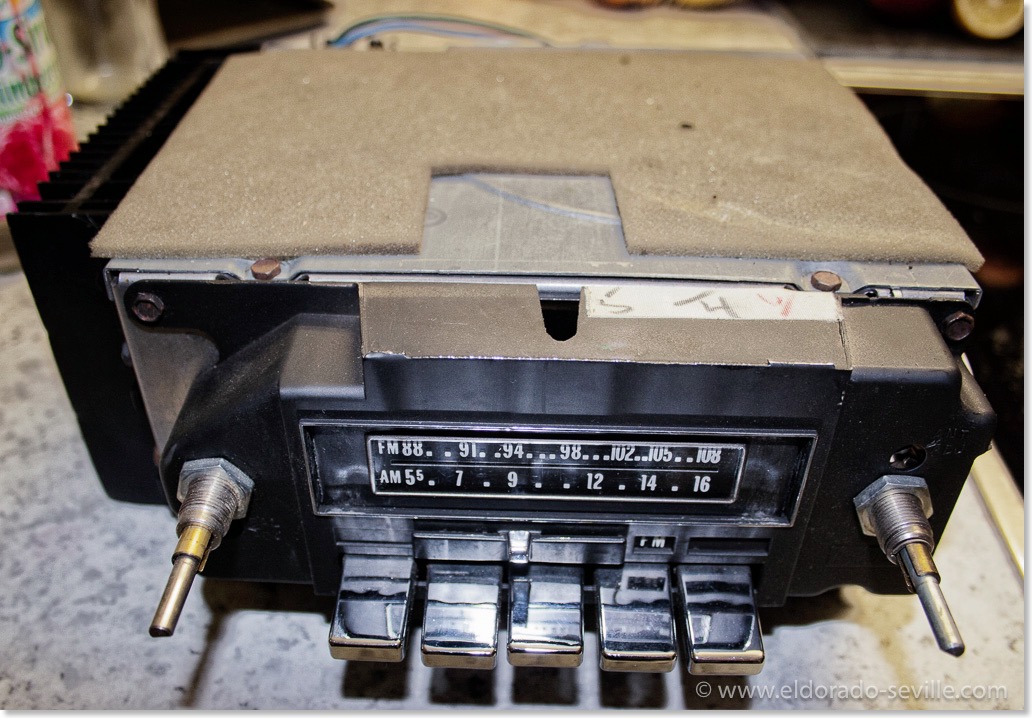
This is the 1974 Cadillac stereo radio with 8 track tape player.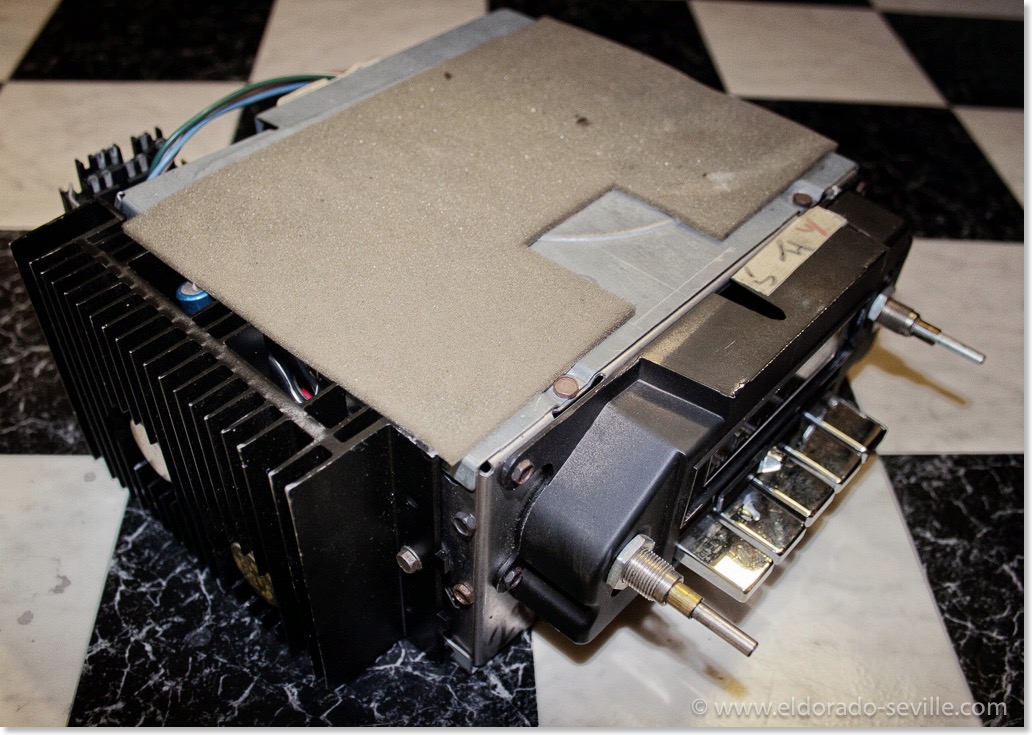
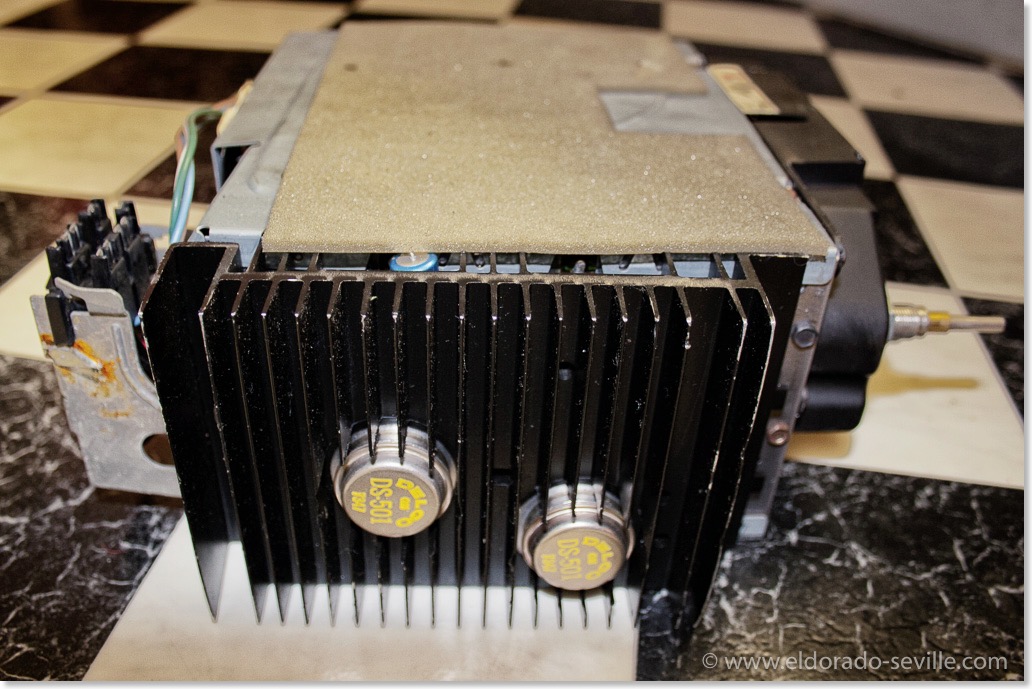
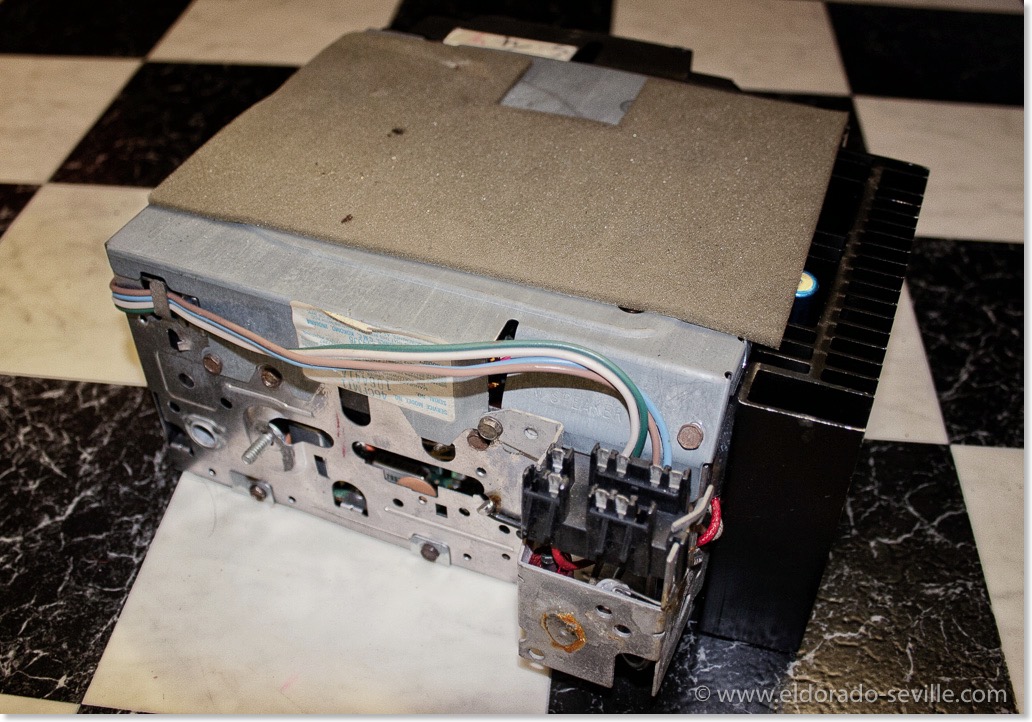
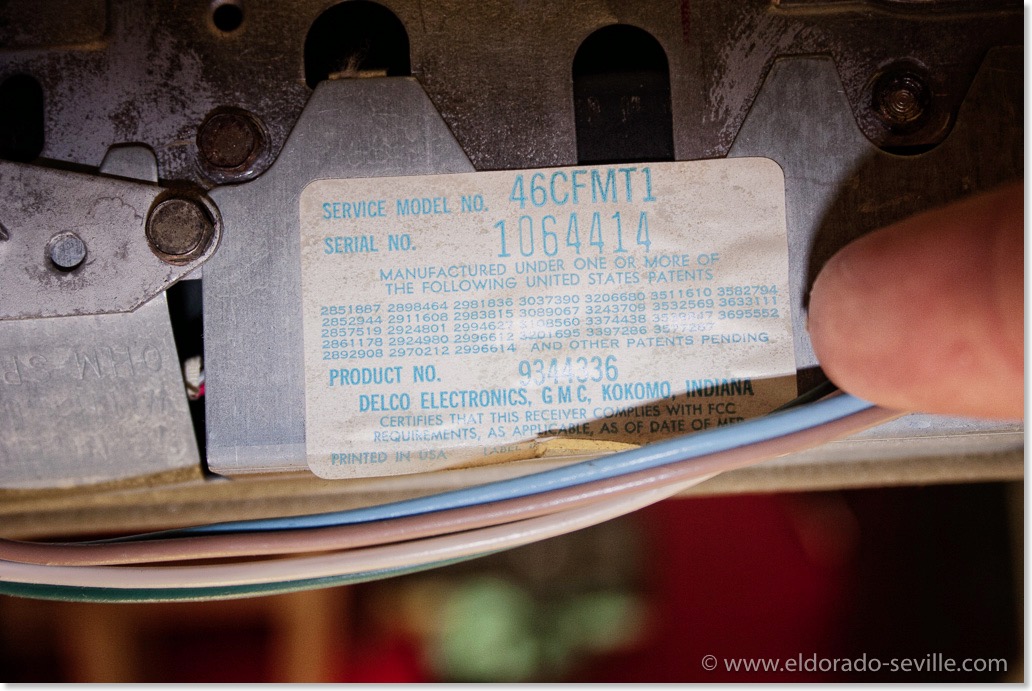
Part # 9344336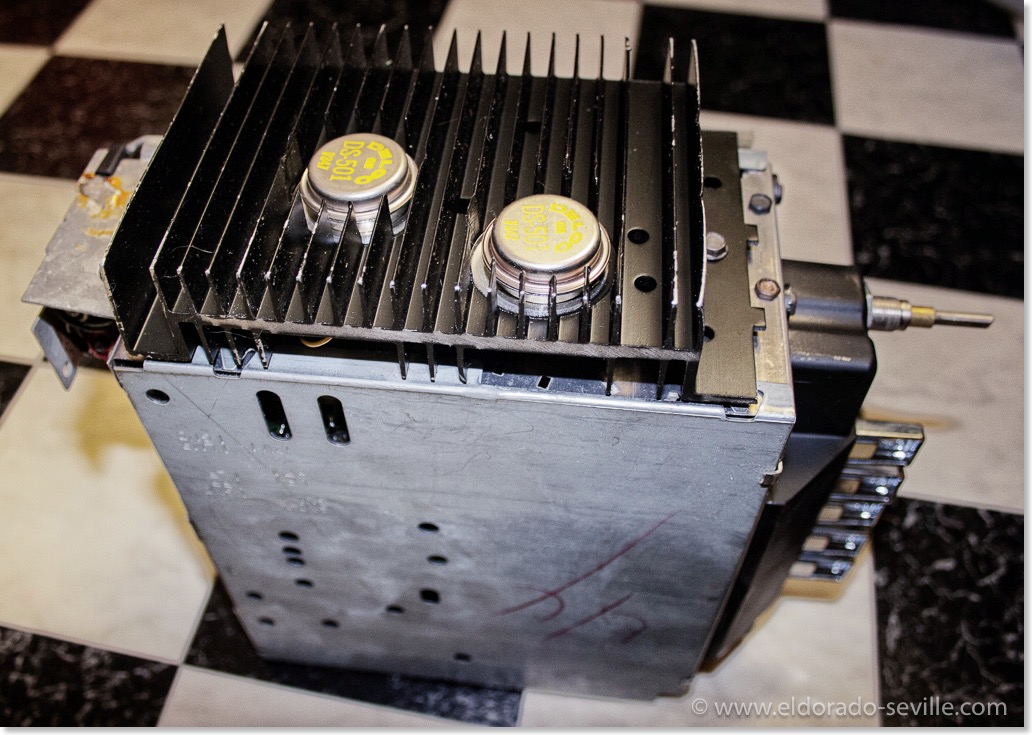
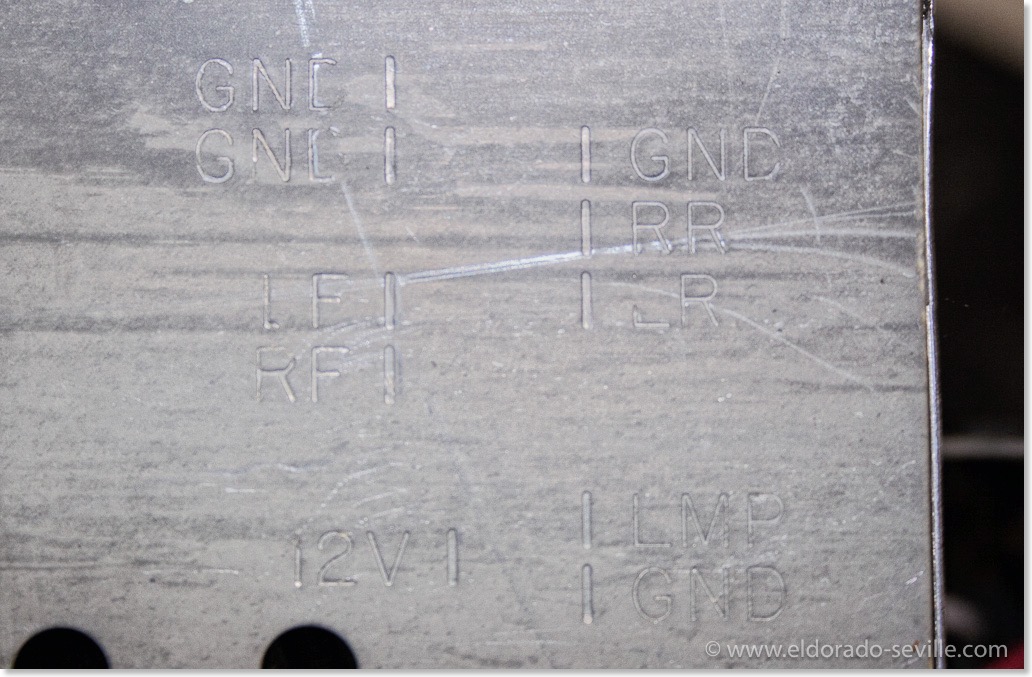
This shows where the wires in the connector are going to.
1978 CADILLAC ELDORADO BIARRITZ RADIO REPAIR
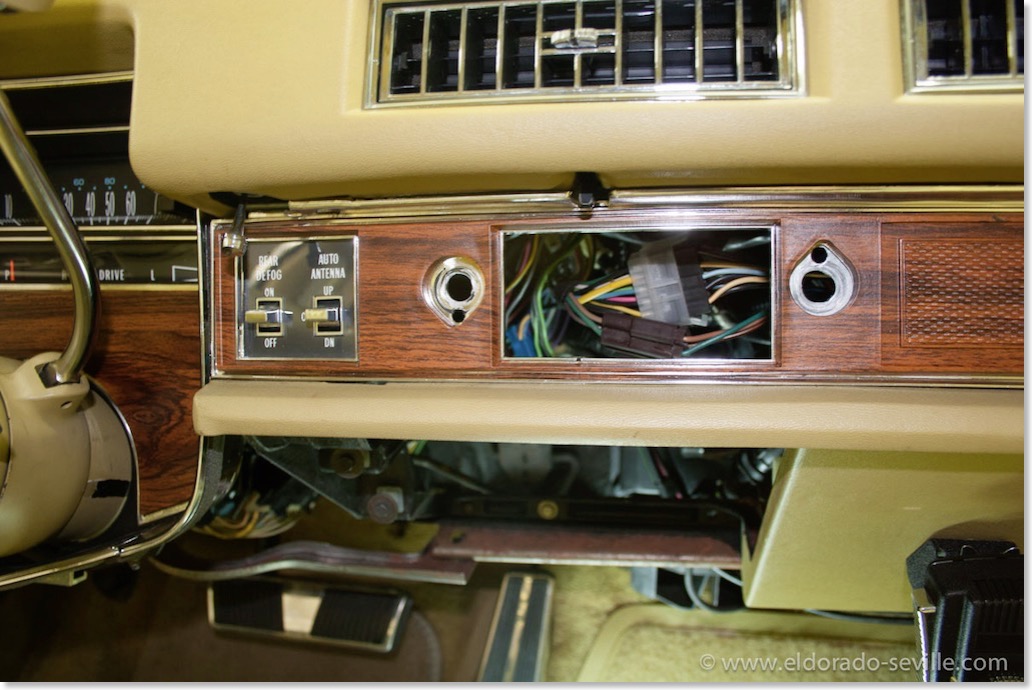
You have to remove the ashtray and part of the lower dash to get the radio out.
Before the spring season will start in May, I want to make sure that all my cars are in top notch condition until then.
The radio on my 78 suddenly died last summer. I was driving the car and the radio and 8-track and CB worked flawlessly. It had great sound and everything worked.
Suddenly, when I wanted to turn the volume down a little bit, the antenna retracted, and the radio went off completely and I could not turn it on again. I also could no longer operate the power antenna.
When I was home I discovered a blown fuse and replaced it, but it immediately blew again when I wanted to turn the radio back on.
I took the radio out now, and measured the power source, and I can clearly see that there is a problem somewhere inside the radio.
It looks like the power source is defective.
My friend Steve who is really good in repairing older radios offered to have a look at it. Unfortunately I cant fix this myself, as I have no clue how this could be repaired, or what could be defective…
Its great to have such good and competent friends who can fix such things.
In a very short time Steve found out what was wrong with the radio. One of the many condensators on the radio got dry over the years and caused a short. Steve replaced the broken condesator and even replaced all the other old ones with new ones to make sure that the radio will last for a long time.
I can´t thank Steve enough for fixing the radio for me. It is very important for me to know that it works again - I hate when things do not work properly on a Cadillac.
When I installed the radio back into the car, it came back to life, but the FM functionality did no longer work, and it was stuck in AM mode. 8 track and CB worked perfectly, but I could not switch to FM mode.
So Steve was so kind to disassemble the radio once again, and found the problem with a disengaged spring which could no longer activate the AM/FM switch.
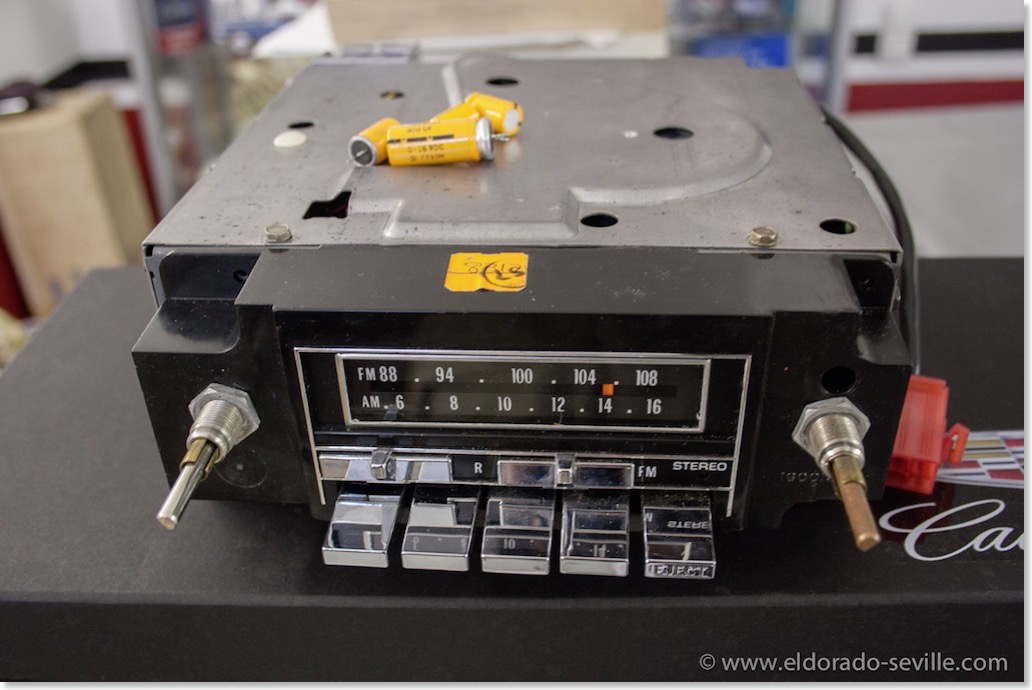
The radio is out of the car - it's the one with 8-track and CB - the most expensive one available in 1978. You can see the replaced condensers on top of the radio.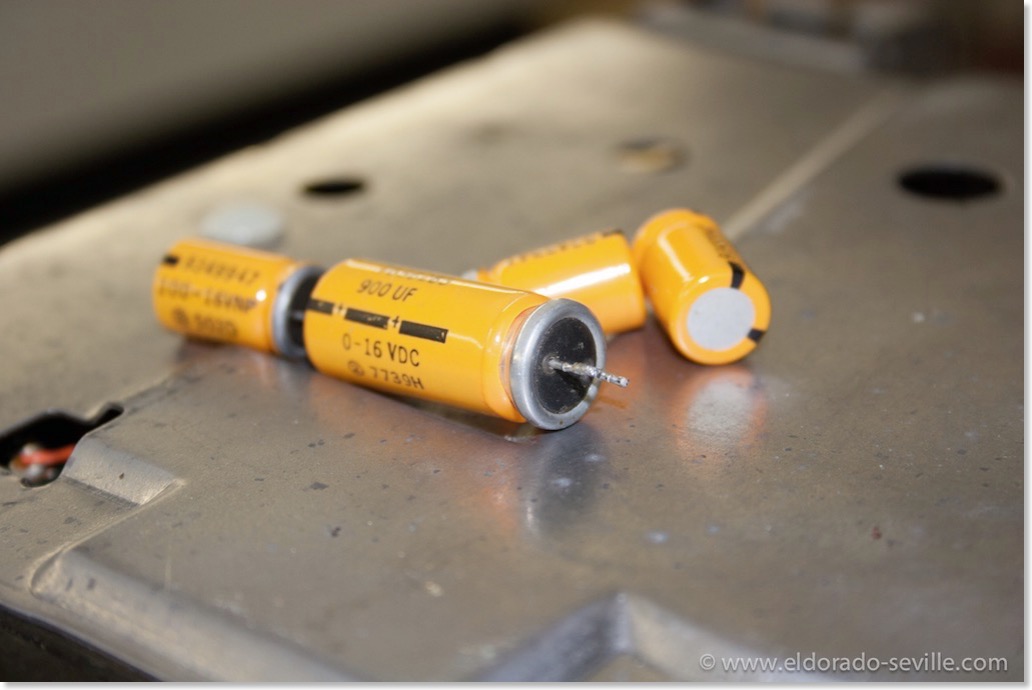
This bigger condenser was the cause for the trouble - it got dry inside and caused a short. The others were exchanged as well as a precautionary measure.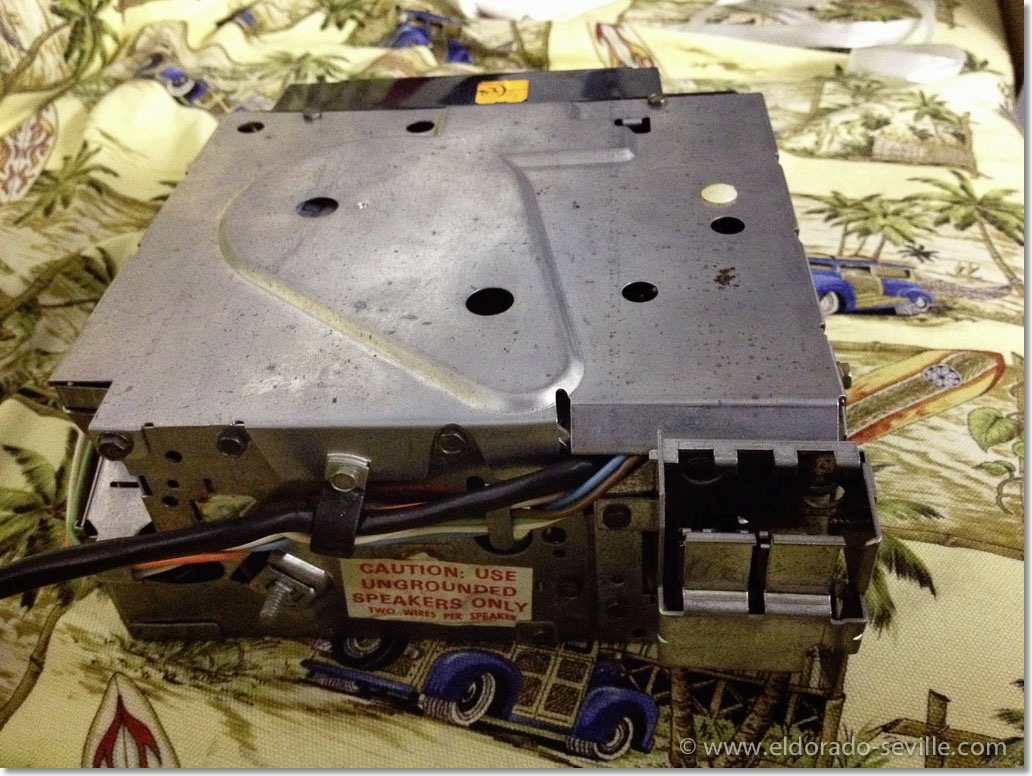
The back side of the radio.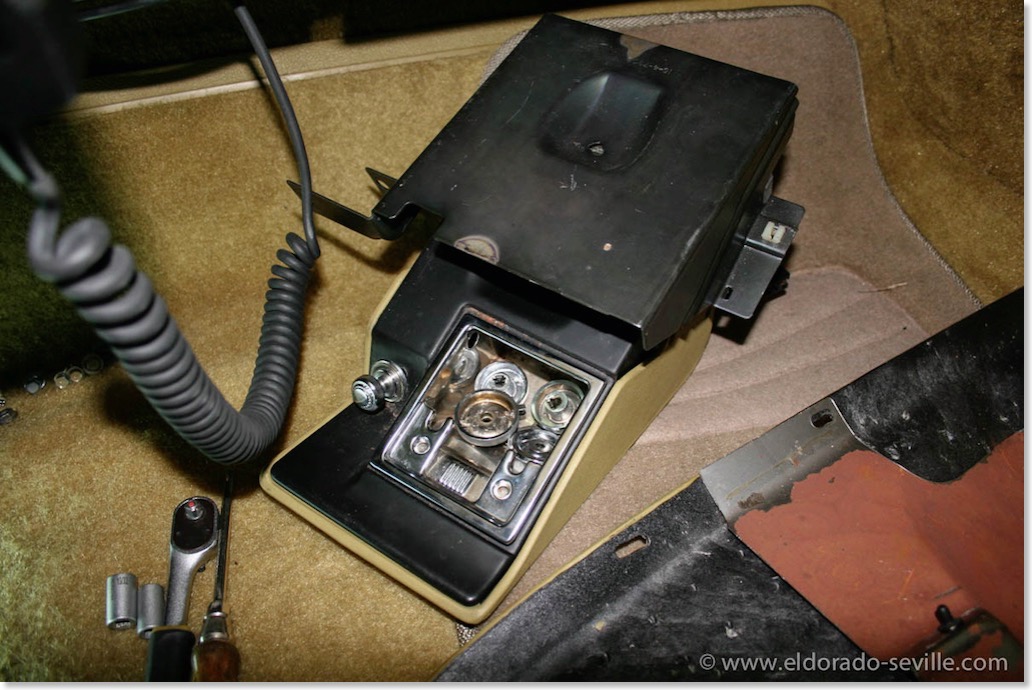
You have to remove the ash tray assembly to get the radio out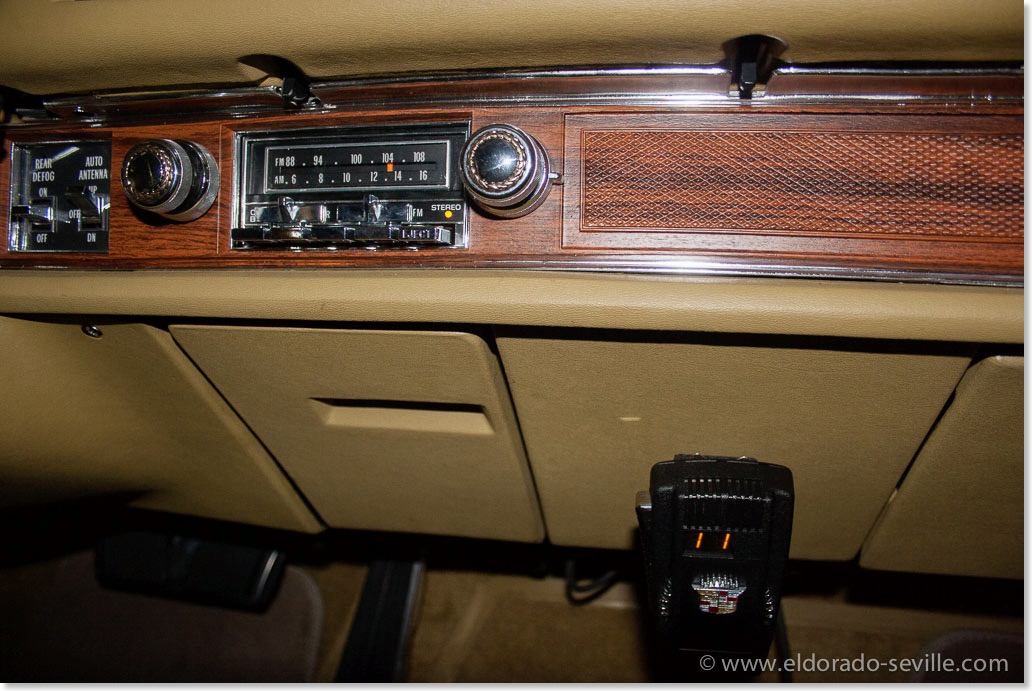
The radio works again and is back in the dash. 8-track and CB work perfectly as well.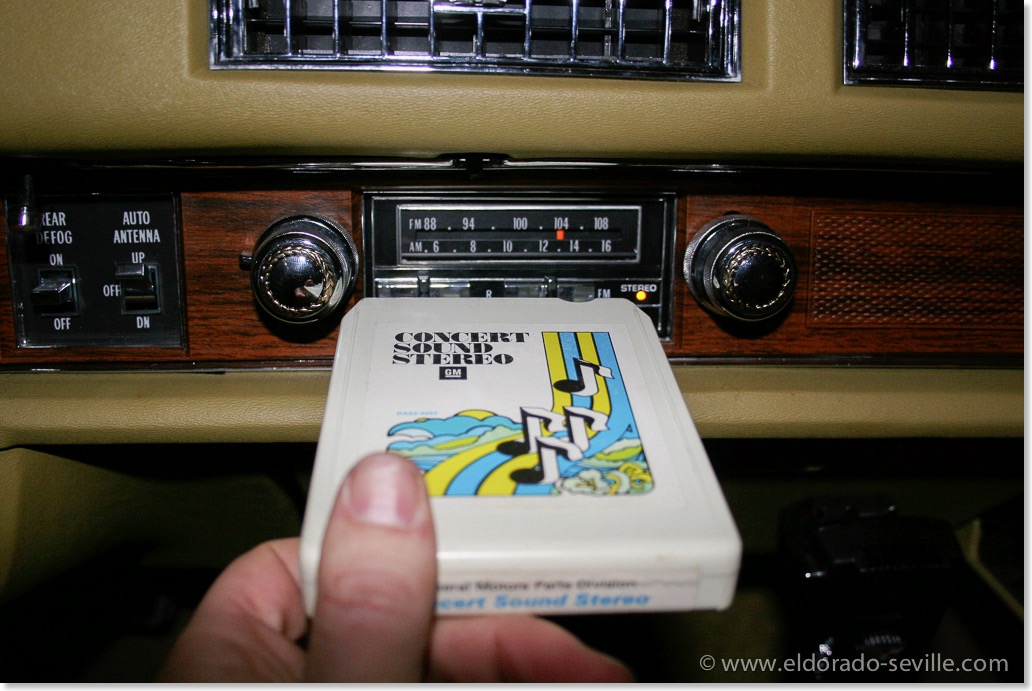
The GM demo tape which came with the car sounds amazingly good. Love the sound.
While I was working on the car I finally repaired the glove box light switch which had a problem since I got the car. I got a new switch from Arizona Vintage Parts and it now works perfectly again.
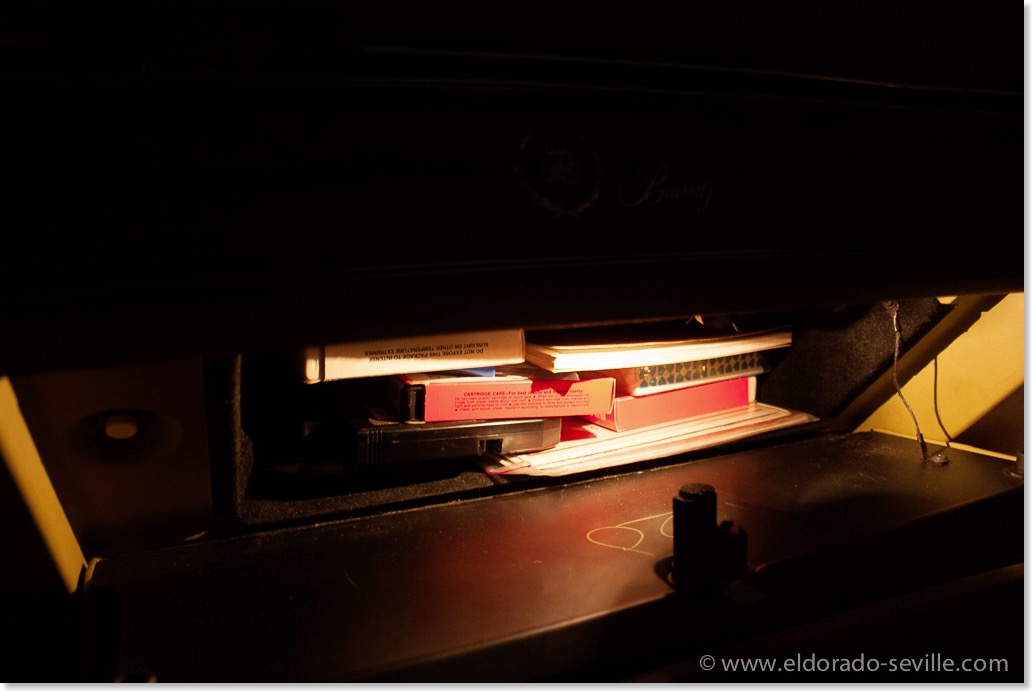
The glove box light is back in working order.
REPLACING THE HOT WATER VALVE
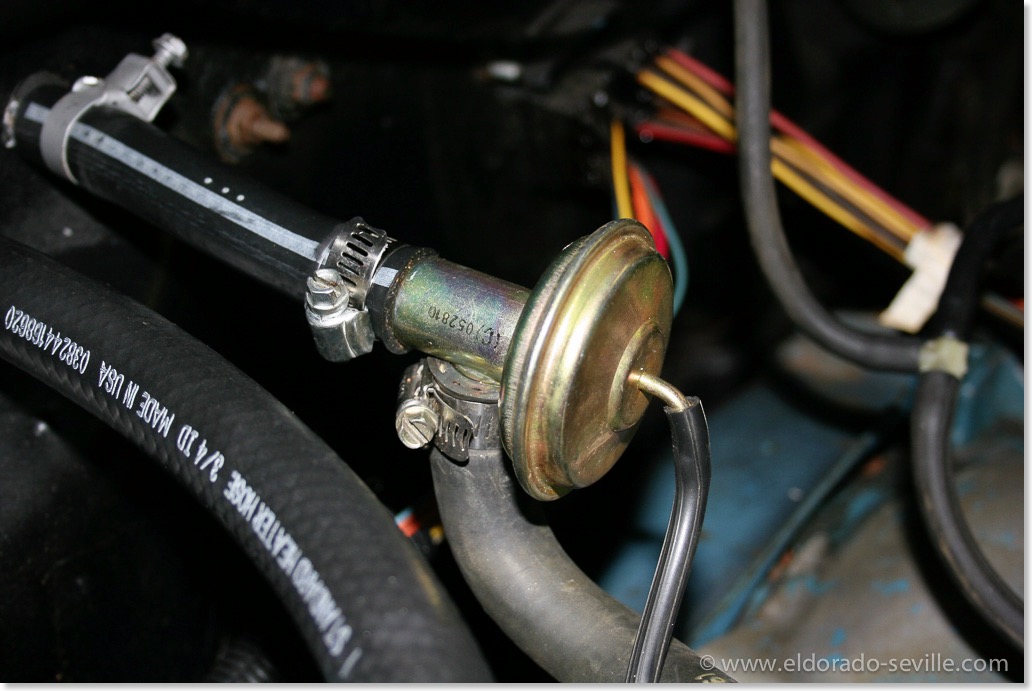
I also replaced the cars original hot water valve, which had a leak at the vacuum diaphragm and could not close any longer.
I found a perfectly working NOS replacement on ebay for it, as the one I got from Rockauto before looked completely different.
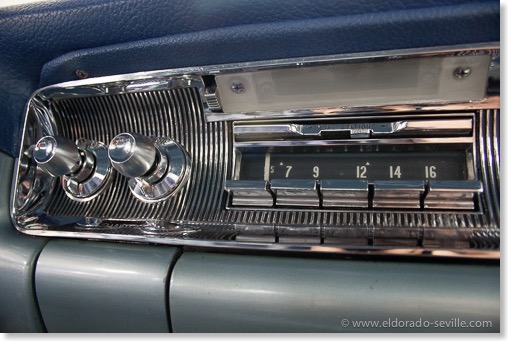
REPAIRING THE WONDERBAR RADIO OF THE 1958 CADILLAC SEVILLE
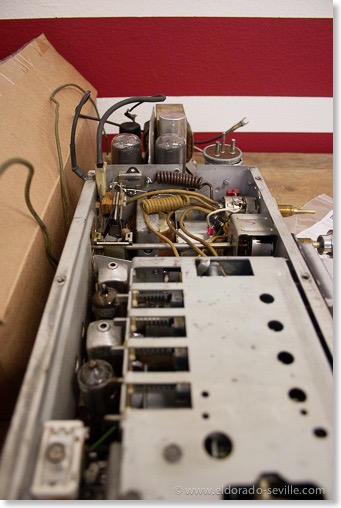
Another Cadillac fan I know who likes to try to repair old things and especially older tube radios wanted to give it a try. So the radio came out of the dash.
After his first investigation it soon turned out that the vibrator inside the radio was inoperative.
We could not find a new one - so he decided to cut the aluminum tube with the vibrator inside open.
He ordered a couple of other parts and somehow managed to repair the original vibrator.
I have no clue how he managed to do that and what he did exactly - but I now have a working AM - “Wonderbar" radio inside my 58 Eldorado Seville and for the first time I can proudly say that EVERYTHING works on my 58!
He also managed to repair the speakers on the 1966 and I have a perfectly working radio on this car as well now.
The 67 Eldorado now has a working radio!
Up first was the radio. The Eldorado came with the original AM radio. When it was turned on nothing happened though... The power antenna worked flawlessly and the signal seeking feature worked as well, but it would not make any sound at all. So I assumed that the speakers were shot and got a new front and rear speaker from Greg Thompson from Turnswitch. They have exactly the same size as the original ones. Cadillac used 10 Ohm speakers for all their cars in 1967. I installed them today and the radio came back to life. As there are no AM stations around any longer I came across a great solution which would enable me to use an Ipod or Iphone to play over the original radio, without having to do any non original conversions to my car. Its a plug and play solution which can be undone in 2 minutes and does not involve any cutting or screwing. The product is called RediRad and it works perfectly. Just tune the radio to 1000 khz on the AM band and plug in the audio source and you can hear your favorite music on your original radio! It is simple and affordable and undetectable as its hidden under the dash.
I also tried to repair the broken stem on my clock and it took me a while to get the clock out only to find out that my replacement stem would not fit. So I had to reinstall it. But at least it seems that it has a better electrical connection to the printed circuit now and the clock works all the time now. Problem is that I can only set the time with long nose pliers at the moment. Looks like I will need an entire new clock or live with it the way it is now. At least it works...
It was great to spend some time with the car again after the long winter months!
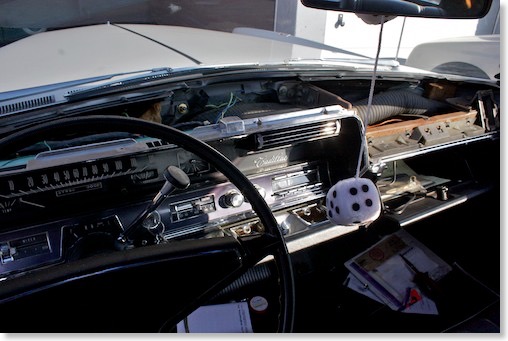
The removed dash.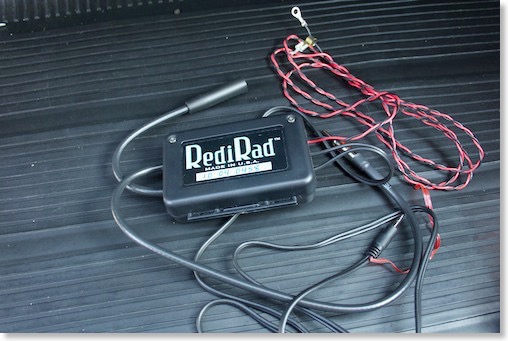
The RediRad system! Great stuff!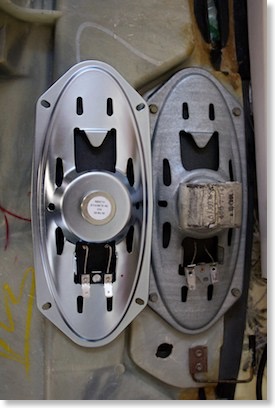
The replacement speaker on the left and the original one on the right.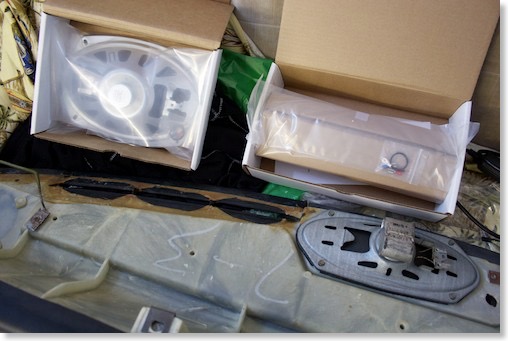
The new speakers with the old one.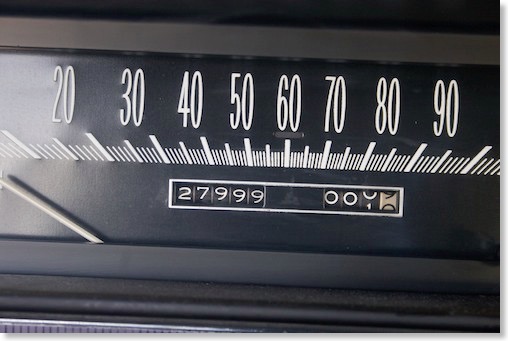
The Eldorado is coming close to the 28k mark... Still a low mileage car ;-)
1967 Cadillac Eldorado radio replacement attempt
Today my wife helped me trying to replace it. It is always a pain to get the old radios out, as the electrical connectors are pretty hard to reach if you have big hands like me... After some fiddling and lots of bad cursing, the radio eventually came out. During this procedure I found out that somebody messed around with the speaker cables which go to the rear speakers and installed new ones - which were connected directly to the front speaker. They cut the wire going to the front speakers and spliced in the rear speakers. Not very well done...
When I finally managed to install the “new” AM/FM radio I found out that it does not fit at all... It either comes from a 66 or a 69 Cadillac?
So I installed the old AM radio coming from my convertible where I did the same procedure 2 years ago - only to find out that non of the 2 speakers seem to work anyways...
I now have to find a good used 1967 AM/FM radio and 2 speakers - the list of things I need is getting longer everyday. I will also have to repair the wiring of the rear speaker back to original.
Thanks to my wife Afra for helping me!
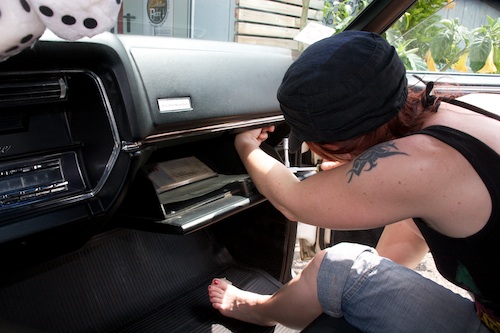
removing the dash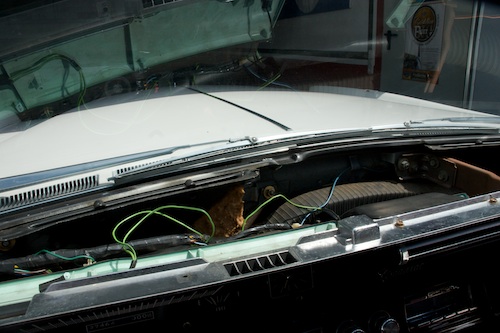
the removed dash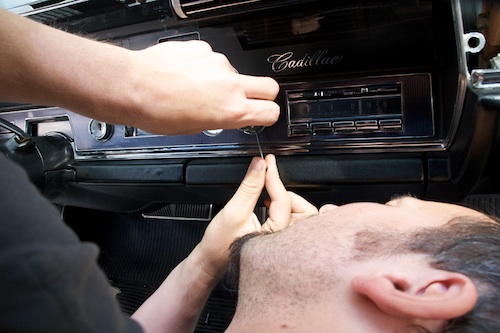
removing the radio buttons was the easiest part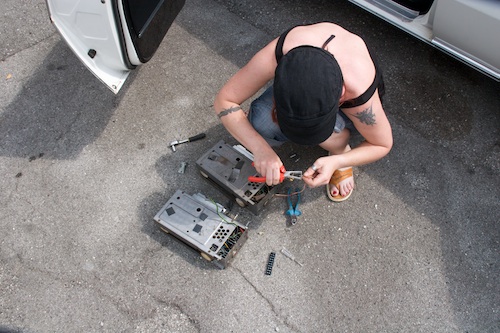
Afra repairing the wiring of the old radio
1966 Cadillac Coupe deVille (16)
1967 Cadillac DeVille (54)
1967 Cadillac Eldorado (73)
1971 Lincoln Continental Mark III (24)
1974 Cadillac Coupe deVille (46)
1978 Cadillac Eldorado Biarritz (25)
1996 Buick Roadmaster (20)
Cadillac BIG Meet (2)
Car Shows (55)
Cruising (4)
CT6 (1)
For Sale (3)
Garage Stuff (32)
Pacer (1)
Restoration (140)
Various (55)
Video (20)
Website News (31)
- 6 way power seat
- 8-track
- 10 Ohm
- 429
- 1932
- 1957
- 1958
- 1958 Cadillac Eldorado Seville
- 1958 Cadillac Repair Tip
- 1959 Cadillac Eldorado Seville
- 1964
- 1965
- 1966
- 1966 Cadillac Coupe deVille
- 1966 Cadillac Repair Tips
- 1967
- 1967 Cadillac DeVille
- 1967 Cadillac Eldorado Repair Tip
- 1967 Cadillac Repair Tip
- 1967 Eldorado
- 1968
- 1970 Cadillac Eldorado
- 1971
- 1971 Lincoln Continental Mark III
- 1974
- 1974 Cadillac Coupe DeVille
- 1974 Cadillac Repair Tip
- 1976
- 1977
- 1978
- 1978 Cadillac Eldorado Biarritz
- 1978 Cadillac Repair Tip
- 1980 Cadillac Eldorado Biarritz
- 1996
- 2012
- 2014
- 2017
- 2018
- 2019
- 2022
- 2023
- 2025
- 3063206
- 7027235
- 7800483
- 7805675
- 7805676
- 12355706
- 17058531
- 17059968
- 17059969
- 22010515
- 22010661
- A.I.R
- A6
- AC
- AC Compressor
- AC Electrical Diagram
- ACC
- Accelerator Pump
- Accelorator pump
- Accident
- Actuators
- Adriatic Blue Metallic
- Ads
- Aftermovie
- Air Pump
- Aircondition
- AIRPUMP
- ALC
- Alternator
- AM
- AM-Transmitter
- Antenna
- Anti Rattle Clips
- Antique Gold
- Arizona Vintage Parts
- Arrival
- Article
- ASC
- Ash Tray removal
- ATC
- Atlantis Blue Firemist
- Austria
- Austro Classic
- Autolite SP-459
- Automatic Seat Back Release
- Award
- Banner
- Barn Find
- Battery
- Battery Tray
- Beach Race
- Bearing
- Bendix
- Biarritz
- Bigfoot
- Bill Hirsch Engine Enamel
- Bleeder Screws
- Bleeding
- Blower
- Bodywork
- Bolts
- Book
- Borg
- Brake Booster
- Brake Fluid
- Brake Gray
- Brakes
- Broken Bolt
- Brougham
- Bucket seats
- Buick
- Bumper End
- Bushings
- Cadillac
- Cadillac BIG Meet
- Cadillac BIG Meet
- Cadillac birthday cake
- Cadillac Blue
- Cadillac Color Selections Dealer Book
- Cadillac Coupe deVille
- Cadillac Dealer
- CADILLAC GRAND EUROPEAN
- Cadillac Meeting
- Cadillac Mini Meeting
- Camaro RS
- Caorle
- Car Show
- Carburetor
- Card
- Carpet
- Carter AFB
- Cavalry Twill Vinyl
- CB
- CBM
- CCCD
- Choke
- Christmas
- Citizens Band
- Classic Cadillac Club Deutschland
- Clay Towel
- Cleaning
- Clock
- Clockwork
- Clutch
- Clutch Coil
- Collector
- Colonial Yellow
- Color Coded Springs
- Commercial
- Compound
- Compressor
- Condenser
- Continental Mark III
- Control Head
- Conversion
- Convertible top
- Coolant
- Corona
- Cowl
- Cruise Control
- Cruising
- CT6
- CV Boots
- CV JOINTS
- D6230
- Dash Trim
- Decal Removal
- Decals
- Decoration
- Dehumidifier
- Delco Moraine
- Der Standard
- detailing
- Deville
- Diagnosis Chart
- Diagram
- Dial
- Digital Rotary Drum Clock
- Diner
- Disc Brakes
- Distributor
- Diverter Valve
- Door Jamb Switch
- Door Rubber Conduit
- Dornbirn
- Dot3
- Drive Shaft
- Driving tour
- Drum brakes
- Dry Ice Blasting
- Dry Ice Cleaning
- DVD
- Eastwood
- Eldorado
- Electric Choke Thermostat
- Electrical schematic
- Elvis
- Engine Bay
- Ep
- Epoxy floor
- Europe
- Evaporator
- Exide
- Factory Markings
- Fender Skirt
- Floor
- Flushing
- Flyer
- Foam
- For Sale
- Front AXLE
- Front brakes
- Front bumper filler
- Front Floor
- Front wheel bearing
- Fuel Filter
- Fuel Pump
- Fuel Sending Unit
- Fusible Link
- Garage
- Garage Cabinets
- Gasket
- GE
- Gear indicator
- General Time
- Glove box light
- Grand European
- H4
- Haus of Hot Rod
- Headlight Actuator
- Headlight doors
- Headlights
- Heater Core
- Heater Hose
- Heater Valve
- High Idle
- History
- Holley
- Honest John
- Hood
- Hood Emblem
- Hood Ornament
- Hose Clamp
- Hot Choke
- Hot Water Valve
- HotRod
- How to
- Hödlmayr
- Ignition Diagram
- Illuminated Entry
- John D‘Agostino
- John Foust
- Klassikwelt Bodensee
- Kremsmünster
- LaSalle
- Leather seats
- Light Switch
- Limited
- Lincoln
- Lincoln Mark III Repair Tip
- Low Mileage
- Magazine
- Marilyn Monroe
- Mark III
- Master Cylinder
- Master Switch
- Master Vacuum Switch
- Media Blasting
- Meeting
- Meguiras
- MK II
- Mobile
- Model
- Moldings
- Mom
- Mopar Nationals
- Mostkost Kustom
- Movie
- Munich
- Neon
- NOS
- Oberösterreicher des Tages
- oilchange
- ORF
- Overspray
- Pacer
- Paint
- Paint correction
- Paintjob
- Part Number
- Parts
- Patch Panel
- Perfect Circle
- Permabag
- Persian Lime
- Photo shooting
- Photoshooting
- Pictures
- PinUp
- POA Valve
- Power Antenna
- Power Servo
- Power Vent Windows
- Power Window
- Printed Circuit Board
- Programmer
- Pulley
- Quadrajet
- Quarter Panel
- Quartz Conversion
- R134
- Radiator
- Radio
- Rattle
- Rear brakes
- Rebuild
- Recalibrate
- RediRad
- Reed Switch
- Relais
- Relaunch
- Removing Overspray
- Repaint
- Repair
- Restoration
- RIP
- Roadhouse
- Roadmaster
- Rochester
- Rocker Arm Cover
- Rocker Panel Extension Clips
- Rostio
- Rotary Valve
- Rotterdam
- Rupes
- Rust removal
- Rust removal gel
- Sabre Wheels
- Sand Blasting
- Sandblasting
- Screed
- Season Greetings
- Seasons Greetings
- Seat Back Locks
- Seat Padding
- Seat Transmission
- See through ornament
- Self adjusters
- Self Starter
- Sepp's Garage
- Seville
- Sheetmetal
- Shocks
- shop manual
- short
- Sign
- Solenoid
- Spark Plug Wire Routing
- Speakers
- Special Award
- Speed Bleeder Screws
- Splash Guard
- Starter Diagram
- Starter Motor
- Steering Column
- Storage
- suction throttling valve
- sunroof
- suspension
- Swirl Mark removal
- Switzerland
- T3
- Taillight Cover
- Texan´s Choice Award
- Thermostat
- Tilt and Telescope
- Time capsule
- Tomsclub
- Torque Specifications
- Tower Hose Clamp
- Towtruck
- Trailer
- Transducer
- Transmission
- transmission control selector
- transmission control selector indicator light
- transmission shift indicator
- Treadle Vac
- Treffen
- Tri-Band
- Troubleshooting
- Trunk Cardboard Kit
- Trunk lid
- Trunk lining
- Trunk to bumper cover
- Turn Signal Switch
- TV
- Typisierung
- Ultimate Garage
- Underbody
- Undercarriage
- Undercoating
- Undercoating Removal
- Vacuum Booster
- Vacuum diagram
- Vacuum hoses
- Vacuum Master Switch
- Vacuum Schematic
- Vacuum Valve
- Valve Cover
- Various
- Vent Window Switch
- Vibration
- Vibrator
- Vicodec roof
- Video
- Vinegar
- Vinyl Roof
- Visitor
- Washer Fluid Float
- Washer Fluid Low Level Indicator
- Water Pump
- Wax
- Weatherstripping
- Website News
- Westclox
- Wheel Bearings
- Wheel Housing
- Wiesbaden
- Windlace
- Winter
- Wiring
- Wiring Diagram
- Wonderbar
- Workbench
- Zurzach
 GERALD´S CADILLACS - NEWS