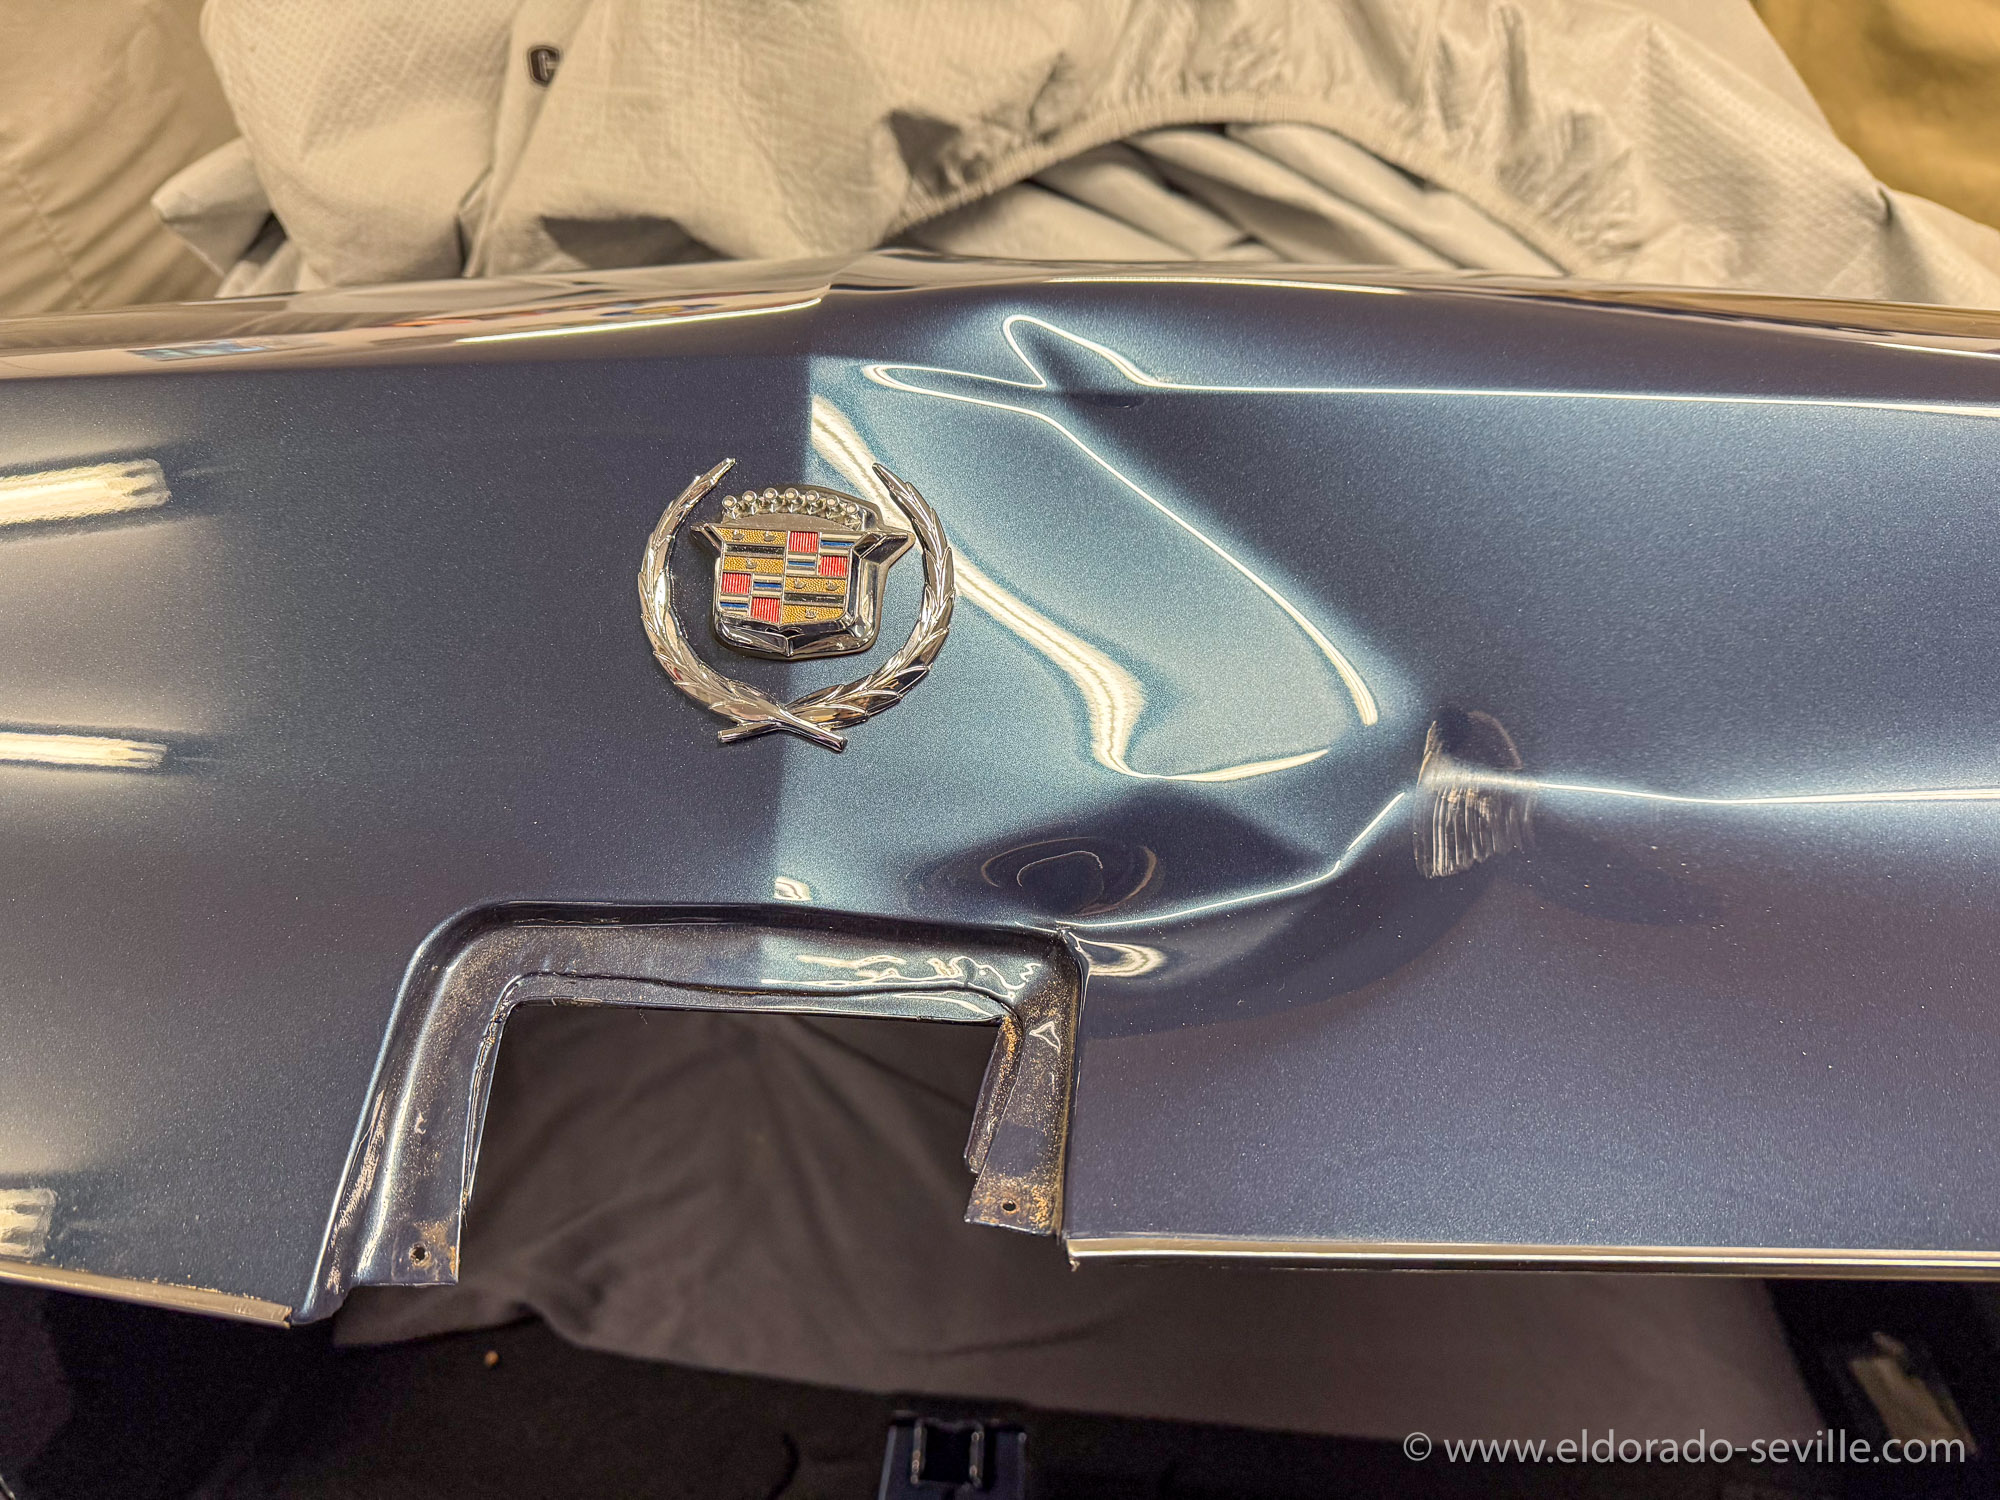
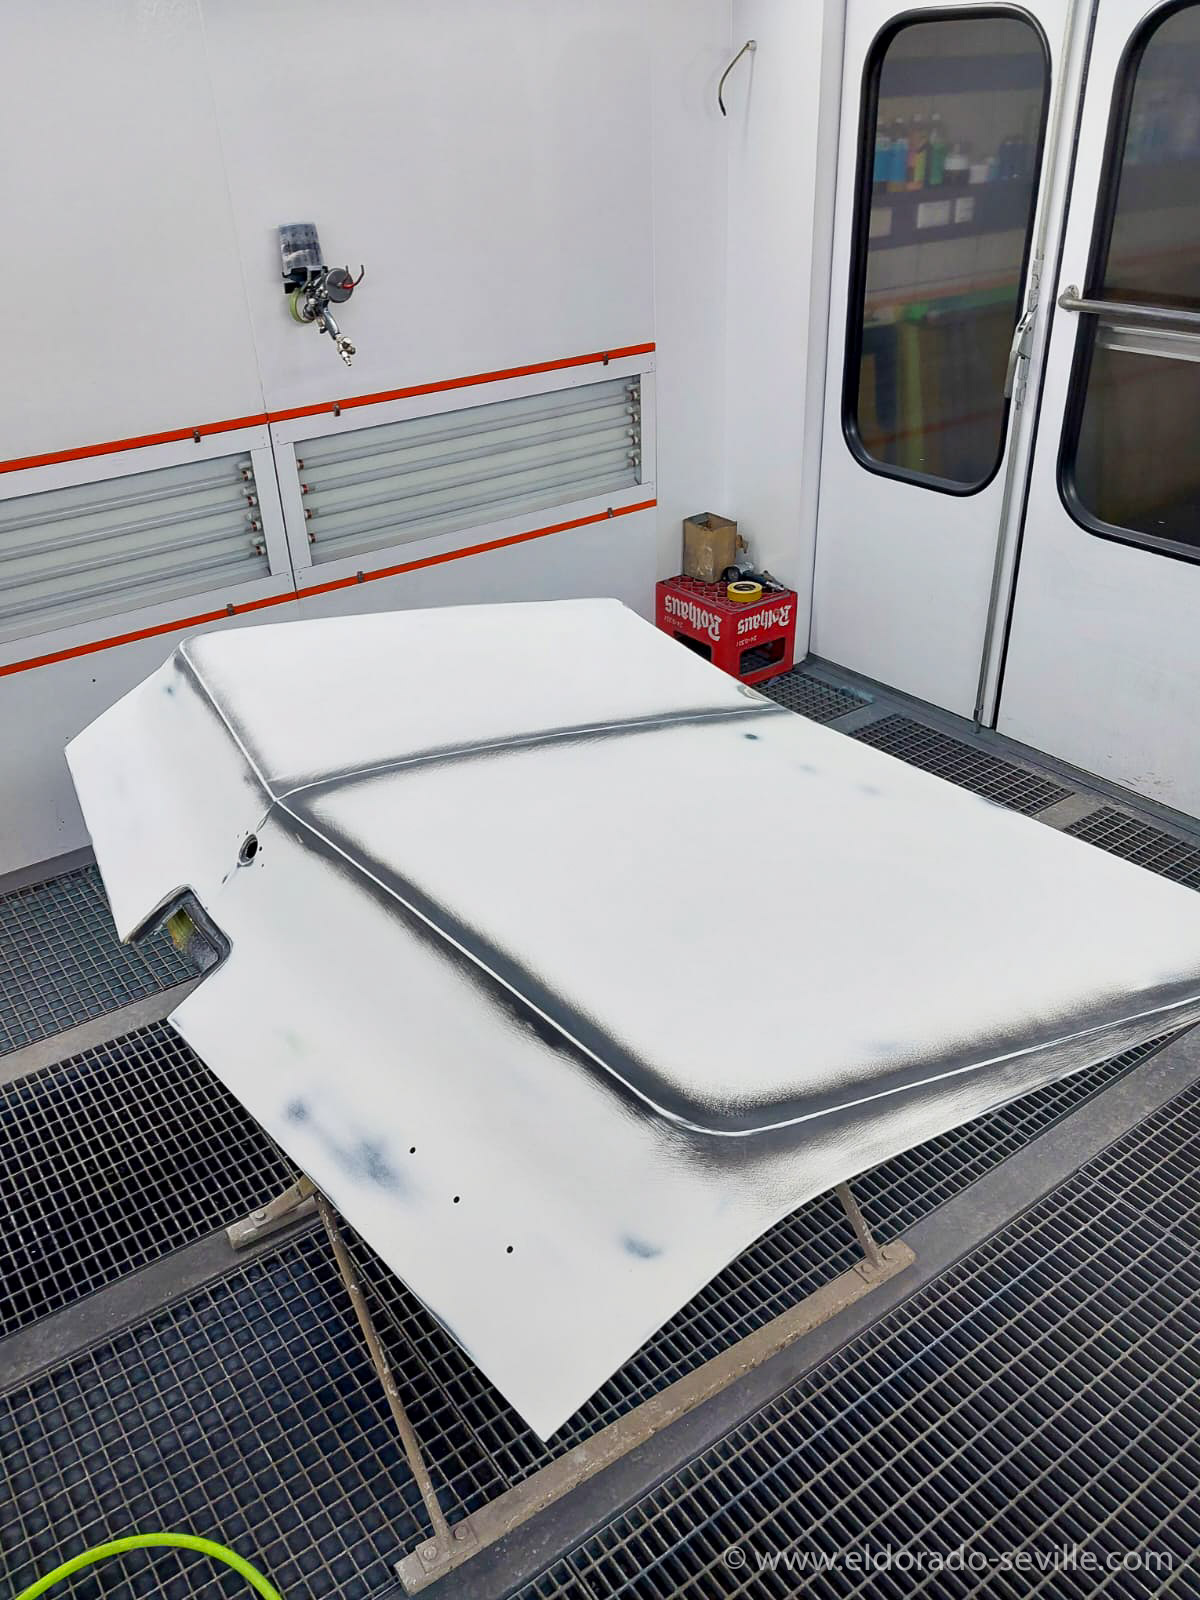
A TERRIBLE ACCIDENT WITH MY 67 ELDORADO
I now had to source a new trunk lid and found one in Arizona on Craigs List.
As we were planning to travel Route 66 this summer anyways I contacted the seller and we visited him in his warehouse in the middle of nowhere.
The lid looked great and rust free and it was advertised as a 68 lid which is completely identical to 67.
Getting it over to Europe was another challenge...
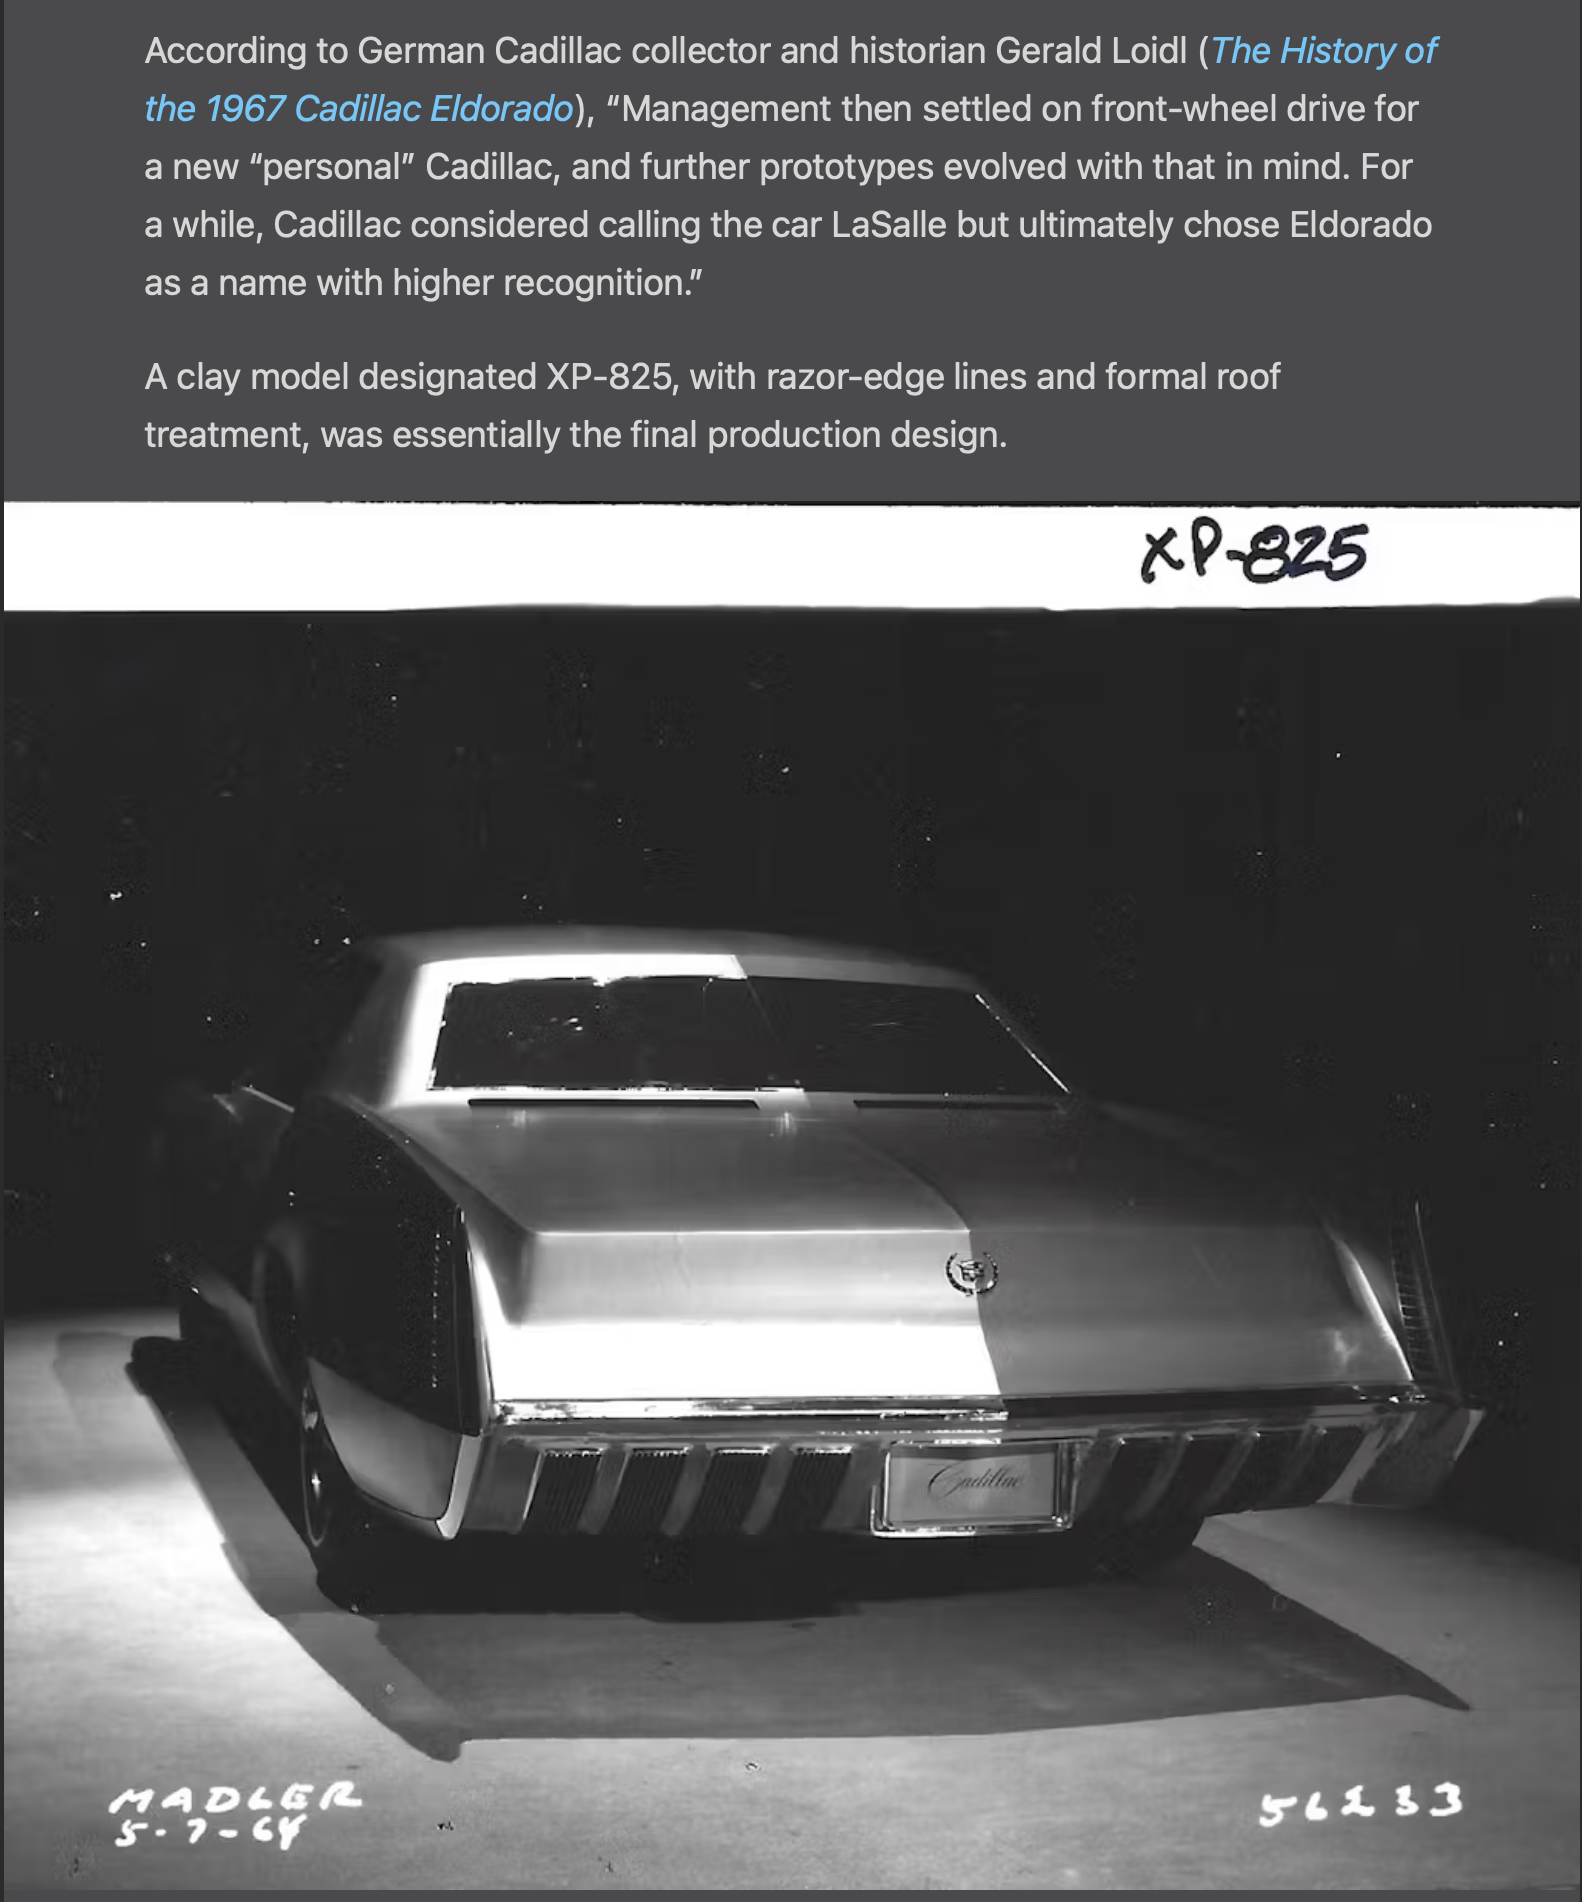
THE HISTORY OF THE 1967 CADILLAC ELDORADO
A Nod from Gary Witzenburg: My Contribution to Hagerty's 1967 Cadillac Eldorado Article
Recently, I had the honor of being contacted by renowned automobile journalist Gary Witzenburg. Gary was working on an article about the 1967 Cadillac Eldorado and, after discovering the research I’ve collected on its development here on my website, he reached out to see if he could reference some of that information for his piece on Hagerty's site.Gary crafted an incredibly informative and detailed article, which you can read [here]. I’m truly grateful for the mention, and I must admit, it’s a thrilling moment for me as an automotive enthusiast and amateur historian to have my work featured by such a respected platform.
Thanks for the shout-out, Gary! It feels like my own little "15 minutes of fame" in the world of classic cars.
MERRY EVERYTHING!
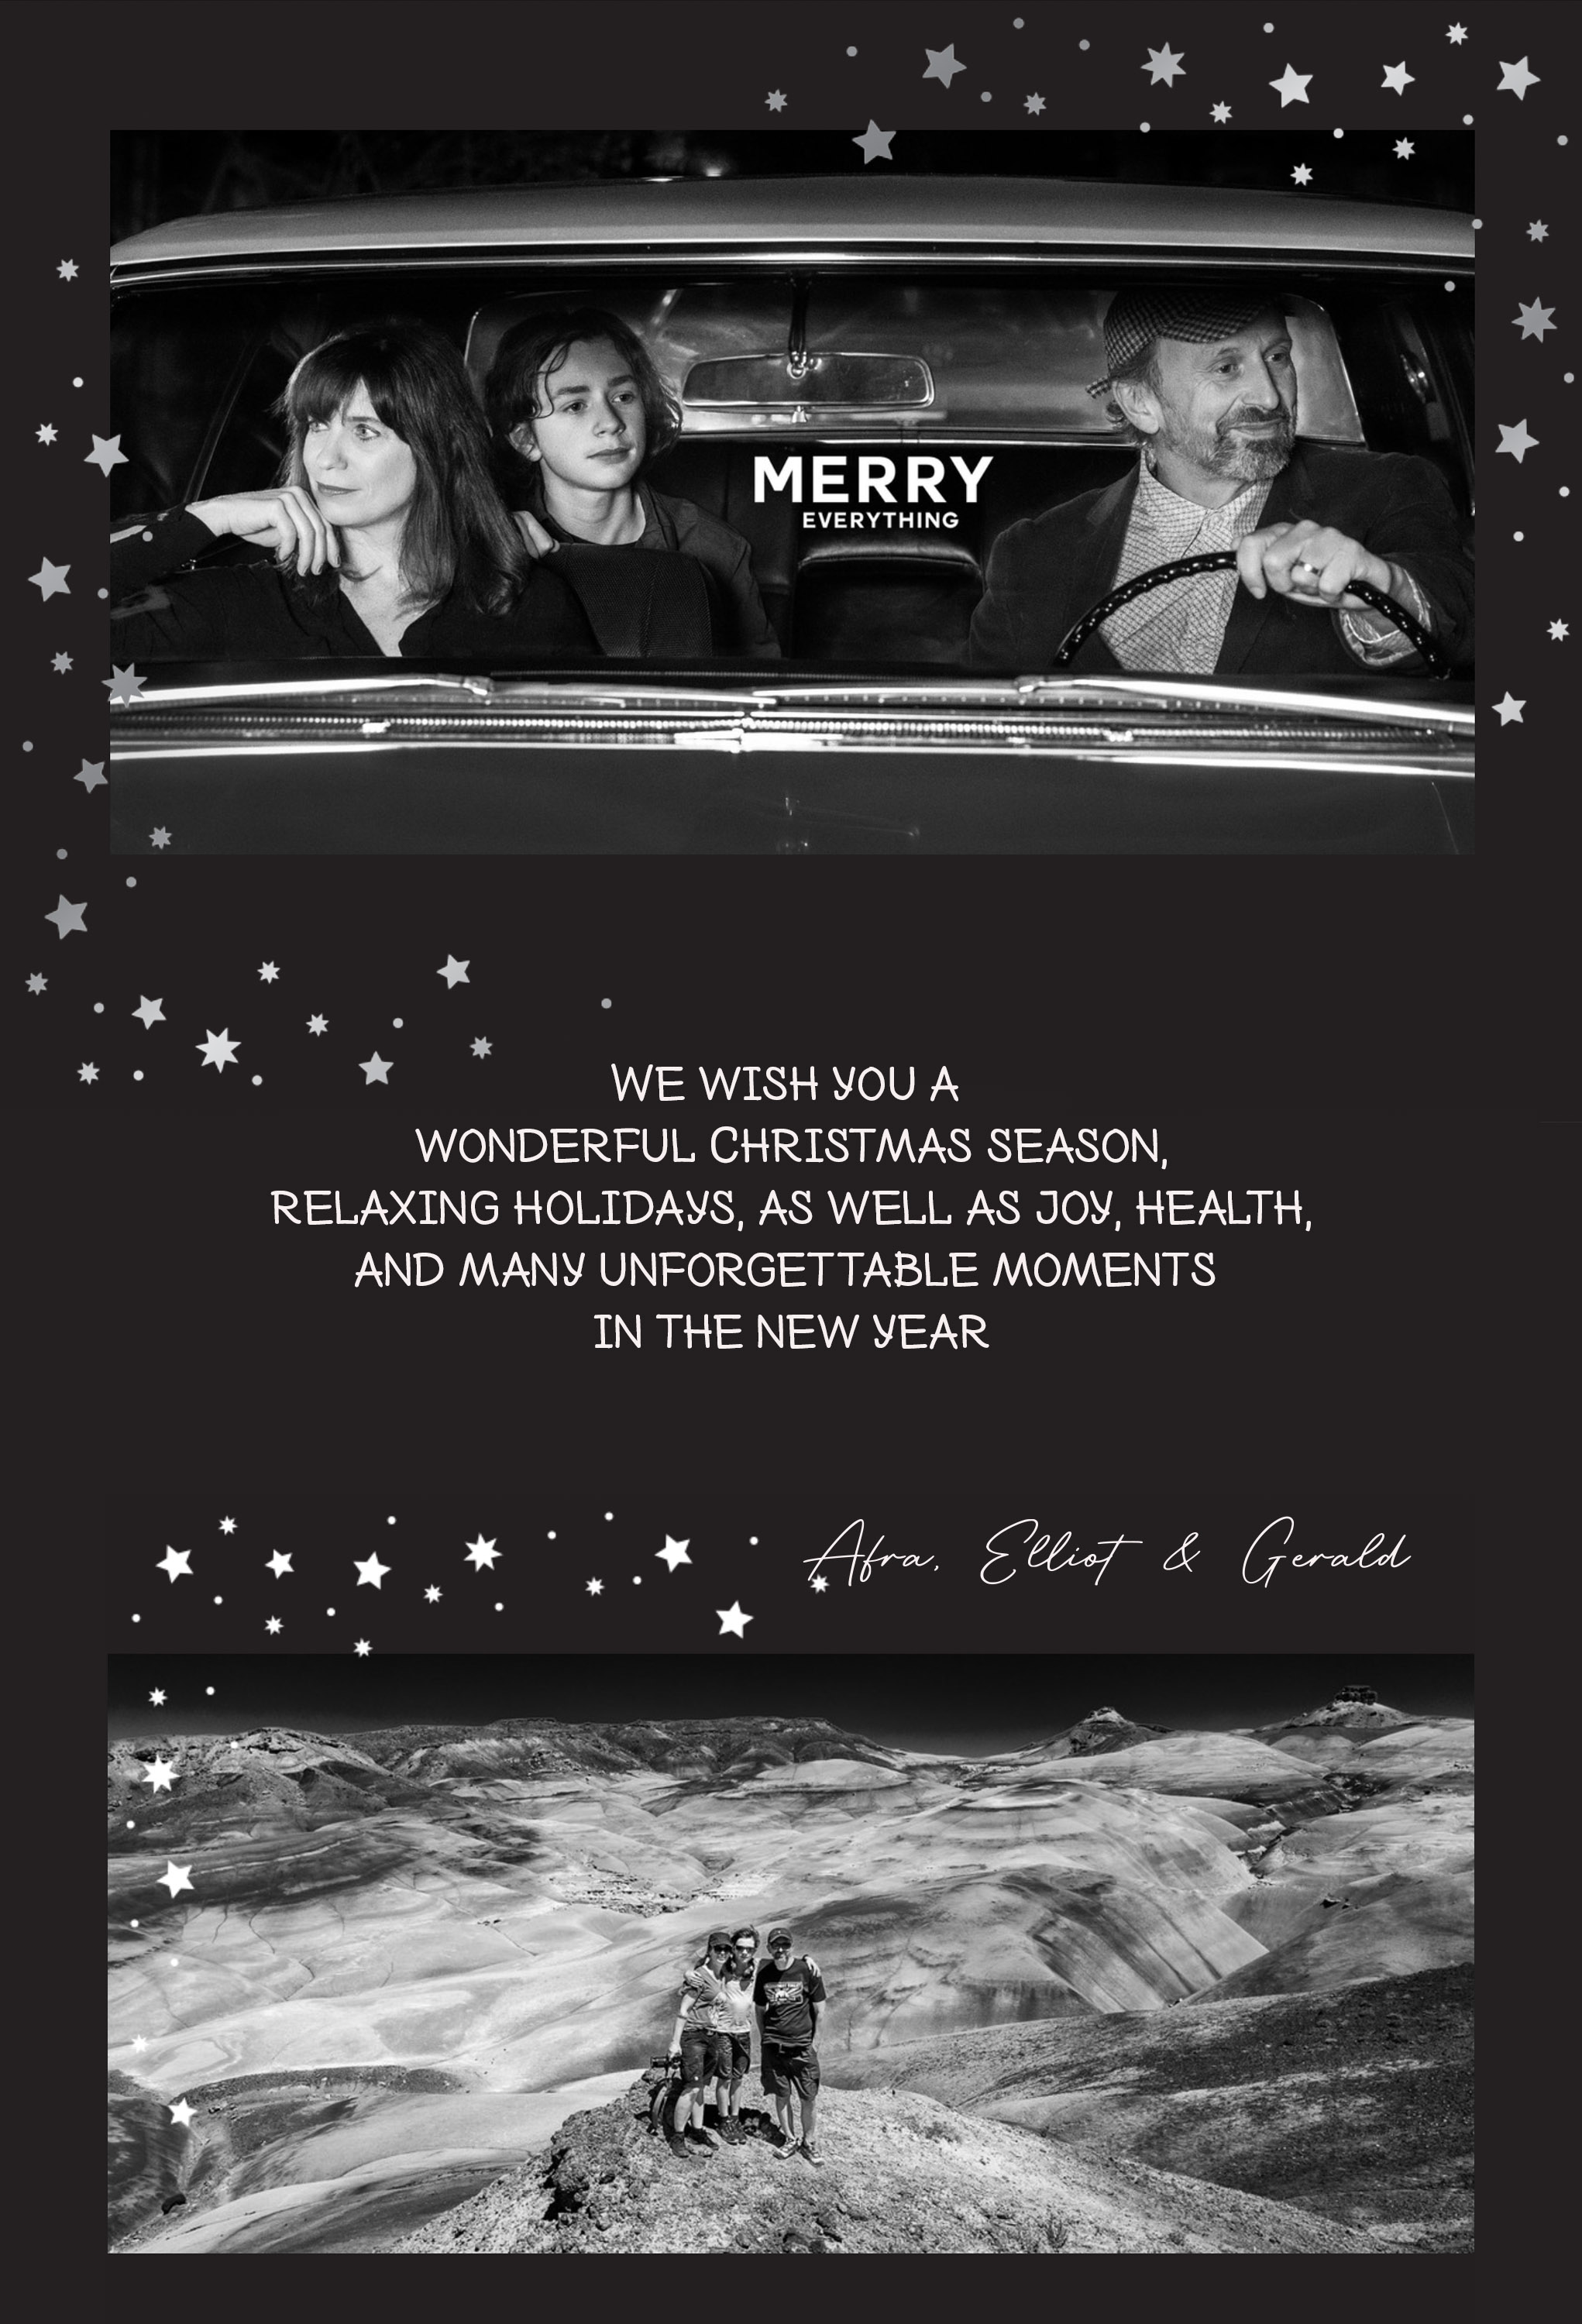
2024: A Quiet Year, Merry Everything From My 1966 Coupe deVille
As 2024 comes to a close, I realize I haven’t posted much here lately. To be honest, it’s been a quiet year on the car front. While I’ve kept up with some minor maintenance on my cars, there hasn’t been much news to share.That said, I did manage to capture one special moment this year: our holiday and Christmas card, which was shot in my 1966 Cadillac Coupe deVille. It was a beautiful day, and the Coupe deVille and my dear family looked stunning, as always.
However, 2024 was also marked by something unexpected and difficult: a car accident in June with my beloved 1967 Eldorado where the trunk lid was destroyed beyond being repairable.
It completely shocked me and put a stop to most of my car-related activities. I was unable to talk about it publicly, only sharing the news with a few close friends.
I’m in the process of restoring it to its former glory, and once it's finished, I’ll share a full report here.
It’s been a challenging journey, but I’m hopeful it will soon be back on the road, looking as magnificent as it ever did.
Here’s to hoping that 2025 will be a better year for my Cadillacs, and for all of us who cherish these beautiful machines.
Looking ahead, there’s some exciting news on the horizon: two major Cadillac events are coming to Europe in August 2025! The Cadillac BIG Meet and the Cadillac LaSalle Club Grand European are both on the calendar, and I’m already looking forward to them.
It will be great to reconnect with fellow enthusiasts and celebrate these amazing cars.
Thank you to all of you who’ve followed along this year. I’ll be back with more updates soon — and hopefully with some exciting new progress on the Eldorado!
Here’s to a fantastic 2025, filled with Cadillacs, good times, and new memories.
CADILLAC BIG MEET 2023 - THE MOVIE
The Cadillac BIG Meet: Europe’s Biggest Cadillac Gathering – And I’m Part of the Team!
I’m excited to share an update on one of the highlights of my automotive year – the Cadillac BIG Meet. For those who don’t know, it’s Europe’s most important gathering of Cadillac enthusiasts, and it’s an event that takes place every second year. This year was particularly special, and I’m proud to say that I’m part of the organization team!One of my many roles within the team involves working on the website, handling photography and videography, and promoting the event. It’s a "job" I truly love, not just because I’m passionate about Cadillacs but also because I get to work alongside such a fantastic group of friends and fellow enthusiasts. The camaraderie we share makes organizing this event even more enjoyable.
A Hot Weekend and 101 Cadillacs!
This year, the weather couldn’t have been better – though, admittedly, it was very hot, with temperatures soaring during the weekend. But that didn’t stop 101 Cadillacs from rolling in, making for an incredible turnout. Seeing all those beautiful cars parked together was truly a sight to behold.
For my wife and I, it was a chance to bring out not one, but two of our Cadillacs! We drove the 1967 Eldorado and the 1978 Biarritz to the event, and they both performed wonderfully, turning heads as always. I love having the opportunity to show off these classic beauties and connect with so many other passionate owners.
A TV Report and the Official Aftermovie!
During the three days of the event, we also shot a TV report and produced the official aftermovie for the meet. It was a fantastic experience, capturing not only the cars but the atmosphere, the people, and the overall energy of the event. We are sure you will enjoy the film!
You can watch the official aftermovie below – and I highly recommend viewing it on a large screen in 4K resolution for the best experience. Trust me, the footage really shines in high definition, and you won’t want to miss a single detail of the amazing cars and the vibrant spirit of the Cadillac BIG Meet.
The official aftermovie
We also did a TV report for an Austrian TV-Channel.
A Truly Unforgettable Event
The Cadillac BIG Meet continues to be one of the most rewarding events I’ve been a part of. The passion, the cars, and the community of Cadillac owners are something truly special, and I’m already looking forward to the next one in 2025!
If you’ve never attended, I highly encourage you to mark your calendar for the next edition. It’s an event like no other, and I promise you won’t regret it.
Thank you to everyone who attended this year – it was an unforgettable weekend, and I can’t wait to do it all over again!
1967 ELDORADO BROKEN POWER WINDOW CABLE
Details coming soon!
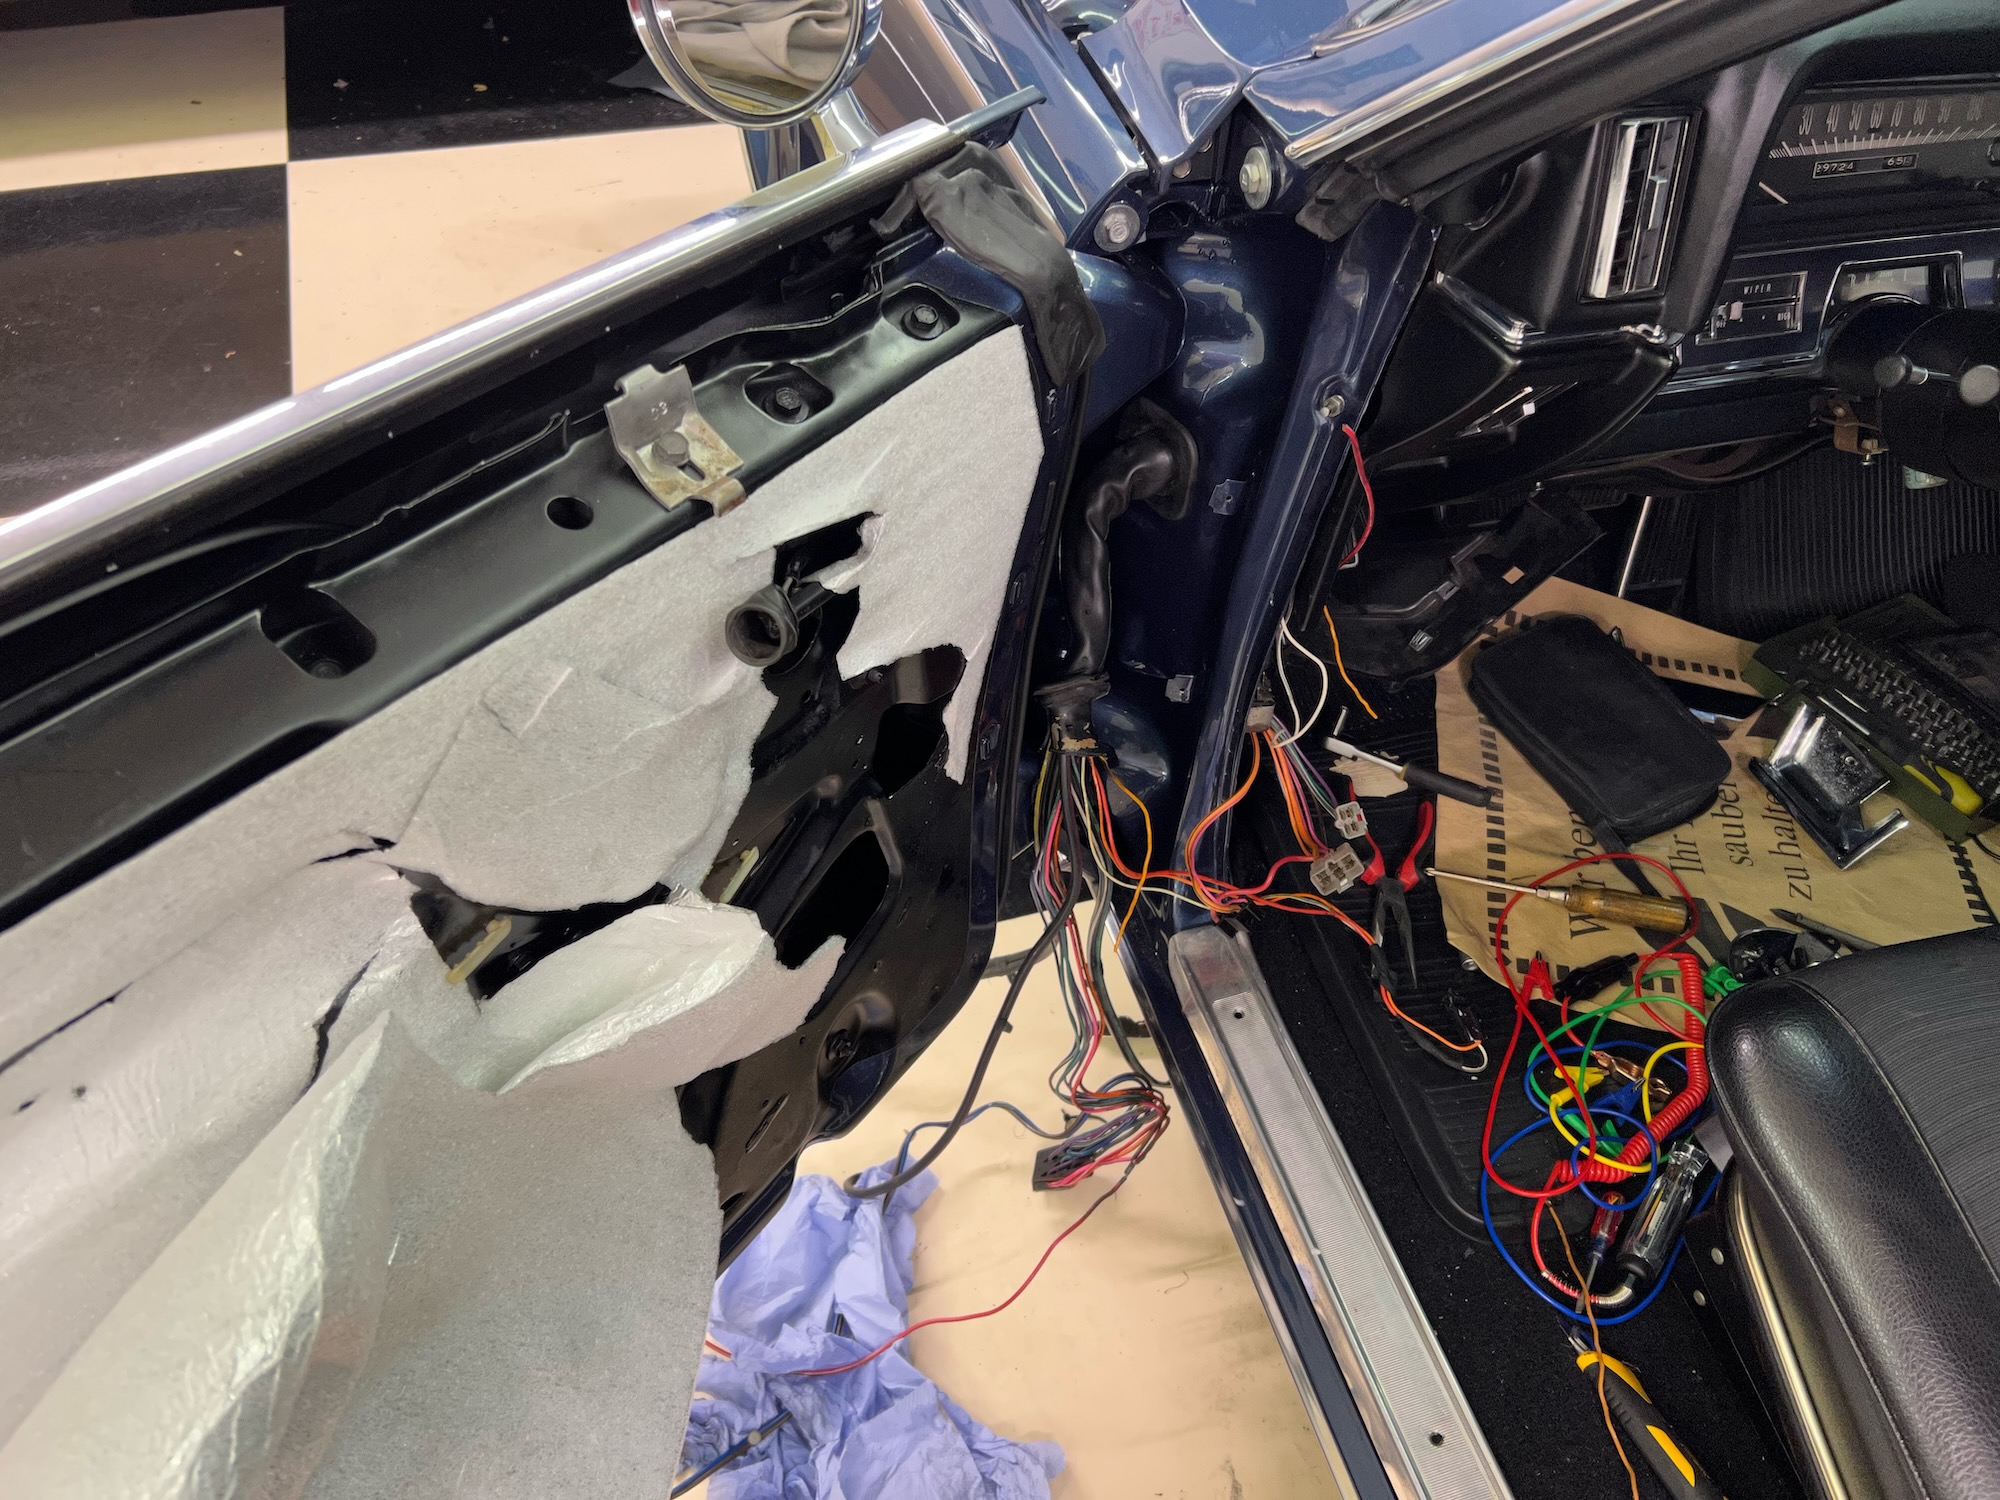
SPRING CLEANING THE 1967 ELDORADO
Unfortunately its very rainy and I can't test drive it.
Here is a short video.
1967 ELDORADO CARBURETOR REPLACEMENT
The Eldorado now purrs like a kitten again with its new Quadrajet. I now have two more carburetors to do - the 1966 has a stuck choke and the 1978 needs a new accelerator pump.... The video is also available on YouTube in 4K HDR quality...
I took a short video of the installation process.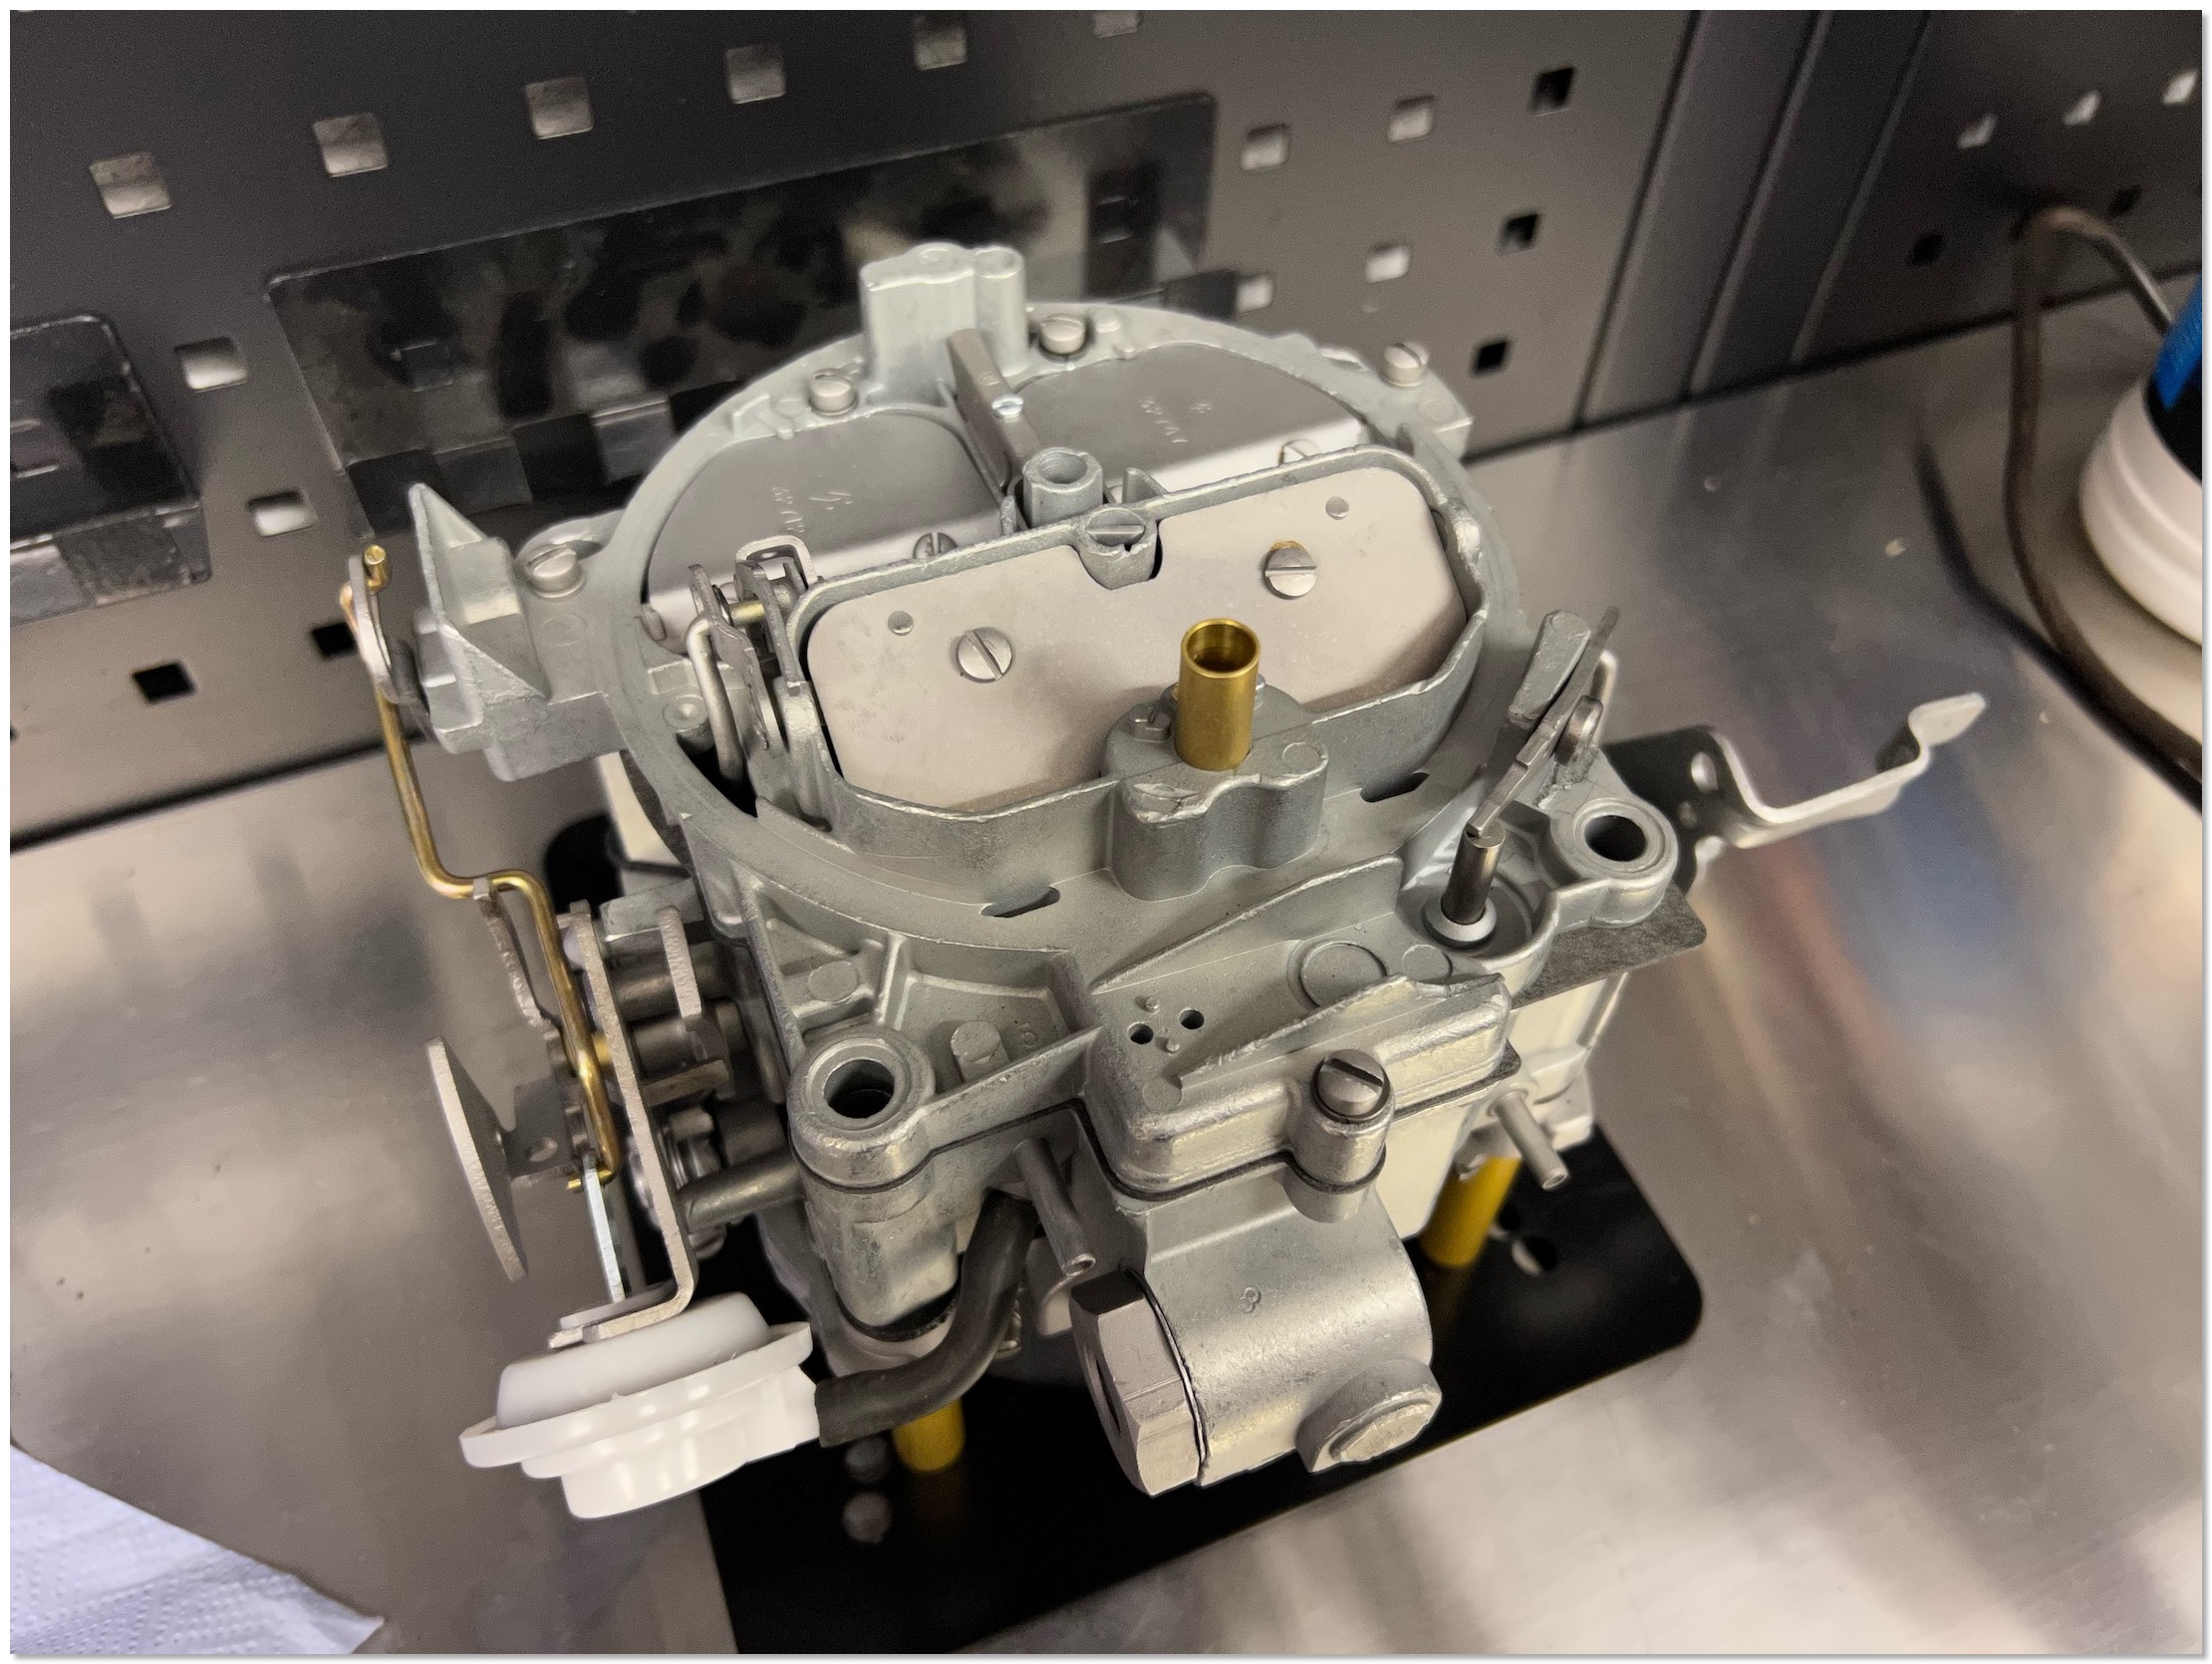
The rebuilt Quadrajet on the bench.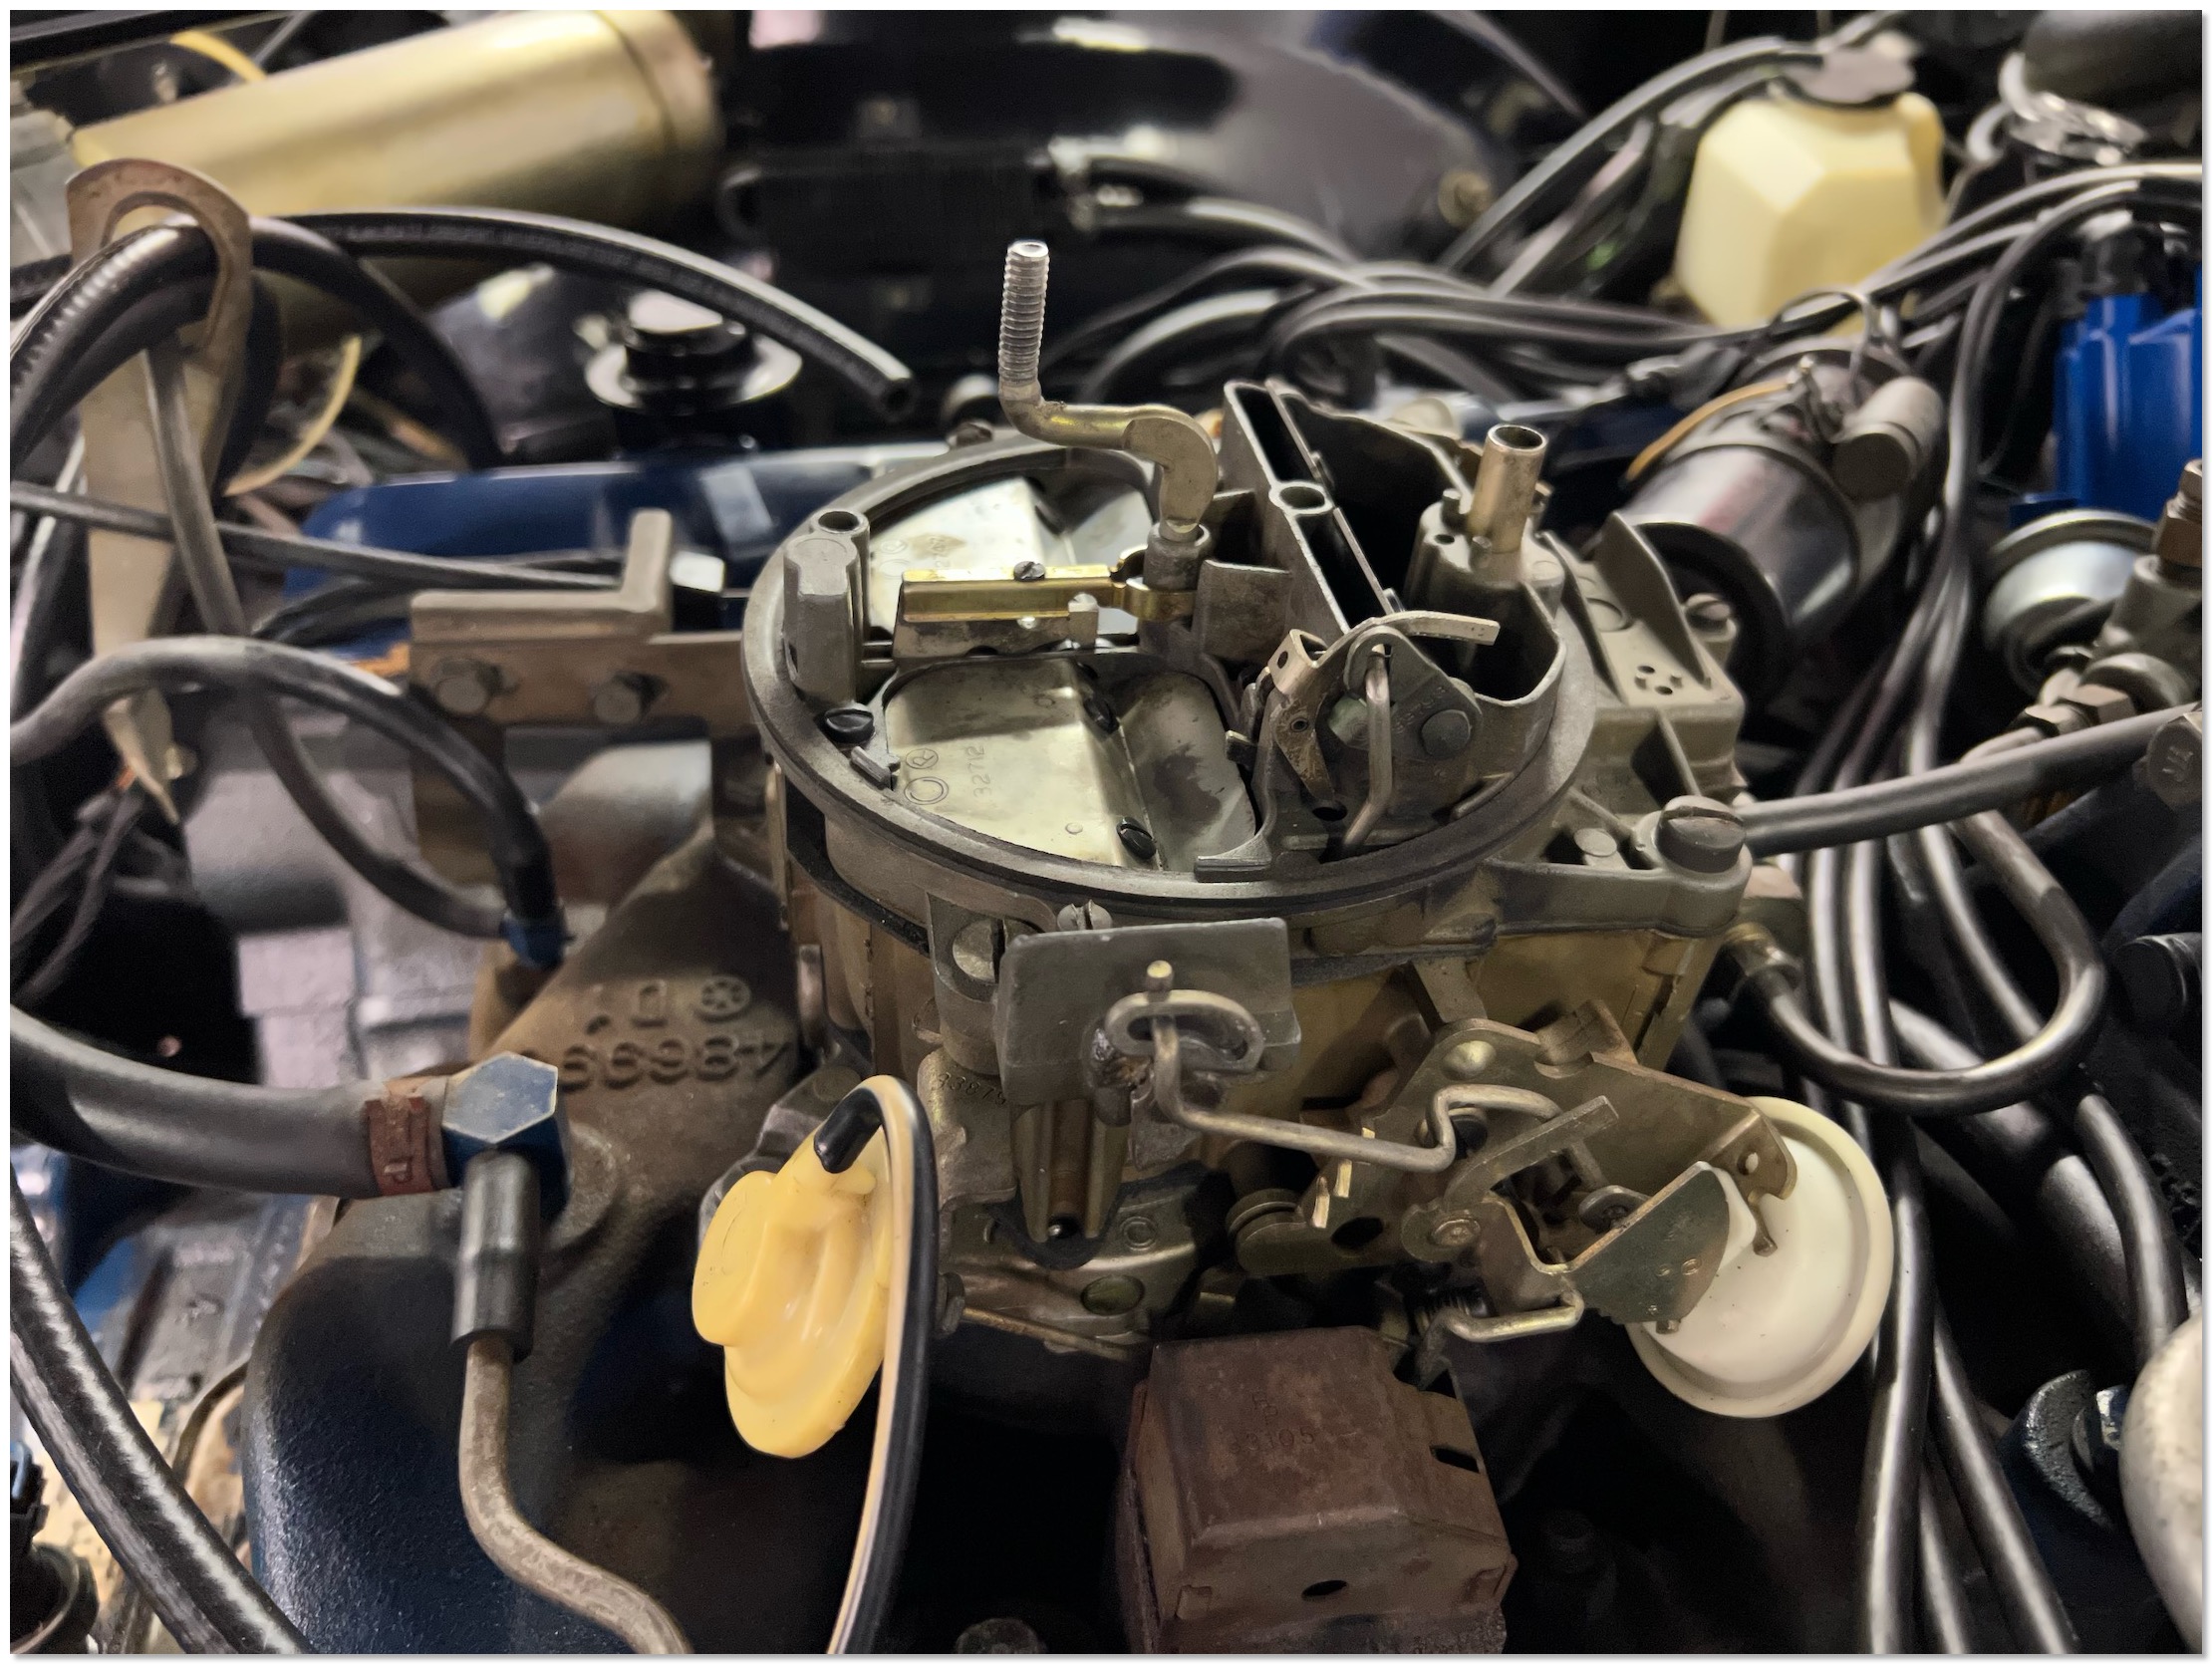
The old original 1967 Eldorado Quadrajet - this is the non California version.
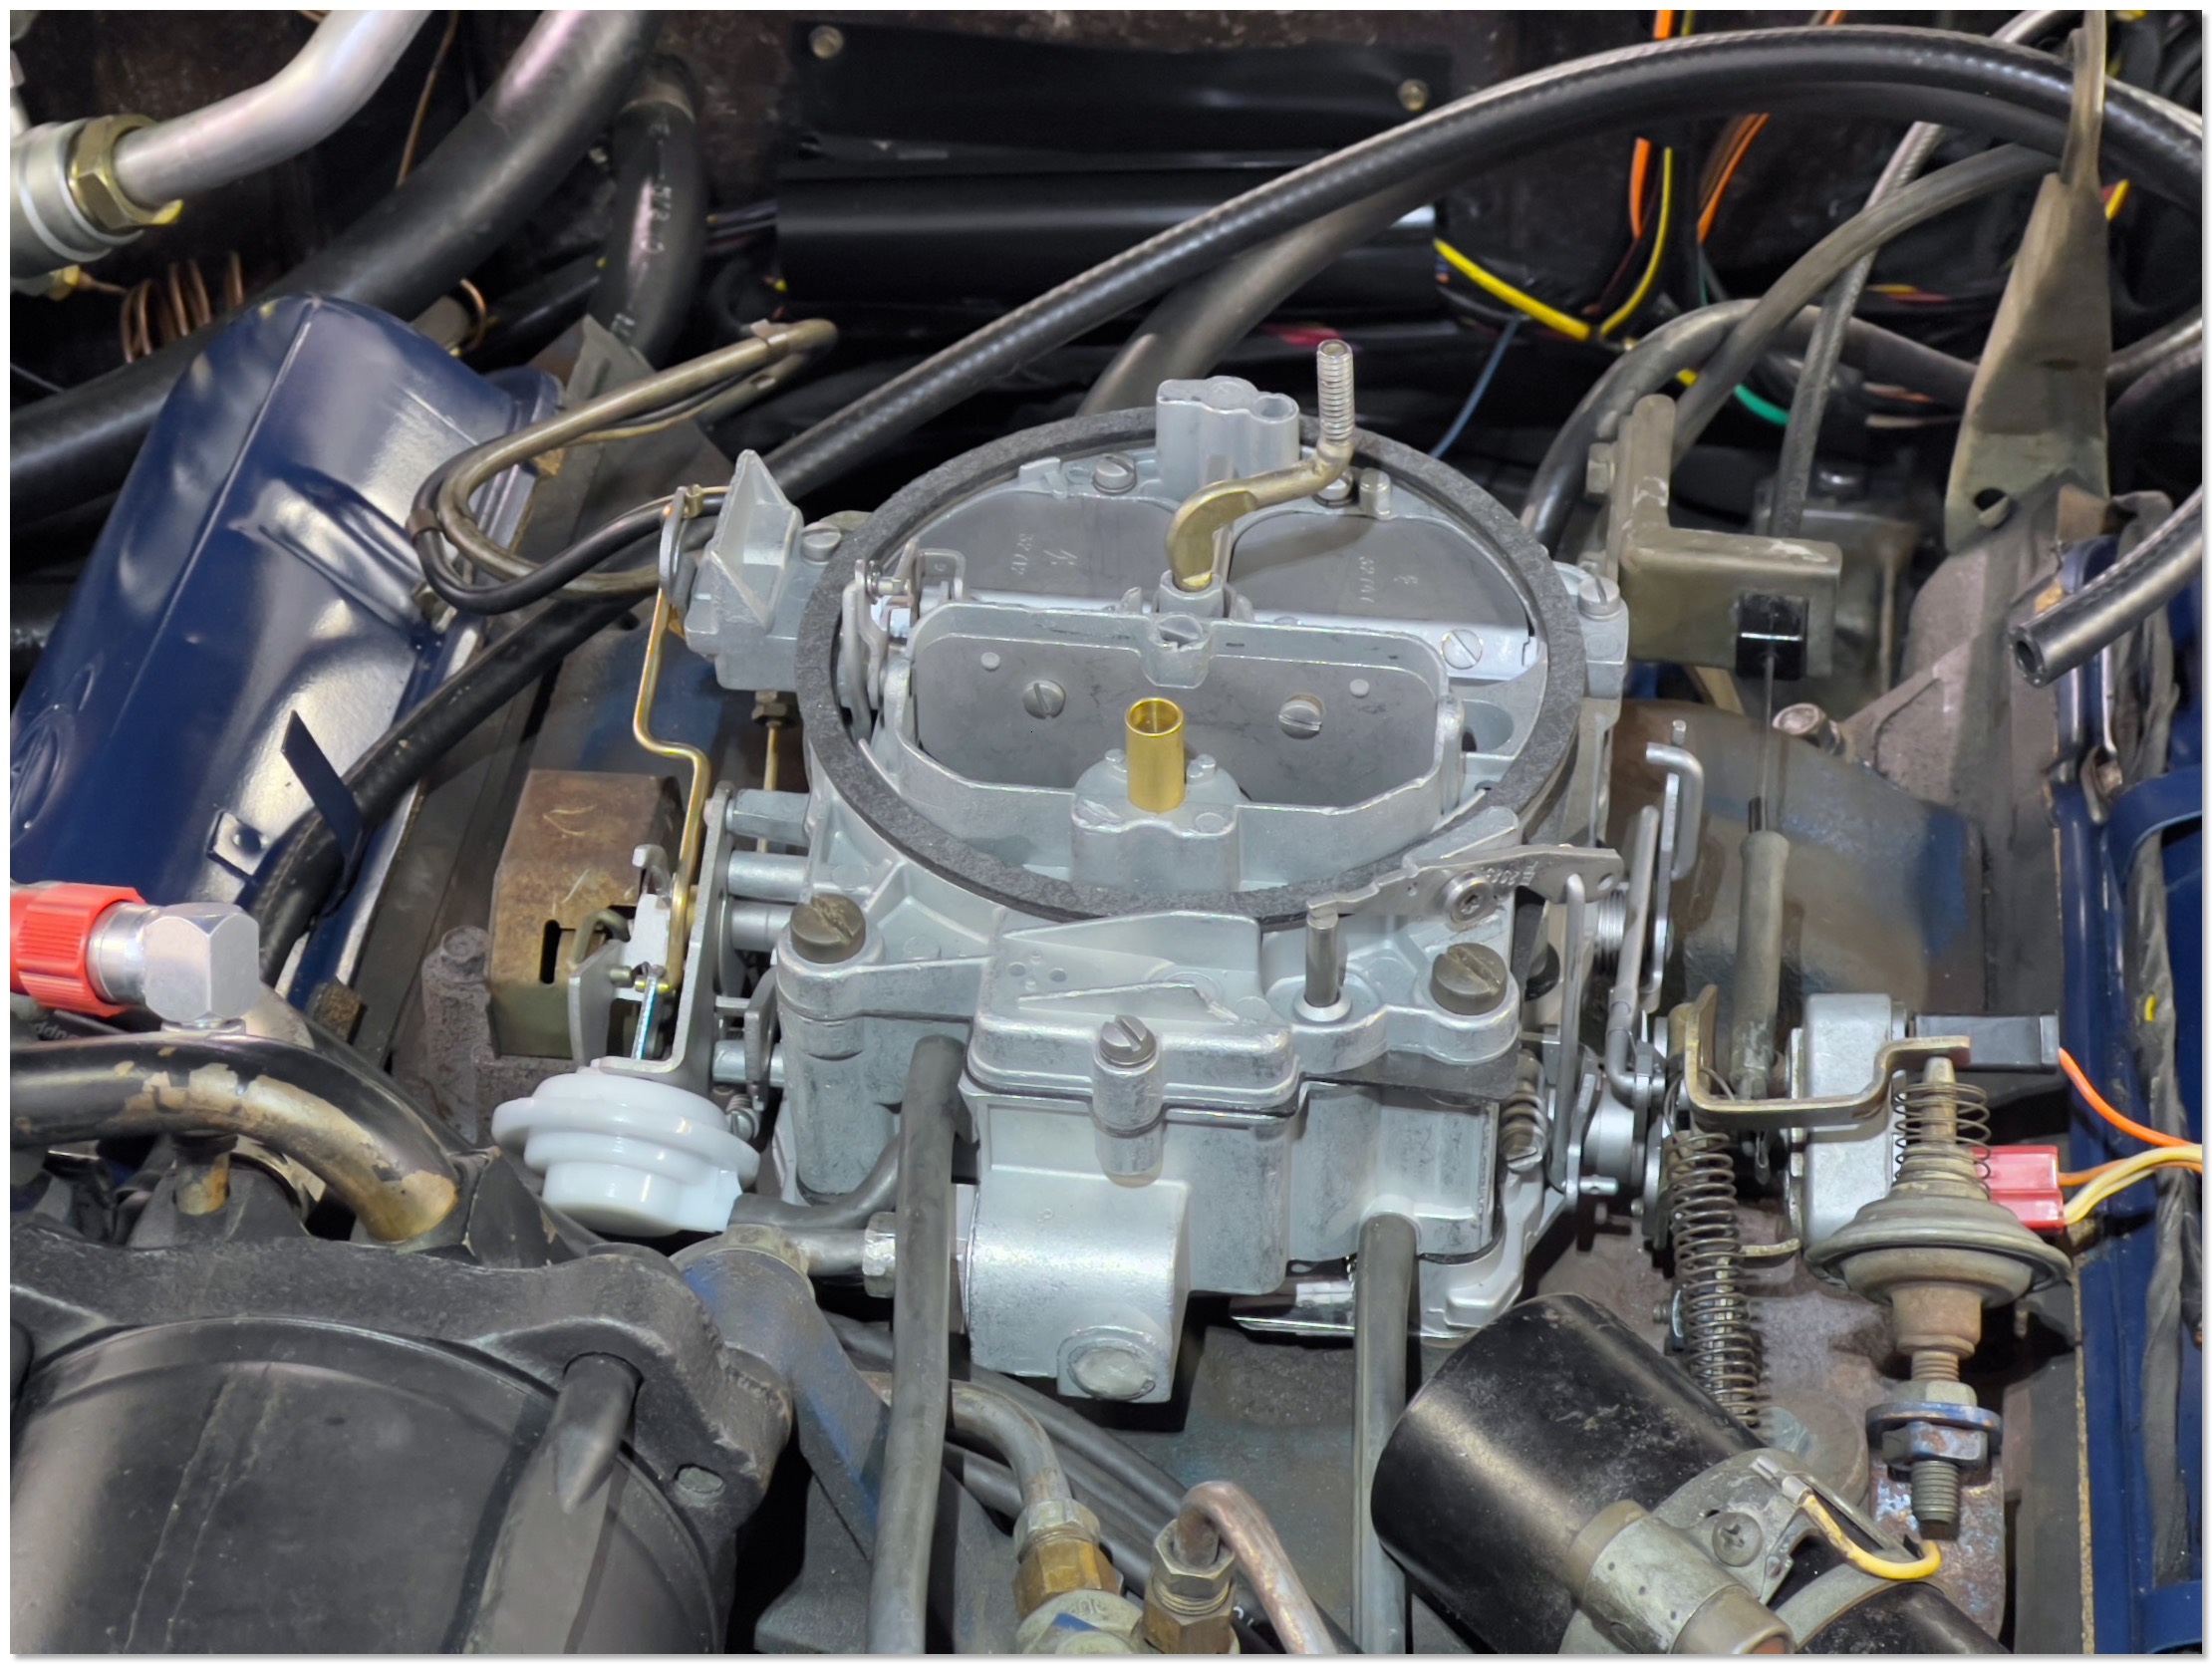
The rebuilt Quadrajet installed.
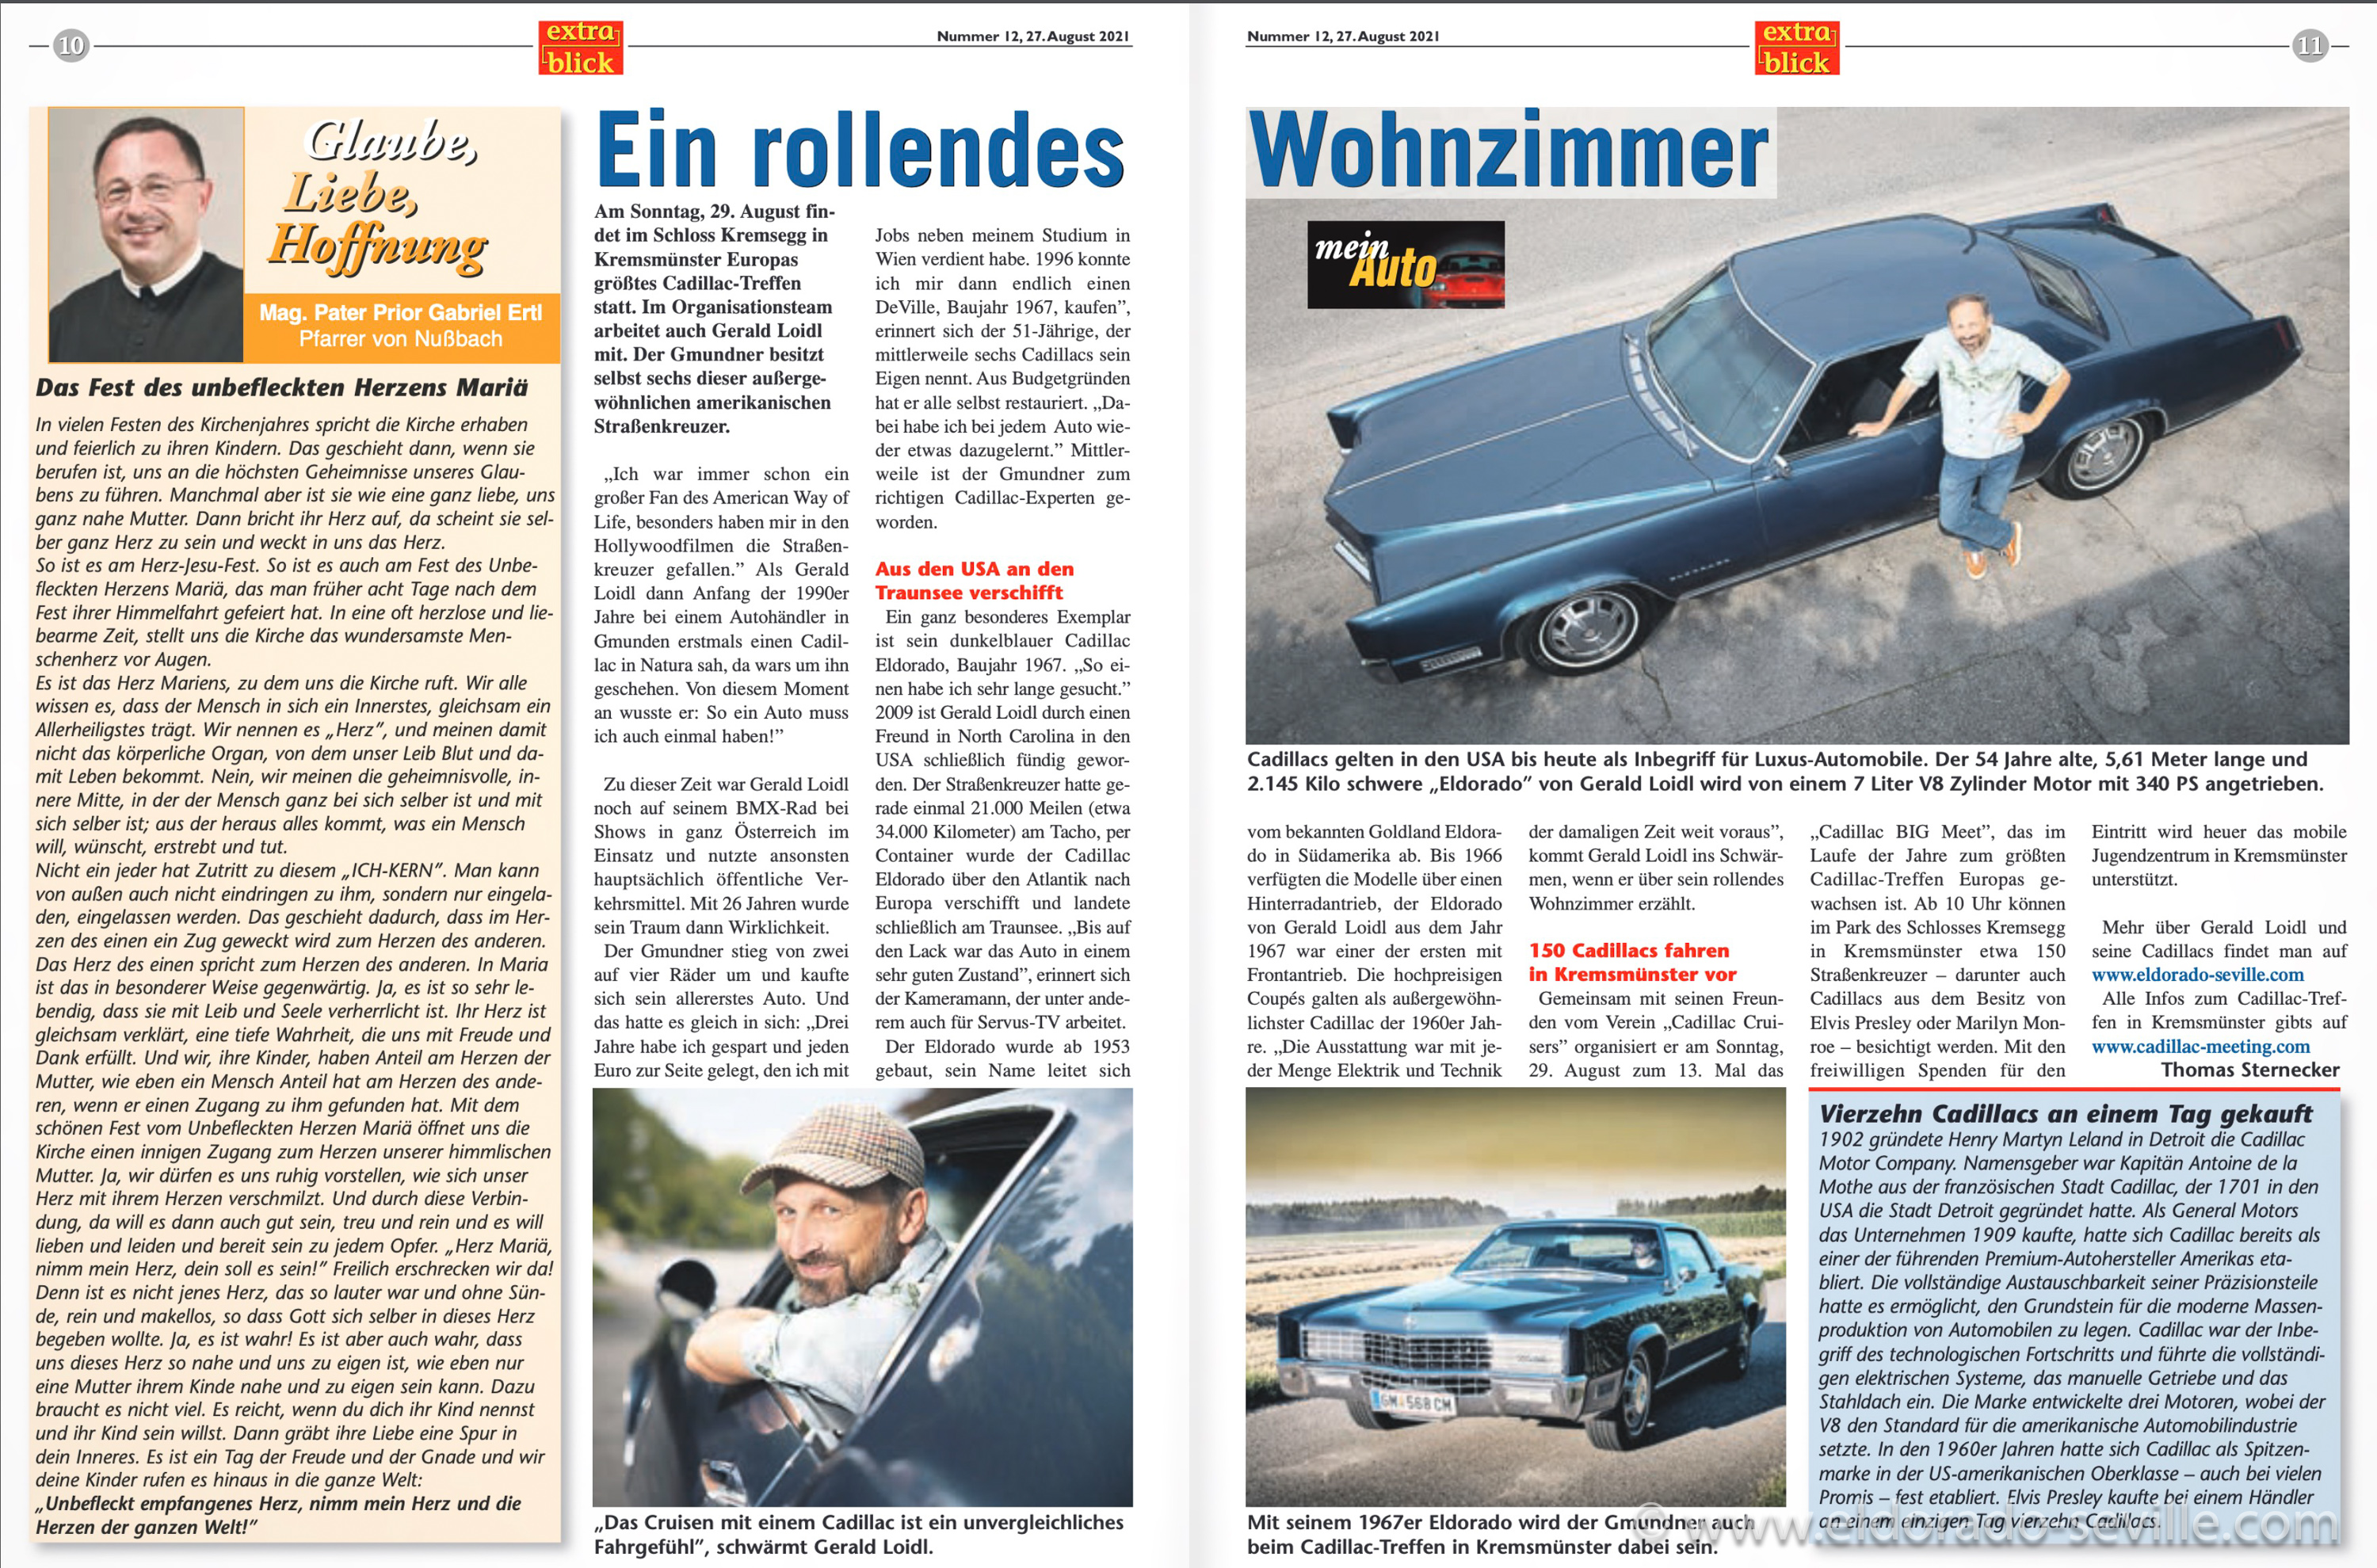
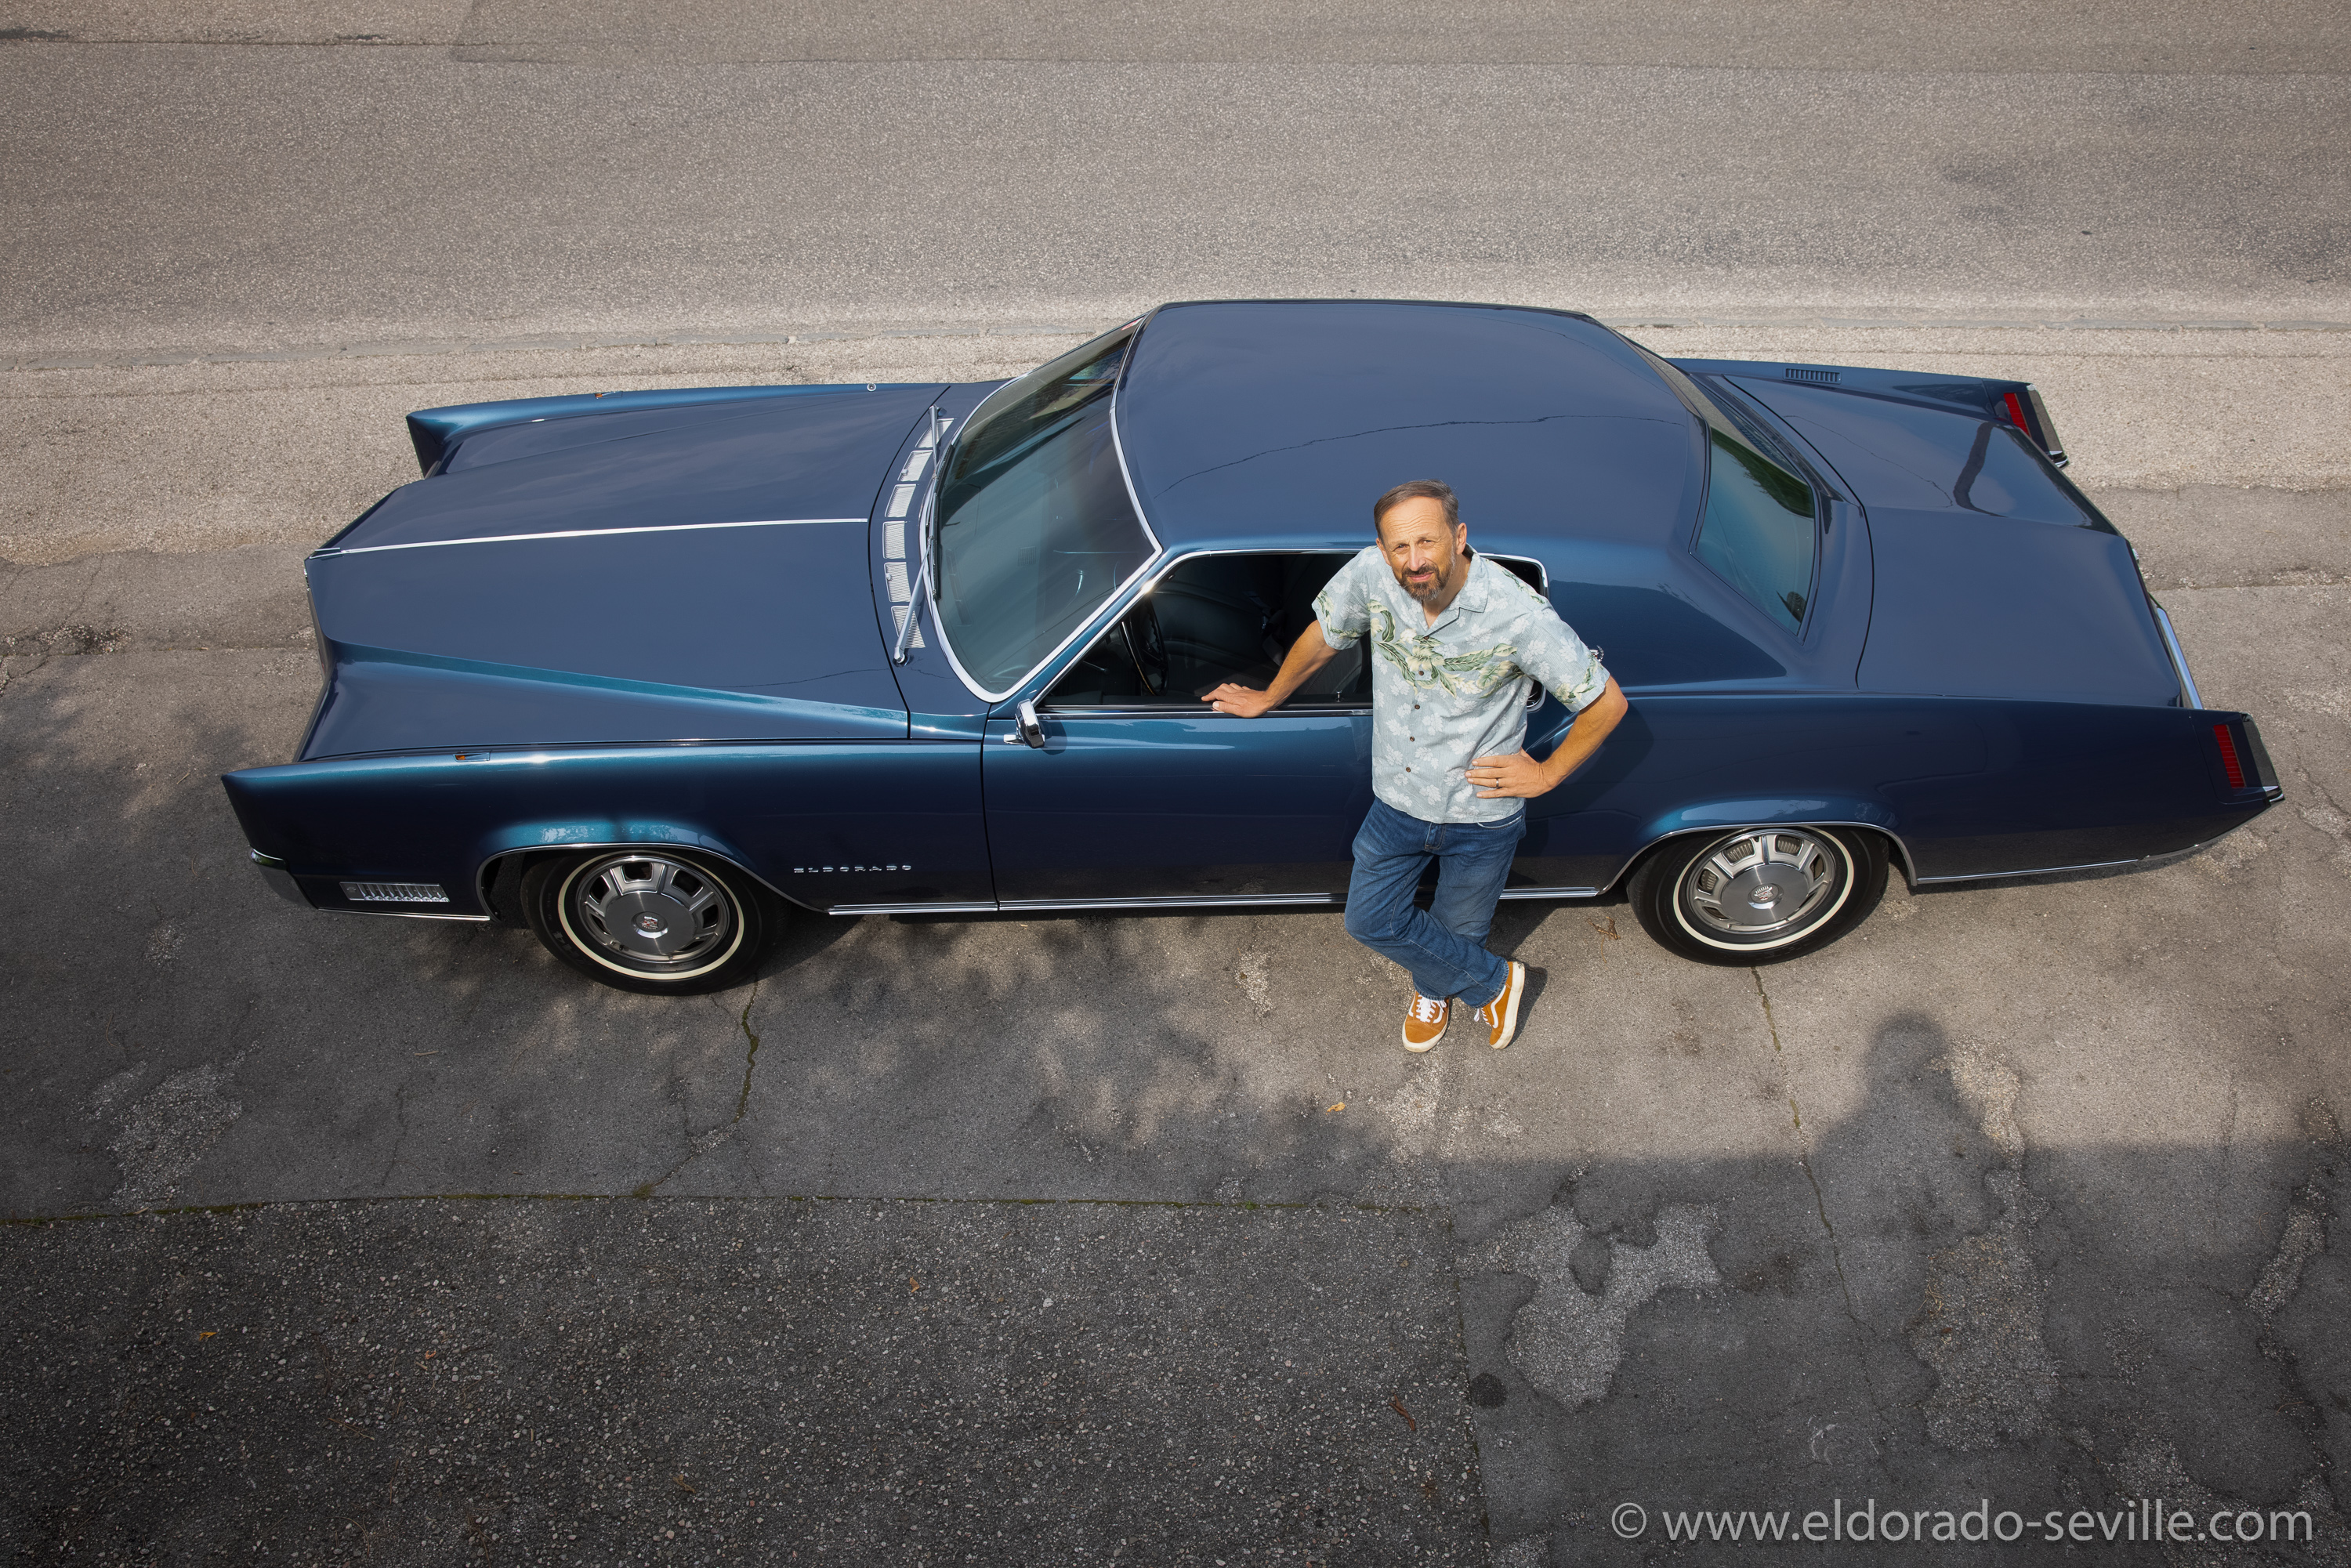
ARTICLE ABOUT MY 67 ELDO IN THE NEWSPAPER
The article was published today and came out really nicely. My dear wife shot all the pictures for the paper during a quick photo shooting.
WINTER PROJECTS FOR 2019/2020
1978 Cadillac Eldorado Biarritz:
- Rebuild the Quadrajet carburetor as the car has some hesitation when accelerating from standstill. Probably the acceleration pump has a problem.
- Check EGR valve.
- The water pump is slightly squeaking (maybe I will have to replace it)
- The AC controller under dash is sometimes making a ticking noise. Looks like a bad contact somewhere causing the setting motor to rattle.
- AIR pump is making a light noise - a well known problem with these old pumps.
- Rebuild AC compressor as it blew its main front gasket a while ago.
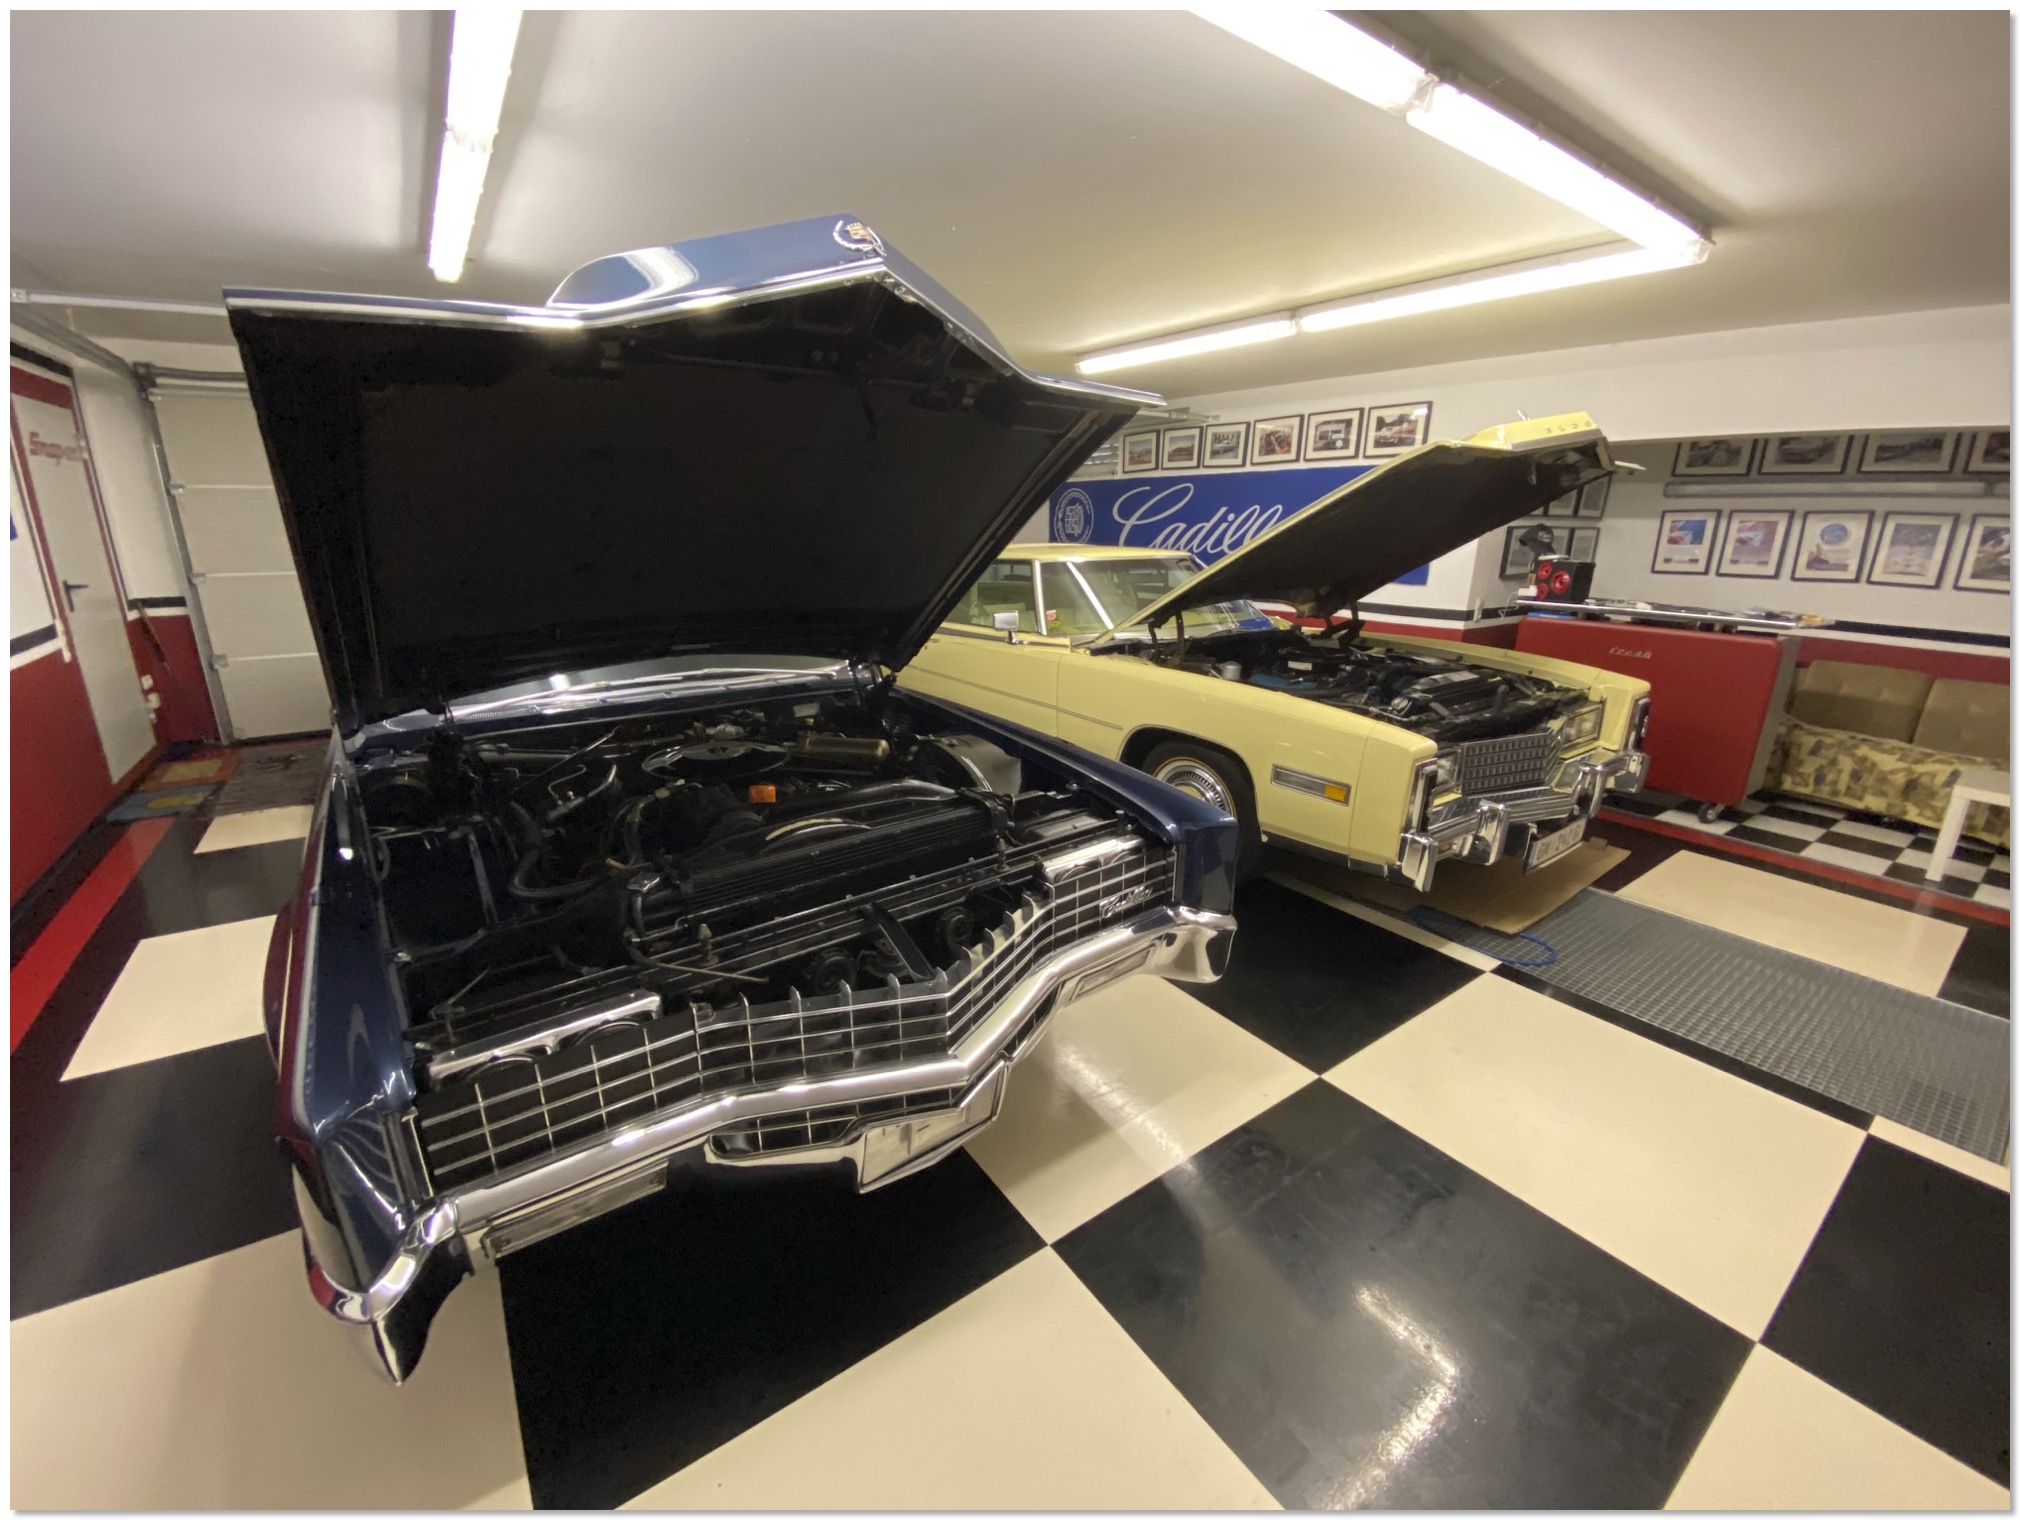
The cars waiting inside the garage for spring to come…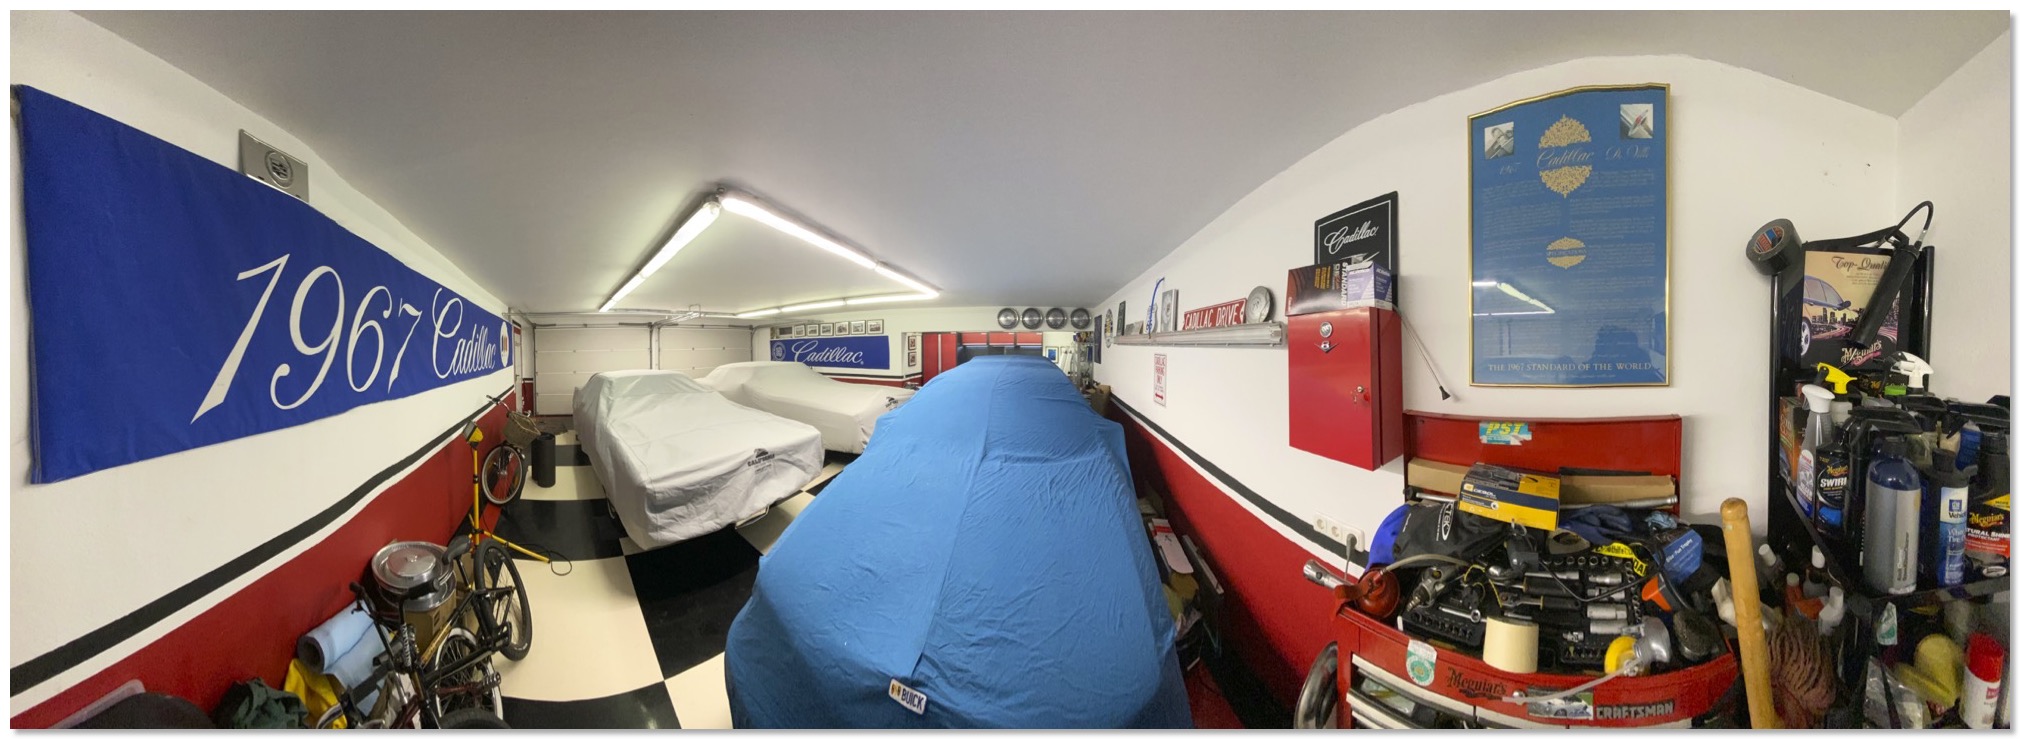
Inside my home garage where I do all the work. First project will be to re-organize my garage and tools.
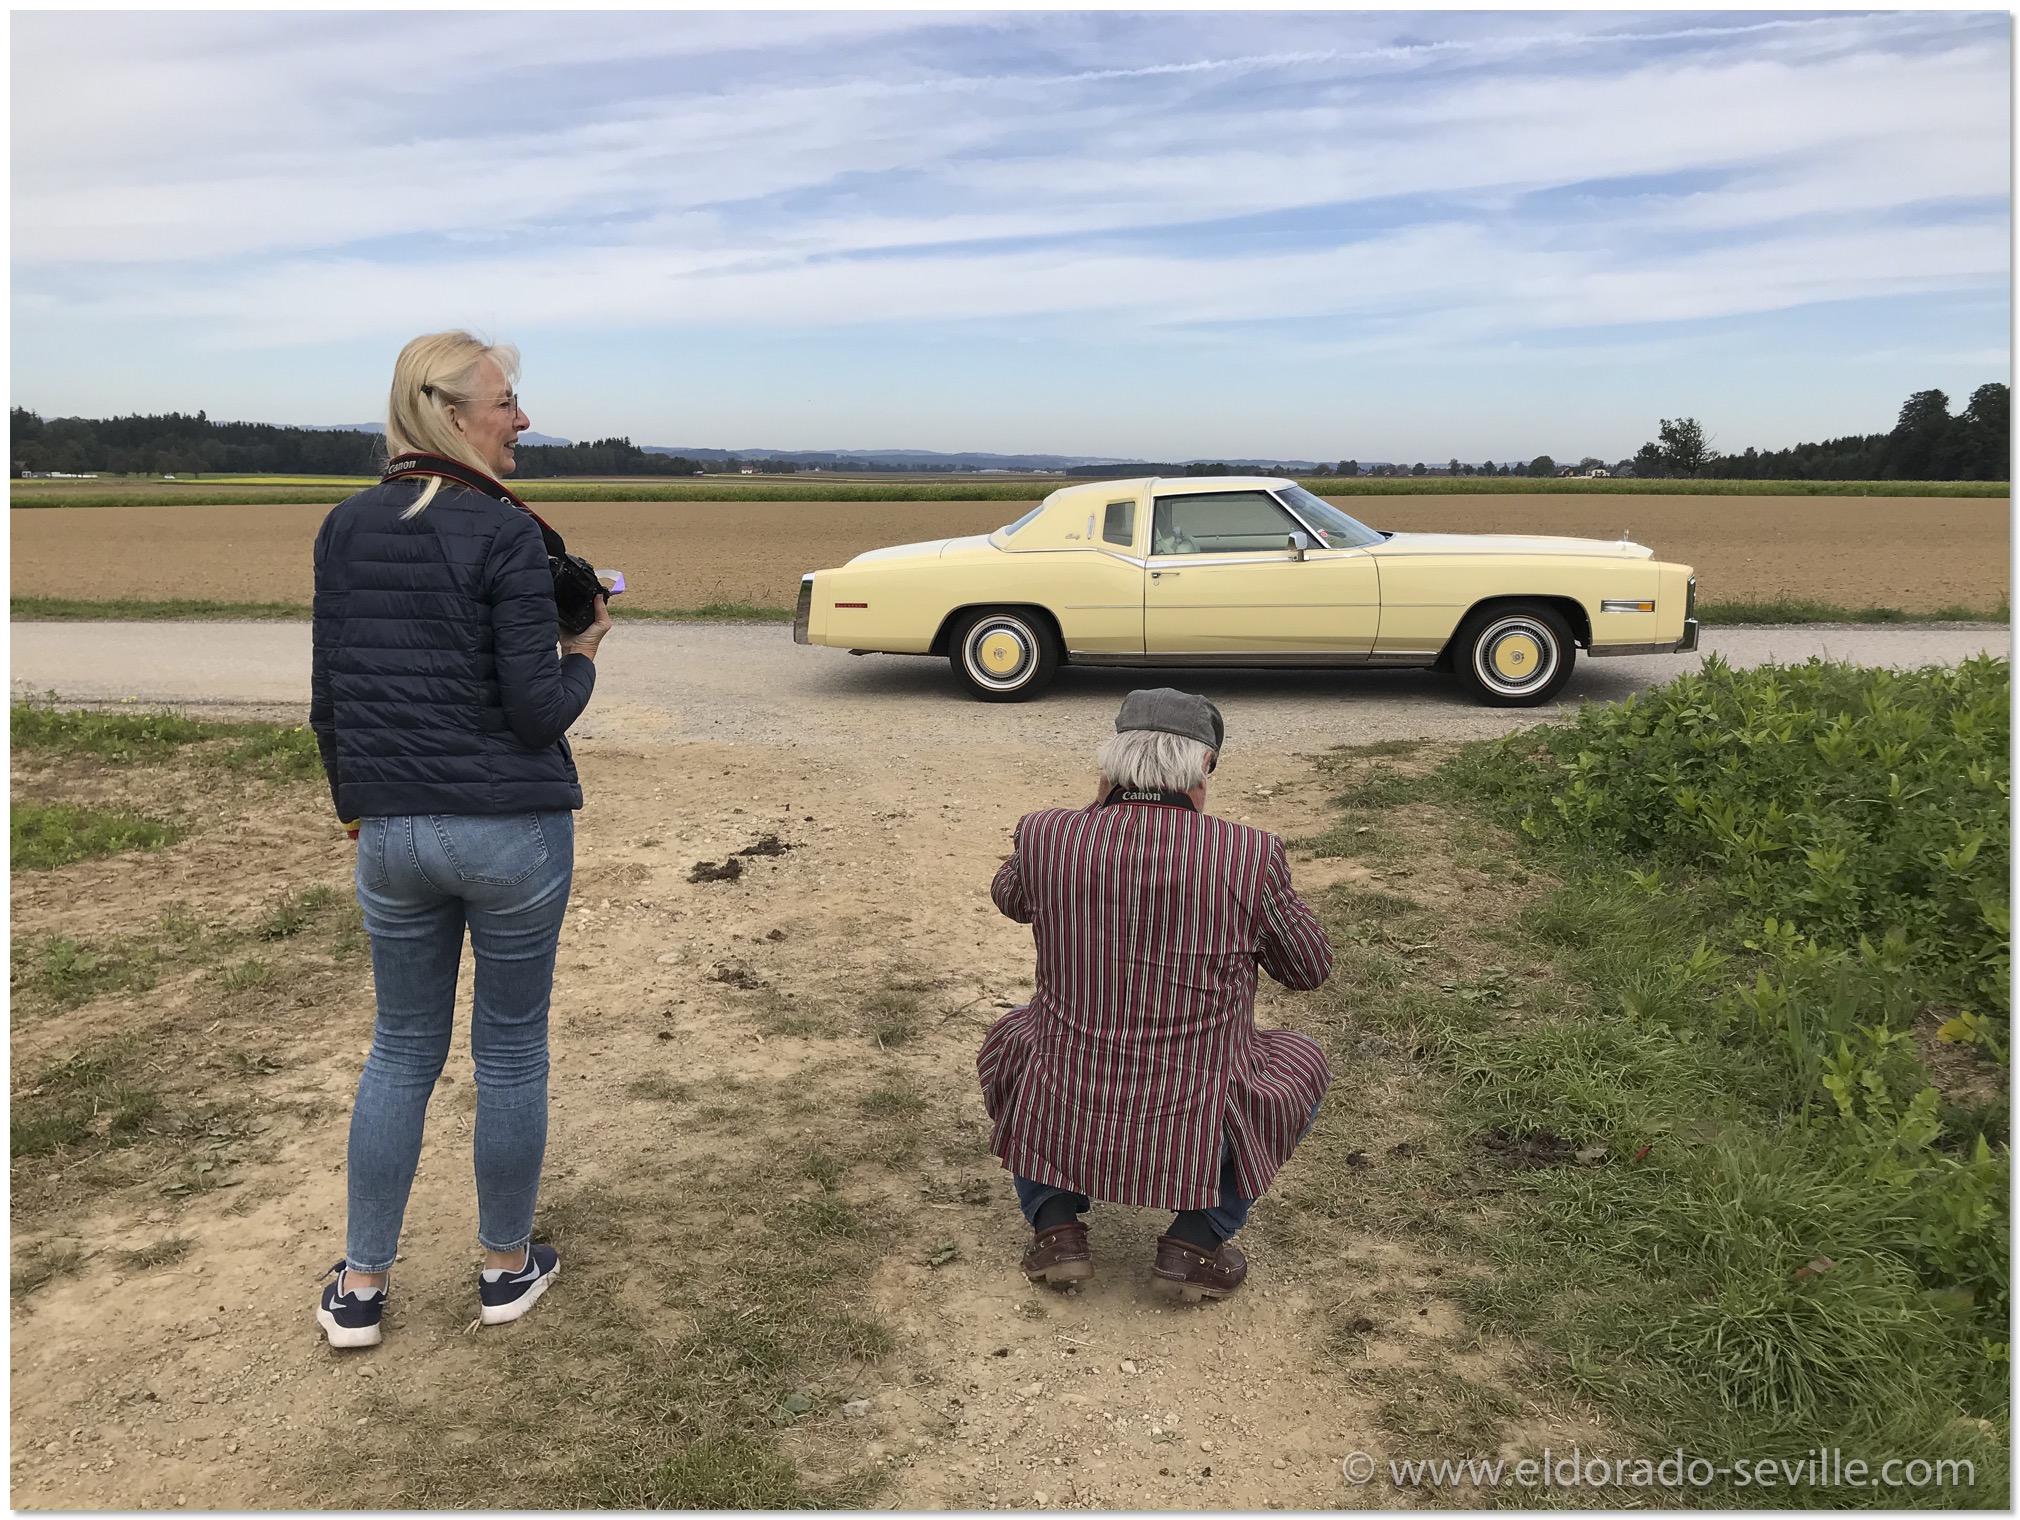
PHOTOSHOOTING FOR AN AUSTRIAN CLASSIC CAR MAGAZINE
I’m looking forward to their story.
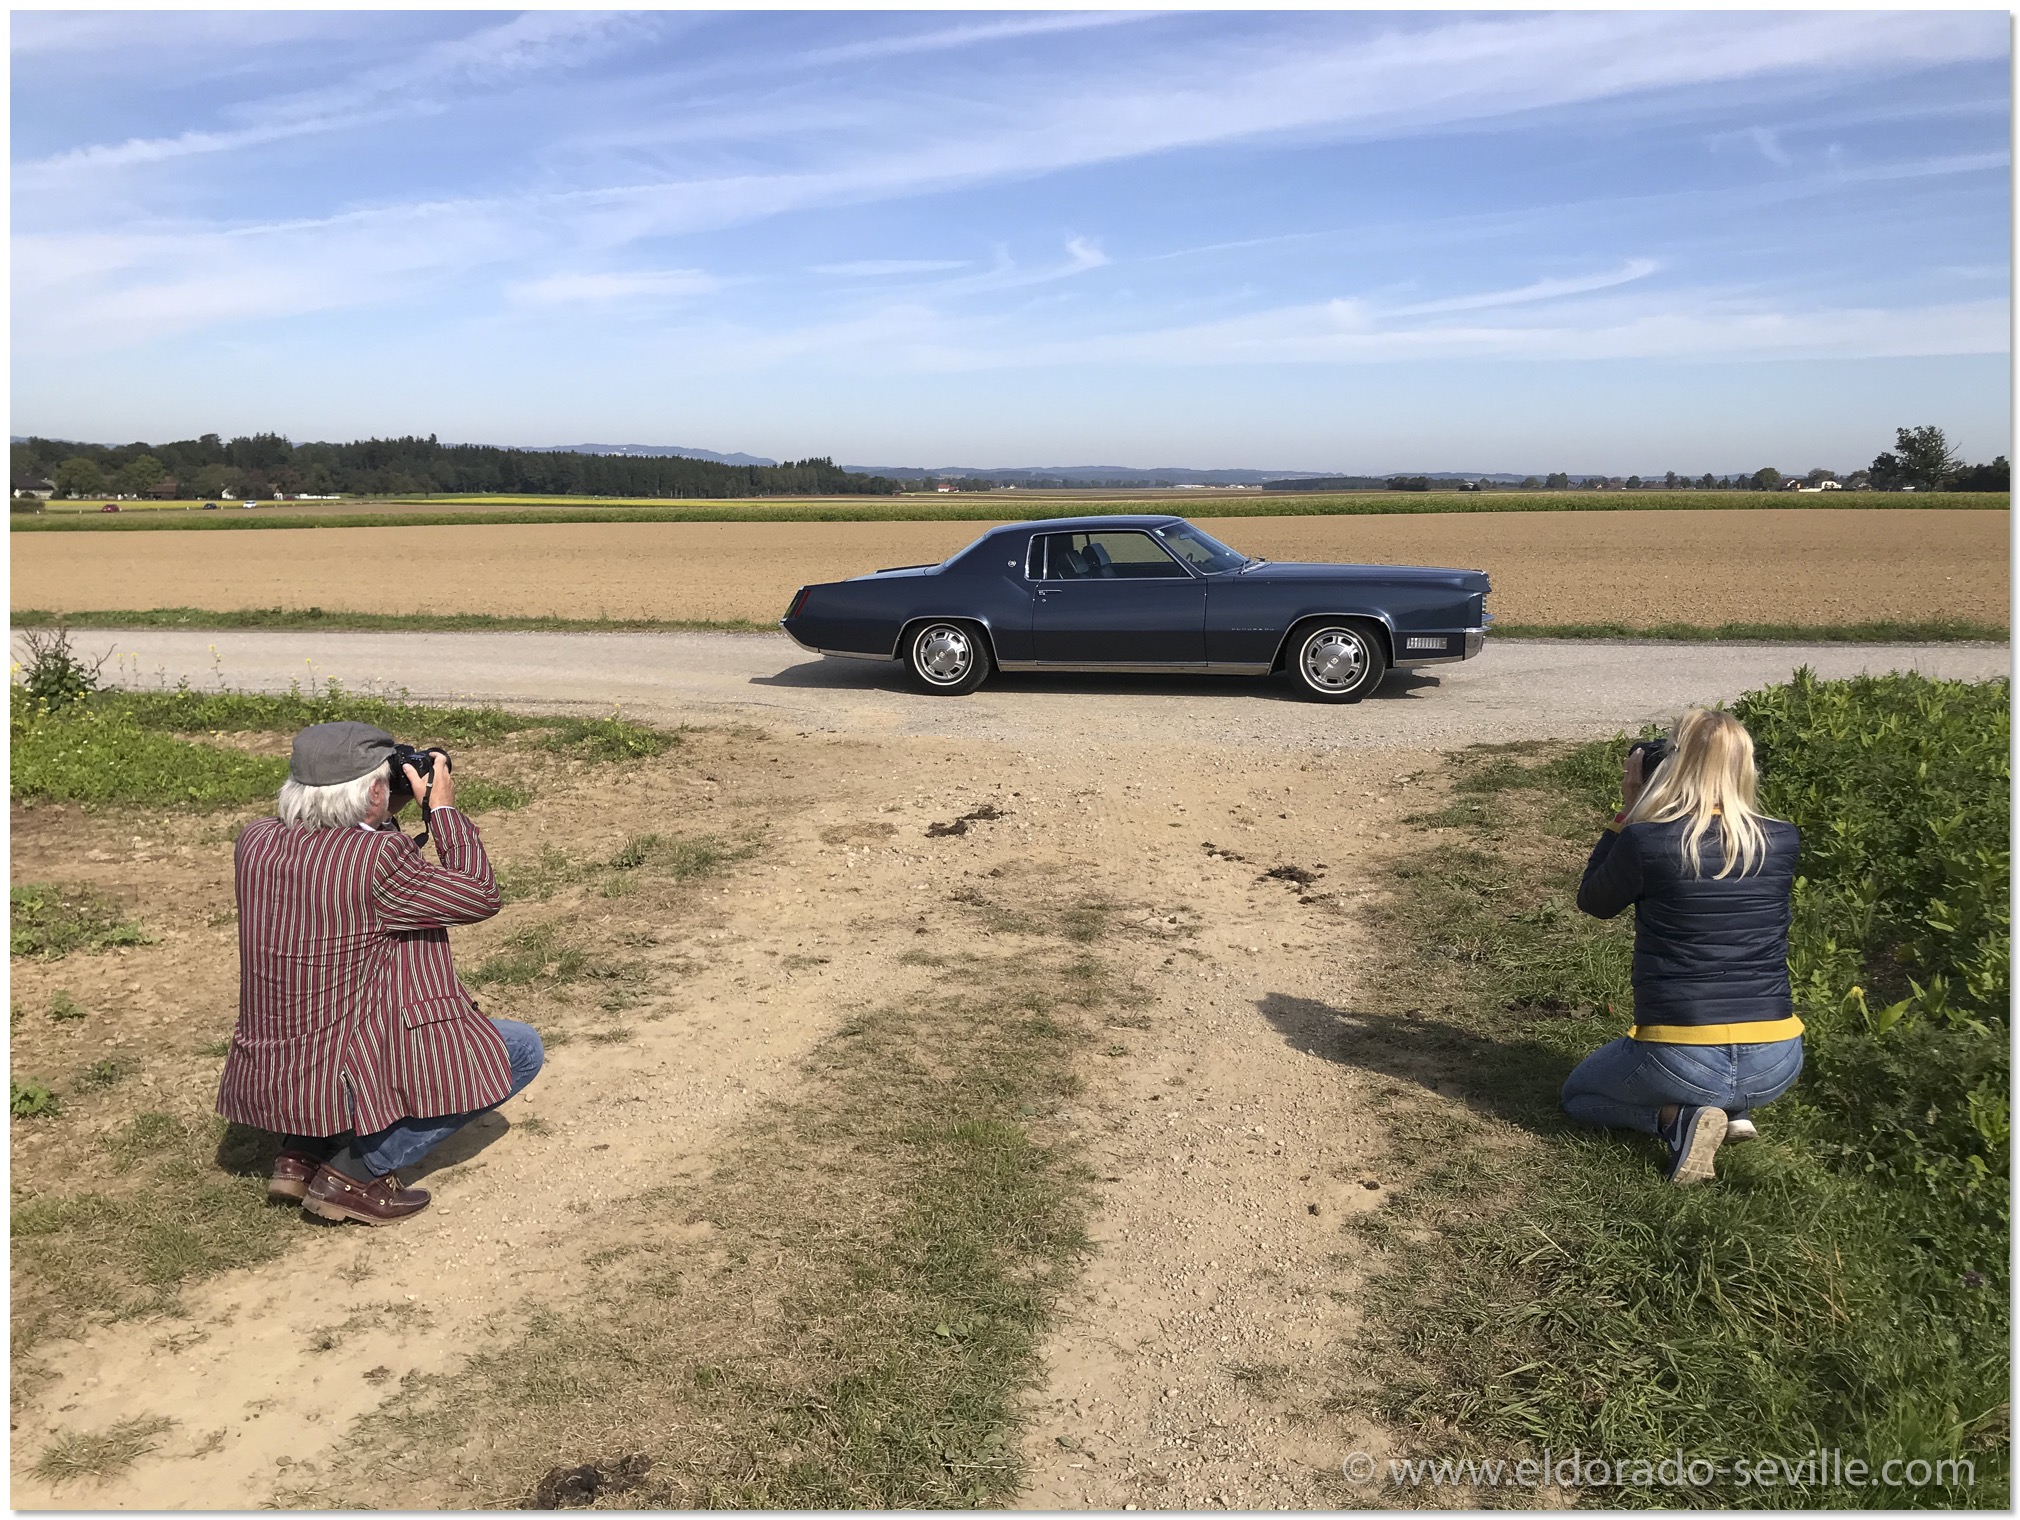 The two photographers and editors at work
VIDEOSHOOTING WITH FRIENDS AND A VISIT TO AN AWESOME GARAGE
We are a group of Cadillac enthusiasts and friends and all of my friends brought one of their many Cadillacs to the first day of the filming.
We then had dinner together and another highlight was a tour of a friends new garage where we had a great evening.
The 1976 Eldorado in the picture is for sale by the way! It has only 1.000 miles on the clock and is in PERFECT condition.
Check out the preview video and some pictures!
Some scenes from the upcoming short film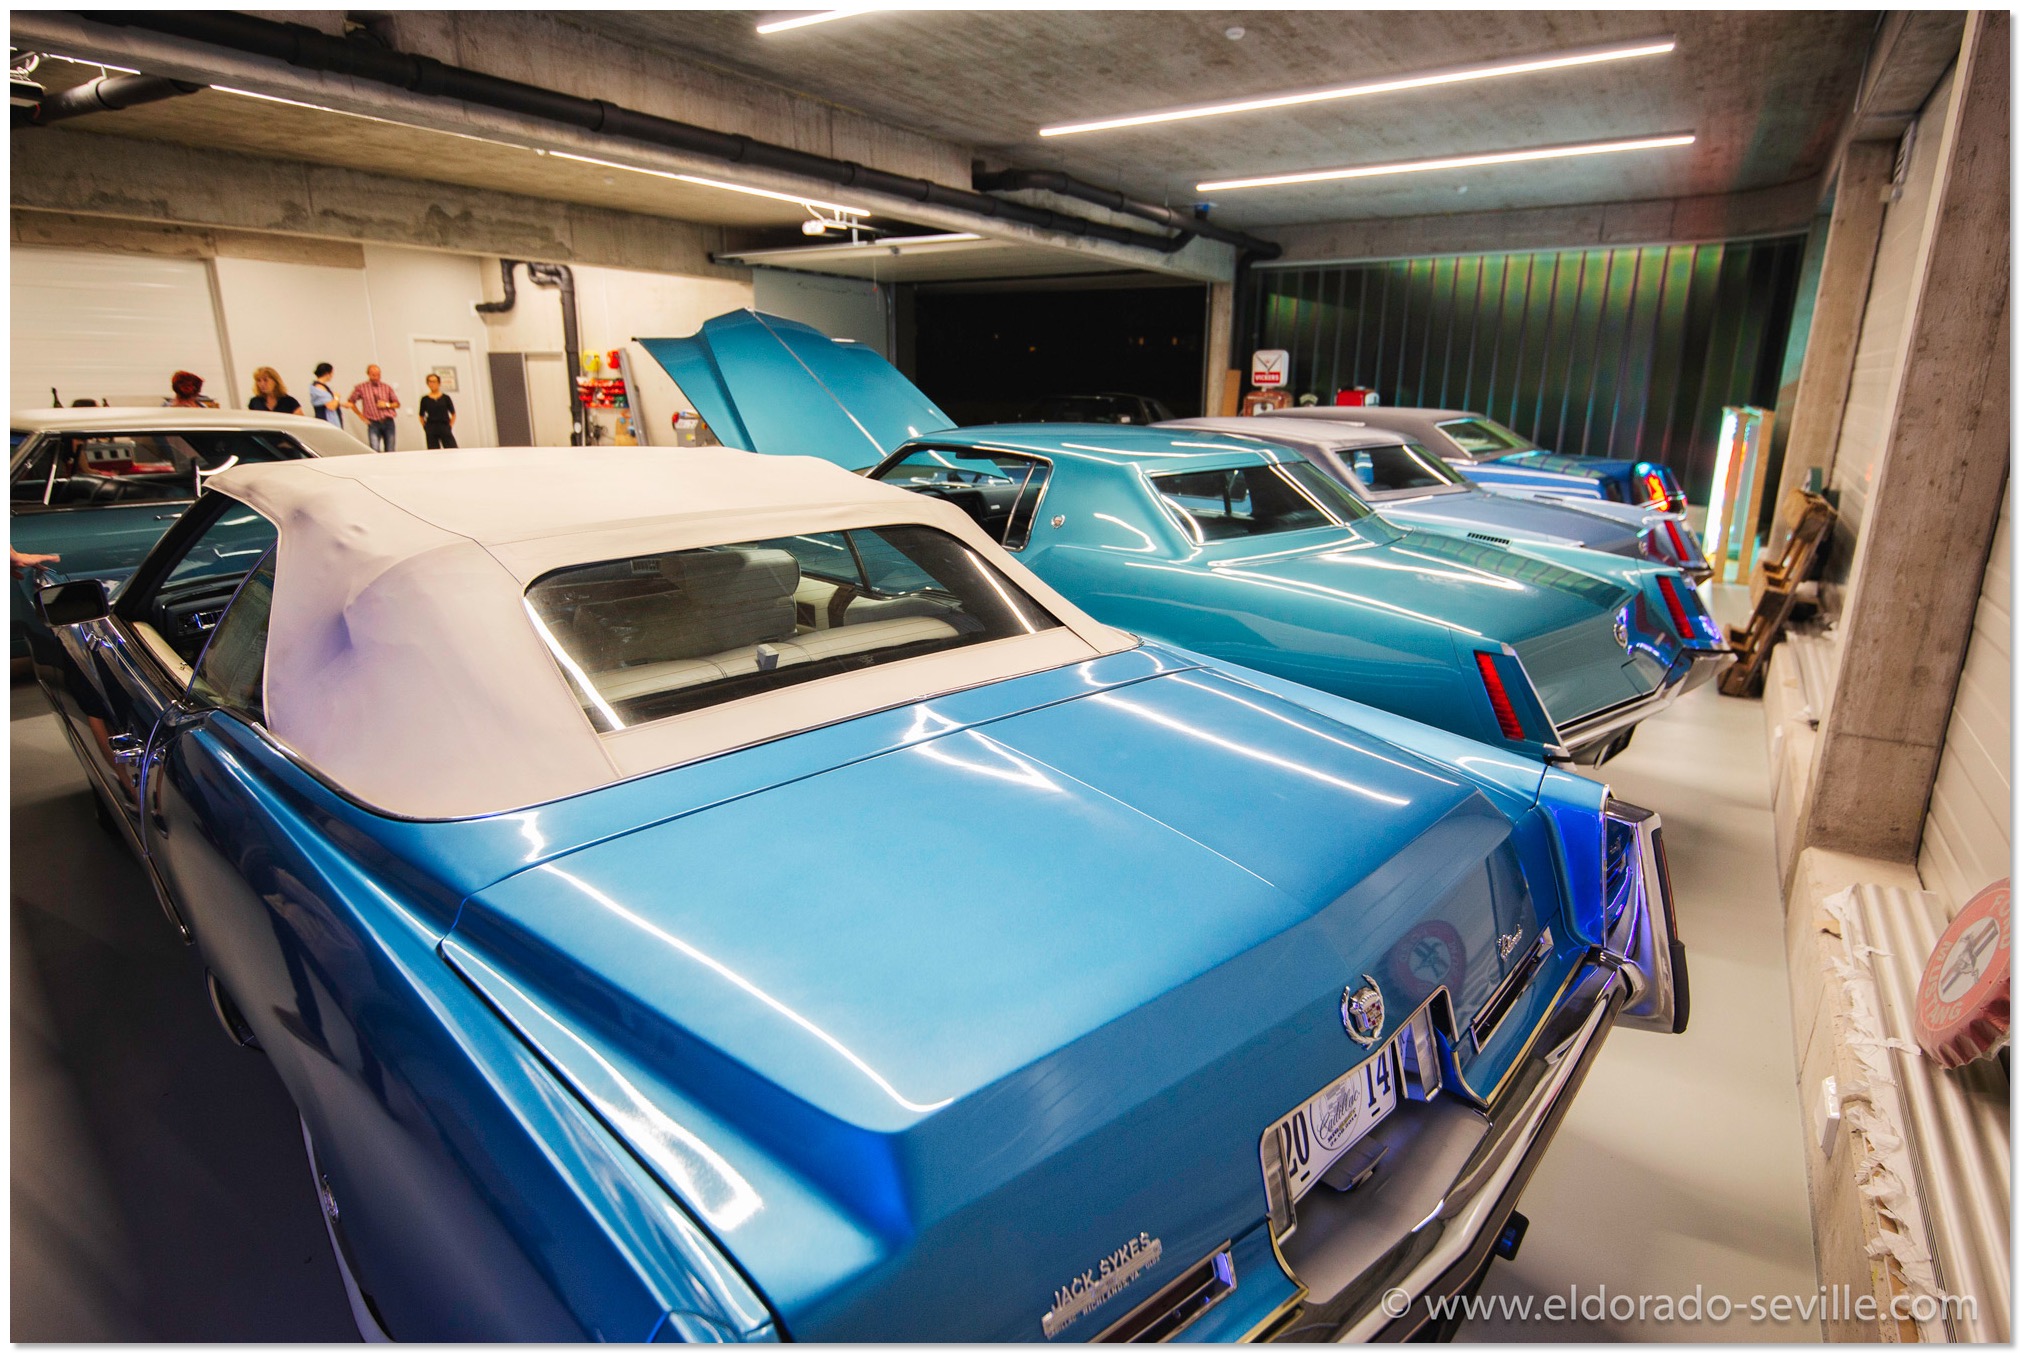 In my friends new garage.
NEW VIDEO OF SOME OF MY CARS
Make sure to watch in HD or even better in 4k!
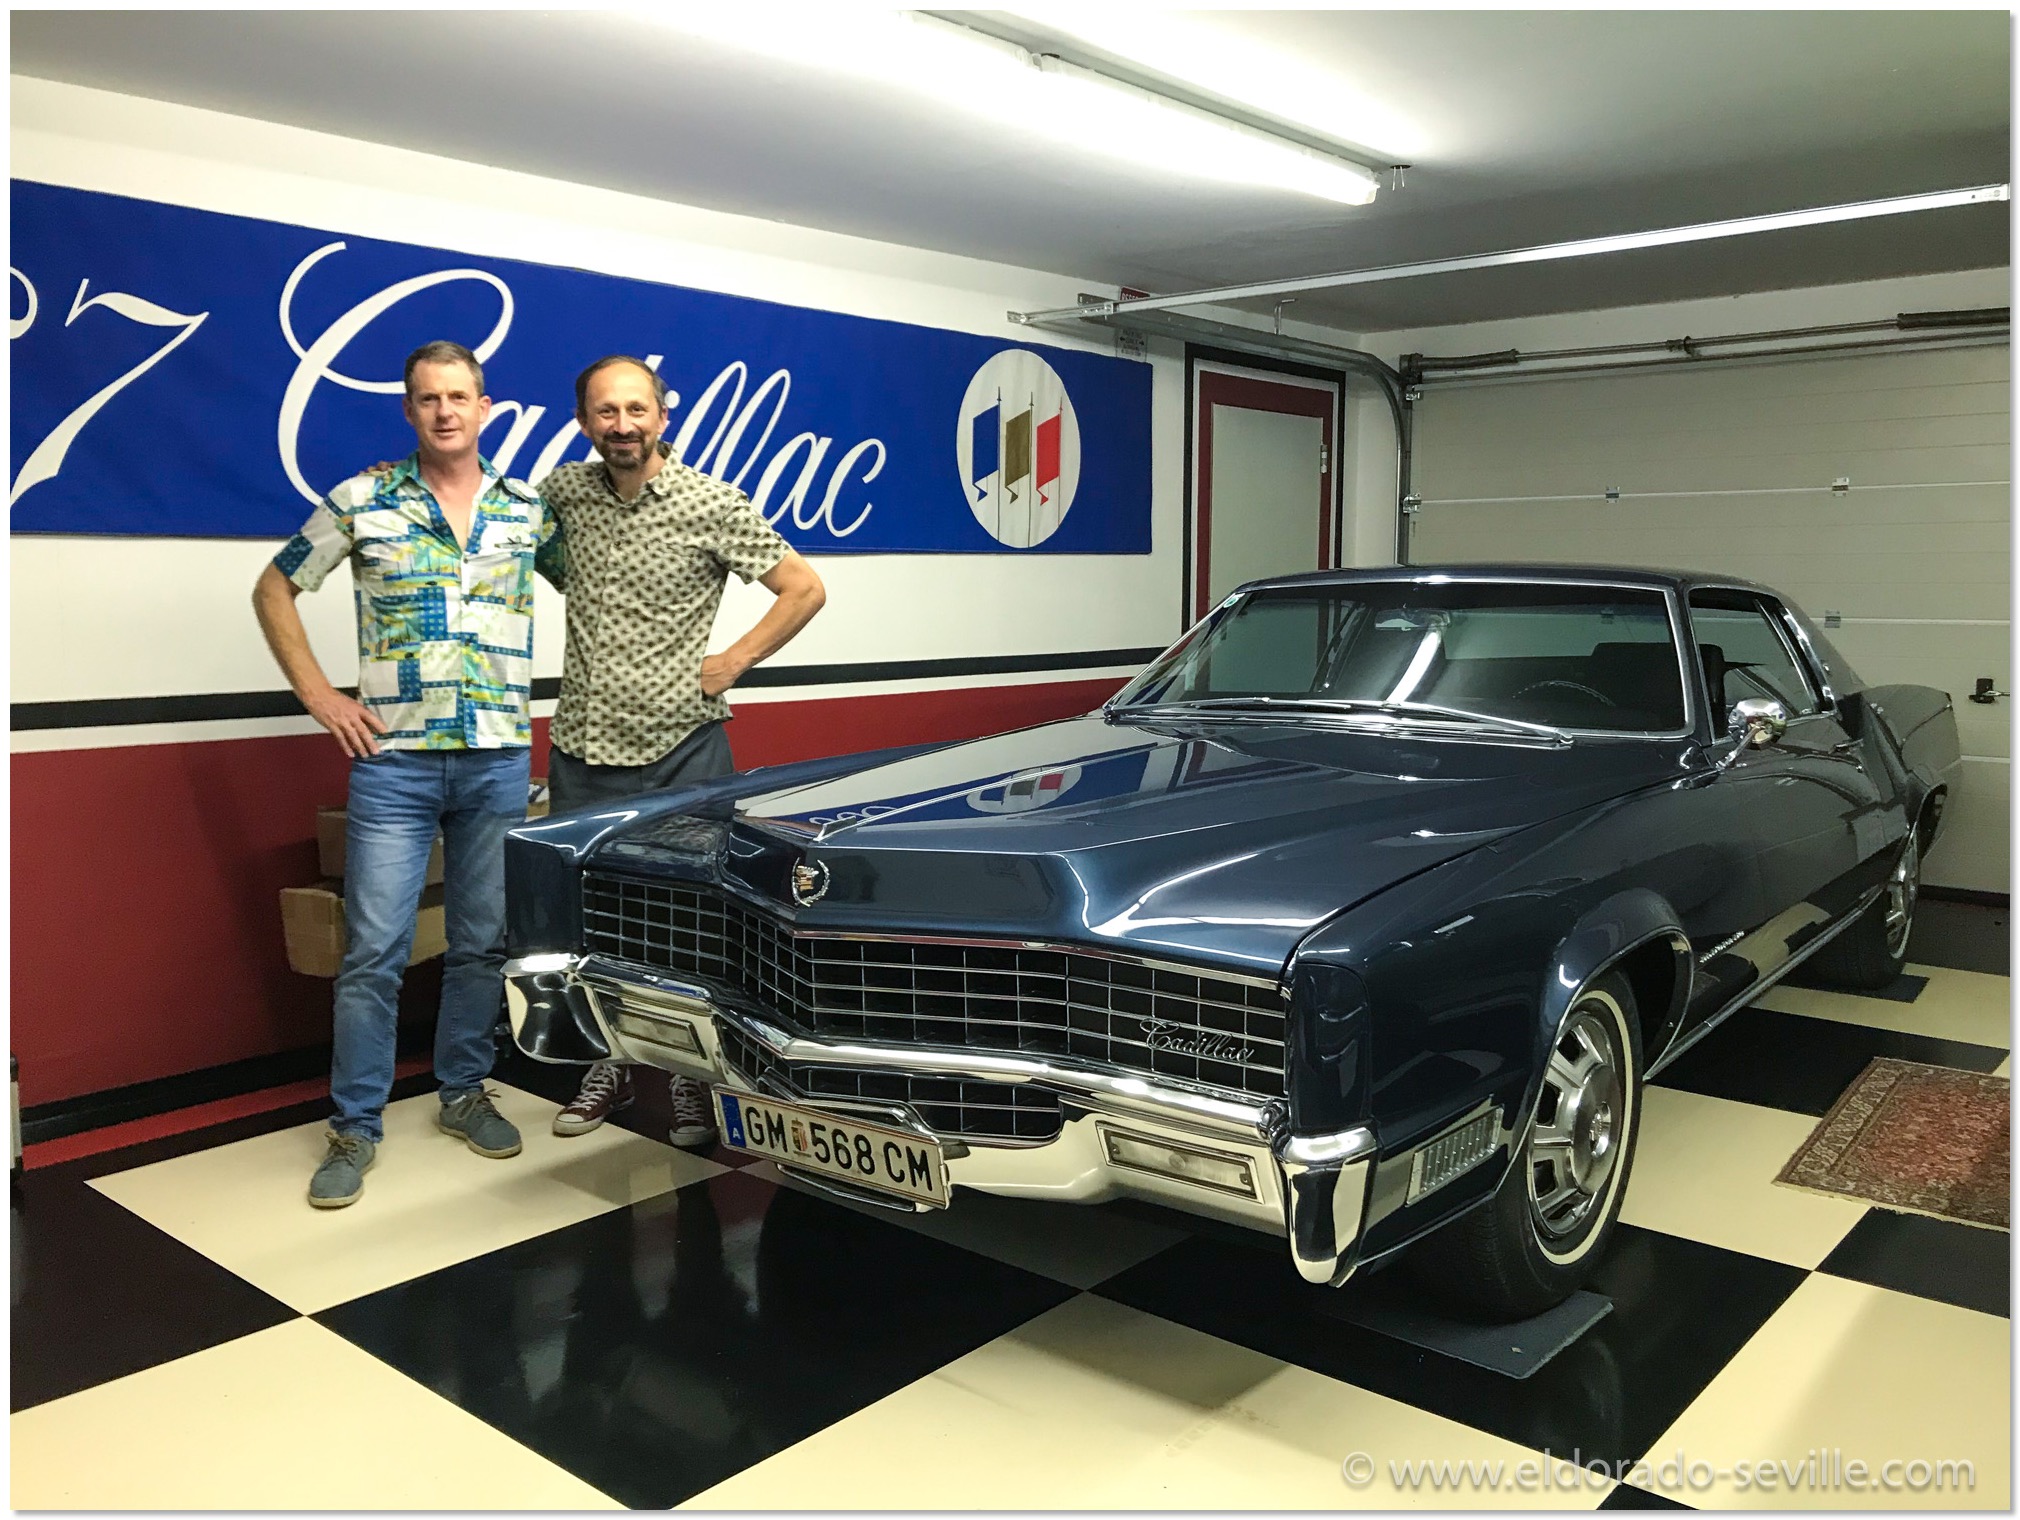
A VISITOR FROM AUSTRALIA
I have been knowing Dermot since around 1996 through the internet where we were members in one of the first Cadillac Mailing Lists - the CML. I´m quite sure that the CML was like the first social media platform for Cadillac Enthusiasts. Over the years I had the opportunity to meet some of the members of the CML in real life. I always enjoy…
 READ MORE...
CADILLAC BIG MEET 2018
I am part of the organisation team consisting of a few good friends who all got the Cadillac bug.
The theme this year was the "1967 - 1970 Eldorados" which we featured in a special exhibition at the venue. So it was clear that I would ….
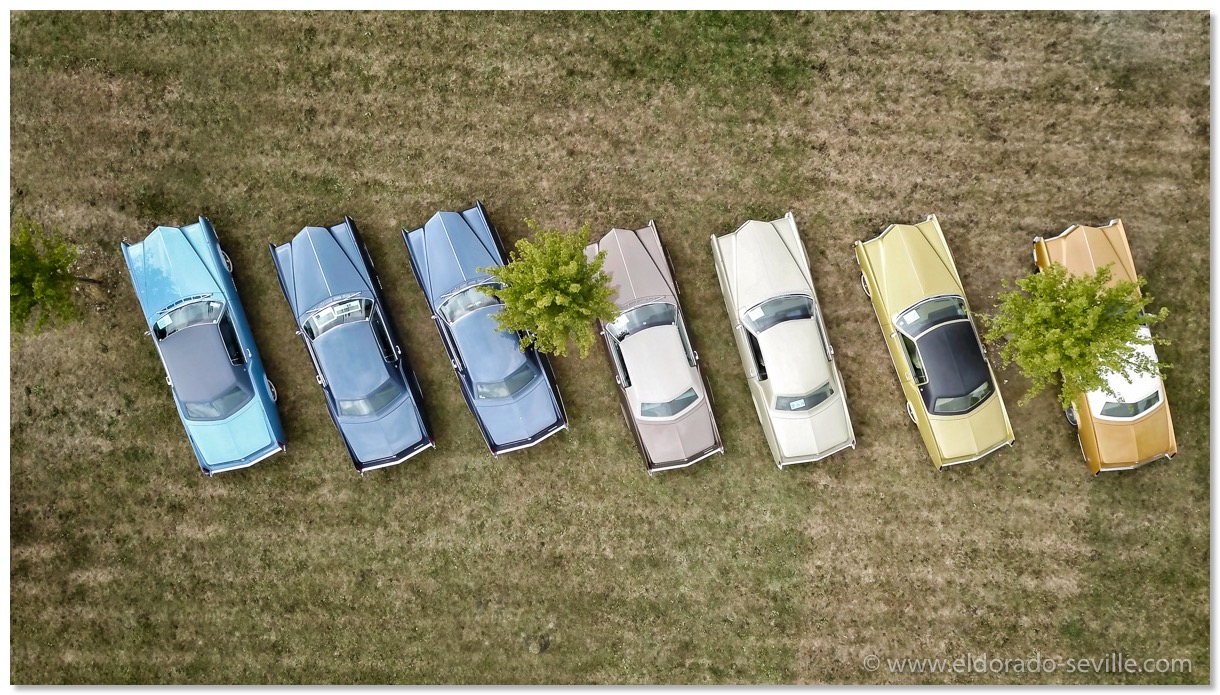
The special exhibition for 2018 was about the 1967 - 1970 Eldorados.
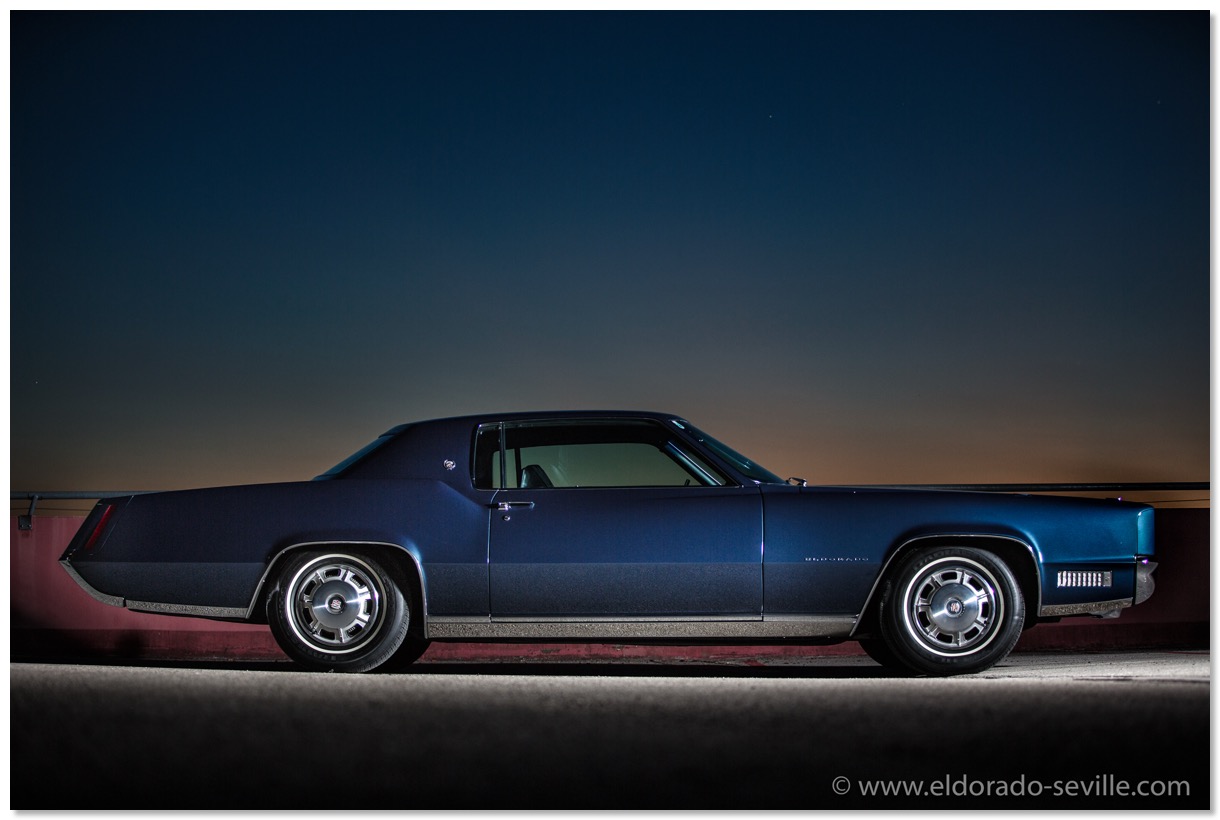
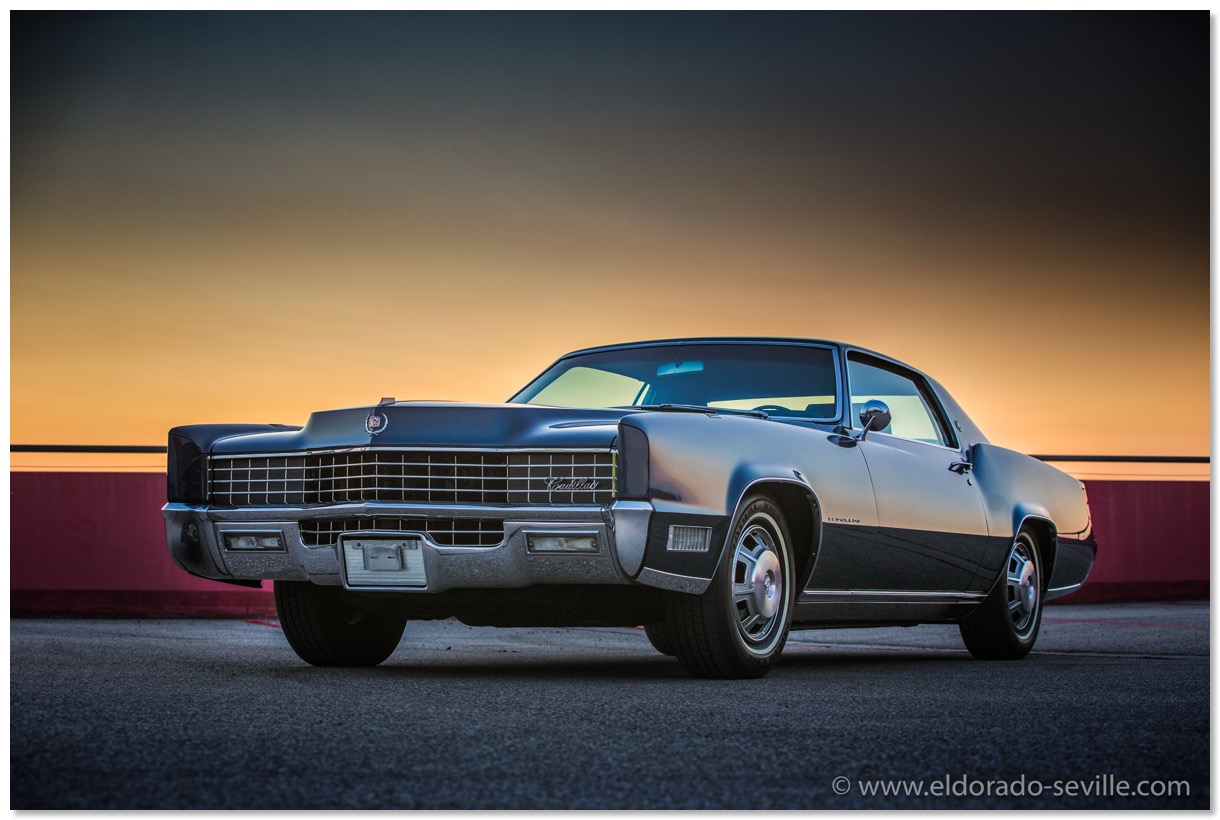
PHOTOSHOOTING WITH THE 1967 ELDORADO
I think they came out great. I especially like the night shots.
You can see all the results in the image gallery for the 67 Eldorado
 READ MORE...
THE 2018 CADILLAC BIG MEET IS JUST AROUND THE CORNER
The 2018 Cadillac BIG Meet spot
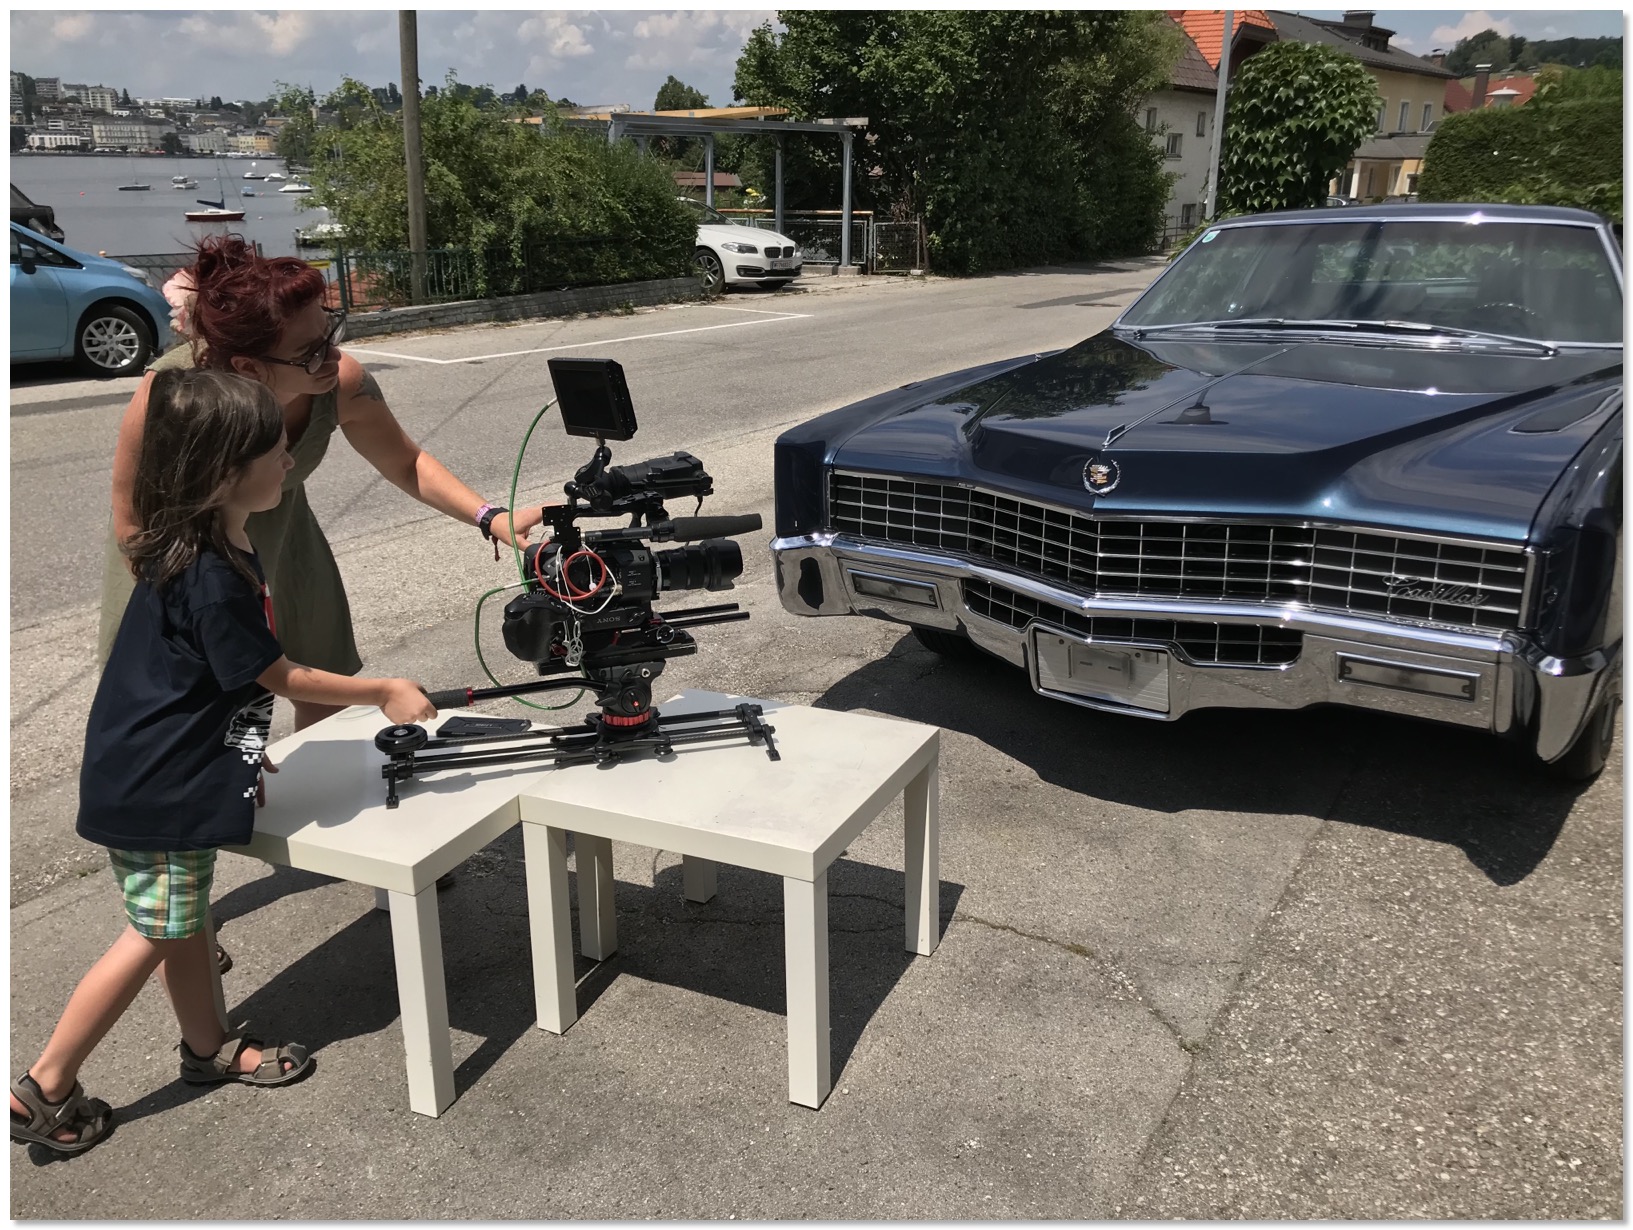
My wife and my son Elliot during filming
THE RESTORATION OF MY 1967 ELDORADO IS FINISHED
The restoration shop let me know that my 67 Eldorado was finished and ready for pick up.
After work my wife and I jumped into the car and drove 2 hours to Radstadt where the restoration shop is located.
I saw the finished car for the very first time.
The job Bernd Preussler and his small team did is amazing. The paint job is the best I have ever seen. Their commitment to details is outstanding.
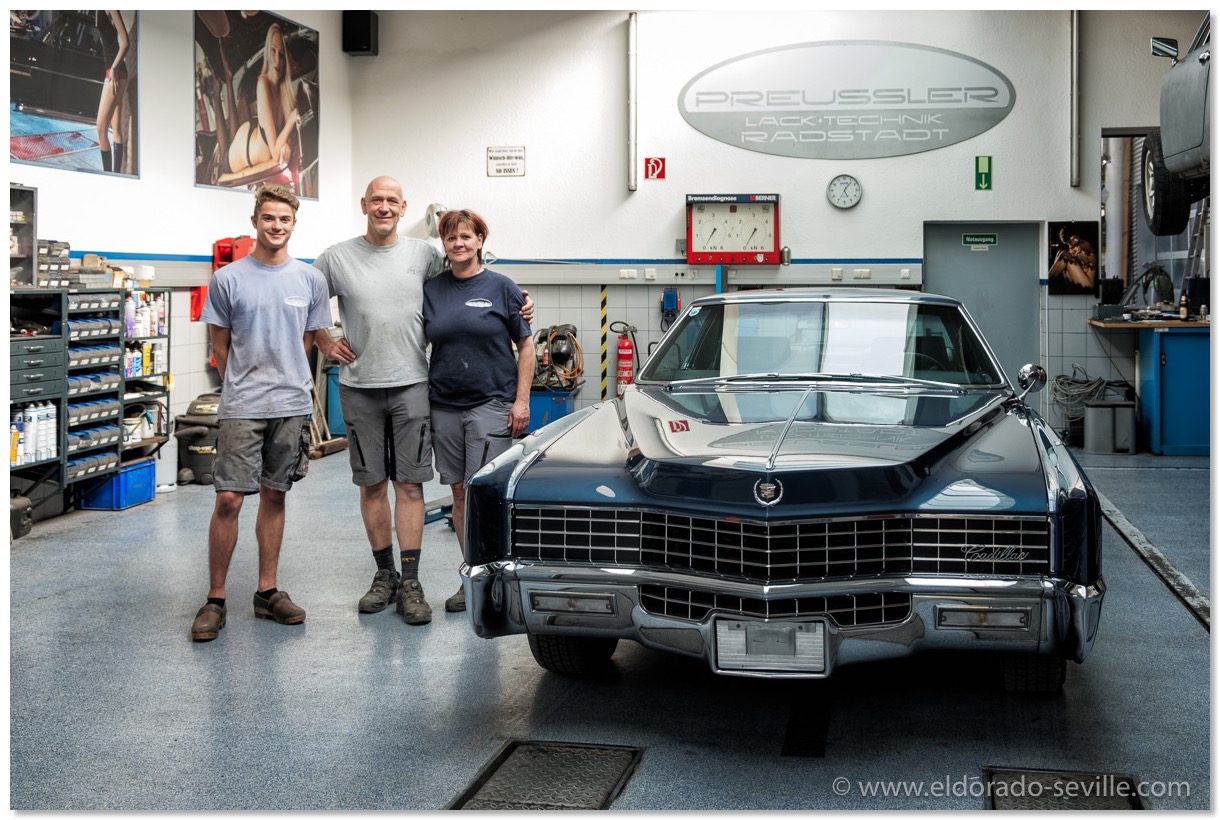
The small team that restored my Cadillac. Thank you so much for your great work! You are my heroes!
Michael Hammer, Bernd Preussler, Angela Steiner (from left to right)
THE 67 ELDORADO RESTORATION IS IN ITS FINAL STAGE
The restoration shop on the other side did a fantastic job so far. There are some minor details they still want to address and the car should be ready for pick up sometimes in May.
Here is a short video I took with my phone at the shop when I delivered the bumper, showing the almost finished car. Make sure to watch in HD to see all the details
The almost finished car still in Bernds Restoration Shop
THE 1967 ELDORADO HAS NEW PAINT!
Today was especially exciting. I saw the Eldorado in its new paint for the first time!
Doesn't she look spectacular in its fresh coat of "Atlantis Blue Firemist! ?
Bernd and his team did an awesome job so far as you can see in the restoration gallery.
There is still tons of work left - but everything looks very promising so far.
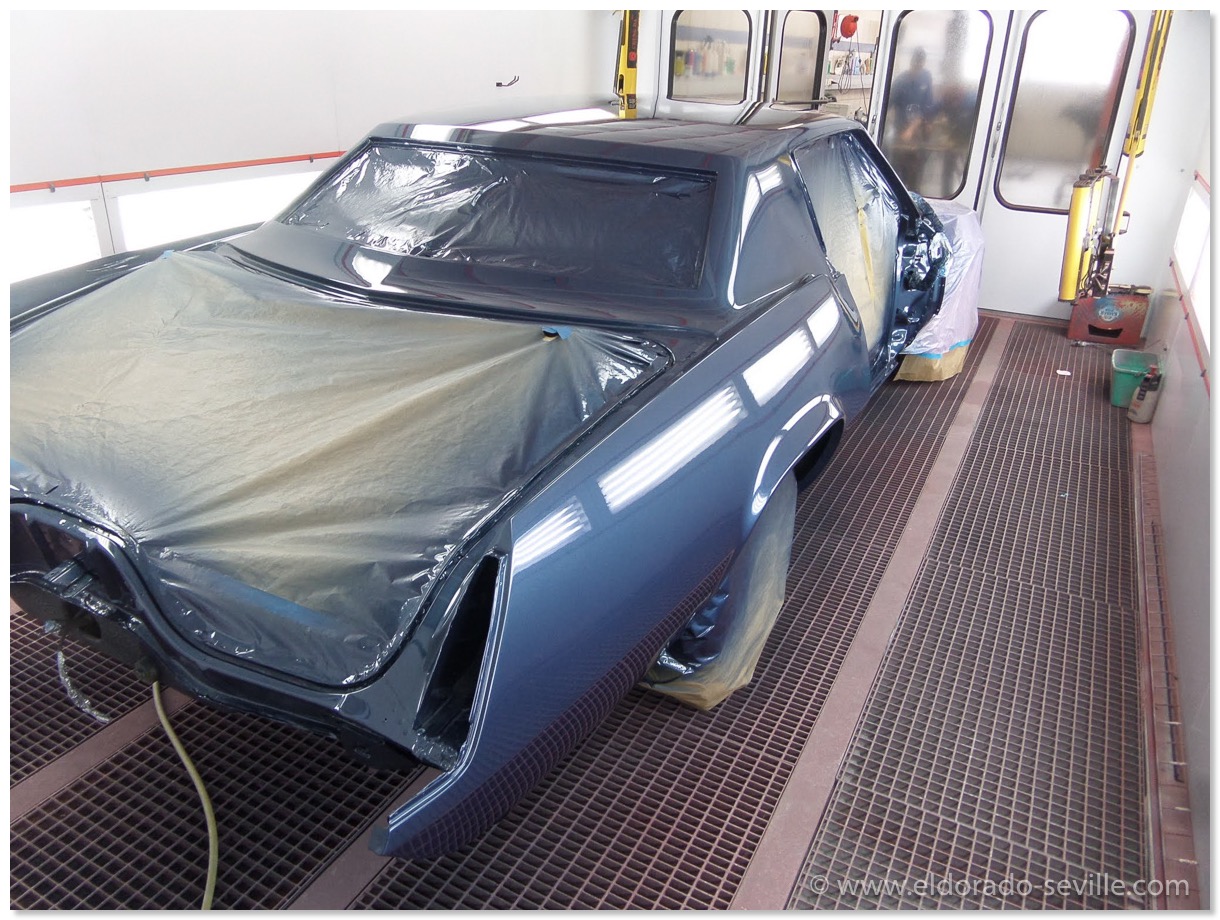
In the paintbooth with fresh paint.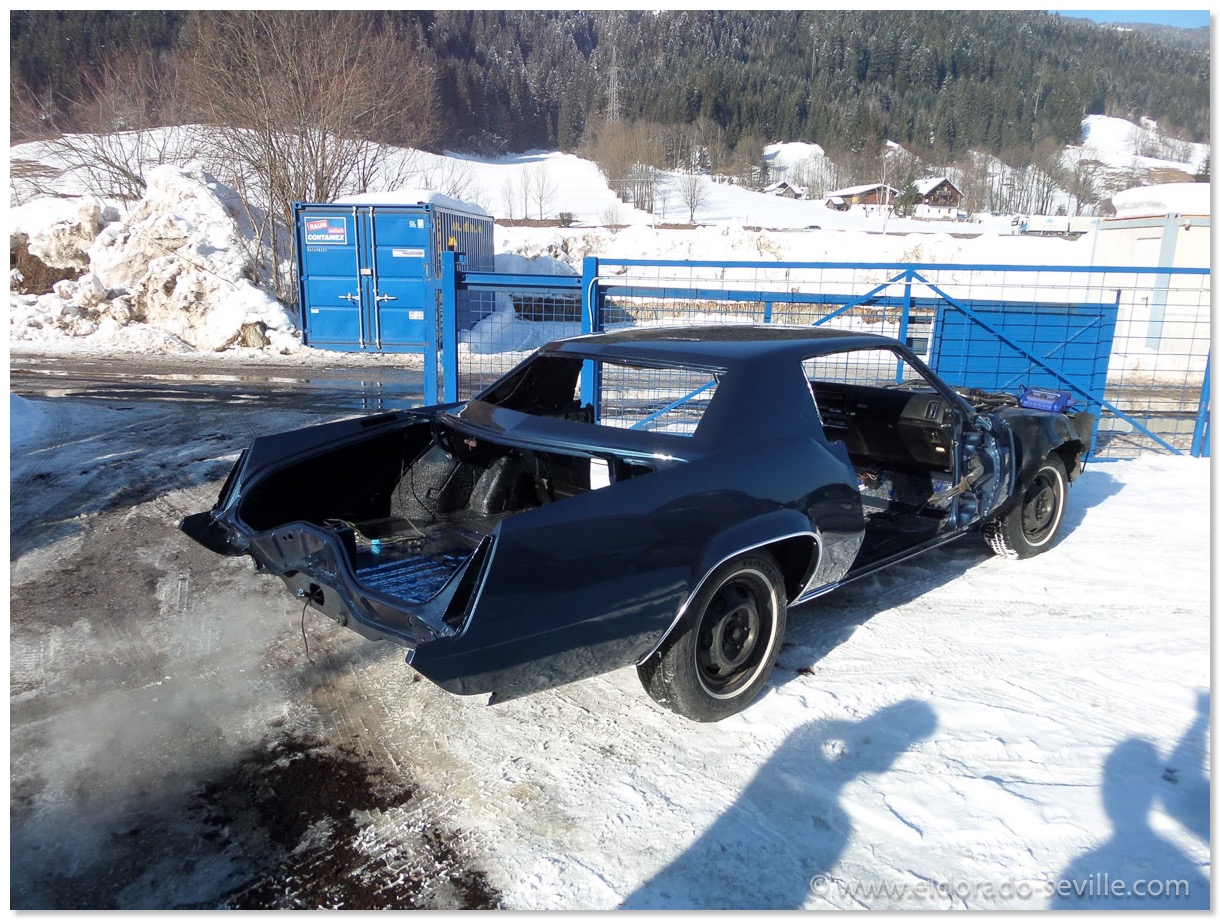
First time in the sunlight, with the first trim parts already installed.
REPLACING THE FRONT FLOOR OF THE 67 ELDORADO
While the exterior of the car did not have much rust I was surprised that the front floor of the car had quite a bit of rust.
Some of the previous owners seems to have tried to stop the rust on the floor sometimes in the past by applying a good amount of rust converter, or whatever the black paint was , he applied over the rusty floor.
It seems that it did not help but just made the sheet metal oxidize underneath this sticky mess.
The restoration shop now started to remove this paint just to find some weak metal with some holes in it.
This is when they decided to cut the entire front floor out and replace it with some fresh metal instead.
They had to make a patch panel from scratch as no new panels are available for this car anywhere. The new custom made replacement floor was now welded in.
Like on the factory rubberized undercoating was reapplied underneath the car and the welding seams were sealed with seam sealer.
You can see all the detailed pictures in the restoration gallery here.
I hope this was the last unpleasant surprise for a while…
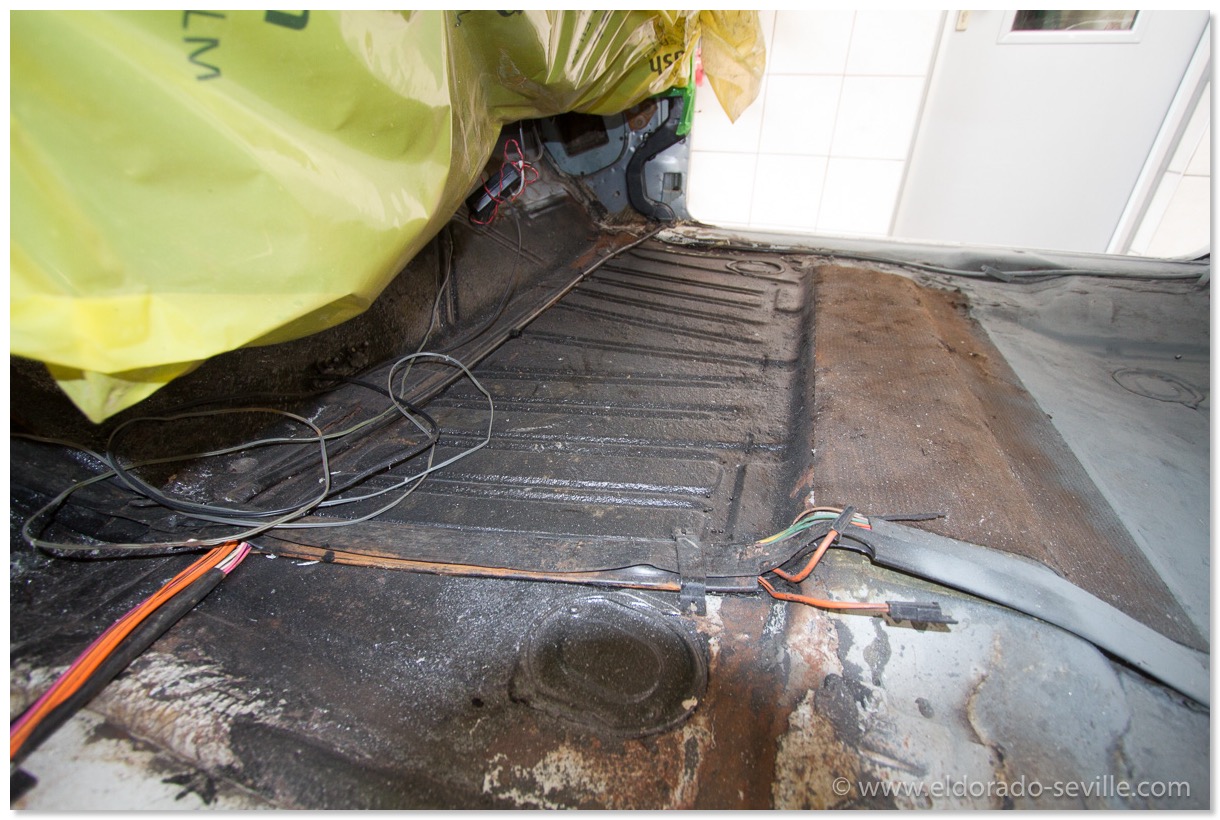
This showed up when the carpet and the seats were removed…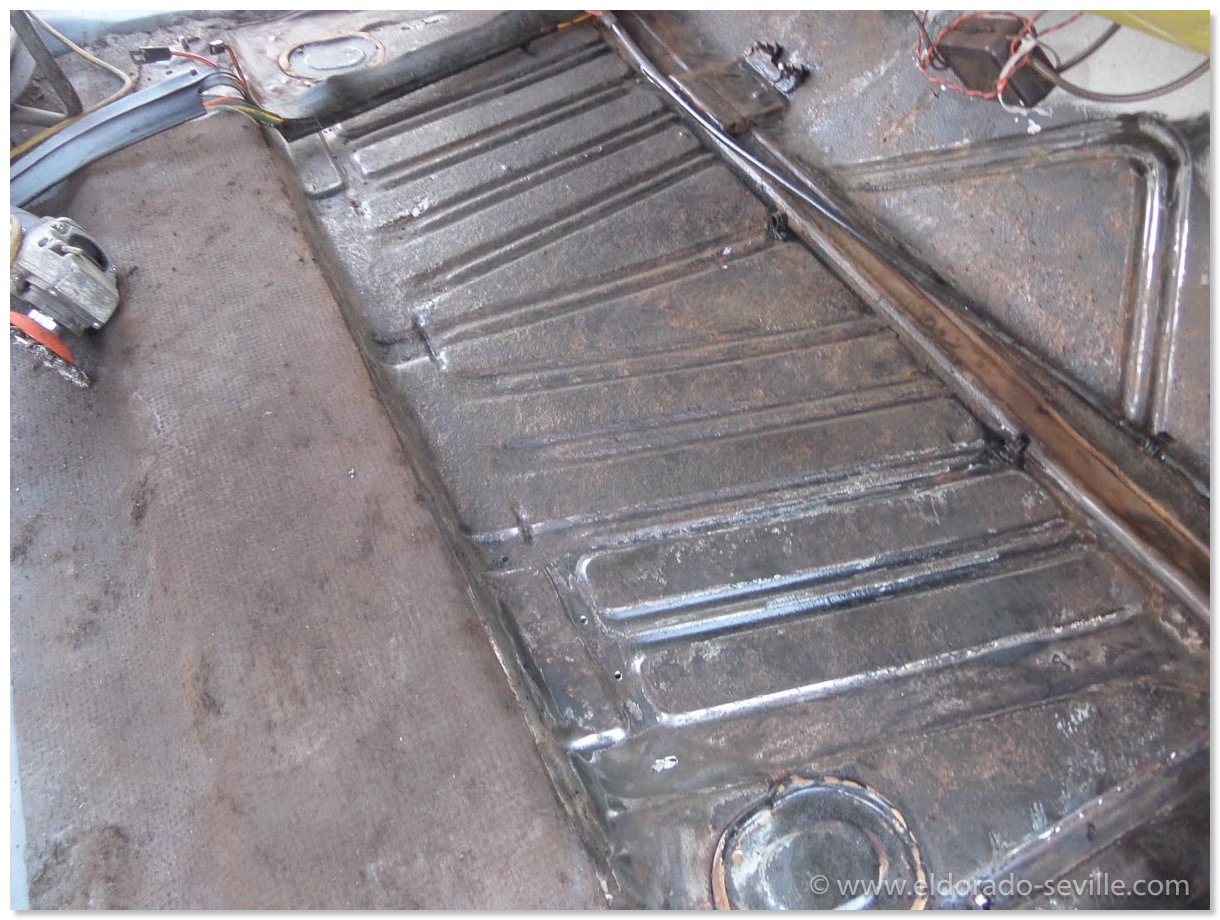
After removing the black mess, the weak metal and some rust holes showed up.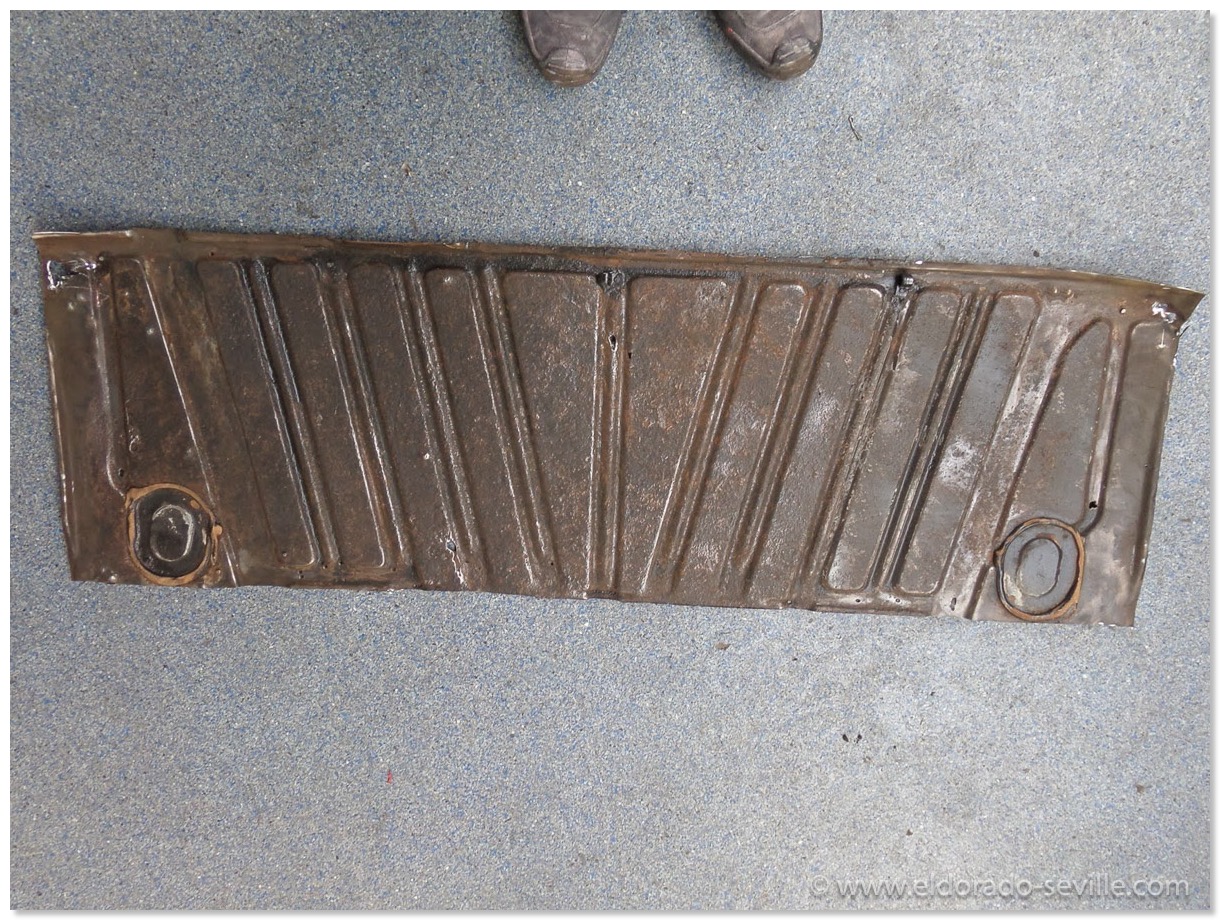
Unfortunately the original floor had to be cut out…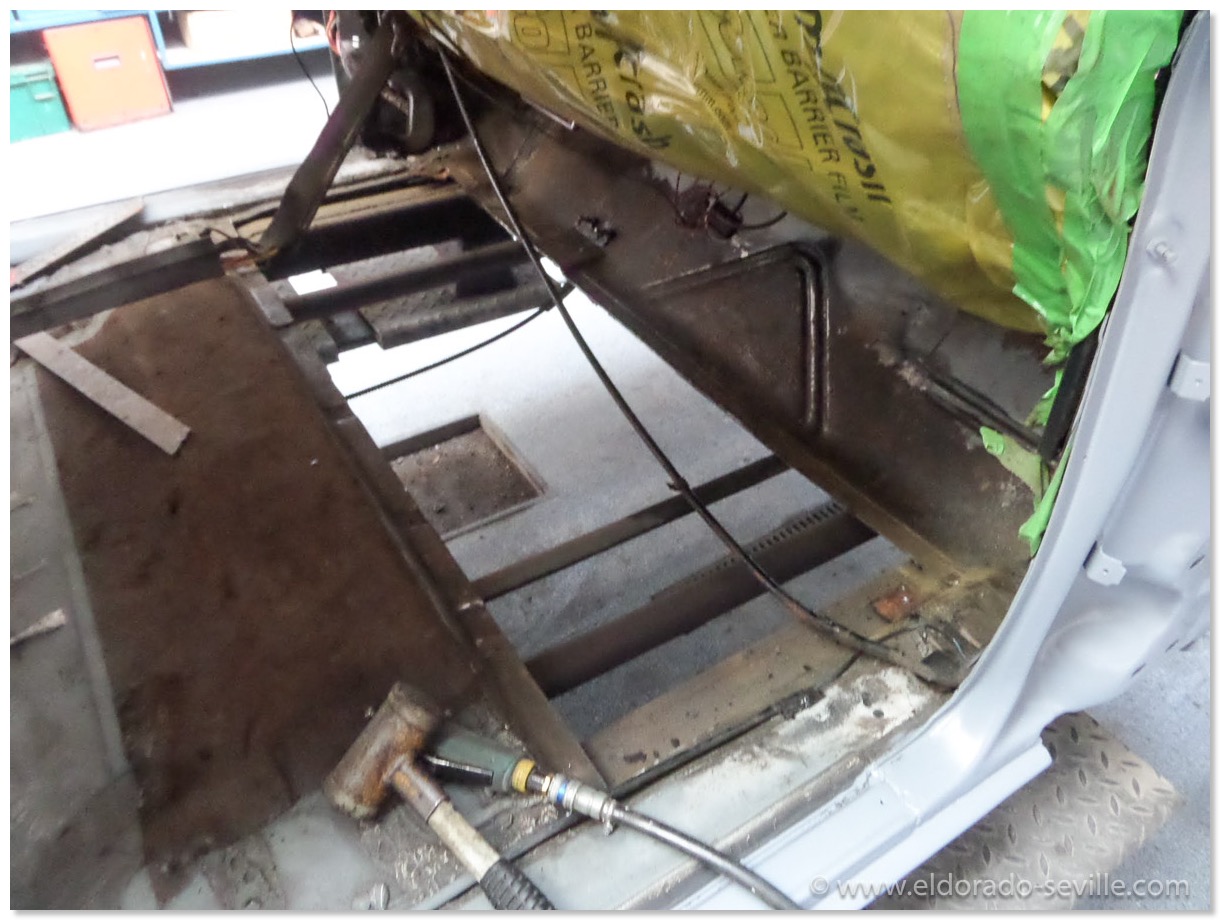
Big hole in the floor.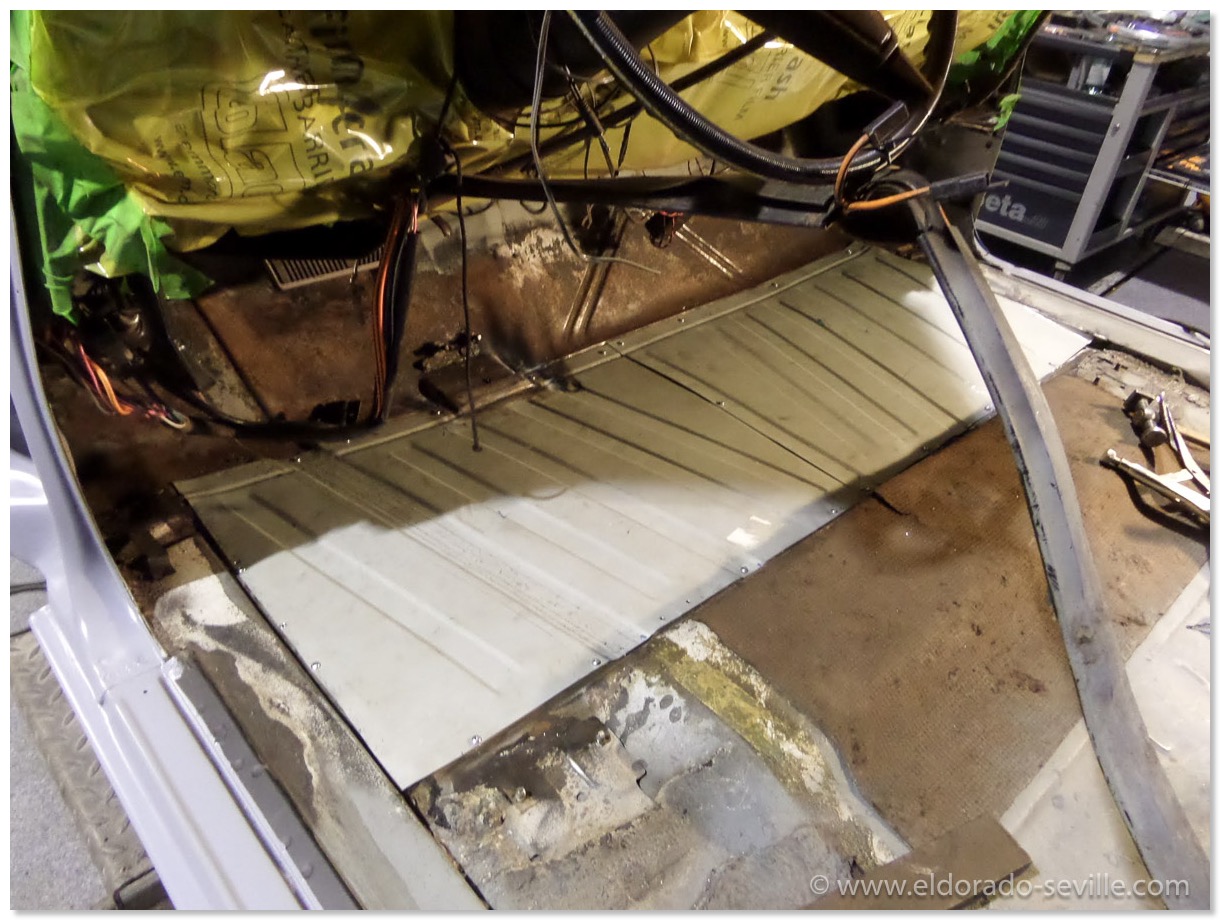
A new custom made patch panel is fitted and will be welded in.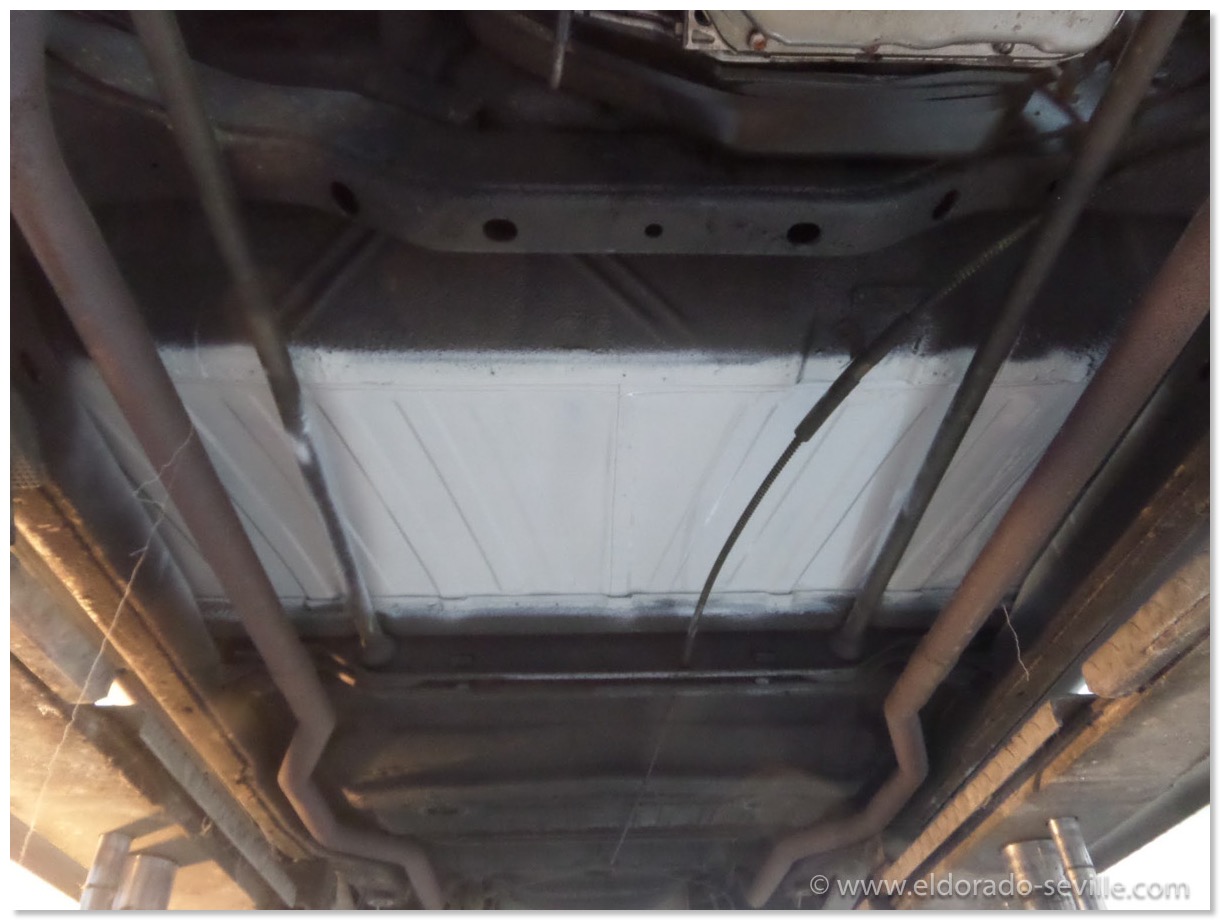
The new custom made patch panel as seen from the underside.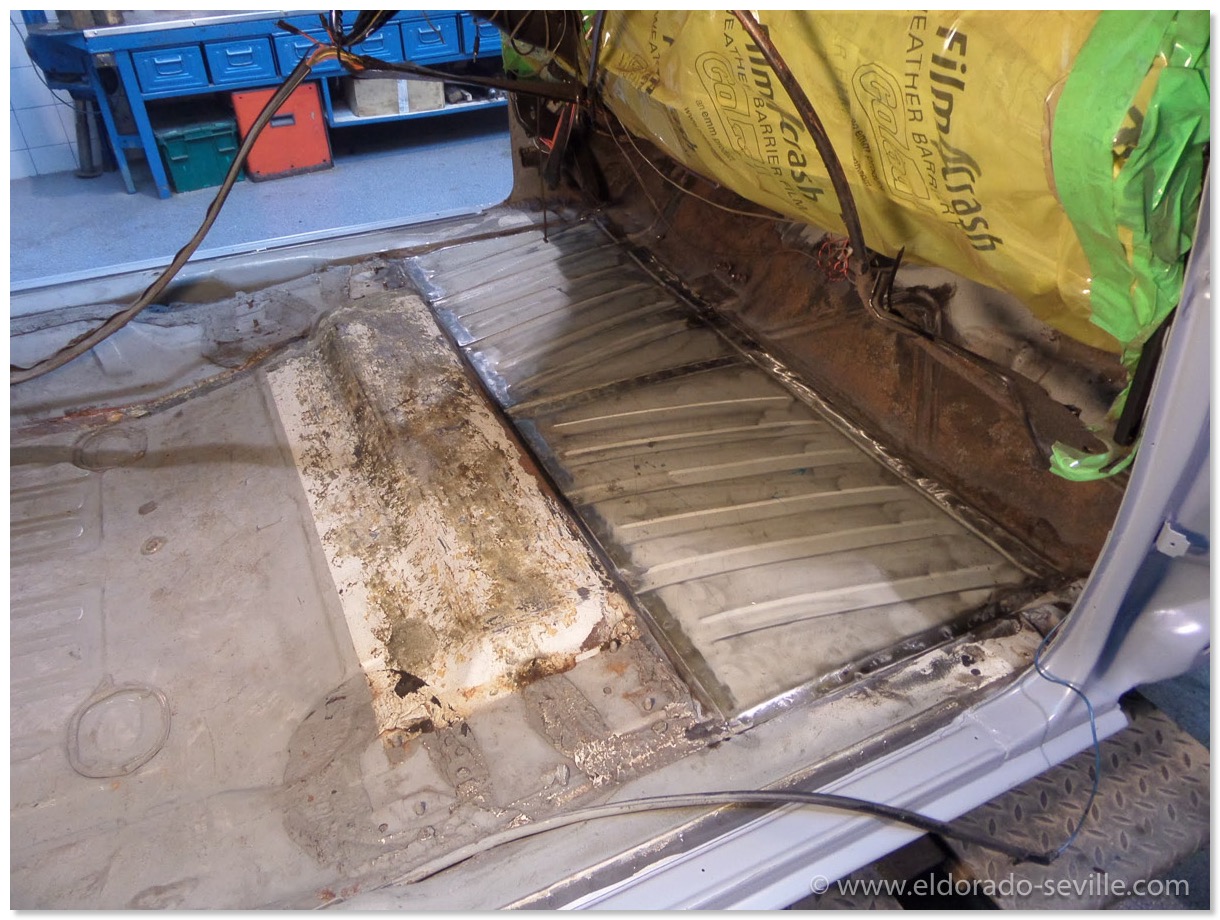
The new panel is completely patched in.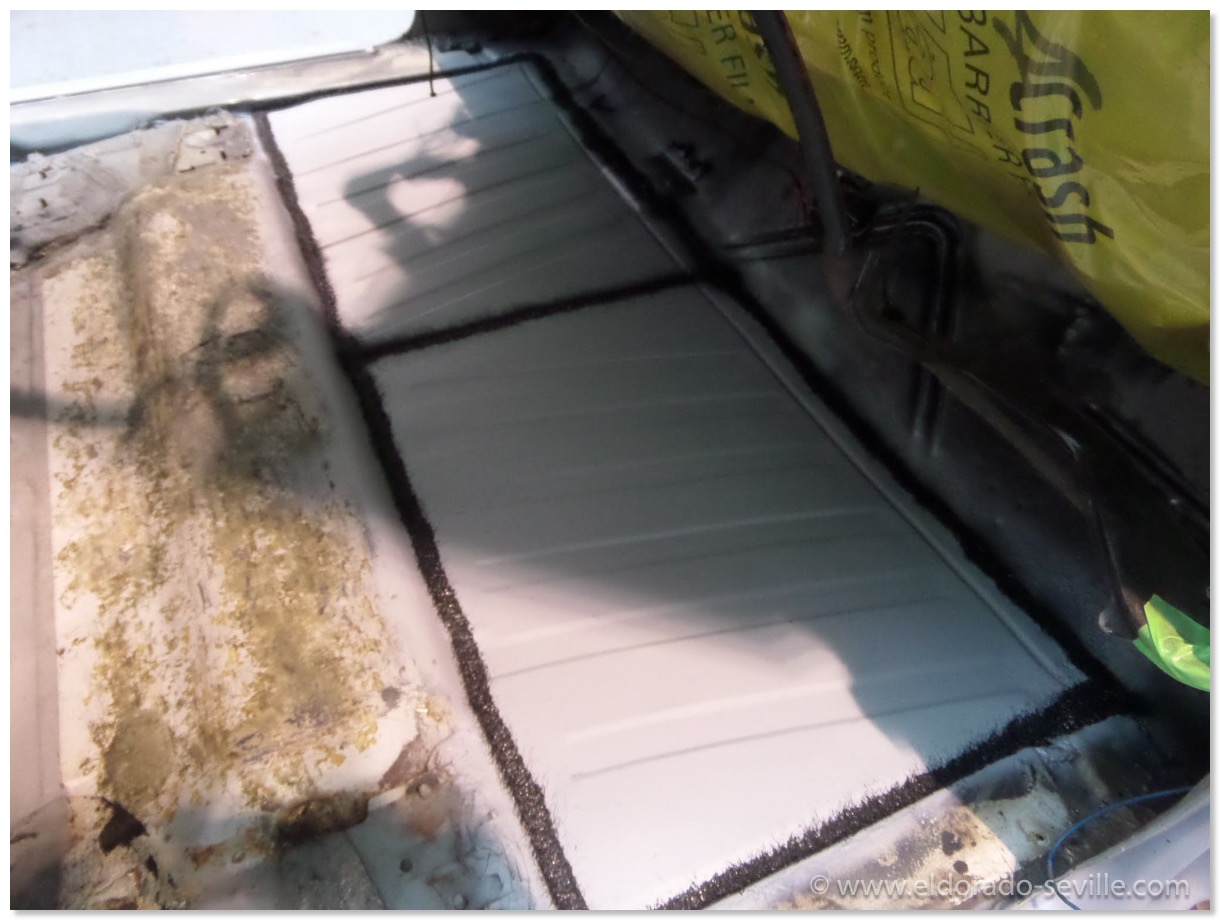
Seam sealer was applied like it was done at the factory. In the factory they just painted over the seam sealer. We will do the same here.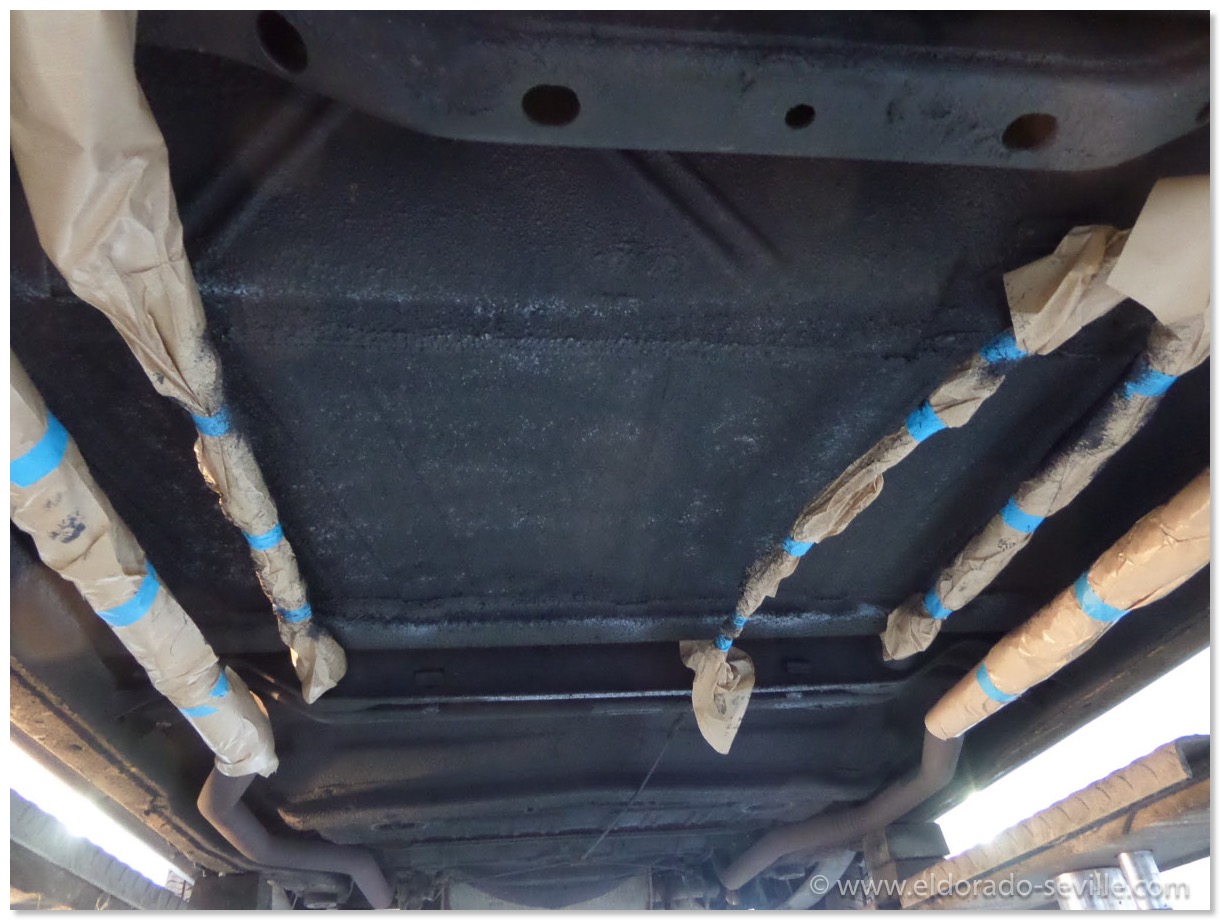
This car came with factory applied rubberized undercoating which was re-applied over the patched floor.
THE 1967 PAINTJOB PROJECT HAS STARTED
The restoration shop is sending me detailed pictures of the process. They are really doing a great job. Very exciting times.
Of course there are the first unpleasant surprises to be seen - there is a little more rust around the rear window than I expected, but still nothing serious. After disassembly we could see that the car is in fantastic shape.
You can find all the pictures of the restoration here on my website as high res pictures.
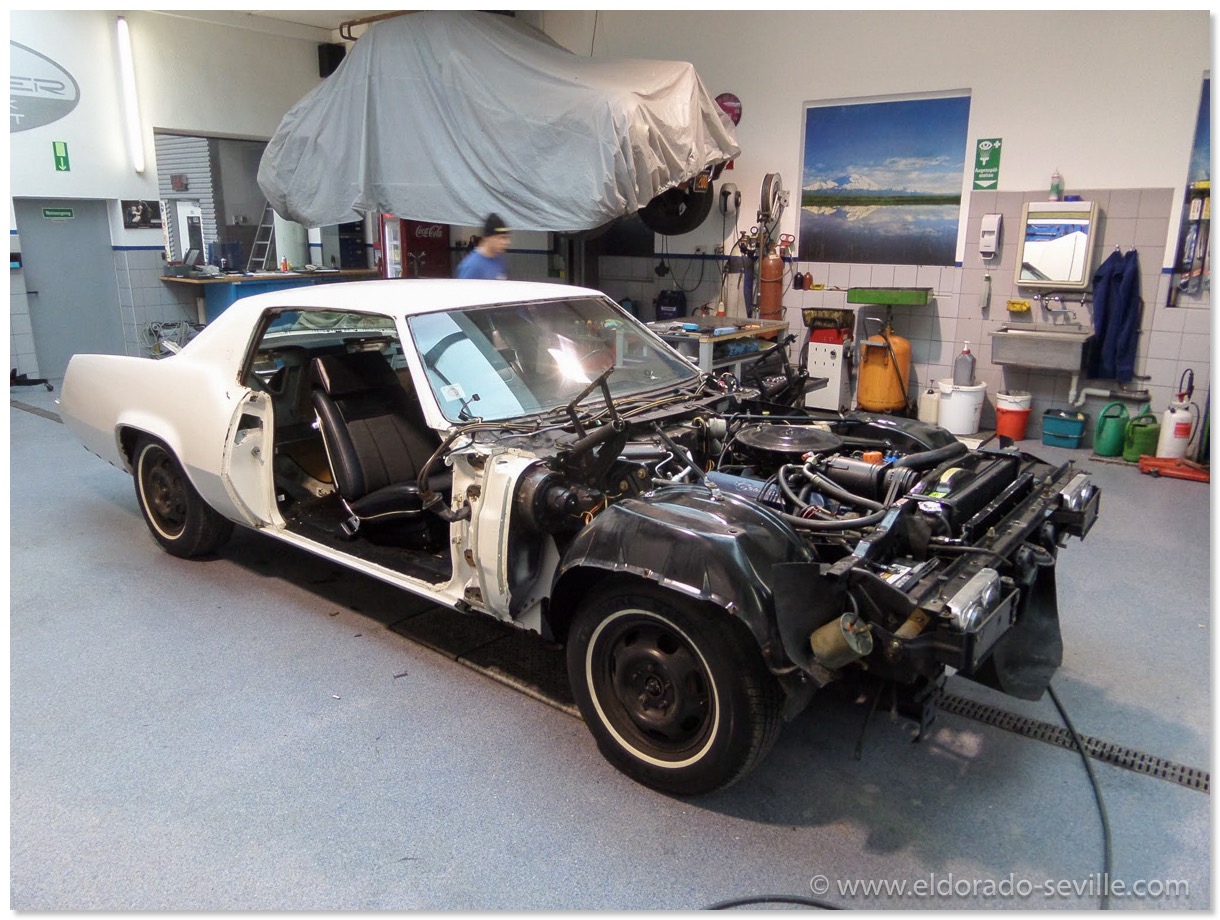
In the shop - disassembly began. They are cleaning everything up now.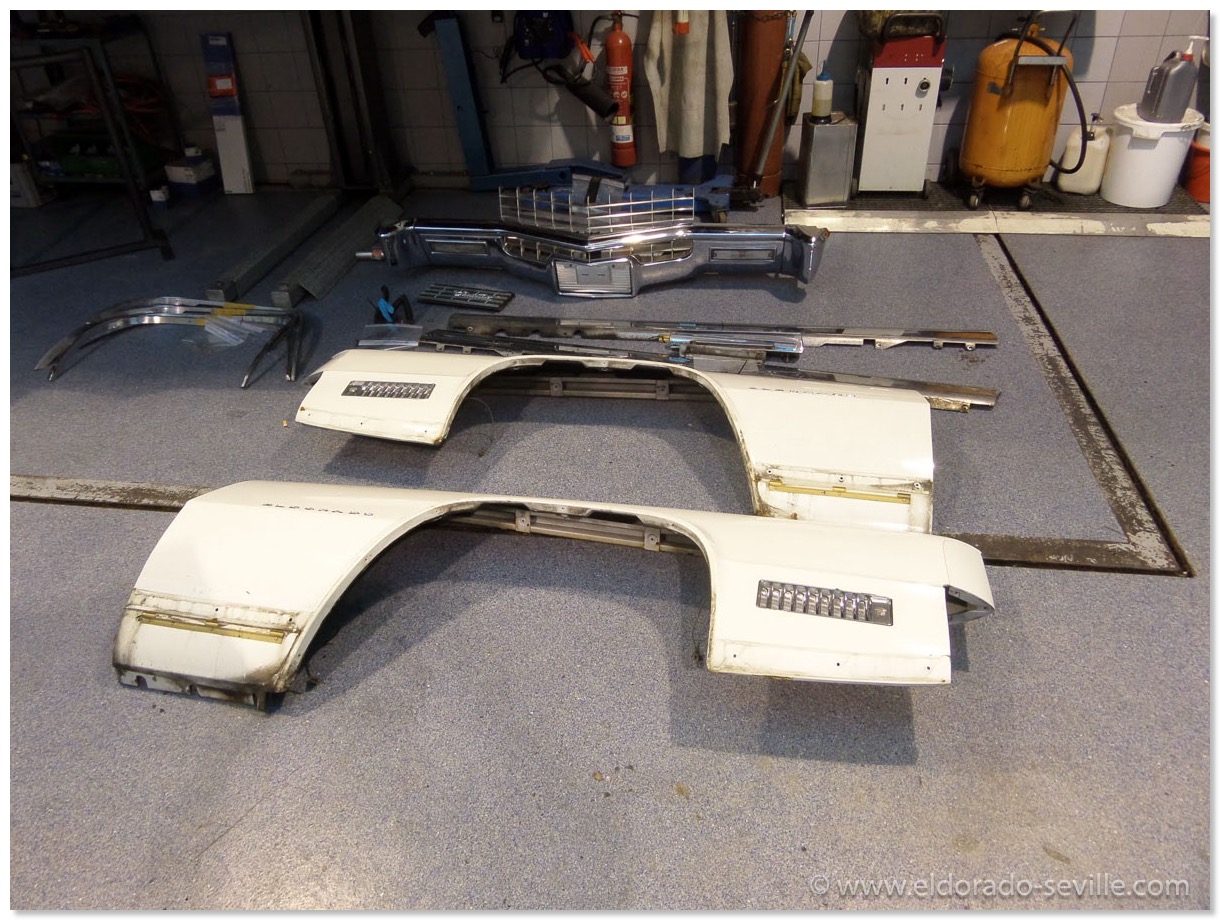
Removal of all the trim and sheet metal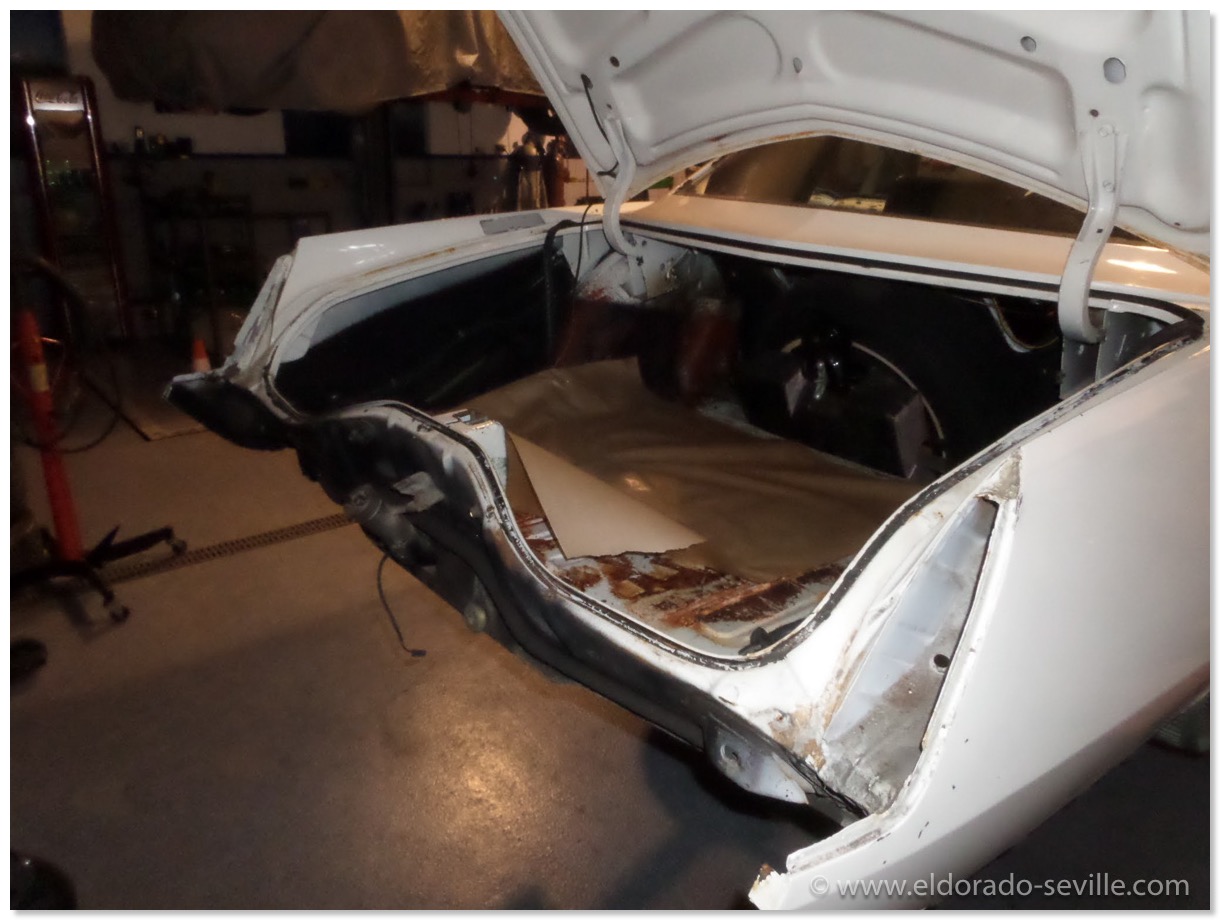
I will also redo the trunk.
NEW PAINTJOB FOR MY 1967 ELDORADO
One of the previous owners of this car tried to touch up the paint in some areas but it was not done properly…
I bought the car in 2009, and since then I was planning to repaint the car to make it perfect.
Being a perfectionist I had a hard time finding a shop which is up to my quality standards and work ethics. During a photo-shooting I came in contact with a shop about 2 hours from where I live. My wife and I were invited to photograph one of the owners Hotrods and he also owns a Cadillac with a breathtaking paint job. While we were there I was extremely impressed by the cleanliness of his shop and the quality of the work I saw there and especially about the attitude of the owner Bernd. A couple of years later 3 of my cars needed some little paint touch ups which made me pretty nervous. But Bernd did the most excellent job on my cars, so that I asked if he could also do my 67 Eldorado.
Unfortunately a couple more years went by where I did not have the financial means to do the job.
Last year - out of nowhere I was contacted by an uncle I had not had any contact for the last 42 years after my dad was killed at a work accident. To make a long family story short - he "inherited" me a very generous amount of money - almost as much as I´ll need for the paint job of my 67 Eldorado.
Yesterday I delivered the car to the restoration shop.
After a long and thorough inspection by the shop owner, the restoration will start soon. The owner is optimistic that hopefully there wont be too many bad surprises hiding. He measured the paint thickness and found some evidence that some damage might be hiding in the right rear quarter panel. Maybe the car had a fender bender sometimes in its previous life.
The car will be completely disassembled. Front and rear glass will be removed. Fenders, hood, trunk and doors are coming off. The interior will be completely removed, but the body will stay on the frame.
Then everything will be taken down to bare metal by sanding, as its too cold to strip the paint with chemical paint stripper during the winter months.
Every step will be documented with pictures which I will post here on my website as well. So keep coming back to follow the restoration if you are into this kind of entertainment.
I´m so happy that the car will be fixed at this shop. It's the first shop I have no worries about the quality of job done. Bernd - the shop owner - is a perfectionist like me. He only accepts perfect quality and wont take any short cuts.
FINDING THE RIGHT COLOR…
The big question for me now is if I should have the car repainted in its original "Grecian White" color, which I am not exactly a big fan of, or repaint it in one of my favorite 1967 Cadillac Eldorado Colors "Atlantis Blue Firemist" which was a pretty expensive optional paint in 1967When I asked my friends to help me decide, about 80% said I should paint it in "Atlantis Blue Firemist"… If I could go back to 1967 and order one from the factory I would probably order the blue one…
I was also informed that the Cadillac LaSalle club does not deduct any points during judging if you do a color change, as long as it is done in a correct color for a certain year…
Being an originality buff - I´m having a hard time to do a color change though. My little son also wants to keep the car white - my wife would like to have it changed to blue… I´m sure whatever I decide - I will sometimes regret my decision. If I paint it in its original white I will always find the color on the boring side and if I paint it blue I will regret that I changed the original color…
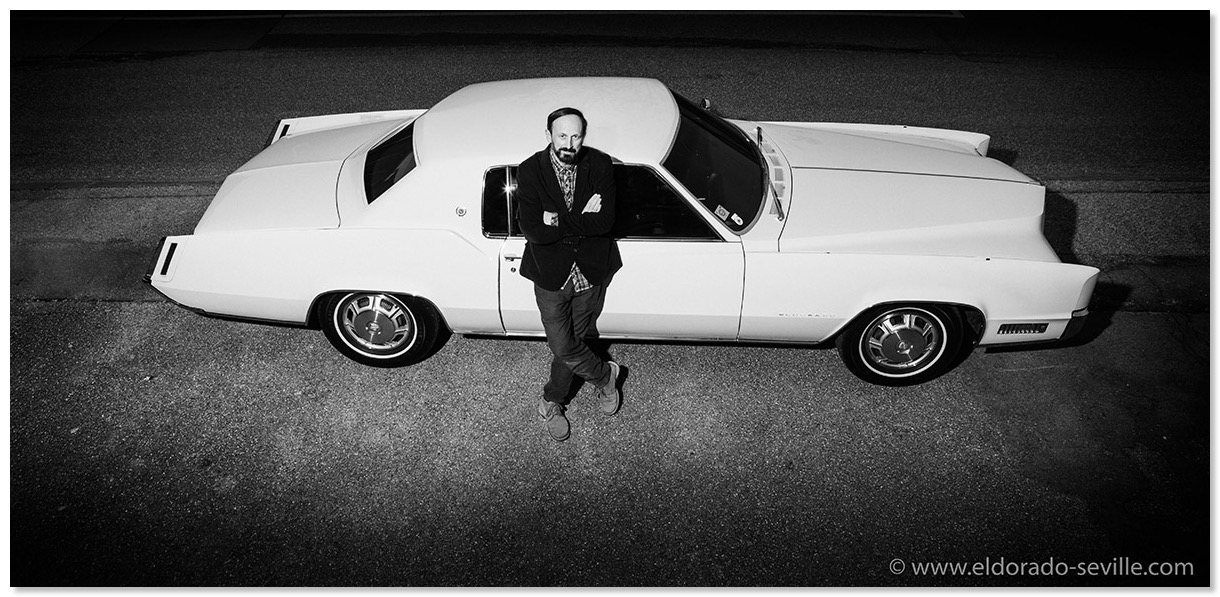 The last The last picture of the 67- still with the original paint.
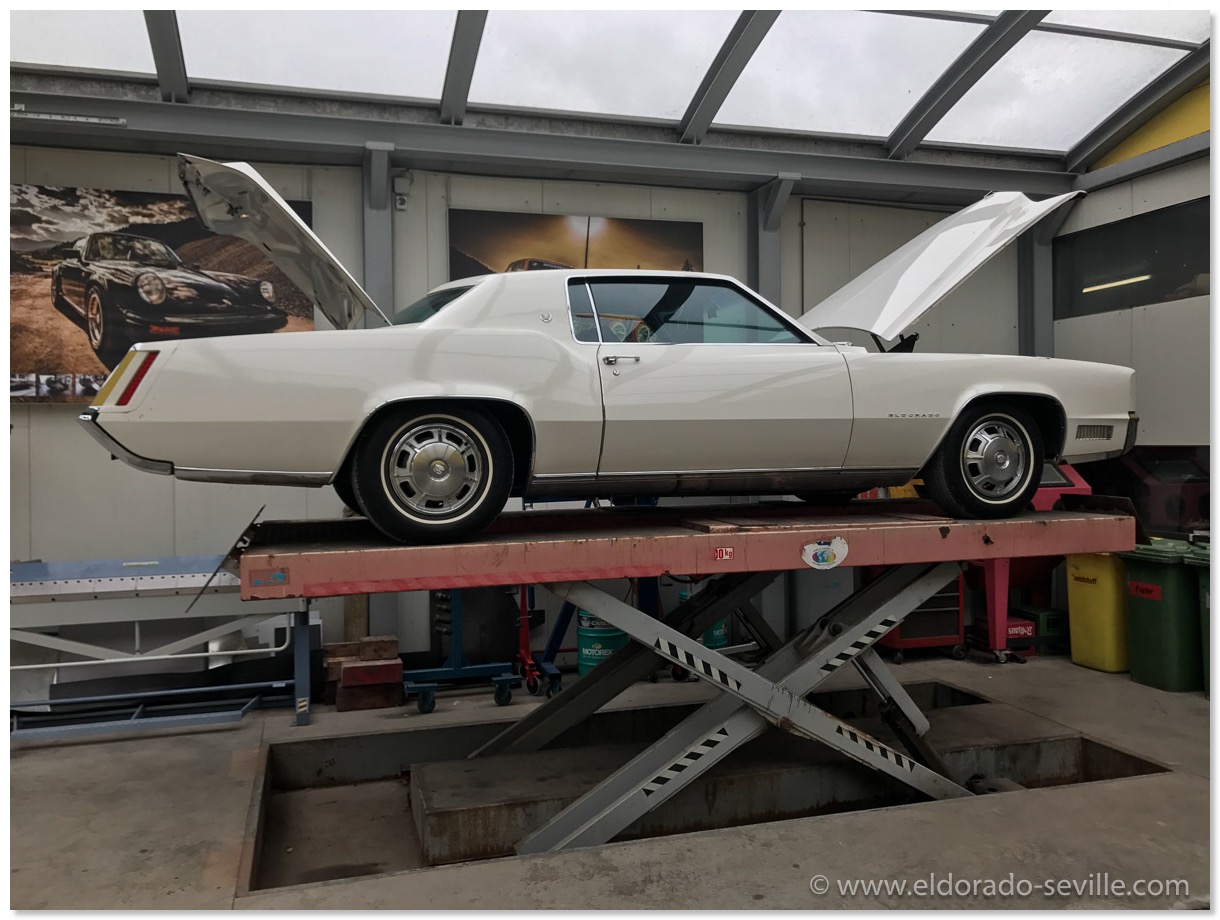
The car at In the restoration shop during the first inspection. The owner of the shop was pleasantly surprised by the condition of the car.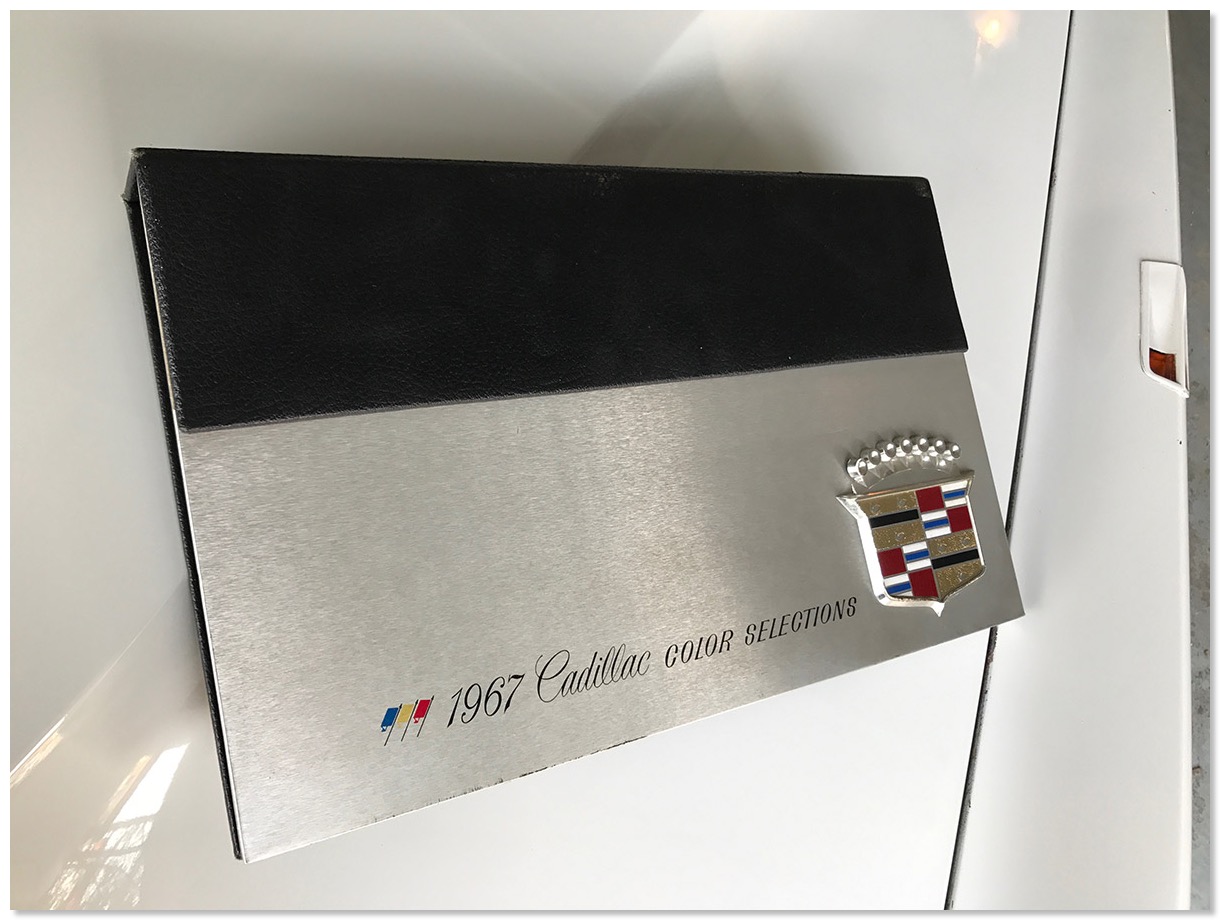
Cadillac buyers had quite a color choice for the 1967 model year. Here is the original 1967 Cadillac Exterior Color Selections Dealer Book
.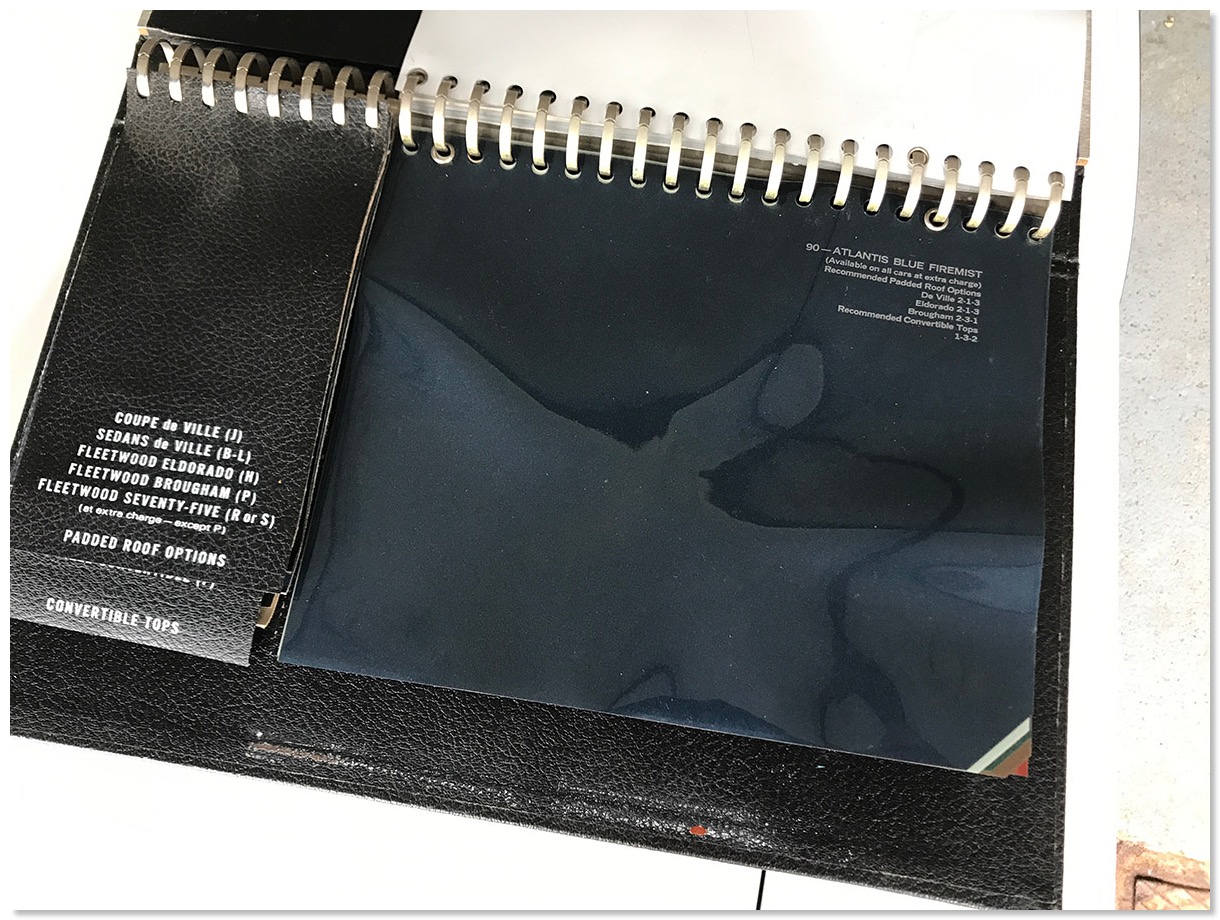
Code 90 - The optional "Atlantis Blue Firemist" is my favorite color for the 67 Eldorado.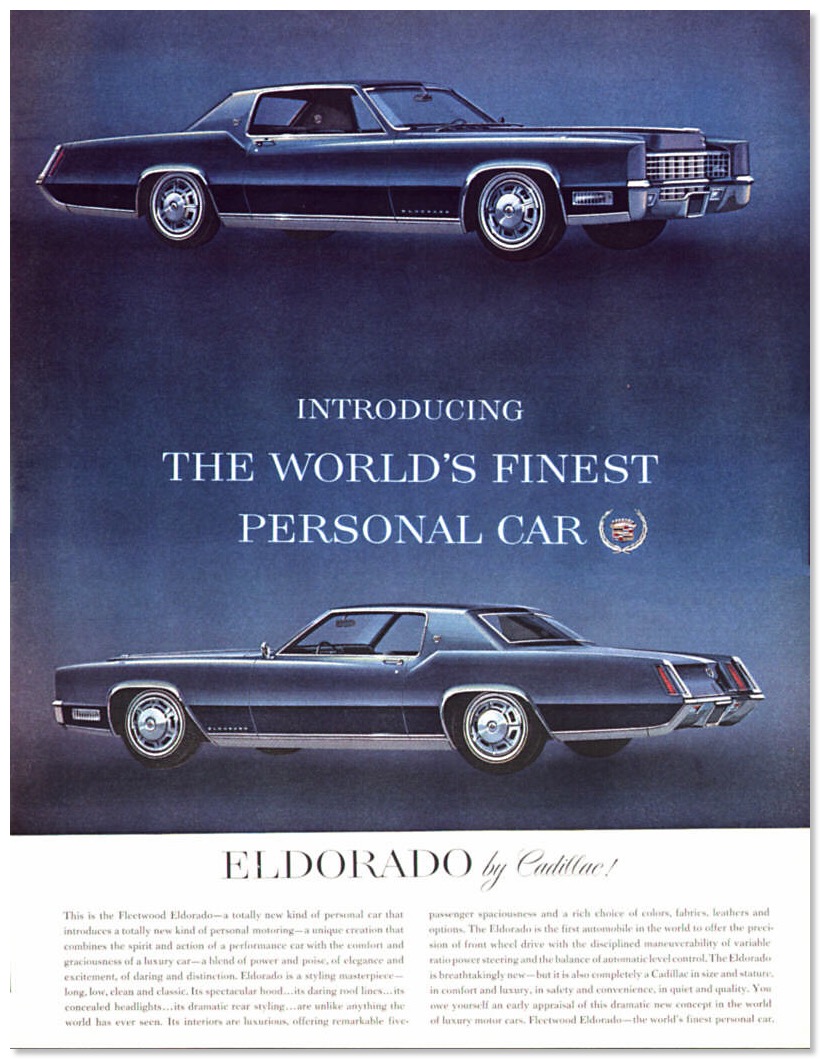
Atlantis Blue Firemist cars were used for advertising the new 1967 Eldorados - Color Code 90. This would be my favorite 1967 Eldorado color…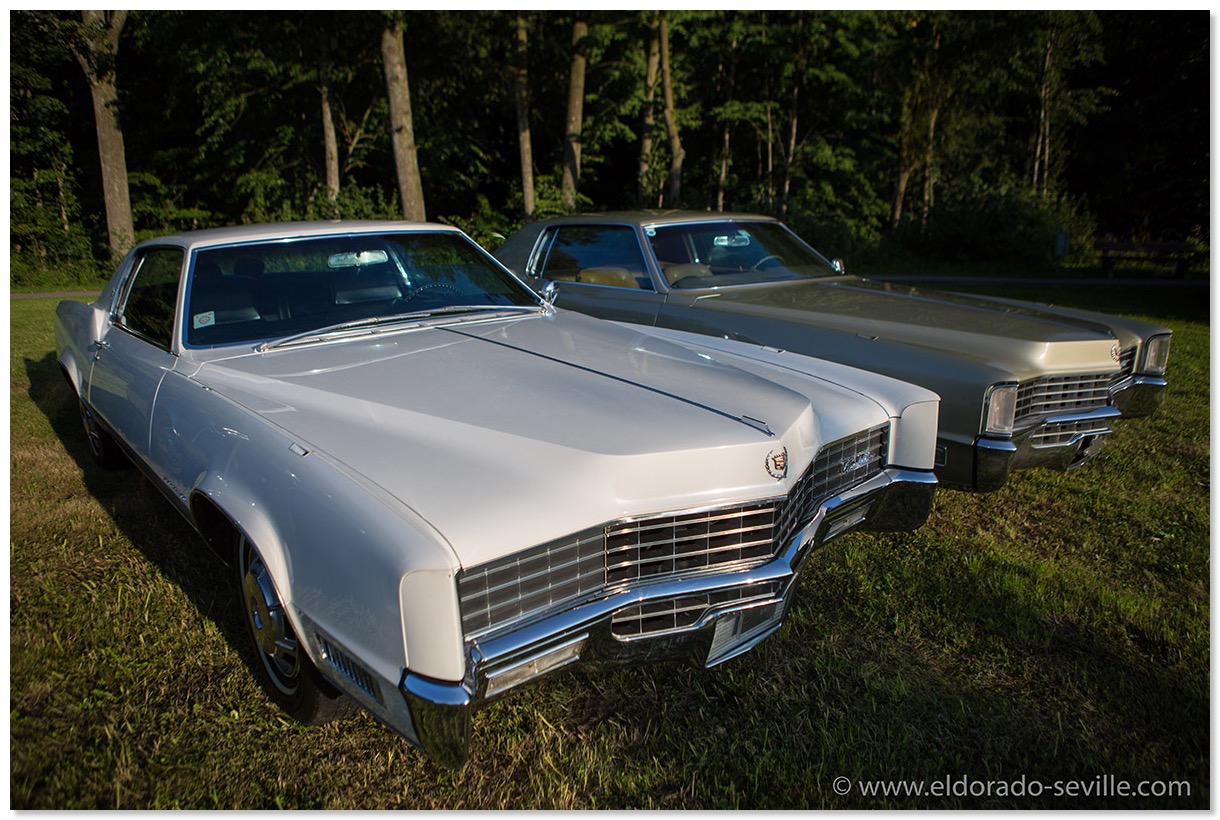
My car still looked flawless on pictures until you looked closer…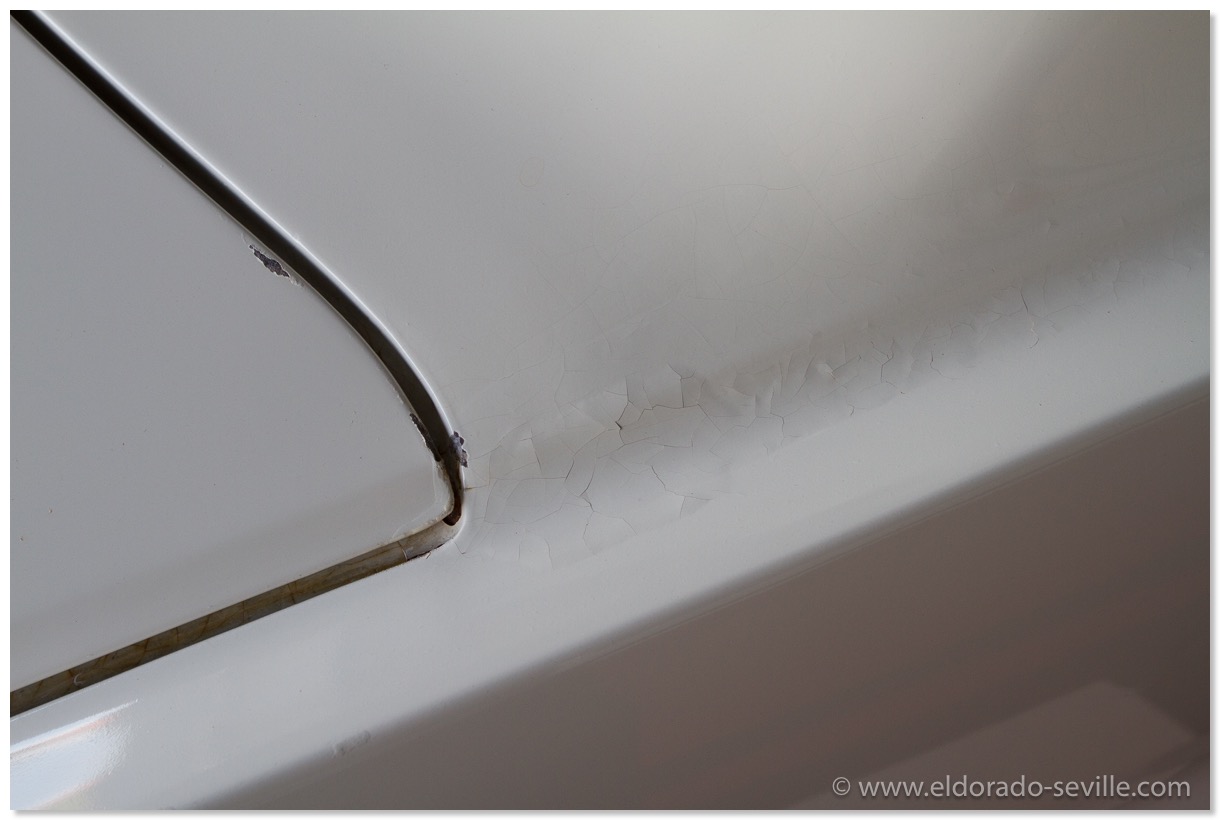
One of the areas where the paint was flaking off.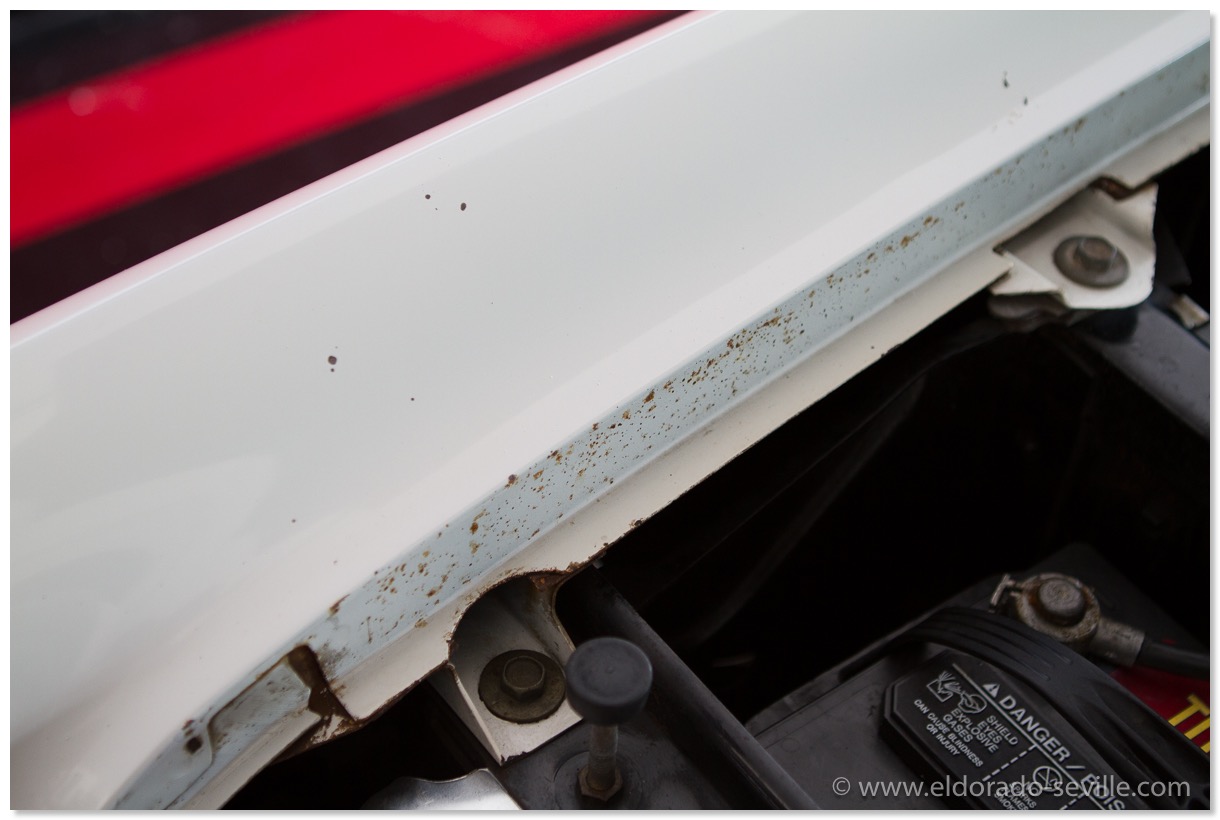
Some of the areas where the paint was pretty worn and surface rust was developing.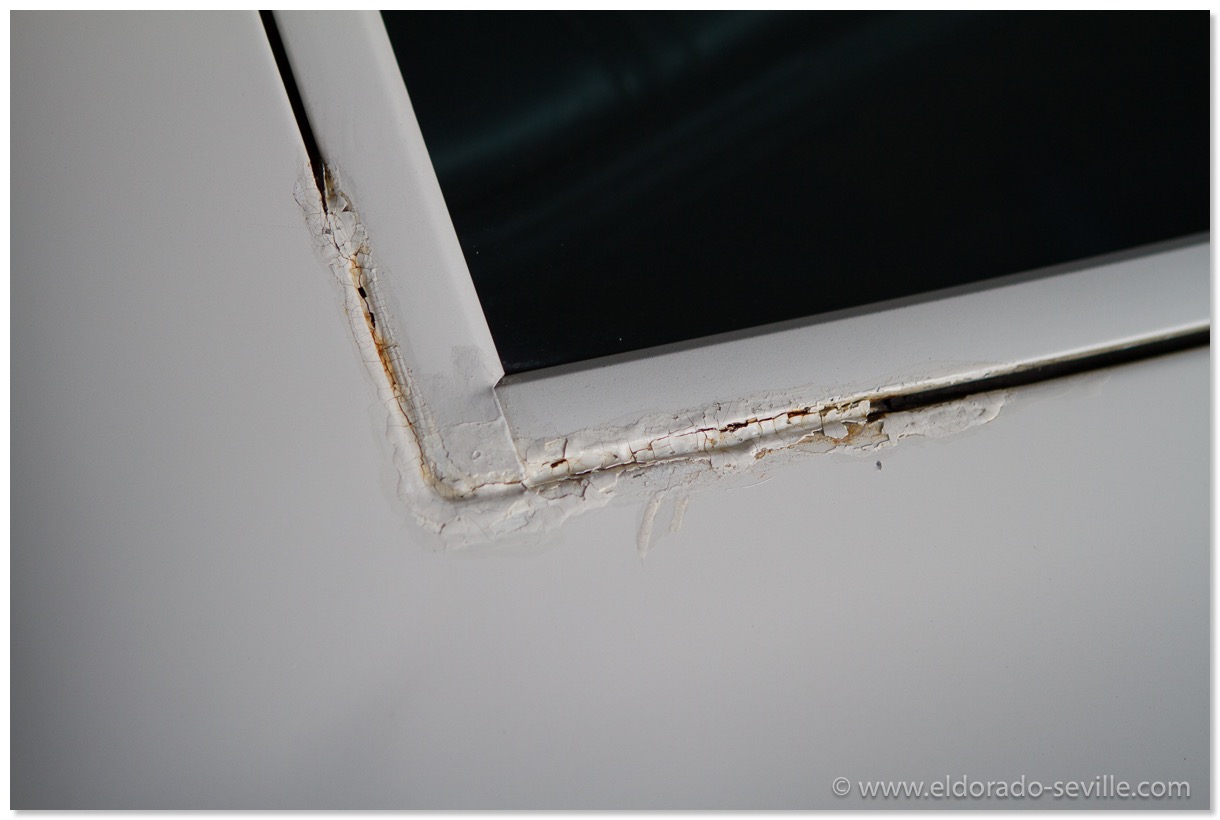
The rear window had to come out to fix this "repair" attempt by one of the previous owners…
REPAIRING THE 1967 CADILLAC AC CONTROL HEAD
This time the 67 Eldorado had a new problem which I had to fix.
It suddenly only blew hot air out of the AC outlets. It did not change modes at all. That was a sign of a weak vacuum signal…
I started to inspect all the AC related vacuum lines of the car which checked out fine. Next I did the test I´m describing here in an older posting, as I suspected that the power servo had a problem.
I soon found out that still not enough vacuum was supplied through the transducer.
That meant that either the transducer could be faulty, the temperature sensor could be defective, or the dash control head would not work properly. I took out the temperature sensor of my 67 Deville to test it in the Eldorado but it did not change anything.
I then removed the control head and tested it with a spare one I once bought cheaply on ebay. It did miss some connectors and switches, it had some blemishes on the chrome and did not look good enough to install it into any of my cars. When I put it into the Eldorado anyway the AC suddenly worked perfectly again.
So I removed all the electrical parts from this working unit and transferred it to the perfectly looking but defective control head. After I had swapped all the usable parts I put the unit back into the car and I now have a perfectly working unit once again.
It looks like that there was a problem in the amplifier part which translates the signal coming from the rheostat into a current going to the transducer which regulates the vacuum going to the control head and the power servo.
Lets see what issue comes up next spring…
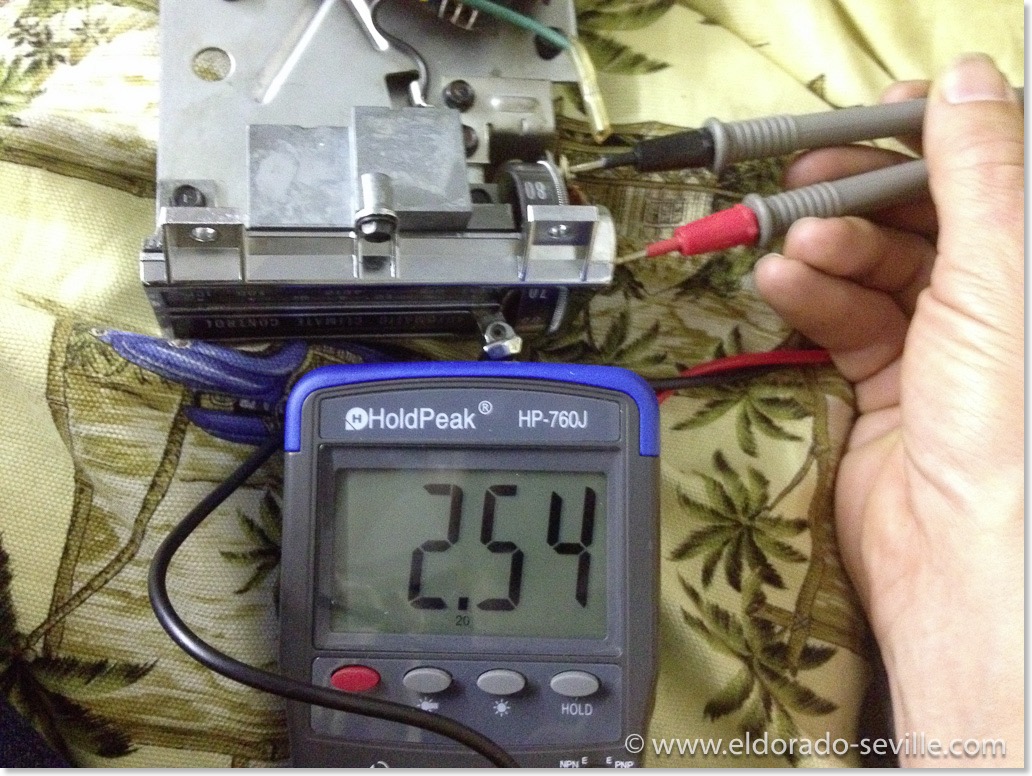
The Rheostat when set to the lowest temperature setting shows around 2,5 Ω You can check if it is working with an Ohmmeter.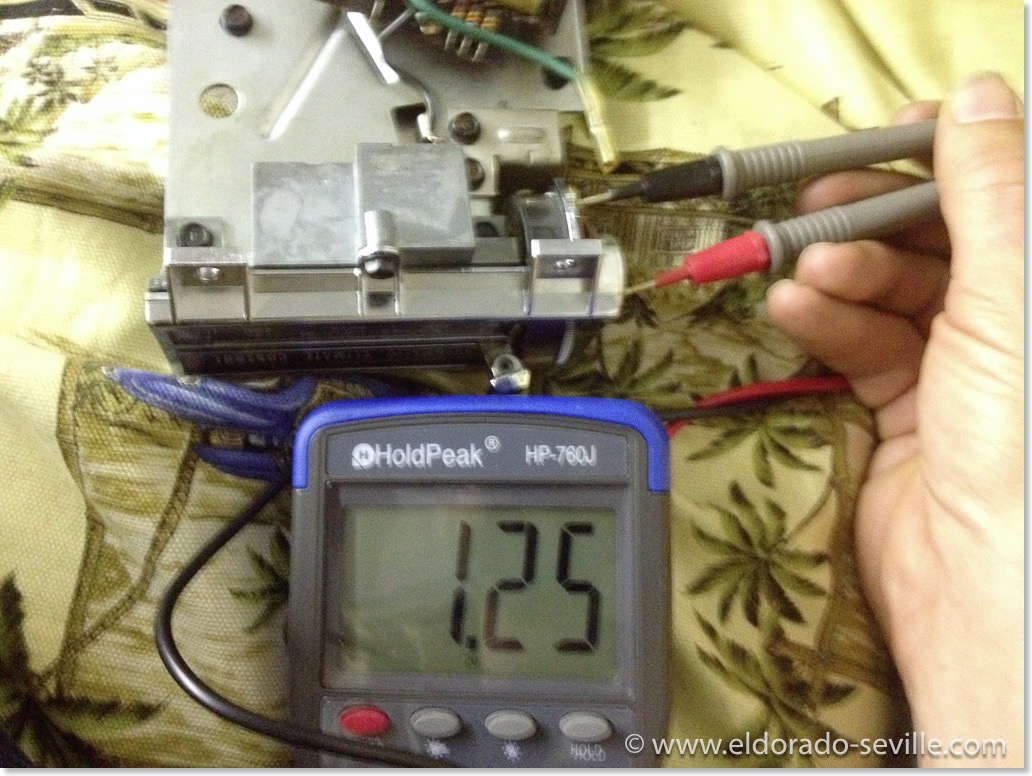
At the highest temperature setting the resistance is getting lower.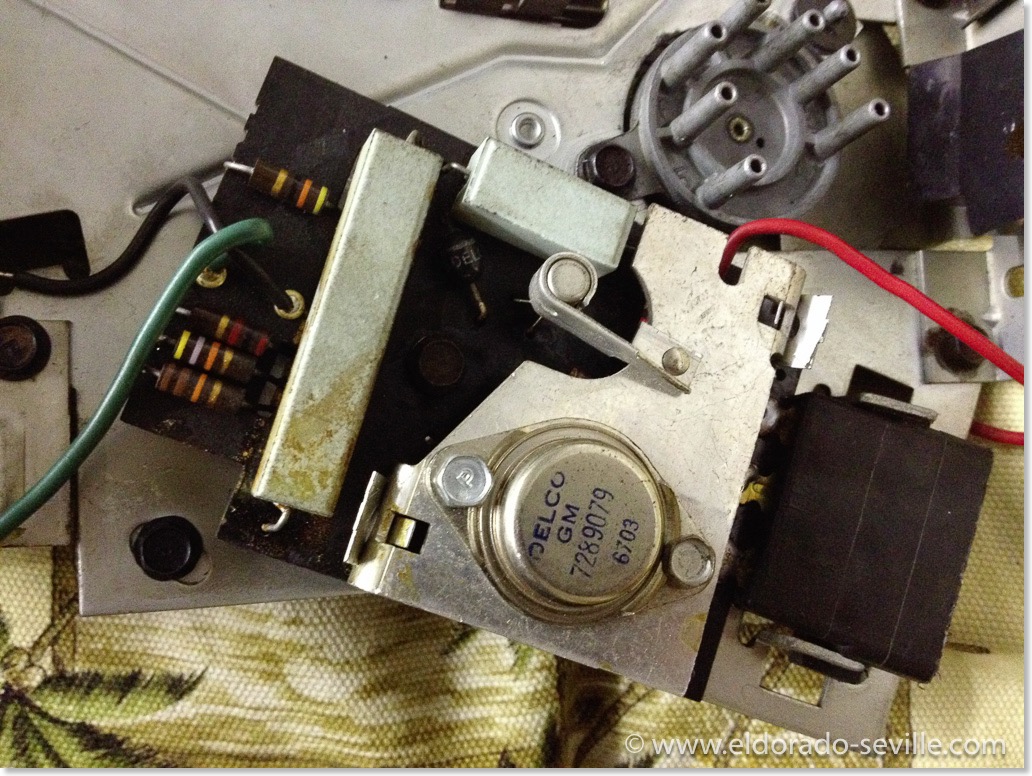
The Amplifier part of the control head is on the underside. Something in here must have gone bad on my control head. I will try to find out what went bad and repair it to have a spare part.
The 67 Eldorado is back on the road for the 2015 season.
1967 CADILLAC BORG CLOCKS REPAIR AND A PROBLEM WITH A PRINTED CIRCUIT BOARD.
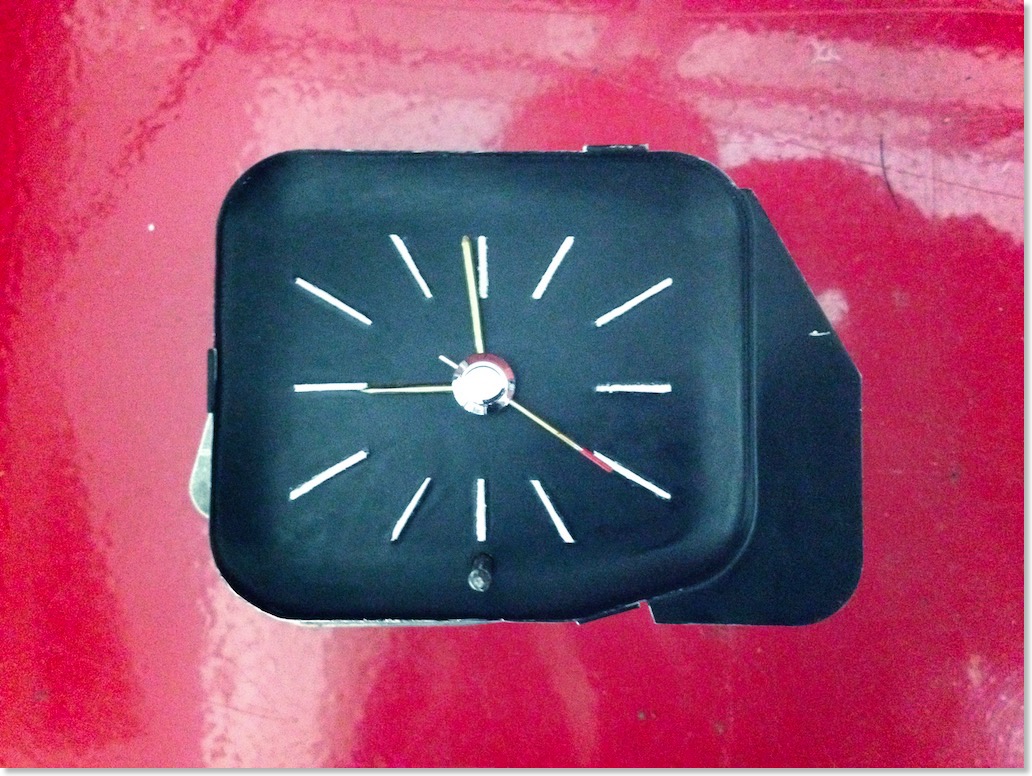
The 1967/1968 Cadillac Westclox clock out of my 67 Eldorado.
The last time I tried to repair the clock in my 67 Cadillac DeVille I totally failed. This was in 1998…
After I got the clocks in all the other Cadillacs moving again - I could no longer stand watching the dead clocks in my 67 Eldorado and DeVille.
So I decided to try to repair them as well.
The last repair attempt at my 67 Eldorado was very disappointing.
In 1998 I took the clock out of my 67 DeVille the last time, and after my repair attempt the hands started spinning in an extremely fast pace - like a ventilator. So I had to disconnect the power to the clock at the printed circuit at the back of the instrument cluster. When I did that I forgot to disconnect the battery and when the power feed touched some metal I had a short somewhere and some smoke came out of the dash… I could not locate where the smoke was coming from - all wires looked perfect. So I just insulated the clock coil power feed and gave up on the repair and forgot about what had happened.
As I found out now - some connection of the printed circuit board got burned back then…
After the failed repair of the 67 Eldorados clock last fall, I decided to try to find a good used clock. Once again Arizona Vintage Parts - my favorite source for parts - came to the rescue. He sold me two non working Borg clocks for a really good price. Unfortunately by now he has run out of stock for them.
So I tried to repair the clocks he sent me - appearance wise they were in very good condition, and I got one back to life for a short time by just cleaning it.
So I put it back into the car and then I made a stupid mistake and ruined it completely. I wanted to tighten the mounting screws and accidentally grabbed the connector for the coil - as you have to work inside the dash without being able to see what you are doing - and so I overtightened it… This stripped the threads of the coil… I had to cut the nut off then and somehow the oscillator wheel inside the mechanism did no longer work properly and when I tried to adjust the stepper it broke off :-(
BTW - Do not use WD40 for cleaning and lubricating a clock like I did… This will ruin the clock as I found out when it was already too late… There are special clock oils available to lubricate clocks.
The other clock I got had a defective oscillator wheel and I could not repair it as well…
So I contacted Arizona Vintage Parts once again for some new clocks but he had sold all his stock on clocks to Sweden…
I had to contact all the Cadillac Parts dealers I found in Hemmings Motor News for two Borg clocks, but I was unsuccessful or they were exorbitantly expensive. Some of the well known Cadillac Parts dealers either did not have them, did not react to my inquiries or asked up to $ 385.- for a used, rebuilt clock. Others asked up to $180.- for a non working clock.
Luckily I found a company called “The Clockworks" which was highly recommended on some Cadillac and other classic car forums for their good work in repairing clocks and also converting them to a quartz movement.
Everybody seems to recommend to convert your clock to a much more reliable and cheaper quartz movement. I thought about it for a while but I decided that I wanted to go for an original movement for authenticity reasons. If you convert to quartz the "tic-toc" movement will be gone and you can tell by just looking at the clock…
I ordered two rebuilt Borg clock movements for my clocks from "The Clockworks". Their service was excellent and they were a great help. Great customer service! I would buy from them again or have my clocks rebuilt by them anytime.
After I received the movements I installed them and put everything back together. You have the keep the adjustment stem and the housing from your old clocks if you replace the movement.
When I put the clock back into the 67 DeVille it did not work though. I soon found out that no power was coming to the coil through the printed circuit board.
I then remembered about my failed repair attempt 17 years ago and the smoke that came out of the dash… Somewhere the circuit board was burned. So I connected the orange cable going into the multiple terminal connector at #7 terminal to the clock directly and it worked again.
So I installed a cable directly to the clock. This is a temporary fix until I´ll have a new circuit board. Installing a new board requires to take the dash completely apart to replace it.
A printed circuit board is available new here: https://www.opgi.com/cadillac/CE11091/
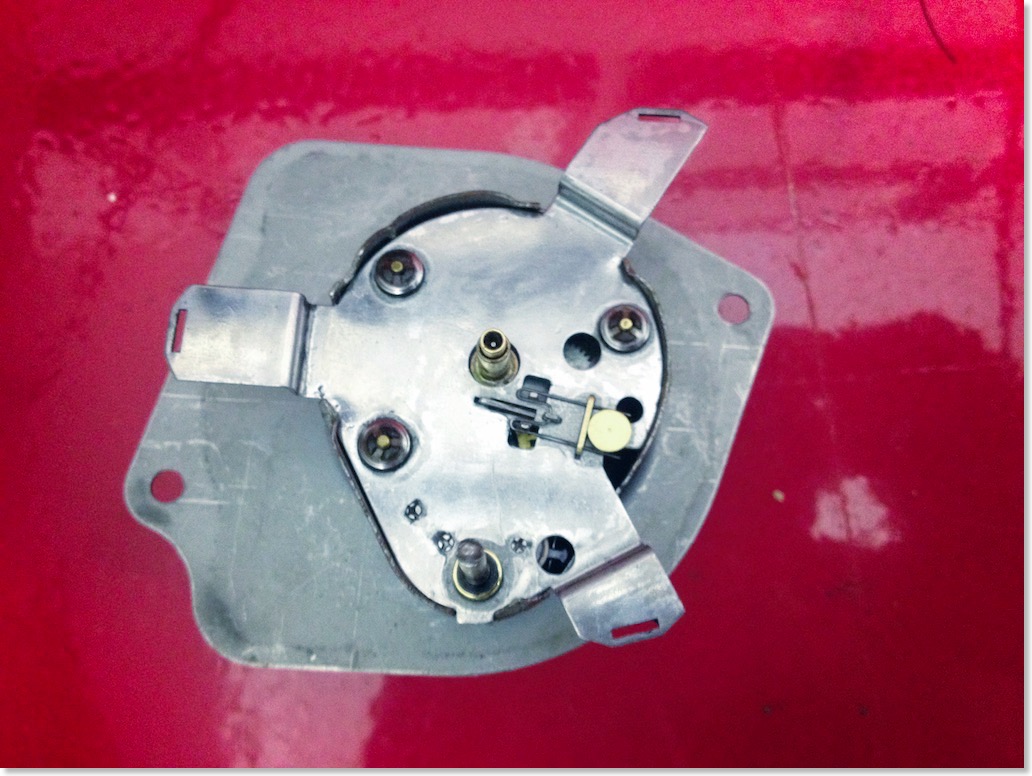
The 1967 Cadillac Westclox clock out of my 67 Eldorado. Seen from the top with the clock face removed. The clock face on the Westclox is mounted differently than on the Borg.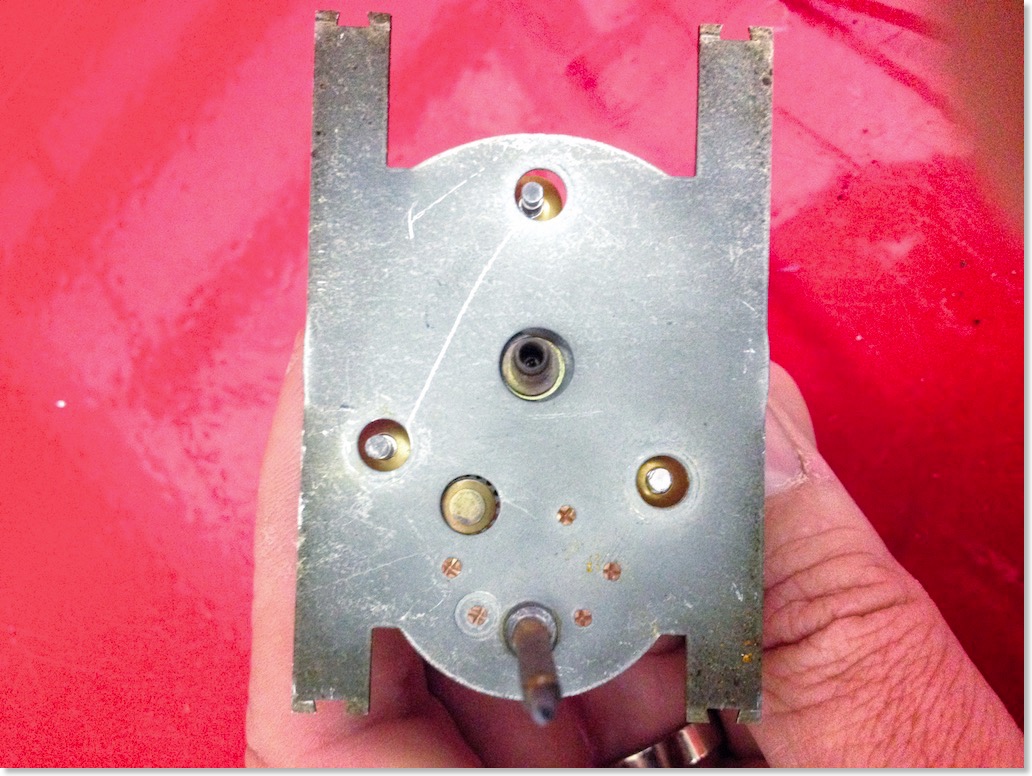
The 1967 Cadillac Borg clock. The housing cover in place - as you can see it looks completely different than the one on the Westclox.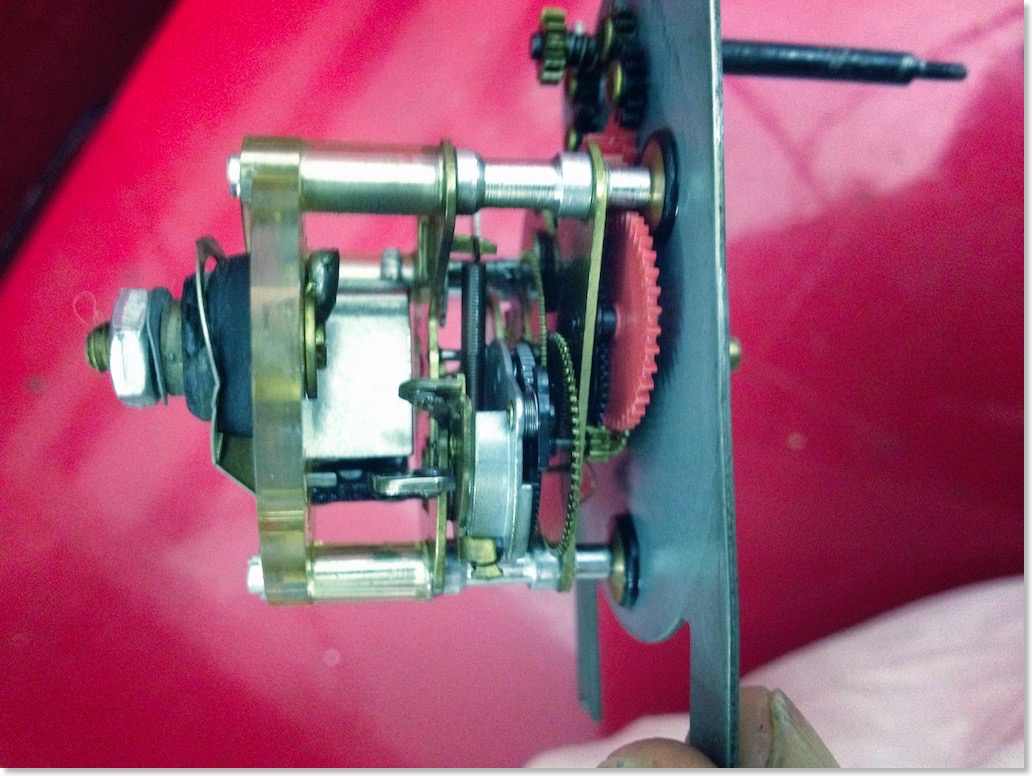
The 1967 Cadillac Borg clock out of my 67 DeVille.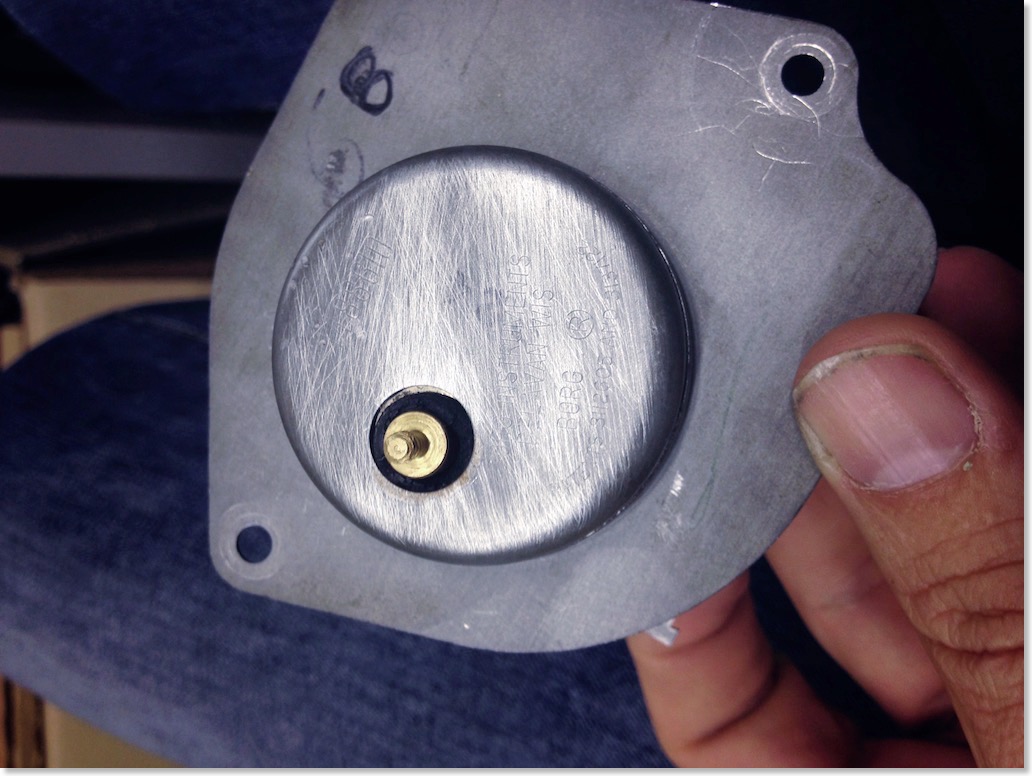
The Borg replacement clock I got from Arizona Vintage Parts. 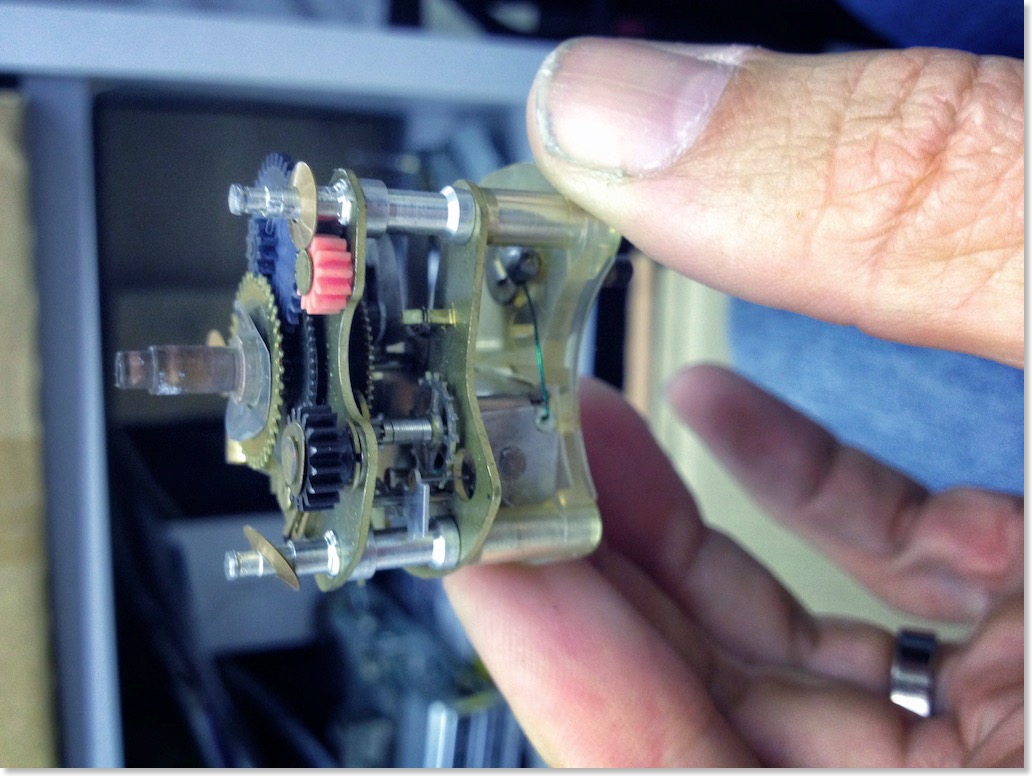
The Borg replacement clock I got from Arizona Vintage Parts - this is the original movement removed from the housing.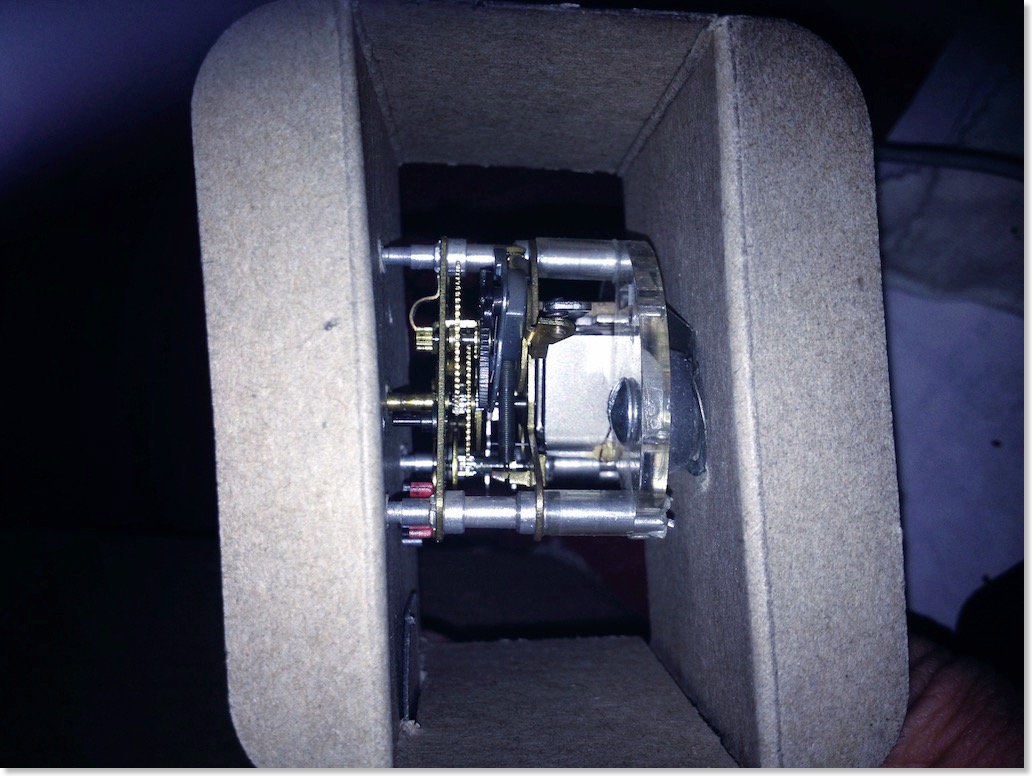
The rebuilt Borg movement I got from "The Clockworks"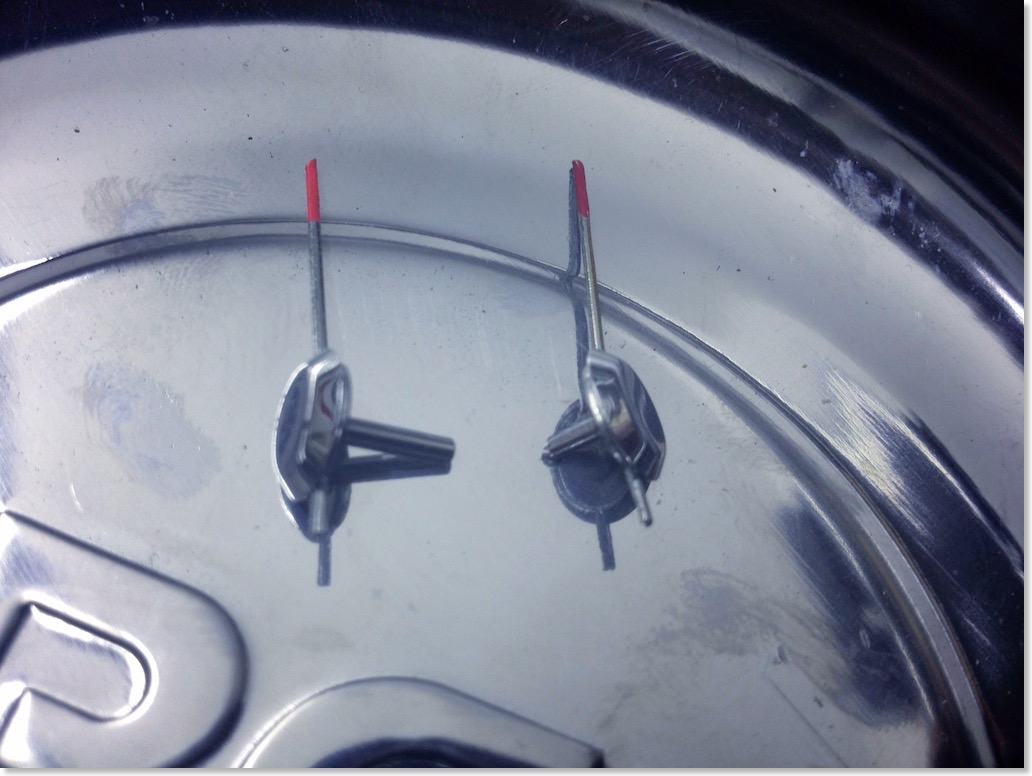
There is a difference in the second arms: On the left the one from a Borg Clock - on the right one from a Westclox. They are not interchangeable. Also the housing of the clocks is different. You cant interchange parts between these two clock types.
I repainted the setting stem in semi gloss black.
The 1967 Cadillac printed circuit. The one for the Eldorado is slightly different though.
REPAIRING THE CLOCKS OF THE 1958, 1966 AND 1967 CADILLAC
So it was time to service some of the clocks which stopped working over the years.
The clock in the 66 did not work at all.
It's extremely simple to remove on the 66 as you can get it out of the instrument panel by just unscrewing one bolt.
The clock was very dirty in the clock work and needed a good cleaning and some good lubrication. Also the contact of the coil was a little worn and this was fixed. It then happily ticked back to life and now works perfectly.
The clock on my 58 stopped working a couple of years ago. So it came out as well. It's a little more complicated to get it out though...
When it was finally out - it could be seen that the coil was burnt and that it needed some very good cleaning as well. Some of the melted insulation material was all over the clock mechanism and of course I had no spare coil for it - so the original one had to be rewound with some good wire from a left over light solenoid...
Wow - this really took a while - but now the clock works perfectly again!
I was not so lucky with the clock on the 67 Eldorado which only worked when the car was warm. To take it out you have to remove the upper dash and then get out some light bulbs and disconnect it from the printed circuit.
It was also cleaned and lubricated and the clock worked, but it made a very loud noise when the coil rewound the spring of the clock.
The sound got better over night, but then the clock stopped working completely... It's a Westcox clock which uses a double coil and is much more complicated to rebuild than the Borg clocks. Its also almost impossible to find parts for it, as Borg clocks are much more widely used.
Looks like I will need a new 1967 clock and replace it with a Borg unit :-(
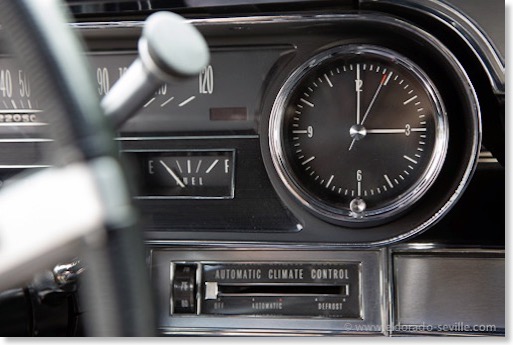
The clock in the 66 is now working perfectly again.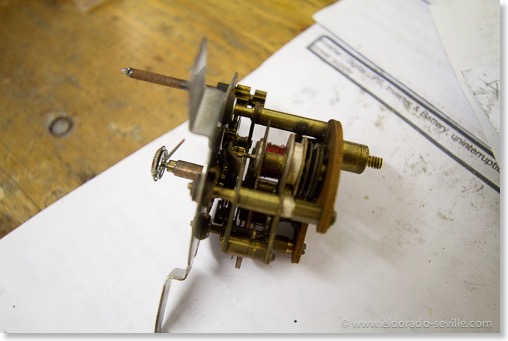
The disassembled clock of the 58 Eldorado.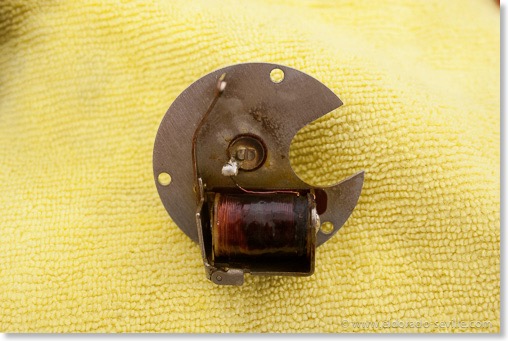
The coil was burnt on the 58 clock.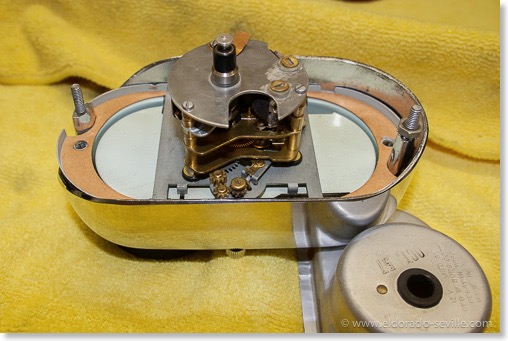
Fully cleaned clock. 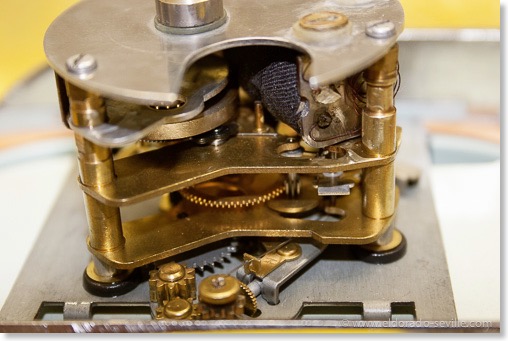
Back together with a rewound coil.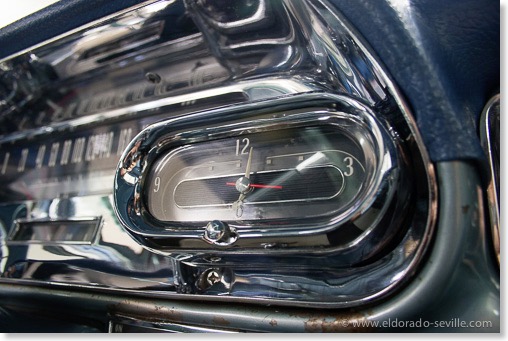
Back in the car - working perfectly again.
1966 Cadillac Coupe deVille (16)
1967 Cadillac DeVille (54)
1967 Cadillac Eldorado (73)
1971 Lincoln Continental Mark III (24)
1974 Cadillac Coupe deVille (46)
1978 Cadillac Eldorado Biarritz (25)
1996 Buick Roadmaster (20)
Cadillac BIG Meet (2)
Car Shows (55)
Cruising (4)
CT6 (1)
For Sale (3)
Garage Stuff (32)
Pacer (1)
Restoration (140)
Various (55)
Video (20)
Website News (31)
- 6 way power seat
- 8-track
- 10 Ohm
- 429
- 1932
- 1957
- 1958
- 1958 Cadillac Eldorado Seville
- 1958 Cadillac Repair Tip
- 1959 Cadillac Eldorado Seville
- 1964
- 1965
- 1966
- 1966 Cadillac Coupe deVille
- 1966 Cadillac Repair Tips
- 1967
- 1967 Cadillac DeVille
- 1967 Cadillac Eldorado Repair Tip
- 1967 Cadillac Repair Tip
- 1967 Eldorado
- 1968
- 1970 Cadillac Eldorado
- 1971
- 1971 Lincoln Continental Mark III
- 1974
- 1974 Cadillac Coupe DeVille
- 1974 Cadillac Repair Tip
- 1976
- 1977
- 1978
- 1978 Cadillac Eldorado Biarritz
- 1978 Cadillac Repair Tip
- 1980 Cadillac Eldorado Biarritz
- 1996
- 2012
- 2014
- 2017
- 2018
- 2019
- 2022
- 2023
- 2025
- 3063206
- 7027235
- 7800483
- 7805675
- 7805676
- 12355706
- 17058531
- 17059968
- 17059969
- 22010515
- 22010661
- A.I.R
- A6
- AC
- AC Compressor
- AC Electrical Diagram
- ACC
- Accelerator Pump
- Accelorator pump
- Accident
- Actuators
- Adriatic Blue Metallic
- Ads
- Aftermovie
- Air Pump
- Aircondition
- AIRPUMP
- ALC
- Alternator
- AM
- AM-Transmitter
- Antenna
- Anti Rattle Clips
- Antique Gold
- Arizona Vintage Parts
- Arrival
- Article
- ASC
- Ash Tray removal
- ATC
- Atlantis Blue Firemist
- Austria
- Austro Classic
- Autolite SP-459
- Automatic Seat Back Release
- Award
- Banner
- Barn Find
- Battery
- Battery Tray
- Beach Race
- Bearing
- Bendix
- Biarritz
- Bigfoot
- Bill Hirsch Engine Enamel
- Bleeder Screws
- Bleeding
- Blower
- Bodywork
- Bolts
- Book
- Borg
- Brake Booster
- Brake Fluid
- Brake Gray
- Brakes
- Broken Bolt
- Brougham
- Bucket seats
- Buick
- Bumper End
- Bushings
- Cadillac
- Cadillac BIG Meet
- Cadillac BIG Meet
- Cadillac birthday cake
- Cadillac Blue
- Cadillac Color Selections Dealer Book
- Cadillac Coupe deVille
- Cadillac Dealer
- CADILLAC GRAND EUROPEAN
- Cadillac Meeting
- Cadillac Mini Meeting
- Camaro RS
- Caorle
- Car Show
- Carburetor
- Card
- Carpet
- Carter AFB
- Cavalry Twill Vinyl
- CB
- CBM
- CCCD
- Choke
- Christmas
- Citizens Band
- Classic Cadillac Club Deutschland
- Clay Towel
- Cleaning
- Clock
- Clockwork
- Clutch
- Clutch Coil
- Collector
- Colonial Yellow
- Color Coded Springs
- Commercial
- Compound
- Compressor
- Condenser
- Continental Mark III
- Control Head
- Conversion
- Convertible top
- Coolant
- Corona
- Cowl
- Cruise Control
- Cruising
- CT6
- CV Boots
- CV JOINTS
- D6230
- Dash Trim
- Decal Removal
- Decals
- Decoration
- Dehumidifier
- Delco Moraine
- Der Standard
- detailing
- Deville
- Diagnosis Chart
- Diagram
- Dial
- Digital Rotary Drum Clock
- Diner
- Disc Brakes
- Distributor
- Diverter Valve
- Door Jamb Switch
- Door Rubber Conduit
- Dornbirn
- Dot3
- Drive Shaft
- Driving tour
- Drum brakes
- Dry Ice Blasting
- Dry Ice Cleaning
- DVD
- Eastwood
- Eldorado
- Electric Choke Thermostat
- Electrical schematic
- Elvis
- Engine Bay
- Ep
- Epoxy floor
- Europe
- Evaporator
- Exide
- Factory Markings
- Fender Skirt
- Floor
- Flushing
- Flyer
- Foam
- For Sale
- Front AXLE
- Front brakes
- Front bumper filler
- Front Floor
- Front wheel bearing
- Fuel Filter
- Fuel Pump
- Fuel Sending Unit
- Fusible Link
- Garage
- Garage Cabinets
- Gasket
- GE
- Gear indicator
- General Time
- Glove box light
- Grand European
- H4
- Haus of Hot Rod
- Headlight Actuator
- Headlight doors
- Headlights
- Heater Core
- Heater Hose
- Heater Valve
- High Idle
- History
- Holley
- Honest John
- Hood
- Hood Emblem
- Hood Ornament
- Hose Clamp
- Hot Choke
- Hot Water Valve
- HotRod
- How to
- Hödlmayr
- Ignition Diagram
- Illuminated Entry
- John D‘Agostino
- John Foust
- Klassikwelt Bodensee
- Kremsmünster
- LaSalle
- Leather seats
- Light Switch
- Limited
- Lincoln
- Lincoln Mark III Repair Tip
- Low Mileage
- Magazine
- Marilyn Monroe
- Mark III
- Master Cylinder
- Master Switch
- Master Vacuum Switch
- Media Blasting
- Meeting
- Meguiras
- MK II
- Mobile
- Model
- Moldings
- Mom
- Mopar Nationals
- Mostkost Kustom
- Movie
- Munich
- Neon
- NOS
- Oberösterreicher des Tages
- oilchange
- ORF
- Overspray
- Pacer
- Paint
- Paint correction
- Paintjob
- Part Number
- Parts
- Patch Panel
- Perfect Circle
- Permabag
- Persian Lime
- Photo shooting
- Photoshooting
- Pictures
- PinUp
- POA Valve
- Power Antenna
- Power Servo
- Power Vent Windows
- Power Window
- Printed Circuit Board
- Programmer
- Pulley
- Quadrajet
- Quarter Panel
- Quartz Conversion
- R134
- Radiator
- Radio
- Rattle
- Rear brakes
- Rebuild
- Recalibrate
- RediRad
- Reed Switch
- Relais
- Relaunch
- Removing Overspray
- Repaint
- Repair
- Restoration
- RIP
- Roadhouse
- Roadmaster
- Rochester
- Rocker Arm Cover
- Rocker Panel Extension Clips
- Rostio
- Rotary Valve
- Rotterdam
- Rupes
- Rust removal
- Rust removal gel
- Sabre Wheels
- Sand Blasting
- Sandblasting
- Screed
- Season Greetings
- Seasons Greetings
- Seat Back Locks
- Seat Padding
- Seat Transmission
- See through ornament
- Self adjusters
- Self Starter
- Sepp's Garage
- Seville
- Sheetmetal
- Shocks
- shop manual
- short
- Sign
- Solenoid
- Spark Plug Wire Routing
- Speakers
- Special Award
- Speed Bleeder Screws
- Splash Guard
- Starter Diagram
- Starter Motor
- Steering Column
- Storage
- suction throttling valve
- sunroof
- suspension
- Swirl Mark removal
- Switzerland
- T3
- Taillight Cover
- Texan´s Choice Award
- Thermostat
- Tilt and Telescope
- Time capsule
- Tomsclub
- Torque Specifications
- Tower Hose Clamp
- Towtruck
- Trailer
- Transducer
- Transmission
- transmission control selector
- transmission control selector indicator light
- transmission shift indicator
- Treadle Vac
- Treffen
- Tri-Band
- Troubleshooting
- Trunk Cardboard Kit
- Trunk lid
- Trunk lining
- Trunk to bumper cover
- Turn Signal Switch
- TV
- Typisierung
- Ultimate Garage
- Underbody
- Undercarriage
- Undercoating
- Undercoating Removal
- Vacuum Booster
- Vacuum diagram
- Vacuum hoses
- Vacuum Master Switch
- Vacuum Schematic
- Vacuum Valve
- Valve Cover
- Various
- Vent Window Switch
- Vibration
- Vibrator
- Vicodec roof
- Video
- Vinegar
- Vinyl Roof
- Visitor
- Washer Fluid Float
- Washer Fluid Low Level Indicator
- Water Pump
- Wax
- Weatherstripping
- Website News
- Westclox
- Wheel Bearings
- Wheel Housing
- Wiesbaden
- Windlace
- Winter
- Wiring
- Wiring Diagram
- Wonderbar
- Workbench
- Zurzach
 GERALD´S CADILLACS - NEWS