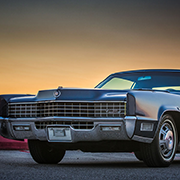
 GERALD´S CADILLACS - NEWS
Happy Holidays!
Thanks to all visitors of my little site and thanks for all your nice comments and kind words and for all the people I had the chance to meet and that became real friends through my site.
You great people are the reason why I´m running this site.
I wish you all a happy 2014! Keep on cruising!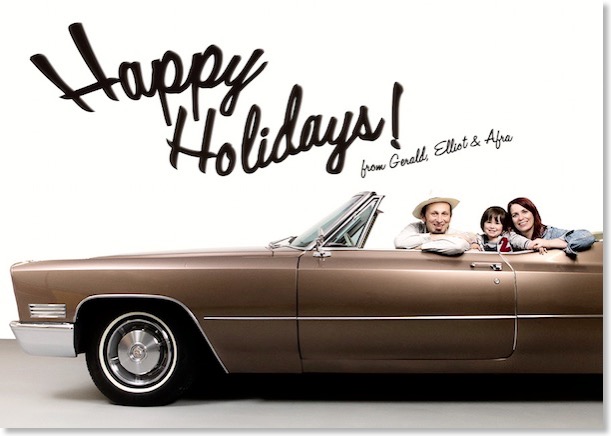
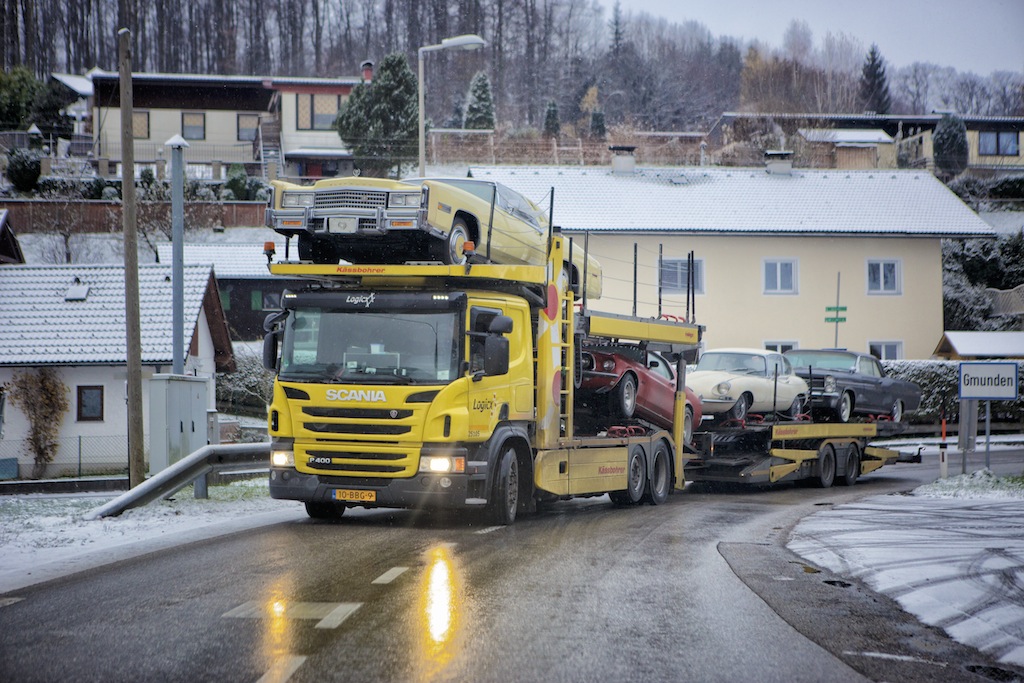
The 1978 Eldorado Biarritz has arrived.
You can read more about how I found it here.
This morning I got a call from the truck driver that he got lost in my town with his big truck. So I had to find him and guide him near to my home to unload the truck.
The 78 rode on top so all of the other cars had to get unloaded first.
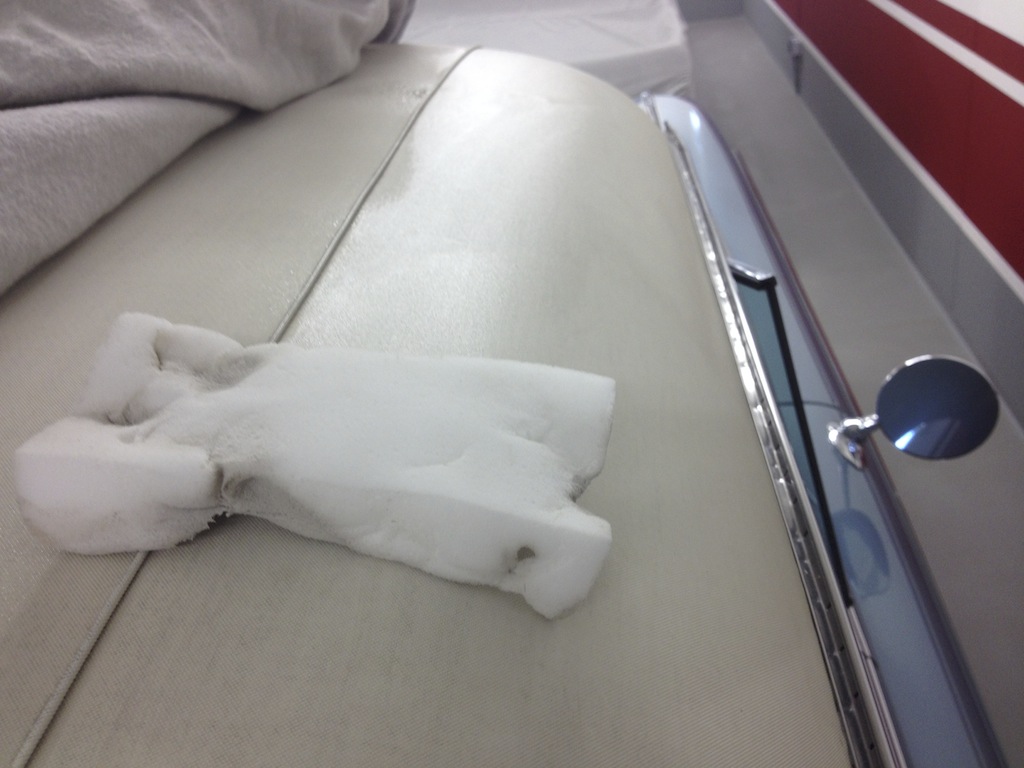
The Biarritz was quite dirty after its long journey and probably saw snow for the very first time.
I drove it home the short distance from the parking lot and it absolutely drives like a new car. I thought the car had stalled - but the engine simple is so quiet and is running so well that you can't hear or feel it from the inside...
Also the transmission is shifting unnoticeably.
My little boy helped me washing the car upon its arrival at my garage, which was not an easy task with temperatures below freezing. Ice was forming on the car immediately...
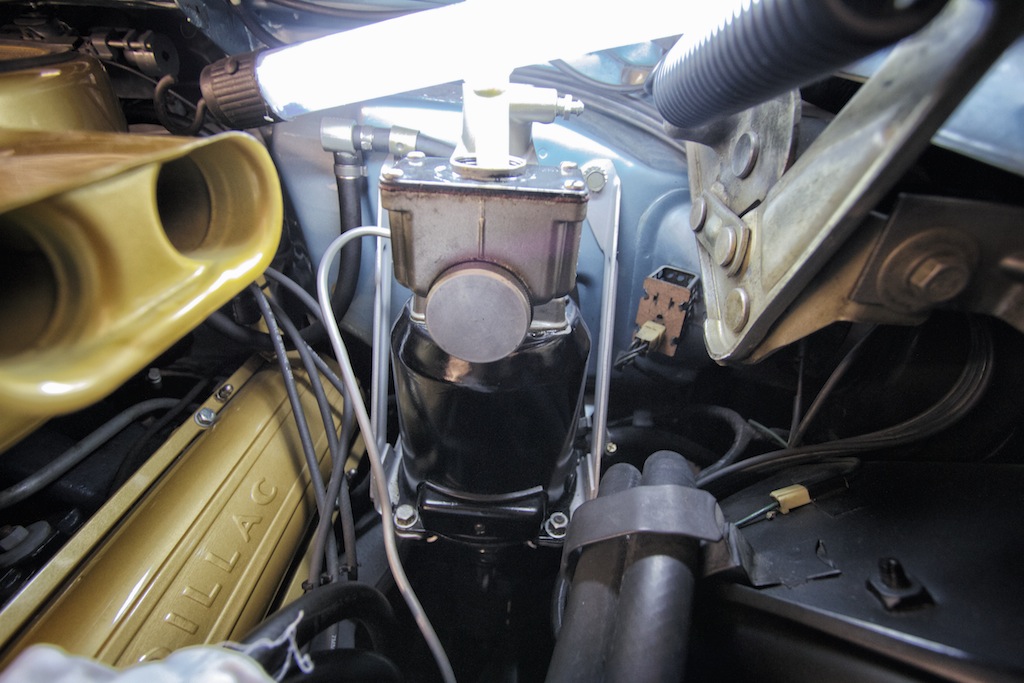
Eventually I managed to get the dirt off, and the best 1970s car I have ever seen appeared. It's an absolute stunning car. The interior is like new, the paint is super nice with almost no flaws, and the chrome is mirror like in its appearance. The undercarriage is super clean and rust free, as it was coated when new. The trunk is looking like it was never used. All the weatherstripping is like new as well. The leather is soft and clean with no tears or sign of any wear. The engine bay is all original and unbelievably clean as well.
The car was equipped with most available options that were available in 1978 except the sun/astroroof, fuel monitor system and the heavy duty cooling system.. Everything else you could order in 1978 is there and works as it should. Also brand-new Vogue tires were installed just recently. The previous owners took extremely good care of this Eldorado.
My friend Tayfun came to visit to help me detail it and bring it to my standard of cleanliness. It will take another few days until we will be finished with it.
As everybody knows build quality was not exactly the best in the 70s - but I have seen other 70s cars with lower mileage which were not as good as this one. Looks like it was built during a motivated shift ;-)
I will add a 1978 Biarritz section to my website soon with lots of info and pictures - stay tuned!
I have to thank my friend Alex who made this purchase possible. Thanks a lot my friend - you made a dream come true. Condition wise this car is the best in my humble collection.
The first time I saw the car - the driver had to back up for half a mile as he has hit a dead end street...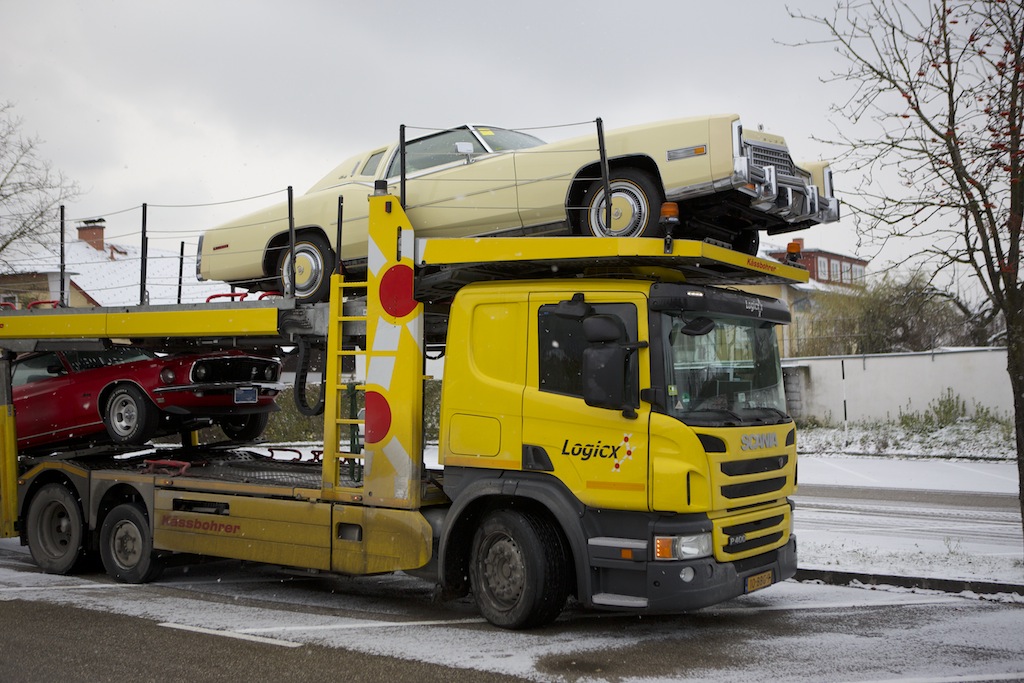
The Biarritz rode on top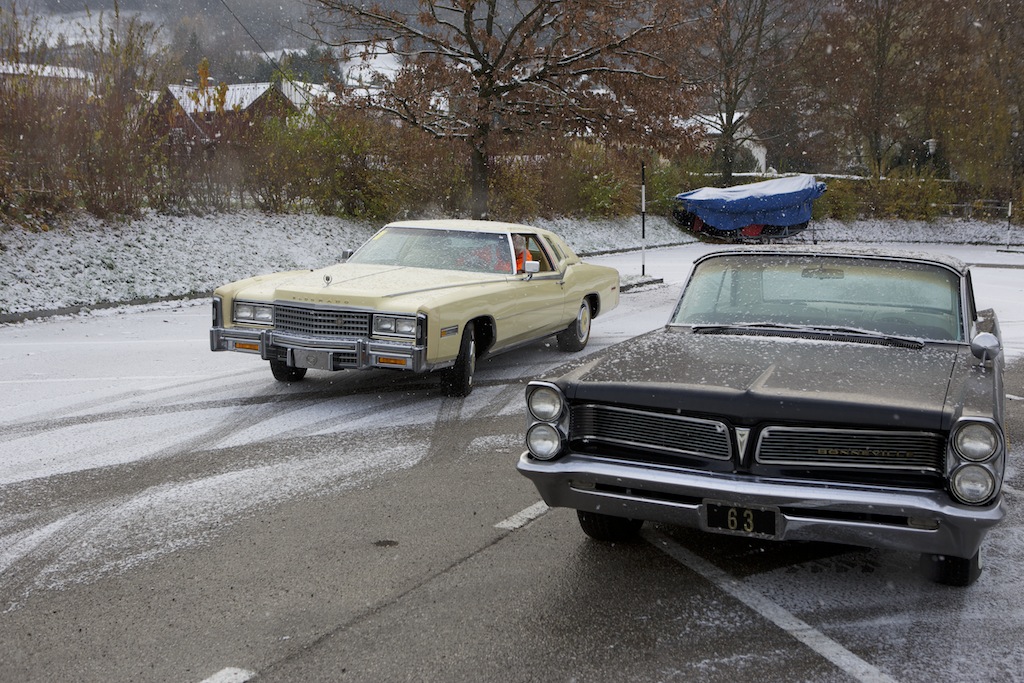
unloading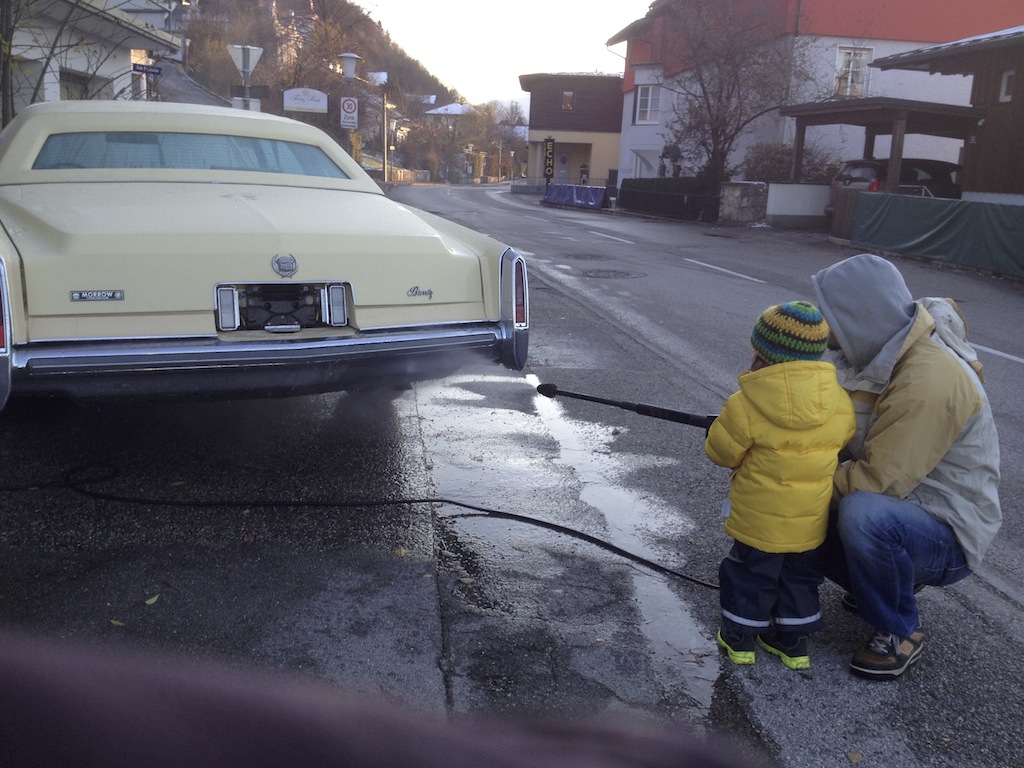
Little Elliot and me washing the car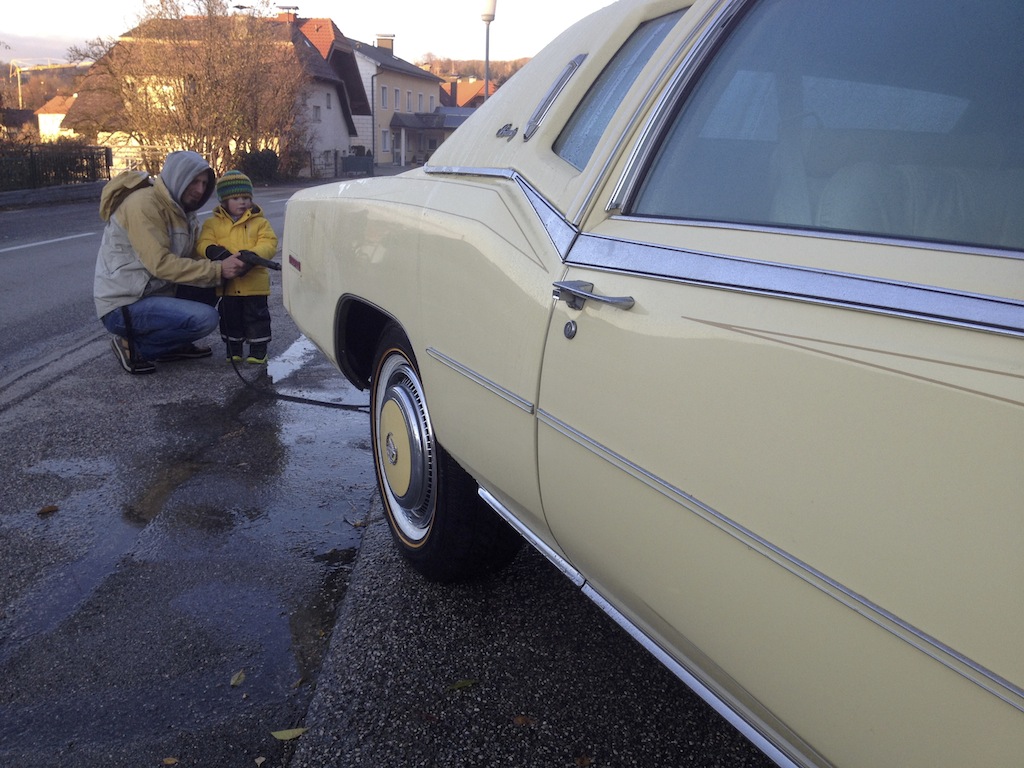
Cleaning in freezing temperatures with my little son Elliot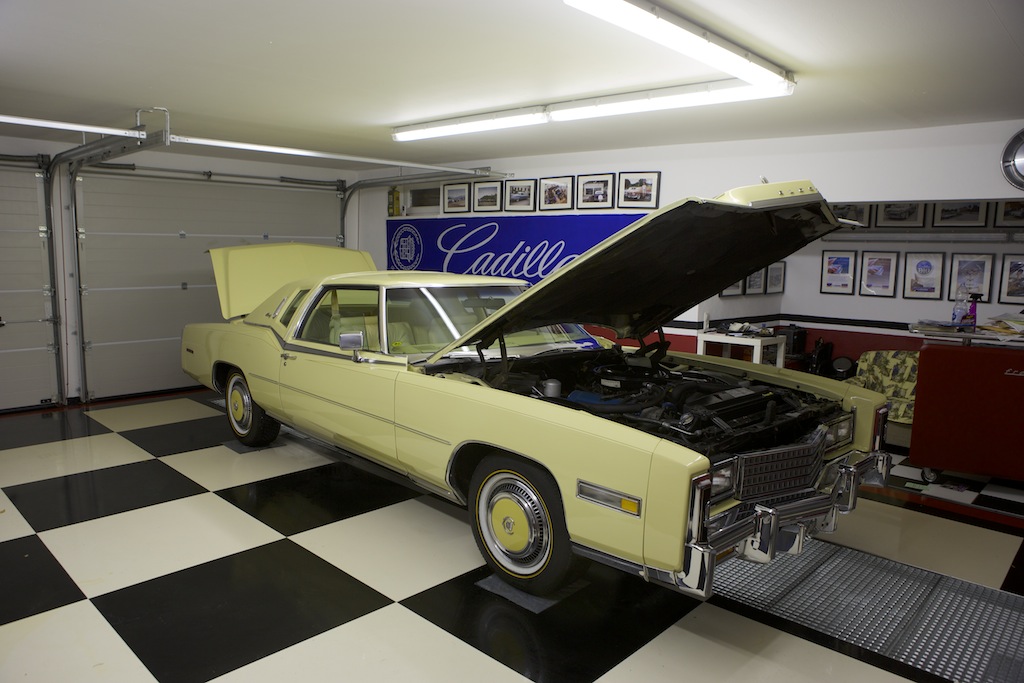
Drying in the garage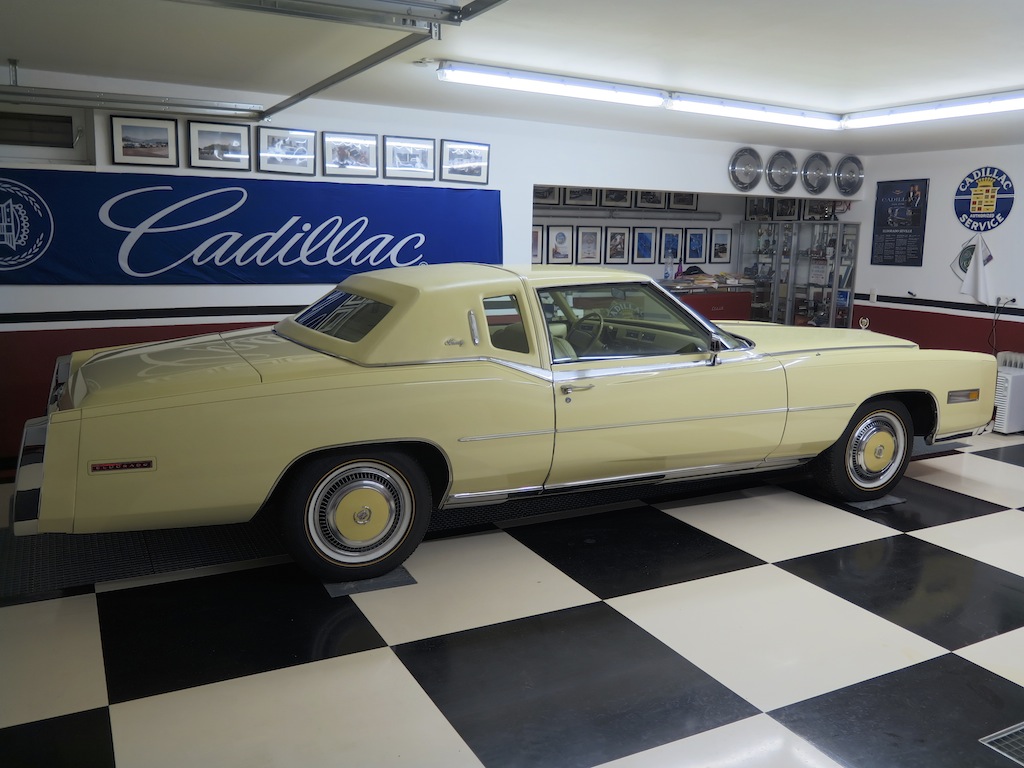
After drying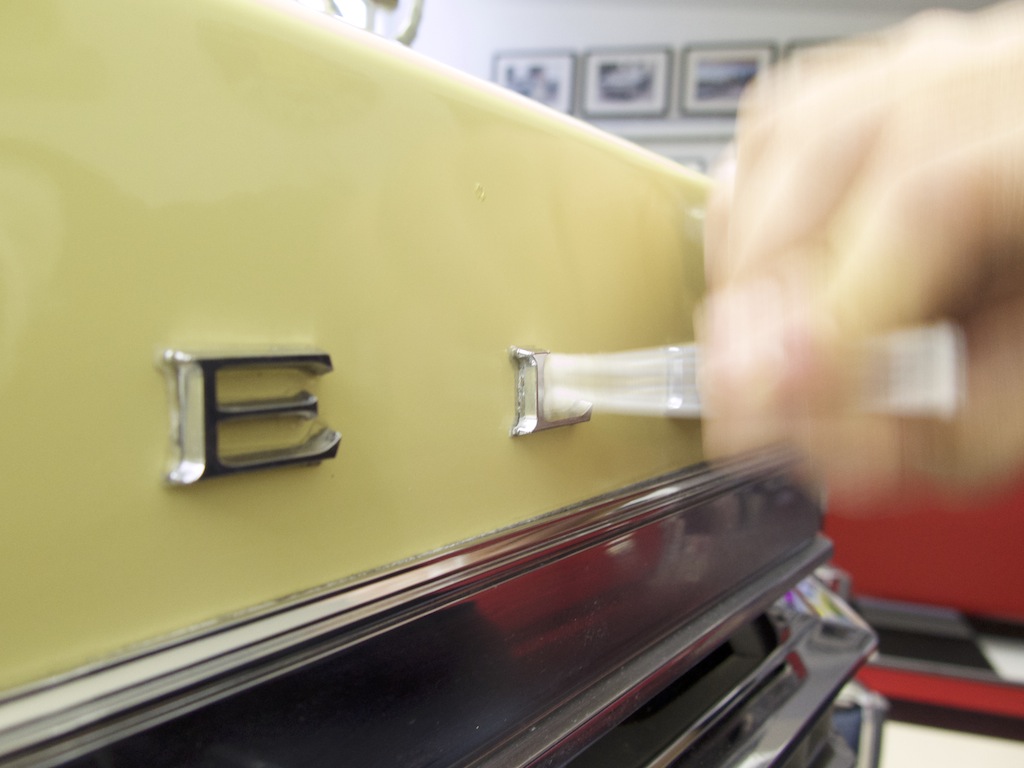
Detailing with q-tips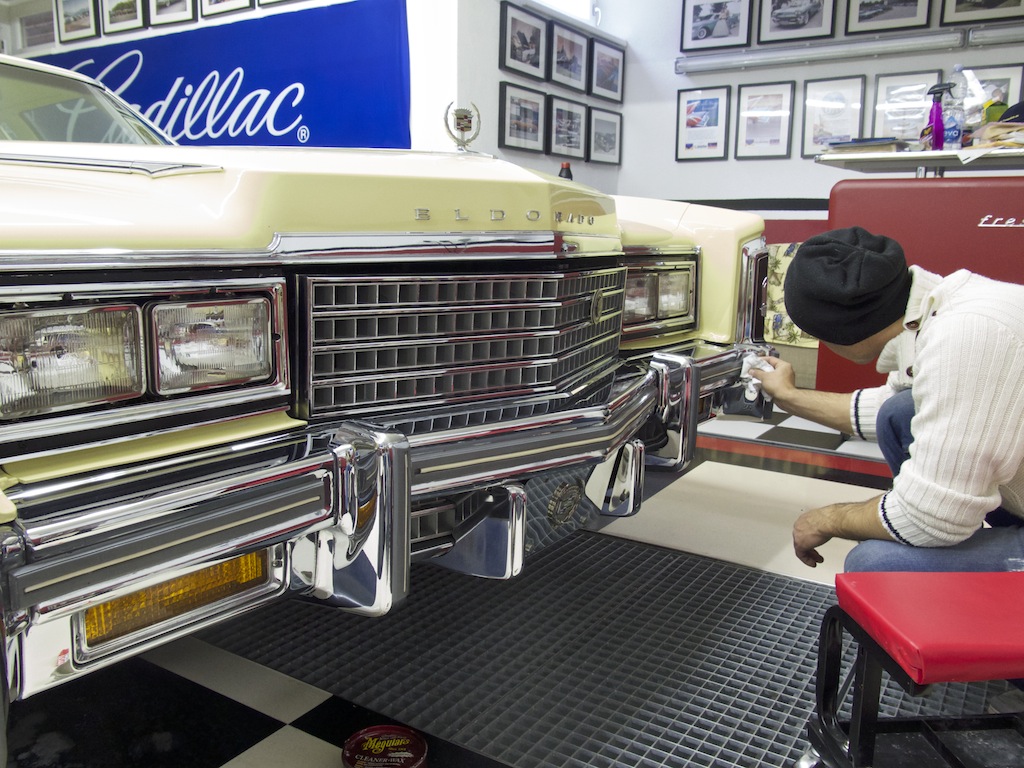
Look at that perfect chrome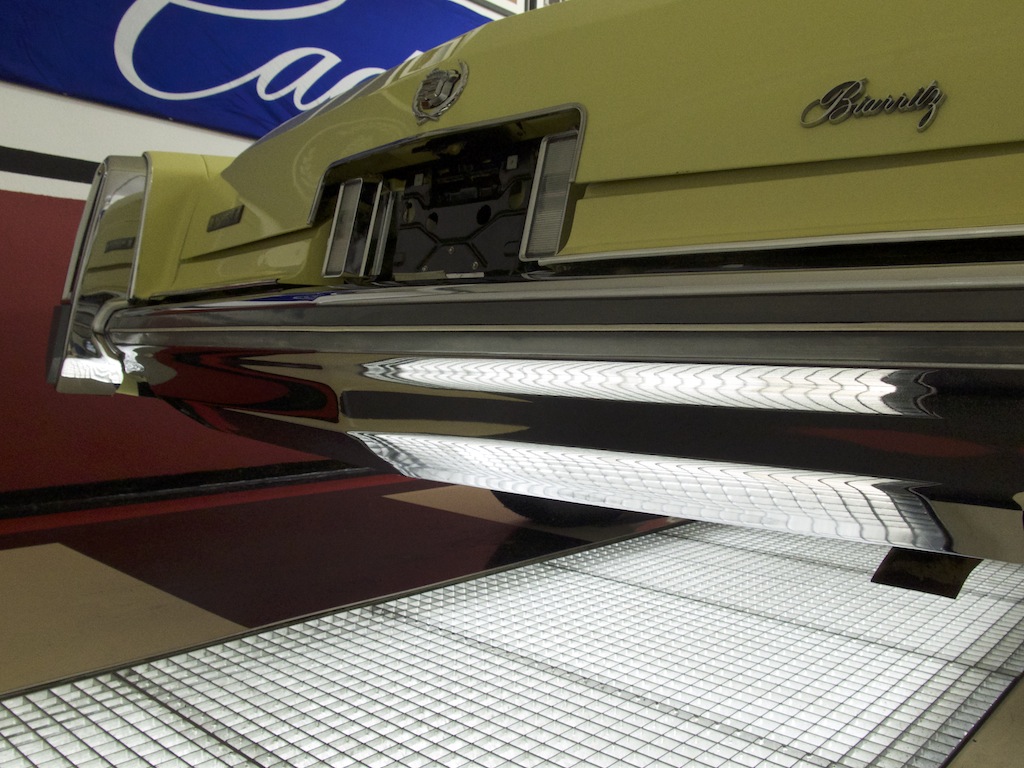
Mirror like chrome bumpers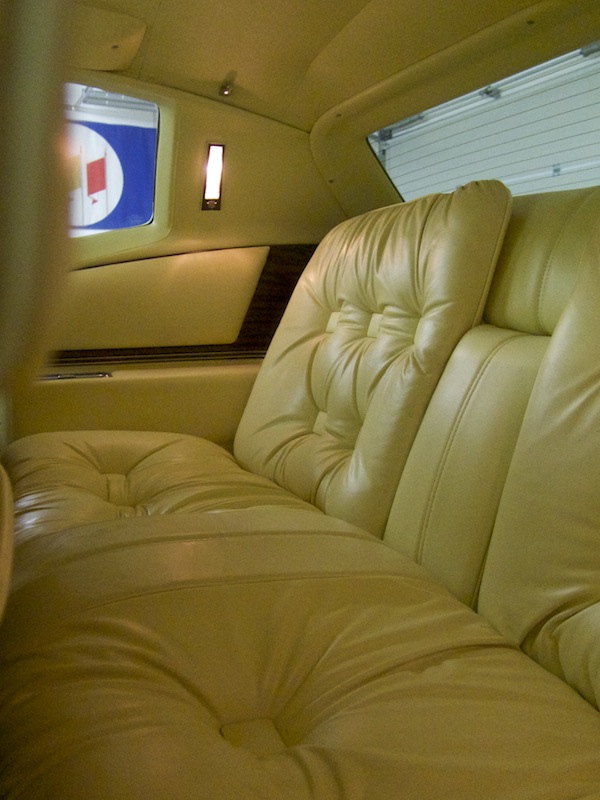
perfect leather - before cleaning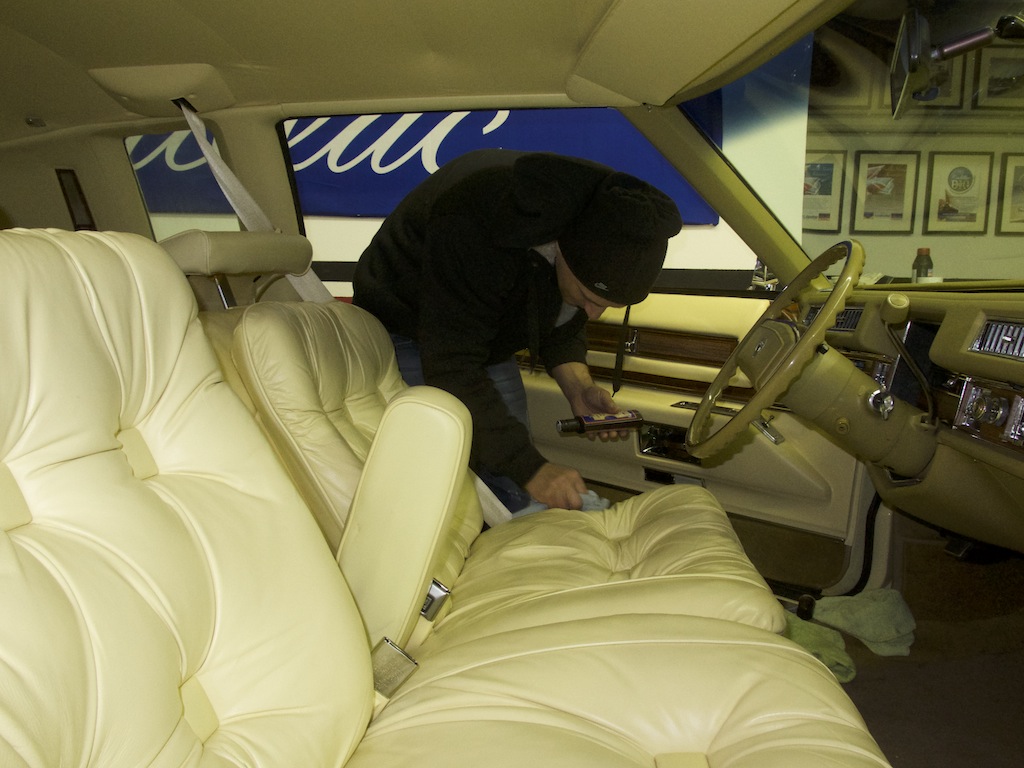
My friend Tayfun helped cleaning the leather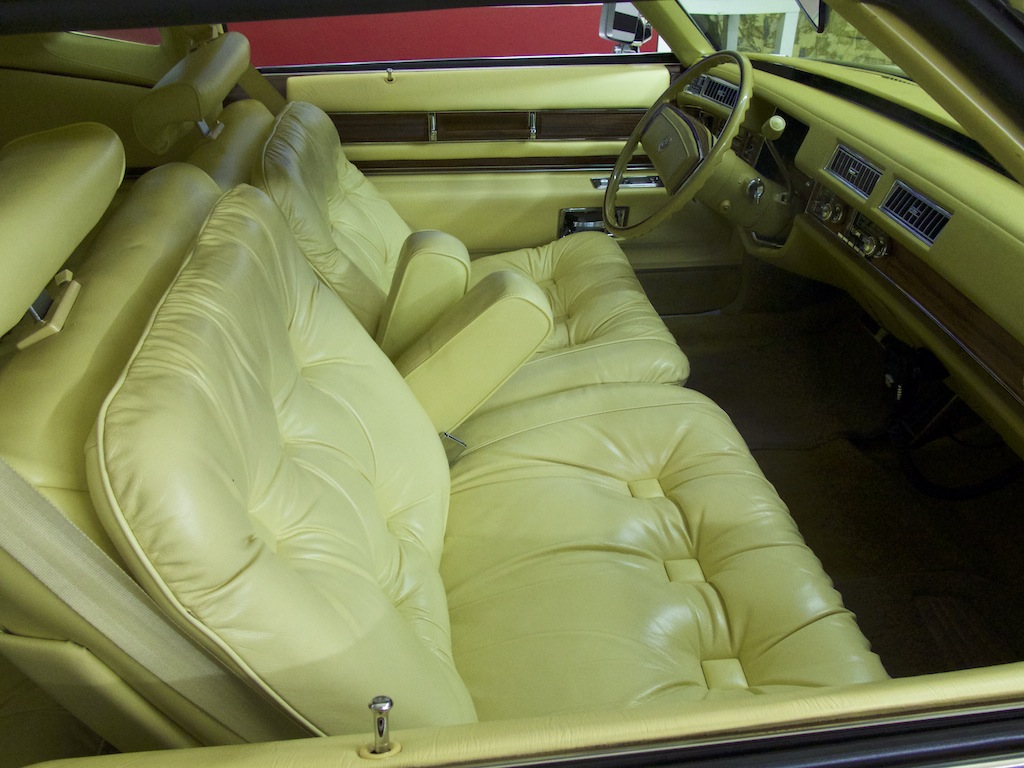
After cleaning and conditioning the front seats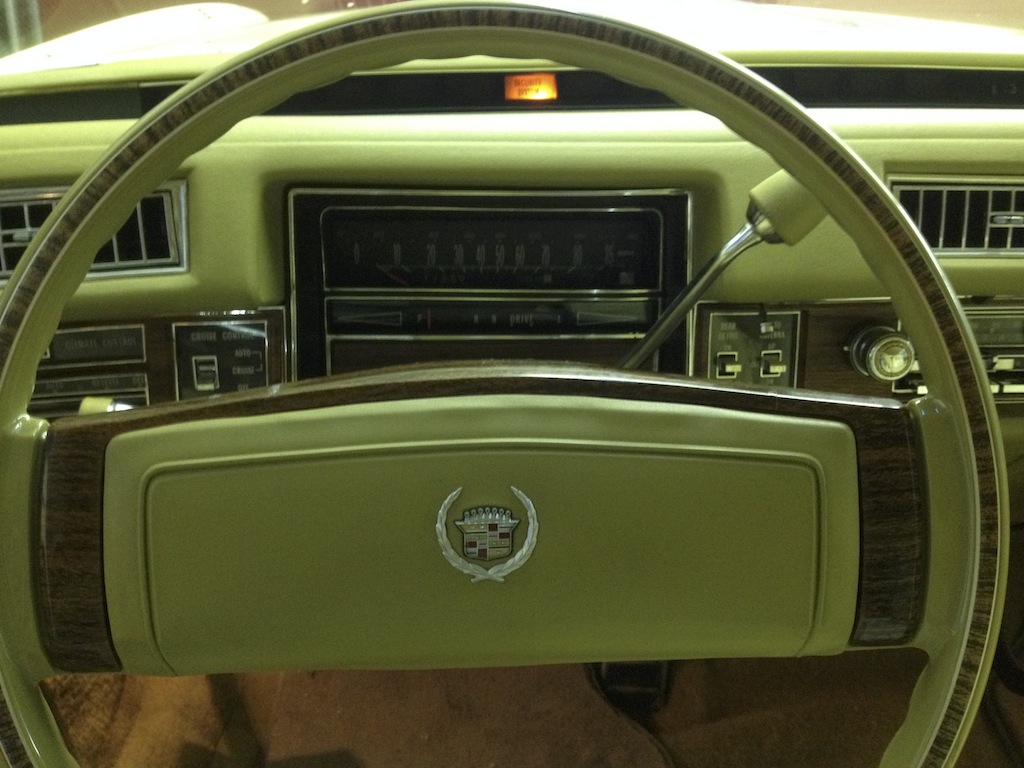
only 11k miles
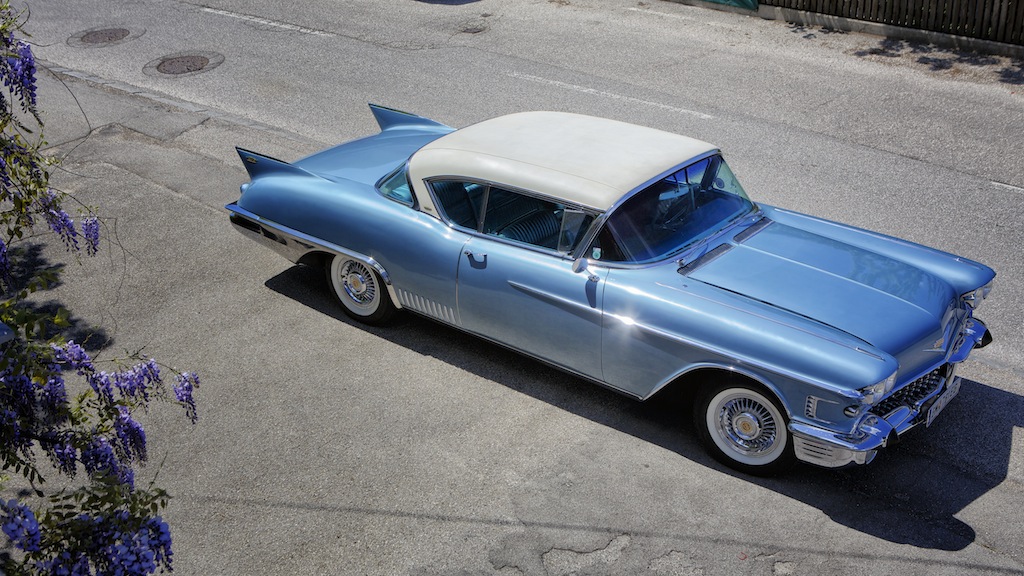
Cleaning the Vicodec roof of the 58 and the convertible top of the 67.
I have tried a variety of cleaning methods and cleaners over the years.
This time I used Meguiars professional vinyl cleaner #M39 ( I think this product is no longer available and they only offer #M40 now) along with their stiff nylon brush followed by a special nano foam sponge which is called "dirt eraser". It really removes dirt very thoroughly even from textured materials.
Both tops came out very clean - I then used Meguiars Convertible top impregnation to protect them from getting dirty again soon. It also weatherproofs the tops. (not that I would ever drive in rain with my cars... ;-) )
I have heard really good things about Meguiars Convertible Top Cleaner as well - will try it out next time...
Disclaimer: I´m not getting paid or receive any free products from the companies I´m mentioning here. If I like products or services I mention them and if I dislike things I will also talk about them in a less positive way ;-) I just like to share my findings.
One of the dirt eraser sponges in action on the original roof from 1958. White tops are a pain to keep clean...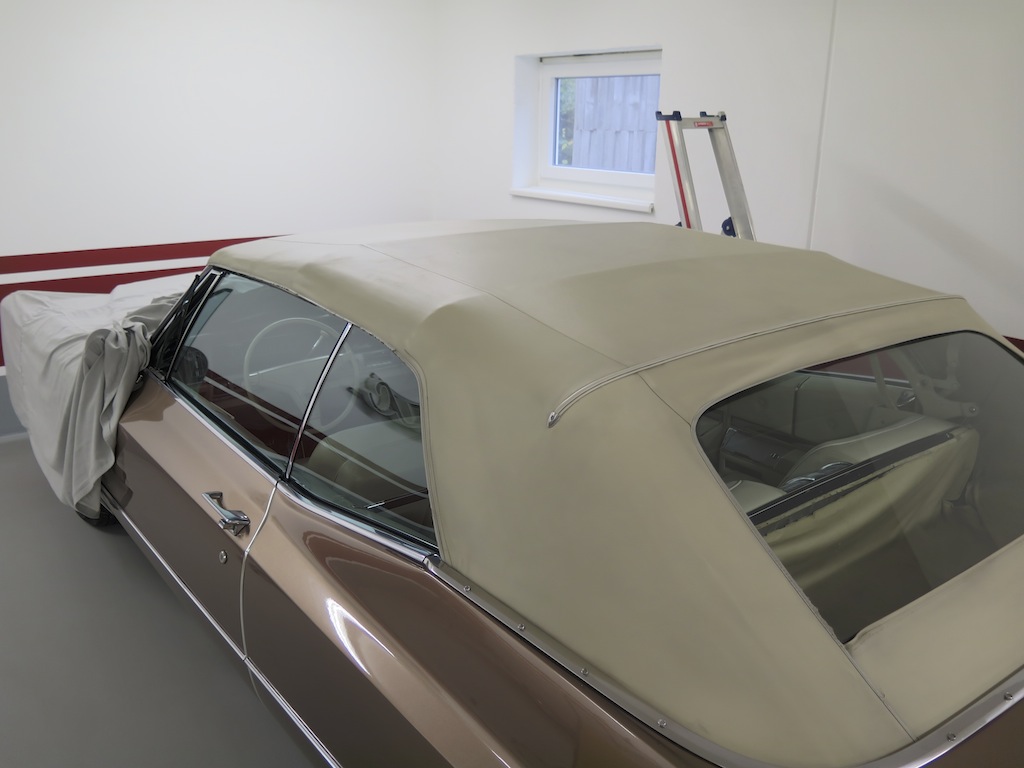
Looking o.k. now - its still the original top from 1967...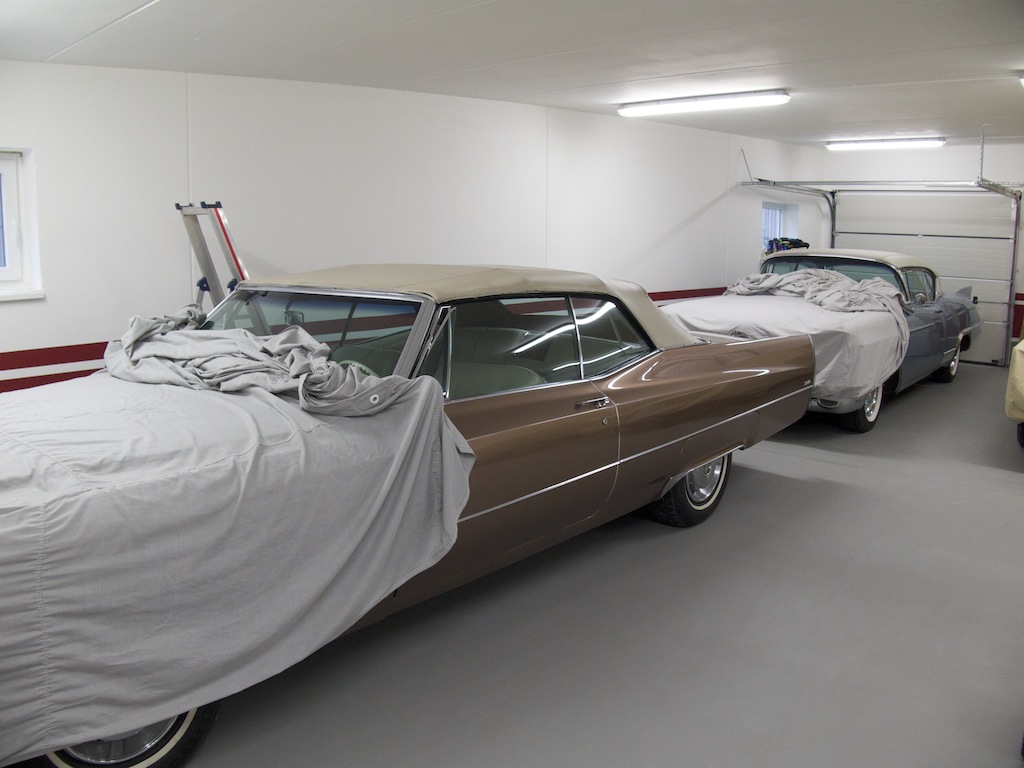
In the garage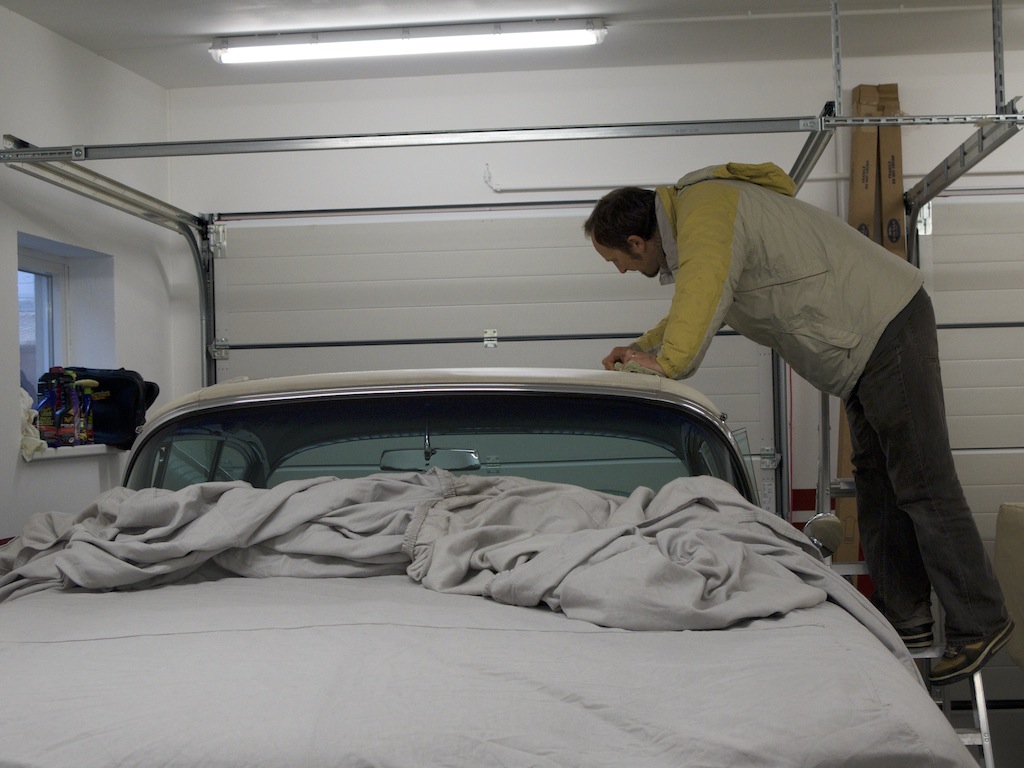
Thoroughly cleaning the Vicodec roof
Meguiars weatherproofer for additional protection
Cadillac Dealer Neon Sign is coming back to life in my garage.
As it turned out later some very important things were missing to get them back to life and to let them glow again...
Lots of wires were cut inside the sign and nobody had an idea how to fix them. After a long search I found a company in Vienna which had the know how and the parts to fix them.
First and most importantly I needed the right two transformers. I had to measure the length of the neon tubes for them to calculate the voltage needed. (11.920 Volts btw...)
My electrician now helped me to bring the neon back to life. We are still waiting for some cables to arrive, but at least the sign is glowing now. With the right cables it will hopefully light up fully.
I have a second sign which I will mount in my other Cadillac garage.
The electrician at work - trying to figure out where the cables should go...
Its mounted on the wall in the center of the garage
Fixing it
The new transformers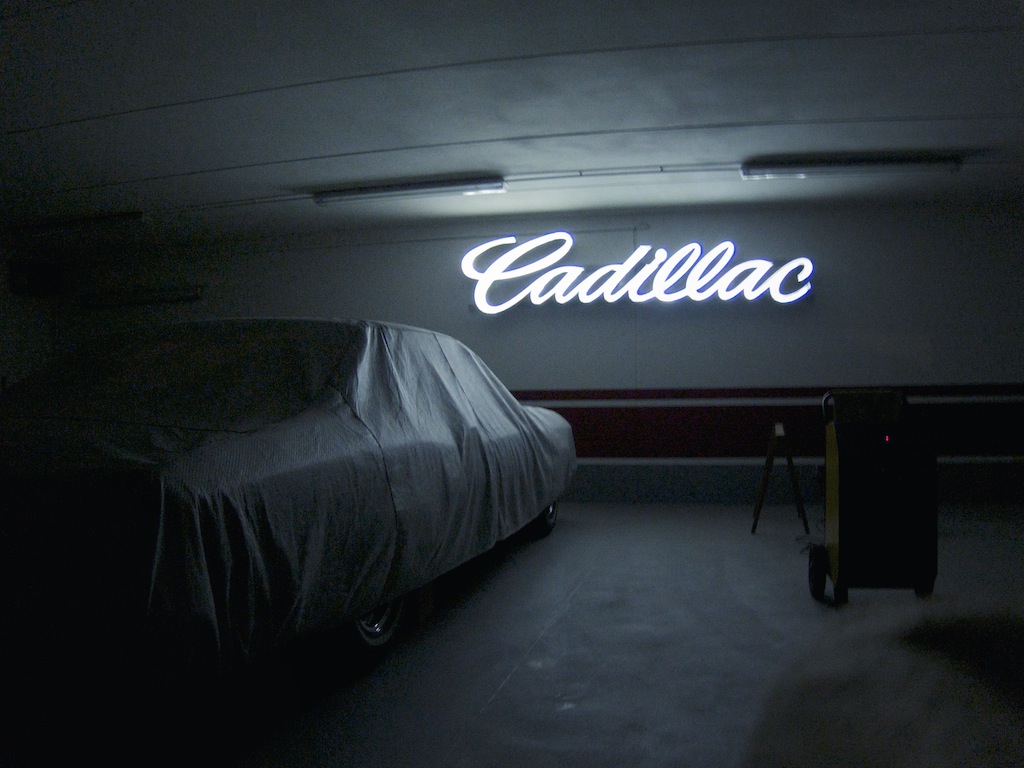
It's glowing
New garage dehumidifier for the BIG garage.
Of course the humid outside air will enter the garages eventually as well .
Rust can start at a relative humidity level of 50% - mold and mildew can start growing on the interior at about 60% humidity. Humidity under 50% will dry out plastic, leather and rubber...
Corrosion is not good for a car - it will also attack electric connectors and switches and eat your sheet metal from the inside where it is not protected...
To protect my cars and those who have rented space in my garage, I decided to use dehumidifiers to keep humidity low inside the garages.
Without using them I would have about 75 - 80% humidity during winter storage. As our winters are very long the cars would have to suffer for about 7 months a year.
For the new garage I now got a new dehumidifier.
I invested in a really big and powerful one which even works at very low temperatures. It drains the condensation into a built in tank and I collect this pure water in a bigger container. This pure water is excellent for washing cars, as there are no minerals inside which could leave stains on the paint.
It automatically controls relative humidity and keeps it around 50% all year round. At very humid days the dehumidifier comes on for about 4-5 hours during a day - keeping energy costs at a reasonable level...
So I know that all cars inside the garage are safe and will stay "fresh" during hibernation.
I can really recommend these dehumidifiers for your garage as well - grab a hygrometer and check whats going on in your garage!
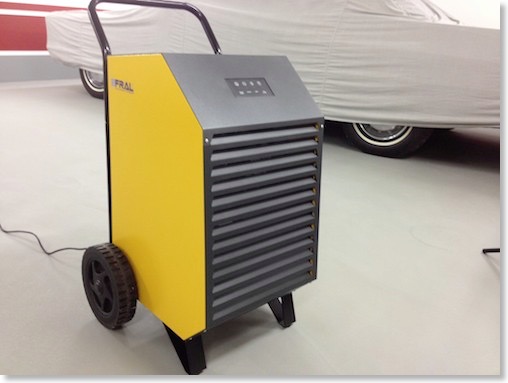
The new dehumidifier in the garage. I´m using the FRAL Superdryer 62 - which is a heavy duty professional unit with the right power for the size of my garage.
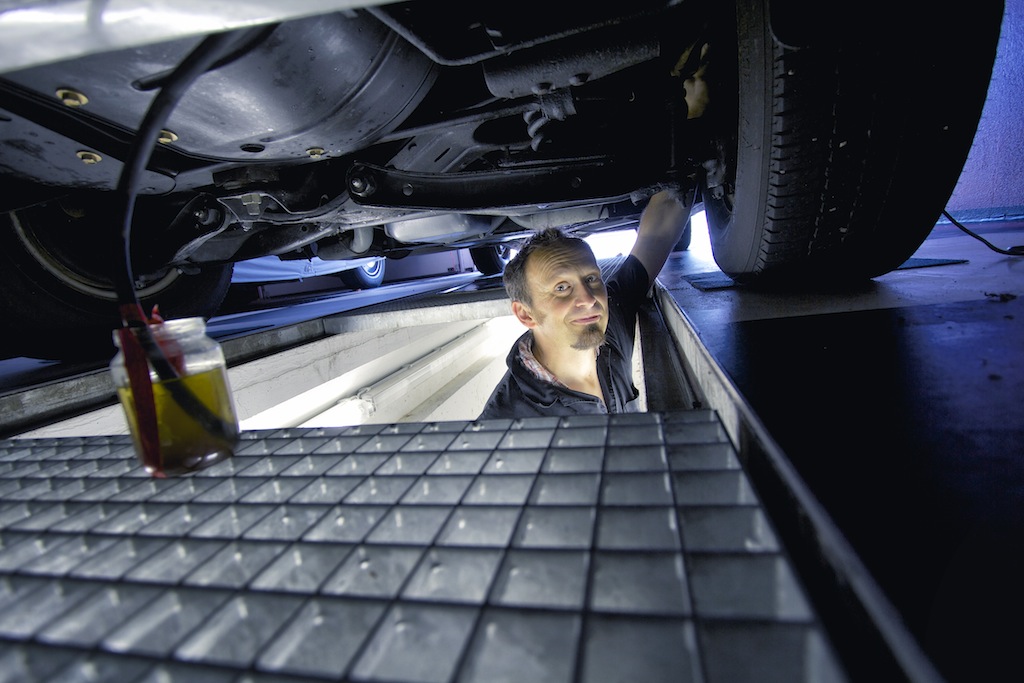
1958 Eldorado Wheel Bearing Replacement - oil change - winter hibernation...
The newly installed Speedbleeder valves made the job a lot easier and quicker. I bled the brakes two times and took the 58 Eldorado for a test drive. The brakes worked fine, but felt differently than before the rebuild. The car did stop perfectly, but pedal travel was too long for my taste, before any brake action took place.
I consulted the shop manual for this symptom and it first suggested to adjust the brake pads first.
As I had no brake adjusting tool, I use a flat screwdriver to adjust the star wheel like described in the shop manual and bled the brakes once again.
After this the brakes worked like before the rebuild again — great!
As I had the front brake drums off anyways, I decided to finally change the wheel bearings as well, as they were making a very slight noise, and I had the new bearings laying around in my garage for years now...
They are pretty easy to remove and replace — no big deal — no special tools necessary. Just make sure to tighten them back to specs (shop manual mentions 4 ft-pound of torque (around 5,5nm))
After this, I also changed the oil after I brought the engine to operating temperature and put in 5 quarts of fresh 10W40 oil and a new oil filter. I also lubed some other parts like the alternator.
I then parked the 58 in the new garage - along with my other cars - where it will spend the long, cold winter.
It will get a good coat of fresh wax on the outside and some good leather treatment soon, and I will also treat the rubber parts and weather stripping, so that everything stays soft during hibernation.
I only managed to drive the 58 Eldorado 86 miles this year - way too less!
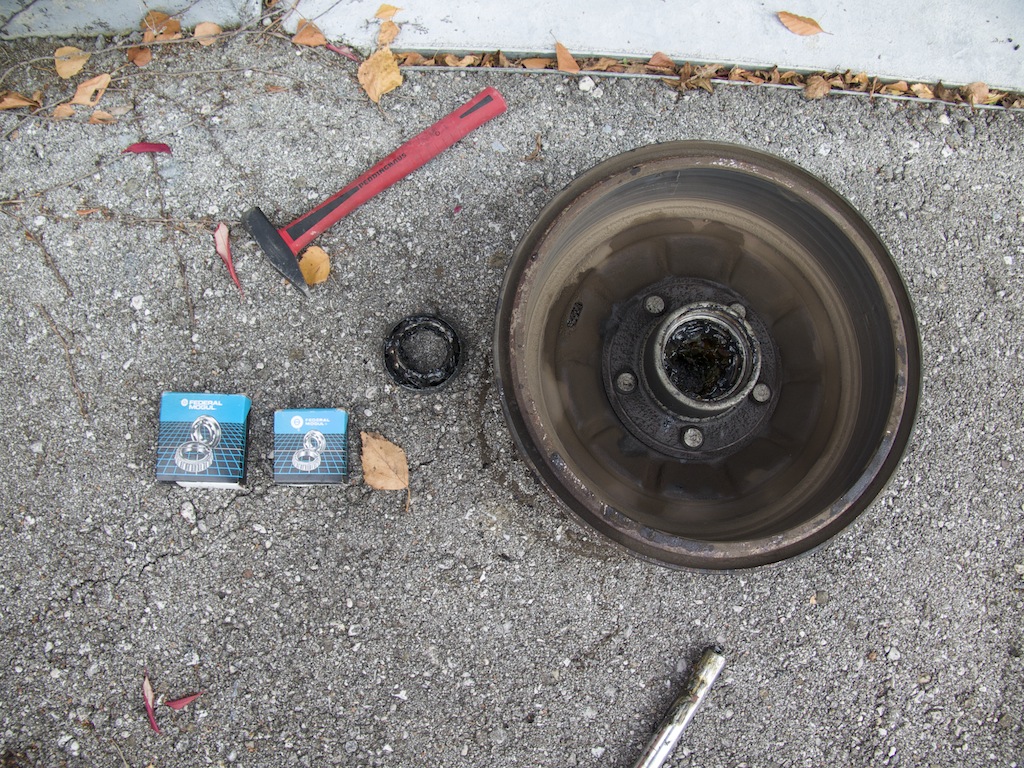
Removed the old bearings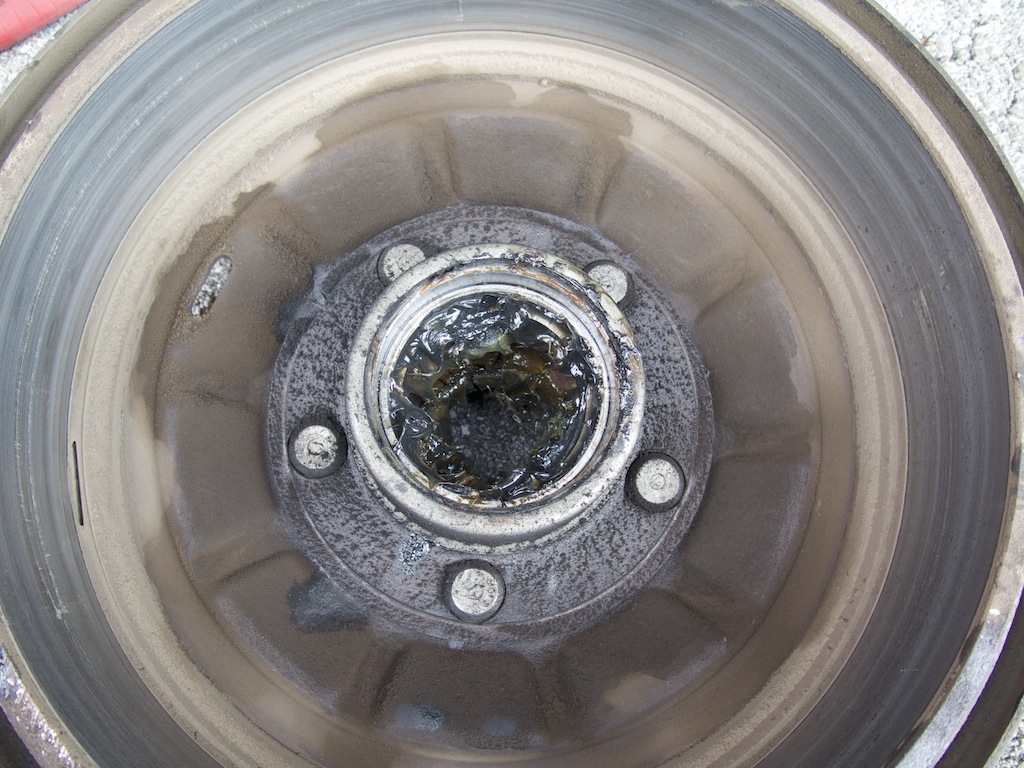
You just have to tap out the rear dust shield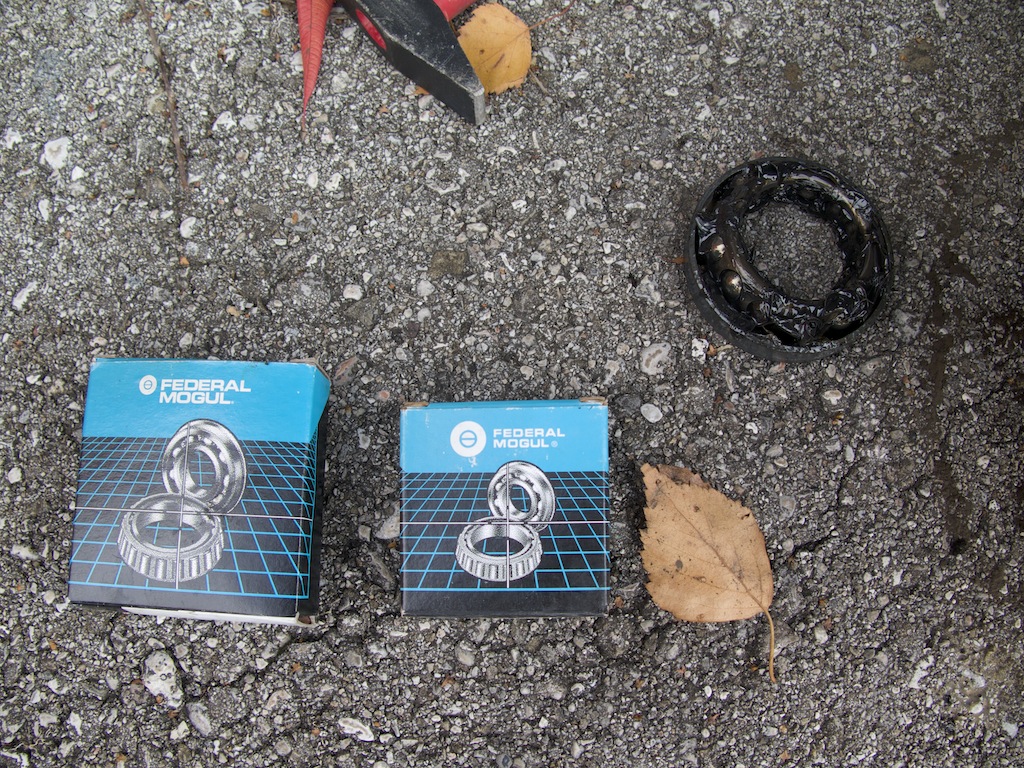
The new bearings waiting for installation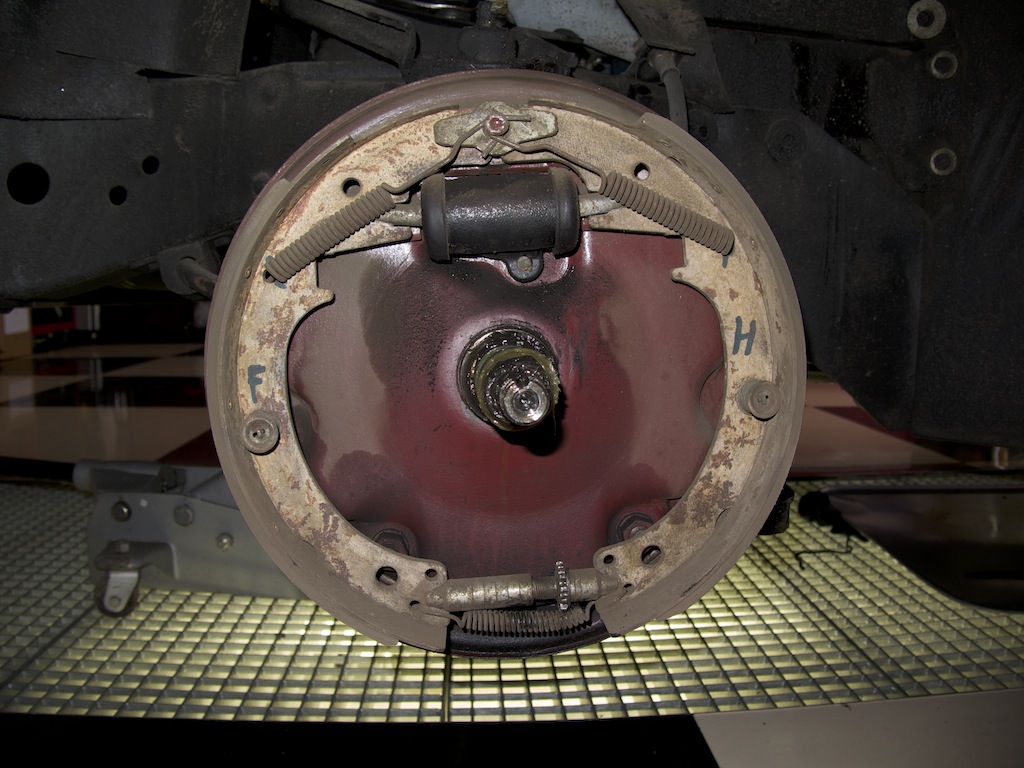
Adjusted the star wheel and checked the front brakes
Changing the engine oil
In its winter home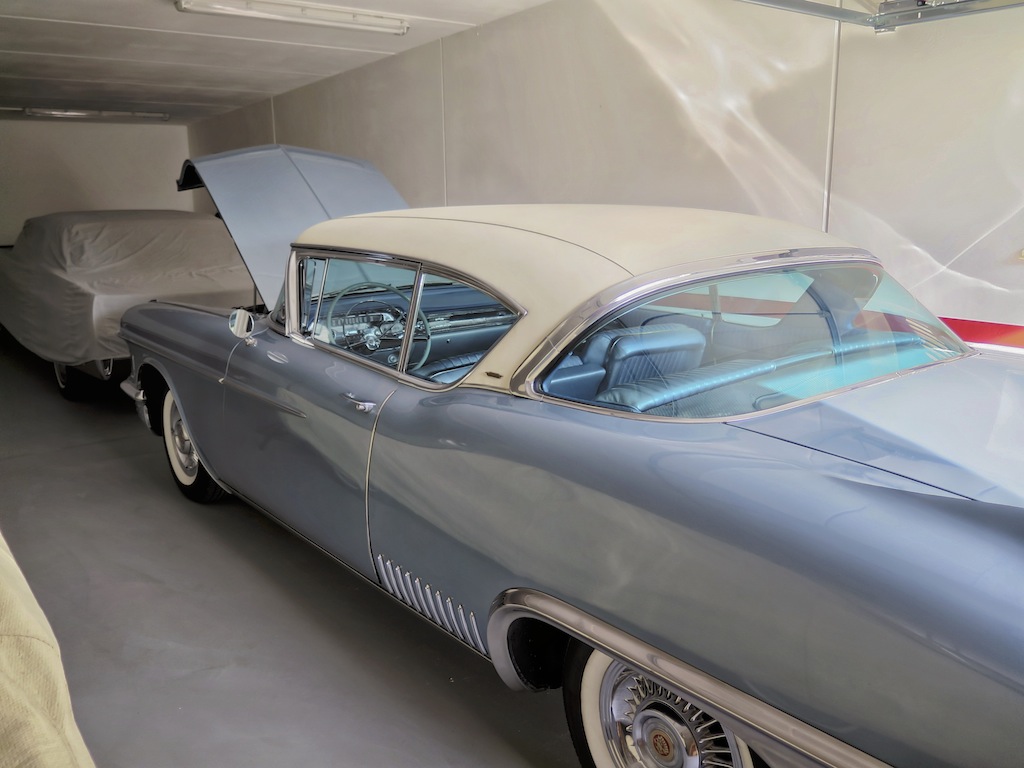
In the winter home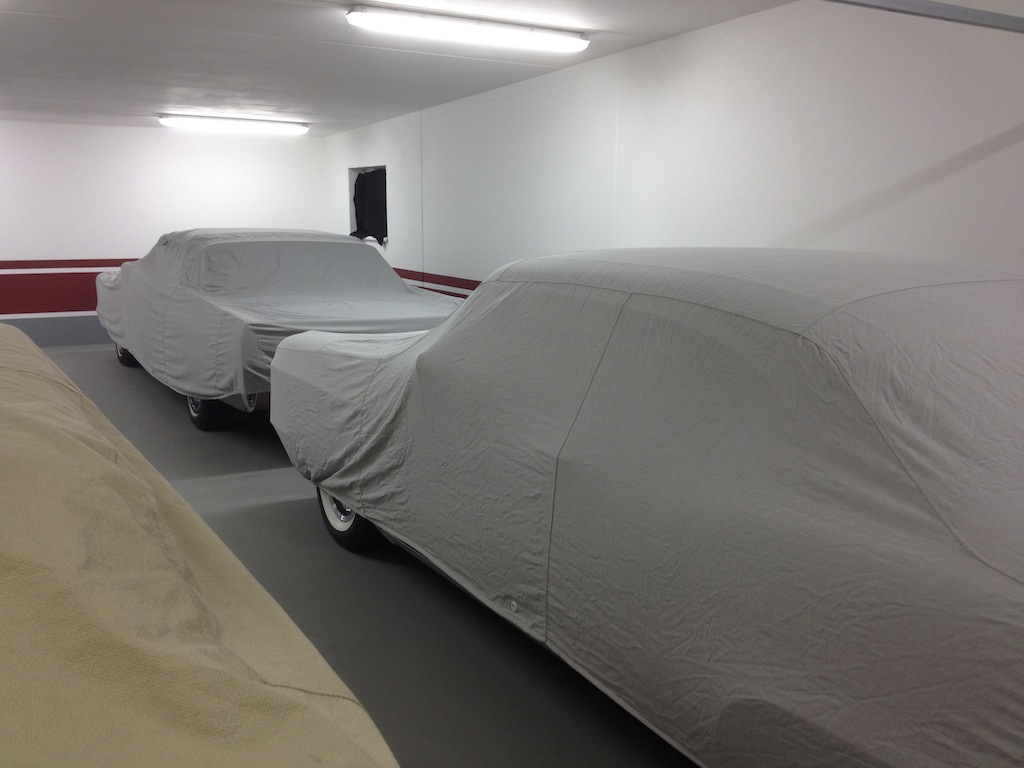
Sleep well!
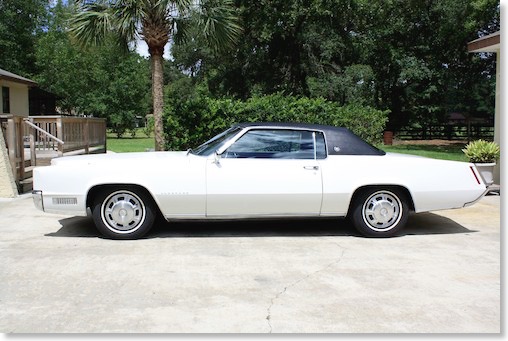
A spectacular low mileage 1978 Cadillac Eldorado Biarritz is on its way to my garage!
Lots of collectors seemed to have thought alike in 1978, when the new downsized 1979 Eldorado was introduced, as they began storing the last big ones aside, and started to tuck them away in their air conditioned garages. Because of this, some of the 1978 Biarritzes survived in spectacular condition, like the car that is coming to my garage hopefully soon all the way from Carrollton, TX.
It was another Cadillac fan who sent me a link to an ebay auction just for my viewing pleasure. When I looked closer, I recognized that this triple yellow, fully loaded, super low mileage Biarritz seemed to be in spectacular condition and that it was very well cared for.
The car did not sell on ebay and so I contacted the seller for more information and suggested a price to him. He was a pleasure to deal with and a real car guy and collector, who answered all my questions and sent me lots of great information. The seller seems to be a great guy.
After a couple of days a deal was made…Luckily a friend borrowed me the money for the purchase of the car.
The car was now picked up from the seller in Texas and is on its long way to Austria into my garage.
The first leg of its journey is to Houston - then it will be transported in an enclosed truck to Florida where it will be loaded into a container before it crosses the Atlantic to Rotterdam.
Cant wait to see this Colonial yellow car in real life - its probably the best 78 Biarritz I ever saw and know of.
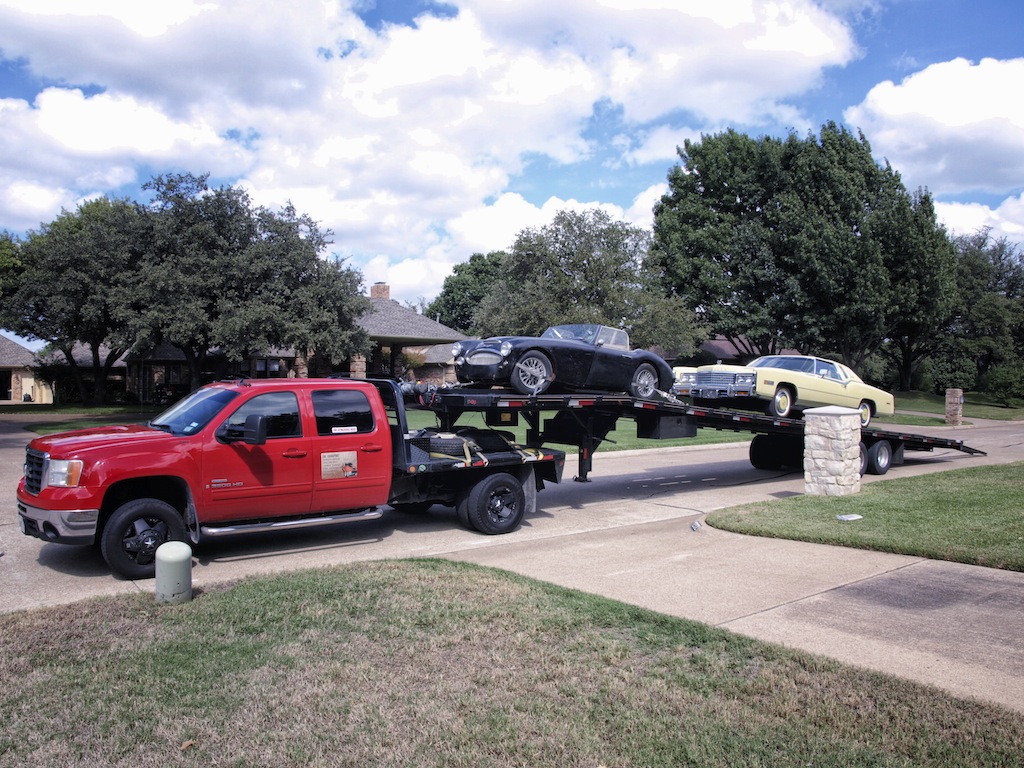
The car was loaded onto the truck in Carrollton, TX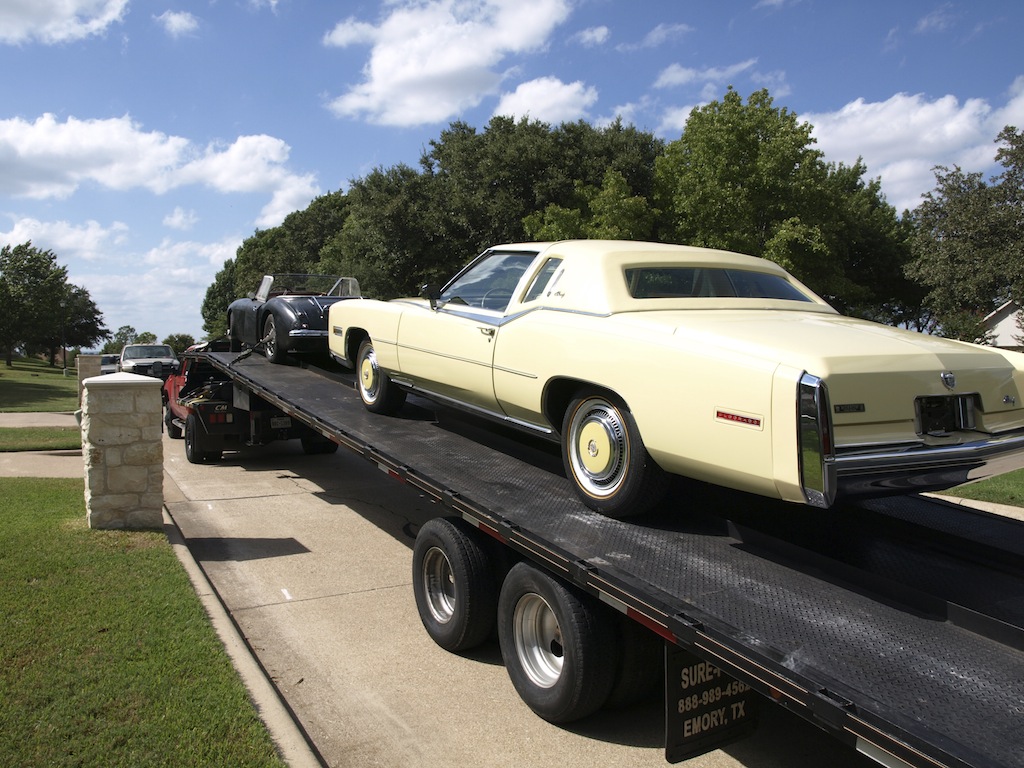
Heading towards Austria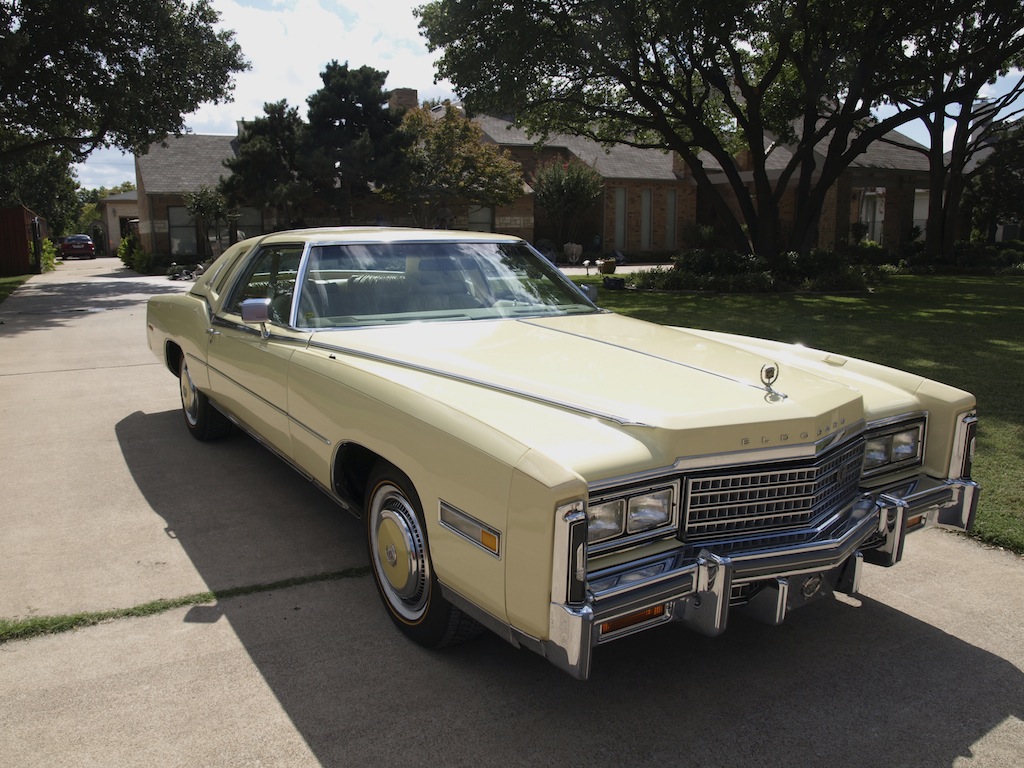
Short before pick up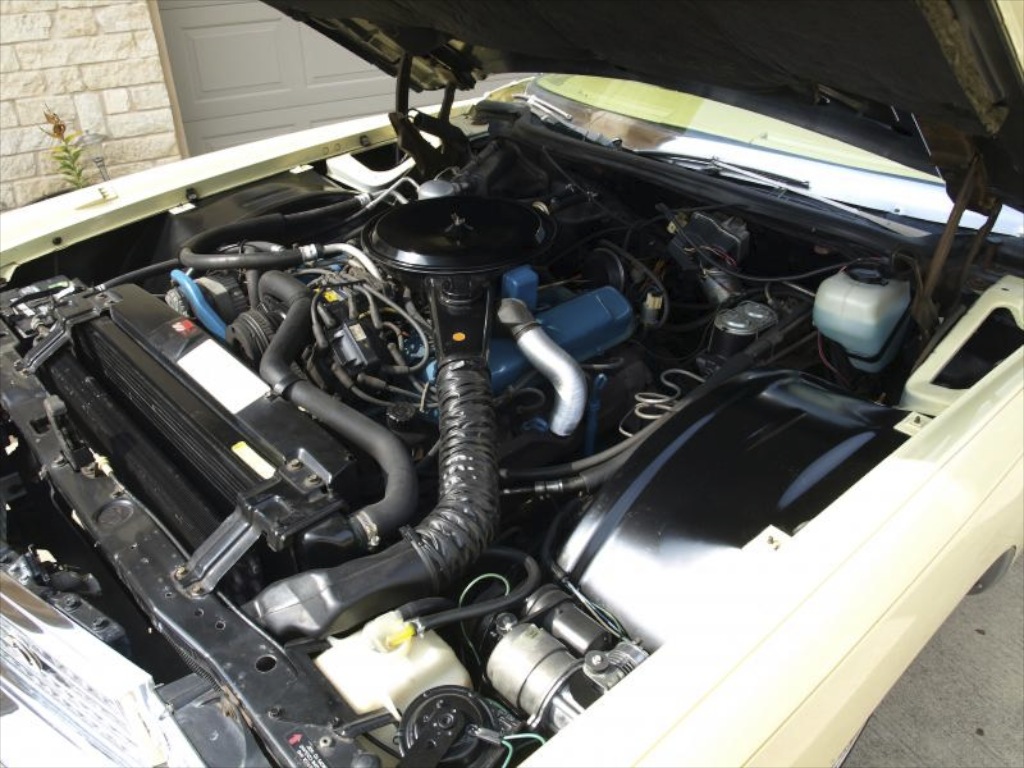
Look at that clean untouched engine bay!
Low mileage!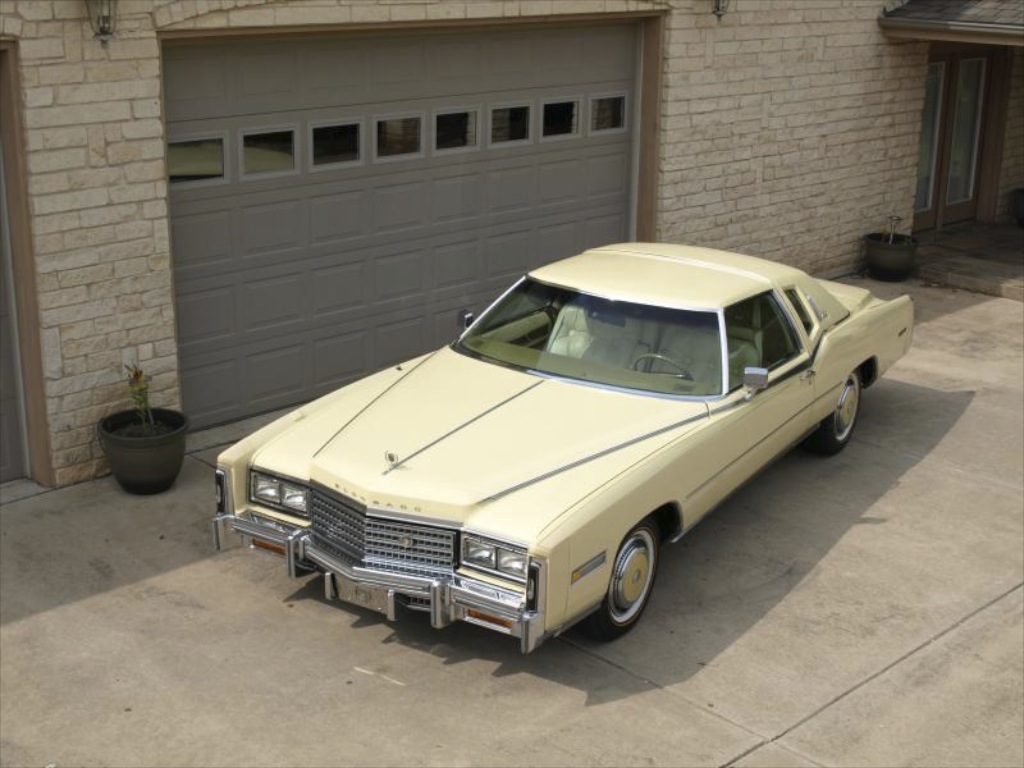
What a beauty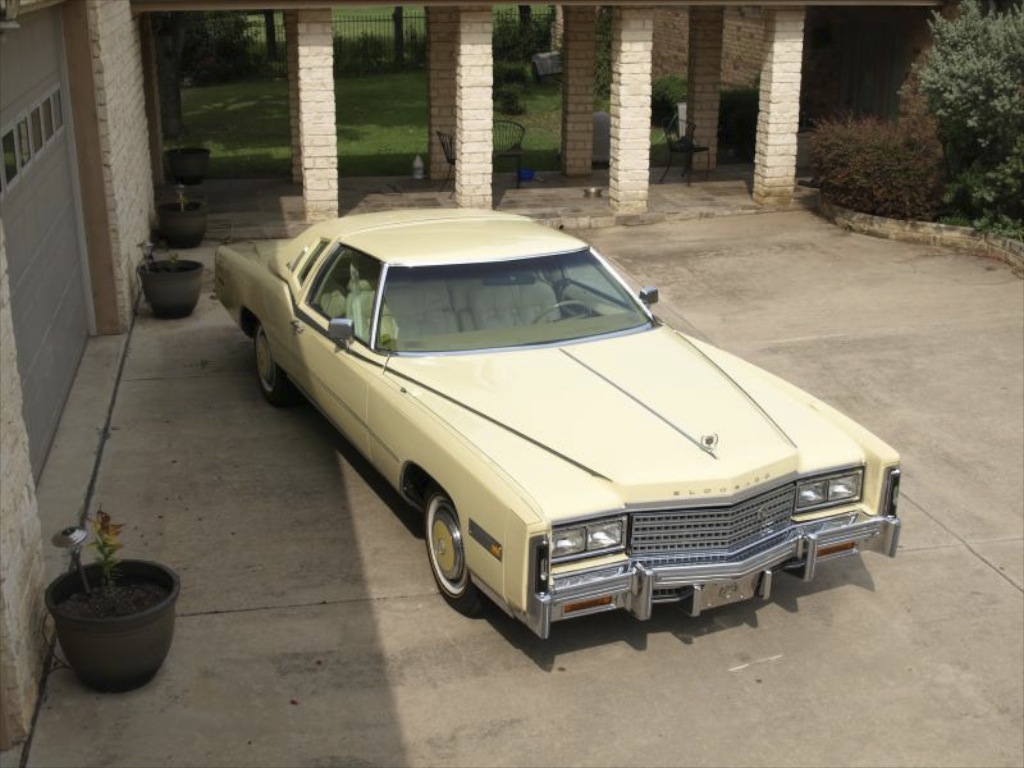
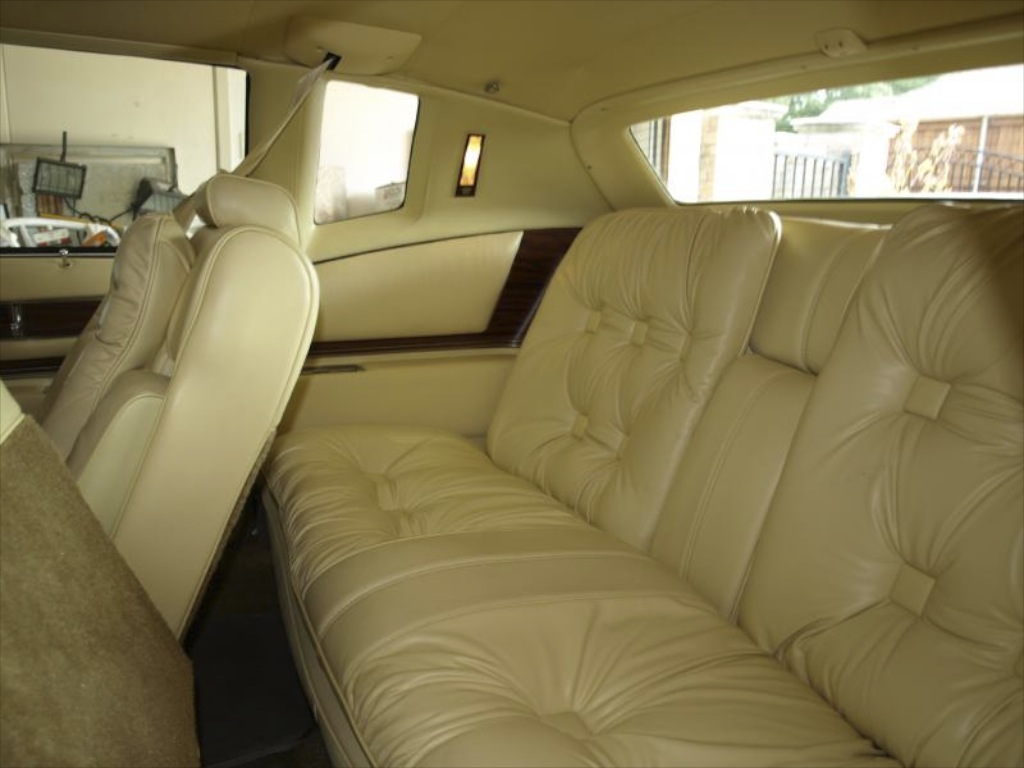
Looks like nobody ever sat in these pillowy seats...
Repairing the Treadle Vac Master Cylinder and Brake Booster of my 58 Eldorado
Now as I wanted to drive it out of the garage, I found a puddle of brake fluid under the car.
So I went on to search where it was coming from.
I suspected a leaking wheel cylinder, but could not find any traces of fluid coming from the wheels. After some more searching, I eventually found out that fluid was dripping out under the brake booster along the push rod. When I checked the fluid level it was only half full.
So I knew that the Treadle Vac would need a full rebuild…
I ordered a rebuild kit at Cadillac Parts LTD. They offer a kit to rebuild everything from the booster to the master cylinder. As I found out, the gasket for the reservoir did not fit from their set and some other correct smaller rubber parts are also not included in the set. So remove everything carefully from your unit as you might have to reuse some parts for your rebuild. I contacted them about the wrong parts and they immediately sent me the correct parts by mail. Great customer services - I would order from them anytime again!
As I had never done a full rebuild I asked my Cadillac friend Lucky for help - knowing that he can repair almost everything, and that he had done this job during the full restoration of his awesome 58 Biarritz before.
He was so kind to offer his assistance and invited me to his fantastic work shop where he is restoring his cars.
So I carefully removed the whole unit from my car and visited Lucky´s workshop.
With his skills he managed to rebuild the whole unit within a couple of hours. As it turned out a bad O-ring caused fluid to leak into the booster.
Due to all the brake fluid the finish of the Bendix unit suffered a lot, and so I decided to strip everything on the outside down to bare metal to repaint it.
So I took everything apart once again to make sure to do it perfectly.
I ordered some great spray cans from Eastwood to get the perfect look to match its appearance to when it was new.
Originally the master cylinder was not painted at all - but left in bare cast metal. Of course it started to collect surface rust very quickly - even on new cars back in 1958.
The booster originally was painted in semi gloss black.
Eastwood has a product called "Brake Gray" which I used to emulate this look. It comes extremely close to bare metal, but of course the paint protects the metal from rust. This paint is also resistant against brake fluid. I first primered the master cylinder with self etching primer two times before two coats of brake gray were applied.
For the brake booster I ordered Eastwoods Chassis Black extreme primer and satin black paint - painting turned out really fine! See pictures below
To make bleeding brakes easier and a one person job I also ordered a set of speed bleeder screws. (SB3824-SS)
The unit still in the car - before removal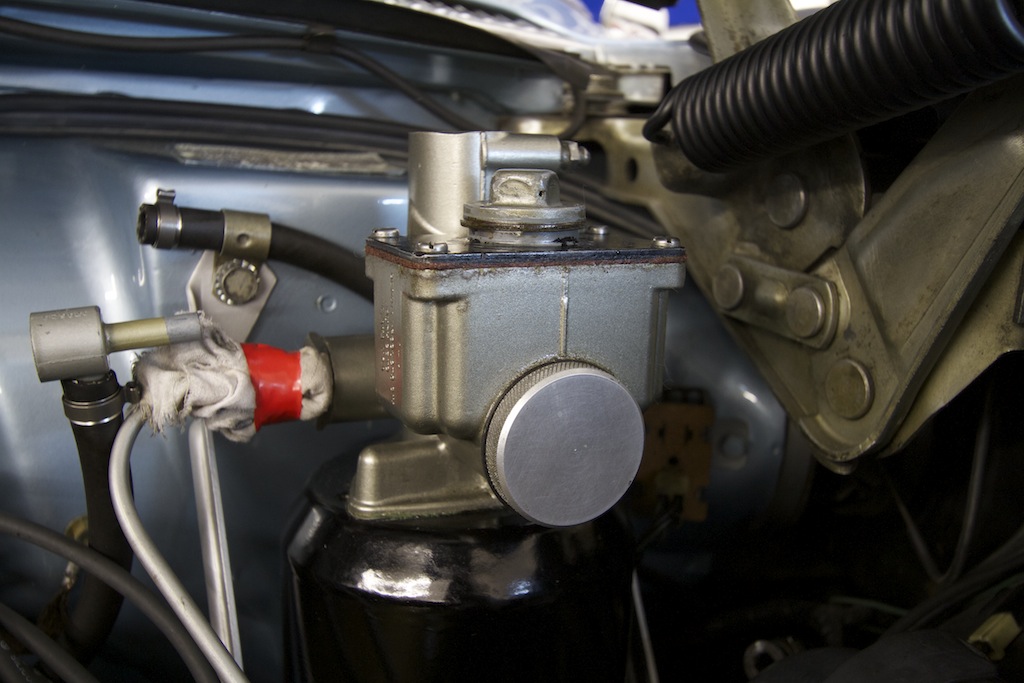
Removal has started
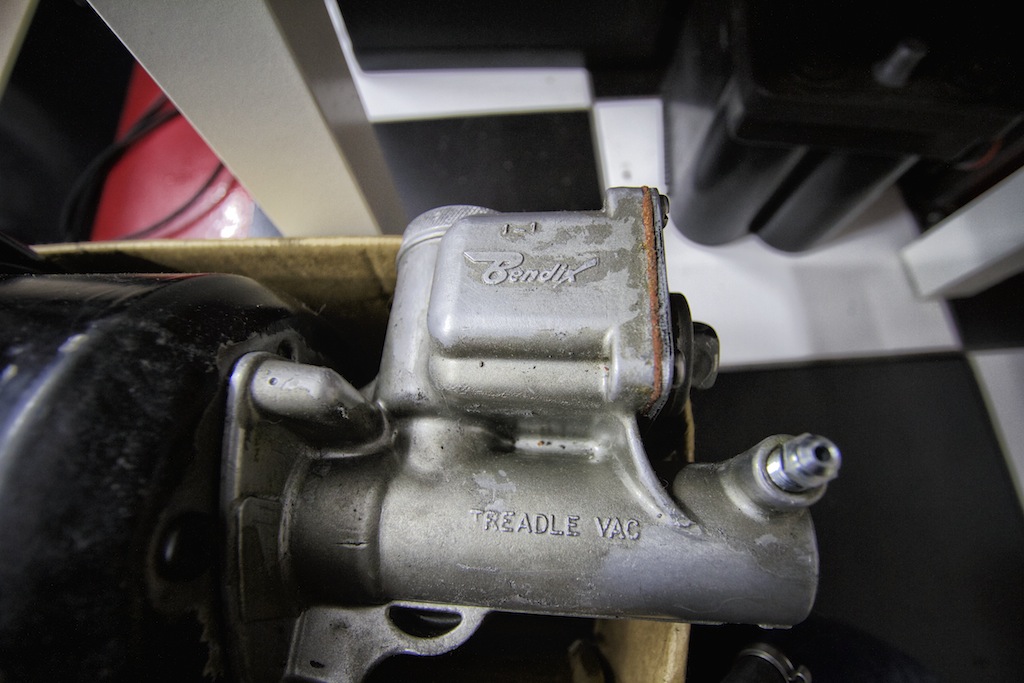
The unit out of the car - before rebuilding it.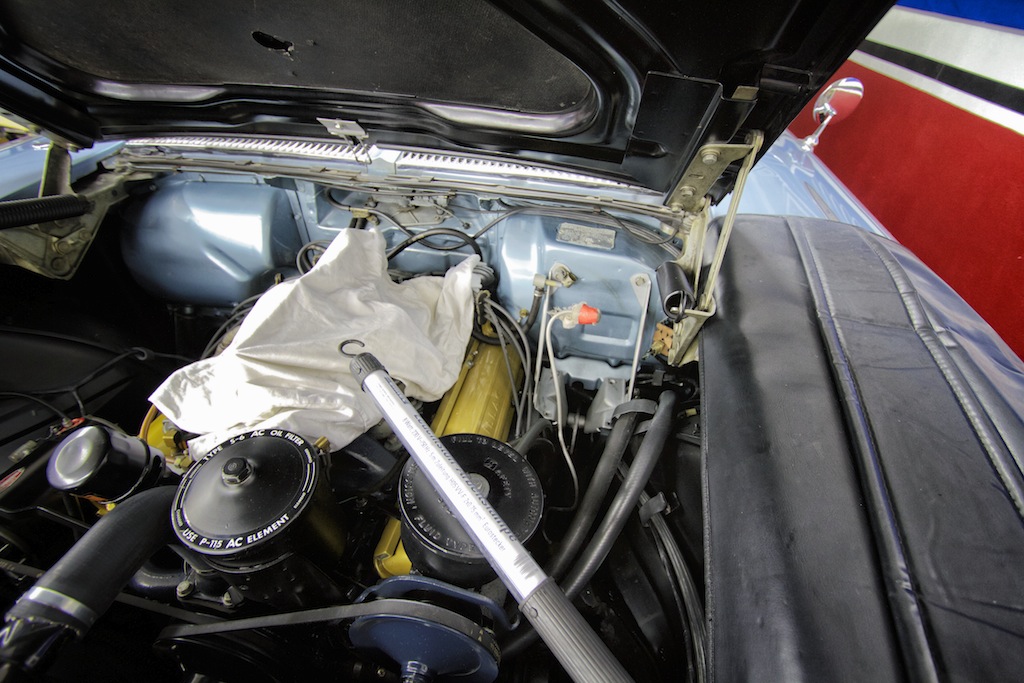
Out of the car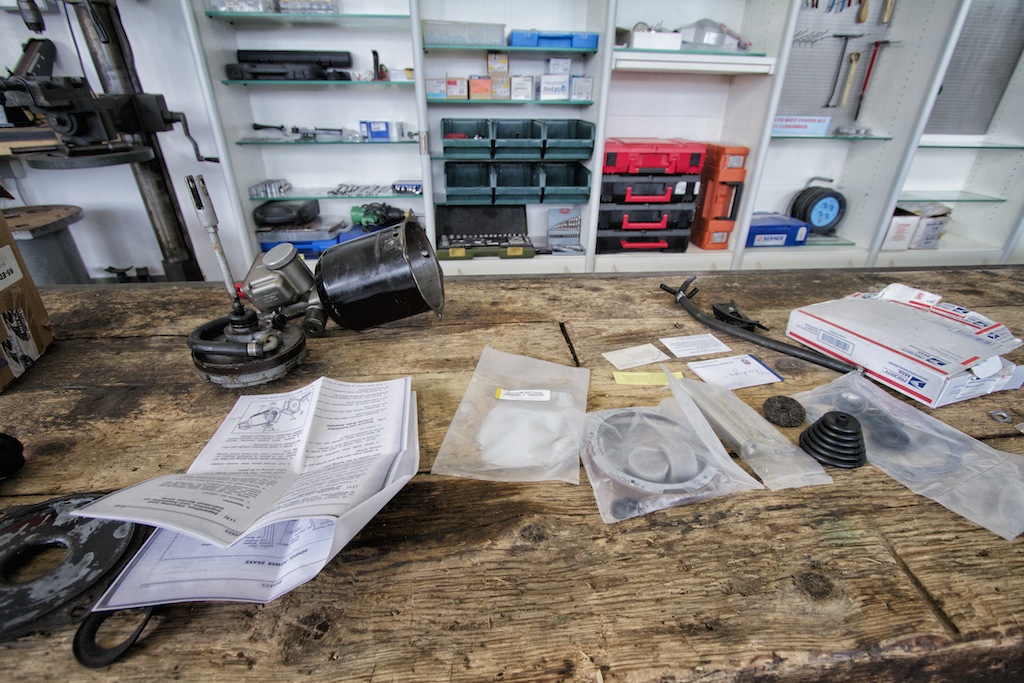
In Lucky´s workshop with the rebuild kit I got from the USA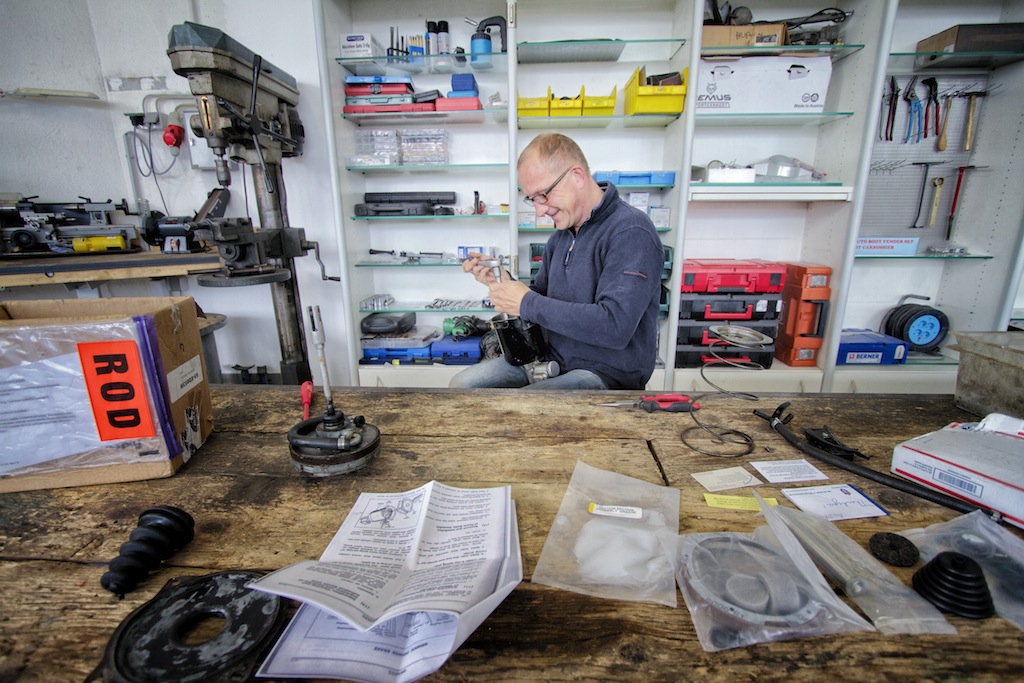
My friend Lucky at work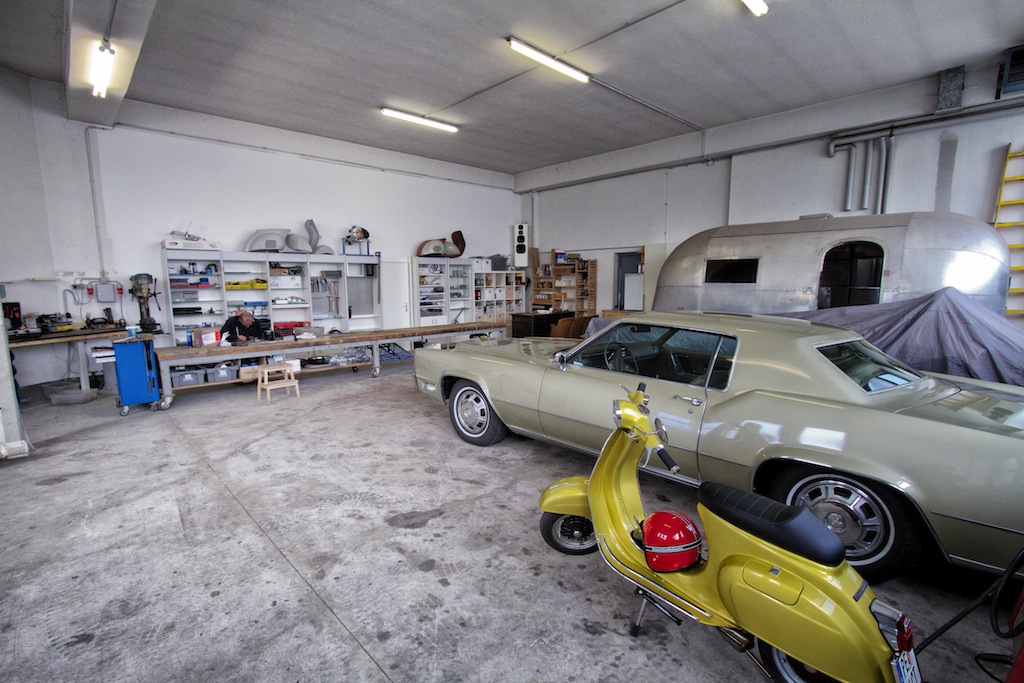
Lucky´s fantastic work shop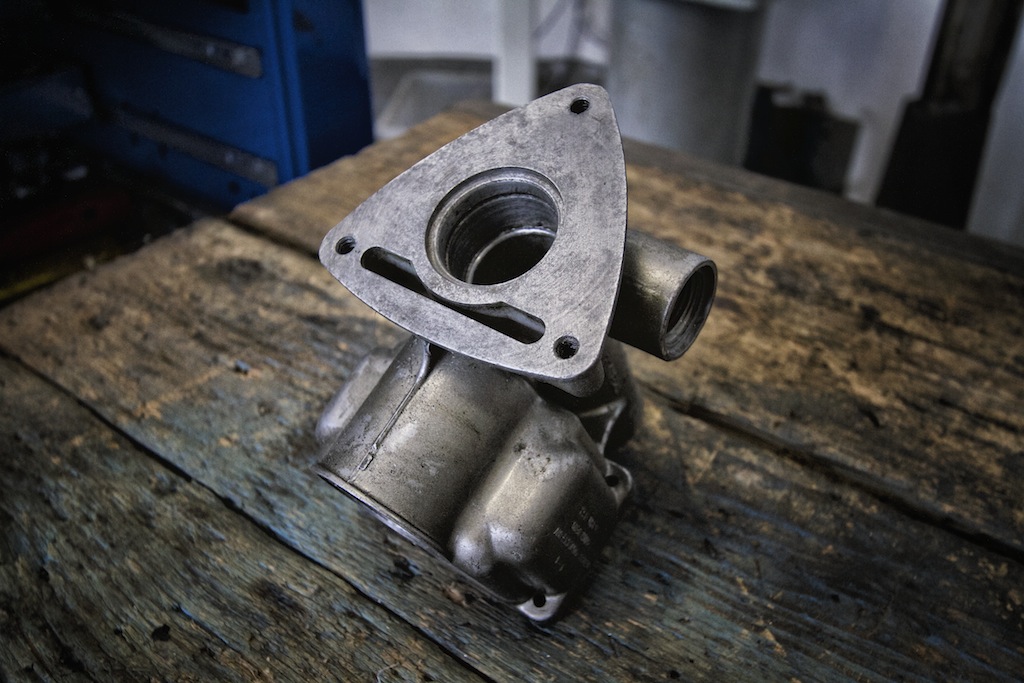
The Bendix master cylinder fully disassembled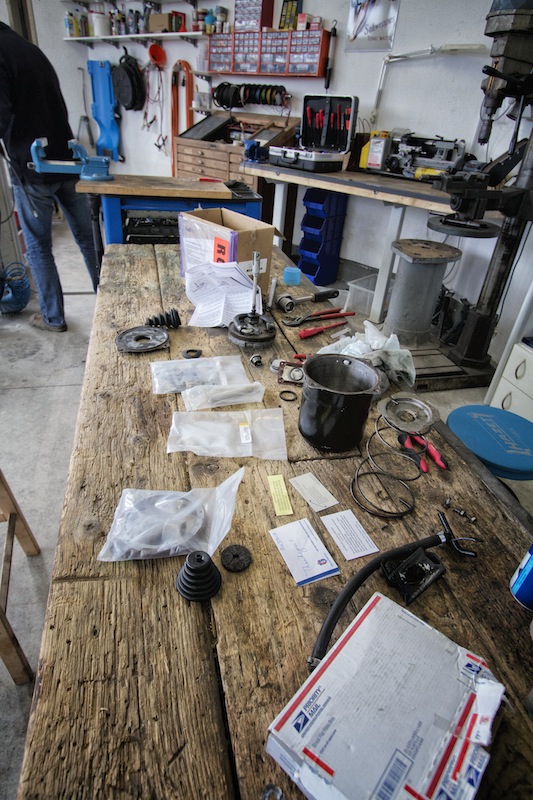
Everything disassembled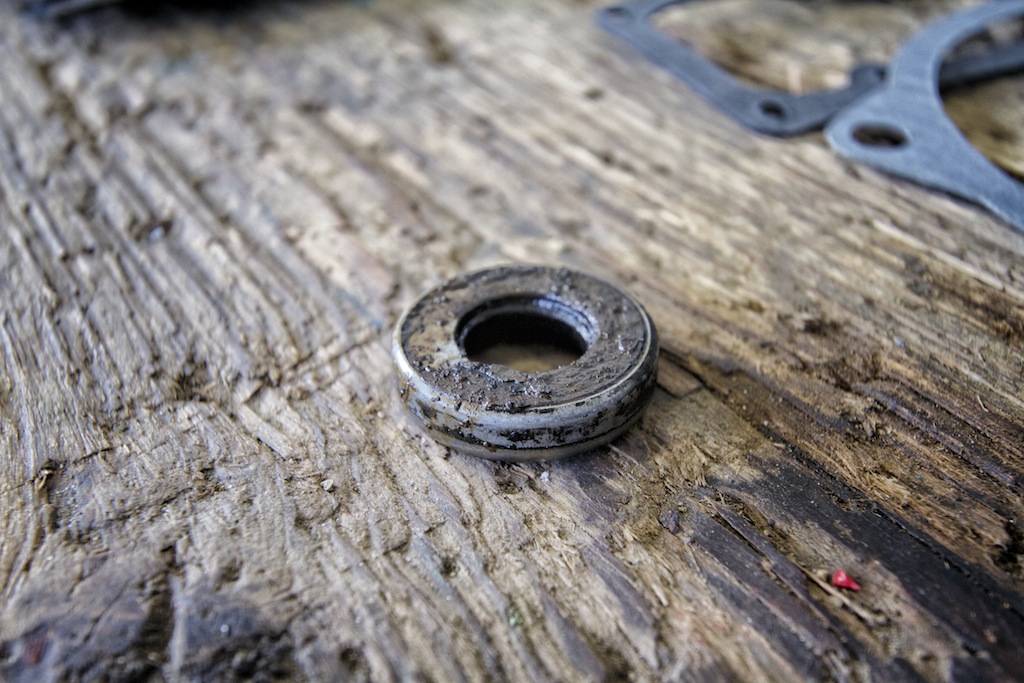
This O-ring was leaking and caused the problem.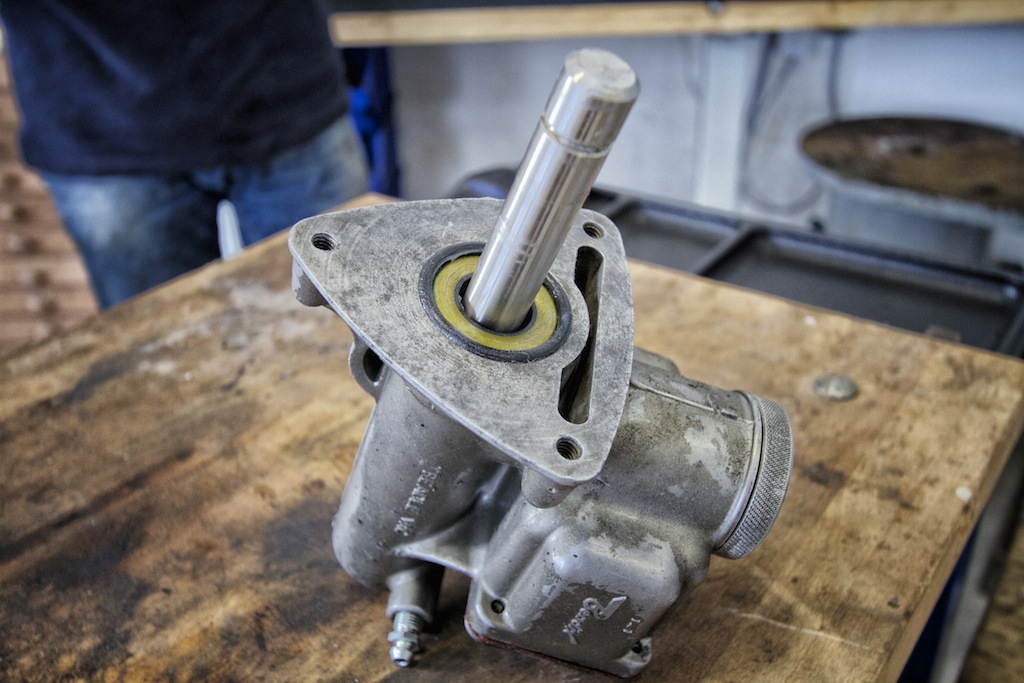
The new o-ring in place.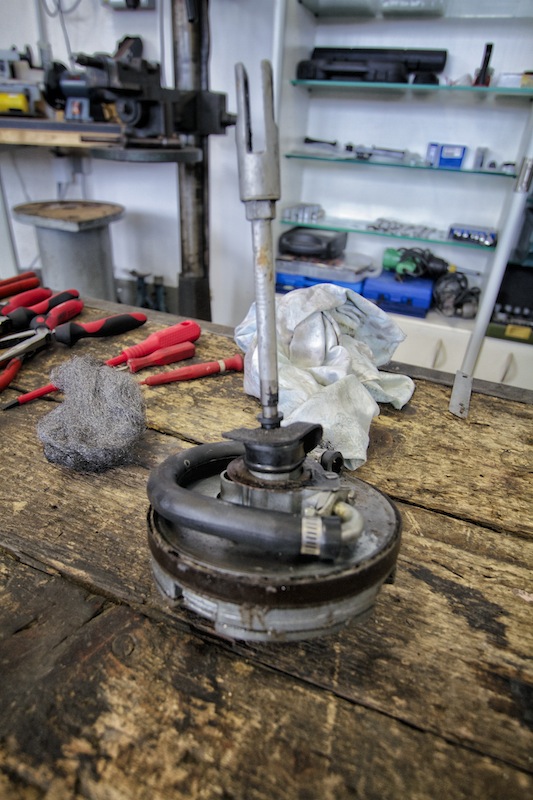
The vacuum cylinder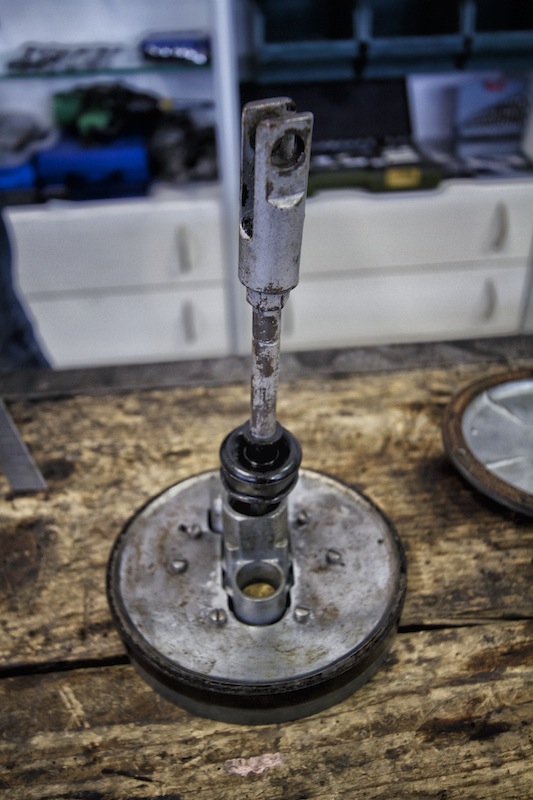
As you can see the paint suffered from the brake fluid - a repaint was necessary after the rebuild.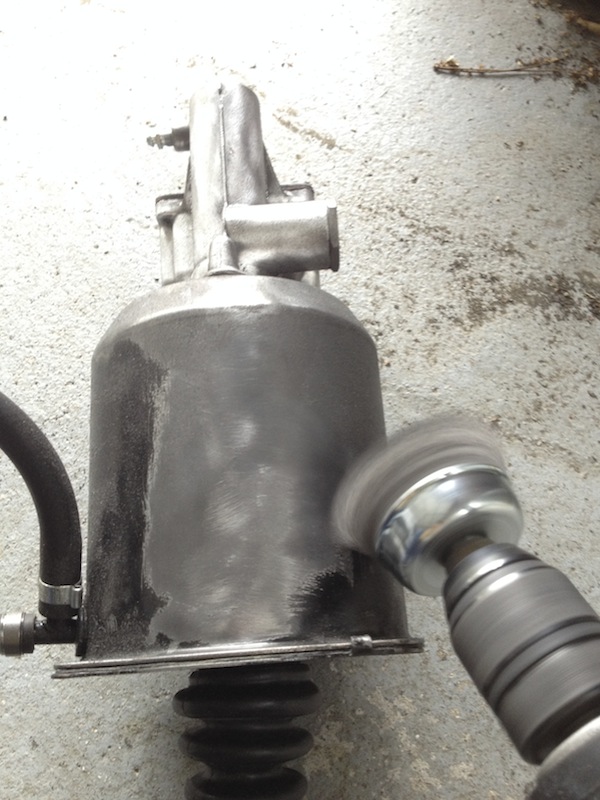
I started to wire brush the paint off - took it apart once again after this picture.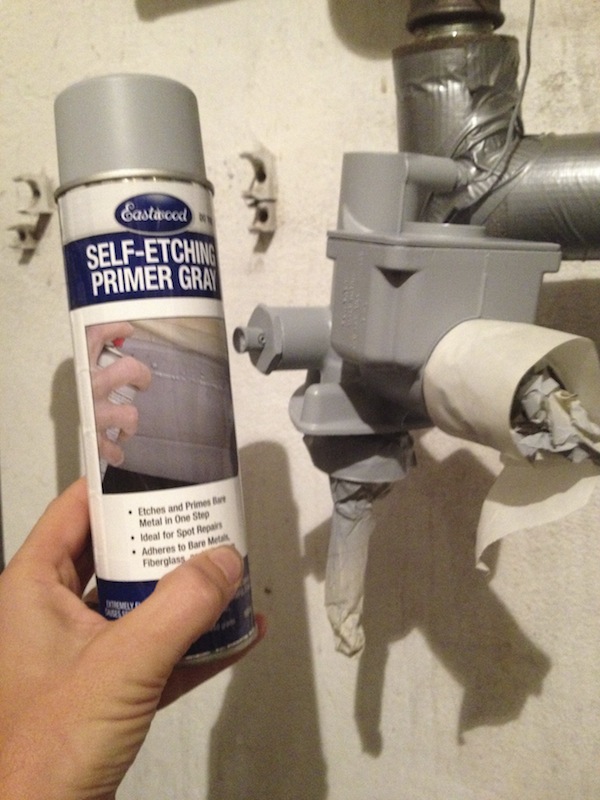
The master cylinder in primer.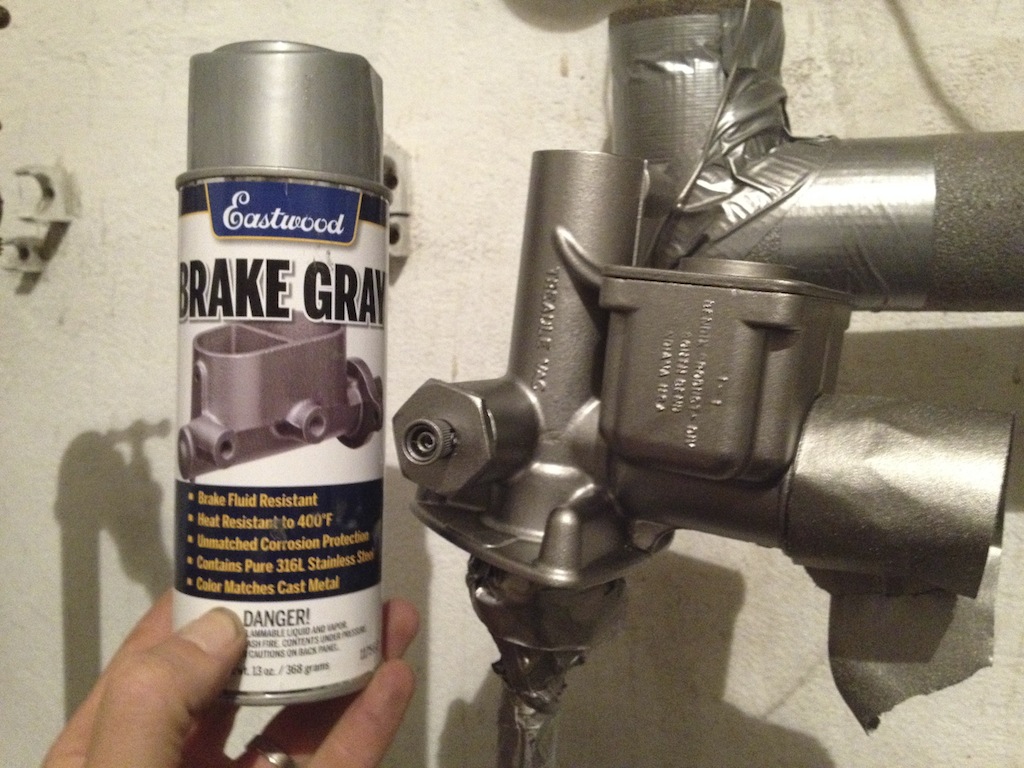
After painting it with "Brake Gray" - great stuff.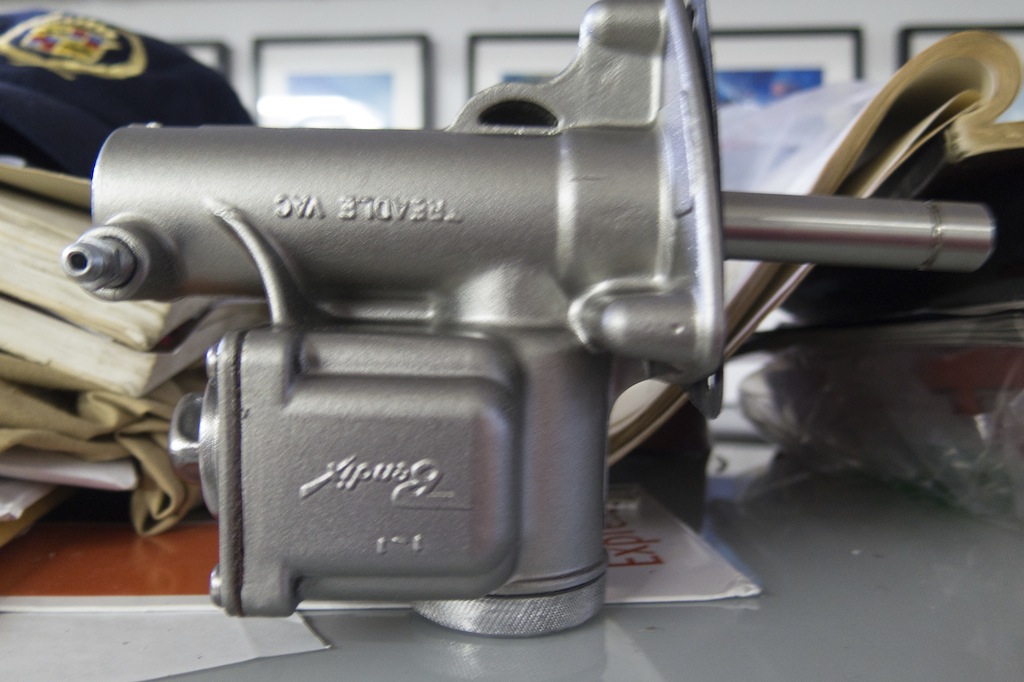
The master cylinder with paint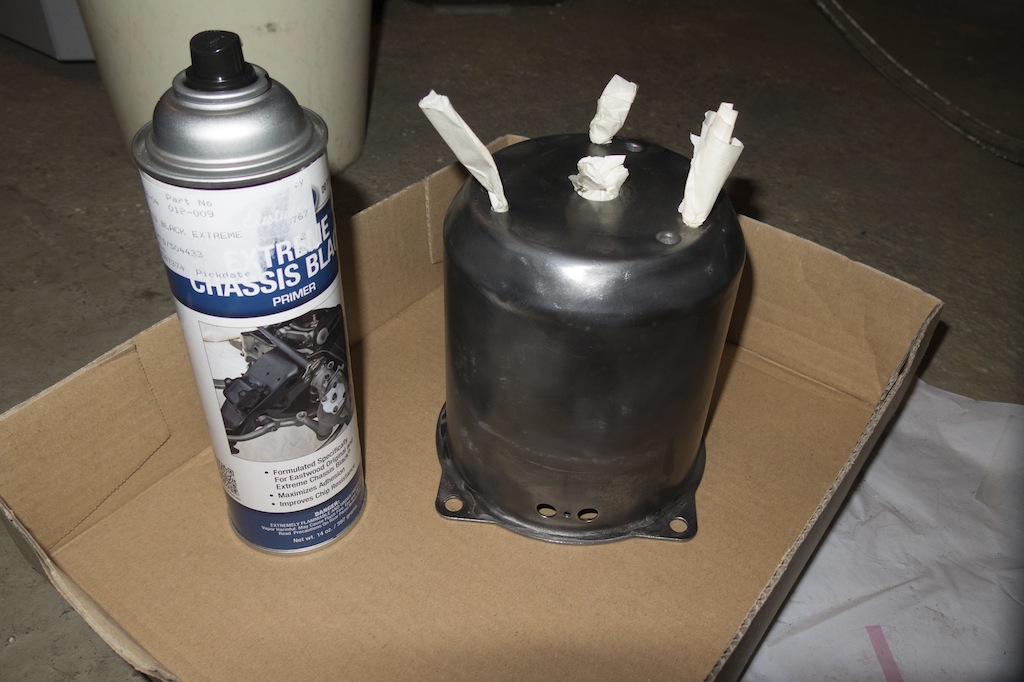
The booster in bare metal before primer. I used Eastwood Extrem Chassis Black primer and paint.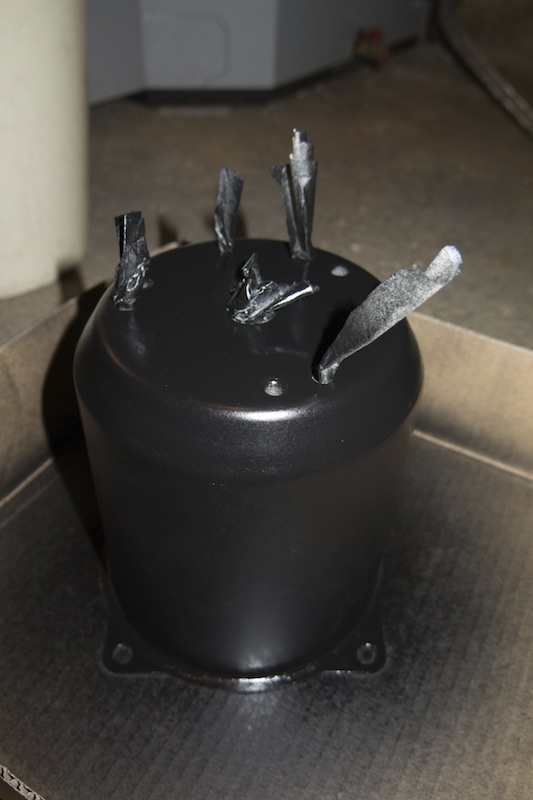
In primer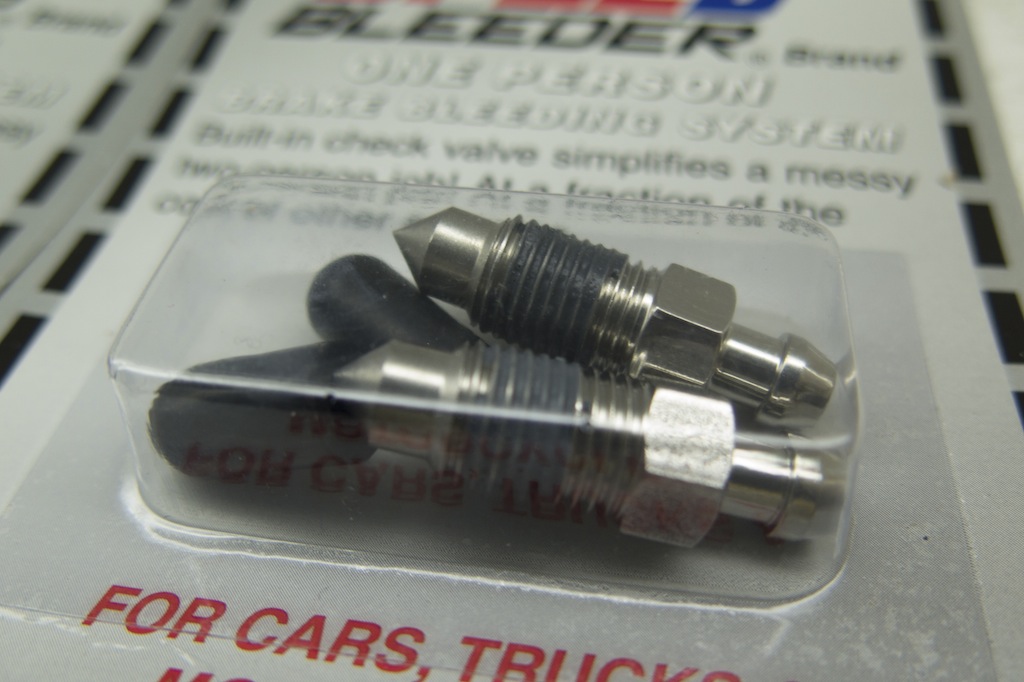
Speed Bleeder screws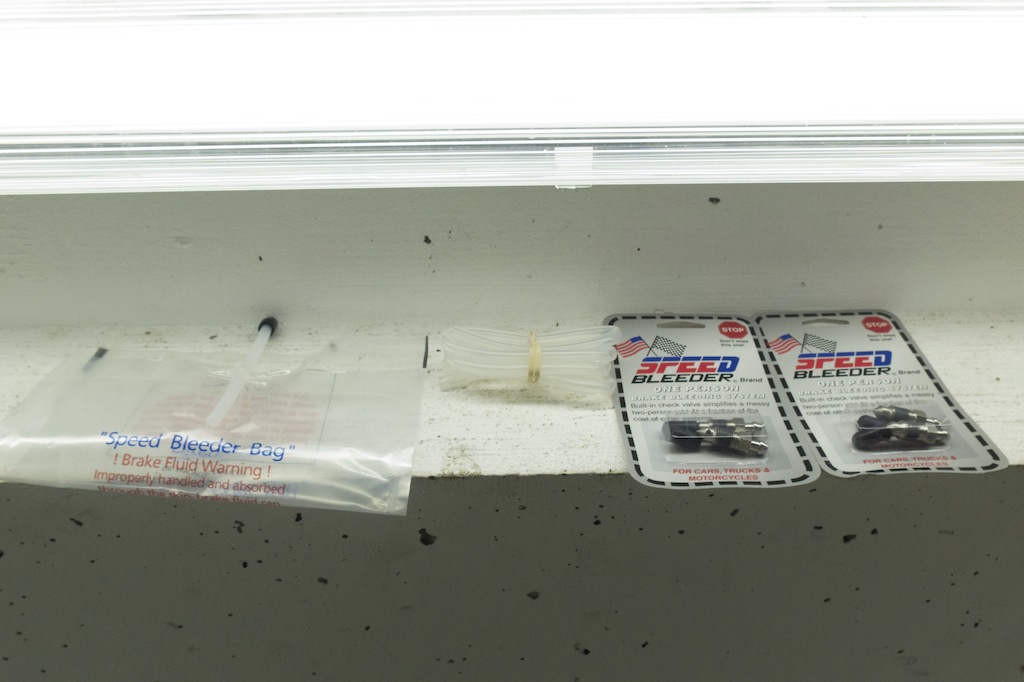
Speed Bleeder screws and bag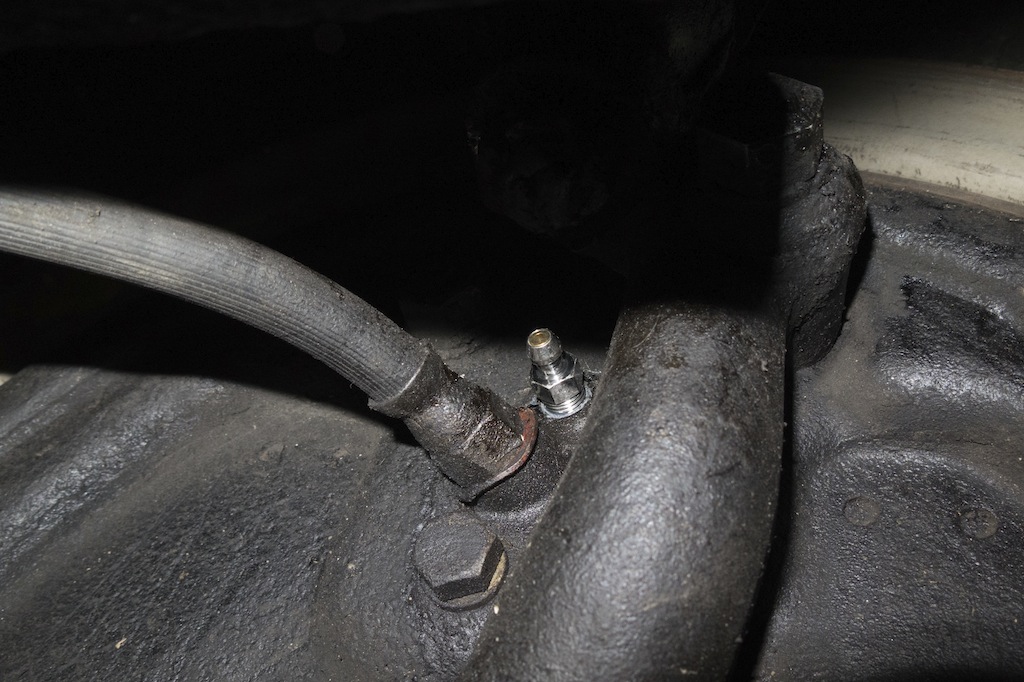
The new Speed Bleeder screw in place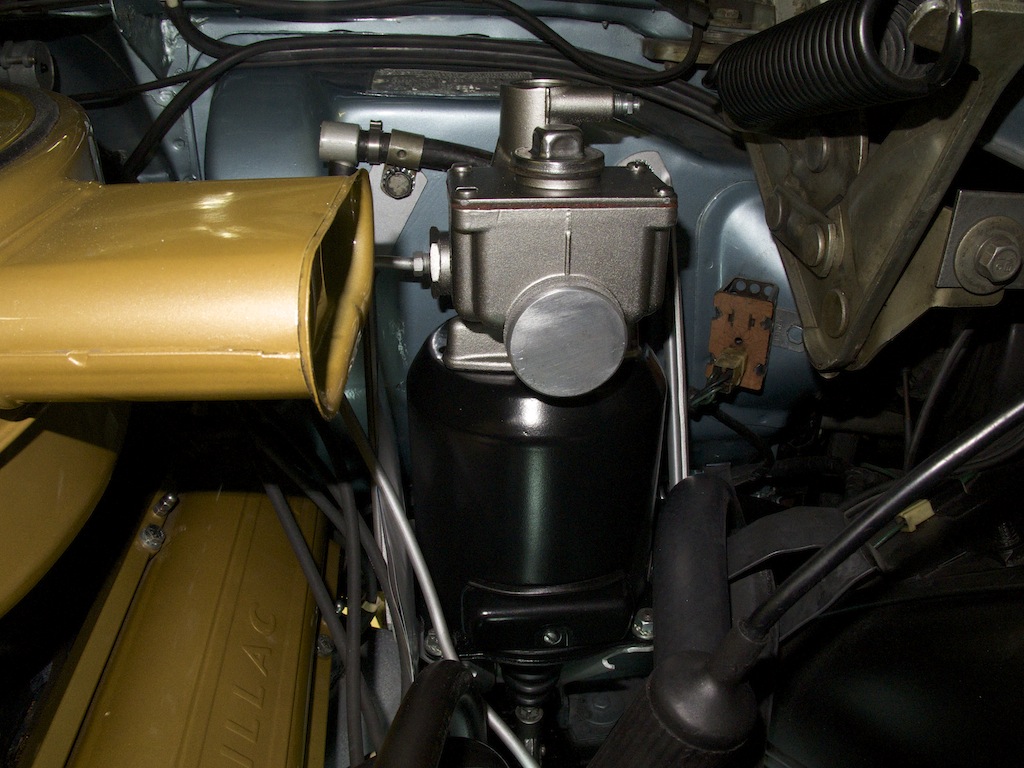
The reassembled unit back in the car.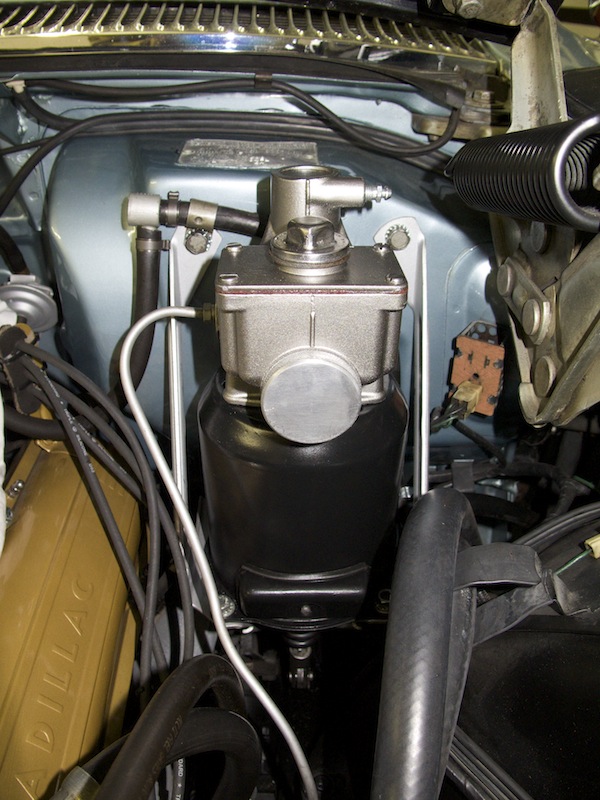
Photoshooting in the garage

Painting the interior of the new garage and moving in.
It was a lot of work to make it look like it does now.
My wife helped me masking everything for spray painting and my friend Richard helped me making the markings for the painted stripes.
Everything else I did on my own.
I needed 150 kg of white paint, 10 kg of red paint and 7 kg of grey paint and about 350 meters of masking tape.
It came out very nice and I finally could move the first cars into the new garage. Some minor things will still have to be done on the interior and I can also start decorating it now.
I hope to be able to also paint the exterior of the garage soon, before the long winter starts.
The pictures of the paint process and the finished interior can be found here.

This is how it looked like with everything masked off.
The (almost) final result - the first cars just moved in :-)
1967 Eldorado with only 8.000 miles for sale!
UPDATE: !!SOLD!! - IT SOLD VERY QUICKLY!
I´ll leave the description below just to let you know what you have missed ;-) Congratulations to the new owner!
This is your chance to own one of the lowest mileage 1967 Cadillac Eldorados on the planet!
Up for sale is a breathtaking 1967 Cadillac Eldorado with less than 9.000 miles on the clock. It's an all original car and probably one of the best in existence.
The car is located in Florida and was brought back to life during the last year. Its for sale by the second owner of the car who owns it for 25 years now and wants to let it go due to his age and as he has nobody to pass this car on.
The original owner died when the car had 7800 miles on it. The car was stored in a heated garage until a broker purchased it. It was then purchased from him by the current owner. It was only driven to local shows. The car is as straight as an arrow. The only repaints on the car are the air cleaner and the valve covers, every thing else is original. This car has drum brakes all around, which can be a plus since rotors are not available.
This car has not seen rain in the last 25 years. Since there is no rust on the drums, I wonder if this car has ever seen any rain.
A list all the things done to the car:
- Radiator boiled out and pressure checked.
- Carb rebuild.
- Brakes rebuilt.
- The vacuum switch for the air conditioner was replaced,
- It has the original Freon in it and comes with 1 and a half cans of the original Freon that goes with the car.
- The water pump has been replaced.
- the vacuum motors that operate the headlight doors were replaced. All the vacuum lines for this have been replaced as well.
- The vacuum lines for the leveling system have been replaced and the system worked fine except that one shock leaked and both rear shocks had to be replaced. The replacement shocks have a spring with them and the car sits perfectly and handles great. The old shocks will go with the car in case they can be rebuilt. Vacuum has been blocked from the pump so it does not run all the time.
- The complete muffler system has been replaced with original parts.
- The original tires have been replaced except the spare witch has never been removed from the trunk.
- The interior is in mint condition.
- The chrome and stainless are really nice, except for one spot on the front bumper, which I think a hot lead hit the bumper years ago. You can see it if you look at the picture of the passenger side bumper pic. Its not that bad but its there. To fix it would require a re-chrome.
As this is a very special quality car it won't go cheap of course! This is one of the best 1967 Cadillac Eldorados in the world.
If you are seriously interested - let me know and I can put you in contact with the seller! If I had the money to purchase another car, I would definitely buy it for myself!
Car is located in Florida!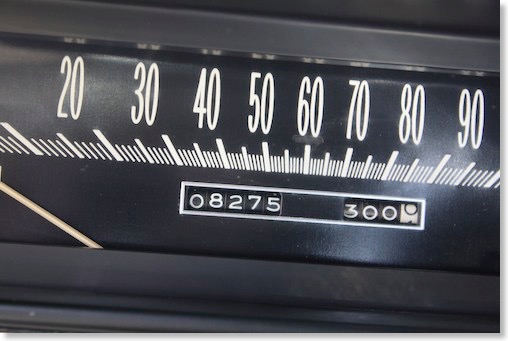
Yes, thats the original mileage!!
New garage floor
You can find all the pictures of the building process in this gallery.
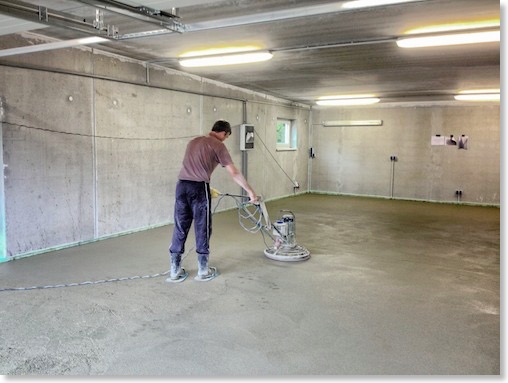
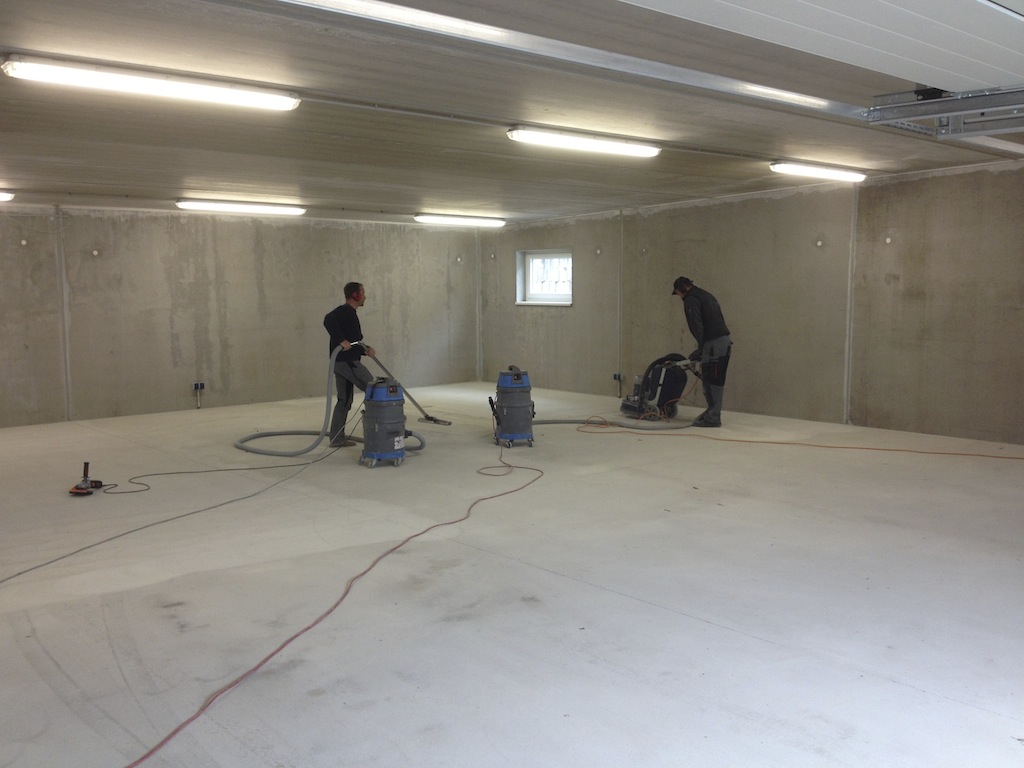
The guys from the floor company at work.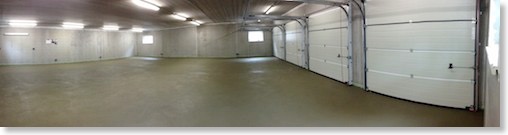
So far the new floor looks great! It will now take 6-8 weeks before it is dry enough for epoxy coating…
1932 LaSalle Photoshooting
Of course we loved this shoot very much and took some very nice pictures of the car and the owner. The owner will start to restore the car back to its original condition as a roadster in the near future.
The owner was so kind to let me drive his car. It was a completely new experience for me to drive such a prewar car. Great!
Some of the resulting images can be found here.
The very rare 1932 LaSalle
It´s still a very agile car despite its age.
US CAR Show Dornbirn 2013
I exhibited one of my Cadillacs at the indoor show in the past years, but this year I decided to take the Roadmaster for the trip and just take part as a regular visitor.
The show itself is a class of its own. You can find hundreds of Hotrods, Classics and Muscle Cars there which you do not see at any other shows in Austria. We really had a great time there and are looking forward to the next edition of the show in 2015.
I did not take many pictures this year - a few of them will be online on my site soon !
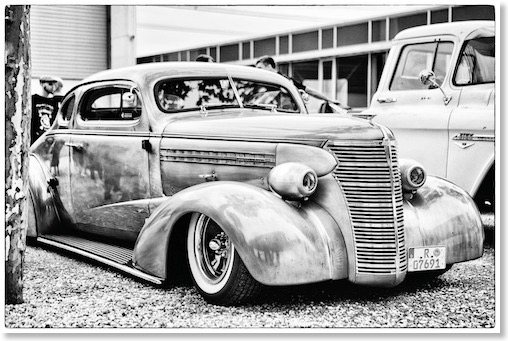
1936? Chevrolet Hot Rod
Bleeding brakes and spring cleaning
First up was the 1958 Cadillac Eldorado Seville which needed new brake fluid.
So I sucked out the old fluid from the reservoir and flushed all the lines with fresh DOT 3 brake fluid.
I started at the right rear line, the left rear, the right front and left front brake cylinder.
Although I have a pit its still a pain to reach all the bleeding screws. The power brake cylinder itself also needs some good bleeding.
Thanks to my dear wife Afra for gently pumping the brake pedal and helping me out.
When you bleed brakes make sure your assistant does not push the brake pedal all the way through as this could damage your master cylinders membrane.
Next up was a thorough cleaning of the garage floor.
My 3 year old son Elliot also wanted to help his daddy and helped me swiping the floor ;-)
Bleeding and flushing the 58s brake lines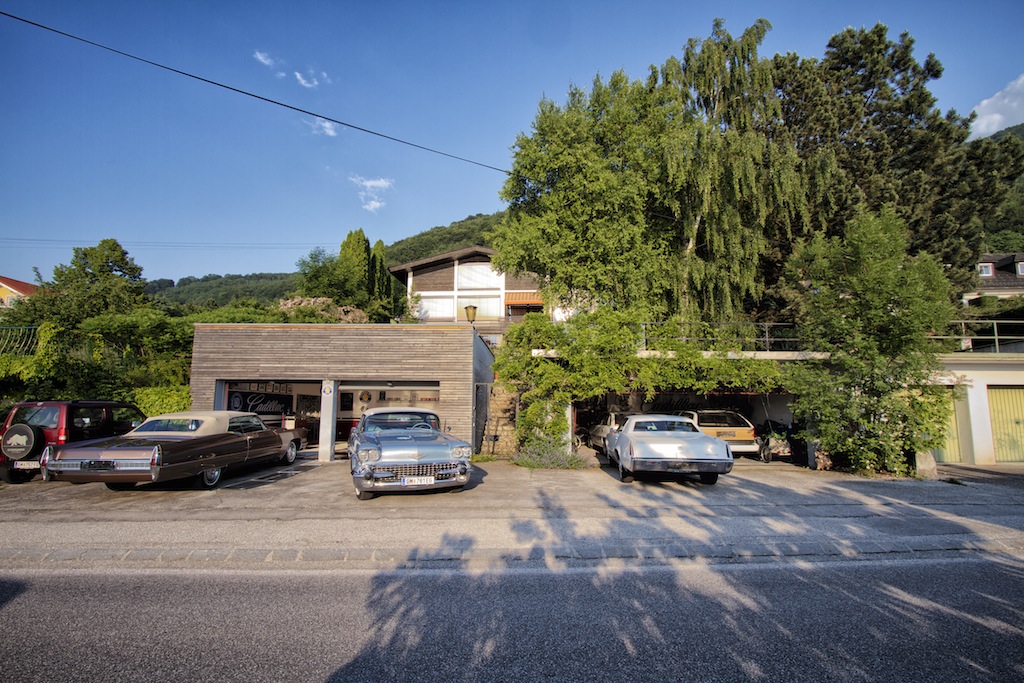
The cars are out for cleaning the garage floor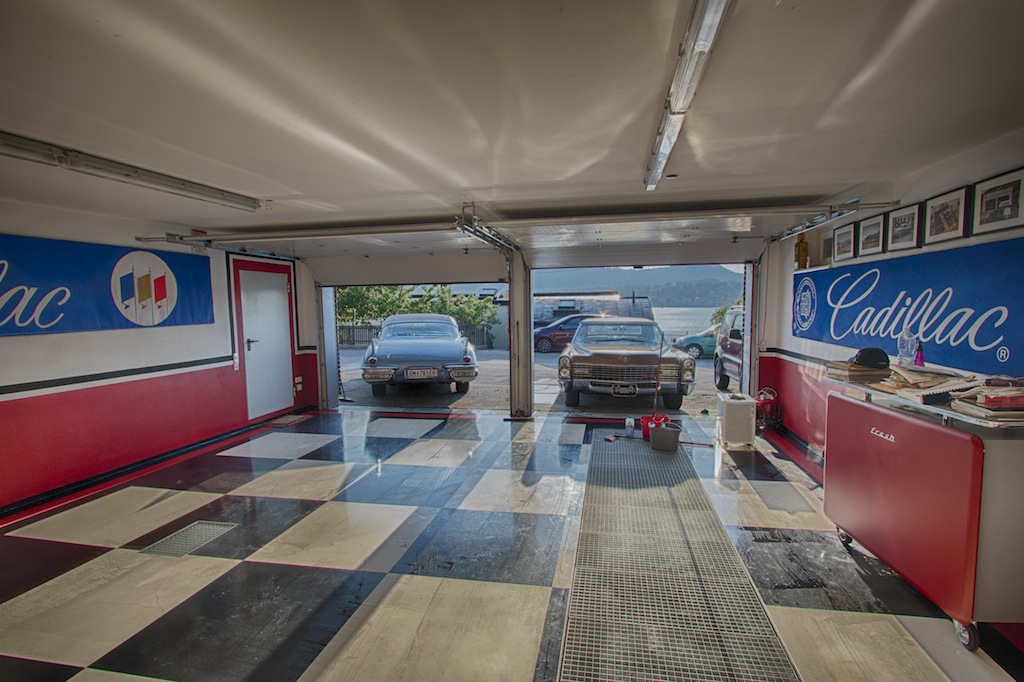
Floor cleaning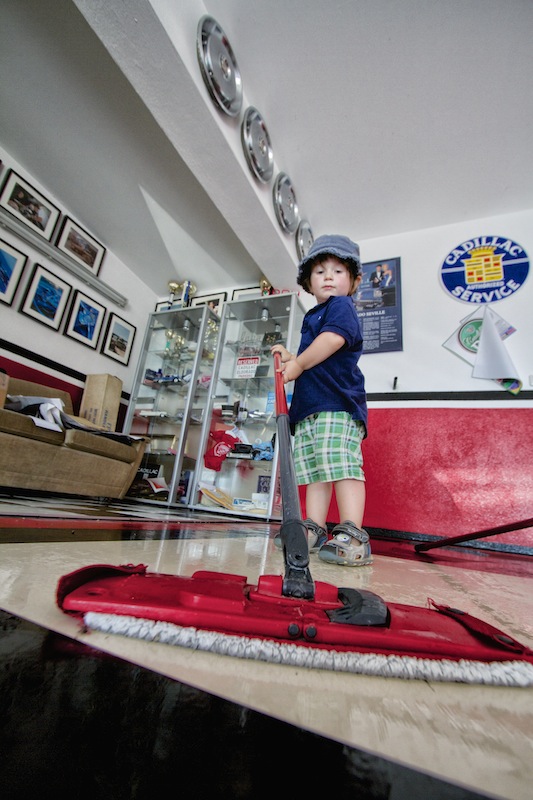
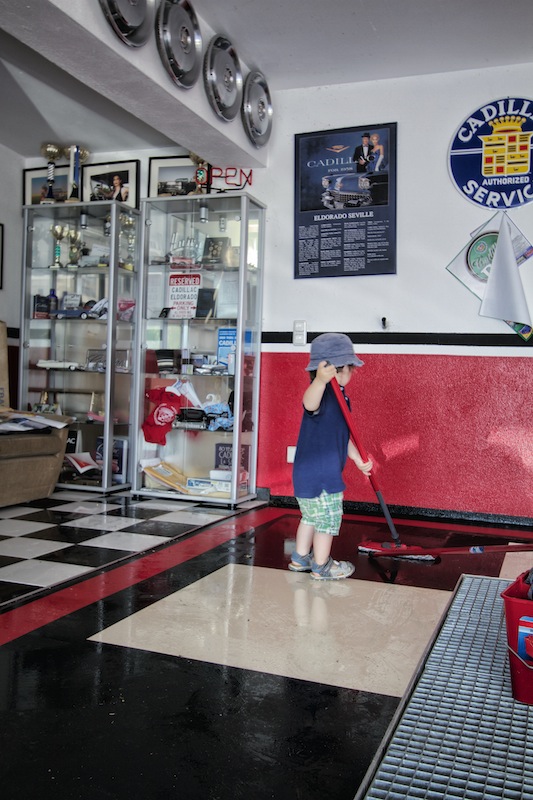
Little Elliot helping out - I´m glad he loves being in the garage.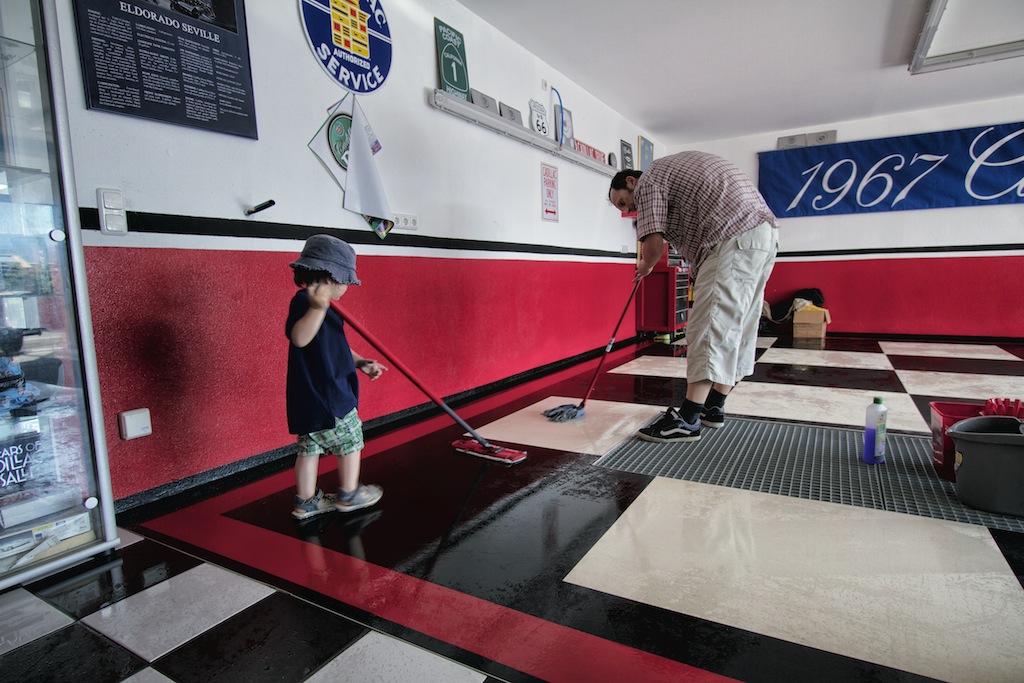
Men at work
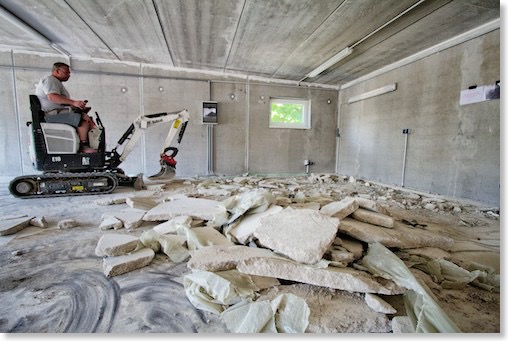
The floor in the garage comes out again
After I finally found an agreement with the construction company today the "old" screed started to come out again…
See more pictures in my garage gallery.
Another EP cover with a picture of my car
A lot of my car pictures were used for CD covers from bands from all over the world in the past and this is the newest release.
You can listen to the new EP on sound cloud btw

Work on my Cadillac garage project continues
3 weeks ago I was planning to have my floor epoxy coated, when I found out that something went terribly wrong with the screed. Its way too soft, so nothing can adhere to it!
The construction company responsible for it has to find a solution now - they will try to fix it with some chemicals, but I´m not very optimistic that it will work out.
I hope we can solve the issue without a legal battle and I will get a new floor soon.
My friend Richard once again helped me out with my garage work as well. He is an expert for plastering work and is helping me adding the last finishing touches to the exterior.
I will be able to do the paint work on the exterior hopefully soon.
Preparing the floor for the planned epoxy coating - it soon turned out that the floor is way too soft
Measuring the hardness of the floor - way too soft! Should be at 1,6 nm/mm2 and not 0,6 -in some areas its only 0,29 nm/mm2
My friend Richard helped me plastering the last details around the doors. The exterior is almost ready for paint.
On the road again - Season 2013 begins
Lets hope for some really nice weather this summer and that I will have enough time to drive and enjoy my cars.
The 58 Seville came out first and needed some new brake fluid and a complete flush of the brake system and a thorough bleeding. Thankfully my wife helped me pushing the brake pedal while I was doing the bleeding procedure under the car. Its great to have such a lovely helper! Thanks darling!
My 1958 Seville on one of the first spring days
Another Hotrod photoshooting with PinUp girls
The shooting was done in Bernds shop which is the cleanest shop I have ever seen. His paint work is spectacular.
The pictures came out great - below you can view one of them. The rest can be found on our professional photographic website.
Great car and pretty girls!
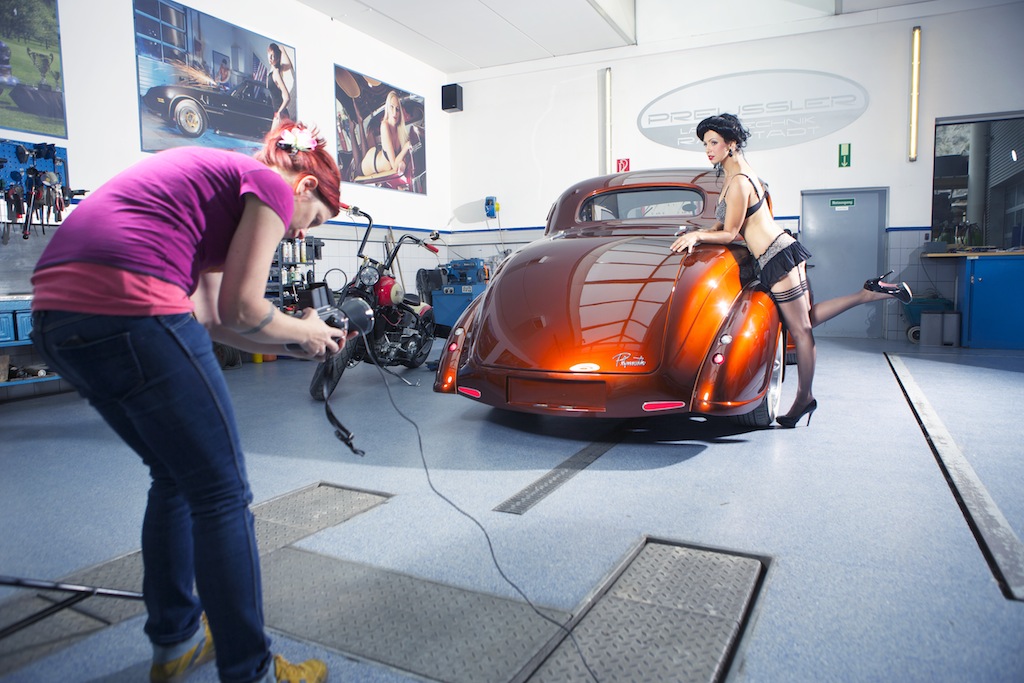
My wife Afra and the model at work with her good old Hasselblad 6x6 medium format camera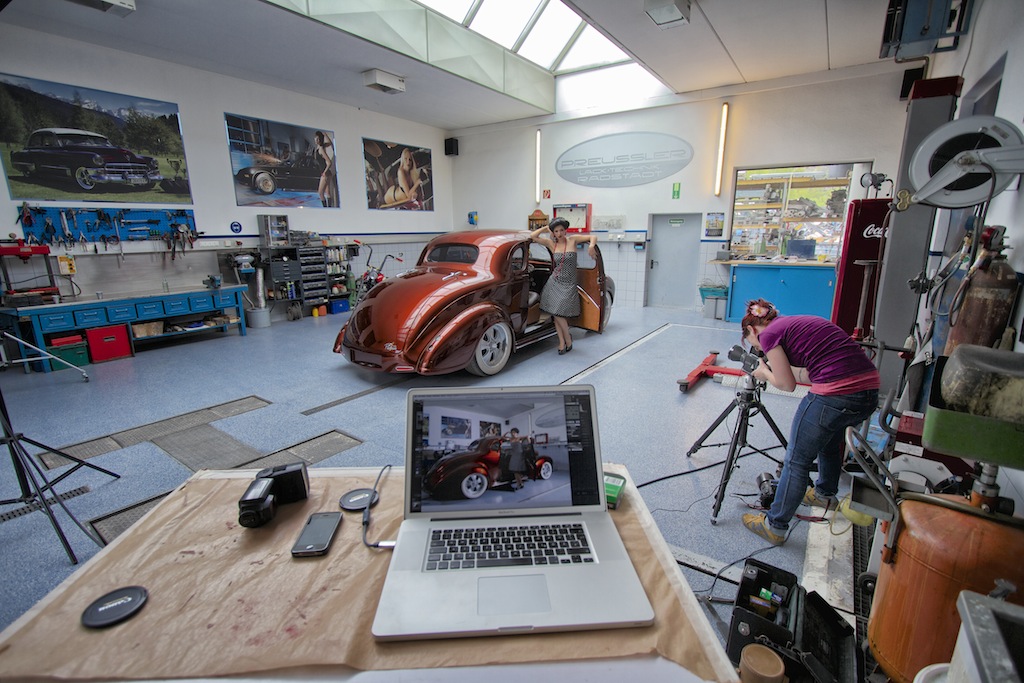
My wife and the model at work.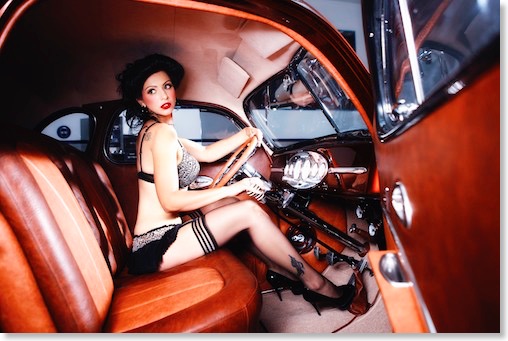
one of the resulting pictures
A visit to Toms Club - The Mark III is back home
Tomsclub has a great restoration service and besides the Cavalry Twill roof repair they also did some other work on the car like repairing the carburetor base plate, adjusting the ignition and other little tune-up things. The quality of their work is exceptional.
My Mark III made the 400 Mile trip home without a problem and turned out to be pretty fuel efficient on the highway at a steady 65mph. It averaged 21 mpg - which is really good for such a car.
Tom Witzel is famous for his awesome collection of the finest Cadillacs and Lincolns. If you want to buy the best of the best low mileage cars you should check him out. He really has the finest cars available. They of course are not cheap on the first look - but worth every cent in my opinion. Tom gave me a tour through his inventory and I was just blown away by his cars. I did not take many pictures - below are a few:

A part of Tomsclub inventory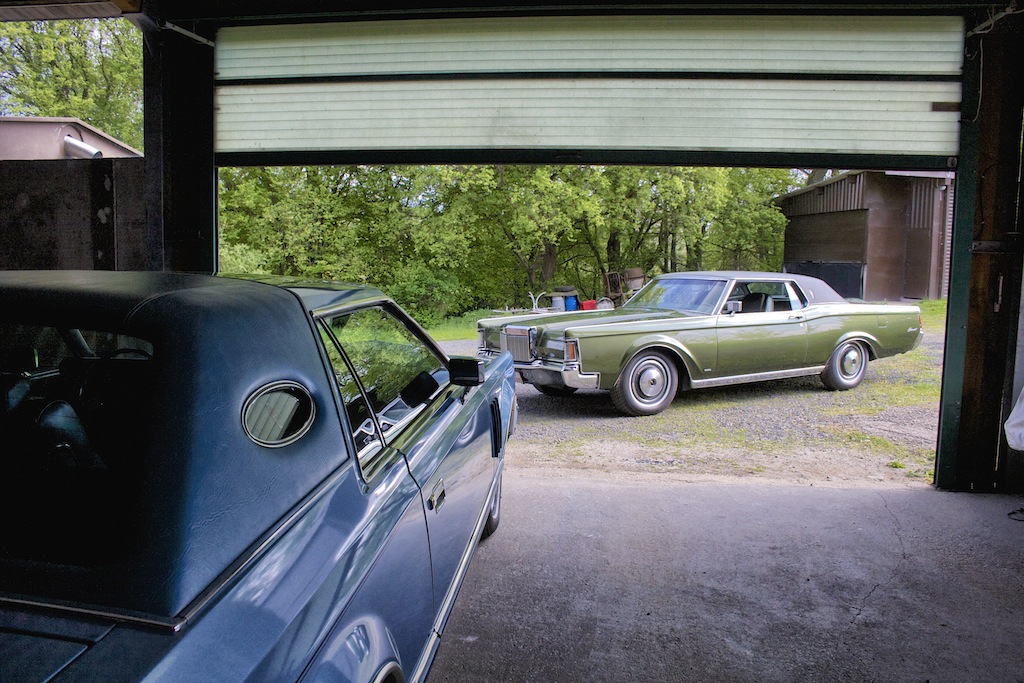
A fantastic 1971 Lincoln Mark III and a 1977 Mark V
A spectacular super low mileage 1979 Mark V - only 4.500 Miles!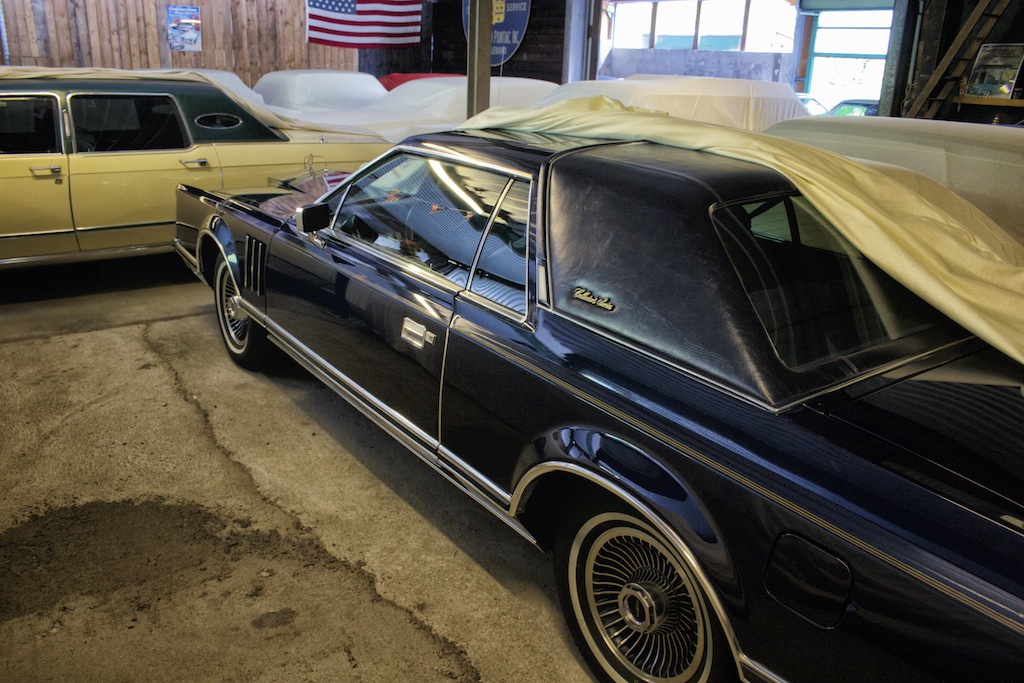
A spectacular super low mileage 1979 Mark V Collectors Edition - only 4.500 Miles!
One of the many cars I would have loved taking home was this 1965 Coupe de Ville! Awesome! It looked like new inside and out...
I have a soft spot for old Station Wagons - this 1978 Ford Country Squire just blew me away.
In the evening at the restaurant - Tom Witzel arrived with this awesome 1977 Town Car.
During the almost 400 mile trip home with my Mark III - it drove like a dream! Too bad it was raining... Fuel efficiency was pretty good - 21mpg!
A Hotrod photo shooting in my new Cadillac garage
Here is a short making of video of the shooting. The pictures from the shooting can be found in this gallery.
Make sure to watch the video in HD!
One of the pictures resulting from the shooting
1966 Cadillac Coupe deVille (16)
1967 Cadillac DeVille (54)
1967 Cadillac Eldorado (73)
1971 Lincoln Continental Mark III (24)
1974 Cadillac Coupe deVille (46)
1978 Cadillac Eldorado Biarritz (25)
1996 Buick Roadmaster (20)
Cadillac BIG Meet (2)
Car Shows (55)
Cruising (4)
CT6 (1)
For Sale (3)
Garage Stuff (32)
Pacer (1)
Restoration (140)
Various (55)
Video (21)
Website News (31)
- 6 way power seat
- 8-track
- 10 Ohm
- 429
- 1932
- 1957
- 1958
- 1958 Cadillac Eldorado Seville
- 1958 Cadillac Repair Tip
- 1959 Cadillac Eldorado Seville
- 1964
- 1965
- 1966
- 1966 Cadillac Coupe deVille
- 1966 Cadillac Repair Tips
- 1967
- 1967 Cadillac DeVille
- 1967 Cadillac Eldorado Repair Tip
- 1967 Cadillac Repair Tip
- 1967 Eldorado
- 1968
- 1970 Cadillac Eldorado
- 1971
- 1971 Lincoln Continental Mark III
- 1974
- 1974 Cadillac Coupe DeVille
- 1974 Cadillac Repair Tip
- 1976
- 1977
- 1978
- 1978 Cadillac Eldorado Biarritz
- 1978 Cadillac Repair Tip
- 1980 Cadillac Eldorado Biarritz
- 1996
- 2012
- 2014
- 2017
- 2018
- 2019
- 2022
- 2023
- 2025
- 3063206
- 7027235
- 7800483
- 7805675
- 7805676
- 12355706
- 17058531
- 17059968
- 17059969
- 22010515
- 22010661
- A.I.R
- A6
- AC
- AC Compressor
- AC Electrical Diagram
- ACC
- Accelerator Pump
- Accelorator pump
- Accident
- Actuators
- Adriatic Blue Metallic
- Ads
- Aftermovie
- Air Pump
- Aircondition
- AIRPUMP
- ALC
- Alternator
- AM
- AM-Transmitter
- Antenna
- Anti Rattle Clips
- Antique Gold
- Arizona Vintage Parts
- Arrival
- Article
- ASC
- Ash Tray removal
- ATC
- Atlantis Blue Firemist
- Austria
- Austro Classic
- Autolite SP-459
- Automatic Seat Back Release
- Award
- Banner
- Barn Find
- Battery
- Battery Tray
- Beach Race
- Bearing
- Bendix
- Biarritz
- Bigfoot
- Bill Hirsch Engine Enamel
- Bleeder Screws
- Bleeding
- Blower
- Bodywork
- Bolts
- Book
- Borg
- Brake Booster
- Brake Fluid
- Brake Gray
- Brakes
- Broken Bolt
- Brougham
- Bucket seats
- Buick
- Bumper End
- Bushings
- Cadillac
- Cadillac BIG Meet
- Cadillac BIG Meet
- Cadillac birthday cake
- Cadillac Blue
- Cadillac Color Selections Dealer Book
- Cadillac Coupe deVille
- Cadillac Dealer
- CADILLAC GRAND EUROPEAN
- Cadillac Meeting
- Cadillac Mini Meeting
- Camaro RS
- Caorle
- Car Show
- Carburetor
- Card
- Carpet
- Carter AFB
- Cavalry Twill Vinyl
- CB
- CBM
- CCCD
- Choke
- Christmas
- Citizens Band
- Classic Cadillac Club Deutschland
- Clay Towel
- Cleaning
- Clock
- Clockwork
- Clutch
- Clutch Coil
- Collector
- Colonial Yellow
- Color Coded Springs
- Commercial
- Compound
- Compressor
- Condenser
- Continental Mark III
- Control Head
- Conversion
- Convertible top
- Coolant
- Corona
- Cowl
- Cruise Control
- Cruising
- CT6
- CV Boots
- CV JOINTS
- D6230
- Dash Trim
- Decal Removal
- Decals
- Decoration
- Dehumidifier
- Delco Moraine
- Der Standard
- detailing
- Deville
- Diagnosis Chart
- Diagram
- Dial
- Digital Rotary Drum Clock
- Diner
- Disc Brakes
- Distributor
- Diverter Valve
- Door Jamb Switch
- Door Rubber Conduit
- Dornbirn
- Dot3
- Drive Shaft
- Driving tour
- Drum brakes
- Dry Ice Blasting
- Dry Ice Cleaning
- DVD
- Eastwood
- Eldorado
- Electric Choke Thermostat
- Electrical schematic
- Elvis
- Engine Bay
- Ep
- Epoxy floor
- Europe
- Evaporator
- Exide
- Factory Markings
- Fender Skirt
- Floor
- Flushing
- Flyer
- Foam
- For Sale
- Front AXLE
- Front brakes
- Front bumper filler
- Front Floor
- Front wheel bearing
- Fuel Filter
- Fuel Pump
- Fuel Sending Unit
- Fusible Link
- Garage
- Garage Cabinets
- Gasket
- GE
- Gear indicator
- General Time
- Glove box light
- Grand European
- H4
- Haus of Hot Rod
- Headlight Actuator
- Headlight doors
- Headlights
- Heater Core
- Heater Hose
- Heater Valve
- High Idle
- History
- Holley
- Honest John
- Hood
- Hood Emblem
- Hood Ornament
- Hose Clamp
- Hot Choke
- Hot Water Valve
- HotRod
- How to
- Hödlmayr
- Ignition Diagram
- Illuminated Entry
- John D‘Agostino
- John Foust
- Klassikwelt Bodensee
- Kremsmünster
- LaSalle
- Leather seats
- Light Switch
- Limited
- Lincoln
- Lincoln Mark III Repair Tip
- Low Mileage
- Magazine
- Marilyn Monroe
- Mark III
- Master Cylinder
- Master Switch
- Master Vacuum Switch
- Media Blasting
- Meeting
- Meguiras
- MK II
- Mobile
- Model
- Moldings
- Mom
- Mopar Nationals
- Mostkost Kustom
- Movie
- Munich
- Neon
- NOS
- Oberösterreicher des Tages
- oilchange
- ORF
- Overspray
- Pacer
- Paint
- Paint correction
- Paintjob
- Part Number
- Parts
- Patch Panel
- Perfect Circle
- Permabag
- Persian Lime
- Photo shooting
- Photoshooting
- Pictures
- PinUp
- POA Valve
- Power Antenna
- Power Servo
- Power Vent Windows
- Power Window
- Printed Circuit Board
- Programmer
- Pulley
- Quadrajet
- Quarter Panel
- Quartz Conversion
- R134
- Radiator
- Radio
- Rattle
- Rear brakes
- Rebuild
- Recalibrate
- RediRad
- Reed Switch
- Relais
- Relaunch
- Removing Overspray
- Repaint
- Repair
- Restoration
- RIP
- Roadhouse
- Roadmaster
- Rochester
- Rocker Arm Cover
- Rocker Panel Extension Clips
- Rostio
- Rotary Valve
- Rotterdam
- Rupes
- Rust removal
- Rust removal gel
- Sabre Wheels
- Sand Blasting
- Sandblasting
- Screed
- Season Greetings
- Seasons Greetings
- Seat Back Locks
- Seat Padding
- Seat Transmission
- See through ornament
- Self adjusters
- Self Starter
- Sepp's Garage
- Seville
- Sheetmetal
- Shocks
- shop manual
- short
- Sign
- Solenoid
- Spark Plug Wire Routing
- Speakers
- Special Award
- Speed Bleeder Screws
- Splash Guard
- Starter Diagram
- Starter Motor
- Steering Column
- Storage
- suction throttling valve
- sunroof
- suspension
- Swirl Mark removal
- Switzerland
- T3
- Taillight Cover
- Texan´s Choice Award
- Thermostat
- Tilt and Telescope
- Time capsule
- Tomsclub
- Torque Specifications
- Tower Hose Clamp
- Towtruck
- Trailer
- Transducer
- Transmission
- transmission control selector
- transmission control selector indicator light
- transmission shift indicator
- Treadle Vac
- Treffen
- Tri-Band
- Troubleshooting
- Trunk Cardboard Kit
- Trunk lid
- Trunk lining
- Trunk to bumper cover
- Turn Signal Switch
- TV
- Typisierung
- Ultimate Garage
- Underbody
- Undercarriage
- Undercoating
- Undercoating Removal
- Vacuum Booster
- Vacuum diagram
- Vacuum hoses
- Vacuum Master Switch
- Vacuum Schematic
- Vacuum Valve
- Valve Cover
- Various
- Vent Window Switch
- Vibration
- Vibrator
- Vicodec roof
- Video
- Vinegar
- Vinyl Roof
- Visitor
- Washer Fluid Float
- Washer Fluid Low Level Indicator
- Water Pump
- Wax
- Weatherstripping
- Website News
- Westclox
- Wheel Bearings
- Wheel Housing
- Wiesbaden
- Windlace
- Winter
- Wiring
- Wiring Diagram
- Wonderbar
- Workbench
- Zurzach