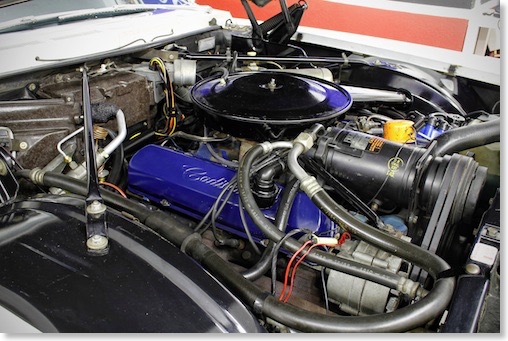
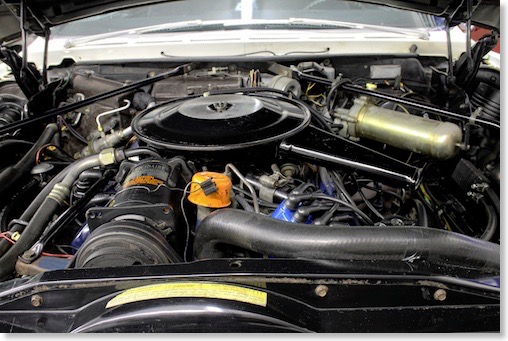
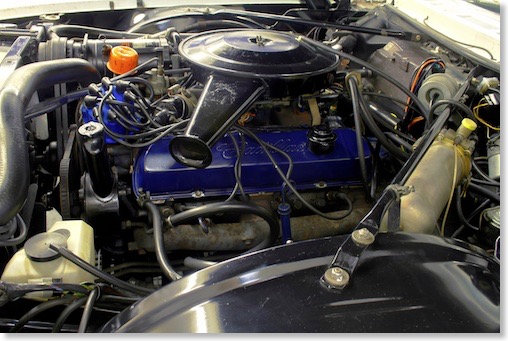
FINISHED THE 1974 CADILLAC ENGINE BAY RESTORATION PROJECT
15 | 04 | 17 | 17:31 | Filed in: 1974 Cadillac Coupe deVille | Restoration
In September 2016 I started to repair the AIR pump which had a broken pulley bolt. The repair of this little bolt resulted in a partial engine bay restoration, which was never planned. But as I had to take out quite a lot of parts to access the pump I noticed all the flacking paint and surface rust any 43 year old original car develops. I did not want to put all these not so good looking parts back into the car, so I decided to clean everything up and detail everything. It included taking out the radiator, condenser, all brackets, AIR pump, generator, all pulleys, power steering pump, AC compressor, removing all the rust from the parts and repaint them, repaint the engine, have some parts powder coated like the fan, dry ice cleaning, rebuilding the AC compressor, straightening the condenser fins and MUCH more.
Everything that came out was cleaned up, and wherever I found some surface rust or flacking paint it was completely removed and the according part was repainted. I had to do all of this on a very tight budget, but luckily the total cost of this project was extremely low, as all I needed were 3 cans of paint, some wire brushes and some cleaning chemicals .
I took a break from Nov. 2016 to April 2017 where I did not do any car related work at all. During the last 2 weeks I finished everything, and the car is now ready and only needs a good cleaning prior to the upcoming season. When everything was back together the car started up immediately (see video below) but I could not let it run for a longer time yet as the engine enamel (I used Bill Hirsch engine enamel) needs at least 2 weeks to fully cure.
I did not restore parts which still had their original decals, because some are irreplaceable, as there are no correct reproduction decals for the 1974 Cadillac out there. Many decals for sale for the 1974 Cadillac are totally incorrect - beware! For example there is no correct "Caution Fan" decal or AC compressor decal available anywhere. So there is still some patina left on some areas, and at first glance the engine bay does not look restored at all, but more like an extremely well kept car with very low mileage. I did not want to go for this over restored look.
But let the pictures speak for themselves - here are 3 Before/After pictures (Click on them for a larger view) and the rest of the restoration pictures can be found here.
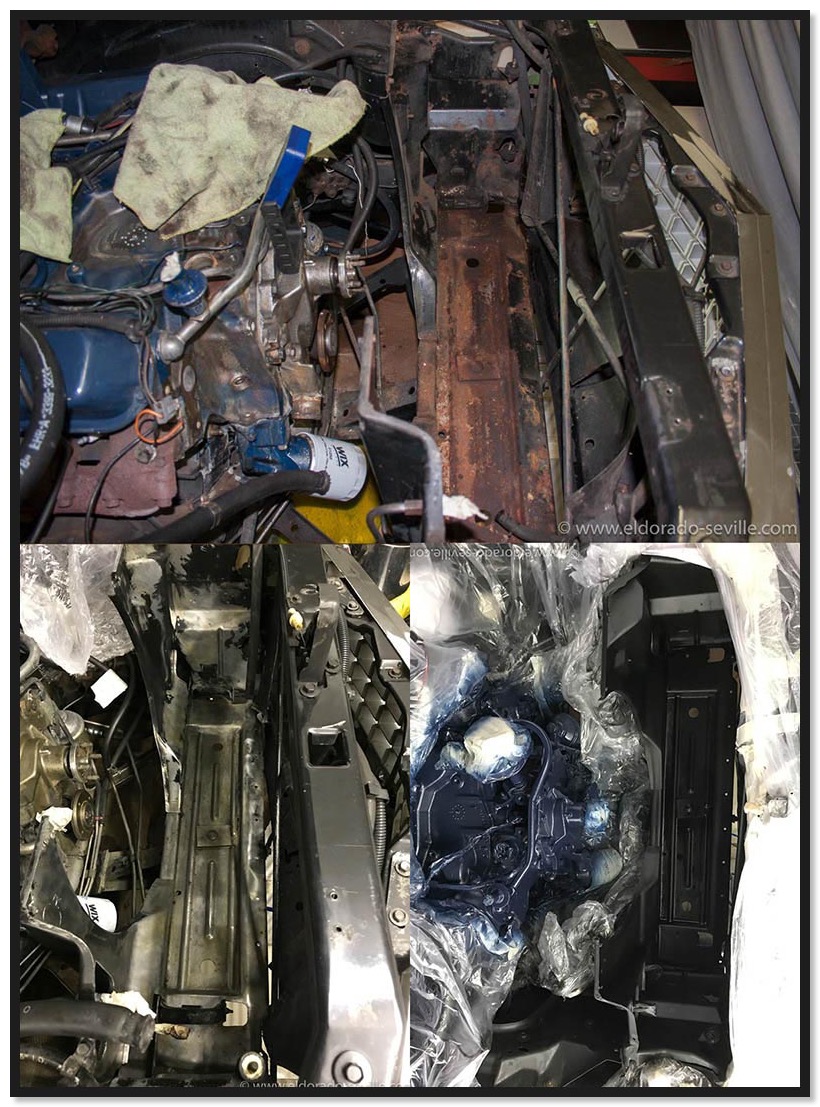
The radiator support frame before, after removing the rust and after painting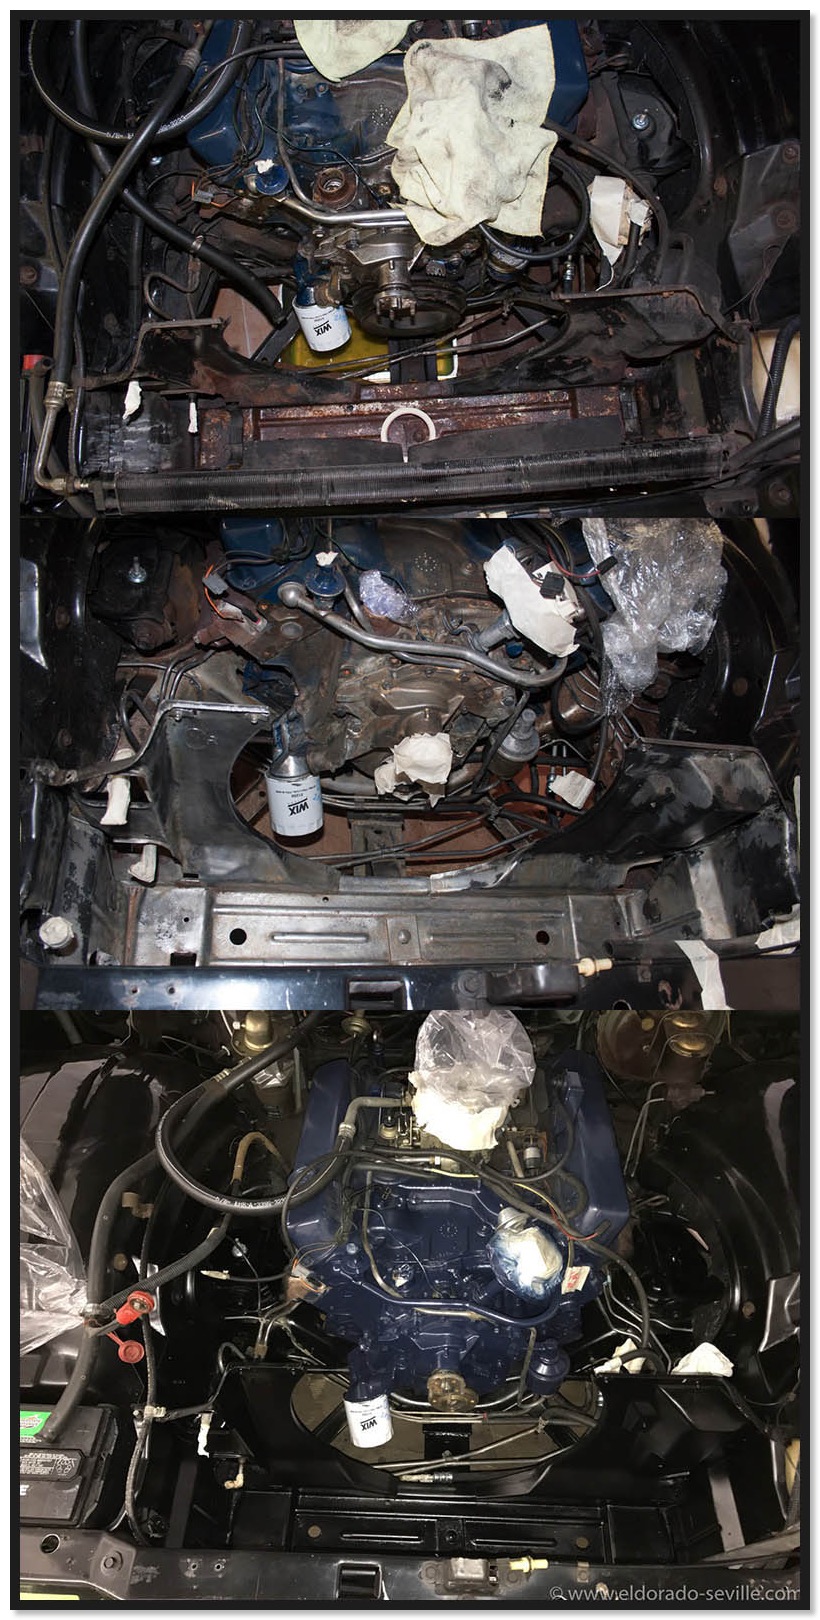
The radiator support frame before, after removing the rust and after painting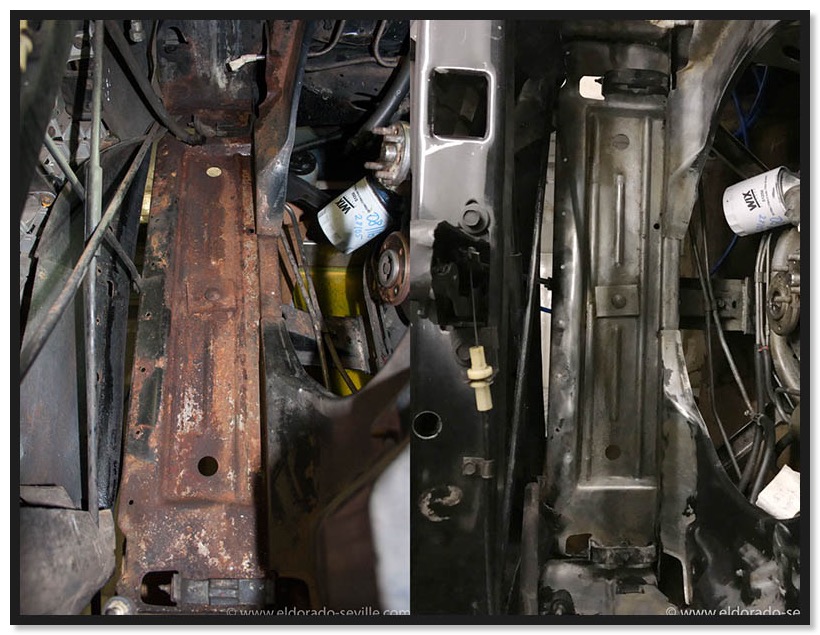
Before and after rust removal
Here is short video of the first start up after the restoration.
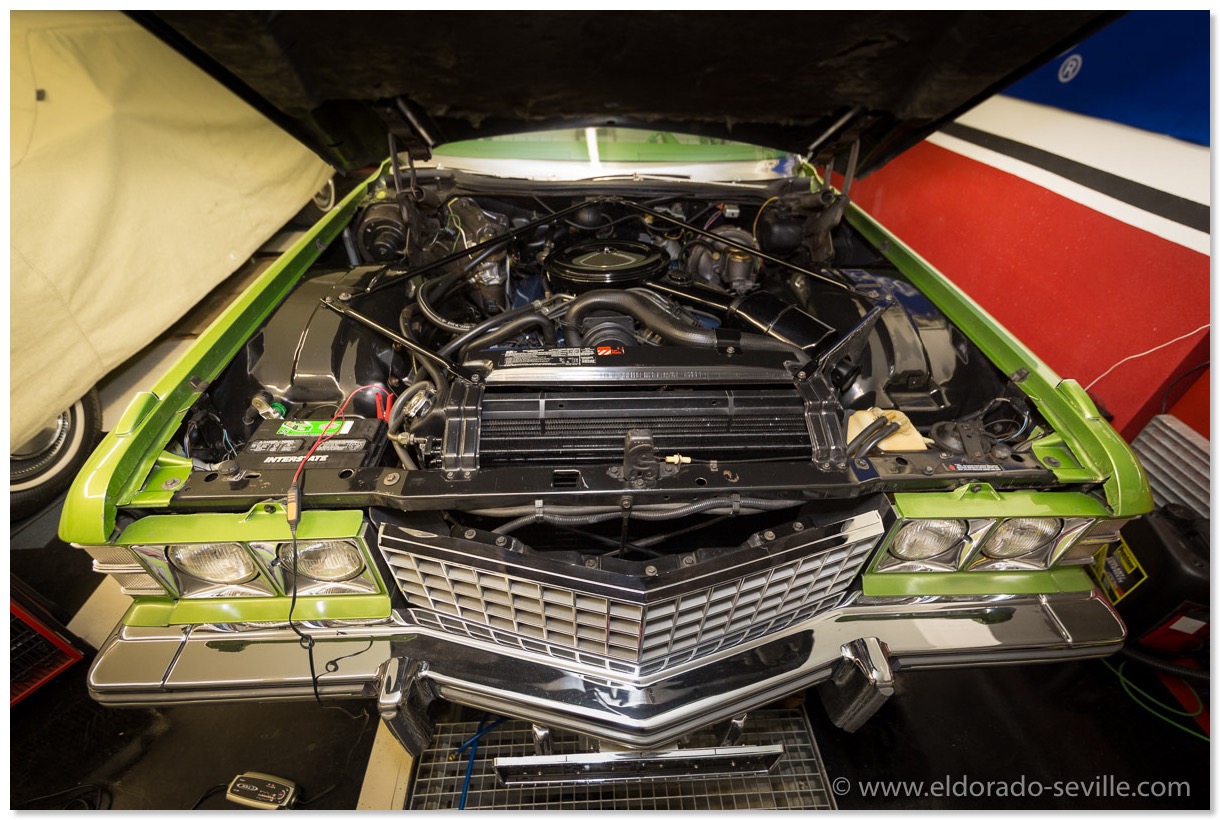
The finished engine bay looks pretty nice!
More pictures of the finished engine bay can be found here.
Comments
DRY ICE CLEANING THE ENGINE AND ENGINE BAY OF MY 1974 COUPE DEVILLE. (VIDEO).
During my ongoing engine compartment clean up project, it was time to remove all the dirt, grime and oils which can be found inside an engine bay after 45 years - even in a low mileage car.
A conventional engine cleaning with a strong degreaser, steam or a pressure washer was not successful when I tried, because the main issue I had was overspray, which you cant remove with traditional cleaning methods.
During the undercarriage project last winter - the paint shop did not cover the engine bay good enough, and a lot of overspray settled down on the entire engine bay. It looked terrible!
This overspray is extremely difficult to remove, and this is why I thought of dry ice cleaning for the remains which I could not remove with clay and polishing.
I had some very good results with dry ice blasting during my undercarriage project for removing the undercoating.
Dry ice-blasting is a form of carbon dioxide cleaning, where dry ice, the solid form of carbon dioxide, is accelerated in a pressurized air stream and directed at a surface in order to clean it. An alternative media for non-abrasive blasting is water-ice, known as ice blasting.
The method is similar to other forms of abrasive blasting such as sand blasting, plastic bead blasting, or soda blasting but substitutes dry ice as the blasting medium. Dry-ice blasting leaves no chemical residue as dry ice sublimates at room temperature.
Dry-ice blasting involves propelling pellets at extremely high speeds. The actual dry-ice pellets are quite soft, and much less dense than other media used in blast-cleaning (i.e., sand or plastic pellets). Upon impact, the pellet sublimates almost immediately, transferring minimal kinetic energy to the surface on impact and producing minimal abrasion. The sublimation process absorbs a large volume of heat from the surface, producing shear stresses due to thermal shock. This is assumed to improve cleaning as the top layer of dirt or contaminant is expected to transfer more heat than the underlying substrate and flake off more easily. The efficiency and effectiveness of this process depends on the thermal conductivity of the substrate and contaminant. The rapid change in state from solid to gas also causes microscopic shock waves, which are also thought to assist in removing the contaminant.
Unlike abrasive media blasting you cannot remove rust with dry ice blasting.
With this cleaning process I could remove 99,99% of the overspray and the engine is now extremely clean. I will have to remove all of the remaining surface rust with rust remover, and then re-paint the areas which will then be bare metal. Some of the original paint had flaked off over the last 45 years, but I´m trying to keep as much in original paint as possible and only repaint where it is absolutely necessary. Areas of the block will get some fresh Bill Hirsch engine enamel and I had to repaint some brackets, pulleys and the power steering pump.
Below I have put together a short video to show how dry ice cleaning was done in my engine bay. Enjoy and make sure to watch in HD to be able to view all the details!
Here is a short video I shot during dry ice cleaning - it shows the process and explains it a little. MAKE SURE TO SET THE QUALITY TO HD TO SEE ALL THE DETAILS!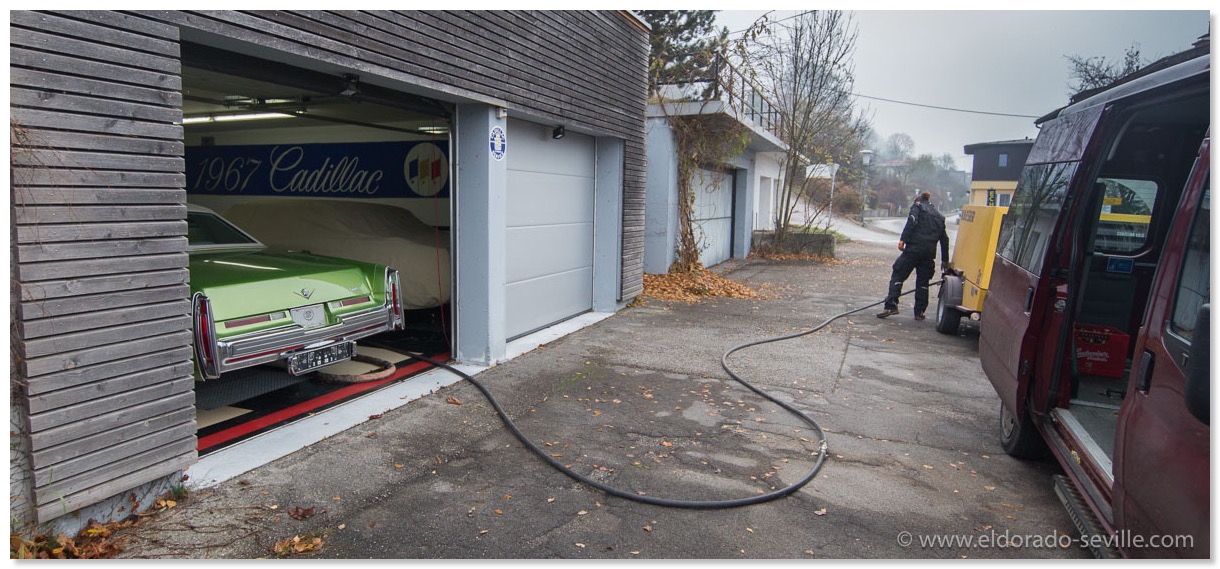
You need a very strong compressor for dry ice cleaning - even a very good shop compressor is not strong enough and cant supply the necessary capacity of air.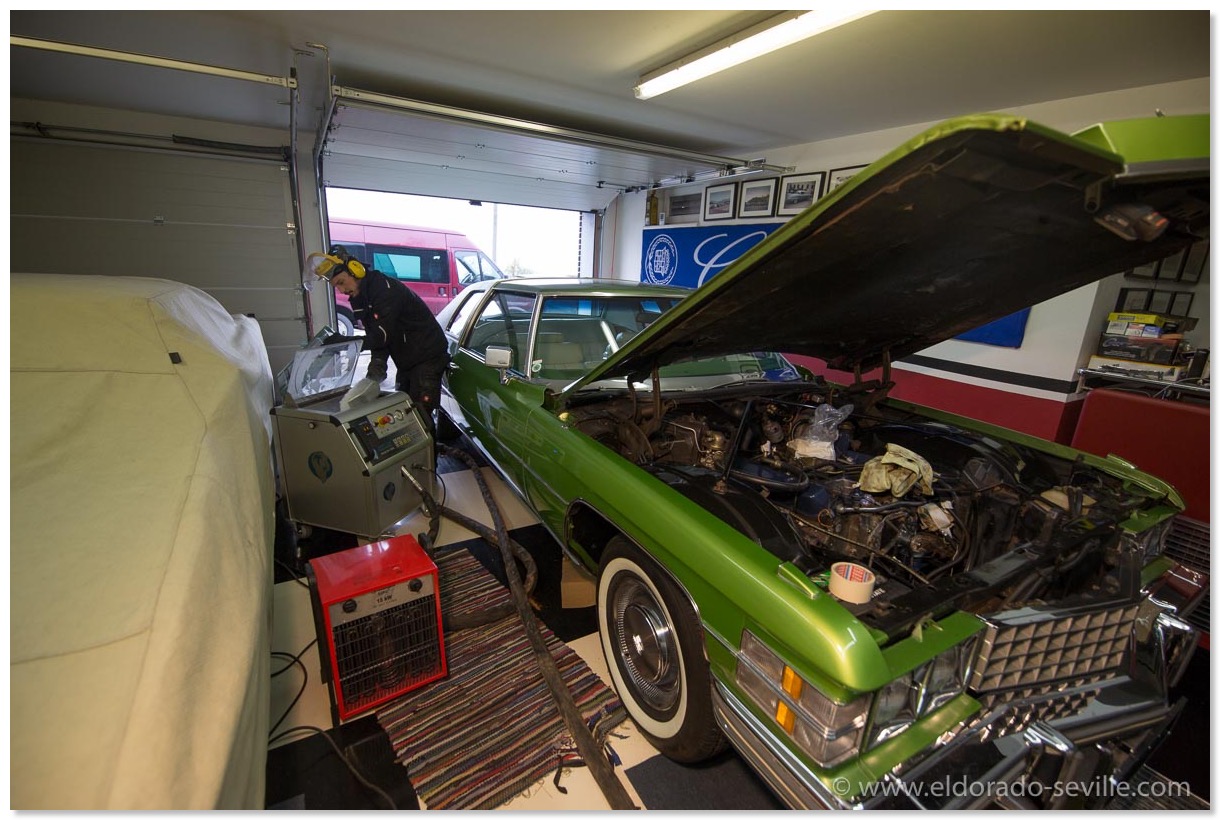
Christoph with his dry ice blasting machine.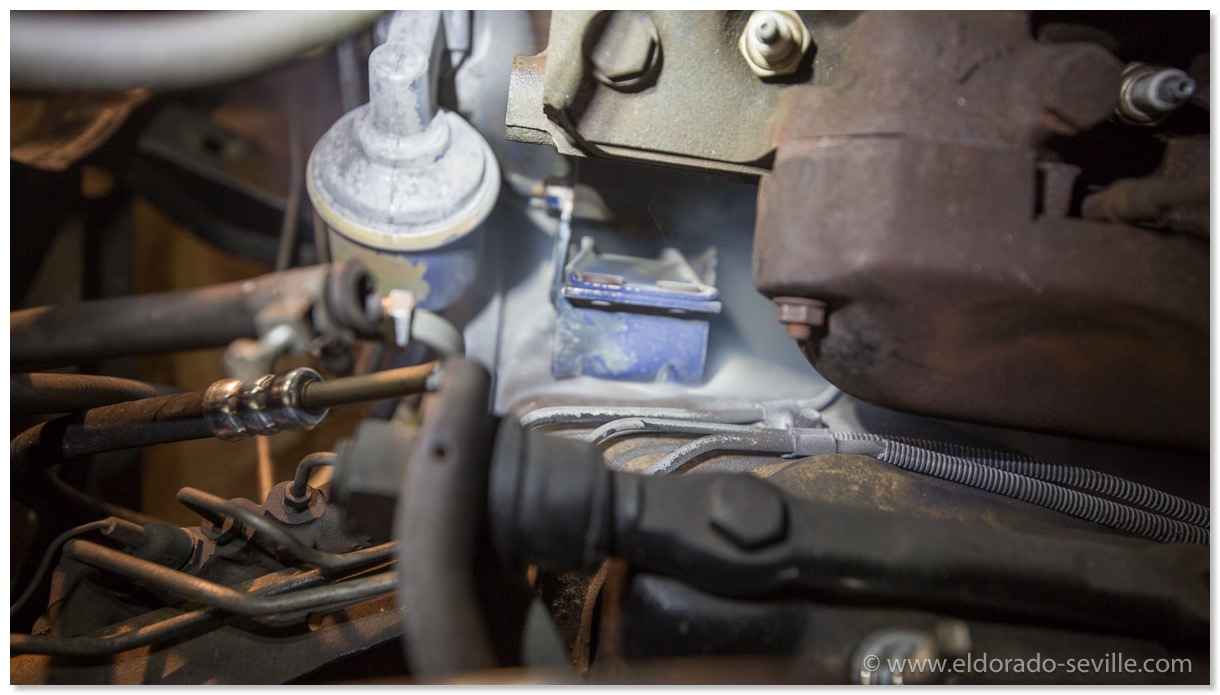
Loose paint will come off easily
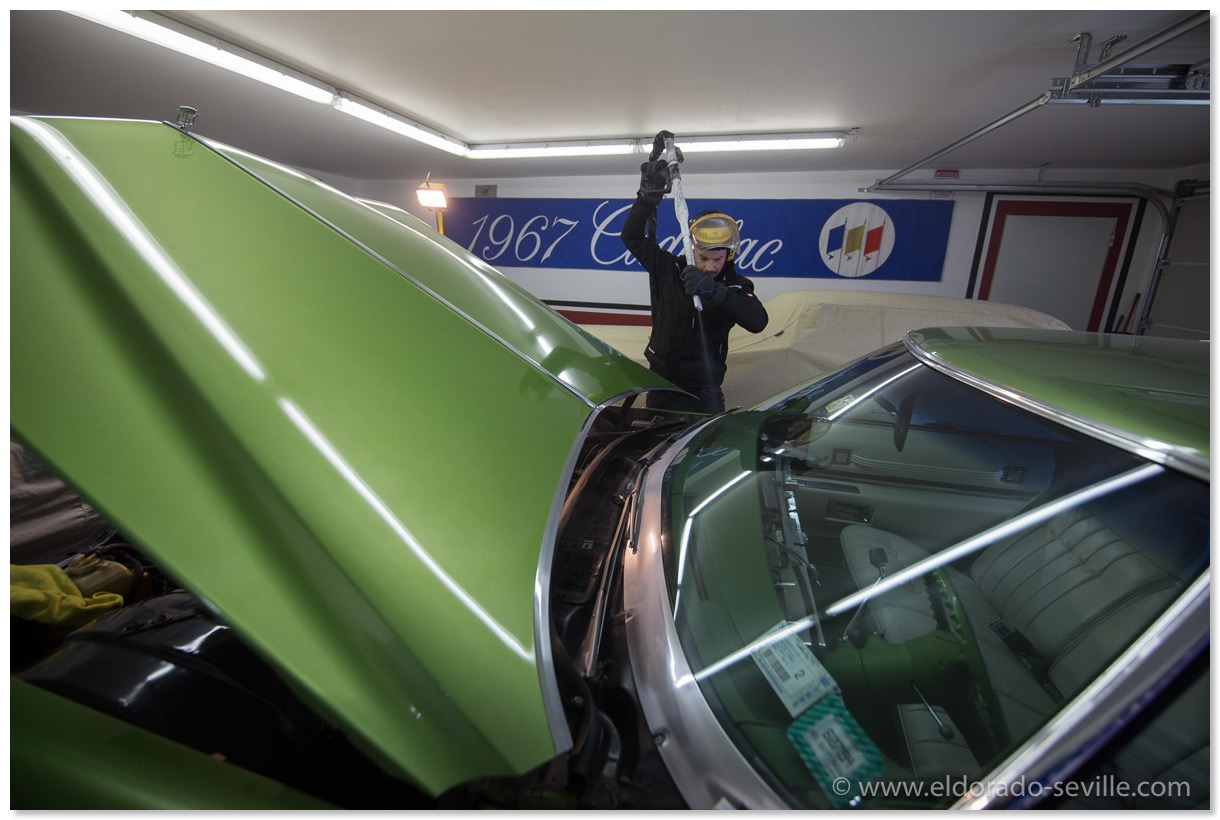
You can also clean weatherstripping and rubber hoses very well.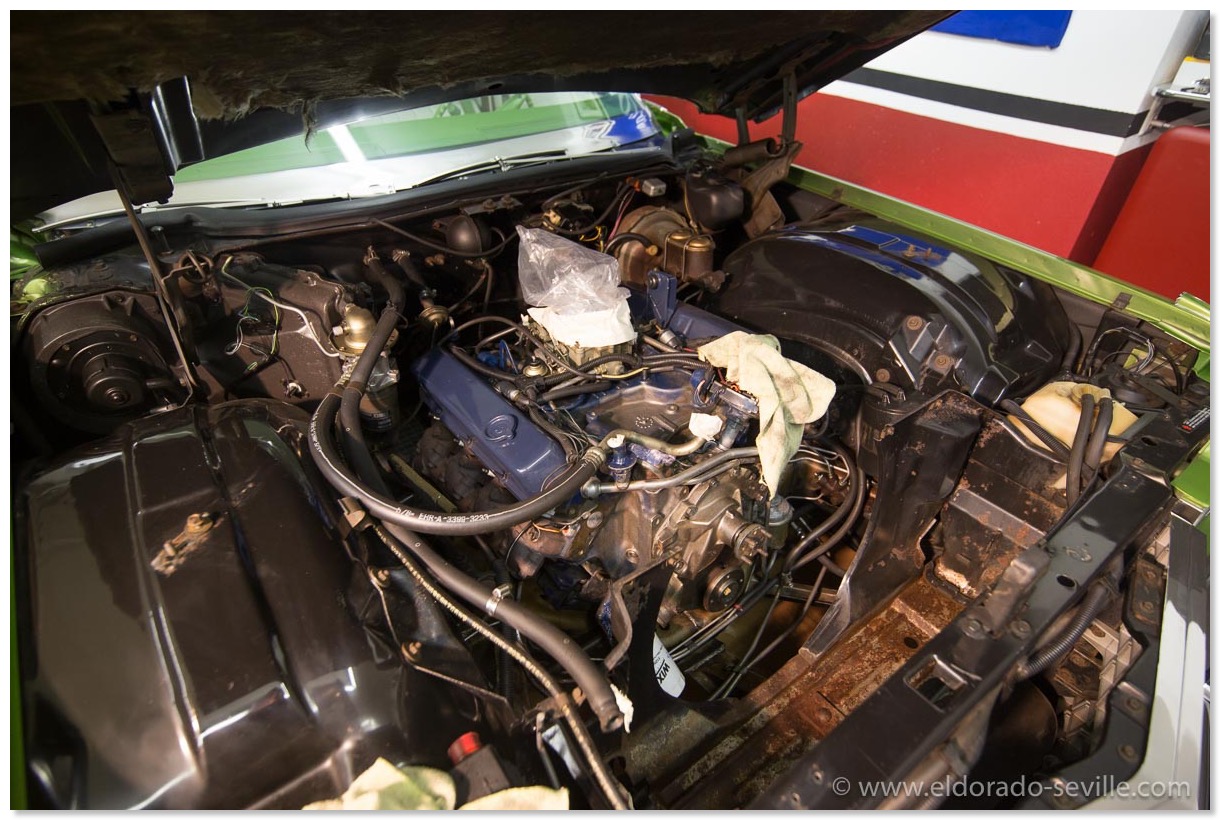
After cleaning - the overspray is gone :-)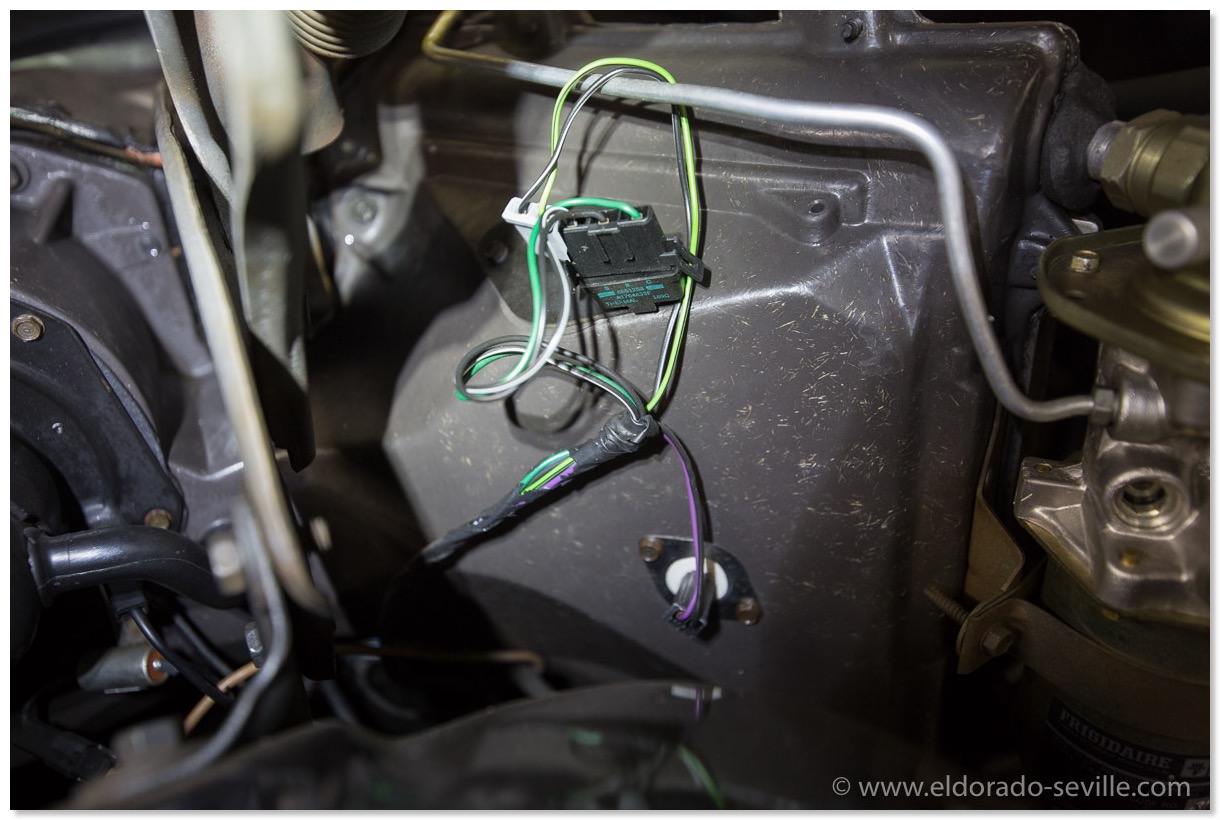
After cleaning - the overspray is gone :-) All the hoses and wires are clean again.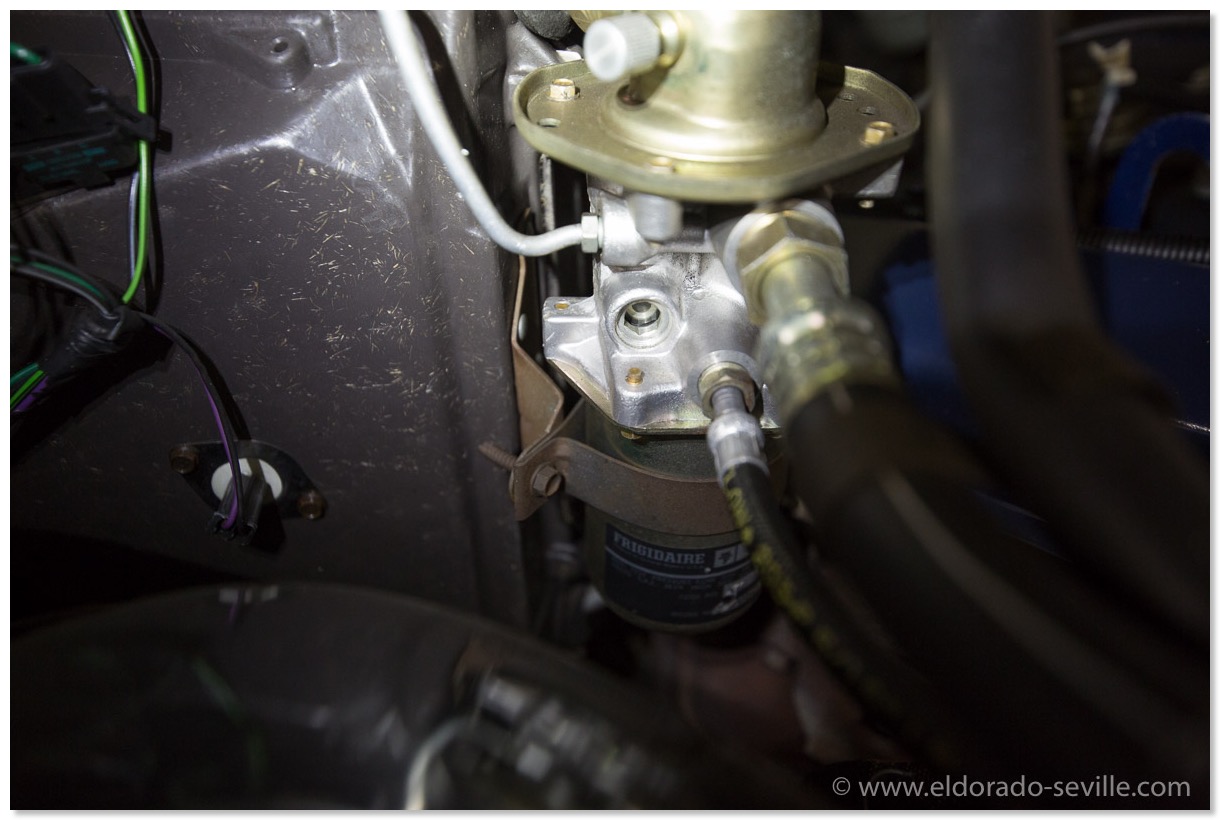
After cleaning - the overspray is gone :-) All the hoses and wires are clean again.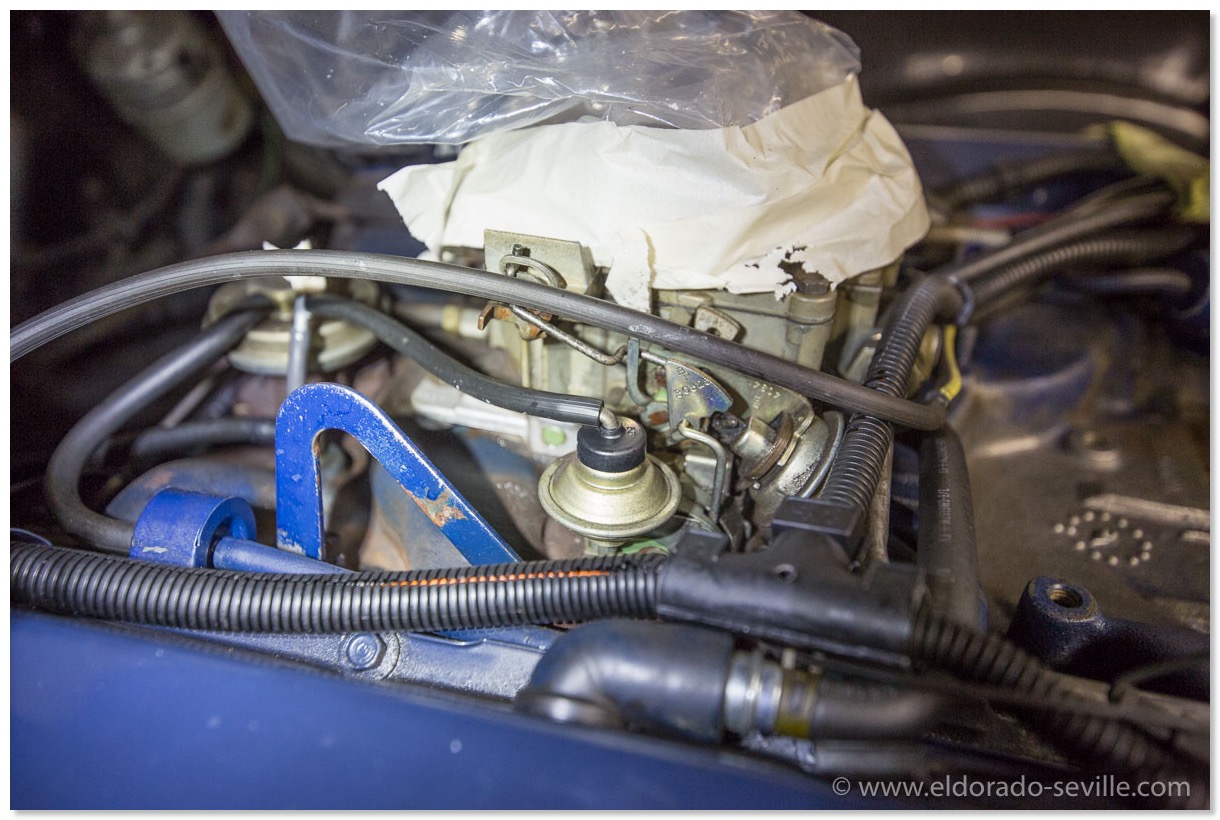
You can also clean the carburetor with dry ice.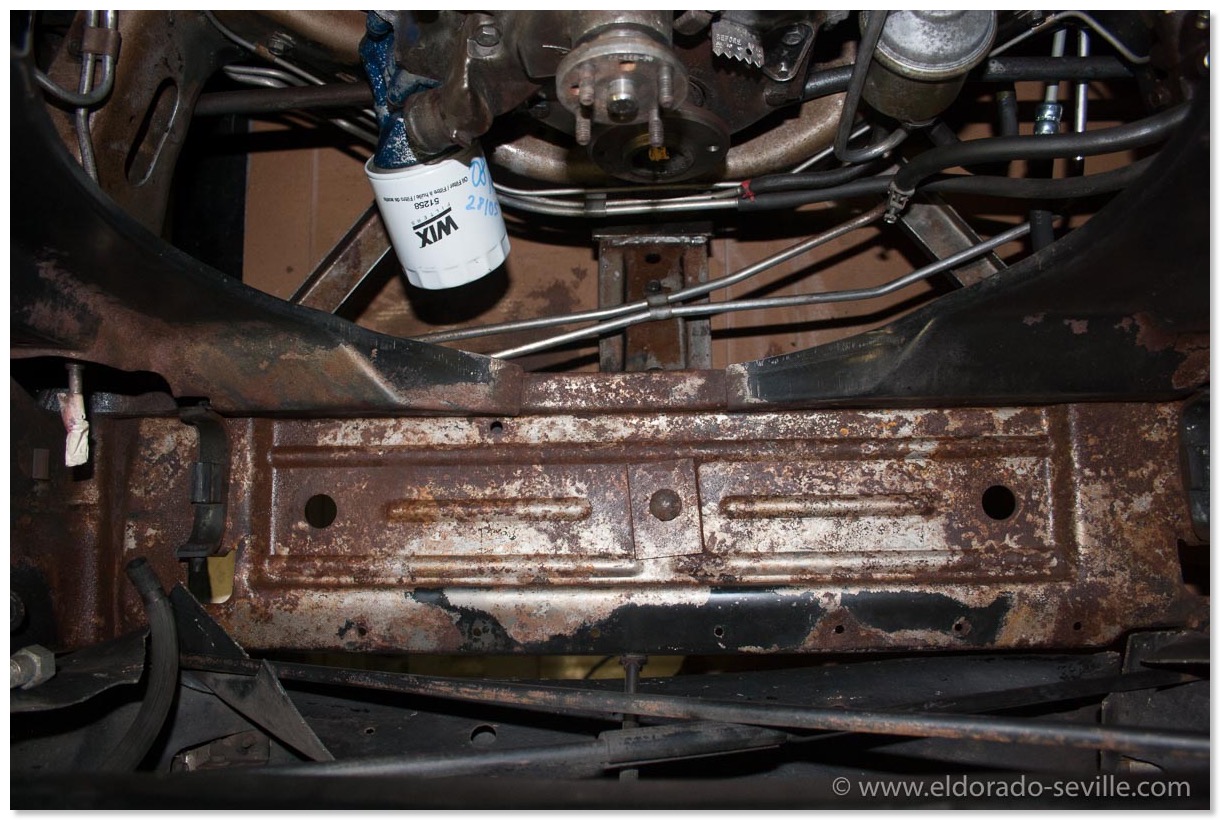
This is the area underneath the radiator. The surface rust will come off pretty easily with rust removing gel. Afterwards I will re- paint it.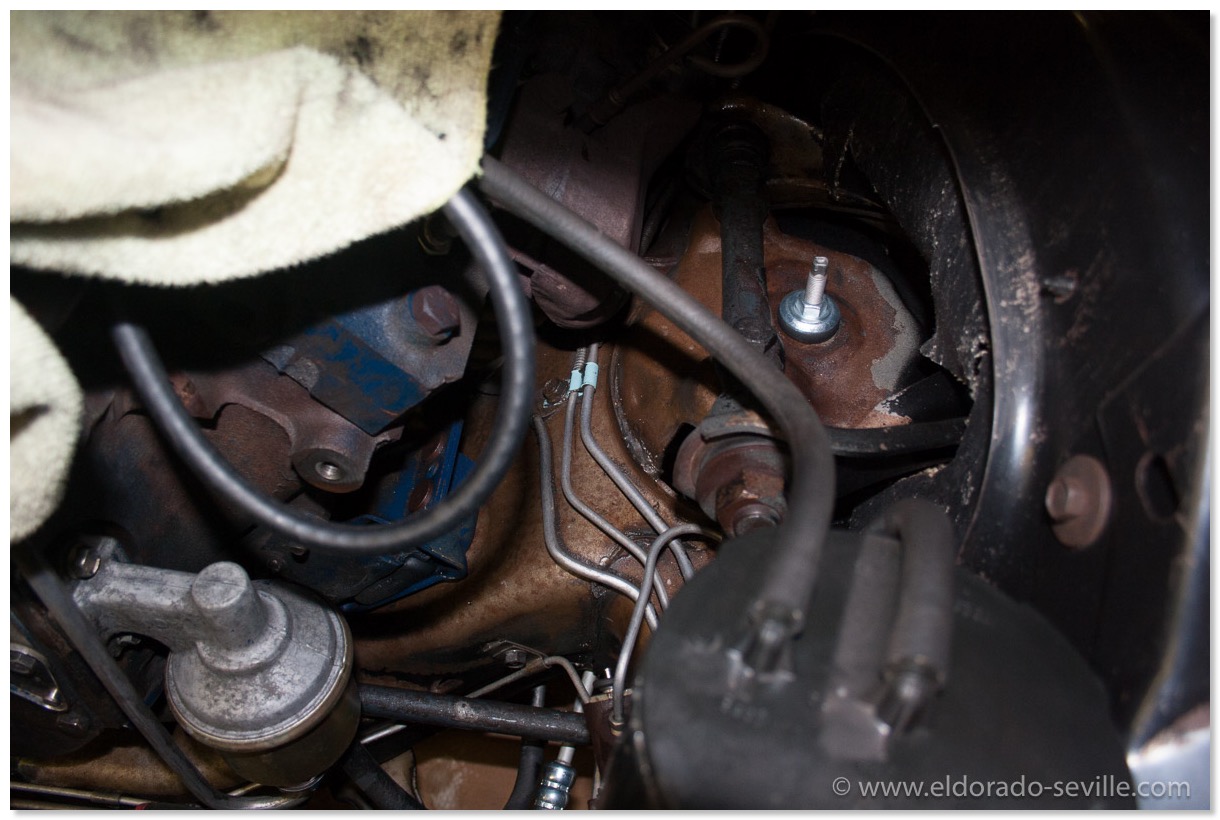
As you can see its clean, but there is some surface rust remaining which I will have to remove before applying some fresh paint.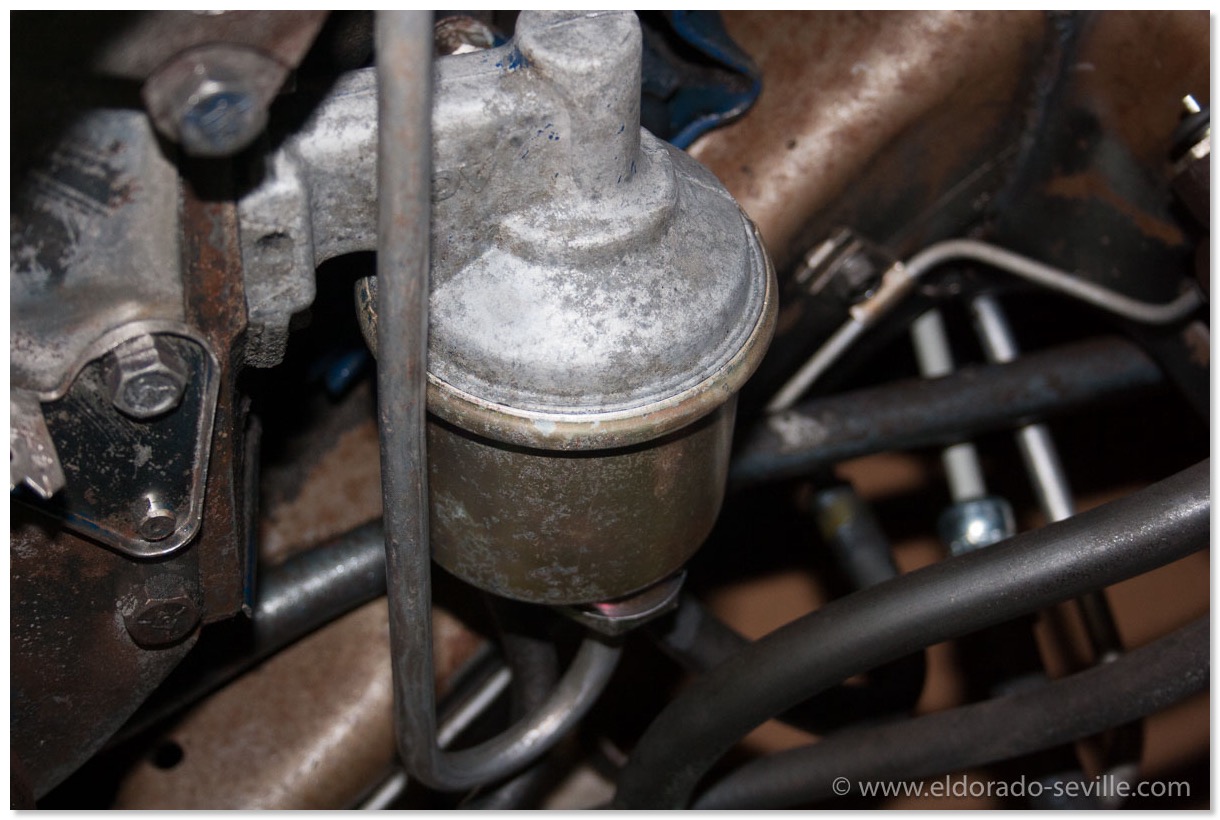
As you can see its clean, but there is some surface rust remaining which I will have to remove before applying some fresh paint. I will remove the fuel pump for painting.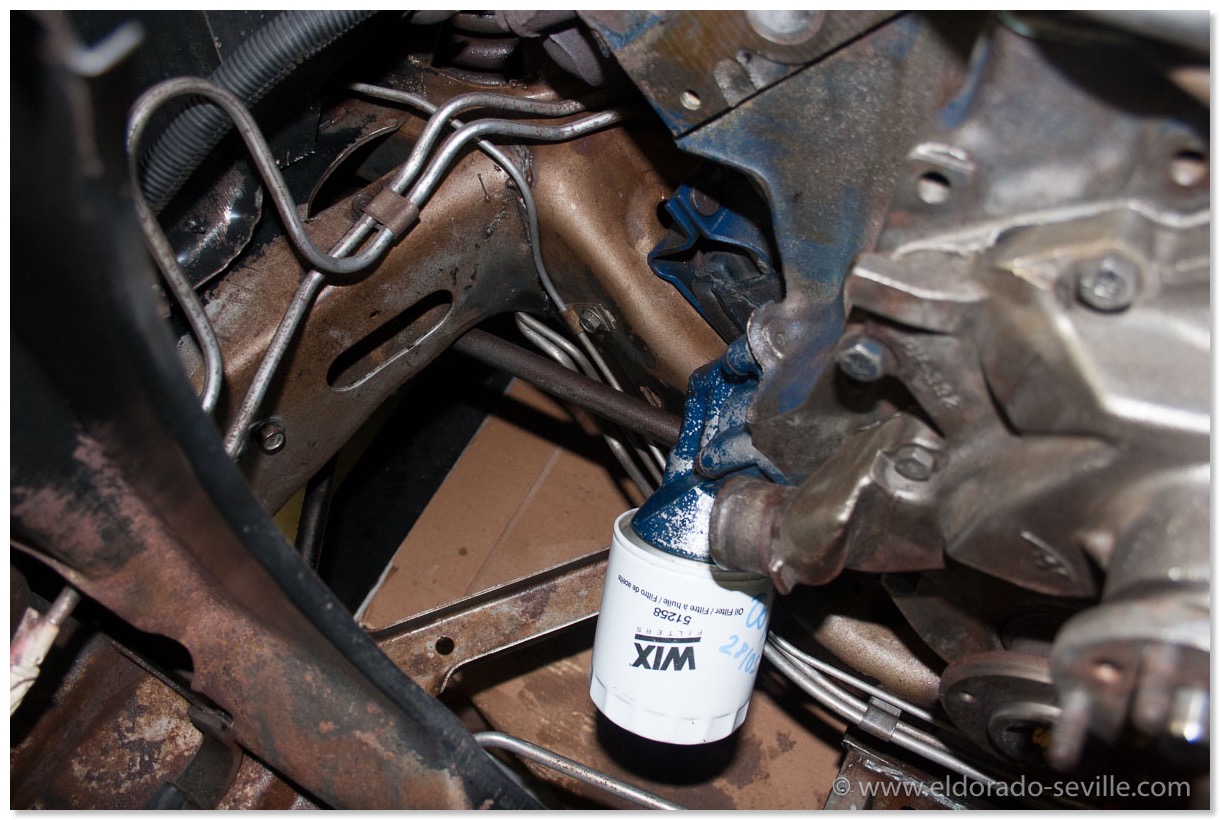
As you can see its clean, but there is some surface rust remaining which I will have to remove before applying some fresh paint.
A conventional engine cleaning with a strong degreaser, steam or a pressure washer was not successful when I tried, because the main issue I had was overspray, which you cant remove with traditional cleaning methods.
During the undercarriage project last winter - the paint shop did not cover the engine bay good enough, and a lot of overspray settled down on the entire engine bay. It looked terrible!
This overspray is extremely difficult to remove, and this is why I thought of dry ice cleaning for the remains which I could not remove with clay and polishing.
I had some very good results with dry ice blasting during my undercarriage project for removing the undercoating.
Dry ice-blasting is a form of carbon dioxide cleaning, where dry ice, the solid form of carbon dioxide, is accelerated in a pressurized air stream and directed at a surface in order to clean it. An alternative media for non-abrasive blasting is water-ice, known as ice blasting.
The method is similar to other forms of abrasive blasting such as sand blasting, plastic bead blasting, or soda blasting but substitutes dry ice as the blasting medium. Dry-ice blasting leaves no chemical residue as dry ice sublimates at room temperature.
Dry-ice blasting involves propelling pellets at extremely high speeds. The actual dry-ice pellets are quite soft, and much less dense than other media used in blast-cleaning (i.e., sand or plastic pellets). Upon impact, the pellet sublimates almost immediately, transferring minimal kinetic energy to the surface on impact and producing minimal abrasion. The sublimation process absorbs a large volume of heat from the surface, producing shear stresses due to thermal shock. This is assumed to improve cleaning as the top layer of dirt or contaminant is expected to transfer more heat than the underlying substrate and flake off more easily. The efficiency and effectiveness of this process depends on the thermal conductivity of the substrate and contaminant. The rapid change in state from solid to gas also causes microscopic shock waves, which are also thought to assist in removing the contaminant.
Unlike abrasive media blasting you cannot remove rust with dry ice blasting.
With this cleaning process I could remove 99,99% of the overspray and the engine is now extremely clean. I will have to remove all of the remaining surface rust with rust remover, and then re-paint the areas which will then be bare metal. Some of the original paint had flaked off over the last 45 years, but I´m trying to keep as much in original paint as possible and only repaint where it is absolutely necessary. Areas of the block will get some fresh Bill Hirsch engine enamel and I had to repaint some brackets, pulleys and the power steering pump.
Below I have put together a short video to show how dry ice cleaning was done in my engine bay. Enjoy and make sure to watch in HD to be able to view all the details!
Here is a short video I shot during dry ice cleaning - it shows the process and explains it a little. MAKE SURE TO SET THE QUALITY TO HD TO SEE ALL THE DETAILS!

You need a very strong compressor for dry ice cleaning - even a very good shop compressor is not strong enough and cant supply the necessary capacity of air.

Christoph with his dry ice blasting machine.

Loose paint will come off easily

You can also clean weatherstripping and rubber hoses very well.

After cleaning - the overspray is gone :-)

After cleaning - the overspray is gone :-) All the hoses and wires are clean again.

After cleaning - the overspray is gone :-) All the hoses and wires are clean again.

You can also clean the carburetor with dry ice.

This is the area underneath the radiator. The surface rust will come off pretty easily with rust removing gel. Afterwards I will re- paint it.

As you can see its clean, but there is some surface rust remaining which I will have to remove before applying some fresh paint.

As you can see its clean, but there is some surface rust remaining which I will have to remove before applying some fresh paint. I will remove the fuel pump for painting.

As you can see its clean, but there is some surface rust remaining which I will have to remove before applying some fresh paint.
Cleaning the 1967 Eldorado´s Engine Bay
07 | 12 | 09 | 15:48 | Filed in: 1967 Cadillac Eldorado | Restoration
I spent quite some time during the last weeks in the engine bay of the 67 Eldorado. I tried to clean everything in there as good as possible. After cleaning and degreasing everything I also gave all the metal parts a fresh coat of wax. I also cleaned all the rubber parts and cables and applied some vinyl and rubber conditioner. Everything is sparkling clean now. I´m now thinking about painting some of the parts where the paint has some imperfections or is worn off. I will have to find the right correct paint first. The engine looks quite presentable now. What will get a new paintjob first will be the airfilter housing, which looks pretty worn. It will be stripped to bare metal before painting of course.
Below you can find some pictures of the now clean engine bay.
Below you can find some pictures of the now clean engine bay.
Cleaning the engine bay
19 | 06 | 09 | 22:49 | Filed in: 1967 Cadillac Eldorado
Today I started cleaning the engine bay of the 1967 Eldorado with its mighty 429cui V8. Amazing how much dirt could collect on a car with only 27k miles on the clock. Its a pretty dirty job and will keep me busy for a while. Surprisingly, below the thick, oily and dirty surface there is still some shiny paint appearing!
I hope though, that I will ever be able to get my hands clean again as well... I guess I should wear a pair of gloves next time...
I hope though, that I will ever be able to get my hands clean again as well... I guess I should wear a pair of gloves next time...
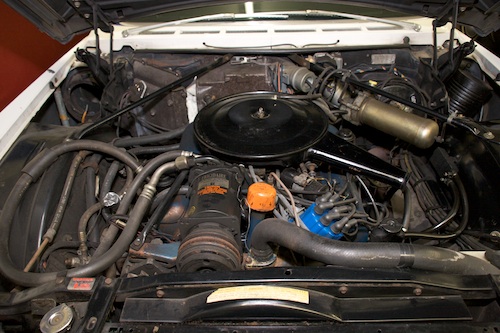
This is how the engine bay of my 1967 Eldorado looked before cleaning - I will also have to install the new evaporator later, reinstall the blower motor, connect all the AC hoses and recharge the AC... lots of work ahead
.
The engine degreaser is pretty aggressive on the oily gunk and dirt.
1958 Cadillac (55)
1966 Cadillac Coupe deVille (16)
1967 Cadillac DeVille (54)
1967 Cadillac Eldorado (73)
1971 Lincoln Continental Mark III (24)
1974 Cadillac Coupe deVille (46)
1978 Cadillac Eldorado Biarritz (25)
1996 Buick Roadmaster (20)
Cadillac BIG Meet (2)
Car Shows (55)
Cruising (4)
CT6 (1)
For Sale (3)
Garage Stuff (32)
Pacer (1)
Restoration (140)
Various (55)
Video (20)
Website News (31)
- 6 way power seat
- 8-track
- 10 Ohm
- 429
- 1932
- 1957
- 1958
- 1958 Cadillac Eldorado Seville
- 1958 Cadillac Repair Tip
- 1959 Cadillac Eldorado Seville
- 1964
- 1965
- 1966
- 1966 Cadillac Coupe deVille
- 1966 Cadillac Repair Tips
- 1967
- 1967 Cadillac DeVille
- 1967 Cadillac Eldorado Repair Tip
- 1967 Cadillac Repair Tip
- 1967 Eldorado
- 1968
- 1970 Cadillac Eldorado
- 1971
- 1971 Lincoln Continental Mark III
- 1974
- 1974 Cadillac Coupe DeVille
- 1974 Cadillac Repair Tip
- 1976
- 1977
- 1978
- 1978 Cadillac Eldorado Biarritz
- 1978 Cadillac Repair Tip
- 1980 Cadillac Eldorado Biarritz
- 1996
- 2012
- 2014
- 2017
- 2018
- 2019
- 2022
- 2023
- 2025
- 3063206
- 7027235
- 7800483
- 7805675
- 7805676
- 12355706
- 17058531
- 17059968
- 17059969
- 22010515
- 22010661
- A.I.R
- A6
- AC
- AC Compressor
- AC Electrical Diagram
- ACC
- Accelerator Pump
- Accelorator pump
- Accident
- Actuators
- Adriatic Blue Metallic
- Ads
- Aftermovie
- Air Pump
- Aircondition
- AIRPUMP
- ALC
- Alternator
- AM
- AM-Transmitter
- Antenna
- Anti Rattle Clips
- Antique Gold
- Arizona Vintage Parts
- Arrival
- Article
- ASC
- Ash Tray removal
- ATC
- Atlantis Blue Firemist
- Austria
- Austro Classic
- Autolite SP-459
- Automatic Seat Back Release
- Award
- Banner
- Barn Find
- Battery
- Battery Tray
- Beach Race
- Bearing
- Bendix
- Biarritz
- Bigfoot
- Bill Hirsch Engine Enamel
- Bleeder Screws
- Bleeding
- Blower
- Bodywork
- Bolts
- Book
- Borg
- Brake Booster
- Brake Fluid
- Brake Gray
- Brakes
- Broken Bolt
- Brougham
- Bucket seats
- Buick
- Bumper End
- Bushings
- Cadillac
- Cadillac BIG Meet
- Cadillac BIG Meet
- Cadillac birthday cake
- Cadillac Blue
- Cadillac Color Selections Dealer Book
- Cadillac Coupe deVille
- Cadillac Dealer
- CADILLAC GRAND EUROPEAN
- Cadillac Meeting
- Cadillac Mini Meeting
- Camaro RS
- Caorle
- Car Show
- Carburetor
- Card
- Carpet
- Carter AFB
- Cavalry Twill Vinyl
- CB
- CBM
- CCCD
- Choke
- Christmas
- Citizens Band
- Classic Cadillac Club Deutschland
- Clay Towel
- Cleaning
- Clock
- Clockwork
- Clutch
- Clutch Coil
- Collector
- Colonial Yellow
- Color Coded Springs
- Commercial
- Compound
- Compressor
- Condenser
- Continental Mark III
- Control Head
- Conversion
- Convertible top
- Coolant
- Corona
- Cowl
- Cruise Control
- Cruising
- CT6
- CV Boots
- CV JOINTS
- D6230
- Dash Trim
- Decal Removal
- Decals
- Decoration
- Dehumidifier
- Delco Moraine
- Der Standard
- detailing
- Deville
- Diagnosis Chart
- Diagram
- Dial
- Digital Rotary Drum Clock
- Diner
- Disc Brakes
- Distributor
- Diverter Valve
- Door Jamb Switch
- Door Rubber Conduit
- Dornbirn
- Dot3
- Drive Shaft
- Driving tour
- Drum brakes
- Dry Ice Blasting
- Dry Ice Cleaning
- DVD
- Eastwood
- Eldorado
- Electric Choke Thermostat
- Electrical schematic
- Elvis
- Engine Bay
- Ep
- Epoxy floor
- Europe
- Evaporator
- Exide
- Factory Markings
- Fender Skirt
- Floor
- Flushing
- Flyer
- Foam
- For Sale
- Front AXLE
- Front brakes
- Front bumper filler
- Front Floor
- Front wheel bearing
- Fuel Filter
- Fuel Pump
- Fuel Sending Unit
- Fusible Link
- Garage
- Garage Cabinets
- Gasket
- GE
- Gear indicator
- General Time
- Glove box light
- Grand European
- H4
- Haus of Hot Rod
- Headlight Actuator
- Headlight doors
- Headlights
- Heater Core
- Heater Hose
- Heater Valve
- High Idle
- History
- Holley
- Honest John
- Hood
- Hood Emblem
- Hood Ornament
- Hose Clamp
- Hot Choke
- Hot Water Valve
- HotRod
- How to
- Hödlmayr
- Ignition Diagram
- Illuminated Entry
- John D‘Agostino
- John Foust
- Klassikwelt Bodensee
- Kremsmünster
- LaSalle
- Leather seats
- Light Switch
- Limited
- Lincoln
- Lincoln Mark III Repair Tip
- Low Mileage
- Magazine
- Marilyn Monroe
- Mark III
- Master Cylinder
- Master Switch
- Master Vacuum Switch
- Media Blasting
- Meeting
- Meguiras
- MK II
- Mobile
- Model
- Moldings
- Mom
- Mopar Nationals
- Mostkost Kustom
- Movie
- Munich
- Neon
- NOS
- Oberösterreicher des Tages
- oilchange
- ORF
- Overspray
- Pacer
- Paint
- Paint correction
- Paintjob
- Part Number
- Parts
- Patch Panel
- Perfect Circle
- Permabag
- Persian Lime
- Photo shooting
- Photoshooting
- Pictures
- PinUp
- POA Valve
- Power Antenna
- Power Servo
- Power Vent Windows
- Power Window
- Printed Circuit Board
- Programmer
- Pulley
- Quadrajet
- Quarter Panel
- Quartz Conversion
- R134
- Radiator
- Radio
- Rattle
- Rear brakes
- Rebuild
- Recalibrate
- RediRad
- Reed Switch
- Relais
- Relaunch
- Removing Overspray
- Repaint
- Repair
- Restoration
- RIP
- Roadhouse
- Roadmaster
- Rochester
- Rocker Arm Cover
- Rocker Panel Extension Clips
- Rostio
- Rotary Valve
- Rotterdam
- Rupes
- Rust removal
- Rust removal gel
- Sabre Wheels
- Sand Blasting
- Sandblasting
- Screed
- Season Greetings
- Seasons Greetings
- Seat Back Locks
- Seat Padding
- Seat Transmission
- See through ornament
- Self adjusters
- Self Starter
- Sepp's Garage
- Seville
- Sheetmetal
- Shocks
- shop manual
- short
- Sign
- Solenoid
- Spark Plug Wire Routing
- Speakers
- Special Award
- Speed Bleeder Screws
- Splash Guard
- Starter Diagram
- Starter Motor
- Steering Column
- Storage
- suction throttling valve
- sunroof
- suspension
- Swirl Mark removal
- Switzerland
- T3
- Taillight Cover
- Texan´s Choice Award
- Thermostat
- Tilt and Telescope
- Time capsule
- Tomsclub
- Torque Specifications
- Tower Hose Clamp
- Towtruck
- Trailer
- Transducer
- Transmission
- transmission control selector
- transmission control selector indicator light
- transmission shift indicator
- Treadle Vac
- Treffen
- Tri-Band
- Troubleshooting
- Trunk Cardboard Kit
- Trunk lid
- Trunk lining
- Trunk to bumper cover
- Turn Signal Switch
- TV
- Typisierung
- Ultimate Garage
- Underbody
- Undercarriage
- Undercoating
- Undercoating Removal
- Vacuum Booster
- Vacuum diagram
- Vacuum hoses
- Vacuum Master Switch
- Vacuum Schematic
- Vacuum Valve
- Valve Cover
- Various
- Vent Window Switch
- Vibration
- Vibrator
- Vicodec roof
- Video
- Vinegar
- Vinyl Roof
- Visitor
- Washer Fluid Float
- Washer Fluid Low Level Indicator
- Water Pump
- Wax
- Weatherstripping
- Website News
- Westclox
- Wheel Bearings
- Wheel Housing
- Wiesbaden
- Windlace
- Winter
- Wiring
- Wiring Diagram
- Wonderbar
- Workbench
- Zurzach
 GERALD´S CADILLACS - NEWS