THE 1966 UNDERCARRIAGE PROJECT - LONG POST!
VIDEO RECAP
I did not plan to do a video about the restoration, but here is a short collage of some footage I had: (on youtube you can watch it in 4k HDR
This is a short video showing what was done.
BEFORE
Some "BEFORE" pictures showing how the car looked before I started working on it.
A picture showing the entire undercarriage
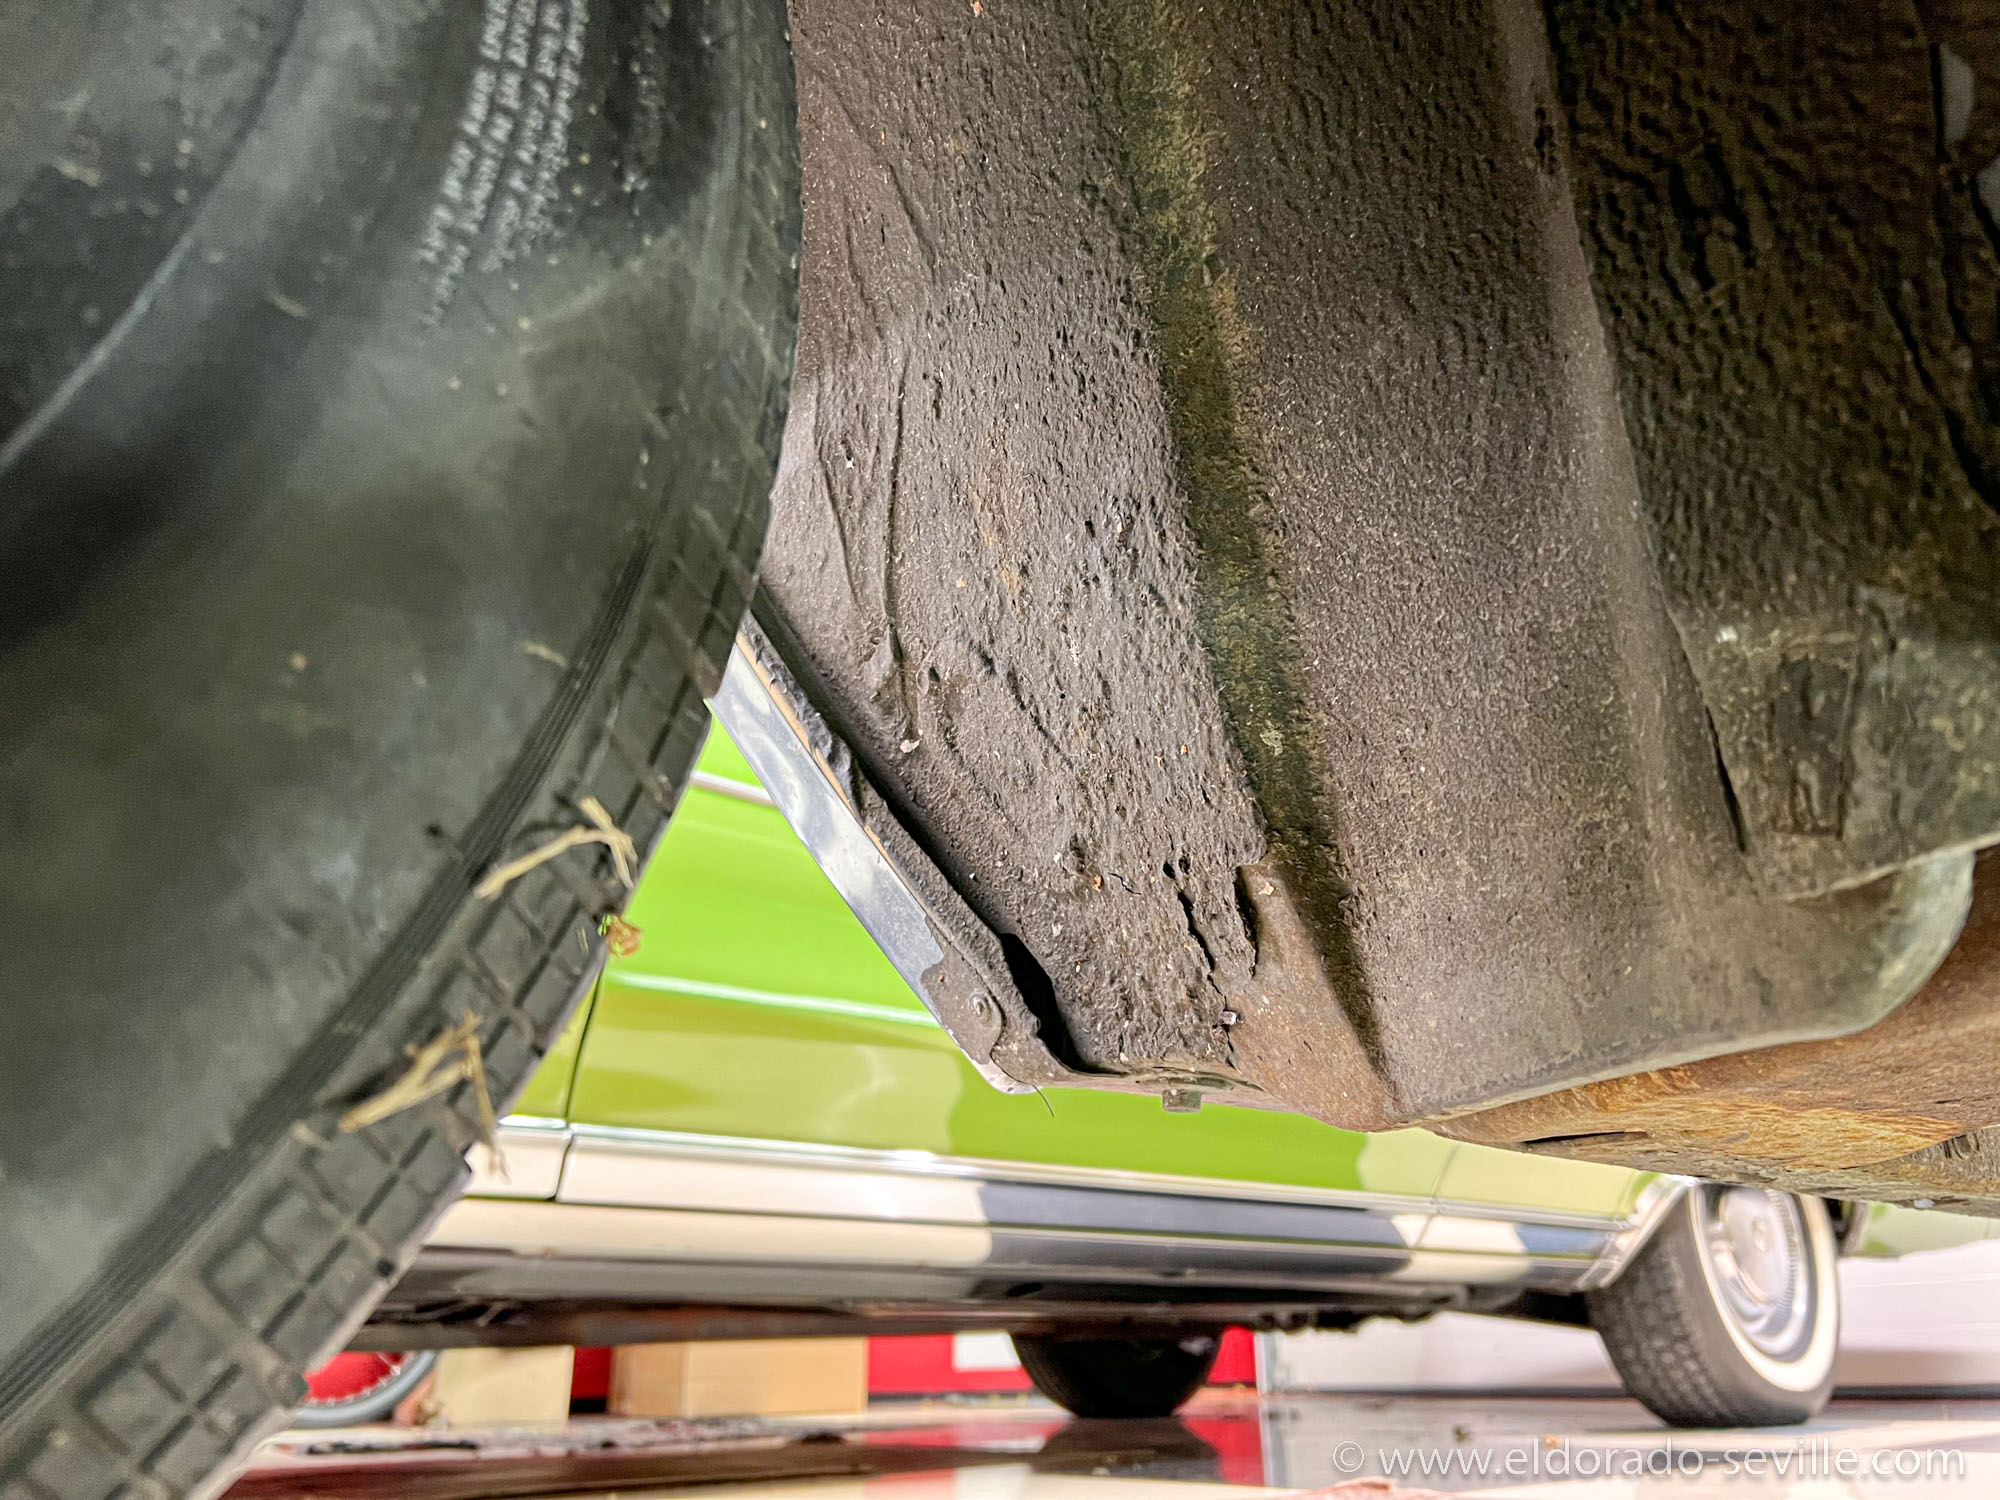
The undercoating in the wheelhousings was getting dry and brittle. Some rust formed underneath it on some areas.
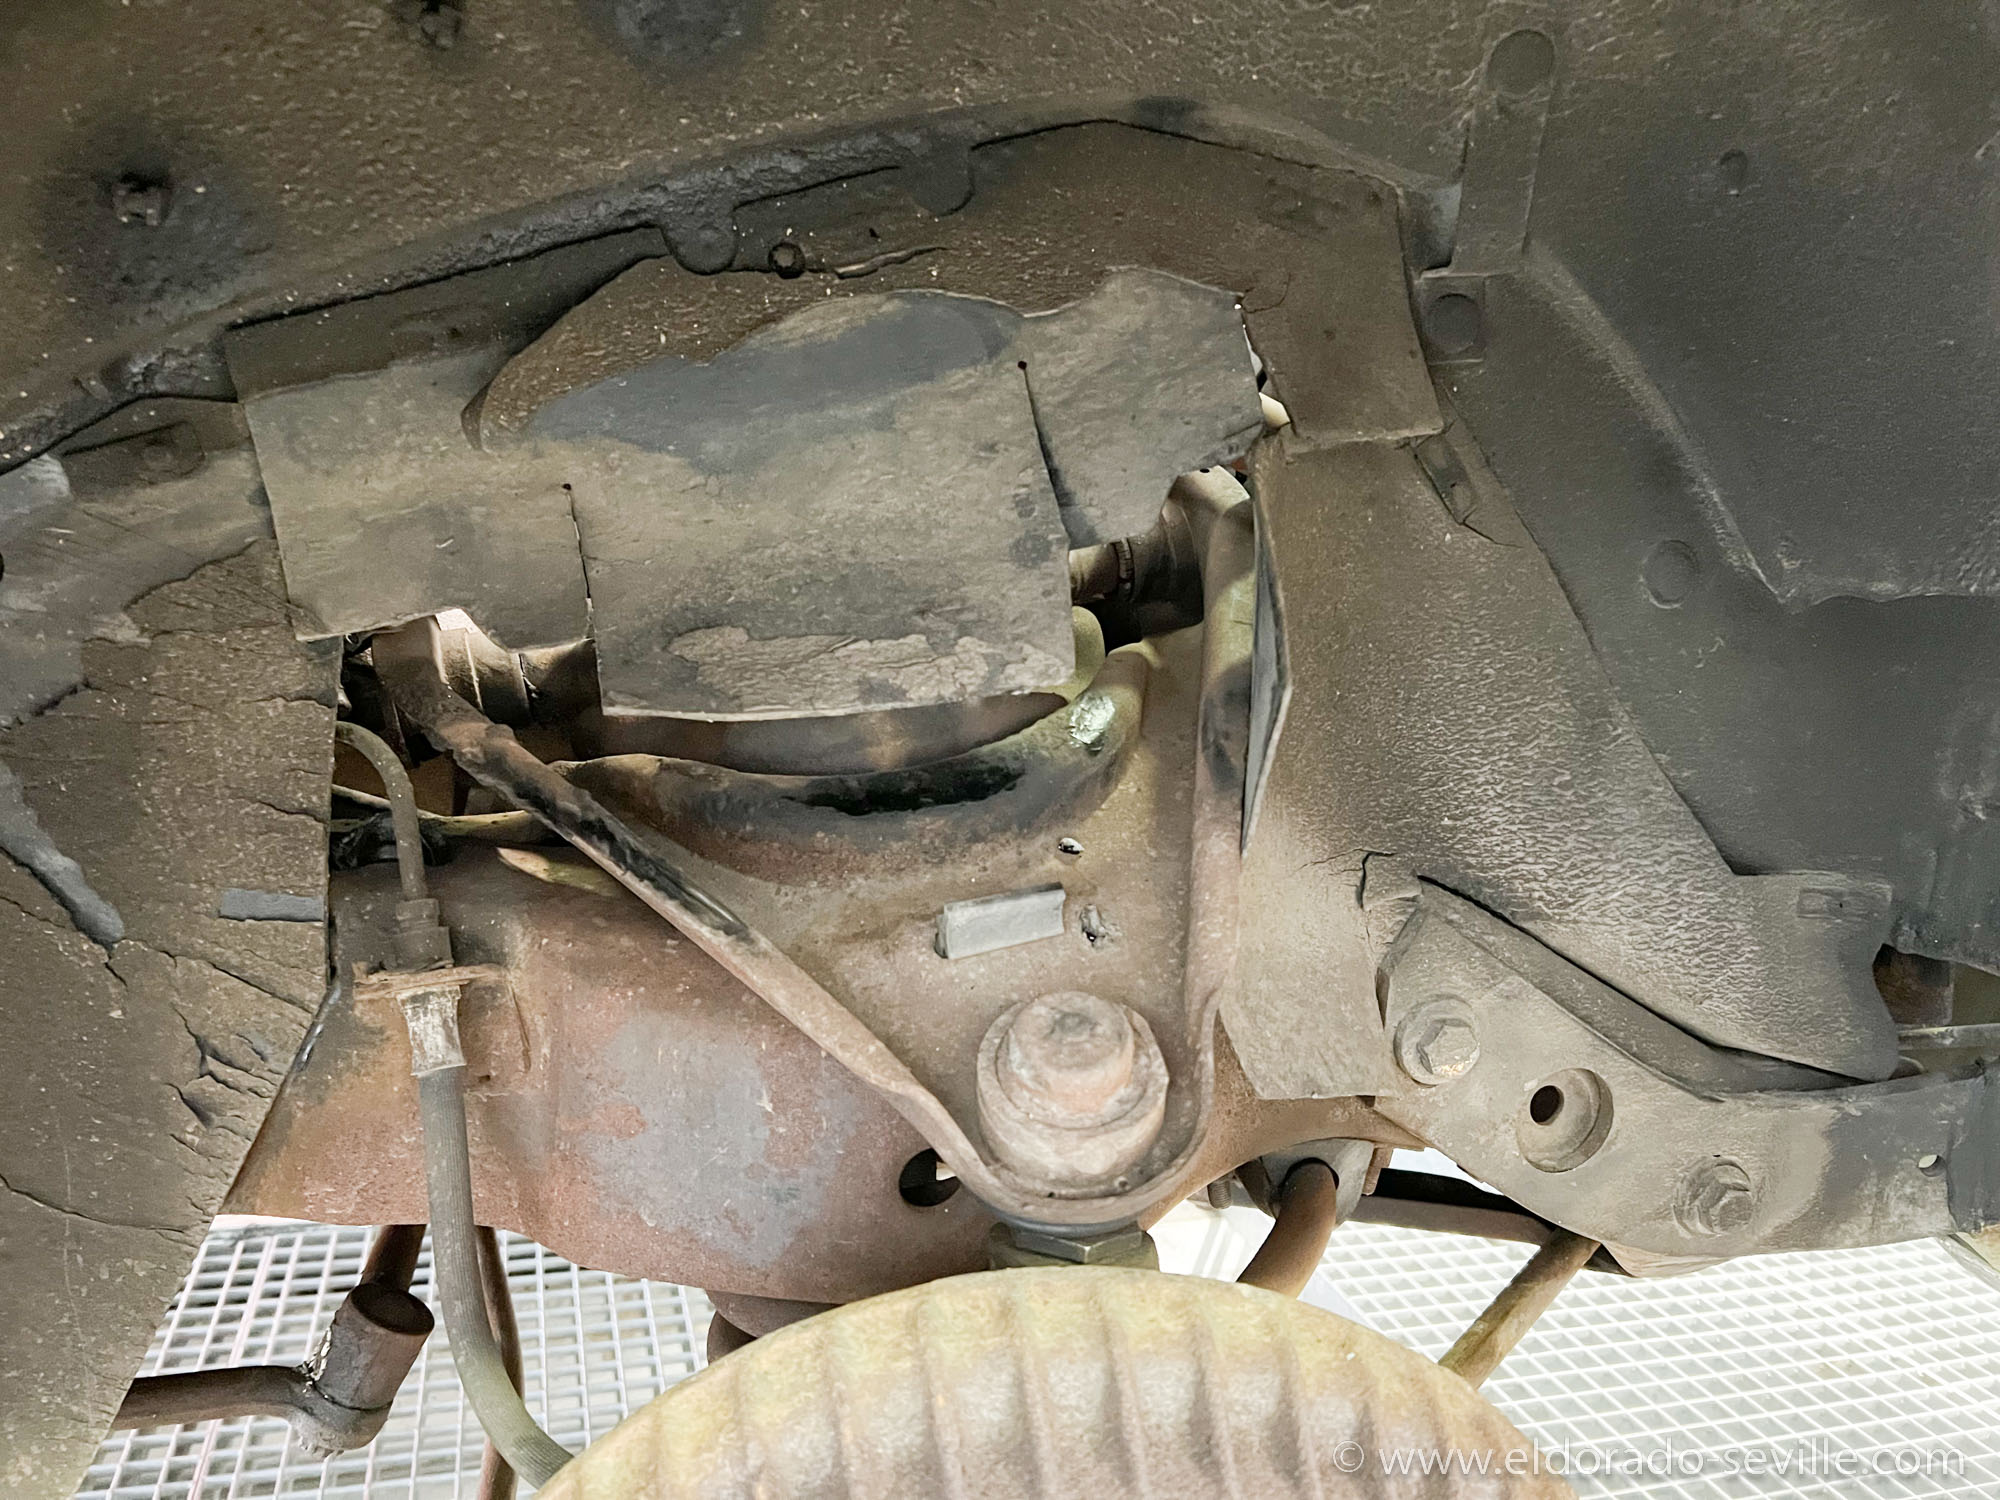
Even the rubber splash aprons were covered in undercoating!
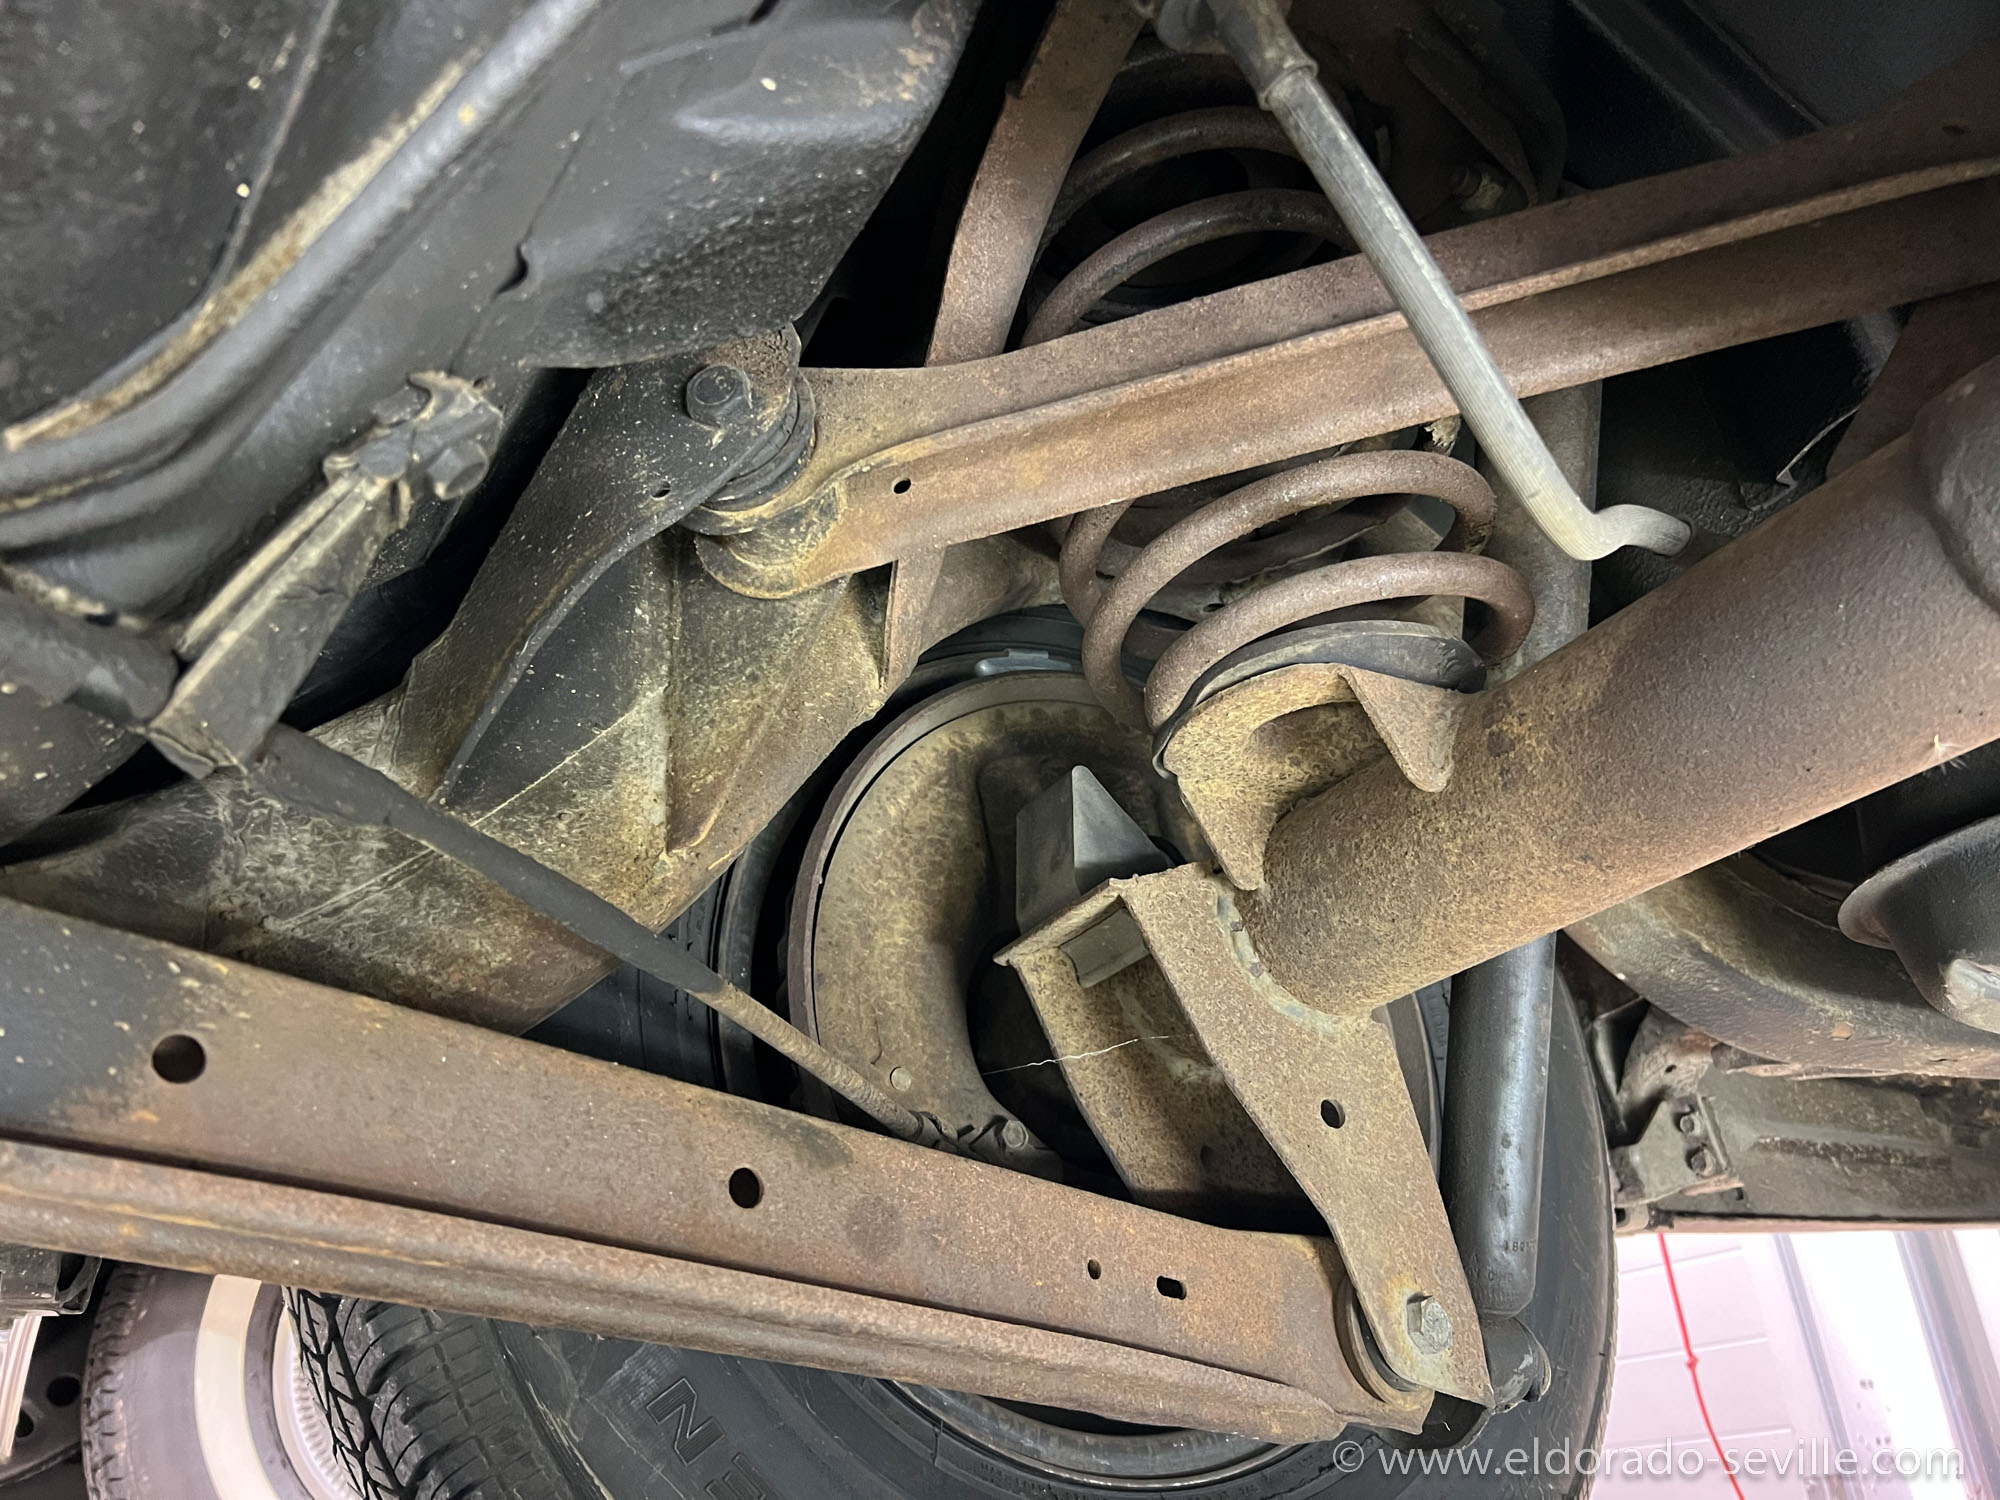
The before pictures - great condition for an original car
The goal of this project was to freshen up the underbody and to conserve the condition of the car.
DRY ICE CLEANING - REMOVING UNDERCOATING
The biggest challenge was to remove the old undercoating by dry ice blasting. While in some areas it came off easily, there were some areas where it just would not come off at all, no matter how much dry ice was used and how much pressure we applied. This was the first time old undercoating could not completely be removed by dry ice cleaning - never had this problem on my 74 and the Roadmaster underbody projects before.Thats why I decided to leave some of the original undercoating on the car. This would preserve the original look, and the new undercoating I used was perfect for working over old undercoating anyway.
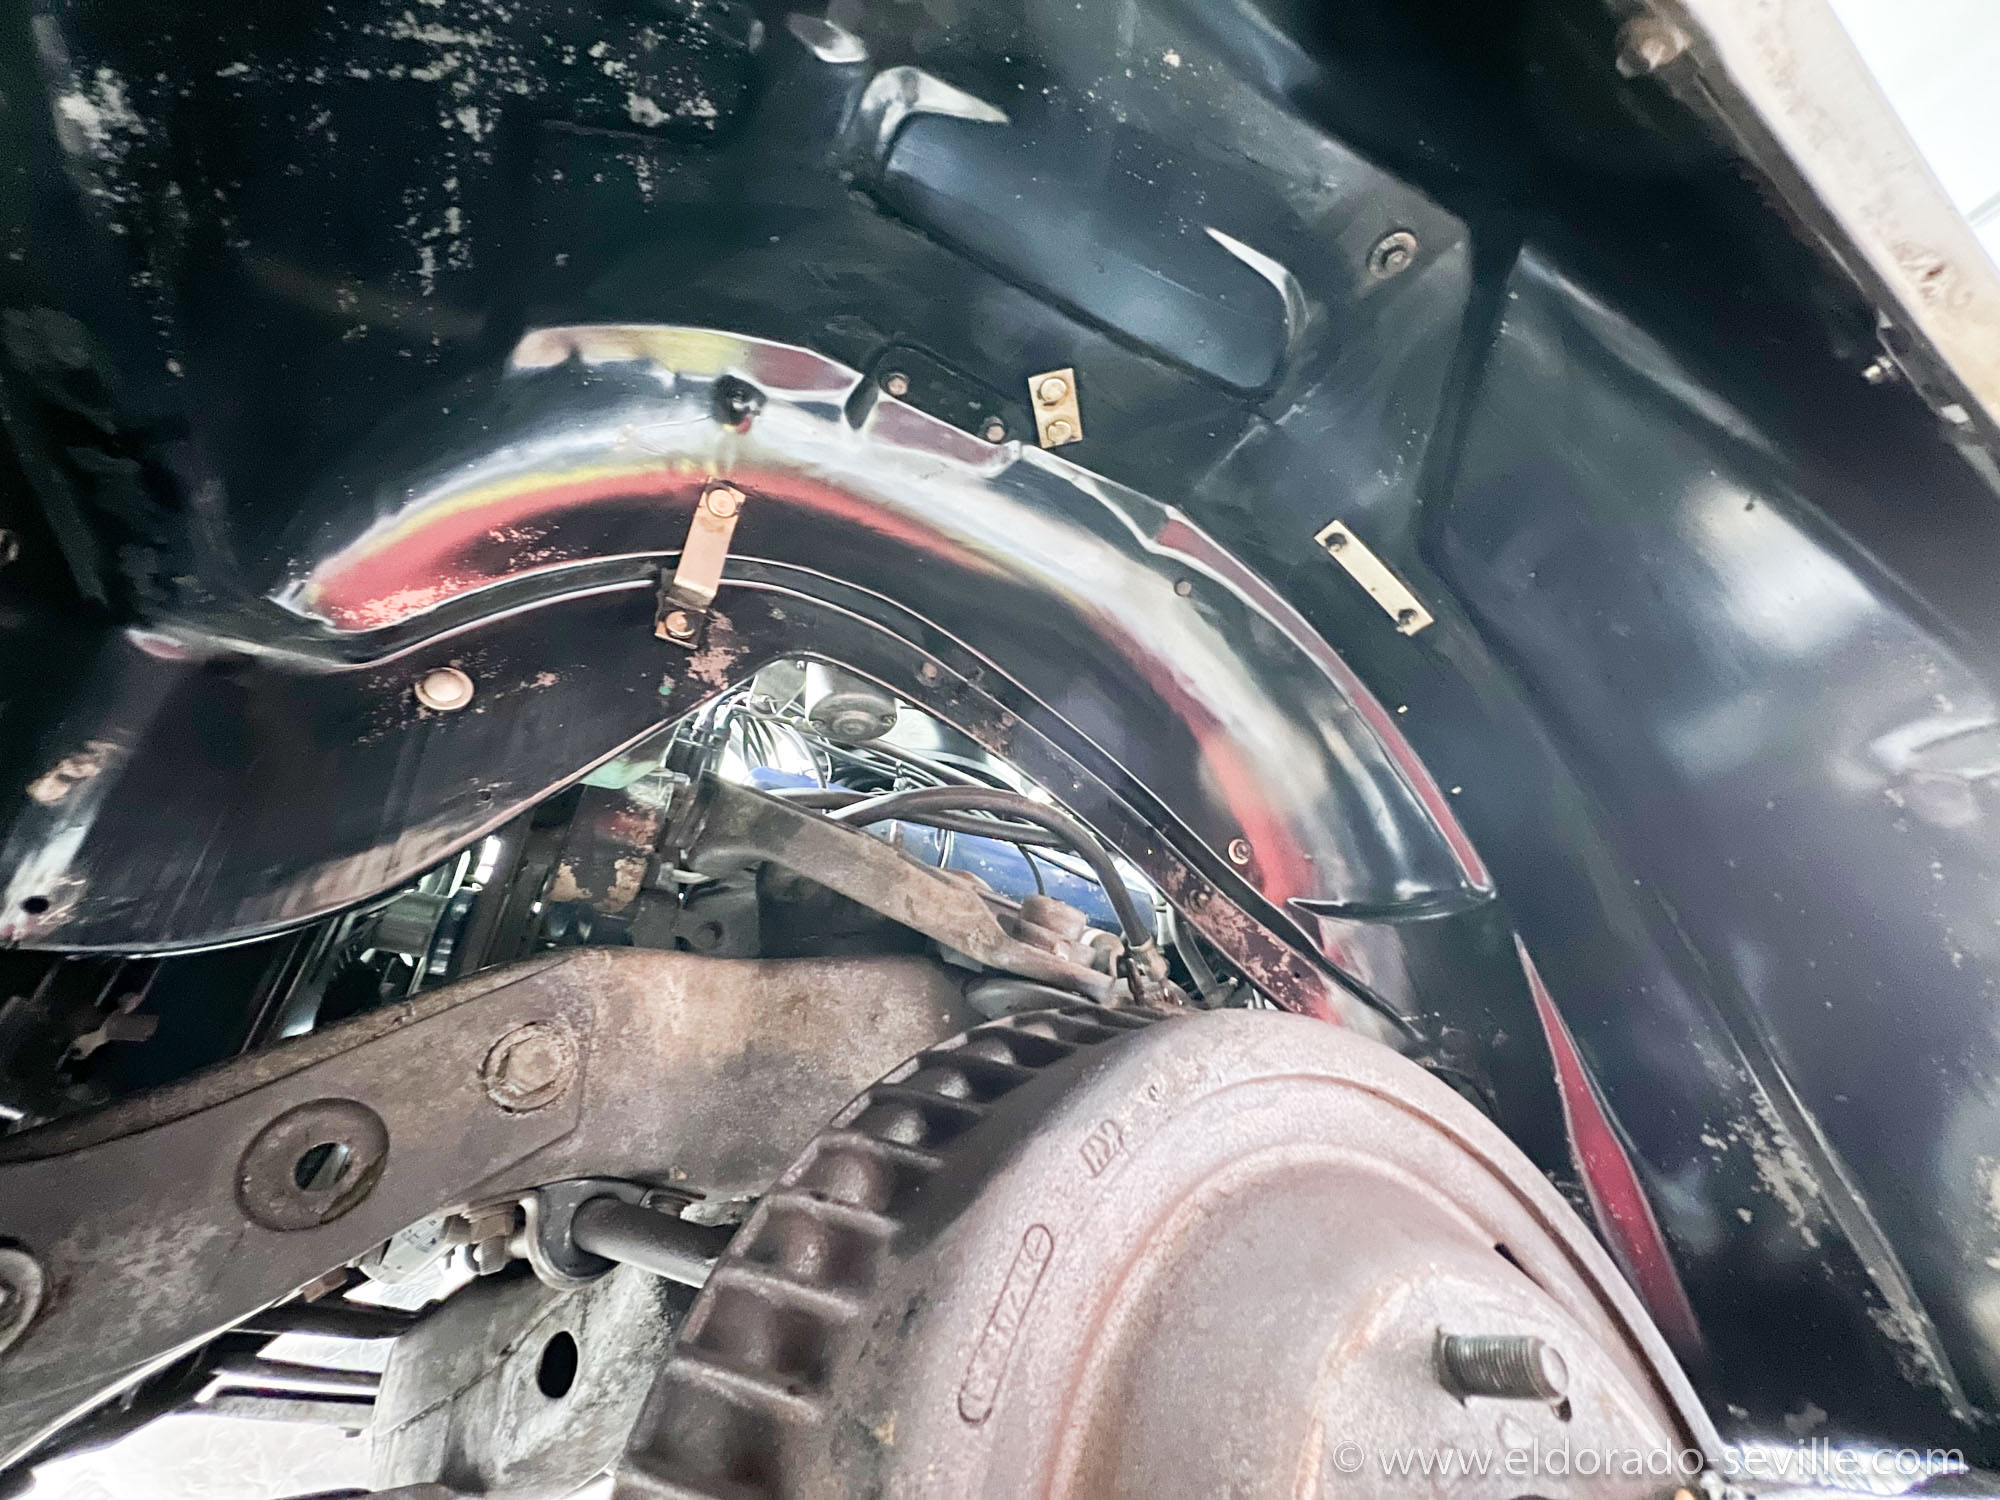
The front wheelhousing after dry ice cleaning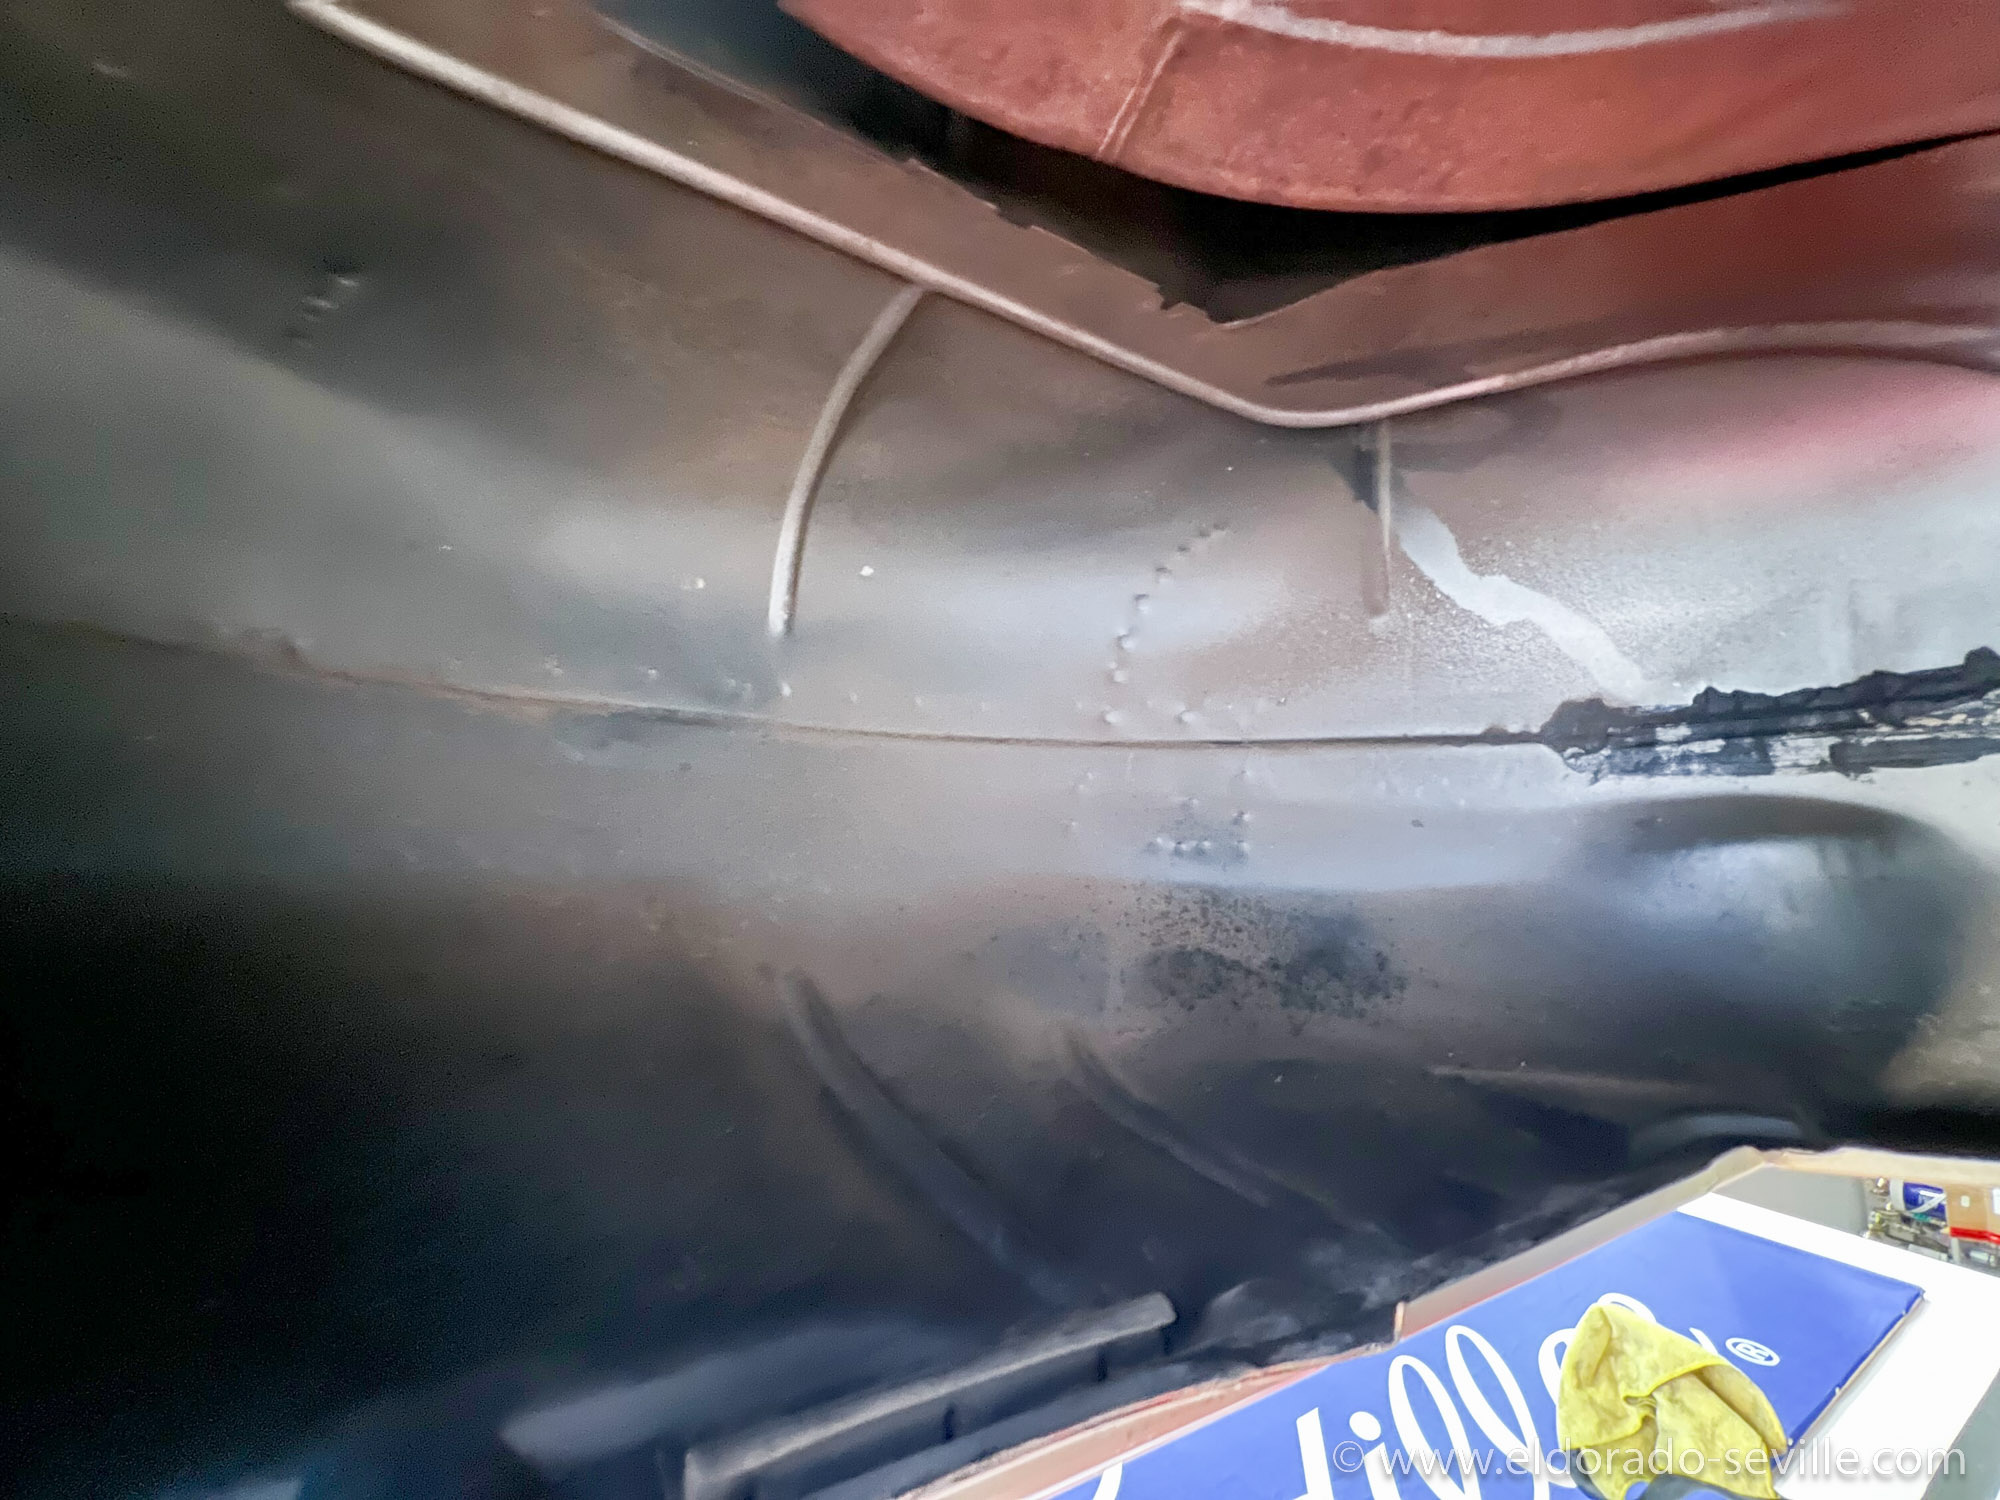
The rear wheel housing after dry ice cleaning. Notice the factory overspray!
RUST REMOVAL
Next step was removing the surface rust which was everywhere. The car, coming out of California, did not have a rust problem at all, but the factory just left some areas unprotected where surface rust could develop. Getting the rust out of all the nooks and crannies is another challenge if you do not plan to disassemble the car completely.I'm a fan of chemically removing rust as it gives more thorough results. Sandblasting is no good idea on an assembled car and is too abrasive.
On my 74 I came up with the idea of spraying the entire underbody with rust removing liquid for a longer period of time.
I set up a system where I could spray rust remover liquid onto the rusty parts on the undercarriage permanently. I used a recirculating pump to spray on the rust remover which is then dripping onto a plastic tarp. From there it flowed back into a large bucket where the pump was and recirculated the fluid back onto the car.
I used a german product called "Rostio" - it's a concentrate used for de-rusting fuel tanks. You have to mix it with hot water. I have also heard great things about Evapo Rust.
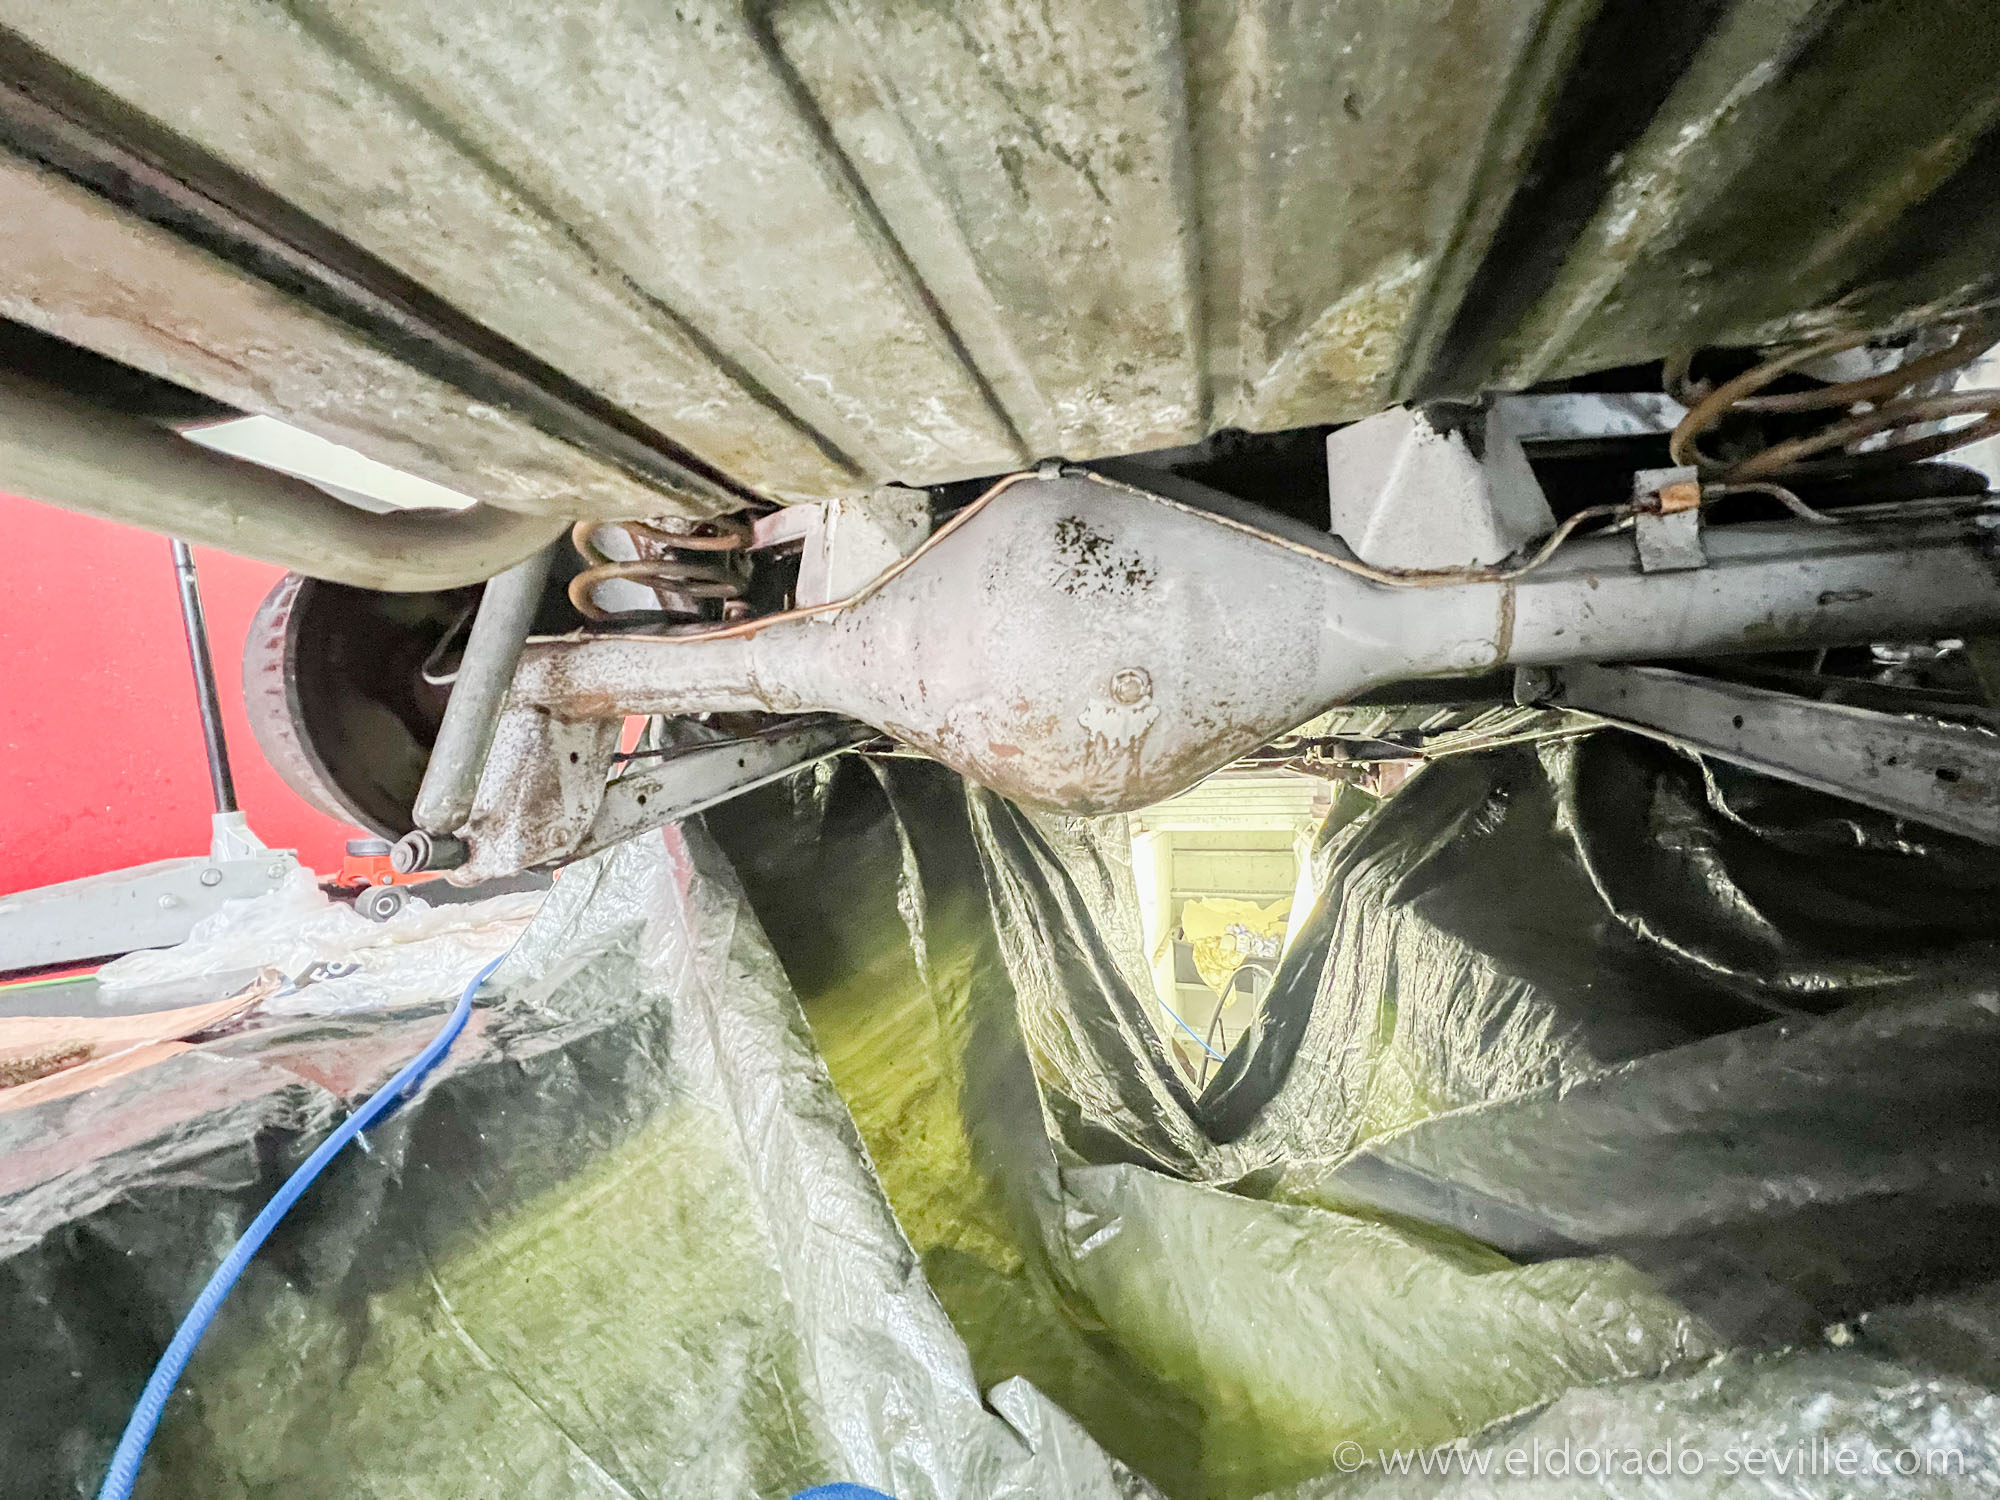
The rear axle area after rust removal.
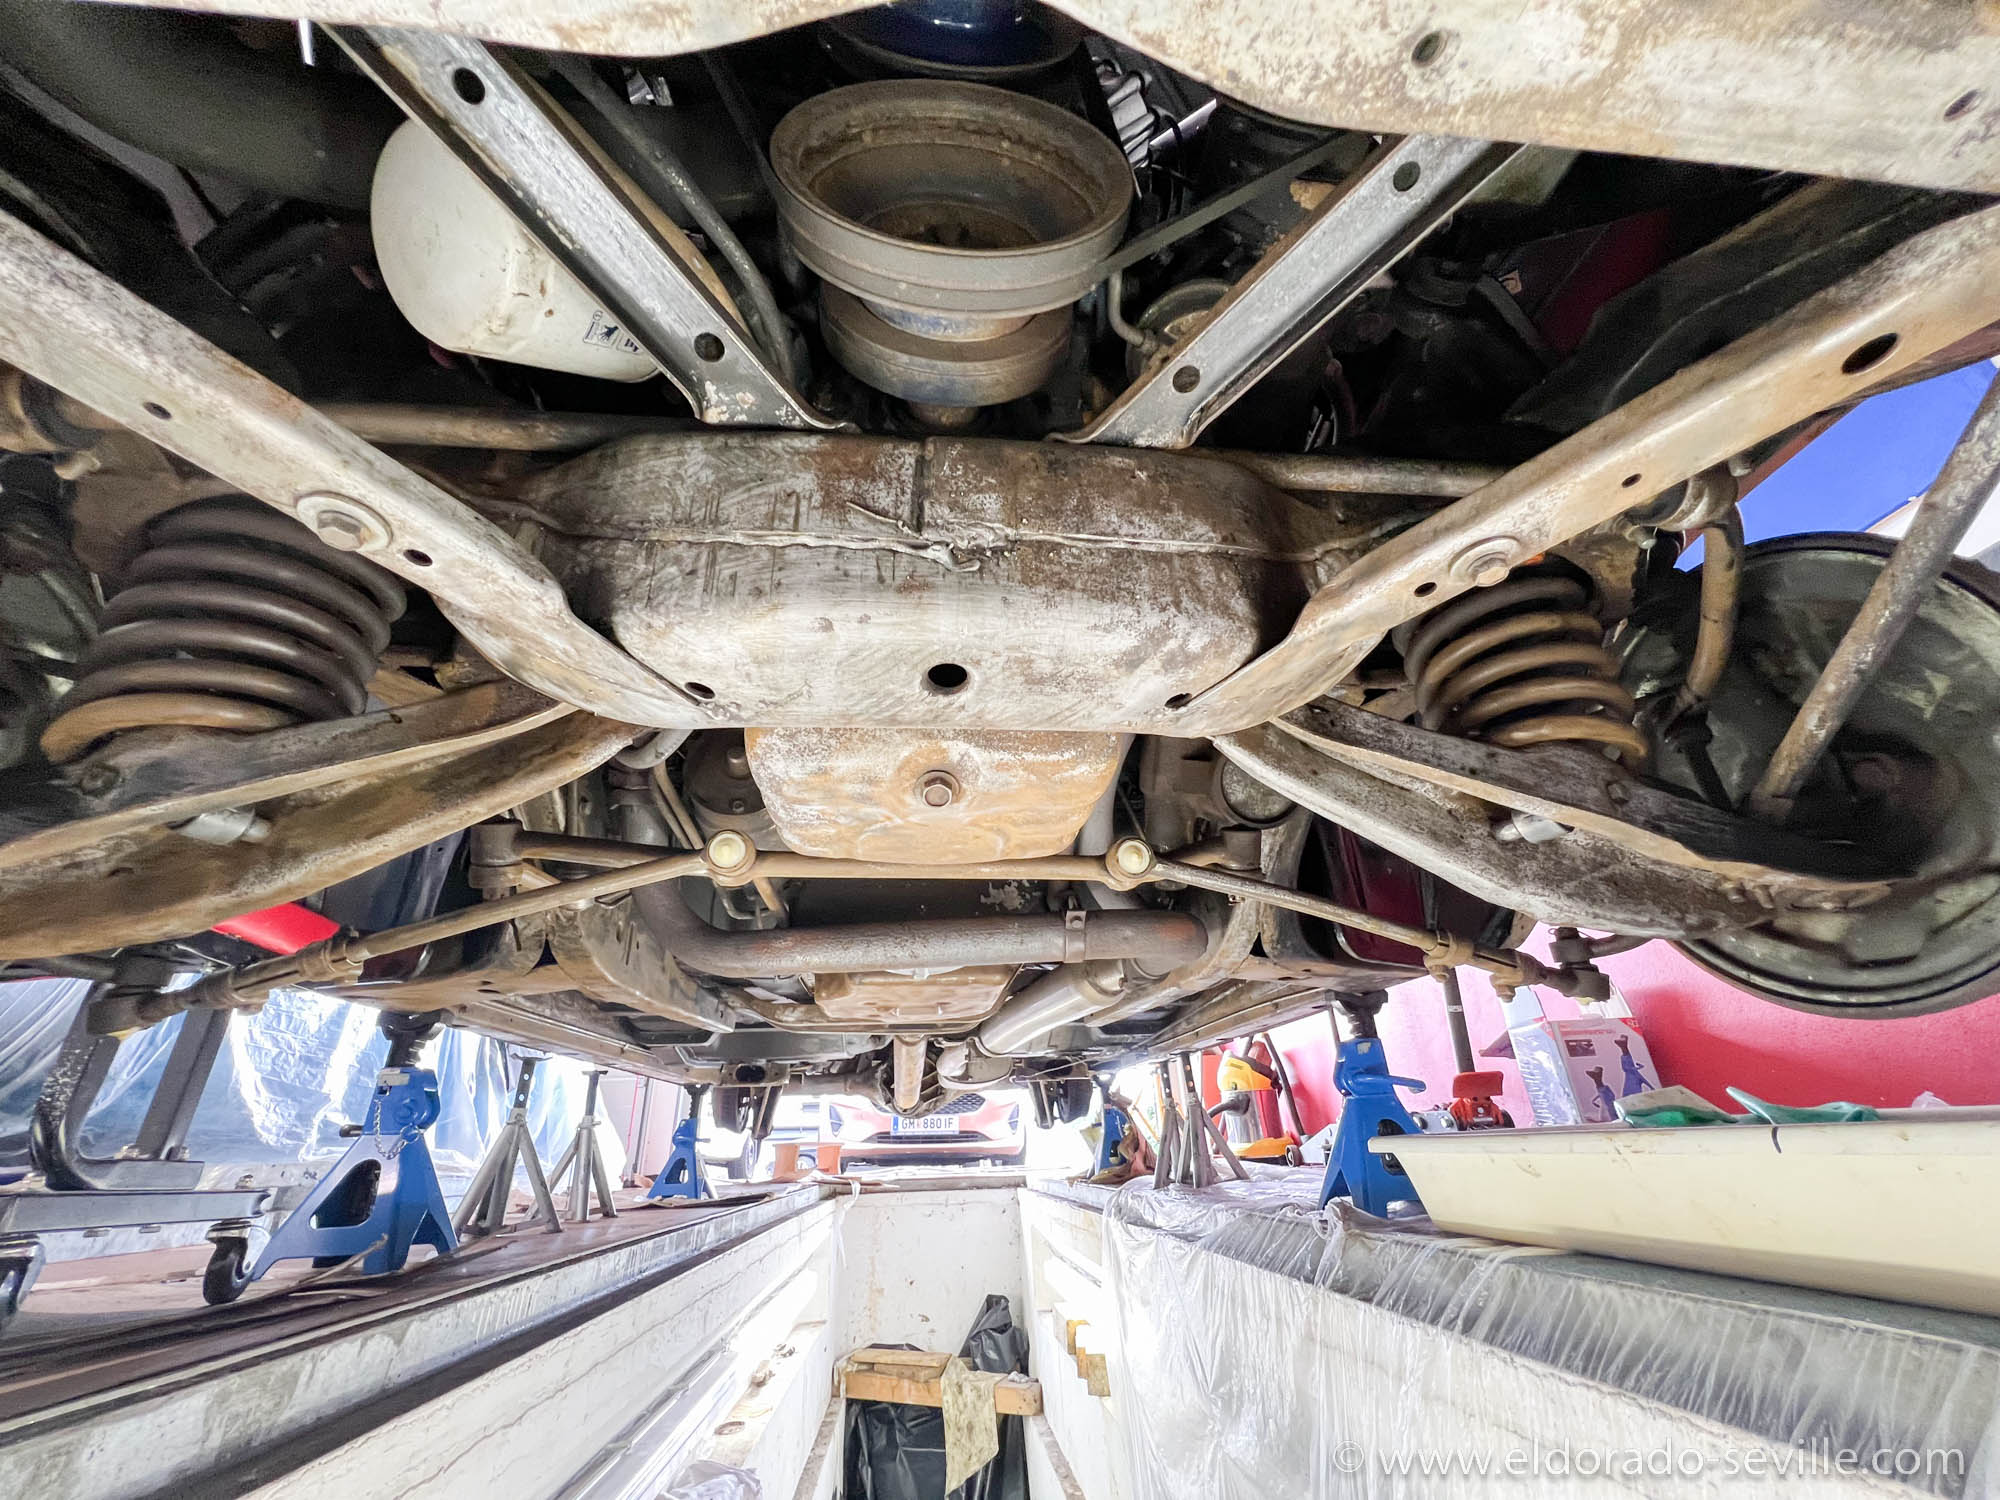
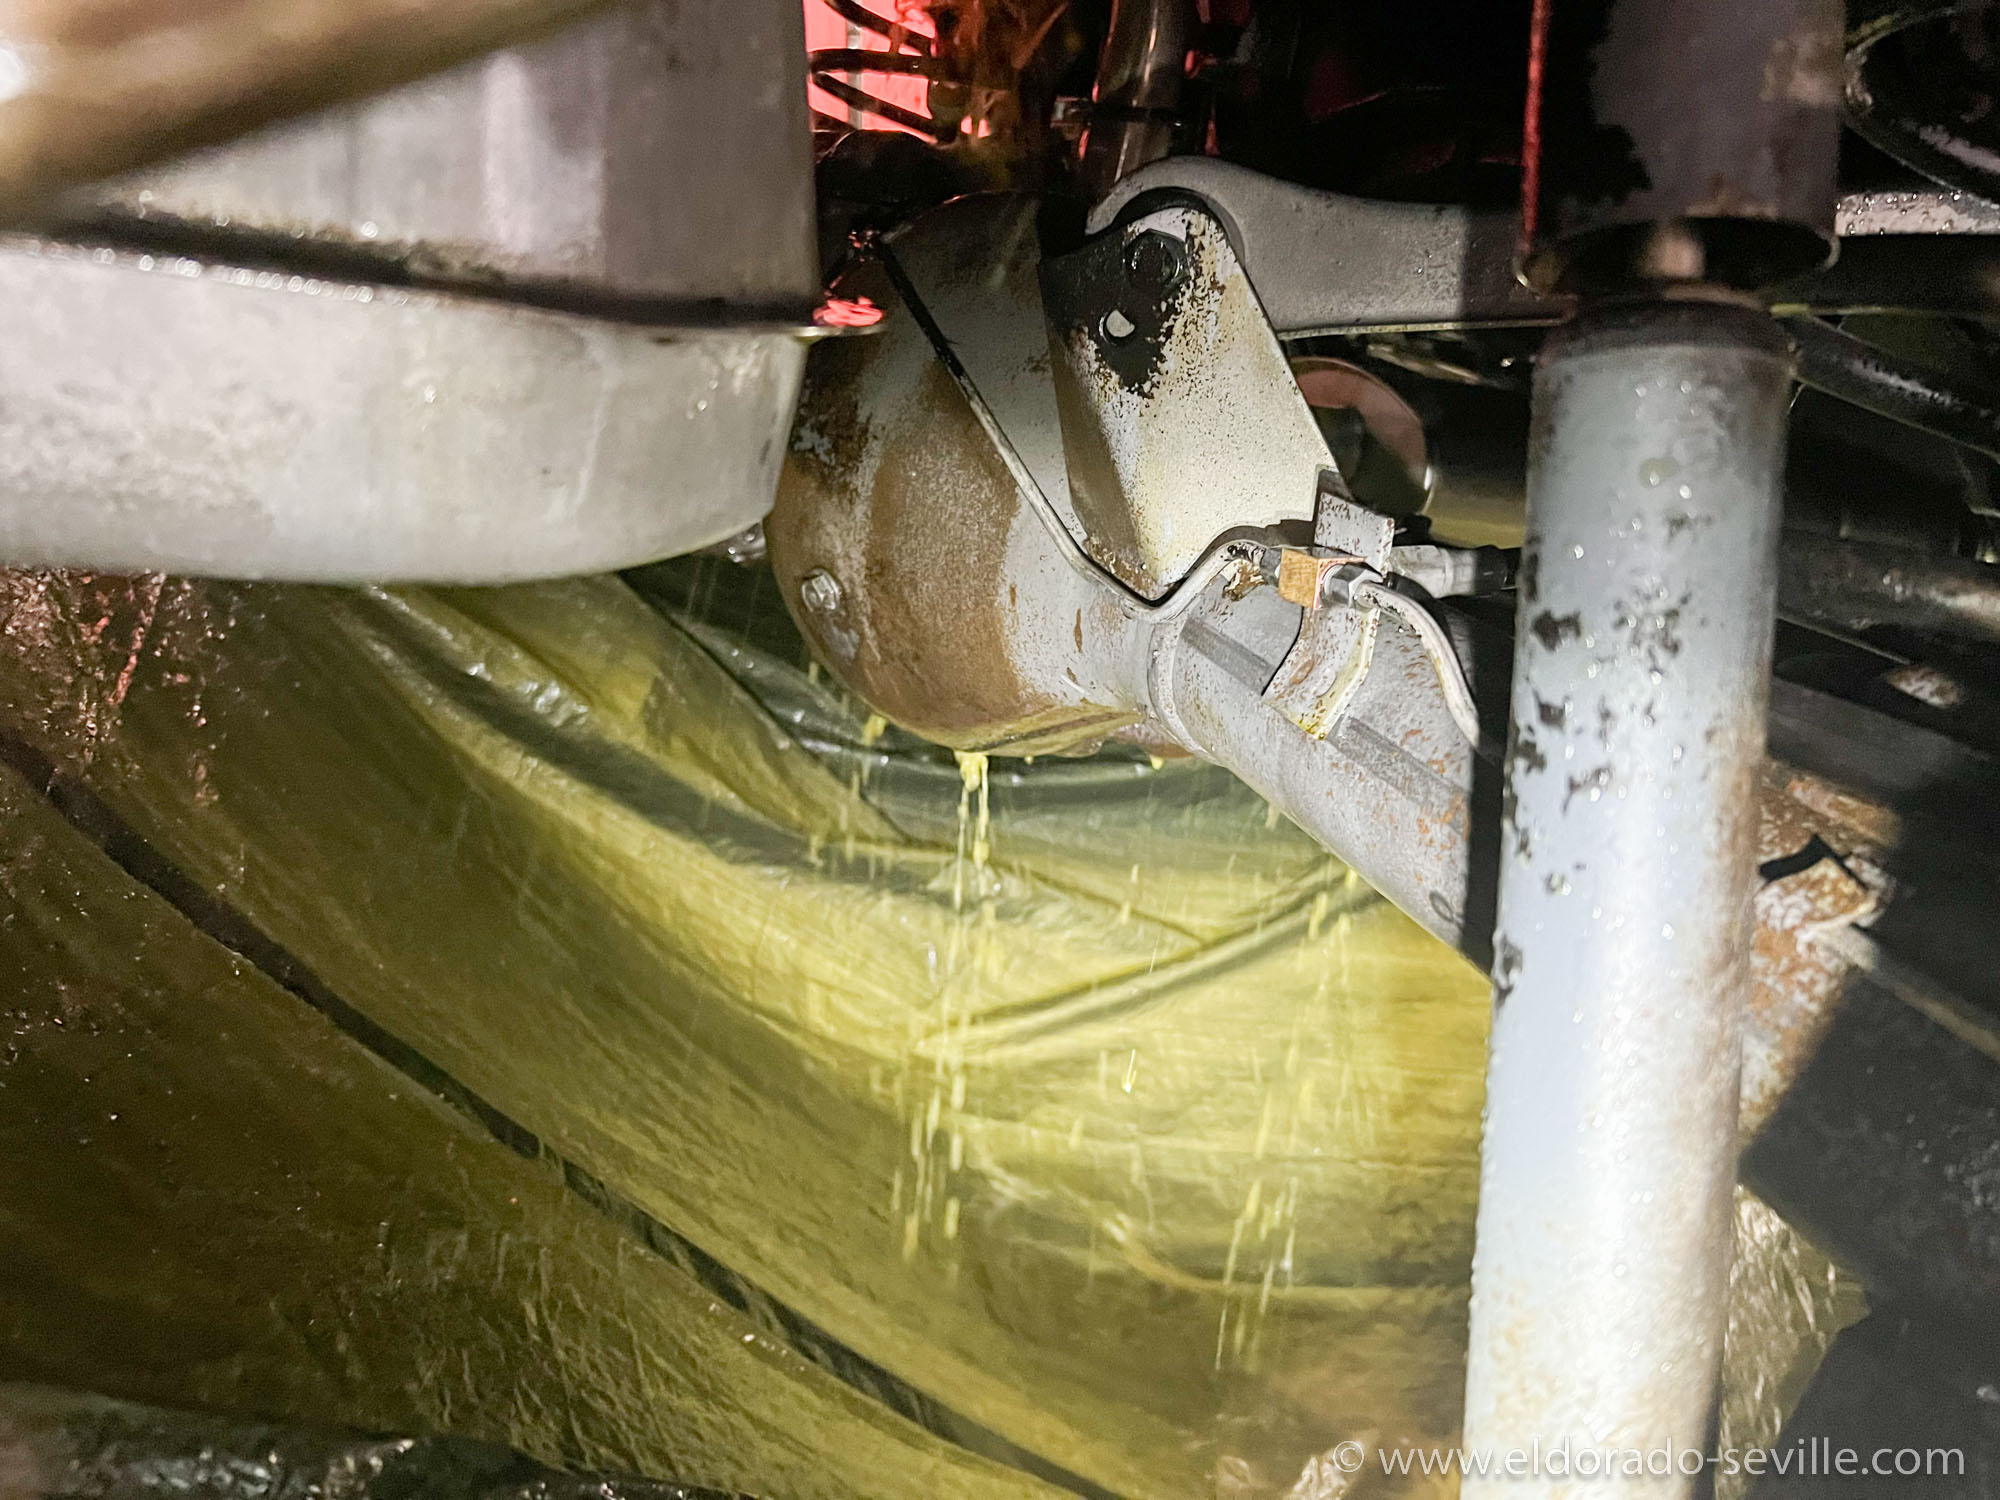
During rust removal - I sprayed on rust removing liquid for many hours.
I let my system run for days until all the surface rust was gone. The advantage is that the liquid could get everywhere and removed the last little pieces of rust.
You will be surprised how well this works. There were only minor traces of rust to be found after 24 hours of spraying the car.
After spraying it with the rust remover you then have to flush it with water thoroughly and then dry it properly to avoid flash rust.
I also used various wire brushes and other abrasive materials to remove rust and strip bad paint.
PAINTING
After rust removal I started masking and taping off all the areas which should not be painted like transmission, lines, cables, exhaust, screws and bolts and more. This took forever to do. Painting the undercarriage was next. Some hard to reach areas where painted with rust preventive paint first. Afterwards I used "Timemax Color" (its from a company which won every comparison test done by a classic car magazine). The first coat I sprayed on was grey, followed by 2 black coats. This way I could make sure that I did not miss any spots.After a couple of days of curing time I sprayed two coats of transparent undercoating followed by a transparent 2k stone chip guard. This product is normally used for rally cars and is impossible to destroy and basically invisible.
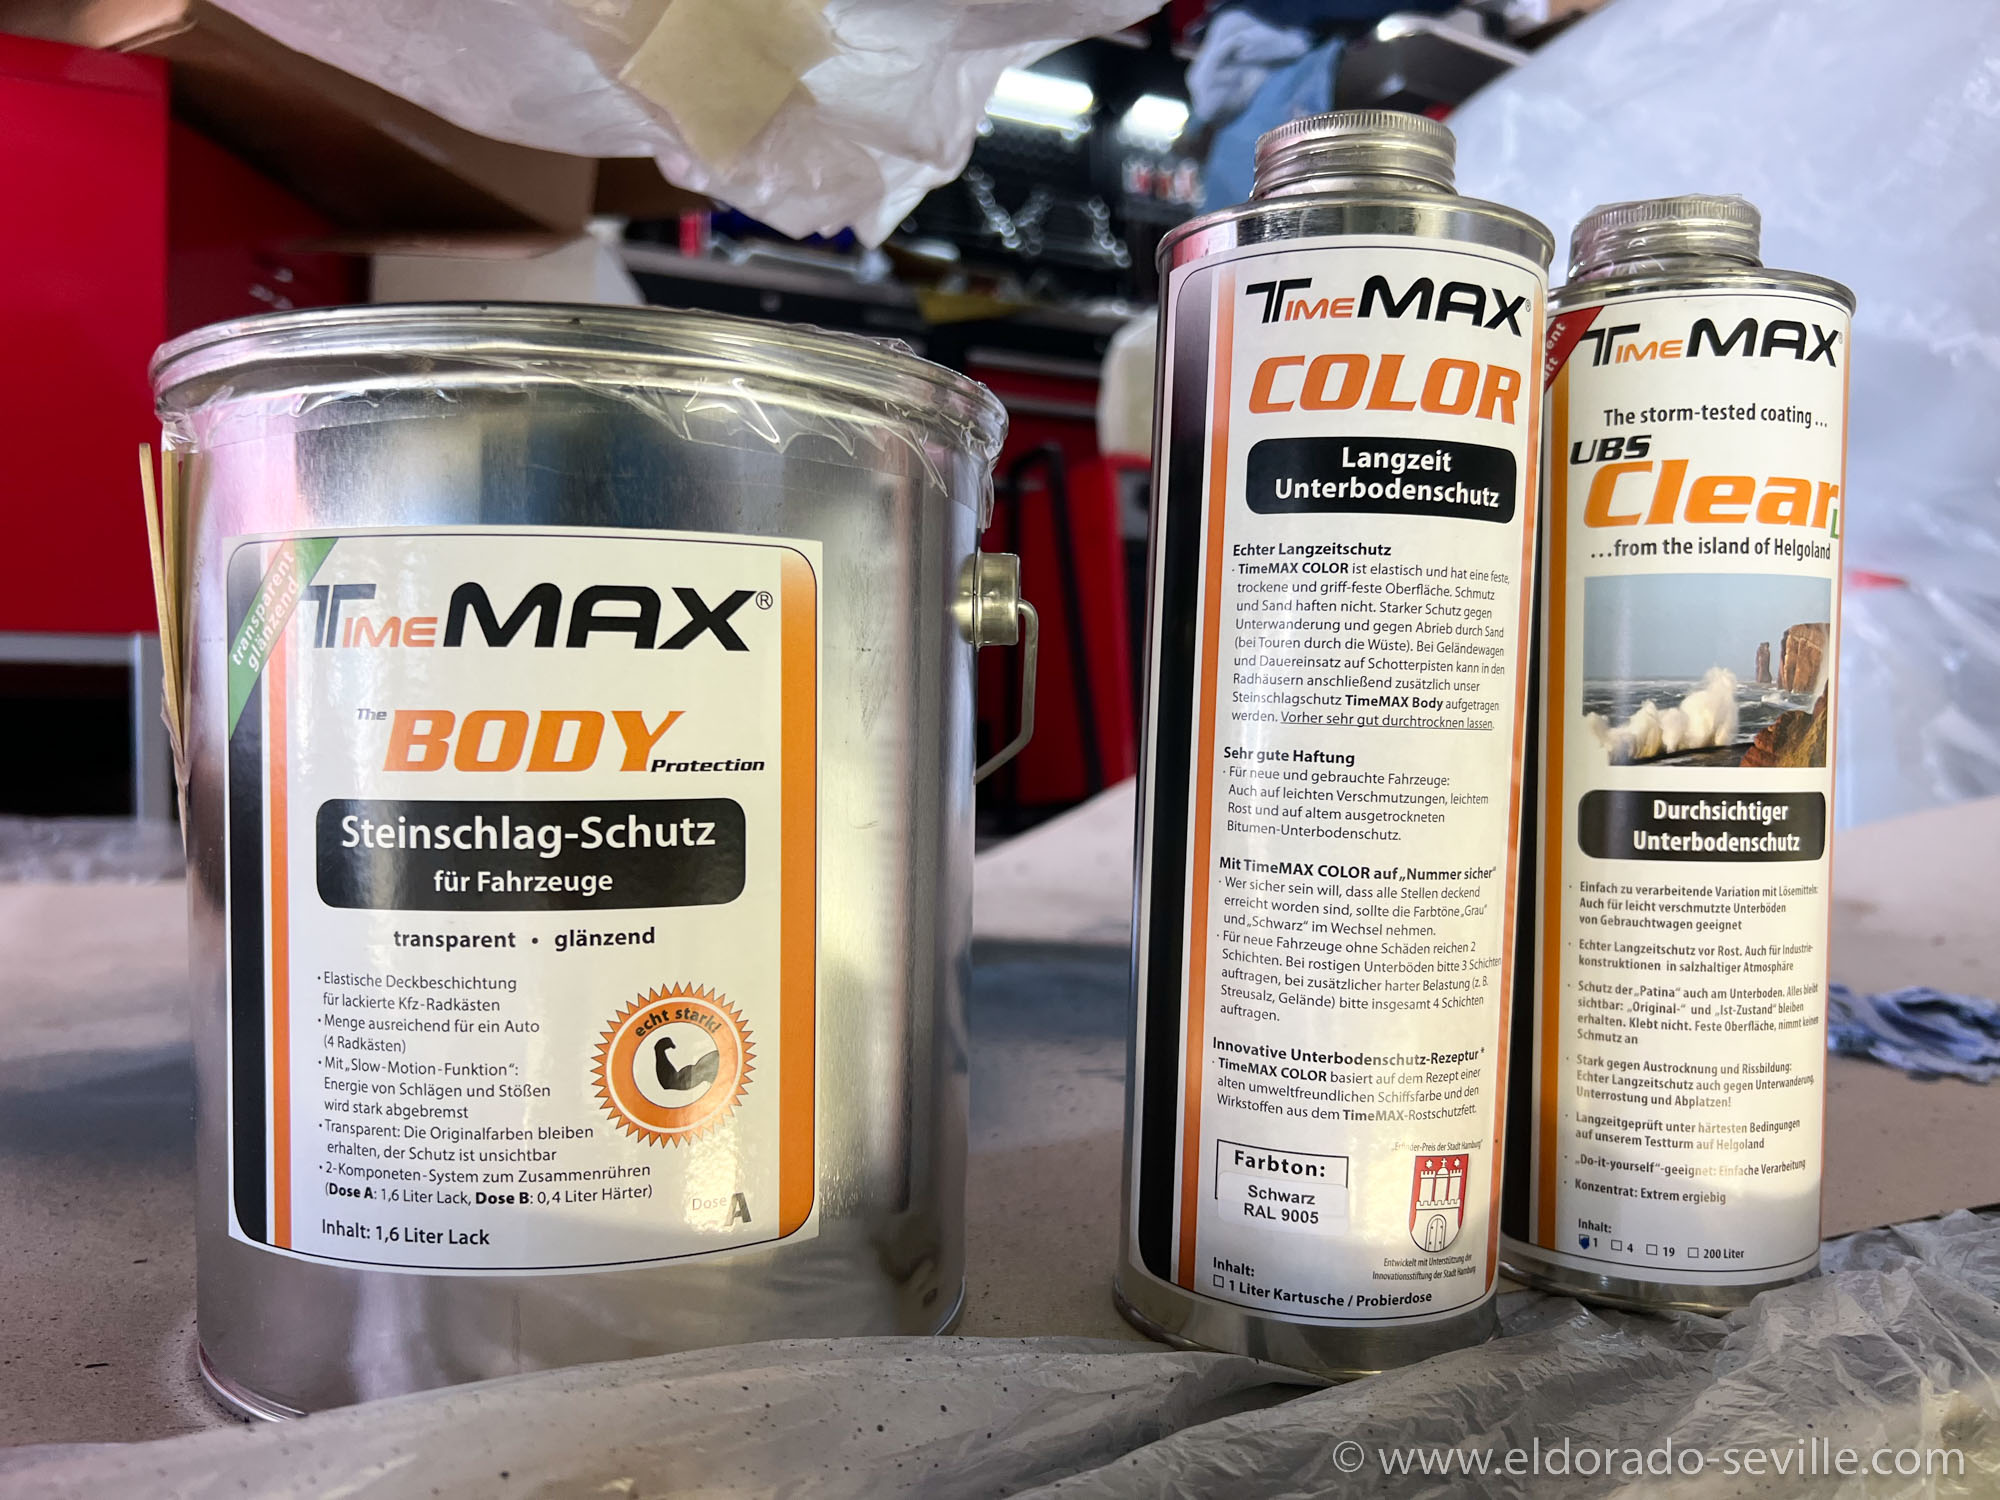
The Timemax products I used. I have used them before on my 74 Cadillac and my Buick Roadmaster with great results.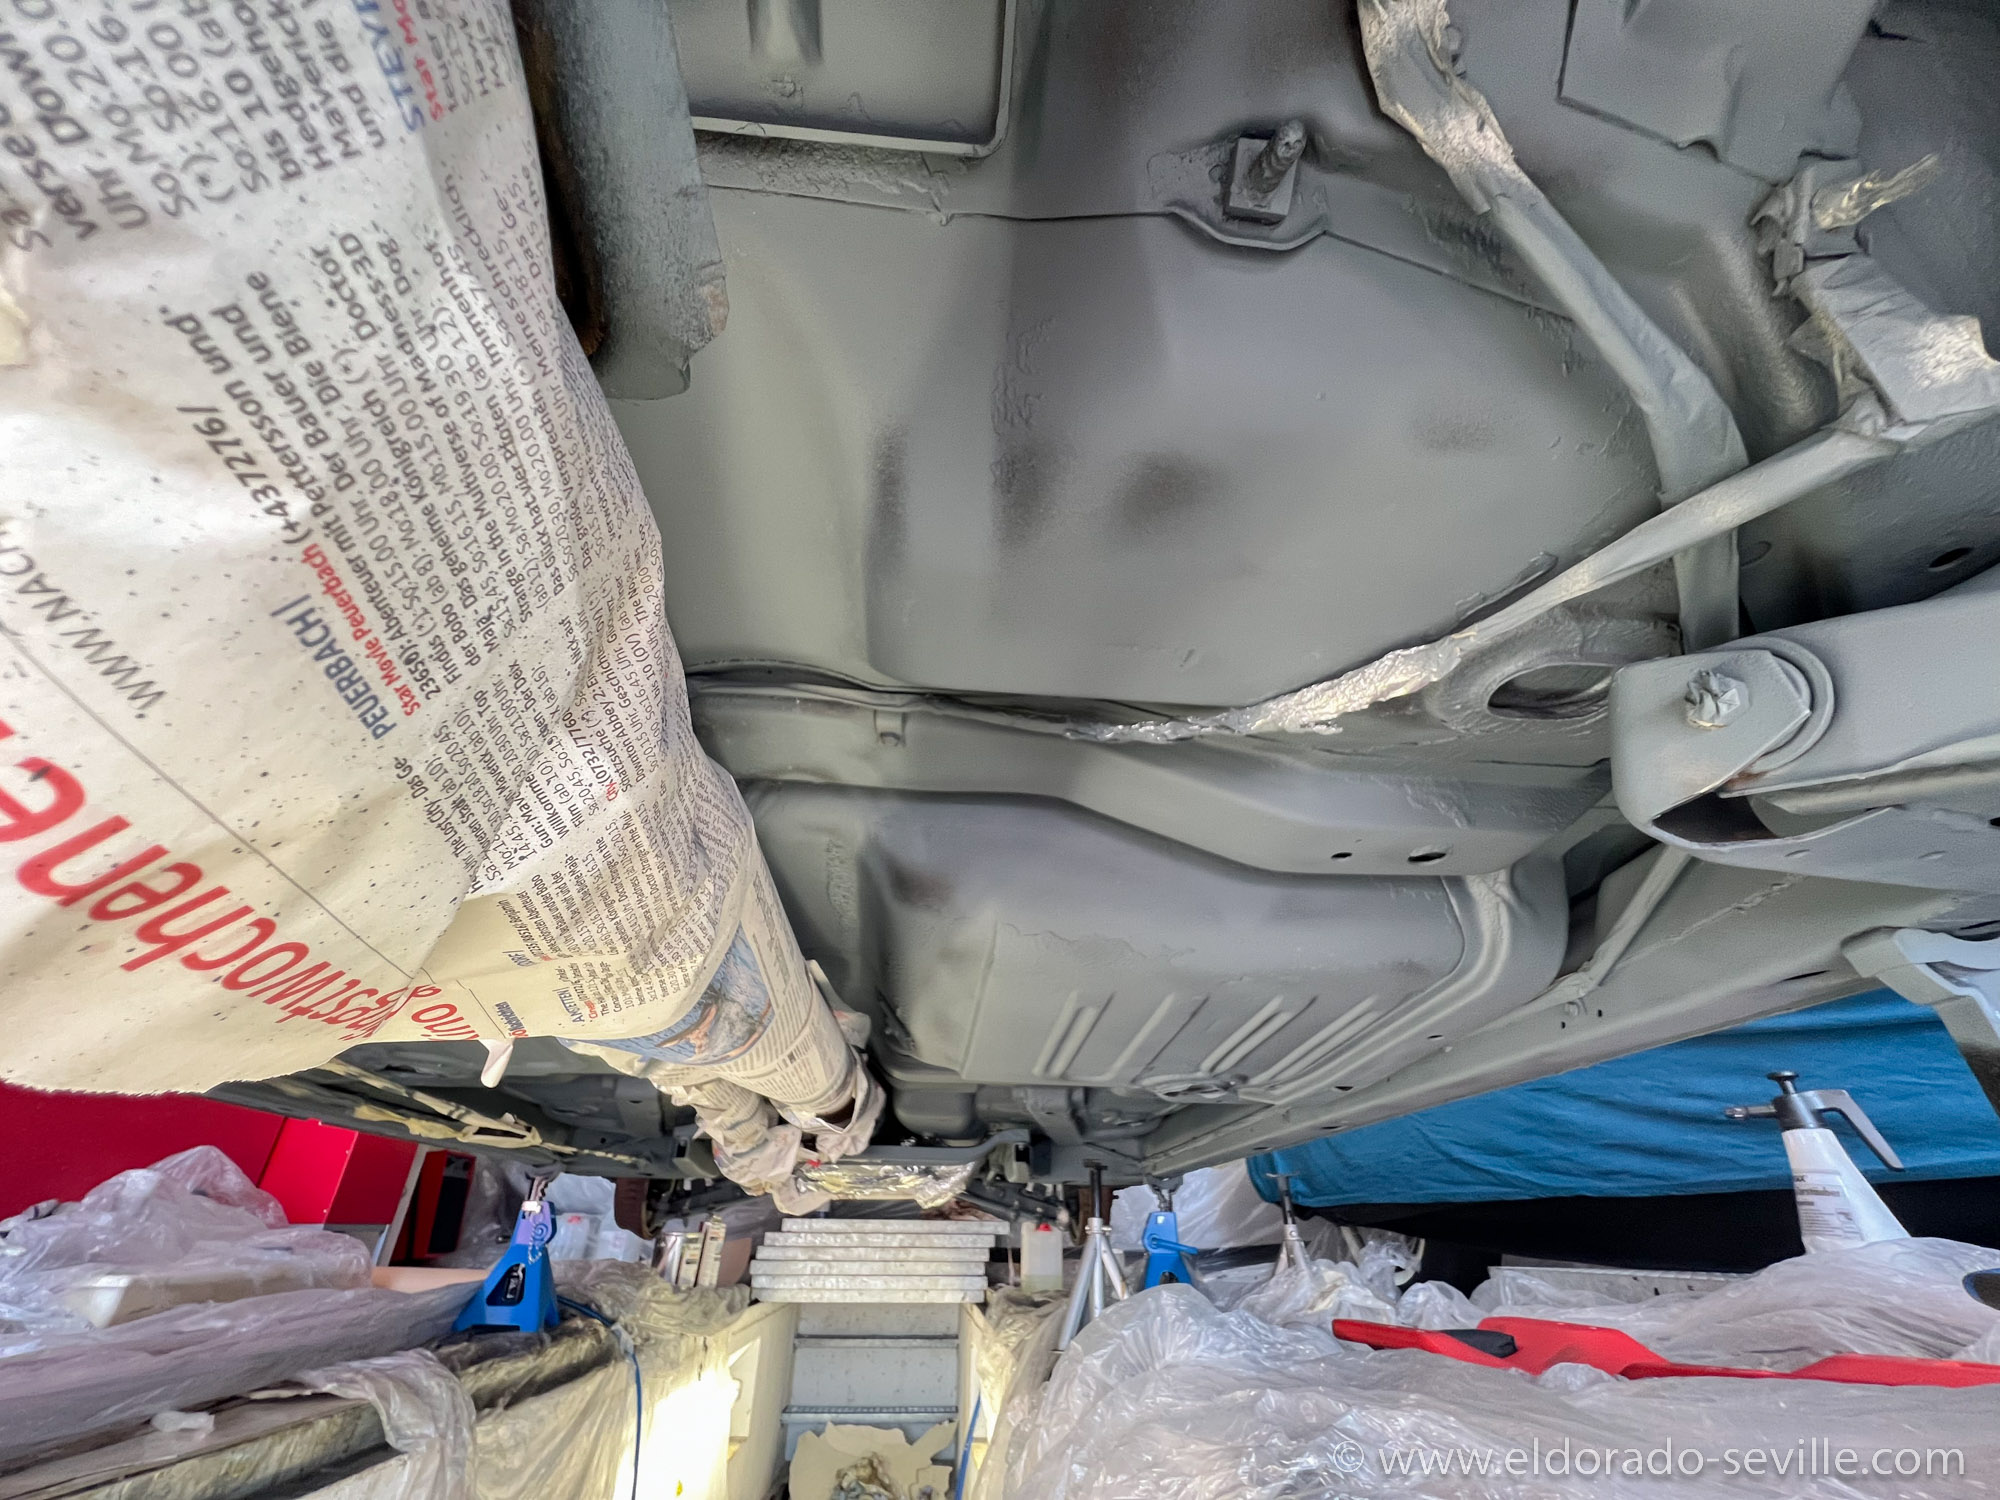
Masking everything was a lot of work…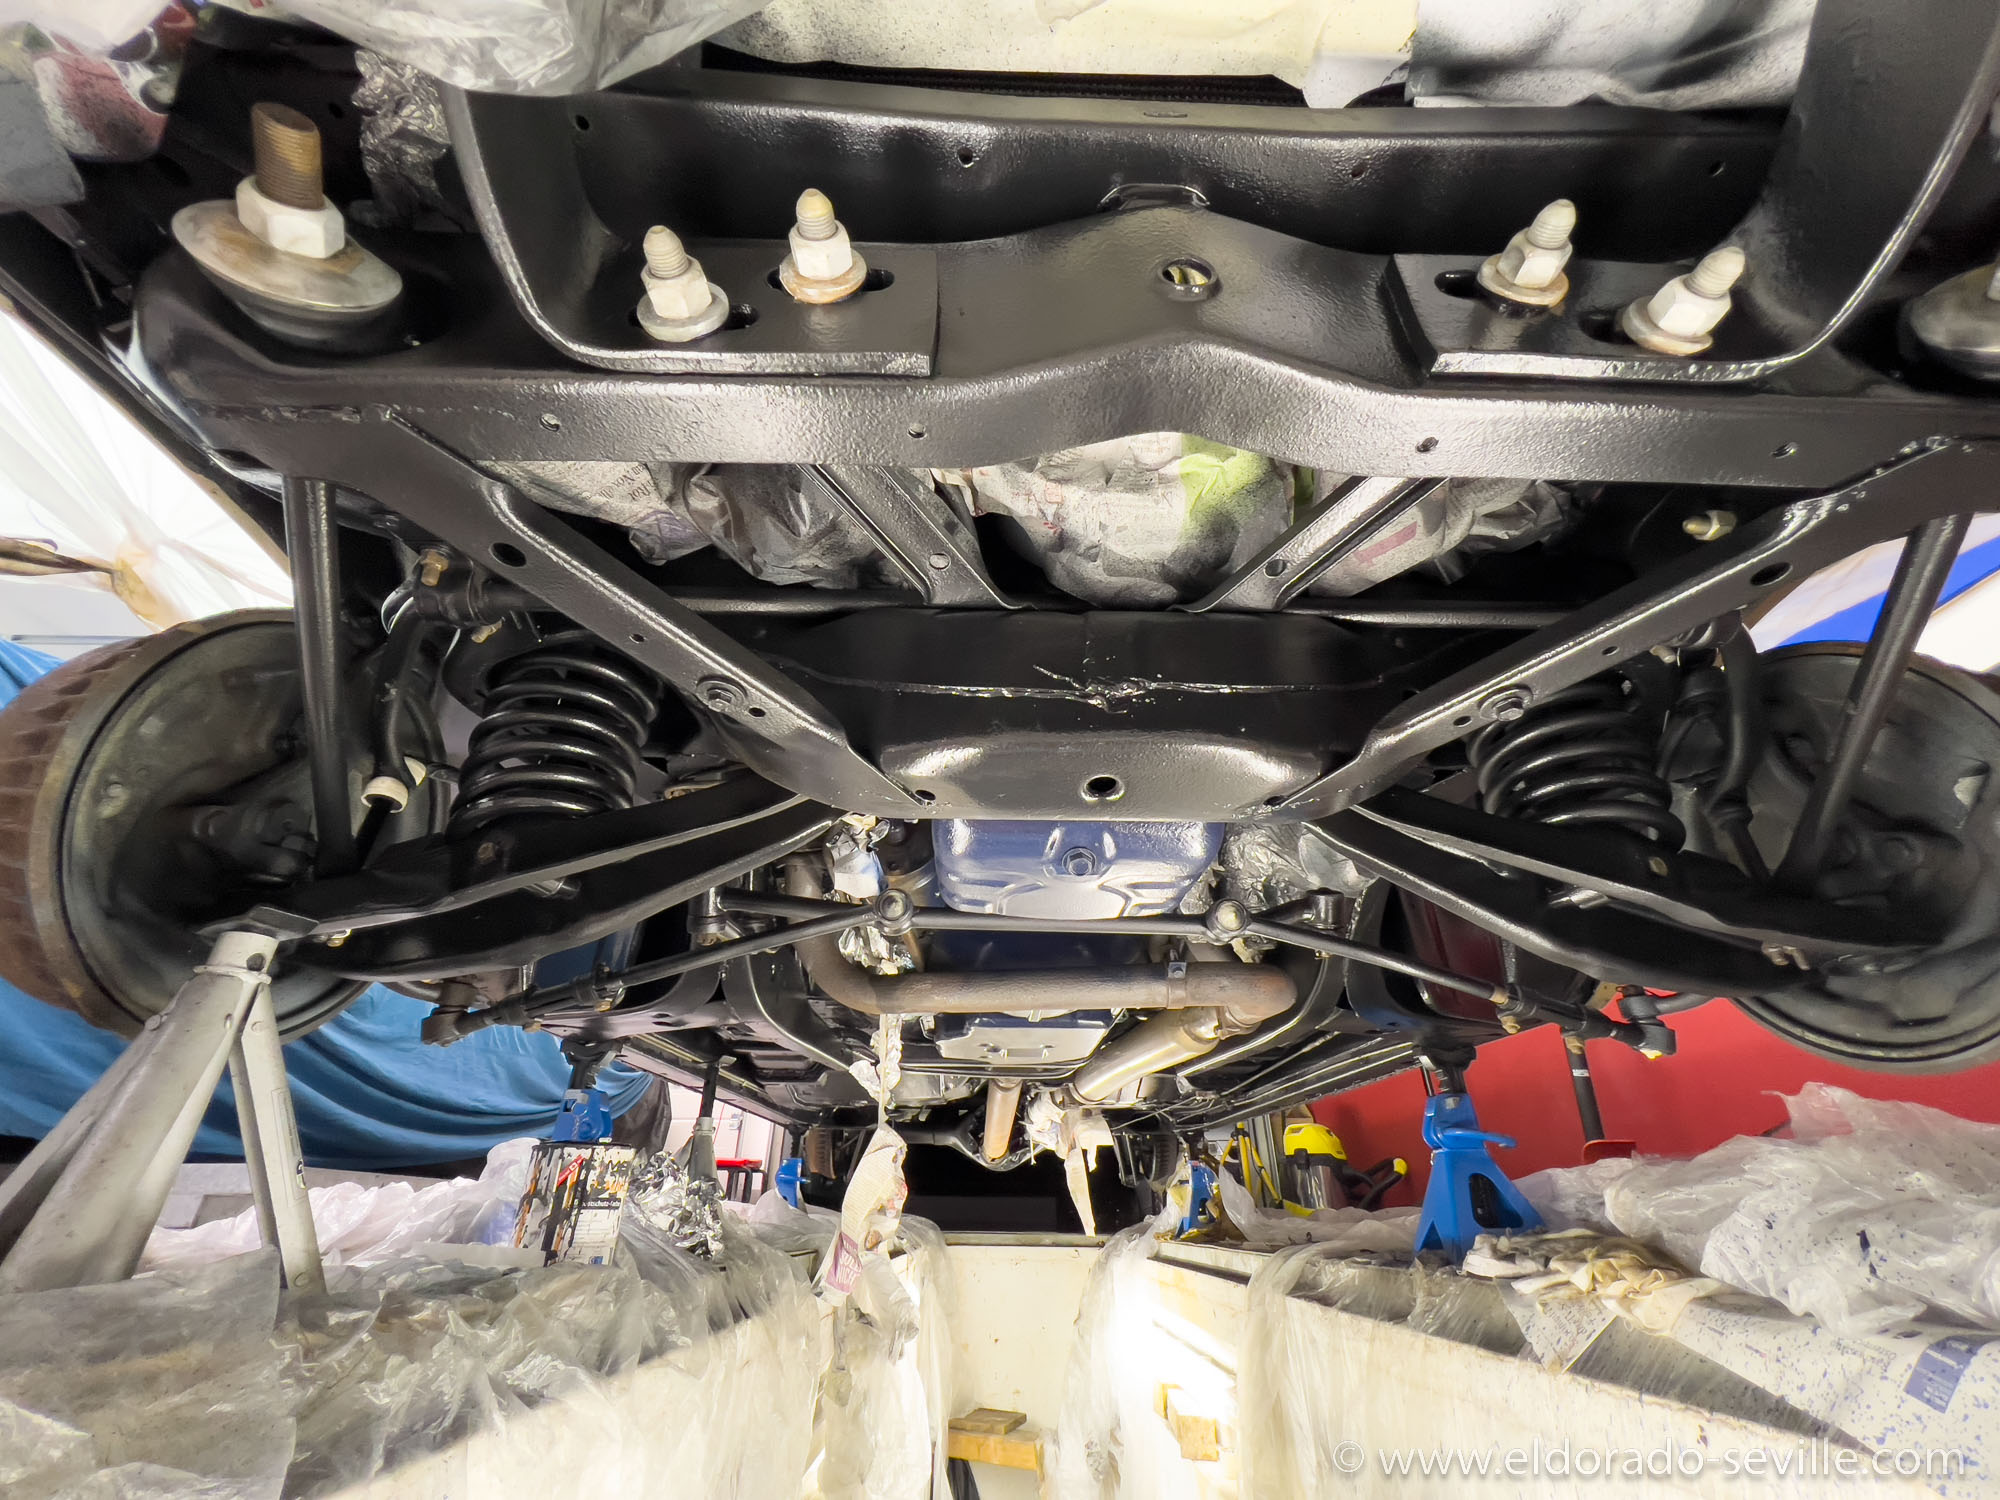
In the rear wheel housings I only used transparent material, because when the factory painted the car there was a lot of overspray in the rear wheelhousings which were an integral part of the body. I wanted the overspray to be visible.
When everything was painted the drive shaft looked out of place and the tank did not look as fresh as well. I took the shaft off the car and painted it replicating the color coded factory markers which could still be found on the shaft. I cleaned the tank and also painted it.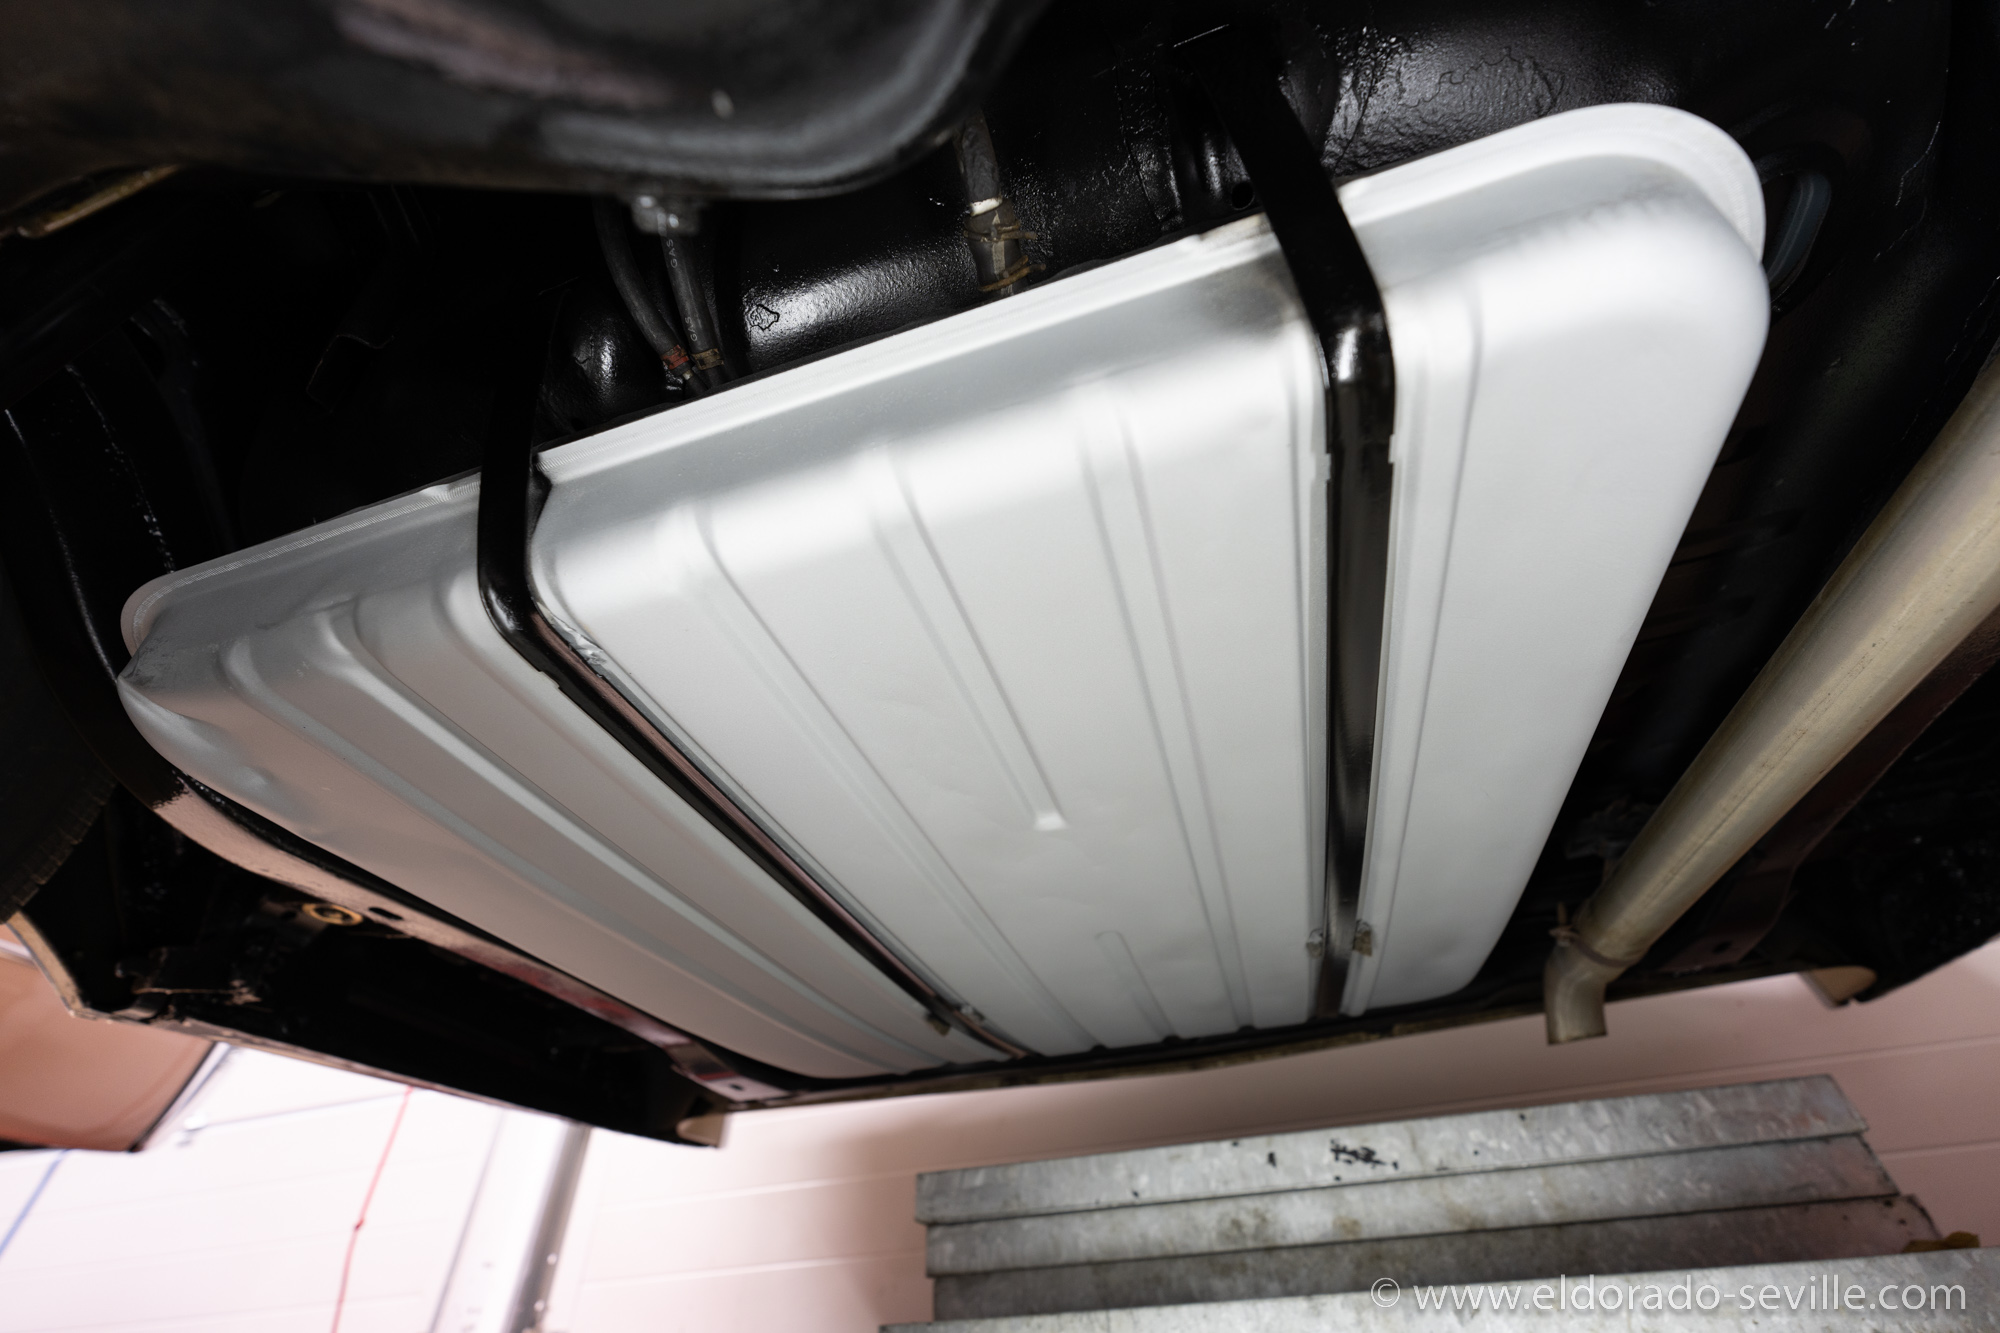
I repainted the tank with Eastwoods fuel tank paint.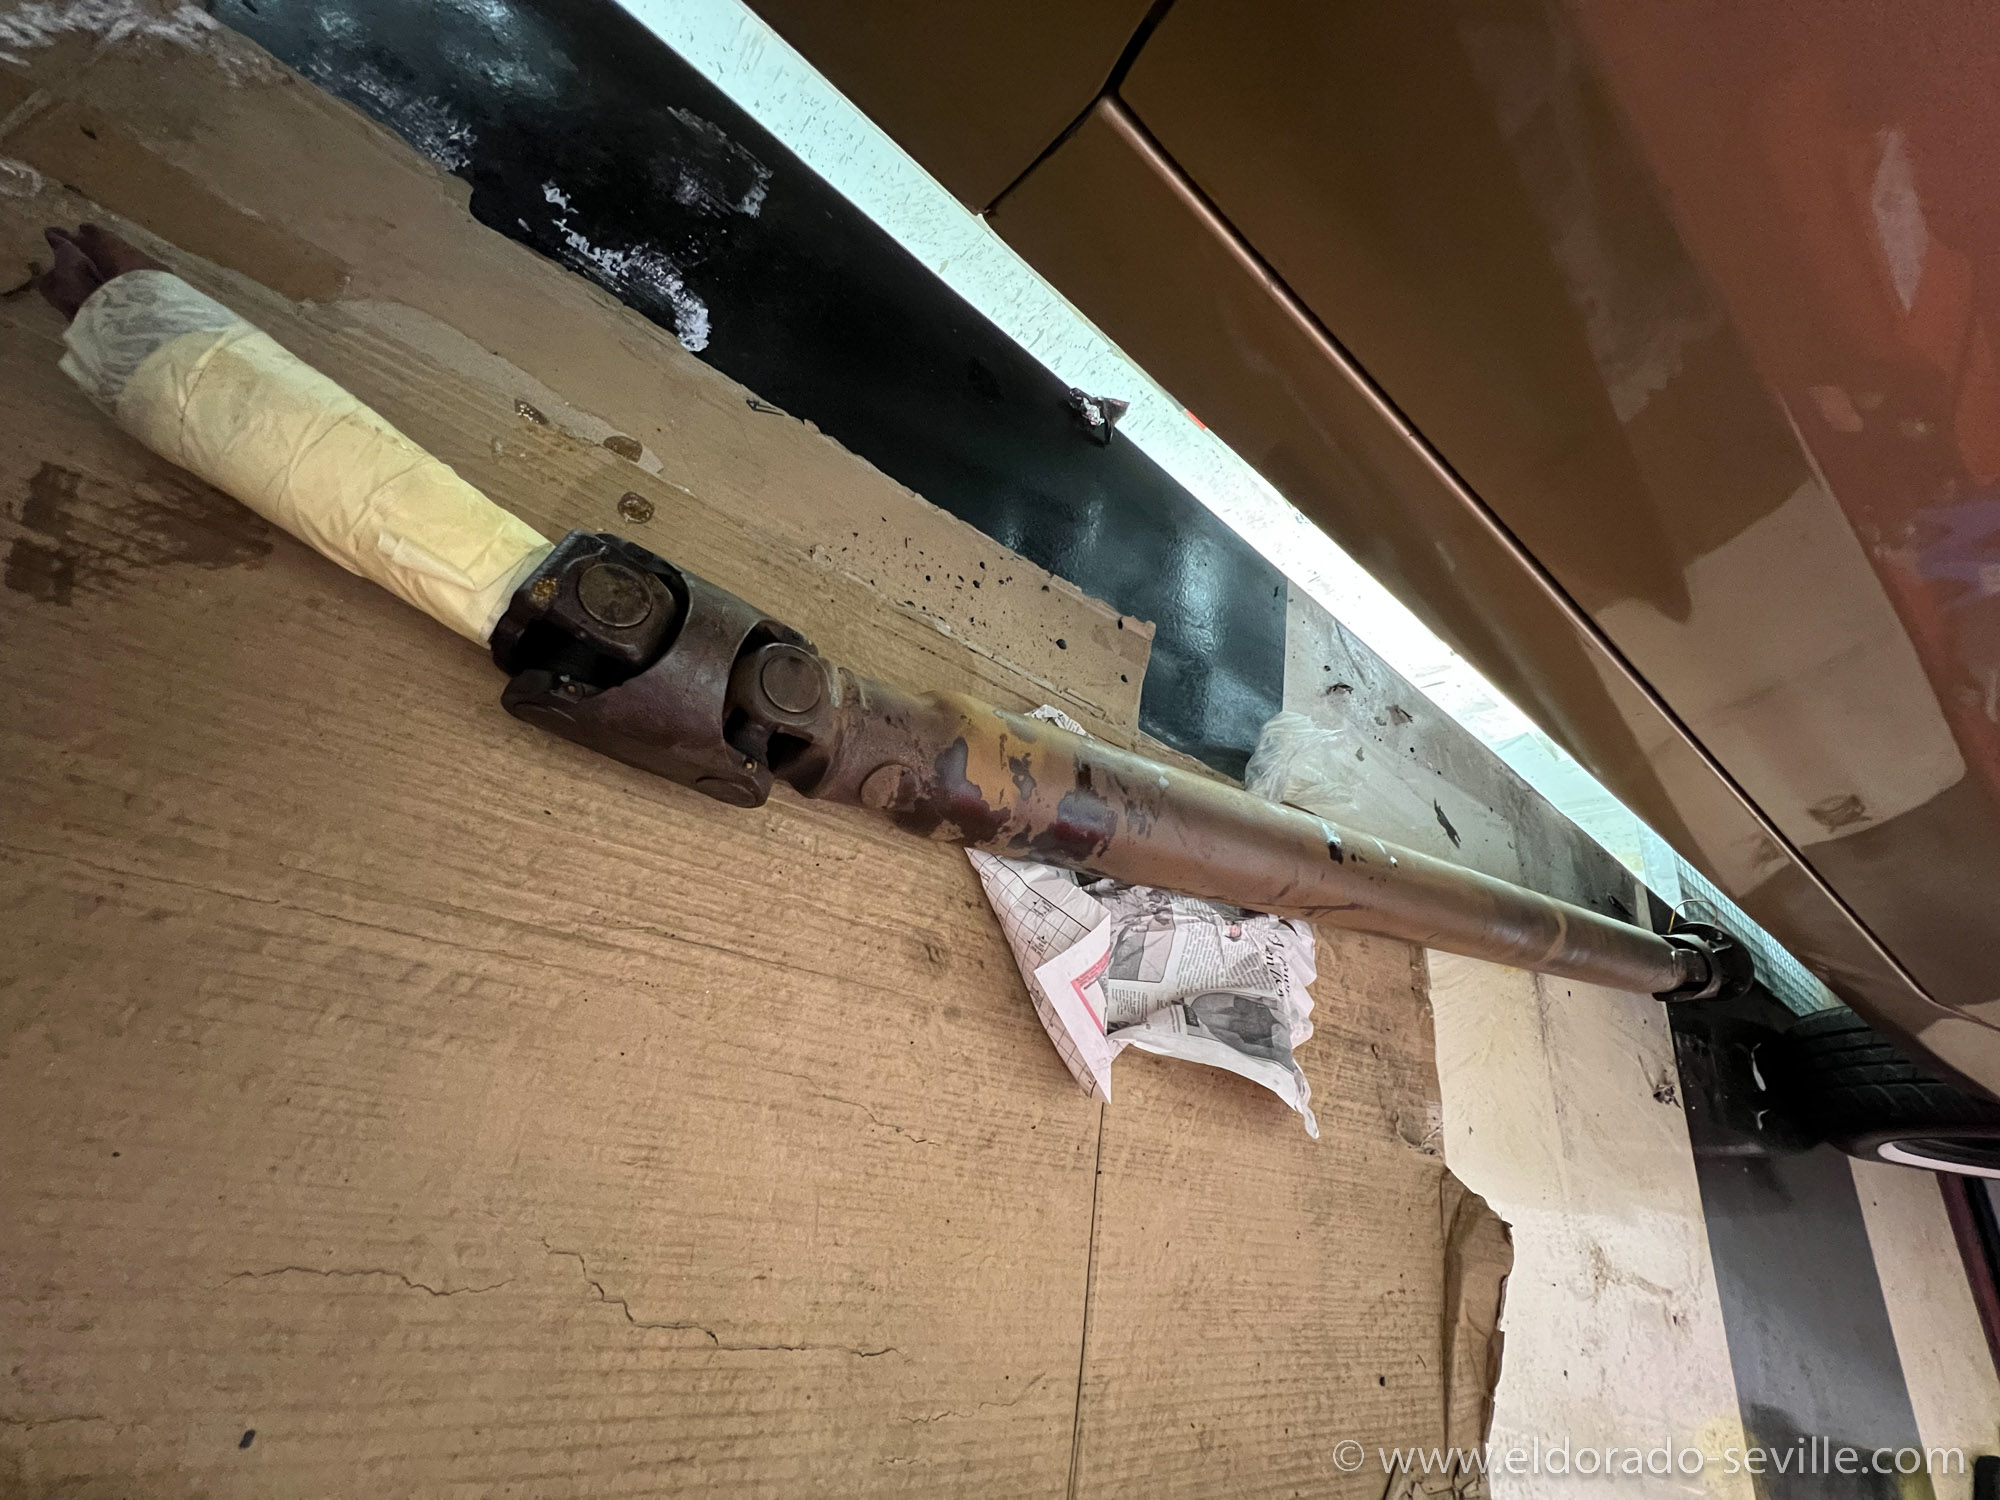
The removed drive shaft before rust removal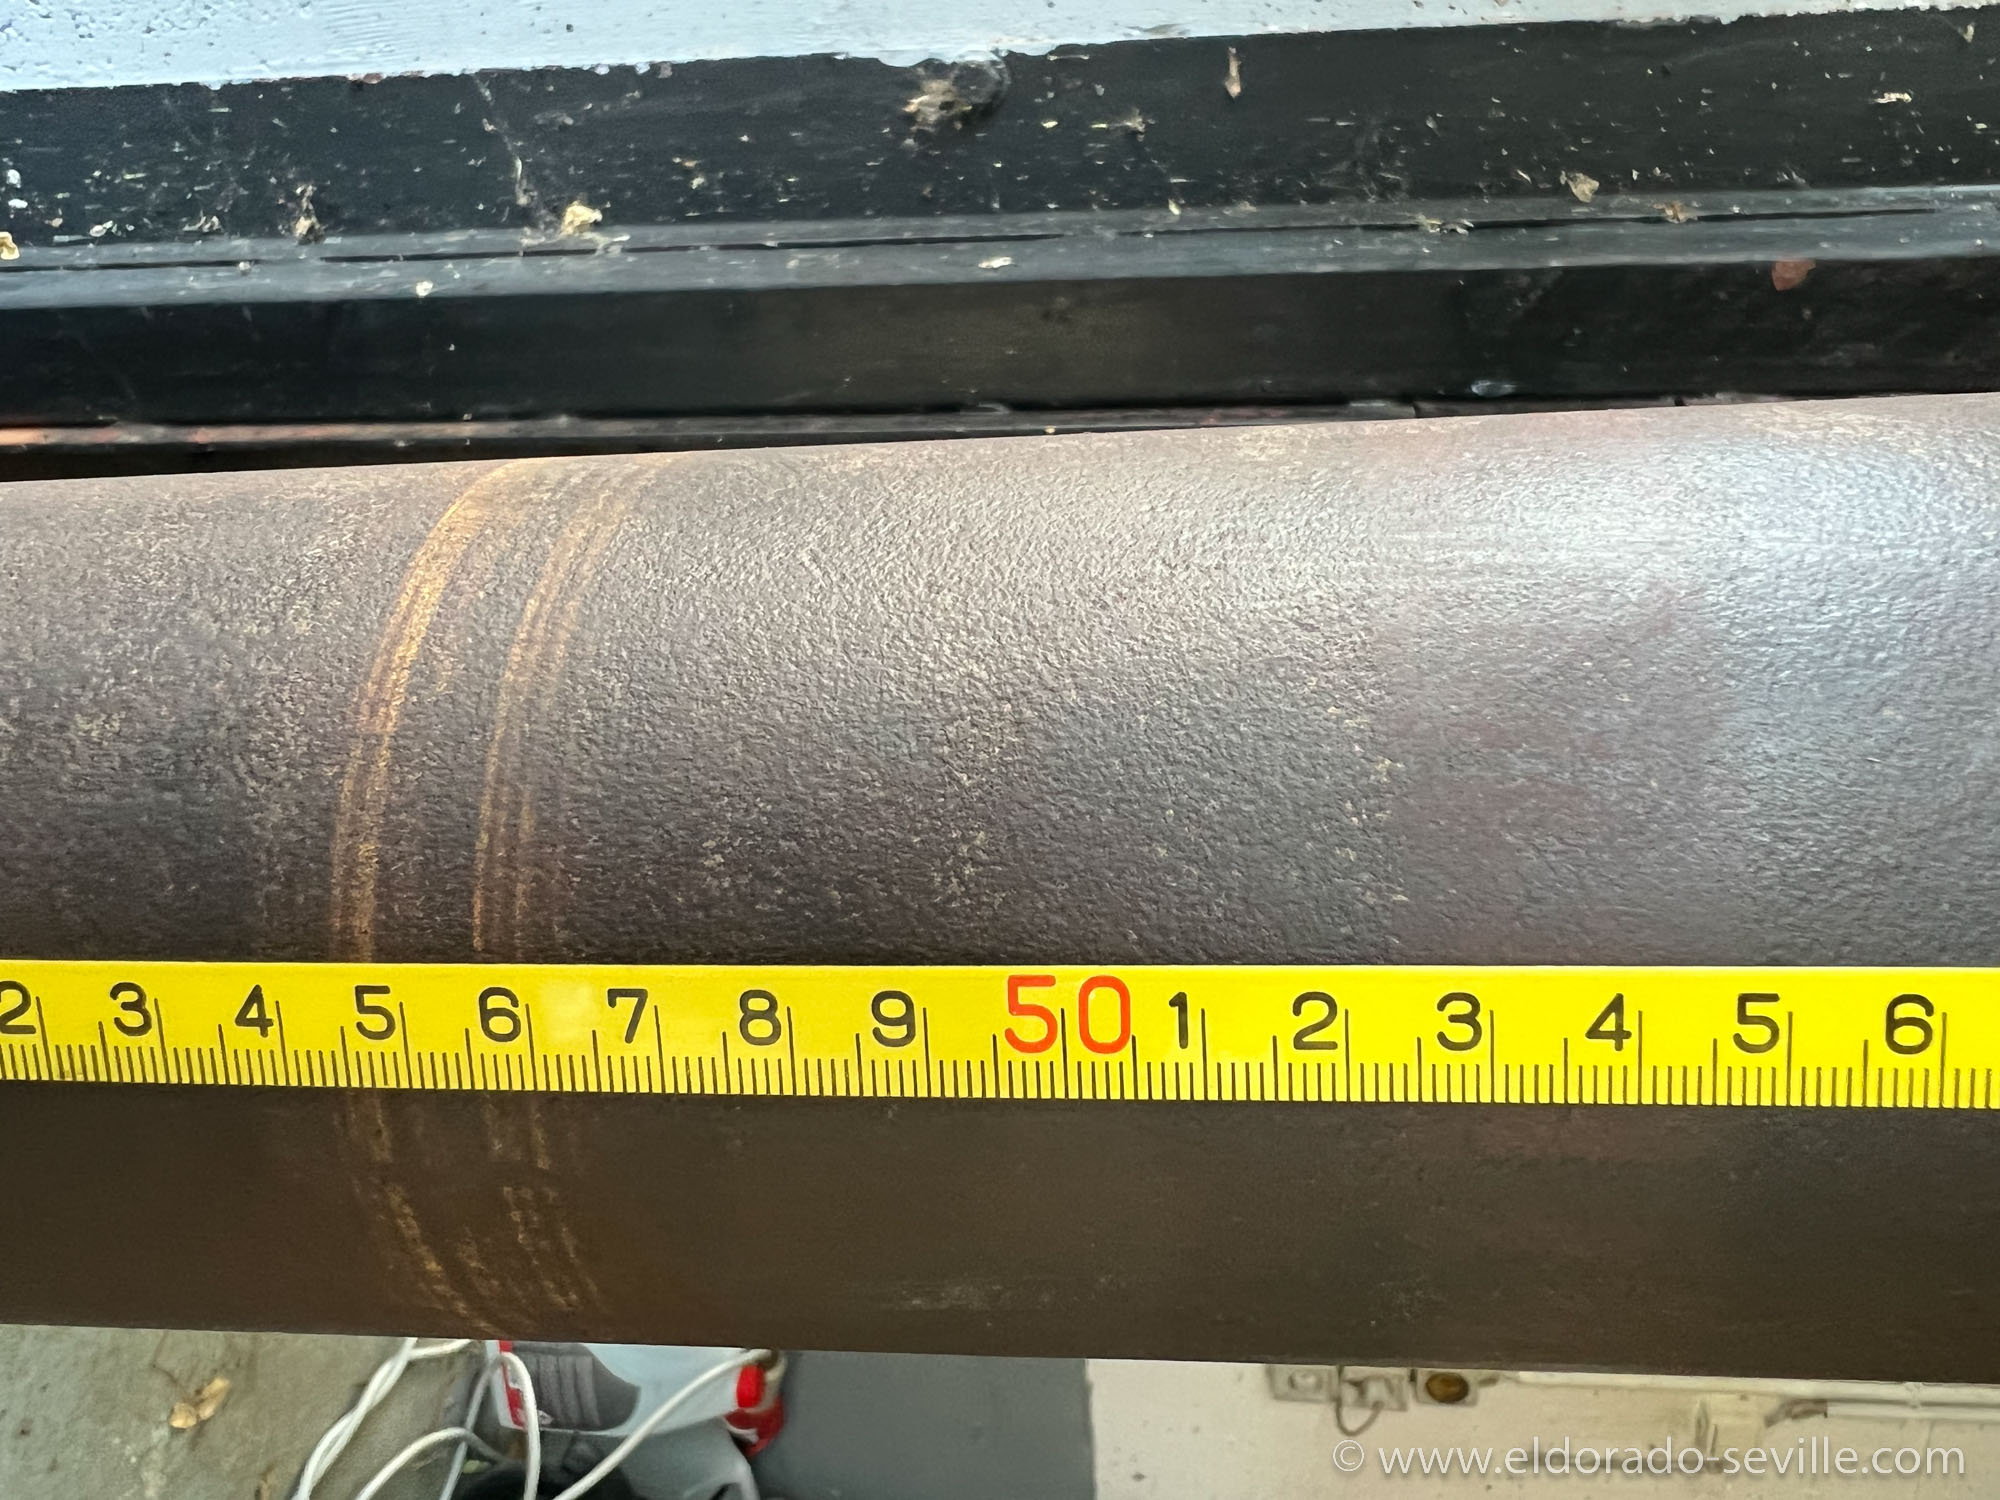
Remains of the factory markings on the drive shaft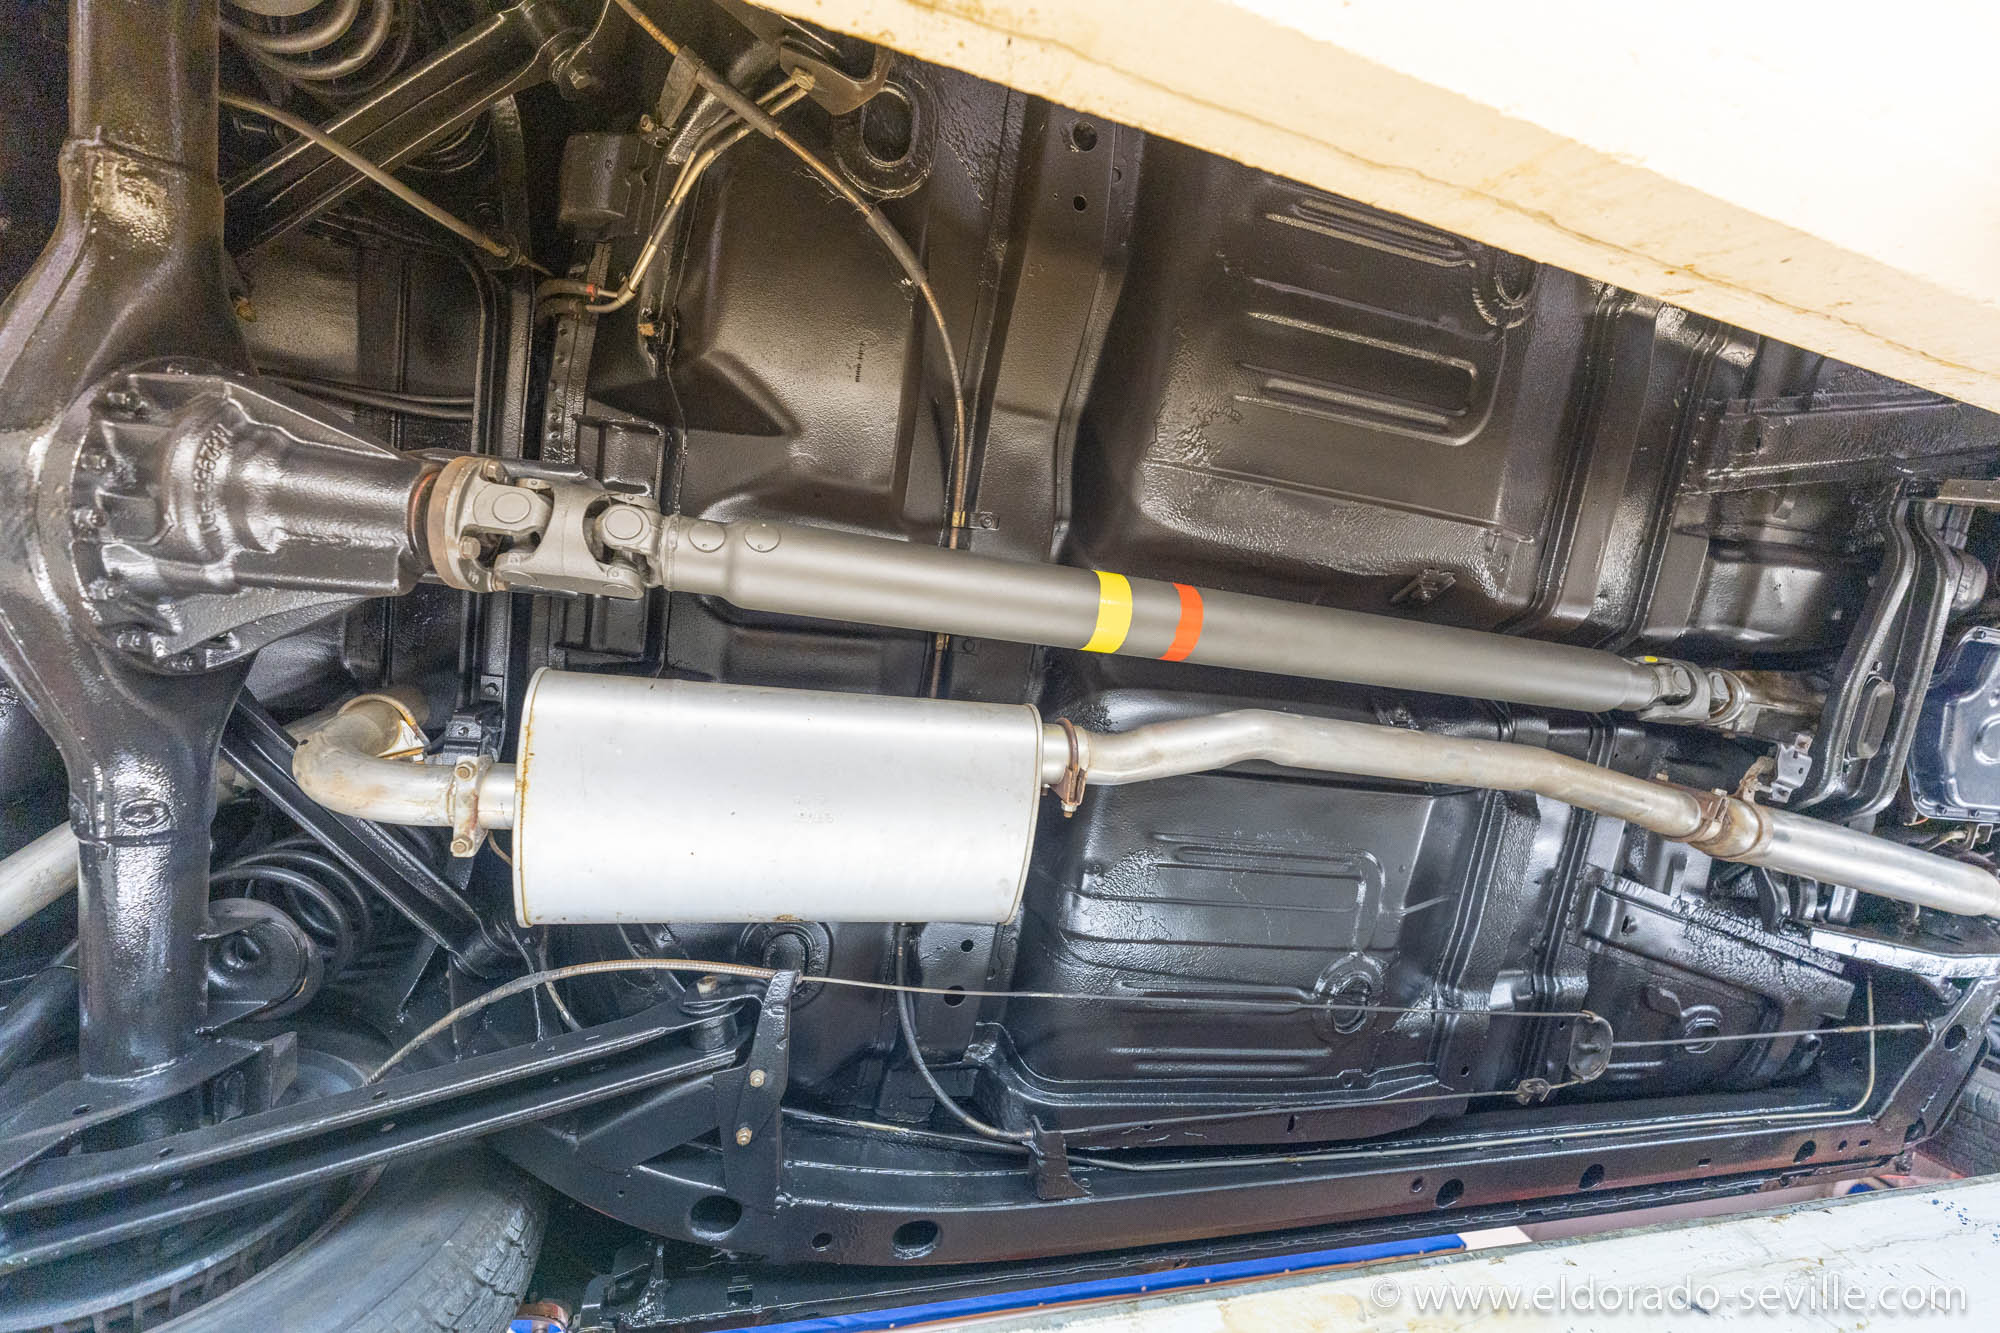
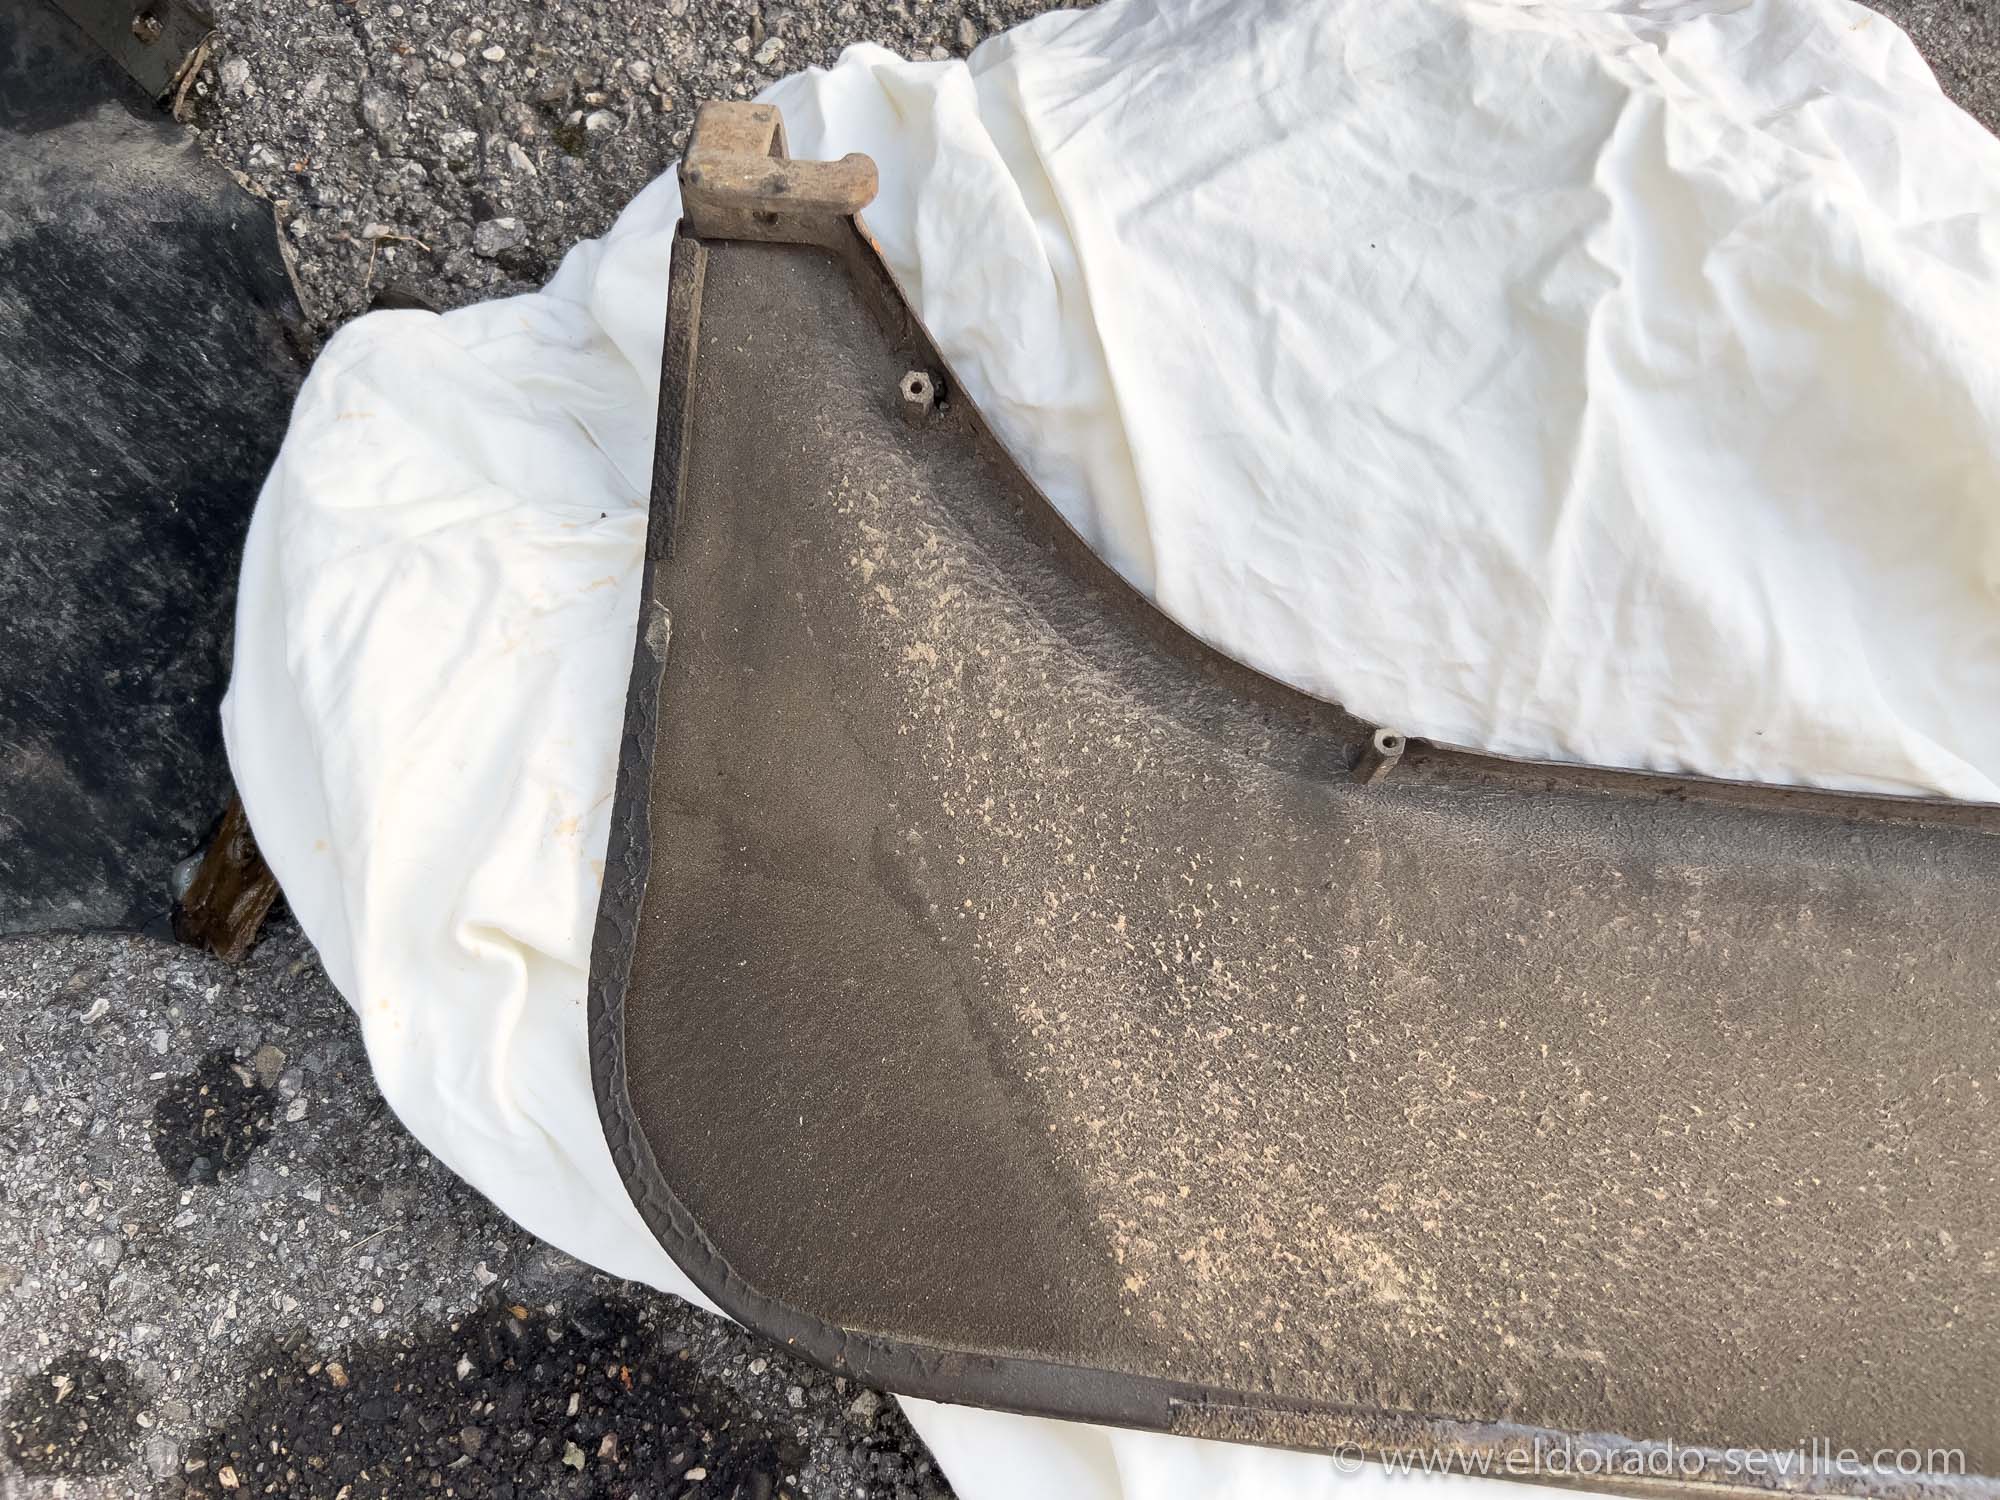
The fenderskirts were full of old undercoating as well.
The fender skirts also needed a lot of cleaning on the inside. I removed the old undercoating with a lot of scrubbing with tar remover. Afterwards I applied transparent undercoating showing off the original surface of the skirts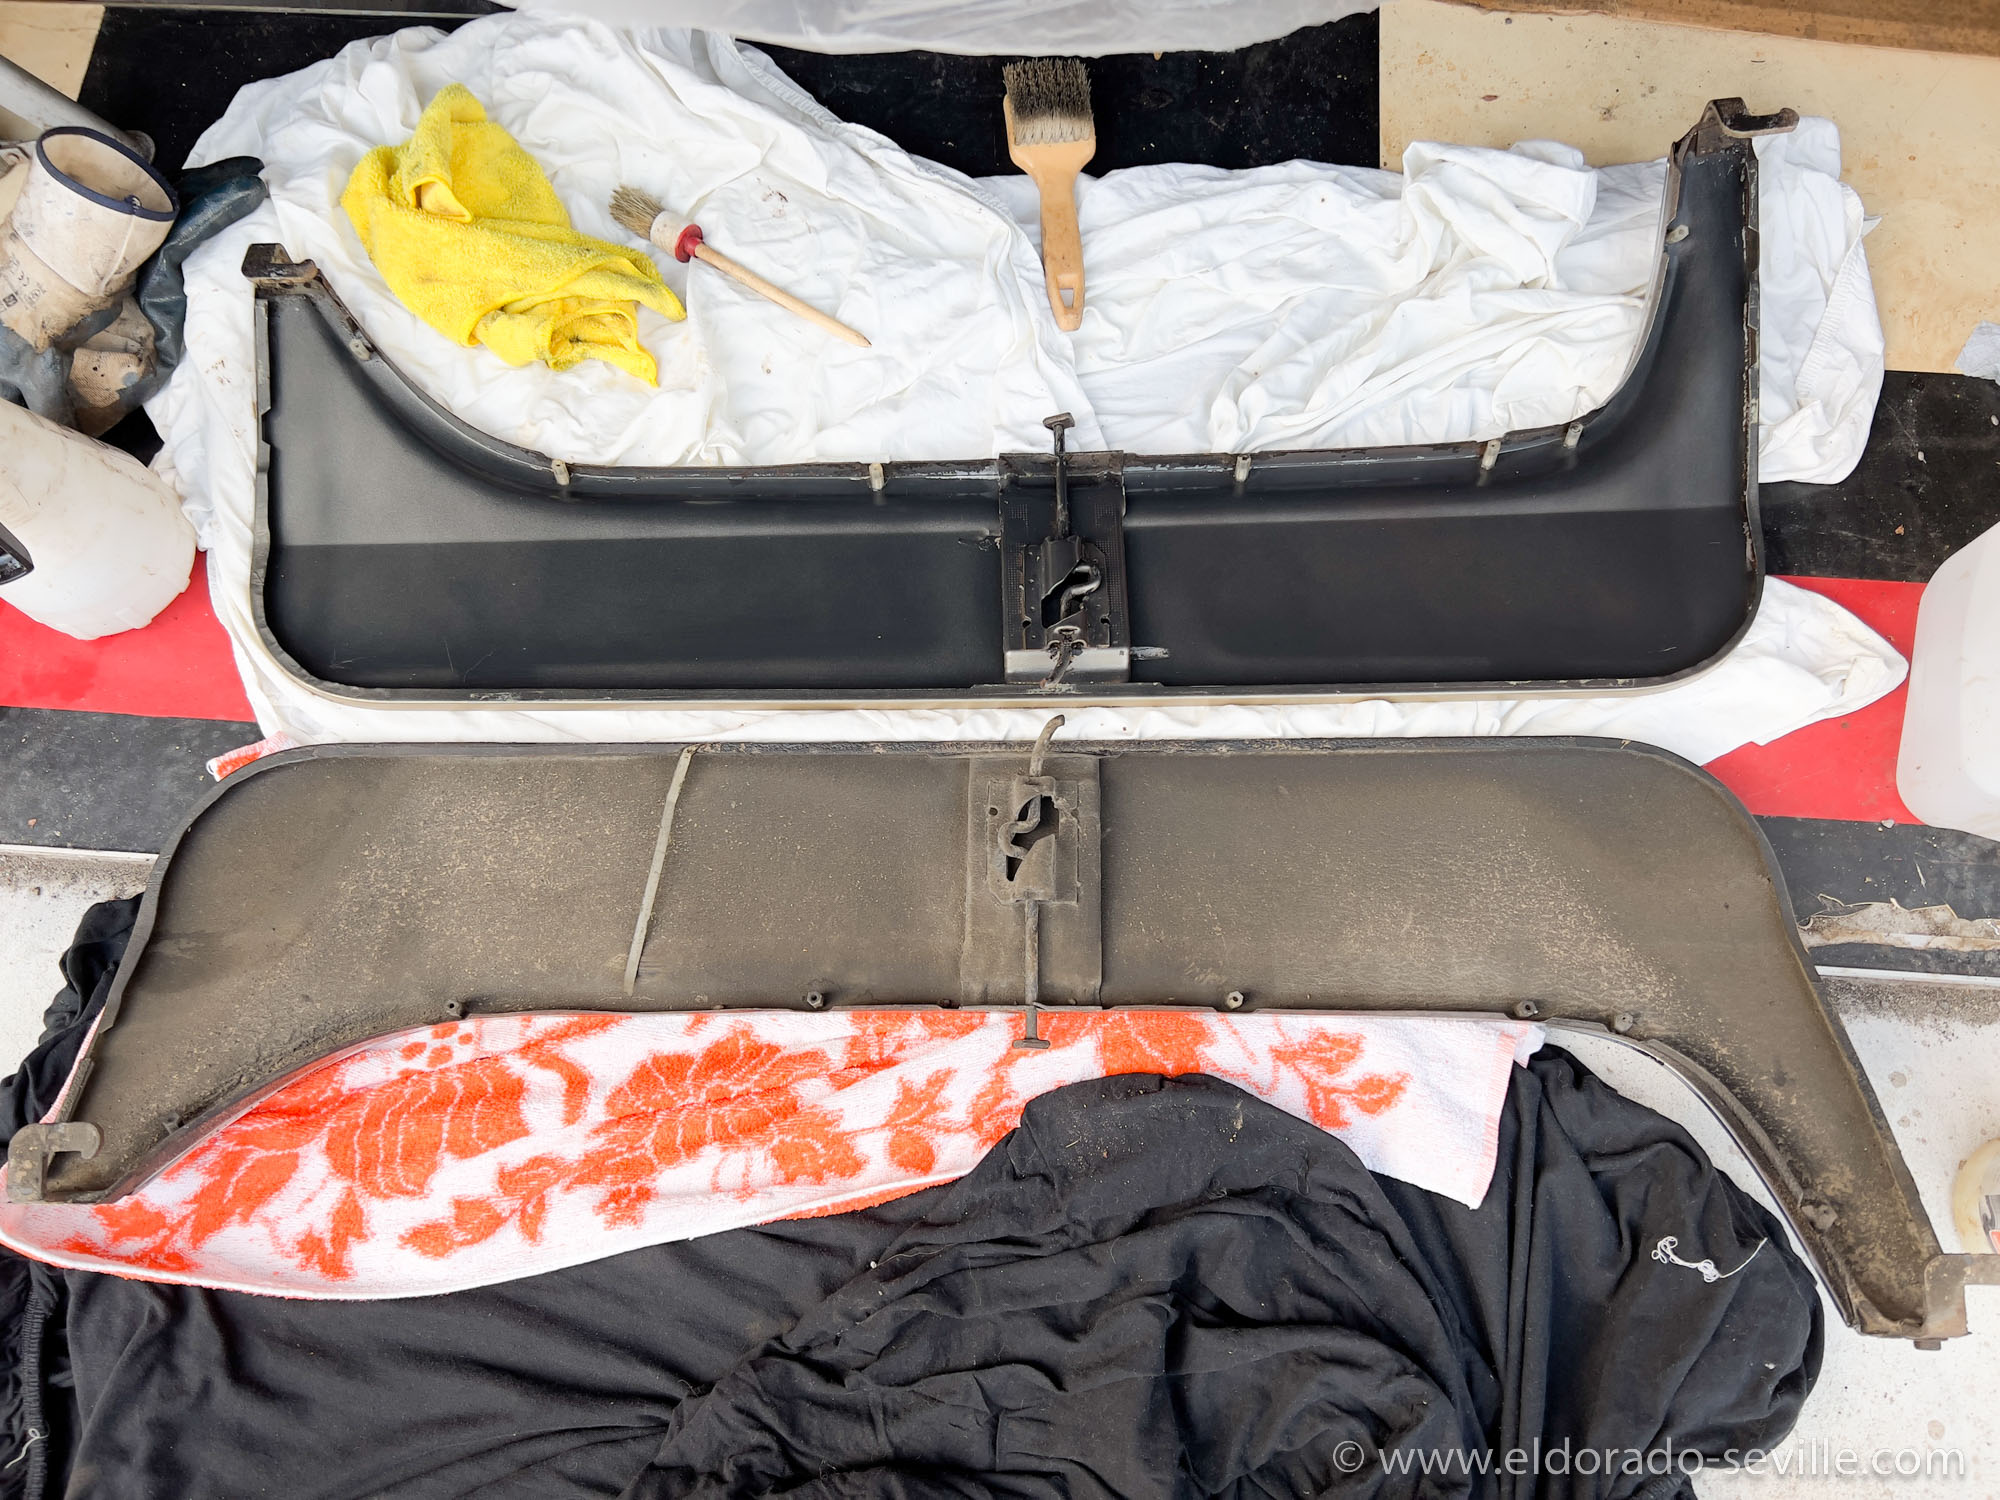
The fender skirts before and after cleaning
SPLASH GUARDS
Reproduction splash guards are available from a couple of vendors. They are made of masticated rubber like the originals. They look great at first sight. When I wanted to install them instead of my dirty old ones I noticed that one hole was too small to install the original mounting screw and washer. When I compared the original splash guards to the reproductions, I noticed that there are many small differences to the original ones. I could have installed the reproductions with some modifications but I decided to reuse my originals instead. They were full of old undercoating as well and it took a lot of work to get them look like new again. It involved a lot of scrubbing and a pressure washer. The chrome trim of the front wheel housings had a lot of undercoating overspray as well which I had to get rid off as well. Tar remover slowly dissolved the overspray.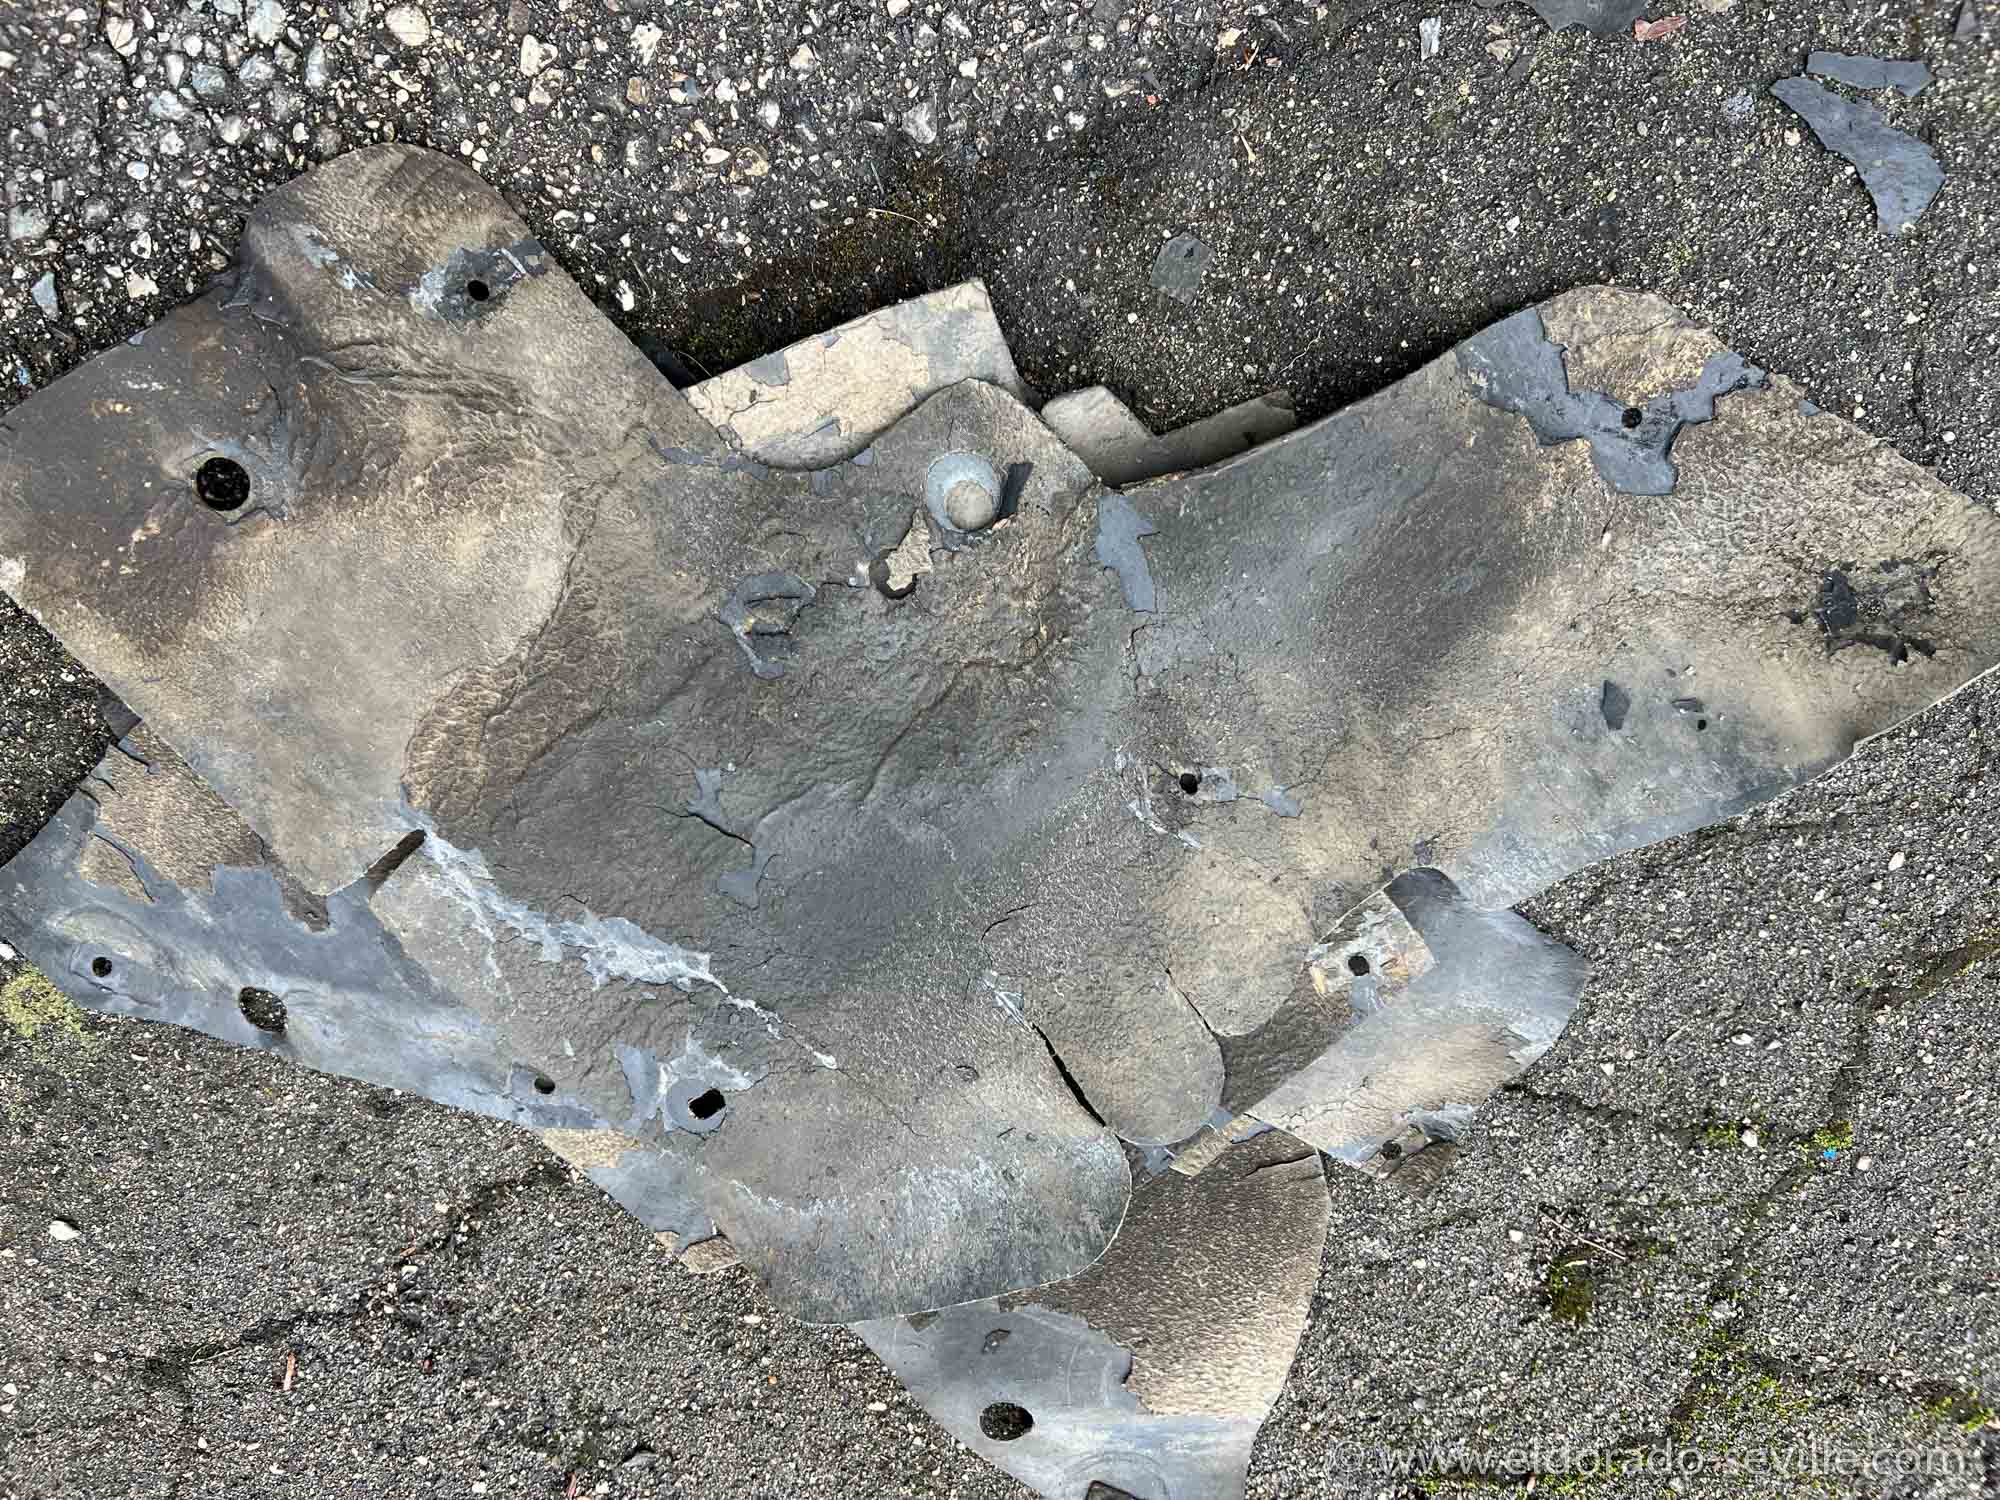
The rubber splash guards before
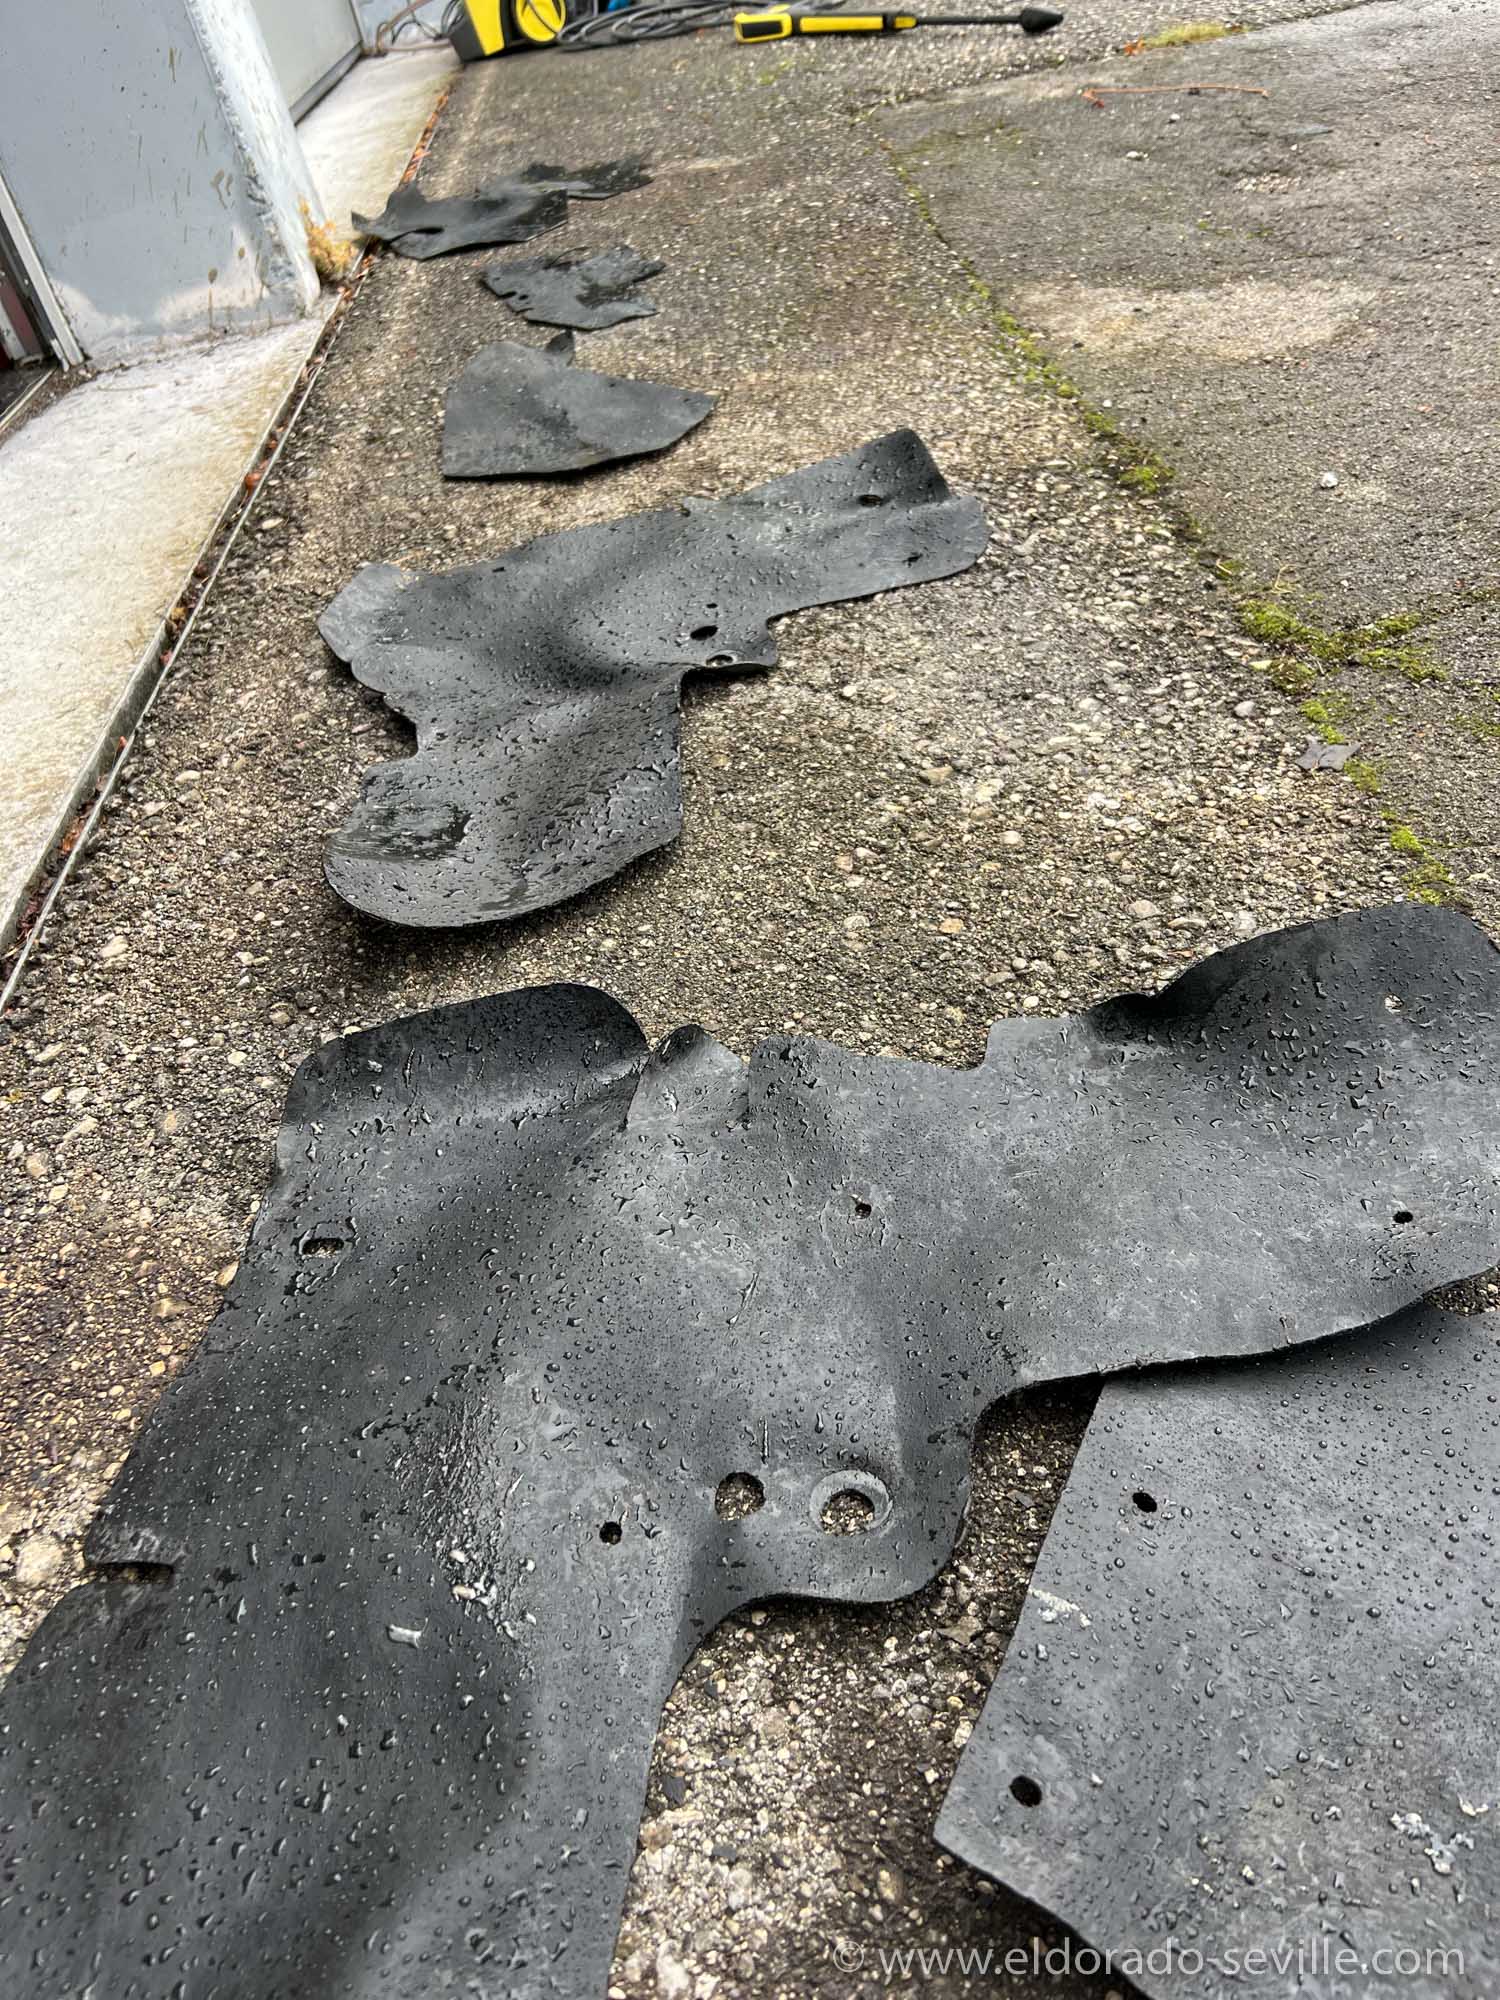
After cleaning
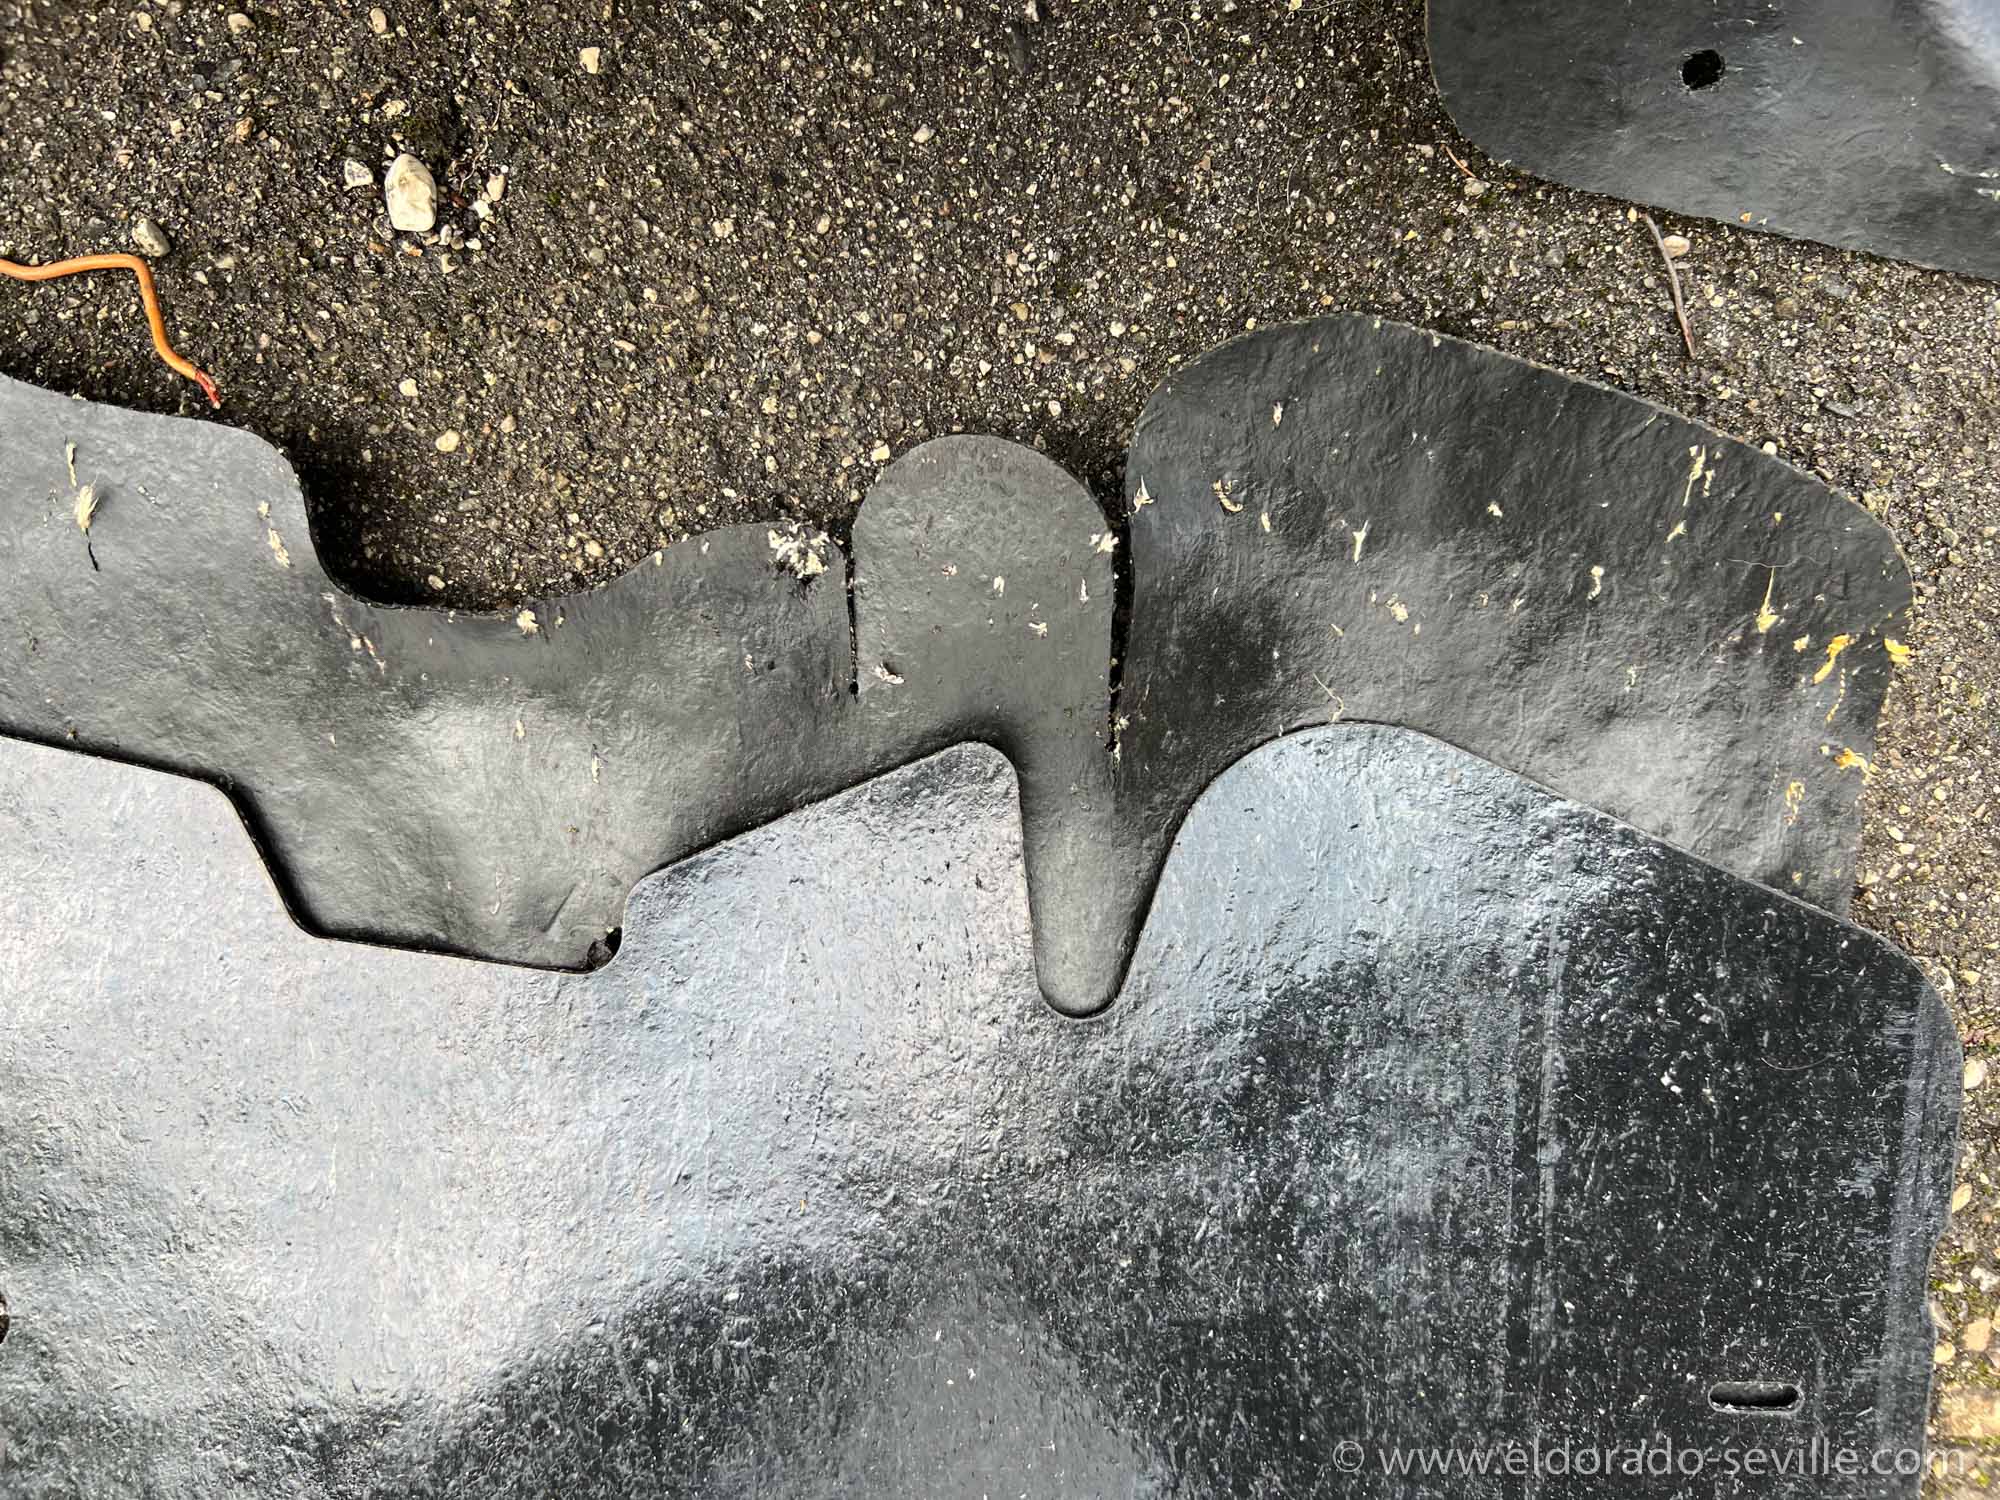
Some of the differences between the original and reproduction splash guards
I´m glad that this project is finished and the car now looks great from the underside as well ;-) It should be well protected even for the harshest conditions, but it probably wont ever get wet again anyway.
While I was down there I also replaced all 4 still original shocks and the front stabiliser linkage.
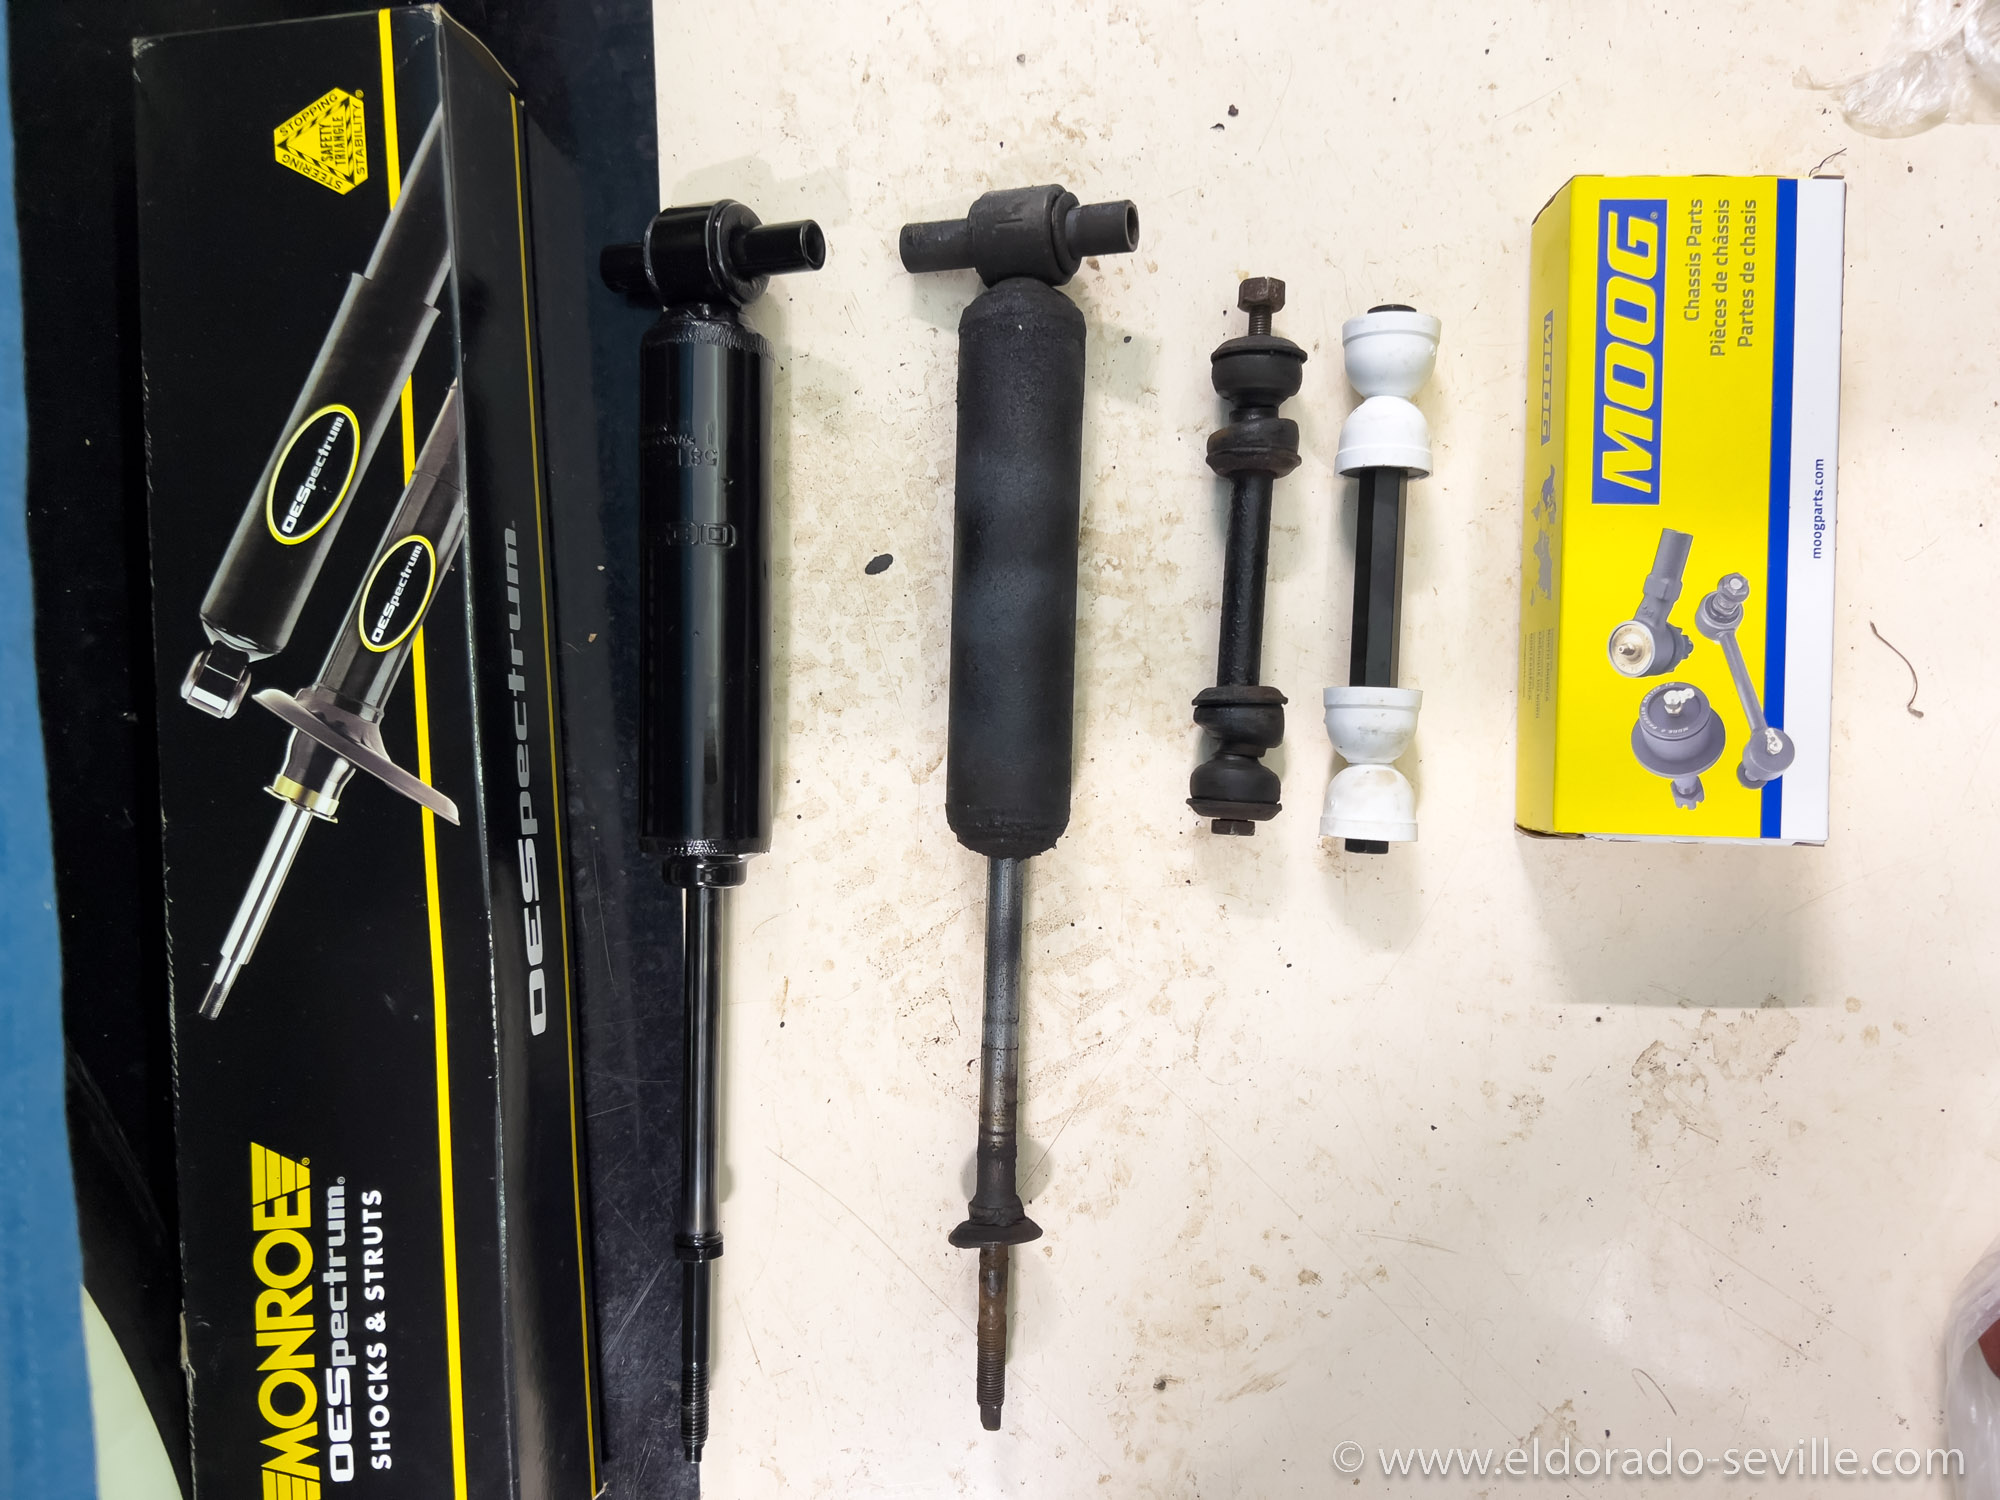
New and old front suspension parts
The front bumper buckets were slightly rusted as they were not protected in any way from the elements. On many cars these are rusted through. I chemically removed the rust and sealed them from the inside.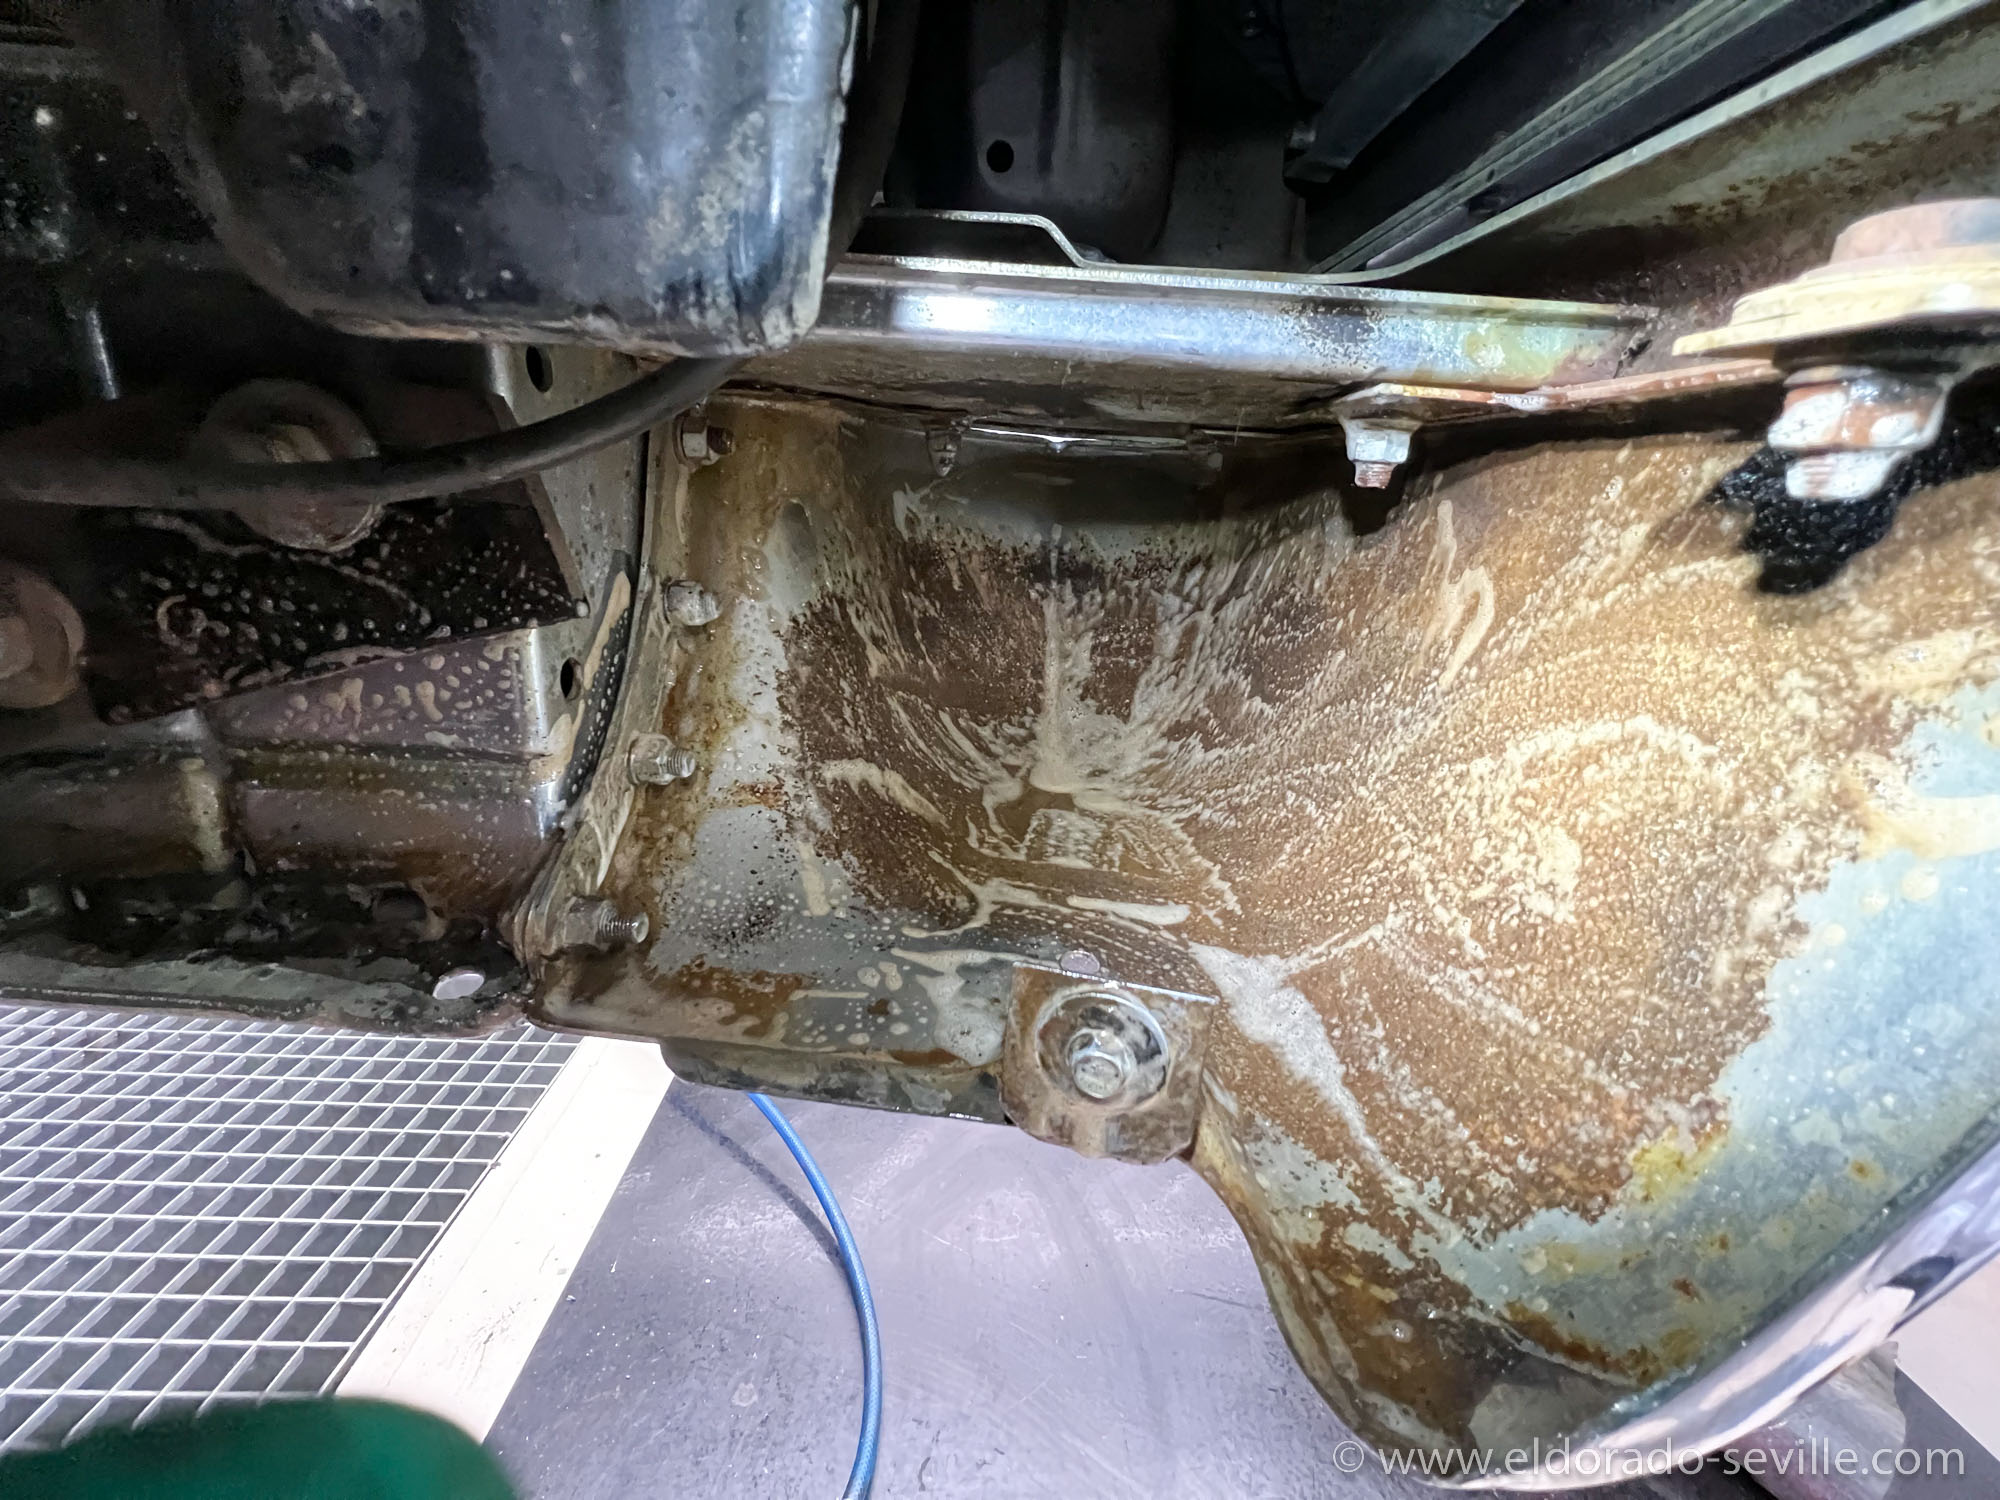
The outer front bumper buckets were rusted and I used rust removing gel to remove all the rust.
AFTER
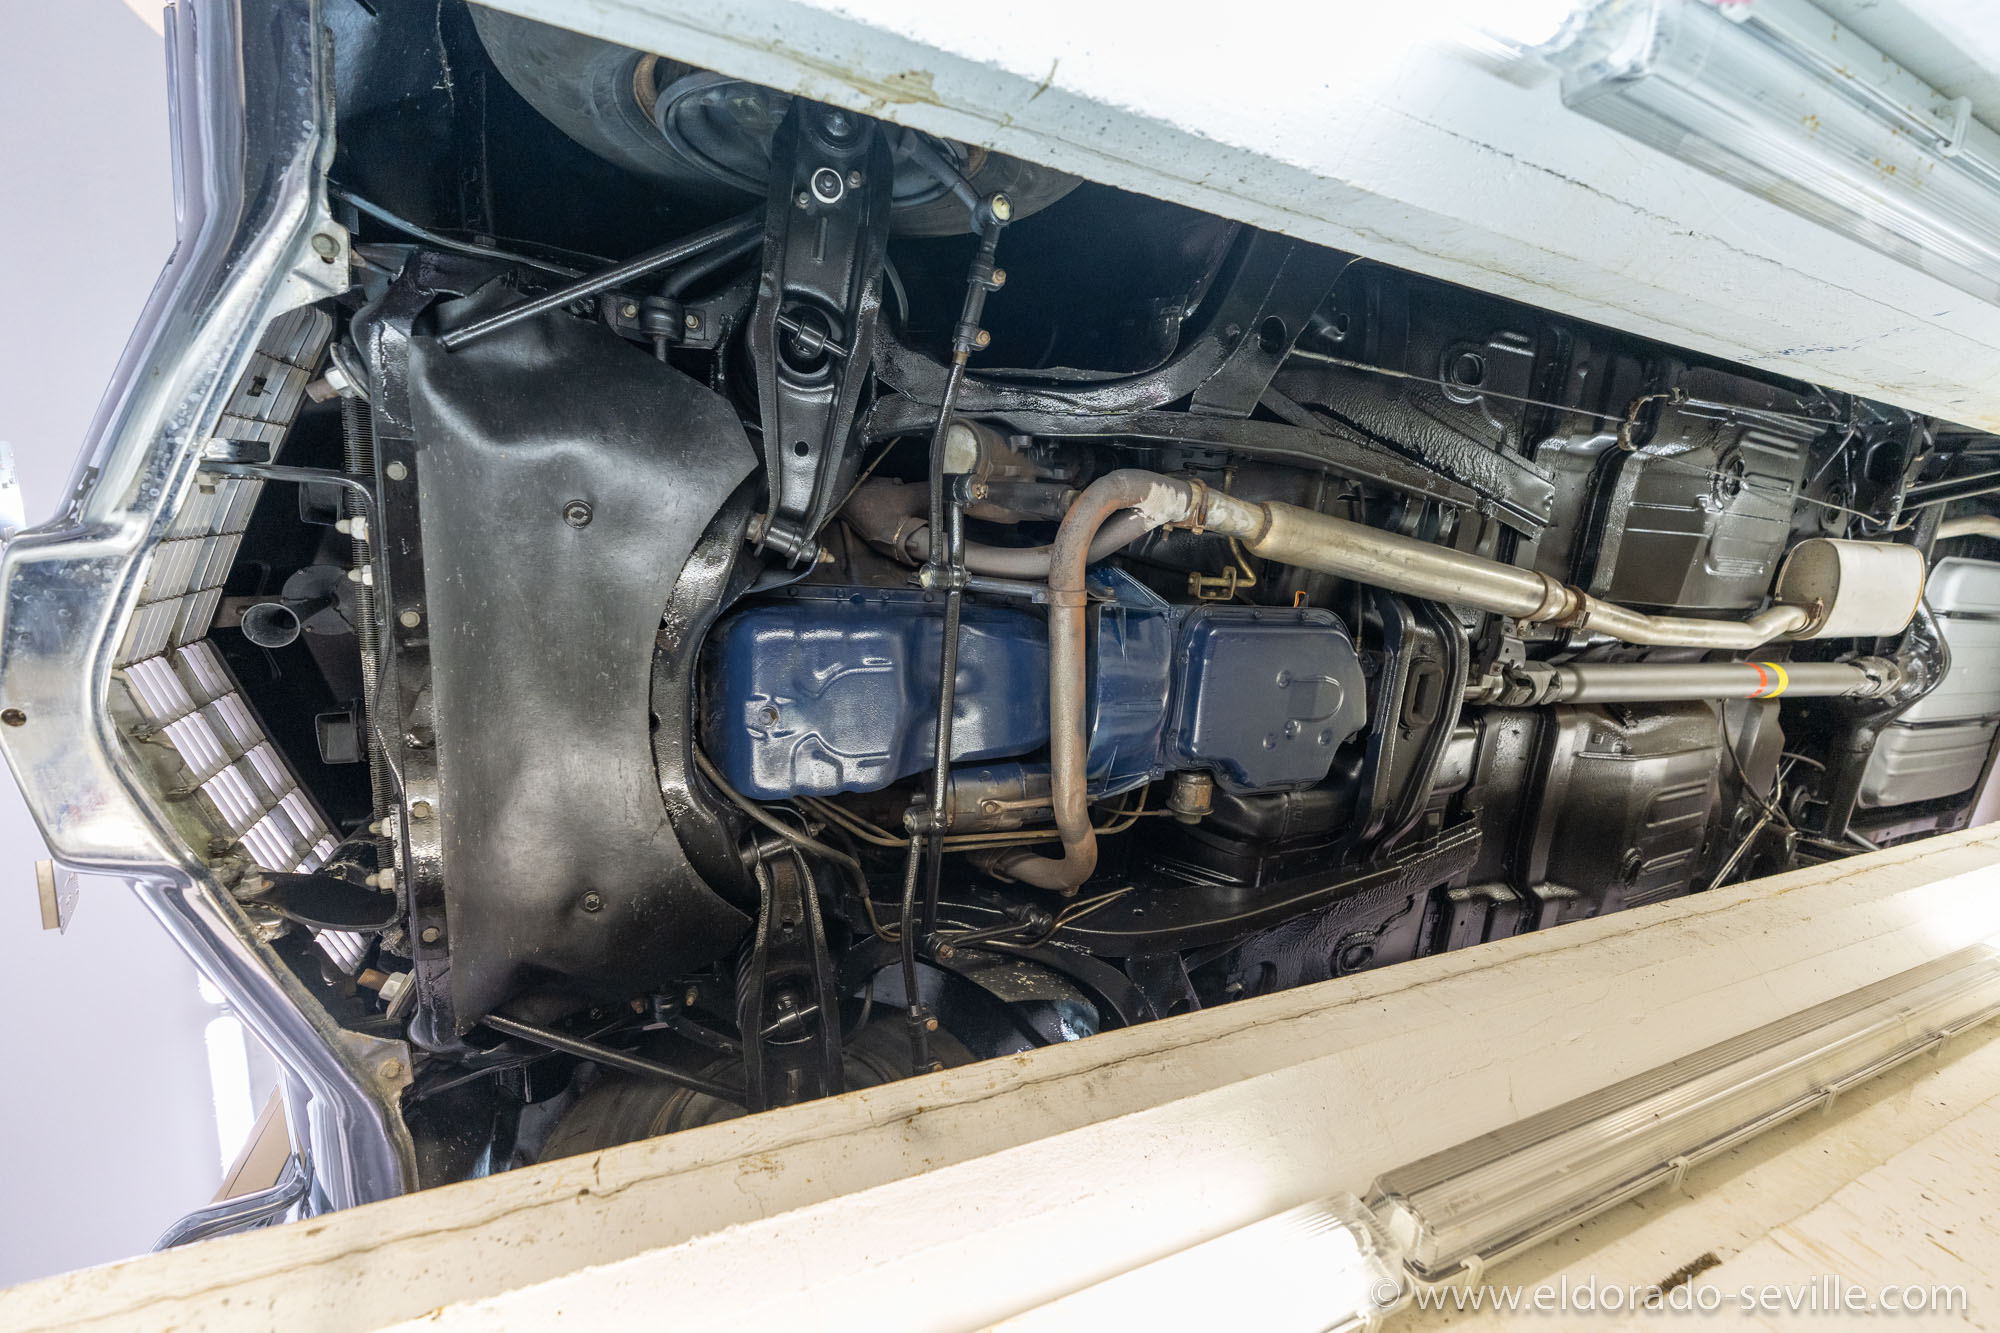
Here is how the finished car looks.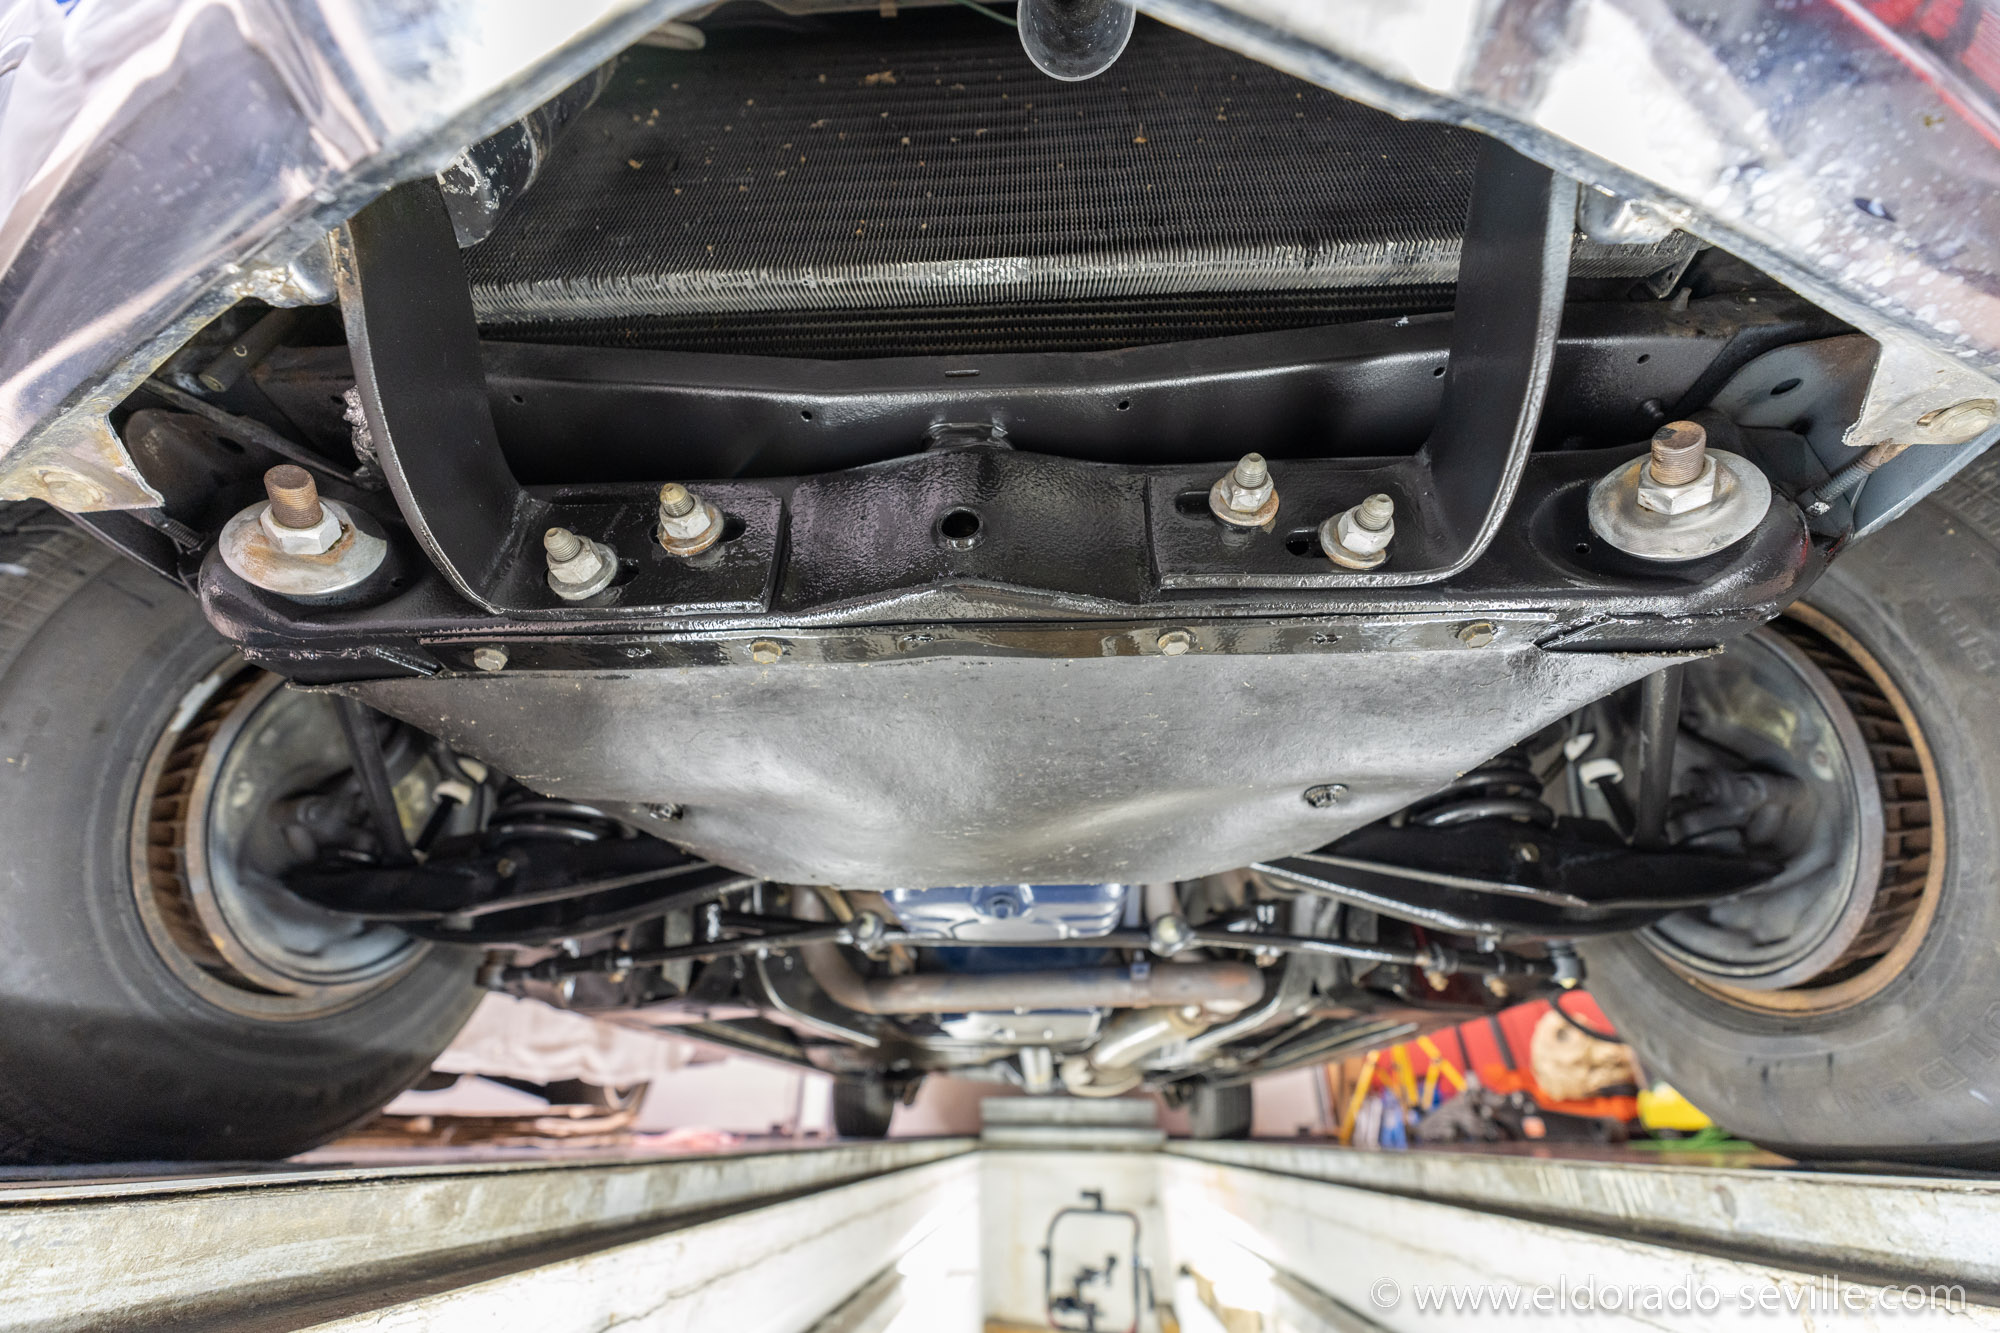
1966 Cadillac Coupe deVille (16)
1967 Cadillac DeVille (54)
1967 Cadillac Eldorado (73)
1971 Lincoln Continental Mark III (24)
1974 Cadillac Coupe deVille (46)
1978 Cadillac Eldorado Biarritz (25)
1996 Buick Roadmaster (20)
Cadillac BIG Meet (2)
Car Shows (55)
Cruising (4)
CT6 (1)
For Sale (3)
Garage Stuff (32)
Pacer (1)
Restoration (140)
Various (55)
Video (20)
Website News (31)
- 6 way power seat
- 8-track
- 10 Ohm
- 429
- 1932
- 1957
- 1958
- 1958 Cadillac Eldorado Seville
- 1958 Cadillac Repair Tip
- 1959 Cadillac Eldorado Seville
- 1964
- 1965
- 1966
- 1966 Cadillac Coupe deVille
- 1966 Cadillac Repair Tips
- 1967
- 1967 Cadillac DeVille
- 1967 Cadillac Eldorado Repair Tip
- 1967 Cadillac Repair Tip
- 1967 Eldorado
- 1968
- 1970 Cadillac Eldorado
- 1971
- 1971 Lincoln Continental Mark III
- 1974
- 1974 Cadillac Coupe DeVille
- 1974 Cadillac Repair Tip
- 1976
- 1977
- 1978
- 1978 Cadillac Eldorado Biarritz
- 1978 Cadillac Repair Tip
- 1980 Cadillac Eldorado Biarritz
- 1996
- 2012
- 2014
- 2017
- 2018
- 2019
- 2022
- 2023
- 2025
- 3063206
- 7027235
- 7800483
- 7805675
- 7805676
- 12355706
- 17058531
- 17059968
- 17059969
- 22010515
- 22010661
- A.I.R
- A6
- AC
- AC Compressor
- AC Electrical Diagram
- ACC
- Accelerator Pump
- Accelorator pump
- Accident
- Actuators
- Adriatic Blue Metallic
- Ads
- Aftermovie
- Air Pump
- Aircondition
- AIRPUMP
- ALC
- Alternator
- AM
- AM-Transmitter
- Antenna
- Anti Rattle Clips
- Antique Gold
- Arizona Vintage Parts
- Arrival
- Article
- ASC
- Ash Tray removal
- ATC
- Atlantis Blue Firemist
- Austria
- Austro Classic
- Autolite SP-459
- Automatic Seat Back Release
- Award
- Banner
- Barn Find
- Battery
- Battery Tray
- Beach Race
- Bearing
- Bendix
- Biarritz
- Bigfoot
- Bill Hirsch Engine Enamel
- Bleeder Screws
- Bleeding
- Blower
- Bodywork
- Bolts
- Book
- Borg
- Brake Booster
- Brake Fluid
- Brake Gray
- Brakes
- Broken Bolt
- Brougham
- Bucket seats
- Buick
- Bumper End
- Bushings
- Cadillac
- Cadillac BIG Meet
- Cadillac BIG Meet
- Cadillac birthday cake
- Cadillac Blue
- Cadillac Color Selections Dealer Book
- Cadillac Coupe deVille
- Cadillac Dealer
- CADILLAC GRAND EUROPEAN
- Cadillac Meeting
- Cadillac Mini Meeting
- Camaro RS
- Caorle
- Car Show
- Carburetor
- Card
- Carpet
- Carter AFB
- Cavalry Twill Vinyl
- CB
- CBM
- CCCD
- Choke
- Christmas
- Citizens Band
- Classic Cadillac Club Deutschland
- Clay Towel
- Cleaning
- Clock
- Clockwork
- Clutch
- Clutch Coil
- Collector
- Colonial Yellow
- Color Coded Springs
- Commercial
- Compound
- Compressor
- Condenser
- Continental Mark III
- Control Head
- Conversion
- Convertible top
- Coolant
- Corona
- Cowl
- Cruise Control
- Cruising
- CT6
- CV Boots
- CV JOINTS
- D6230
- Dash Trim
- Decal Removal
- Decals
- Decoration
- Dehumidifier
- Delco Moraine
- Der Standard
- detailing
- Deville
- Diagnosis Chart
- Diagram
- Dial
- Digital Rotary Drum Clock
- Diner
- Disc Brakes
- Distributor
- Diverter Valve
- Door Jamb Switch
- Door Rubber Conduit
- Dornbirn
- Dot3
- Drive Shaft
- Driving tour
- Drum brakes
- Dry Ice Blasting
- Dry Ice Cleaning
- DVD
- Eastwood
- Eldorado
- Electric Choke Thermostat
- Electrical schematic
- Elvis
- Engine Bay
- Ep
- Epoxy floor
- Europe
- Evaporator
- Exide
- Factory Markings
- Fender Skirt
- Floor
- Flushing
- Flyer
- Foam
- For Sale
- Front AXLE
- Front brakes
- Front bumper filler
- Front Floor
- Front wheel bearing
- Fuel Filter
- Fuel Pump
- Fuel Sending Unit
- Fusible Link
- Garage
- Garage Cabinets
- Gasket
- GE
- Gear indicator
- General Time
- Glove box light
- Grand European
- H4
- Haus of Hot Rod
- Headlight Actuator
- Headlight doors
- Headlights
- Heater Core
- Heater Hose
- Heater Valve
- High Idle
- History
- Holley
- Honest John
- Hood
- Hood Emblem
- Hood Ornament
- Hose Clamp
- Hot Choke
- Hot Water Valve
- HotRod
- How to
- Hödlmayr
- Ignition Diagram
- Illuminated Entry
- John D‘Agostino
- John Foust
- Klassikwelt Bodensee
- Kremsmünster
- LaSalle
- Leather seats
- Light Switch
- Limited
- Lincoln
- Lincoln Mark III Repair Tip
- Low Mileage
- Magazine
- Marilyn Monroe
- Mark III
- Master Cylinder
- Master Switch
- Master Vacuum Switch
- Media Blasting
- Meeting
- Meguiras
- MK II
- Mobile
- Model
- Moldings
- Mom
- Mopar Nationals
- Mostkost Kustom
- Movie
- Munich
- Neon
- NOS
- Oberösterreicher des Tages
- oilchange
- ORF
- Overspray
- Pacer
- Paint
- Paint correction
- Paintjob
- Part Number
- Parts
- Patch Panel
- Perfect Circle
- Permabag
- Persian Lime
- Photo shooting
- Photoshooting
- Pictures
- PinUp
- POA Valve
- Power Antenna
- Power Servo
- Power Vent Windows
- Power Window
- Printed Circuit Board
- Programmer
- Pulley
- Quadrajet
- Quarter Panel
- Quartz Conversion
- R134
- Radiator
- Radio
- Rattle
- Rear brakes
- Rebuild
- Recalibrate
- RediRad
- Reed Switch
- Relais
- Relaunch
- Removing Overspray
- Repaint
- Repair
- Restoration
- RIP
- Roadhouse
- Roadmaster
- Rochester
- Rocker Arm Cover
- Rocker Panel Extension Clips
- Rostio
- Rotary Valve
- Rotterdam
- Rupes
- Rust removal
- Rust removal gel
- Sabre Wheels
- Sand Blasting
- Sandblasting
- Screed
- Season Greetings
- Seasons Greetings
- Seat Back Locks
- Seat Padding
- Seat Transmission
- See through ornament
- Self adjusters
- Self Starter
- Sepp's Garage
- Seville
- Sheetmetal
- Shocks
- shop manual
- short
- Sign
- Solenoid
- Spark Plug Wire Routing
- Speakers
- Special Award
- Speed Bleeder Screws
- Splash Guard
- Starter Diagram
- Starter Motor
- Steering Column
- Storage
- suction throttling valve
- sunroof
- suspension
- Swirl Mark removal
- Switzerland
- T3
- Taillight Cover
- Texan´s Choice Award
- Thermostat
- Tilt and Telescope
- Time capsule
- Tomsclub
- Torque Specifications
- Tower Hose Clamp
- Towtruck
- Trailer
- Transducer
- Transmission
- transmission control selector
- transmission control selector indicator light
- transmission shift indicator
- Treadle Vac
- Treffen
- Tri-Band
- Troubleshooting
- Trunk Cardboard Kit
- Trunk lid
- Trunk lining
- Trunk to bumper cover
- Turn Signal Switch
- TV
- Typisierung
- Ultimate Garage
- Underbody
- Undercarriage
- Undercoating
- Undercoating Removal
- Vacuum Booster
- Vacuum diagram
- Vacuum hoses
- Vacuum Master Switch
- Vacuum Schematic
- Vacuum Valve
- Valve Cover
- Various
- Vent Window Switch
- Vibration
- Vibrator
- Vicodec roof
- Video
- Vinegar
- Vinyl Roof
- Visitor
- Washer Fluid Float
- Washer Fluid Low Level Indicator
- Water Pump
- Wax
- Weatherstripping
- Website News
- Westclox
- Wheel Bearings
- Wheel Housing
- Wiesbaden
- Windlace
- Winter
- Wiring
- Wiring Diagram
- Wonderbar
- Workbench
- Zurzach
 GERALD´S CADILLACS - NEWS