 GERALD´S CADILLACS - NEWS
1974 CADILLAC DIGITAL ROTARY DRUM CLOCK REPAIR AND SERVICE
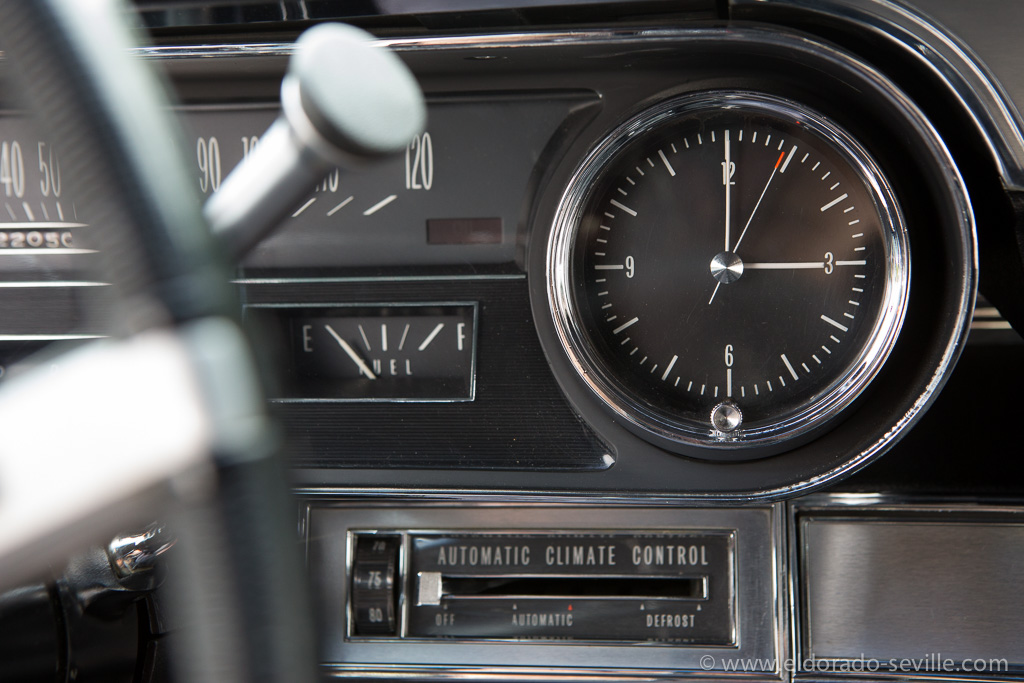
The clock still works on warm summer days or when the heat is on, but it can get stuck from time to time and does not work on colder days at all.
Its a clear sign that it needs a good cleaning and some fresh oil. My guess is that it was never serviced as the car is a low mileage beauty which was stored for longer periods of time.
While I have successfully brought some regular clocks from 1958 to 1967 back to life in the past , I have never worked on a digital rotating drum clock before, and somehow I can't find any information on the internet about it...
I have already showed it to the clockmaker in my town and asked if he could service it, but he did not even want to touch it...
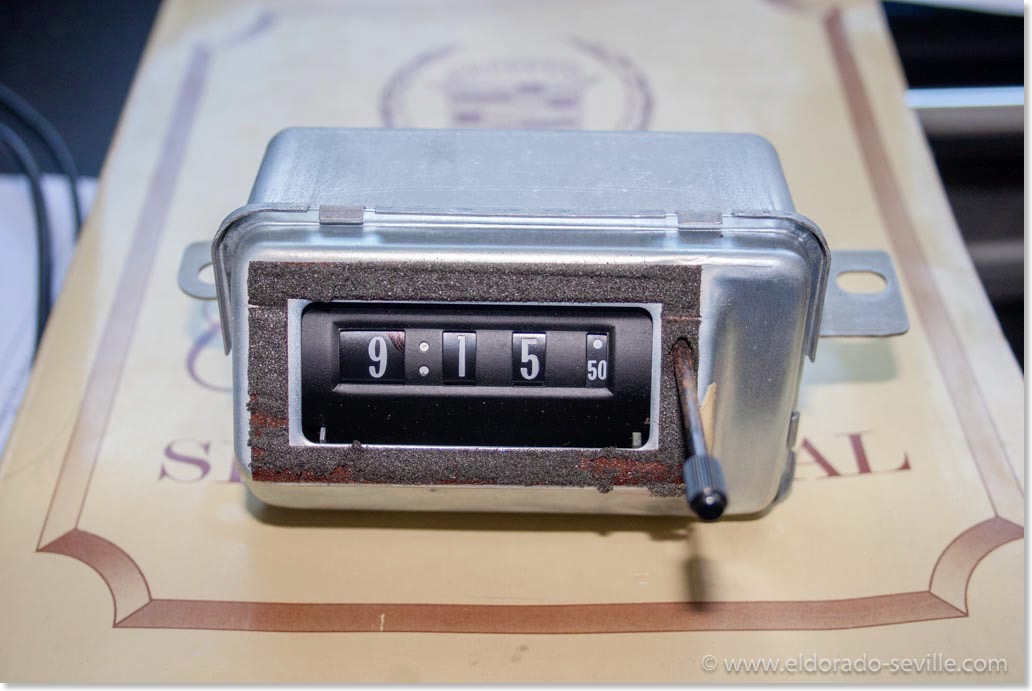
The removed clock out of my 74.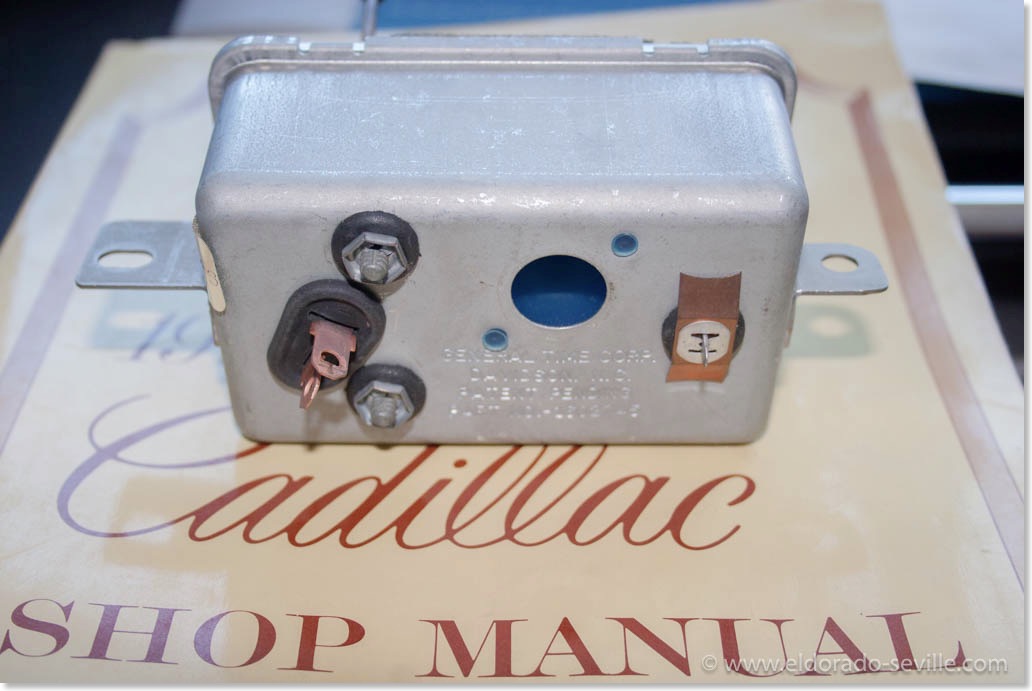
The 1974 Cadillac clocks were produced by General Time Corp. They were used up to 1978, but 1978 had different connectors on the back.
I contacted the excellent Cadillac La Salle Club forum and got valuable tips on how these clocks can be serviced by oneself.
Unfortunately these tips came a little late as I had already sent out the clock to a professional clock restorer in the USA. A company called "The Clockworks" will do the service for me. I cant wait to get the clock back hopefully by the end of February 2016.
Nevertheless here are the instructions on how the clock could be repaired by user "Aprules2" who was so kind to take pictures and upload them to the CLC forum:
All pictures and description © Aprules2
"OK, I finally got around to getting some pictures for you. The clock is super simple, nothing like what you're used to. I apologize that its dirty I apparently took it apart, cleaned and oiled it and never put it back together and it sat in my tool box all this time.So this is a picture of the front of the clock - this part wont come off.
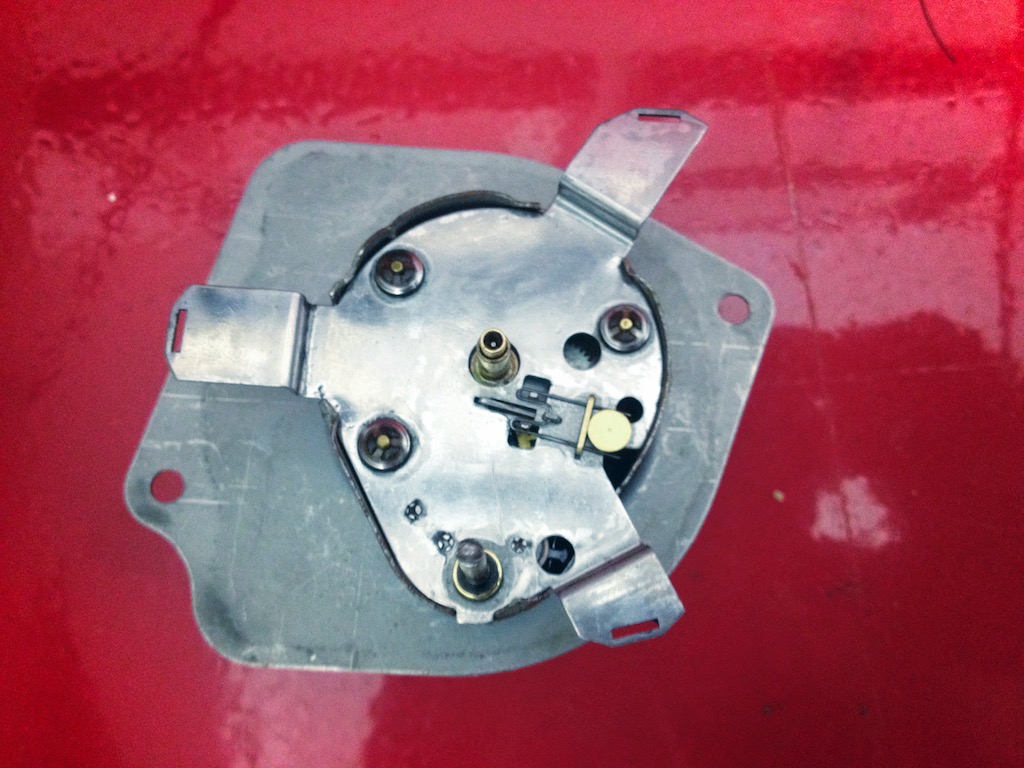
Once this case is open you'll be able to see this. This is the black cover that protects the clock motor. Just carefully get under that silver ring and work it off so you can remove the cover.
Now you'll be looking at this that thin round piece standing in the middle is what I was calling the little record - thats actually the armature of the motor. Try not to get any oil on it but it's not the end of the world if you do. Just drip some on the ends of the shaft it rides on and put a bunch on any gear you see including the one on the end of the shaft the record rides on. If you do get oil on the armature just wipe it carefully with a q tip with rubbing alcohol on it.
Heres another shot of the motor that round brown part is what I called the record.
Make sure to really oil these gears you want to try and get oil on every tooth you see. This isn't like the old school mechanical clocks that wont run right with too much oil. These seem to run better when oiled.
Heres the back side of the clock put a liberal amount of oil between each reel, and you'll notice the real with the seconds on it has a gear built into it try to oil all those teeth too. Sometimes once it's running Ill dribble some on while it rotates.
Once you've done all that plug it in with it still apart. If it doesn't start instantly, give the clock a slight shake or GENTLY roll the record just to get it started, it should start spinning and your clock will now keep time. I usually leave it to run all night, and if it stops in the middle of the night I add some oil and restart it. Im pretty sure it's the same issue as most old mechanical clocks and watches the oil dries up and becomes sticky and because the motor has very little torque it cant keep the clock running. But adding the slot car oil loosens it up, its just got to migrate through all the friction points. So it's not uncommon to have it stop 2 or 3 times, before it starts running reliably, which is why I like to bench test them. "
Thank you Aprules2 for this great description - whenever I need to service another clock like this in the future I will definitely do it myself.
1967 CADILLAC BORG CLOCKS REPAIR AND A PROBLEM WITH A PRINTED CIRCUIT BOARD.
The 1967/1968 Cadillac Westclox clock out of my 67 Eldorado.
The last time I tried to repair the clock in my 67 Cadillac DeVille I totally failed. This was in 1998…
After I got the clocks in all the other Cadillacs moving again - I could no longer stand watching the dead clocks in my 67 Eldorado and DeVille.
So I decided to try to repair them as well.
The last repair attempt at my 67 Eldorado was very disappointing.
In 1998 I took the clock out of my 67 DeVille the last time, and after my repair attempt the hands started spinning in an extremely fast pace - like a ventilator. So I had to disconnect the power to the clock at the printed circuit at the back of the instrument cluster. When I did that I forgot to disconnect the battery and when the power feed touched some metal I had a short somewhere and some smoke came out of the dash… I could not locate where the smoke was coming from - all wires looked perfect. So I just insulated the clock coil power feed and gave up on the repair and forgot about what had happened.
As I found out now - some connection of the printed circuit board got burned back then…
After the failed repair of the 67 Eldorados clock last fall, I decided to try to find a good used clock. Once again Arizona Vintage Parts - my favorite source for parts - came to the rescue. He sold me two non working Borg clocks for a really good price. Unfortunately by now he has run out of stock for them.
So I tried to repair the clocks he sent me - appearance wise they were in very good condition, and I got one back to life for a short time by just cleaning it.
So I put it back into the car and then I made a stupid mistake and ruined it completely. I wanted to tighten the mounting screws and accidentally grabbed the connector for the coil - as you have to work inside the dash without being able to see what you are doing - and so I overtightened it… This stripped the threads of the coil… I had to cut the nut off then and somehow the oscillator wheel inside the mechanism did no longer work properly and when I tried to adjust the stepper it broke off :-(
BTW - Do not use WD40 for cleaning and lubricating a clock like I did… This will ruin the clock as I found out when it was already too late… There are special clock oils available to lubricate clocks.
The other clock I got had a defective oscillator wheel and I could not repair it as well…
So I contacted Arizona Vintage Parts once again for some new clocks but he had sold all his stock on clocks to Sweden…
I had to contact all the Cadillac Parts dealers I found in Hemmings Motor News for two Borg clocks, but I was unsuccessful or they were exorbitantly expensive. Some of the well known Cadillac Parts dealers either did not have them, did not react to my inquiries or asked up to $ 385.- for a used, rebuilt clock. Others asked up to $180.- for a non working clock.
Luckily I found a company called “The Clockworks" which was highly recommended on some Cadillac and other classic car forums for their good work in repairing clocks and also converting them to a quartz movement.
Everybody seems to recommend to convert your clock to a much more reliable and cheaper quartz movement. I thought about it for a while but I decided that I wanted to go for an original movement for authenticity reasons. If you convert to quartz the "tic-toc" movement will be gone and you can tell by just looking at the clock…
I ordered two rebuilt Borg clock movements for my clocks from "The Clockworks". Their service was excellent and they were a great help. Great customer service! I would buy from them again or have my clocks rebuilt by them anytime.
After I received the movements I installed them and put everything back together. You have the keep the adjustment stem and the housing from your old clocks if you replace the movement.
When I put the clock back into the 67 DeVille it did not work though. I soon found out that no power was coming to the coil through the printed circuit board.
I then remembered about my failed repair attempt 17 years ago and the smoke that came out of the dash… Somewhere the circuit board was burned. So I connected the orange cable going into the multiple terminal connector at #7 terminal to the clock directly and it worked again.
So I installed a cable directly to the clock. This is a temporary fix until I´ll have a new circuit board. Installing a new board requires to take the dash completely apart to replace it.
A printed circuit board is available new here: https://www.opgi.com/cadillac/CE11091/
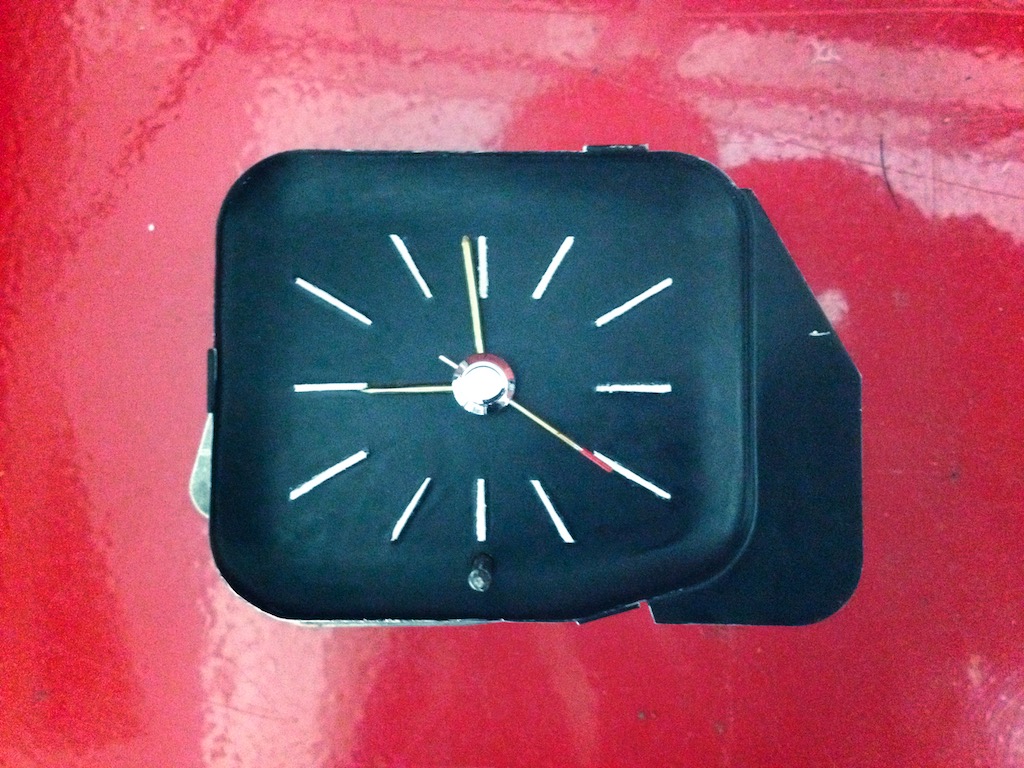
The 1967 Cadillac Westclox clock out of my 67 Eldorado. Seen from the top with the clock face removed. The clock face on the Westclox is mounted differently than on the Borg.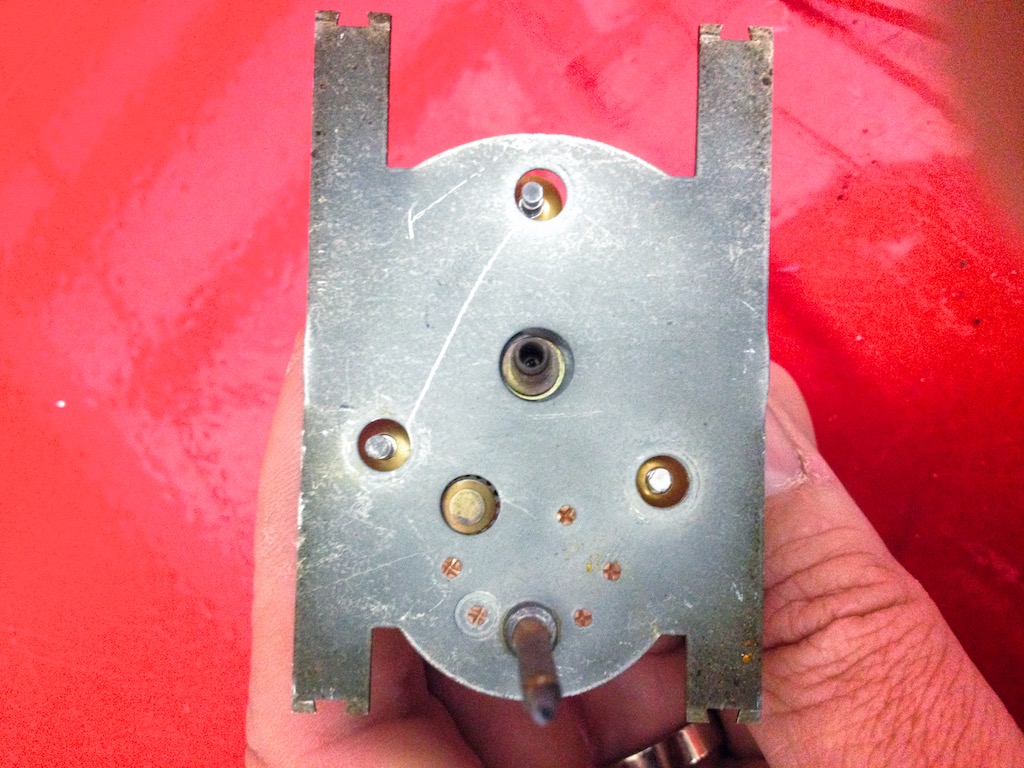
The 1967 Cadillac Borg clock. The housing cover in place - as you can see it looks completely different than the one on the Westclox.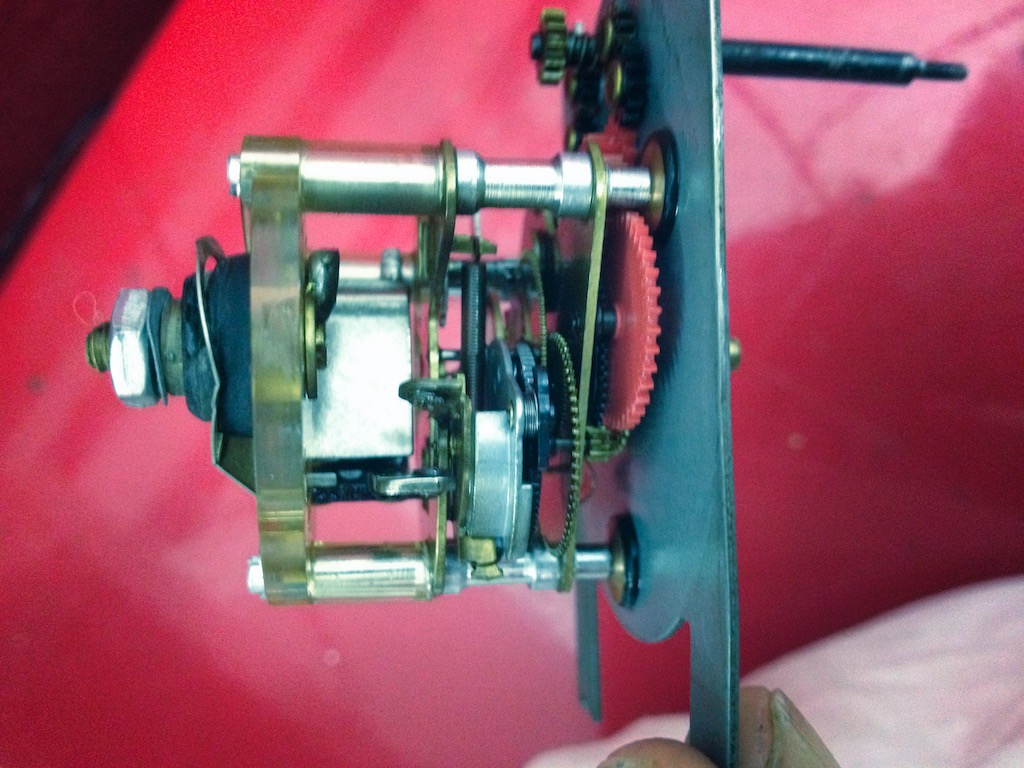
The 1967 Cadillac Borg clock out of my 67 DeVille.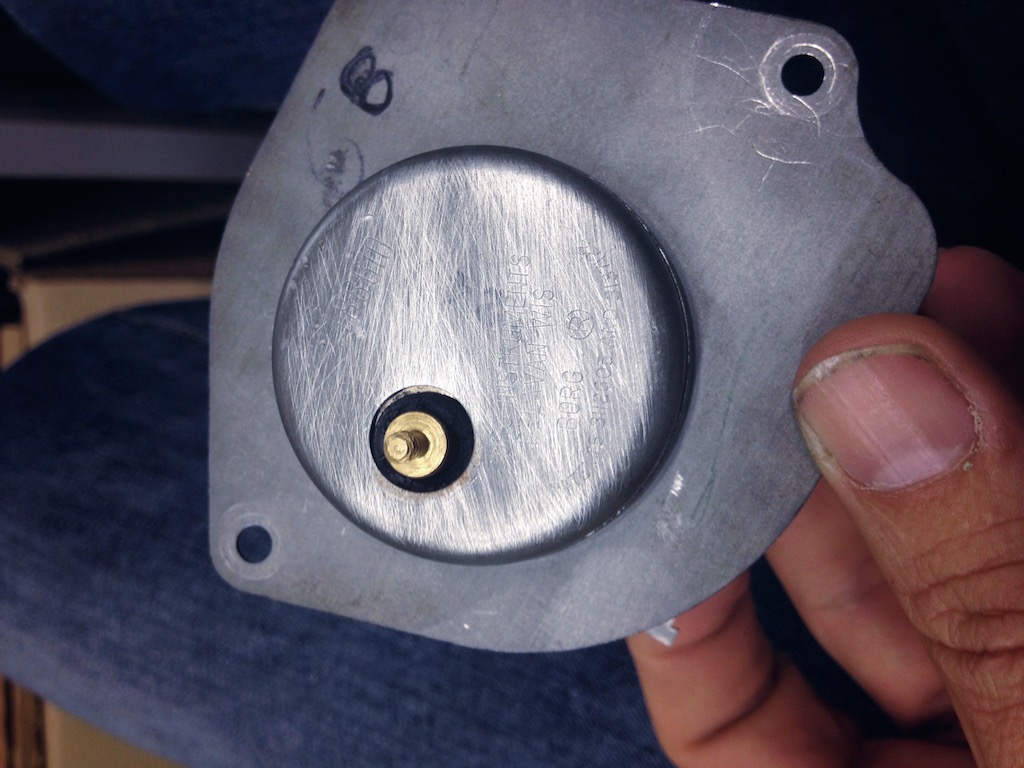
The Borg replacement clock I got from Arizona Vintage Parts. 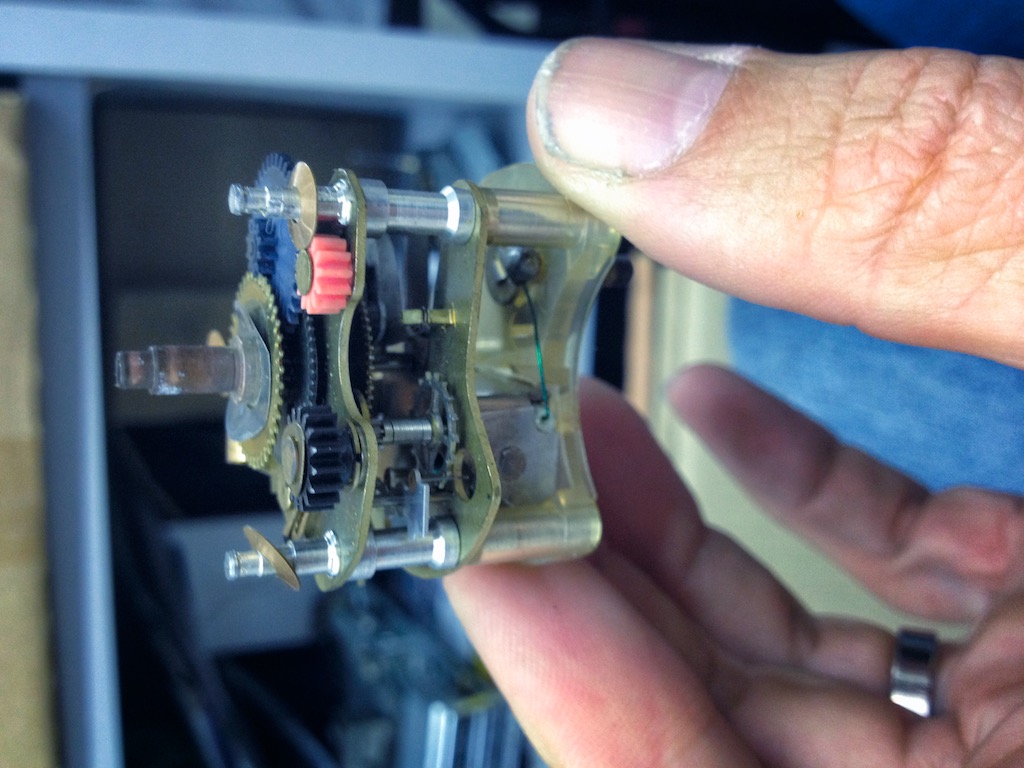
The Borg replacement clock I got from Arizona Vintage Parts - this is the original movement removed from the housing.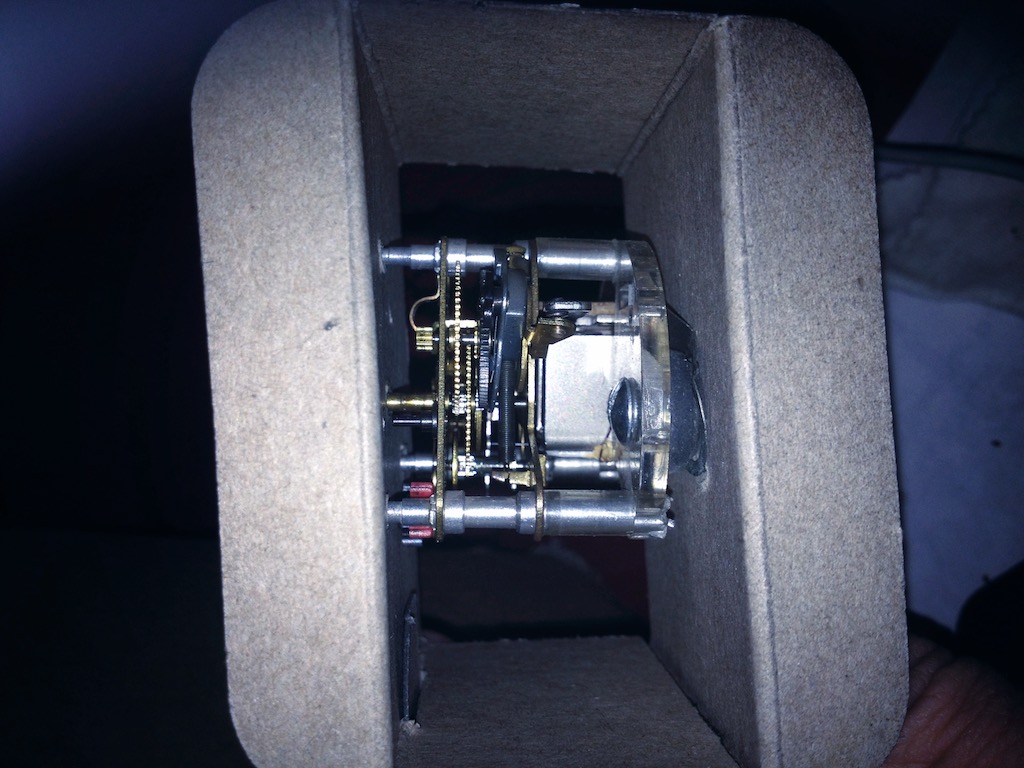
The rebuilt Borg movement I got from "The Clockworks"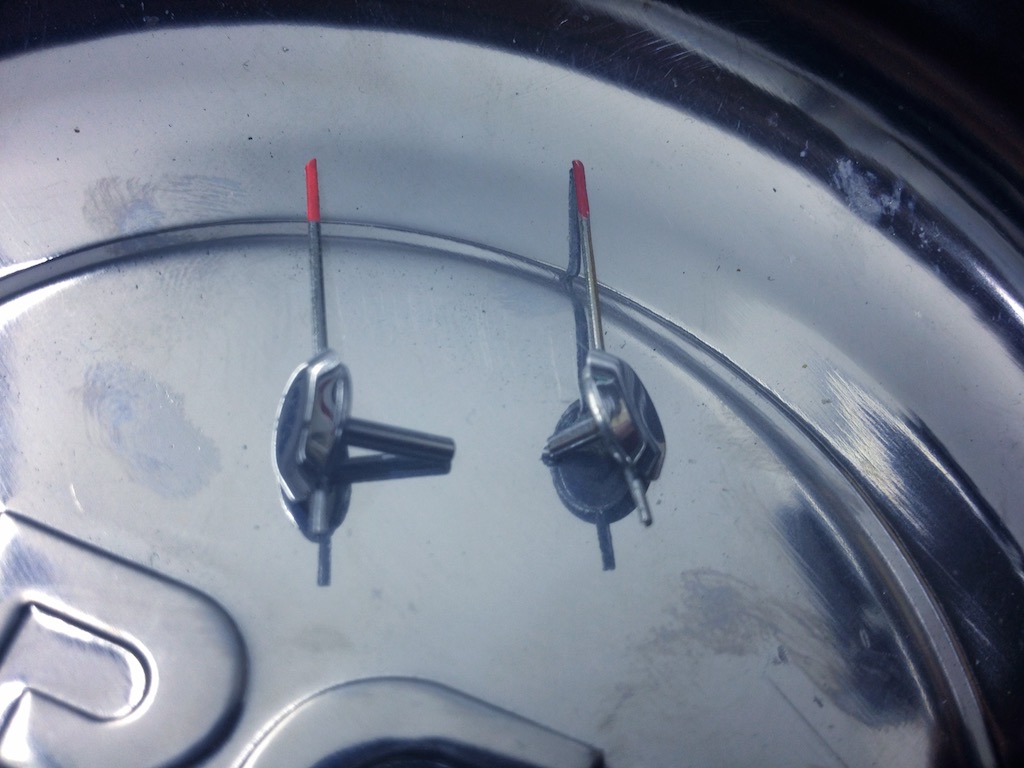
There is a difference in the second arms: On the left the one from a Borg Clock - on the right one from a Westclox. They are not interchangeable. Also the housing of the clocks is different. You cant interchange parts between these two clock types.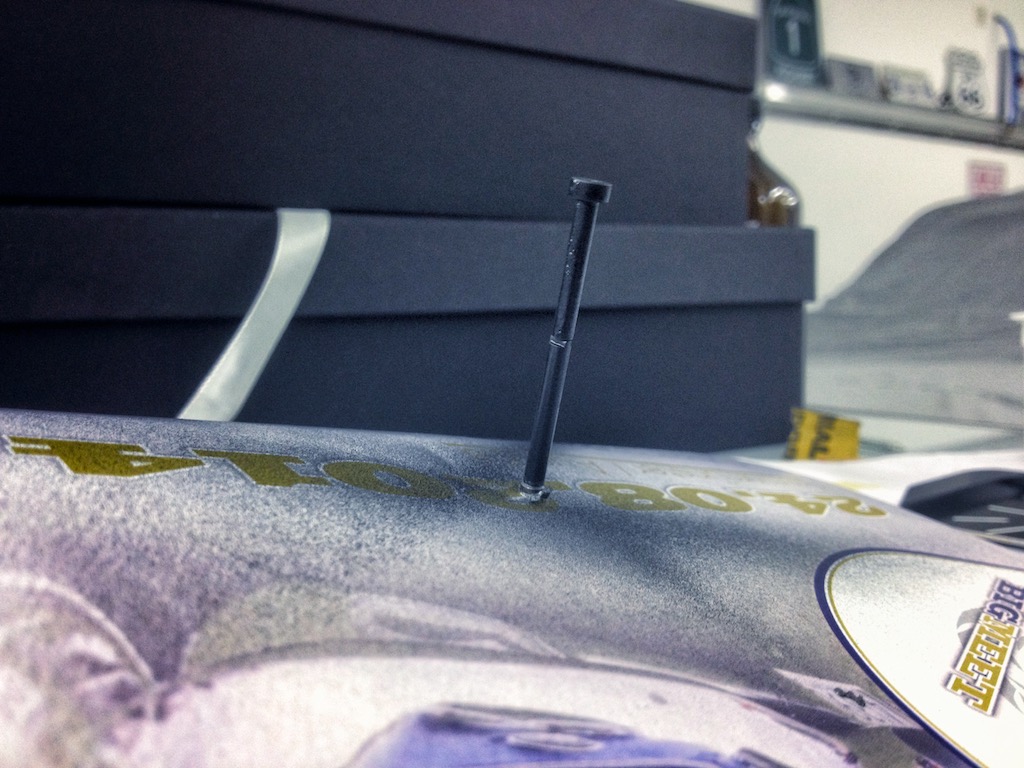
I repainted the setting stem in semi gloss black.
The 1967 Cadillac printed circuit. The one for the Eldorado is slightly different though.
REPAIRING THE CLOCKS OF THE 1958, 1966 AND 1967 CADILLAC
So it was time to service some of the clocks which stopped working over the years.
The clock in the 66 did not work at all.
It's extremely simple to remove on the 66 as you can get it out of the instrument panel by just unscrewing one bolt.
The clock was very dirty in the clock work and needed a good cleaning and some good lubrication. Also the contact of the coil was a little worn and this was fixed. It then happily ticked back to life and now works perfectly.
The clock on my 58 stopped working a couple of years ago. So it came out as well. It's a little more complicated to get it out though...
When it was finally out - it could be seen that the coil was burnt and that it needed some very good cleaning as well. Some of the melted insulation material was all over the clock mechanism and of course I had no spare coil for it - so the original one had to be rewound with some good wire from a left over light solenoid...
Wow - this really took a while - but now the clock works perfectly again!
I was not so lucky with the clock on the 67 Eldorado which only worked when the car was warm. To take it out you have to remove the upper dash and then get out some light bulbs and disconnect it from the printed circuit.
It was also cleaned and lubricated and the clock worked, but it made a very loud noise when the coil rewound the spring of the clock.
The sound got better over night, but then the clock stopped working completely... It's a Westcox clock which uses a double coil and is much more complicated to rebuild than the Borg clocks. Its also almost impossible to find parts for it, as Borg clocks are much more widely used.
Looks like I will need a new 1967 clock and replace it with a Borg unit :-(
The clock in the 66 is now working perfectly again.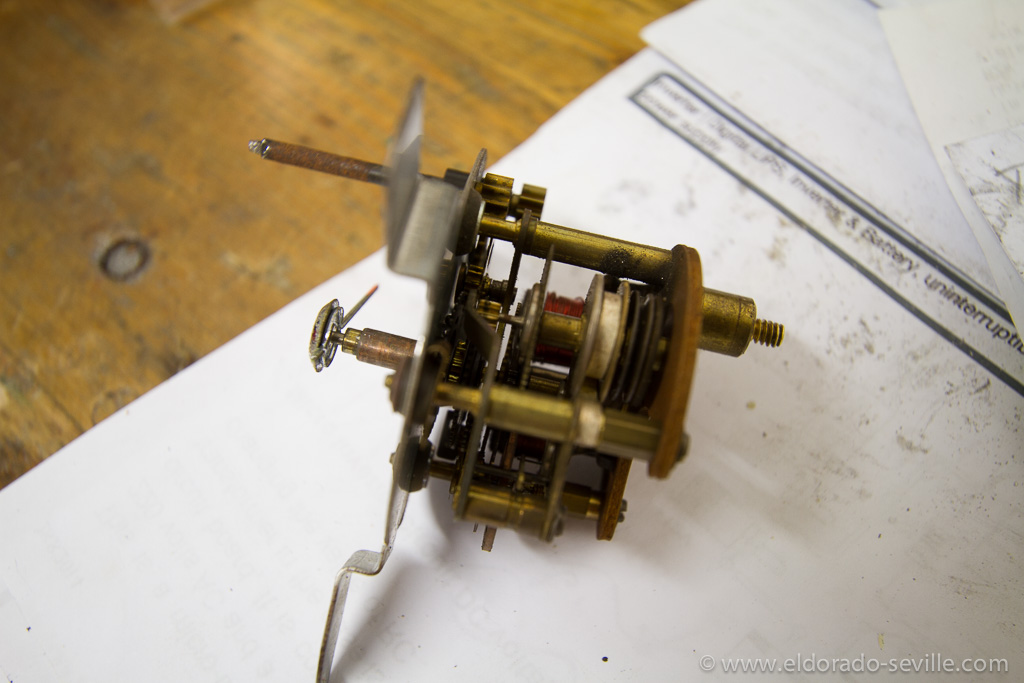
The disassembled clock of the 58 Eldorado.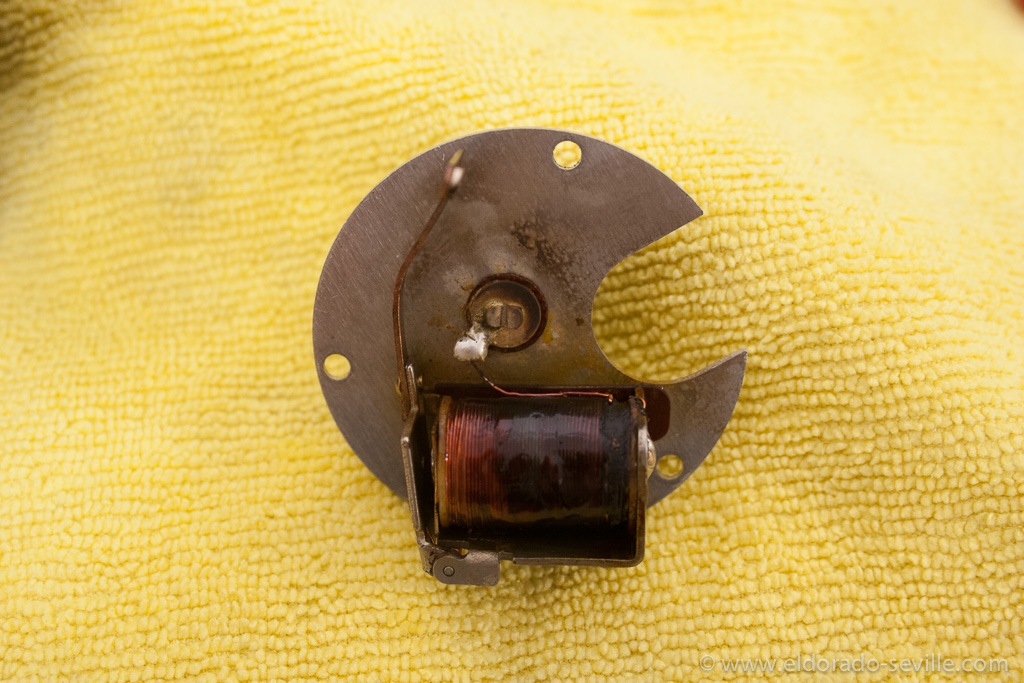
The coil was burnt on the 58 clock.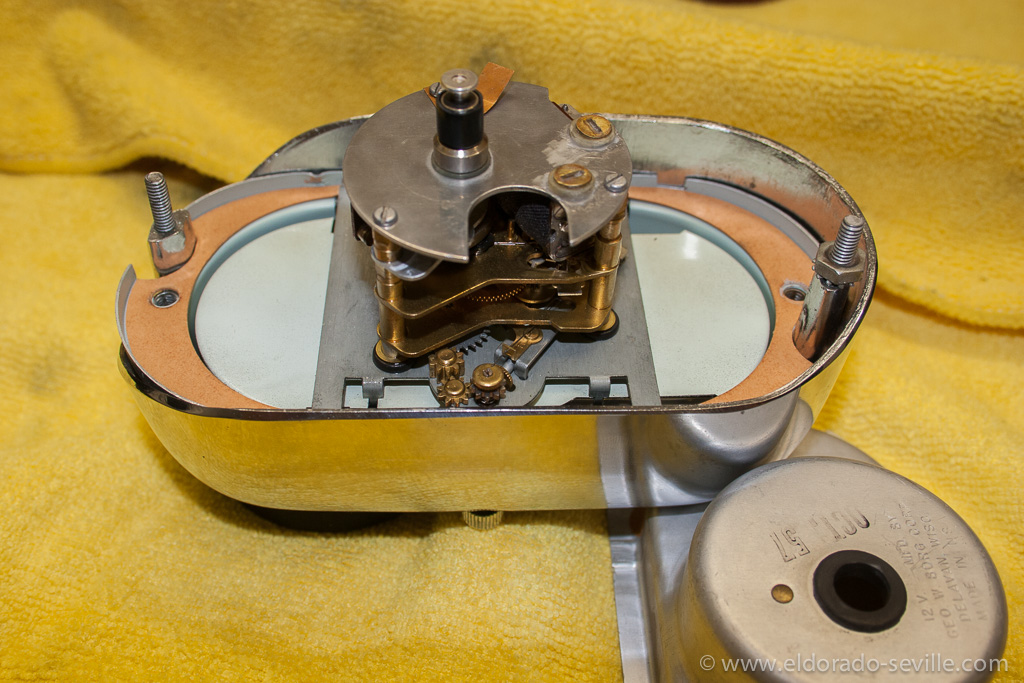
Fully cleaned clock. 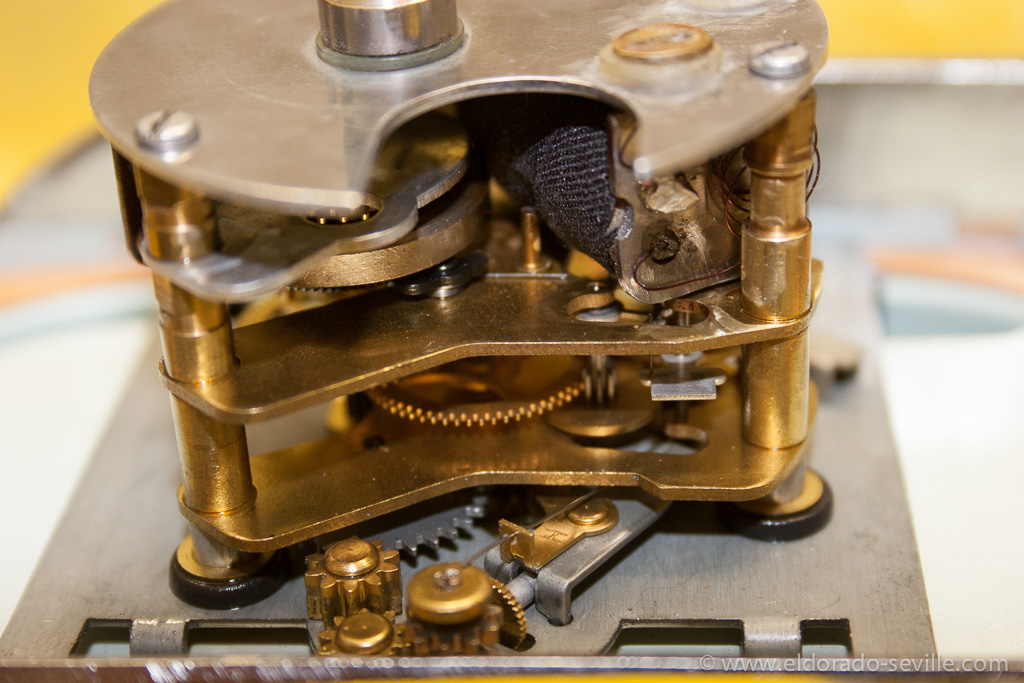
Back together with a rewound coil.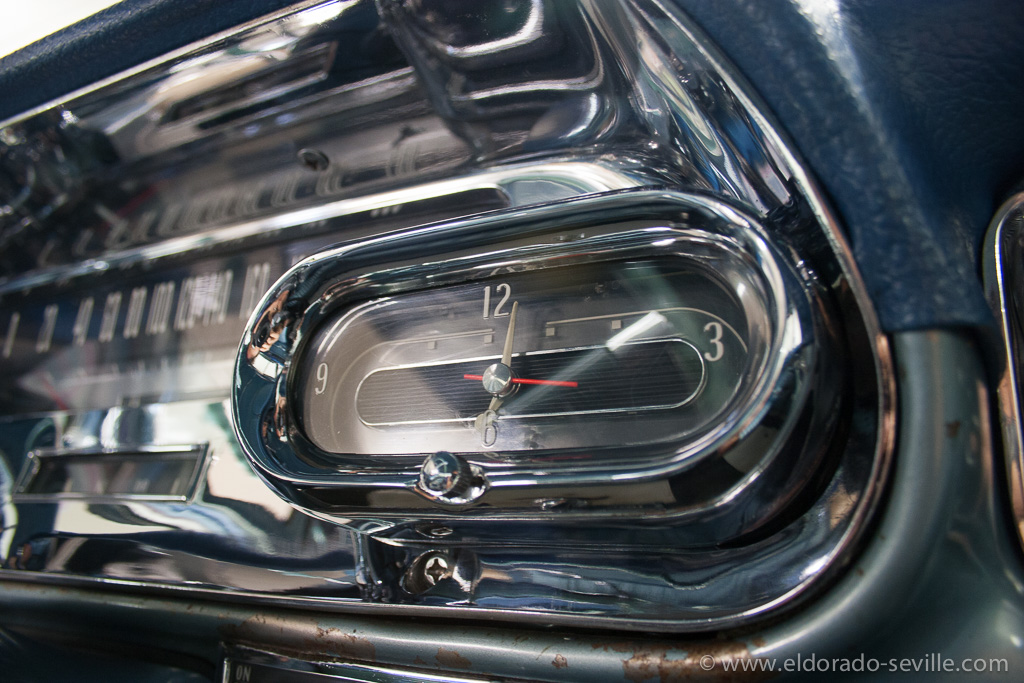
Back in the car - working perfectly again.
The 67 Eldorado now has a working radio!
Up first was the radio. The Eldorado came with the original AM radio. When it was turned on nothing happened though... The power antenna worked flawlessly and the signal seeking feature worked as well, but it would not make any sound at all. So I assumed that the speakers were shot and got a new front and rear speaker from Greg Thompson from Turnswitch. They have exactly the same size as the original ones. Cadillac used 10 Ohm speakers for all their cars in 1967. I installed them today and the radio came back to life. As there are no AM stations around any longer I came across a great solution which would enable me to use an Ipod or Iphone to play over the original radio, without having to do any non original conversions to my car. Its a plug and play solution which can be undone in 2 minutes and does not involve any cutting or screwing. The product is called RediRad and it works perfectly. Just tune the radio to 1000 khz on the AM band and plug in the audio source and you can hear your favorite music on your original radio! It is simple and affordable and undetectable as its hidden under the dash.
I also tried to repair the broken stem on my clock and it took me a while to get the clock out only to find out that my replacement stem would not fit. So I had to reinstall it. But at least it seems that it has a better electrical connection to the printed circuit now and the clock works all the time now. Problem is that I can only set the time with long nose pliers at the moment. Looks like I will need an entire new clock or live with it the way it is now. At least it works...
It was great to spend some time with the car again after the long winter months!
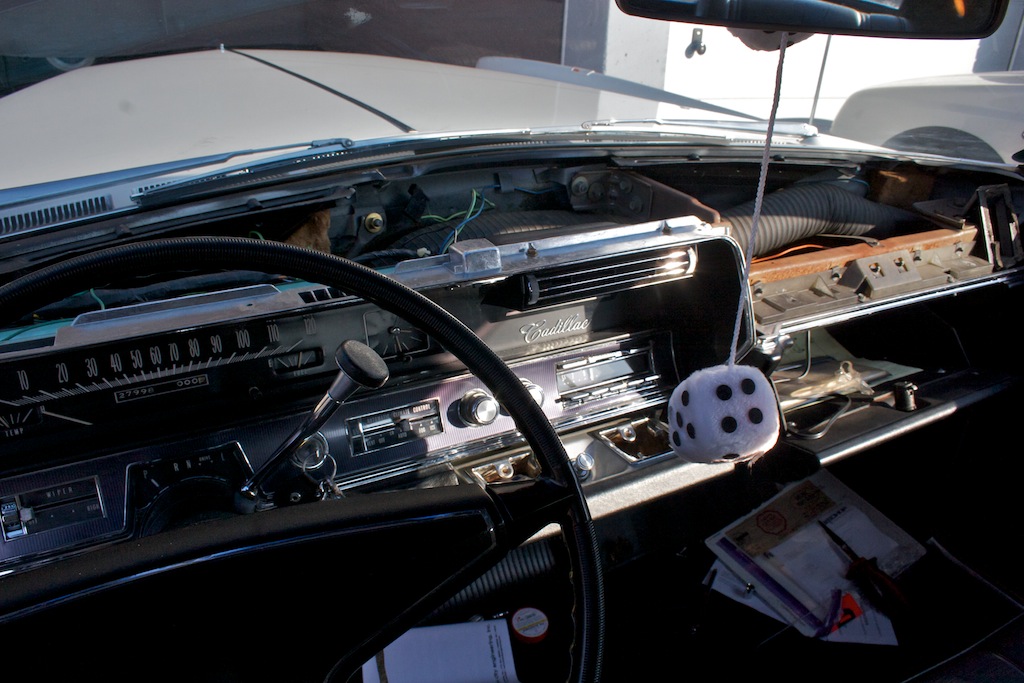
The removed dash.
The RediRad system! Great stuff!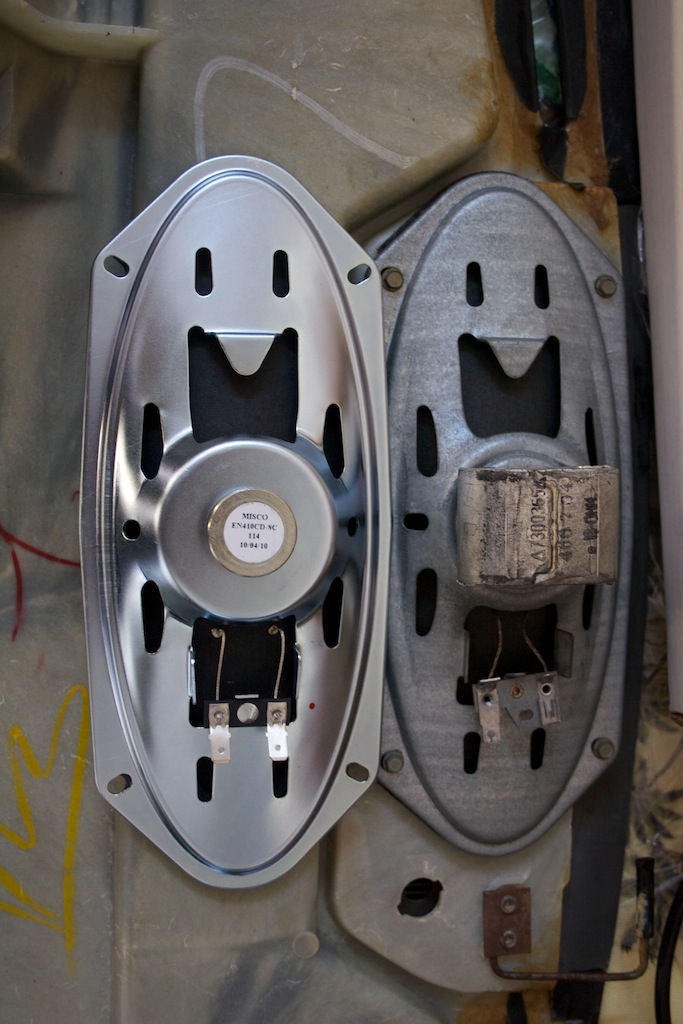
The replacement speaker on the left and the original one on the right.
The new speakers with the old one.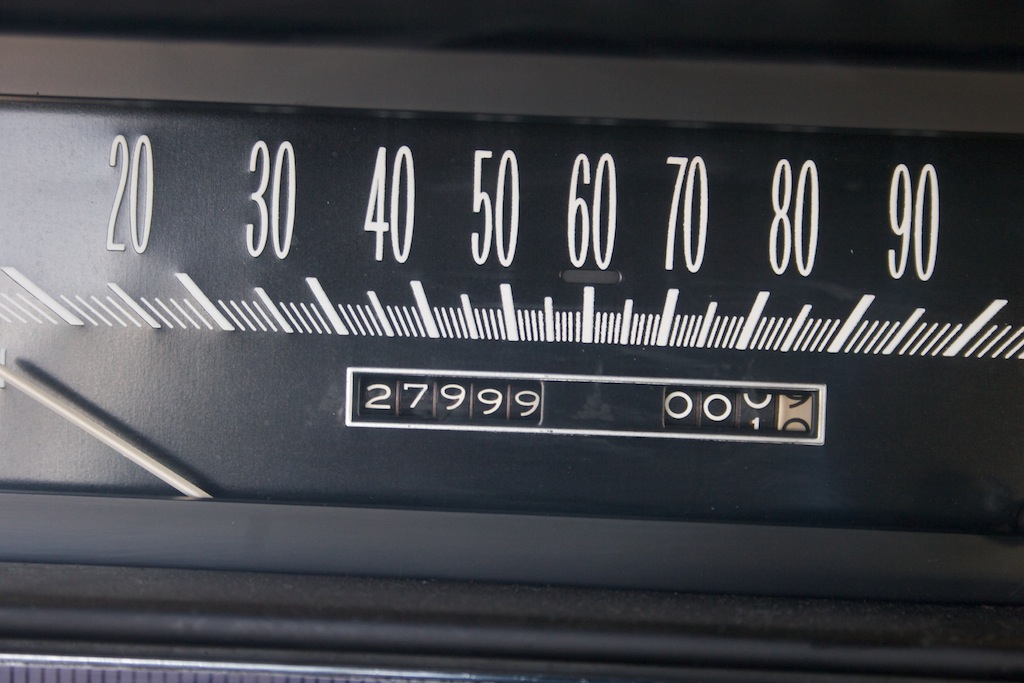
The Eldorado is coming close to the 28k mark... Still a low mileage car ;-)
1966 Cadillac Coupe deVille (15)
1967 Cadillac DeVille (54)
1967 Cadillac Eldorado (71)
1971 Lincoln Continental Mark III (23)
1974 Cadillac Coupe deVille (45)
1978 Cadillac Eldorado Biarritz (24)
1996 Buick Roadmaster (19)
Car Shows (53)
Cruising (4)
For Sale (3)
Garage Stuff (32)
Pacer (1)
Restoration (137)
Various (55)
Video (16)
Website News (30)
- 6 way power seat
- 8-track
- 10 Ohm
- 429
- 1932
- 1957
- 1958
- 1958 Cadillac Eldorado Seville
- 1958 Cadillac Repair Tip
- 1959 Cadillac Eldorado Seville
- 1964
- 1965
- 1966
- 1966 Cadillac Coupe deVille
- 1966 Cadillac Repair Tips
- 1967
- 1967 Cadillac DeVille
- 1967 Cadillac Eldorado Repair Tip
- 1967 Cadillac Repair Tip
- 1967 Eldorado
- 1968
- 1970 Cadillac Eldorado
- 1971
- 1971 Lincoln Continental Mark III
- 1974
- 1974 Cadillac Coupe DeVille
- 1974 Cadillac Repair Tip
- 1976
- 1977
- 1978
- 1978 Cadillac Eldorado Biarritz
- 1978 Cadillac Repair Tip
- 1980 Cadillac Eldorado Biarritz
- 1996
- 2012
- 2014
- 2017
- 2018
- 2019
- 2022
- 2023
- 3063206
- 7027235
- 7800483
- 7805675
- 7805676
- 12355706
- 17058531
- 17059968
- 17059969
- 22010515
- 22010661
- A.I.R
- A6
- AC
- AC Compressor
- AC Electrical Diagram
- ACC
- Accelerator Pump
- Accelorator pump
- Actuators
- Adriatic Blue Metallic
- Ads
- Aftermovie
- Air Pump
- Aircondition
- AIRPUMP
- ALC
- Alternator
- AM
- AM-Transmitter
- Antenna
- Anti Rattle Clips
- Antique Gold
- Arizona Vintage Parts
- Arrival
- Article
- ASC
- Ash Tray removal
- ATC
- Atlantis Blue Firemist
- Austria
- Austro Classic
- Autolite SP-459
- Automatic Seat Back Release
- Award
- Banner
- Barn Find
- Battery
- Battery Tray
- Beach Race
- Bearing
- Bendix
- Biarritz
- Bigfoot
- Bill Hirsch Engine Enamel
- Bleeder Screws
- Blower
- Bolts
- Borg
- Brake Booster
- Brake Fluid
- Brake Gray
- Brakes
- Broken Bolt
- Brougham
- Bucket seats
- Buick
- Bumper End
- Bushings
- Cadillac
- Cadillac BIG Meet
- Cadillac BIG Meet
- Cadillac birthday cake
- Cadillac Blue
- Cadillac Color Selections Dealer Book
- Cadillac Coupe deVille
- Cadillac Dealer
- Cadillac Meeting
- Cadillac Mini Meeting
- Camaro RS
- Caorle
- Car Show
- Carburetor
- Card
- Carpet
- Carter AFB
- Cavalry Twill Vinyl
- CB
- CBM
- CCCD
- Choke
- Christmas
- Citizens Band
- Classic Cadillac Club Deutschland
- Clay Towel
- Cleaning
- Clock
- Clockwork
- Clutch
- Clutch Coil
- Collector
- Colonial Yellow
- Color Coded Springs
- Commercial
- Compound
- Compressor
- Condenser
- Continental Mark III
- Control Head
- Conversion
- Convertible top
- Coolant
- Corona
- Cowl
- Cruise Control
- Cruising
- CV Boots
- CV JOINTS
- D6230
- Dash Trim
- Decal Removal
- Decals
- Decoration
- Dehumidifier
- Delco Moraine
- Der Standard
- detailing
- Deville
- Diagnosis Chart
- Diagram
- Dial
- Digital Rotary Drum Clock
- Diner
- Disc Brakes
- Distributor
- Diverter Valve
- Door Jamb Switch
- Door Rubber Conduit
- Dornbirn
- Dot3
- Drive Shaft
- Driving tour
- Drum brakes
- Dry Ice Blasting
- Dry Ice Cleaning
- DVD
- Eastwood
- Eldorado
- Electric Choke Thermostat
- Electrical schematic
- Elvis
- Engine Bay
- Ep
- Epoxy floor
- Europe
- Evaporator
- Exide
- Factory Markings
- Fender Skirt
- Floor
- Flushing
- Foam
- For Sale
- Front AXLE
- Front brakes
- Front bumper filler
- Front Floor
- Front wheel bearing
- Fuel Filter
- Fuel Pump
- Fuel Sending Unit
- Fusible Link
- Garage
- Garage Cabinets
- Gasket
- GE
- Gear indicator
- General Time
- Glove box light
- Grand European
- H4
- Haus of Hot Rod
- Headlight Actuator
- Headlight doors
- Headlights
- Heater Core
- Heater Hose
- Heater Valve
- High Idle
- Holley
- Honest John
- Hood
- Hood Emblem
- Hood Ornament
- Hose Clamp
- Hot Choke
- Hot Water Valve
- HotRod
- How to
- Hödlmayr
- Ignition Diagram
- Illuminated Entry
- John D‘Agostino
- John Foust
- Klassikwelt Bodensee
- Kremsmünster
- LaSalle
- Leather seats
- Light Switch
- Limited
- Lincoln
- Lincoln Mark III Repair Tip
- Low Mileage
- Magazine
- Marilyn Monroe
- Mark III
- Master Cylinder
- Master Switch
- Master Vacuum Switch
- Media Blasting
- Meeting
- Meguiras
- MK II
- Mobile
- Model
- Moldings
- Mom
- Mopar Nationals
- Mostkost Kustom
- Movie
- Neon
- NOS
- Oberösterreicher des Tages
- oilchange
- ORF
- Overspray
- Pacer
- Paint
- Paint correction
- Paintjob
- Part Number
- Parts
- Patch Panel
- Perfect Circle
- Permabag
- Persian Lime
- Photo shooting
- Photoshooting
- Pictures
- PinUp
- POA Valve
- Power Antenna
- Power Servo
- Power Vent Windows
- Power Window
- Printed Circuit Board
- Programmer
- Pulley
- Quadrajet
- Quarter Panel
- Quartz Conversion
- R134
- Radiator
- Radio
- Rattle
- Rear brakes
- Rebuild
- Recalibrate
- RediRad
- Reed Switch
- Relais
- Relaunch
- Removing Overspray
- Repaint
- Repair
- Restoration
- RIP
- Roadhouse
- Roadmaster
- Rochester
- Rocker Arm Cover
- Rocker Panel Extension Clips
- Rostio
- Rotary Valve
- Rotterdam
- Rupes
- Rust removal
- Rust removal gel
- Sabre Wheels
- Sand Blasting
- Sandblasting
- Screed
- Season Greetings
- Seasons Greetings
- Seat Back Locks
- Seat Padding
- Seat Transmission
- See through ornament
- Self adjusters
- Sepp's Garage
- Seville
- Sheetmetal
- Shocks
- shop manual
- short
- Sign
- Solenoid
- Spark Plug Wire Routing
- Speakers
- Special Award
- Speed Bleeder Screws
- Splash Guard
- Starter Diagram
- Starter Motor
- Steering Column
- Storage
- suction throttling valve
- sunroof
- suspension
- Swirl Mark removal
- Switzerland
- T3
- Taillight Cover
- Texan´s Choice Award
- Thermostat
- Tilt and Telescope
- Time capsule
- Tomsclub
- Torque Specifications
- Tower Hose Clamp
- Towtruck
- Transducer
- Transmission
- transmission control selector
- transmission control selector indicator light
- transmission shift indicator
- Treadle Vac
- Treffen
- Tri-Band
- Troubleshooting
- Trunk Cardboard Kit
- Trunk lining
- Trunk to bumper cover
- Turn Signal Switch
- TV
- Typisierung
- Ultimate Garage
- Underbody
- Undercarriage
- Undercoating
- Undercoating Removal
- Vacuum Booster
- Vacuum diagram
- Vacuum hoses
- Vacuum Master Switch
- Vacuum Schematic
- Vacuum Valve
- Valve Cover
- Various
- Vent Window Switch
- Vibration
- Vibrator
- Vicodec roof
- Video
- Vinegar
- Vinyl Roof
- Visitor
- Washer Fluid Float
- Washer Fluid Low Level Indicator
- Water Pump
- Wax
- Weatherstripping
- Website News
- Westclox
- Wheel Bearings
- Wheel Housing
- Wiesbaden
- Windlace
- Winter
- Wiring
- Wiring Diagram
- Wonderbar
- Workbench
- Zurzach