 GERALD´S CADILLACS - NEWS
1974 CADILLAC SPEAKER REPLACEMENT
I have to repair my radio anyway (see here) as it does not work properly. My friend Steve who is so kind to repair the radio for me already found out that the radio had a defect which caused the speakers to burn through.
So it was clear that I would need new speakers for my car.
In the past I already had to install replacement speakers in most of my cars. I´m always replacing them with replacement speakers from Turnswitch. They do have some really good reproduction speakers which fit perfectly with only minor modifications necessary. I have dealt with them a couple of times and they are always extremely helpful and friendly and their speakers are great. That is why I can truly recommend them and will use them again if I ever need some speakers in the future.
If you have a stereo/tape radio you need their round 3 1/2" speakers with the block cover to be able to reuse the factory mounting clips for the front speakers in the dash.
The mounting ears have to be cut off and the speaker is then held in with the wire clips used on many GM applications.
The cover blocks are the shape of the original magnet structure and go over the magnets for the wire clip. They are made of wood and you have to glue them onto the speaker in the same orientation as the original magnet. Also make sure that polarity is correct - for some reason it's exactly opposite to the original speakers and you have to connect the positive cable (green or blue) to the speaker lead with the red dot. On the original speakers the wires on the front speakers were soldered on - I re-did it with connectors on the new speakers as they are easier to install and to remove with them.
The new front speakers do not have a dust screen on them, so I carefully removed the screen from the original speakers and glued it to the replacements speakers. So they are protected now and it looks factory correct as you could see the missing screen through the speaker grilles on the dash.
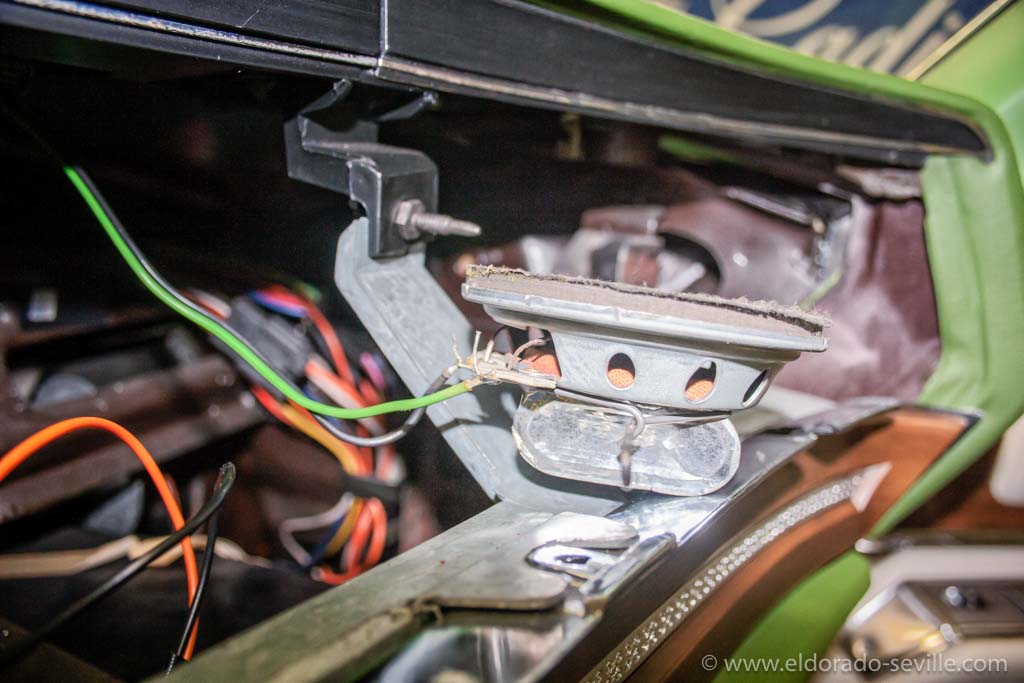
To remove the left speaker and install the new one you have to remove the AC hose to get access to the speaker. The speaker cables are relatively short so be careful not to damage them when you pull the speaker out.
For the rear speakers you need their 6x9 speakers which come with a dust screen already installed.
Here you need to do some more modifications as the original speakers have an additional bracket with a bolt, which holds the insulated cardboard cover in the trunk in place. Without this bracket you cant install this cover.
I carefully drilled out the rivet which holds the original bracket in place and also drilled a hole into the metal frame of the new speaker. I then used a small bolt and nut instead of a rivet to install it onto the new speaker. This works really well, but you have to be extremely careful when you drill this hole as you can easily damage the membrane of the speaker underneath if you drill too deep … (I made this mistake when I drilled out the rivet on the old speaker and immediately had a hole in the old membrane…)
The terminals of the rear speakers were connected with a special connector which you can´t reuse with the new speakers unfortunately, so I had to cut the wire and install a supplied connector instead. On the rear speakers you also have to ground the negative terminal to the car. A short ground cable to do this properly is also supplied with the speakers.
Then you can screw the speakers back into the car and connect them.
Here is some more useful info about replacement speakers from the turnkey website:
"Many replacement speakers now sold by the discount stores, auto parts stores and mail order restoration parts houses are labeled as "4 to 8 ohm compatible" and are in fact 4 ohm speakers. These speakers can damage the older transistor radios. 4 ohm speakers will measure around 3.2 ohms with a DC ohmmeter. An 8 - 10 ohm speaker will measure around 7.4 ohms with a DC ohmmeter. The DC resistance is the critical number for the Delco radios as the output transistor is in series with the speaker. A properly operating Delco radio should have 1.5 volts DC across the speaker voice coil. A 4 ohm speaker will draw twice the current of an 8 ohm and cause the amplifier transistor (the half dollar size device mounted to the black finned heat sink on the back of a Delco radio) to run very hot. The speaker cone should be displaced in an upward (away from the magnet) direction about 1/8" when a Delco radio is turned on. If the cone moves down toward the magnet, the speaker leads need to be reversed".
I´m looking forward to installing the hopefully eventually repaired radio into the car and to test the sound of the new speakers. They should normally sound a little better than the original ones.
The original right front speaker unclipped from the car.
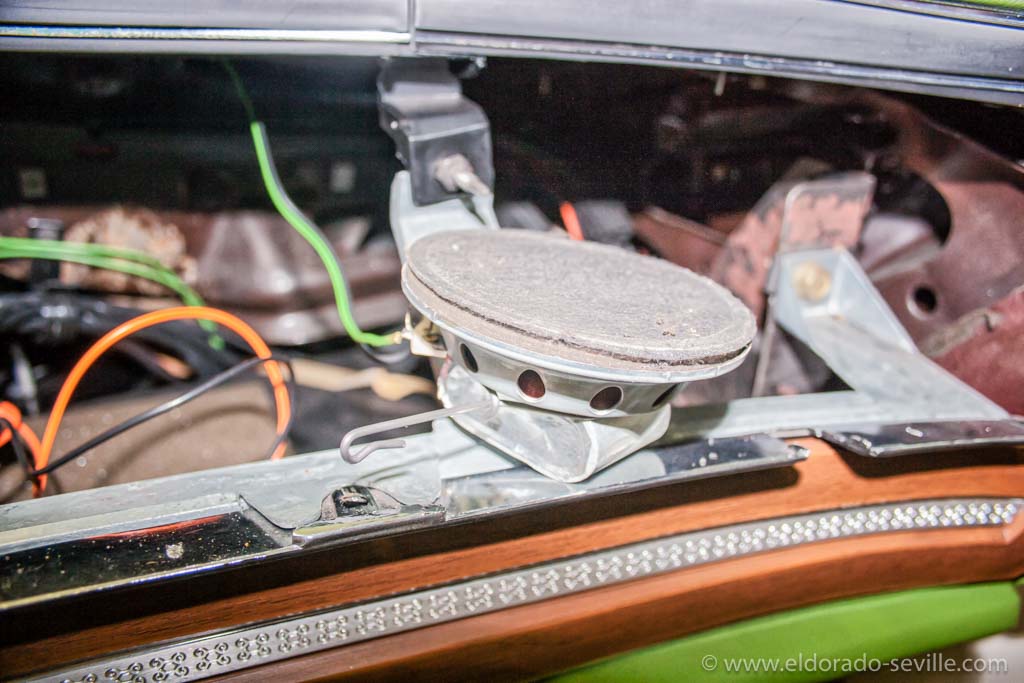
The original right front speaker unclipped from the car. Here you can see the original dust screen which you will have to reuse with the front speakers.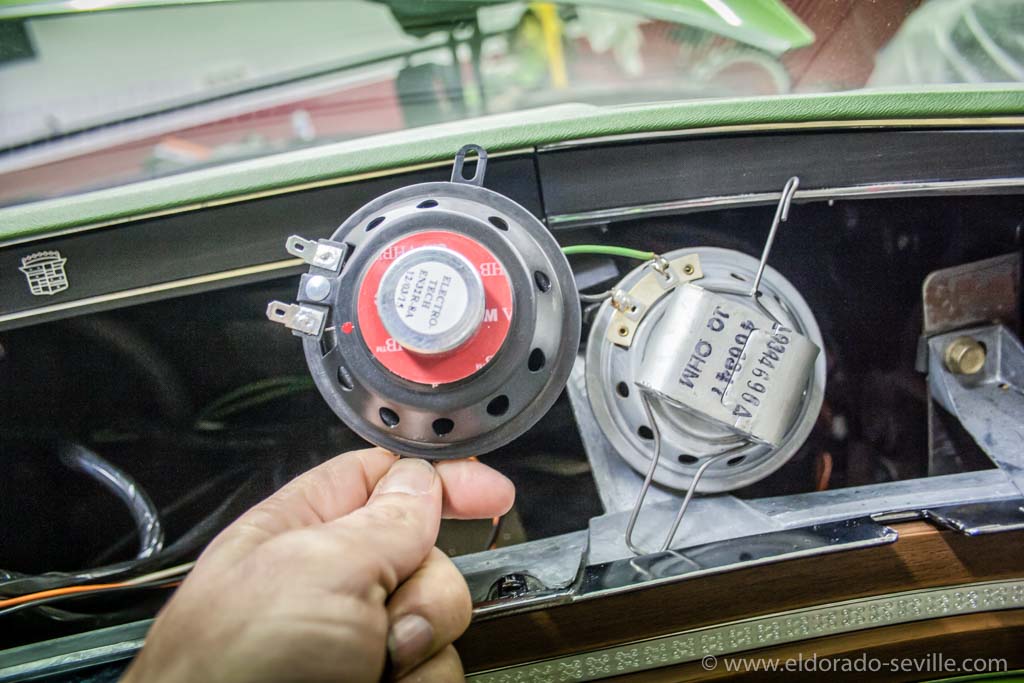
The replacement and the original speaker, as you can see the magnet looks different and you have to cut off the mounting ears.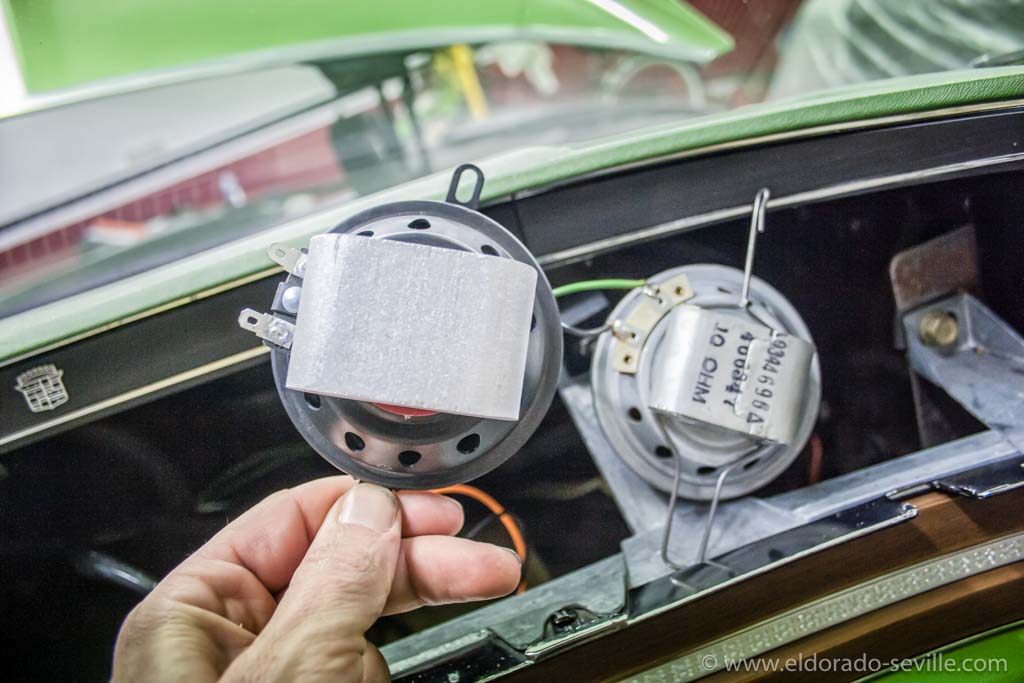
The replacement speaker with the cover block installed. You have to order it separately for your Cadillac.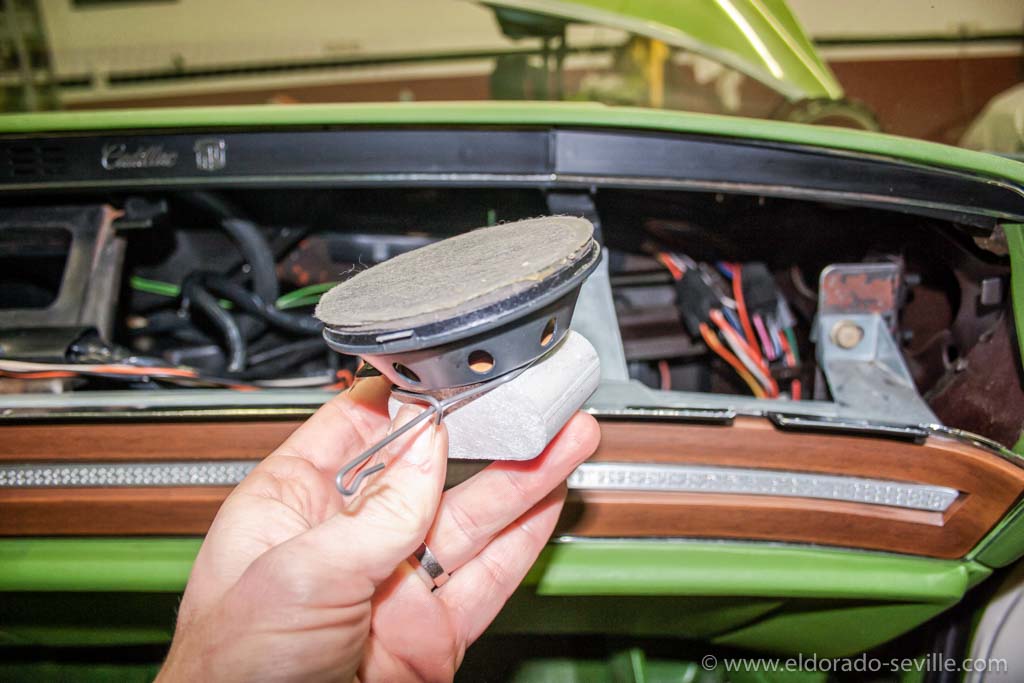
The replacement speaker with the old dust screen installed.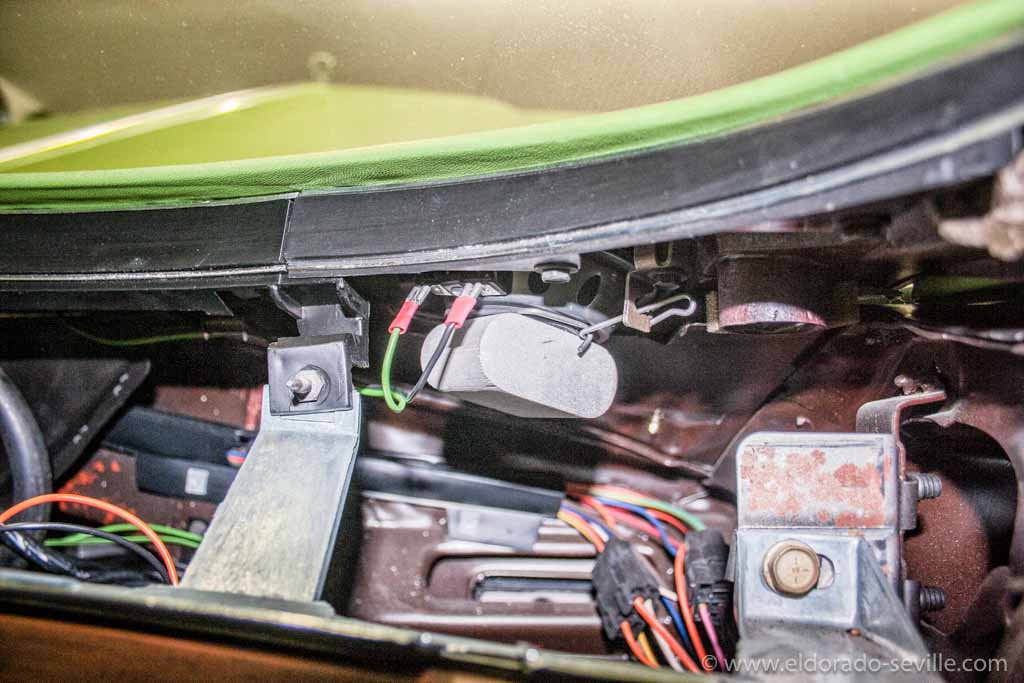
The new speaker back in the car with the supplied connectors.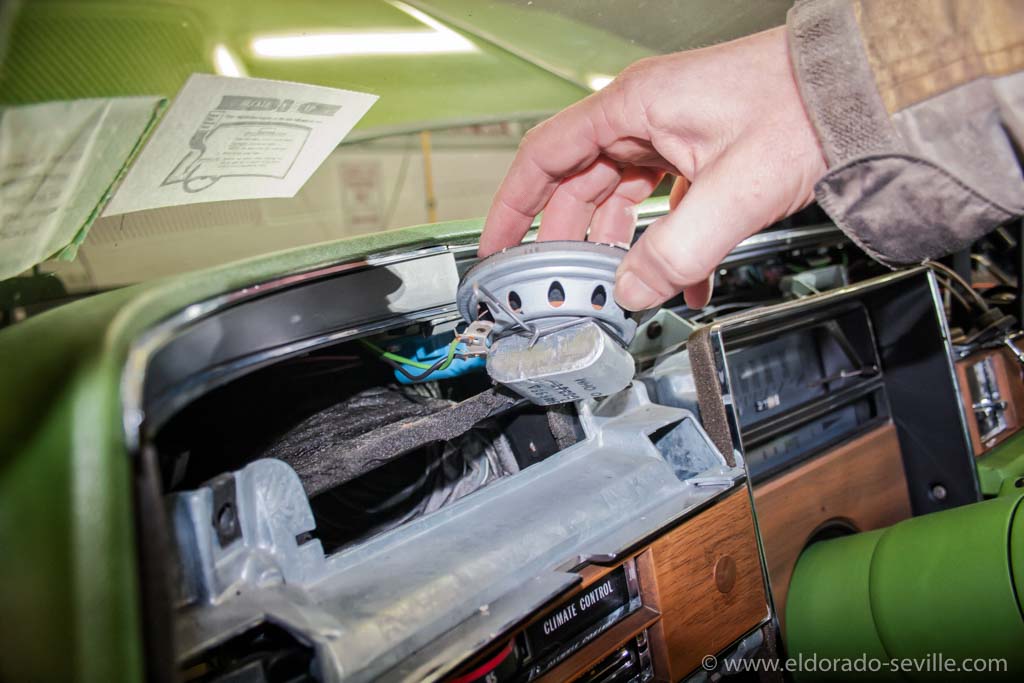
The original left speaker removed - you have to remove the AC hose to get to it.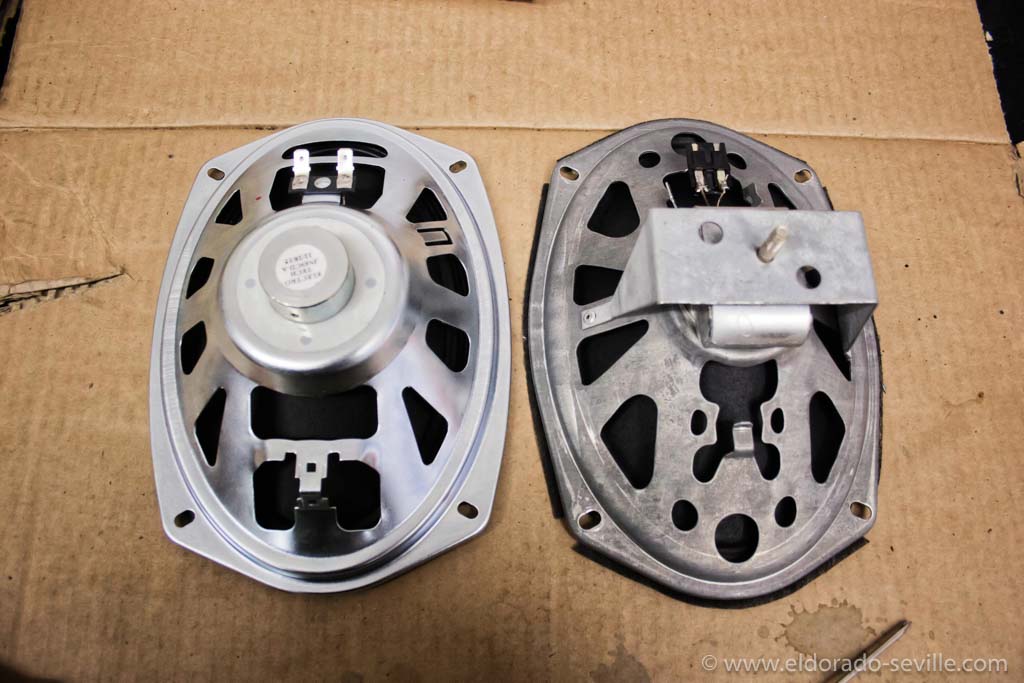
The replacement 6x9 speaker and the factory installed original speaker. Note the bracket - you have to move it to the new speaker and install it there.
The replacement 6x9 speaker and the factory installed original speaker. Note the bracket - you have to move it to the new speaker and install it there.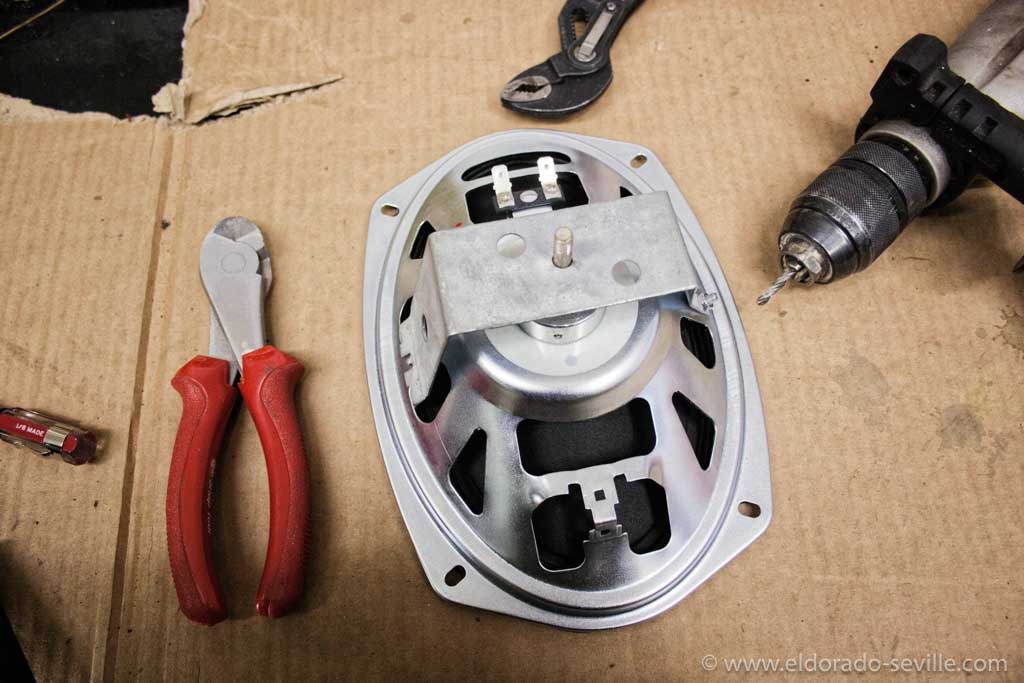
I drilled out the rivet to be able to remove the bracket. Be extremely careful when you drill it out!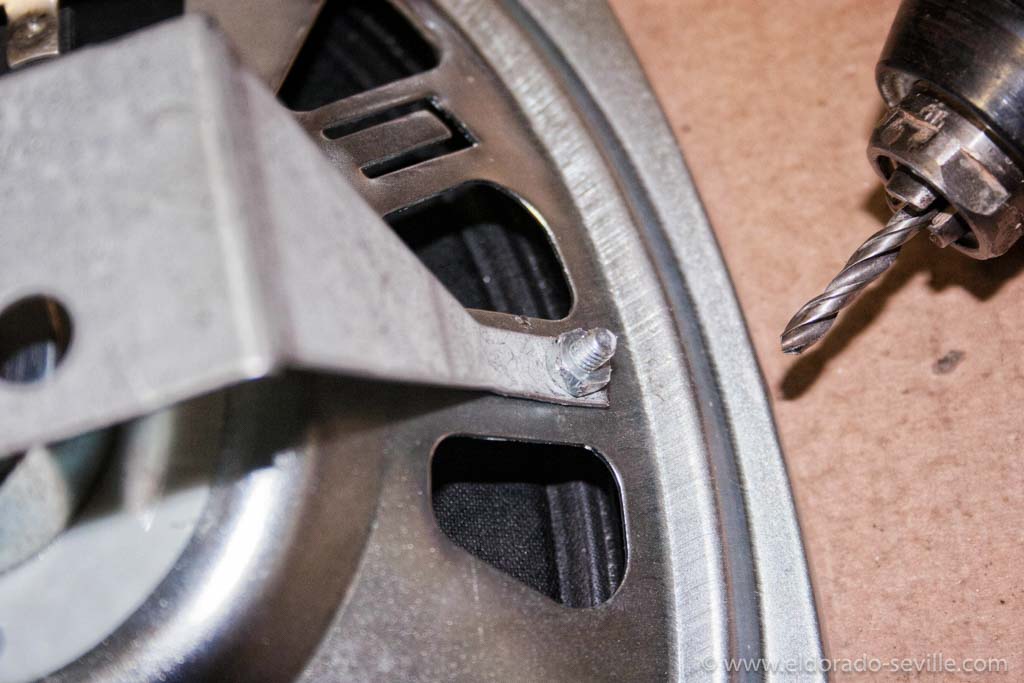
Instead of the original rivet I used a short bolt to install the bracket to the new speaker.
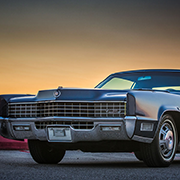
1966 Cadillac Coupe deVille (15)
1967 Cadillac DeVille (54)
1967 Cadillac Eldorado (71)
1971 Lincoln Continental Mark III (23)
1974 Cadillac Coupe deVille (45)
1978 Cadillac Eldorado Biarritz (24)
1996 Buick Roadmaster (19)
Car Shows (53)
Cruising (4)
For Sale (3)
Garage Stuff (32)
Pacer (1)
Restoration (137)
Various (55)
Video (16)
Website News (30)
- 6 way power seat
- 8-track
- 10 Ohm
- 429
- 1932
- 1957
- 1958
- 1958 Cadillac Eldorado Seville
- 1958 Cadillac Repair Tip
- 1959 Cadillac Eldorado Seville
- 1964
- 1965
- 1966
- 1966 Cadillac Coupe deVille
- 1966 Cadillac Repair Tips
- 1967
- 1967 Cadillac DeVille
- 1967 Cadillac Eldorado Repair Tip
- 1967 Cadillac Repair Tip
- 1967 Eldorado
- 1968
- 1970 Cadillac Eldorado
- 1971
- 1971 Lincoln Continental Mark III
- 1974
- 1974 Cadillac Coupe DeVille
- 1974 Cadillac Repair Tip
- 1976
- 1977
- 1978
- 1978 Cadillac Eldorado Biarritz
- 1978 Cadillac Repair Tip
- 1980 Cadillac Eldorado Biarritz
- 1996
- 2012
- 2014
- 2017
- 2018
- 2019
- 2022
- 2023
- 3063206
- 7027235
- 7800483
- 7805675
- 7805676
- 12355706
- 17058531
- 17059968
- 17059969
- 22010515
- 22010661
- A.I.R
- A6
- AC
- AC Compressor
- AC Electrical Diagram
- ACC
- Accelerator Pump
- Accelorator pump
- Actuators
- Adriatic Blue Metallic
- Ads
- Aftermovie
- Air Pump
- Aircondition
- AIRPUMP
- ALC
- Alternator
- AM
- AM-Transmitter
- Antenna
- Anti Rattle Clips
- Antique Gold
- Arizona Vintage Parts
- Arrival
- Article
- ASC
- Ash Tray removal
- ATC
- Atlantis Blue Firemist
- Austria
- Austro Classic
- Autolite SP-459
- Automatic Seat Back Release
- Award
- Banner
- Barn Find
- Battery
- Battery Tray
- Beach Race
- Bearing
- Bendix
- Biarritz
- Bigfoot
- Bill Hirsch Engine Enamel
- Bleeder Screws
- Blower
- Bolts
- Borg
- Brake Booster
- Brake Fluid
- Brake Gray
- Brakes
- Broken Bolt
- Brougham
- Bucket seats
- Buick
- Bumper End
- Bushings
- Cadillac
- Cadillac BIG Meet
- Cadillac BIG Meet
- Cadillac birthday cake
- Cadillac Blue
- Cadillac Color Selections Dealer Book
- Cadillac Coupe deVille
- Cadillac Dealer
- Cadillac Meeting
- Cadillac Mini Meeting
- Camaro RS
- Caorle
- Car Show
- Carburetor
- Card
- Carpet
- Carter AFB
- Cavalry Twill Vinyl
- CB
- CBM
- CCCD
- Choke
- Christmas
- Citizens Band
- Classic Cadillac Club Deutschland
- Clay Towel
- Cleaning
- Clock
- Clockwork
- Clutch
- Clutch Coil
- Collector
- Colonial Yellow
- Color Coded Springs
- Commercial
- Compound
- Compressor
- Condenser
- Continental Mark III
- Control Head
- Conversion
- Convertible top
- Coolant
- Corona
- Cowl
- Cruise Control
- Cruising
- CV Boots
- CV JOINTS
- D6230
- Dash Trim
- Decal Removal
- Decals
- Decoration
- Dehumidifier
- Delco Moraine
- Der Standard
- detailing
- Deville
- Diagnosis Chart
- Diagram
- Dial
- Digital Rotary Drum Clock
- Diner
- Disc Brakes
- Distributor
- Diverter Valve
- Door Jamb Switch
- Door Rubber Conduit
- Dornbirn
- Dot3
- Drive Shaft
- Driving tour
- Drum brakes
- Dry Ice Blasting
- Dry Ice Cleaning
- DVD
- Eastwood
- Eldorado
- Electric Choke Thermostat
- Electrical schematic
- Elvis
- Engine Bay
- Ep
- Epoxy floor
- Europe
- Evaporator
- Exide
- Factory Markings
- Fender Skirt
- Floor
- Flushing
- Foam
- For Sale
- Front AXLE
- Front brakes
- Front bumper filler
- Front Floor
- Front wheel bearing
- Fuel Filter
- Fuel Pump
- Fuel Sending Unit
- Fusible Link
- Garage
- Garage Cabinets
- Gasket
- GE
- Gear indicator
- General Time
- Glove box light
- Grand European
- H4
- Haus of Hot Rod
- Headlight Actuator
- Headlight doors
- Headlights
- Heater Core
- Heater Hose
- Heater Valve
- High Idle
- Holley
- Honest John
- Hood
- Hood Emblem
- Hood Ornament
- Hose Clamp
- Hot Choke
- Hot Water Valve
- HotRod
- How to
- Hödlmayr
- Ignition Diagram
- Illuminated Entry
- John D‘Agostino
- John Foust
- Klassikwelt Bodensee
- Kremsmünster
- LaSalle
- Leather seats
- Light Switch
- Limited
- Lincoln
- Lincoln Mark III Repair Tip
- Low Mileage
- Magazine
- Marilyn Monroe
- Mark III
- Master Cylinder
- Master Switch
- Master Vacuum Switch
- Media Blasting
- Meeting
- Meguiras
- MK II
- Mobile
- Model
- Moldings
- Mom
- Mopar Nationals
- Mostkost Kustom
- Movie
- Neon
- NOS
- Oberösterreicher des Tages
- oilchange
- ORF
- Overspray
- Pacer
- Paint
- Paint correction
- Paintjob
- Part Number
- Parts
- Patch Panel
- Perfect Circle
- Permabag
- Persian Lime
- Photo shooting
- Photoshooting
- Pictures
- PinUp
- POA Valve
- Power Antenna
- Power Servo
- Power Vent Windows
- Power Window
- Printed Circuit Board
- Programmer
- Pulley
- Quadrajet
- Quarter Panel
- Quartz Conversion
- R134
- Radiator
- Radio
- Rattle
- Rear brakes
- Rebuild
- Recalibrate
- RediRad
- Reed Switch
- Relais
- Relaunch
- Removing Overspray
- Repaint
- Repair
- Restoration
- RIP
- Roadhouse
- Roadmaster
- Rochester
- Rocker Arm Cover
- Rocker Panel Extension Clips
- Rostio
- Rotary Valve
- Rotterdam
- Rupes
- Rust removal
- Rust removal gel
- Sabre Wheels
- Sand Blasting
- Sandblasting
- Screed
- Season Greetings
- Seasons Greetings
- Seat Back Locks
- Seat Padding
- Seat Transmission
- See through ornament
- Self adjusters
- Sepp's Garage
- Seville
- Sheetmetal
- Shocks
- shop manual
- short
- Sign
- Solenoid
- Spark Plug Wire Routing
- Speakers
- Special Award
- Speed Bleeder Screws
- Splash Guard
- Starter Diagram
- Starter Motor
- Steering Column
- Storage
- suction throttling valve
- sunroof
- suspension
- Swirl Mark removal
- Switzerland
- T3
- Taillight Cover
- Texan´s Choice Award
- Thermostat
- Tilt and Telescope
- Time capsule
- Tomsclub
- Torque Specifications
- Tower Hose Clamp
- Towtruck
- Transducer
- Transmission
- transmission control selector
- transmission control selector indicator light
- transmission shift indicator
- Treadle Vac
- Treffen
- Tri-Band
- Troubleshooting
- Trunk Cardboard Kit
- Trunk lining
- Trunk to bumper cover
- Turn Signal Switch
- TV
- Typisierung
- Ultimate Garage
- Underbody
- Undercarriage
- Undercoating
- Undercoating Removal
- Vacuum Booster
- Vacuum diagram
- Vacuum hoses
- Vacuum Master Switch
- Vacuum Schematic
- Vacuum Valve
- Valve Cover
- Various
- Vent Window Switch
- Vibration
- Vibrator
- Vicodec roof
- Video
- Vinegar
- Vinyl Roof
- Visitor
- Washer Fluid Float
- Washer Fluid Low Level Indicator
- Water Pump
- Wax
- Weatherstripping
- Website News
- Westclox
- Wheel Bearings
- Wheel Housing
- Wiesbaden
- Windlace
- Winter
- Wiring
- Wiring Diagram
- Wonderbar
- Workbench
- Zurzach