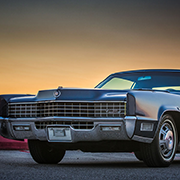
 GERALD´S CADILLACS - NEWS
THE 1966 UNDERCARRIAGE PROJECT - LONG POST!
VIDEO RECAP
I did not plan to do a video about the restoration, but here is a short collage of some footage I had: (on youtube you can watch it in 4k HDR
This is a short video showing what was done
BEFORE
Some "BEFORE" pictures showing how the car looked before I started working on it.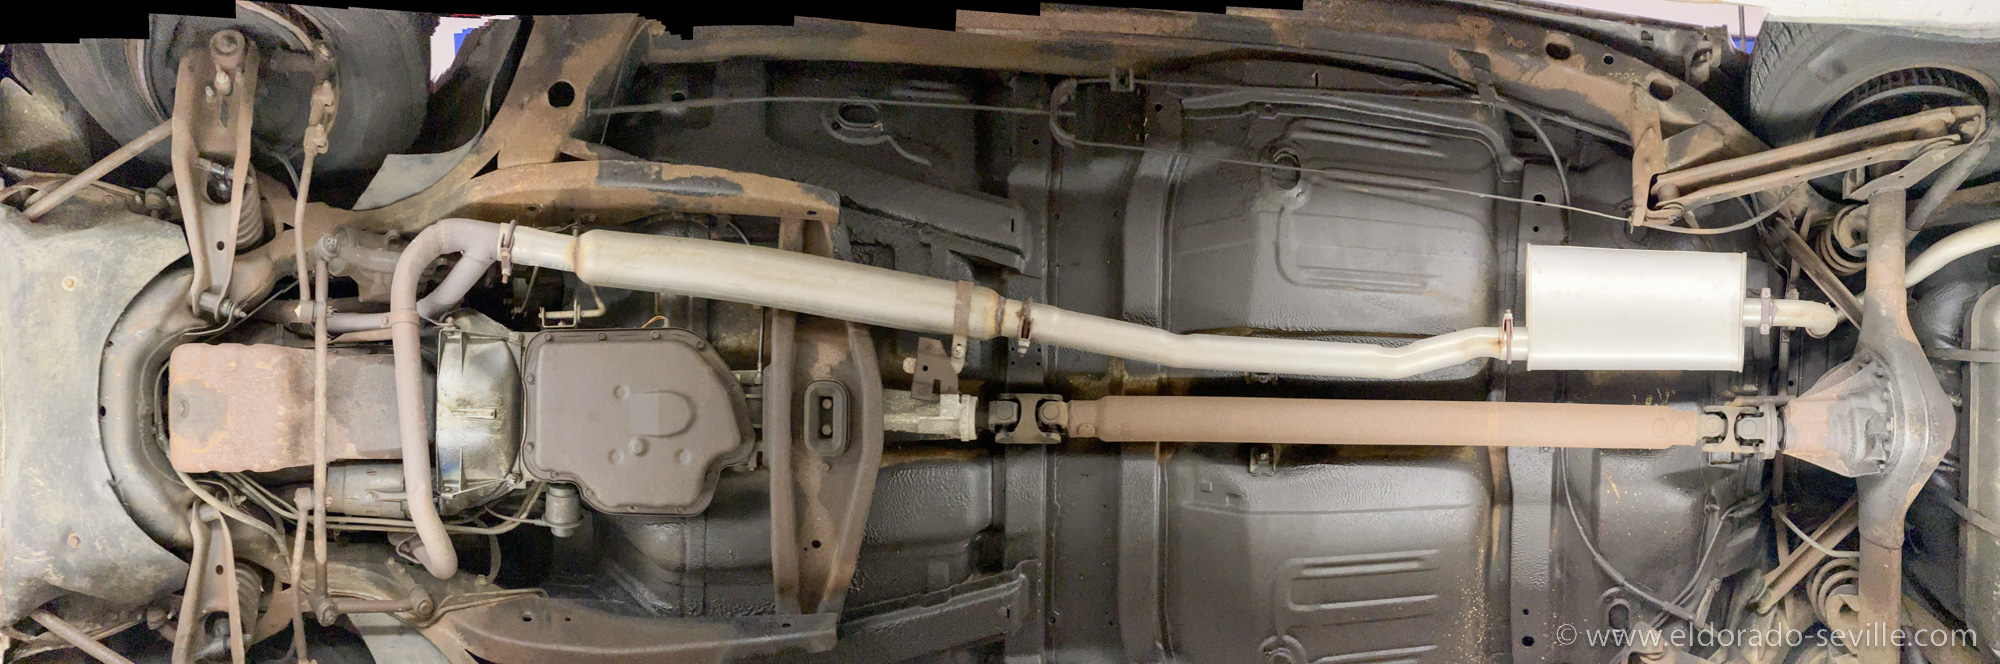
AFTER
This is how it looks now - after all the work I did. Click to see the full report.
READ MORE...
1966 AC BLOWER VACUUM MASTER SWITCH
I rebuilt the carburetor and let the car idle for a while. During this I wanted all accessories to move and also turned on the heat. It came on as always and after about 30sec the blower went off again. The power servo started to move in and out all the time by itself, but the blower would stay off. The idle speed up came on and off as well depending on the placement of the power servo. After a while it stopped doing this and stayed in the fully retracted position (full heat). If I turned the temperature dial it did not change anything - but it was around freezing outside and this is what it should, do as the sensors sense the low temperatures and then send the system into full heating mode.
I checked the following things.
- Master Switch seemed to work and gets engaged by vacuum. Power is going through it as it should. Current is going in and out. (This is what I thought…)
- Blower Motor tested with a direct feed - worked
- Blower Motor Relay - tested. Put a 12 V feed to the dark blue connector and it engaged and the blower motor came on. There was no current coming through the blue wire though.
- Power Servo - cleaned all contacts and measured the resistance in all positions - looked good to me
- Control Head in Dash - removed it and checked the blower switches - it seemed to work.
Full vacuum was applied to the power servo, and I also checked the vacuum and voltage at the transducer. I also checked all vacuum actuators with a vacuum gauge, but everything checked out perfectly.
I then put everything back together. Still the system did not work in the full heat position. I did a lot more tests and checked the vacuum and electrical diagrams.
I ordered the 1966 AC manual from "Cadillac Tim" which is available also on ebay for $45,- . These instructions are a must-have for your car, as everything about the AC system is explained very well by Tim. There is a great troubleshooting guide in there. Its money well spent! Tim also offers a rebuild service for many Cadillac parts and has a great selection of refurbished parts. Check out his website!

The 1966 dash control unit - here you can see the amplifier part.
After days of troubleshooting it finally dawned on me where the problem was. I had checked the master vacuum switch multiple times and when checked it always had electrical continuity. But I did not check it correctly. I only pushed the backside of the switch until I heard a click.
I should have tested it with full vacuum applied. As it turned out, if high vacuum was applied to the switch (during heating mode), the switch did no longer work correctly!
 The contacts did no longer touch when full vacuum was applied to the switch…
Today I took it apart and made a video about it. As it turned out the switch contacts did not align as they should and I had to bend it a little bit to make it work again. I then put everything back together and now the AC system works perfectly again. Check out the video for all the details!
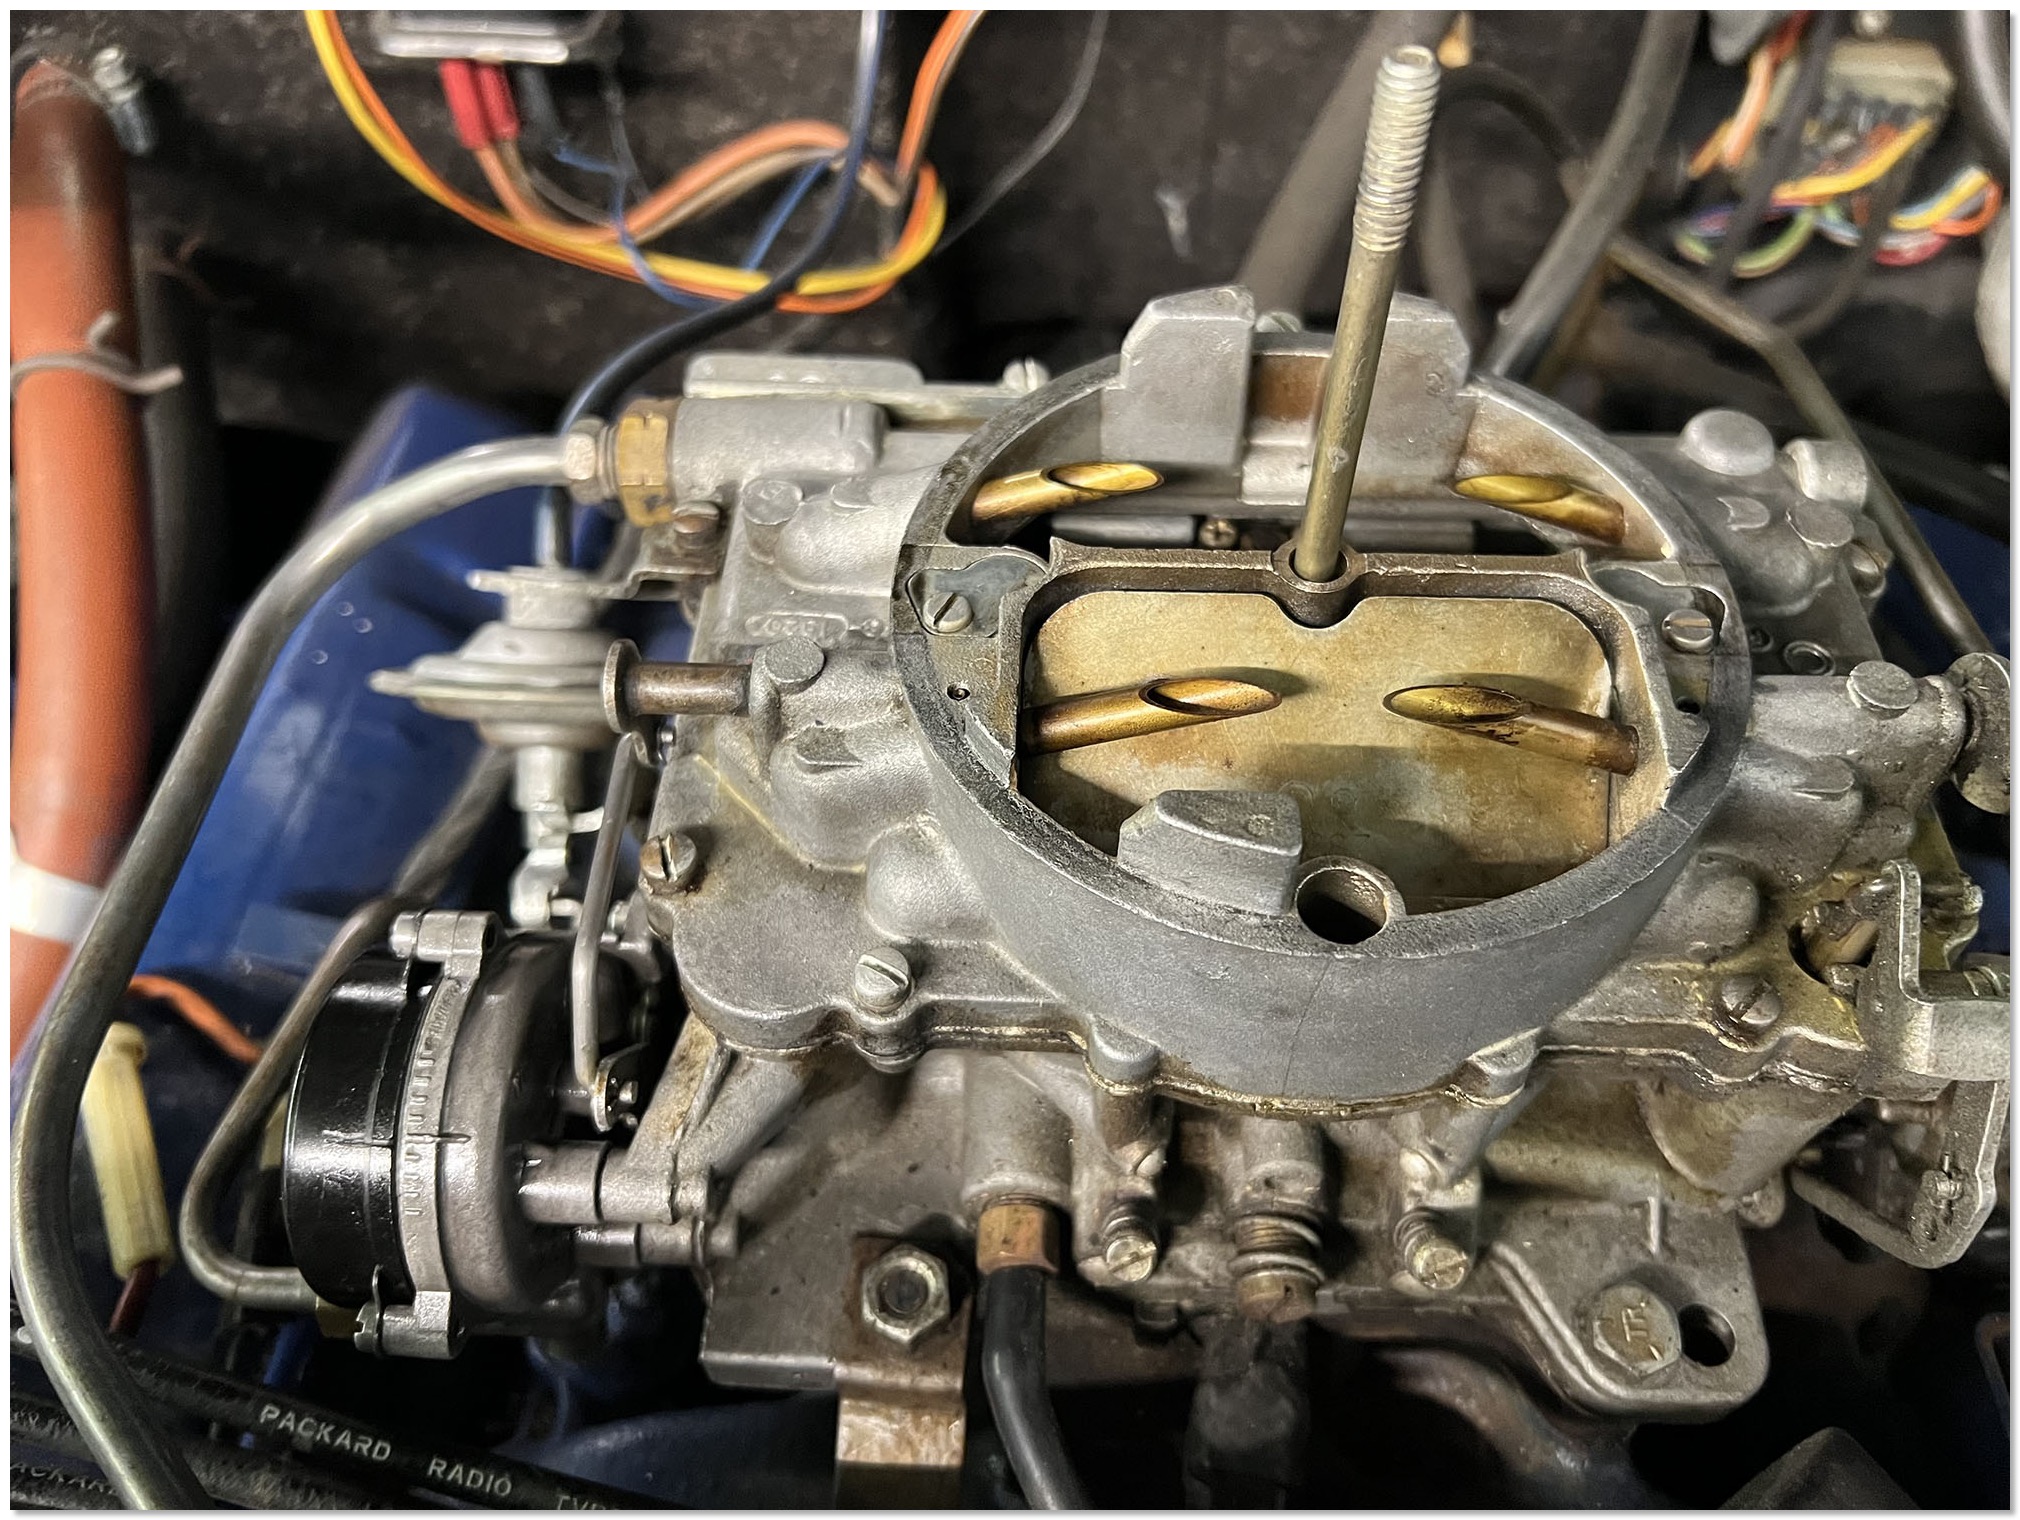
1966 HOT CHOKE CARBURETOR REPAIR
I removed the choke housing from the car and it was completely stuck and did not move at all. Both the lever and the counter weight were completely frozen up although everything inside the housing looked pretty clean.
First I tried anti seize oil which did not change anything. Then I soaked the unit in a parts cleaner solution over night which did not free it up either. The next day I soaked it in a rust removing solution which did not help either. I then put it in a can of transmission fluid for a while.
In-between I always gently tried to move it and suddenly it freed up and now works perfectly smooth again. I put the carburetor back together and now the car is very easy to start again - even on a very cold day.
The choke after repair. The choke mechanism disassembled for repair after I managed to free it up.
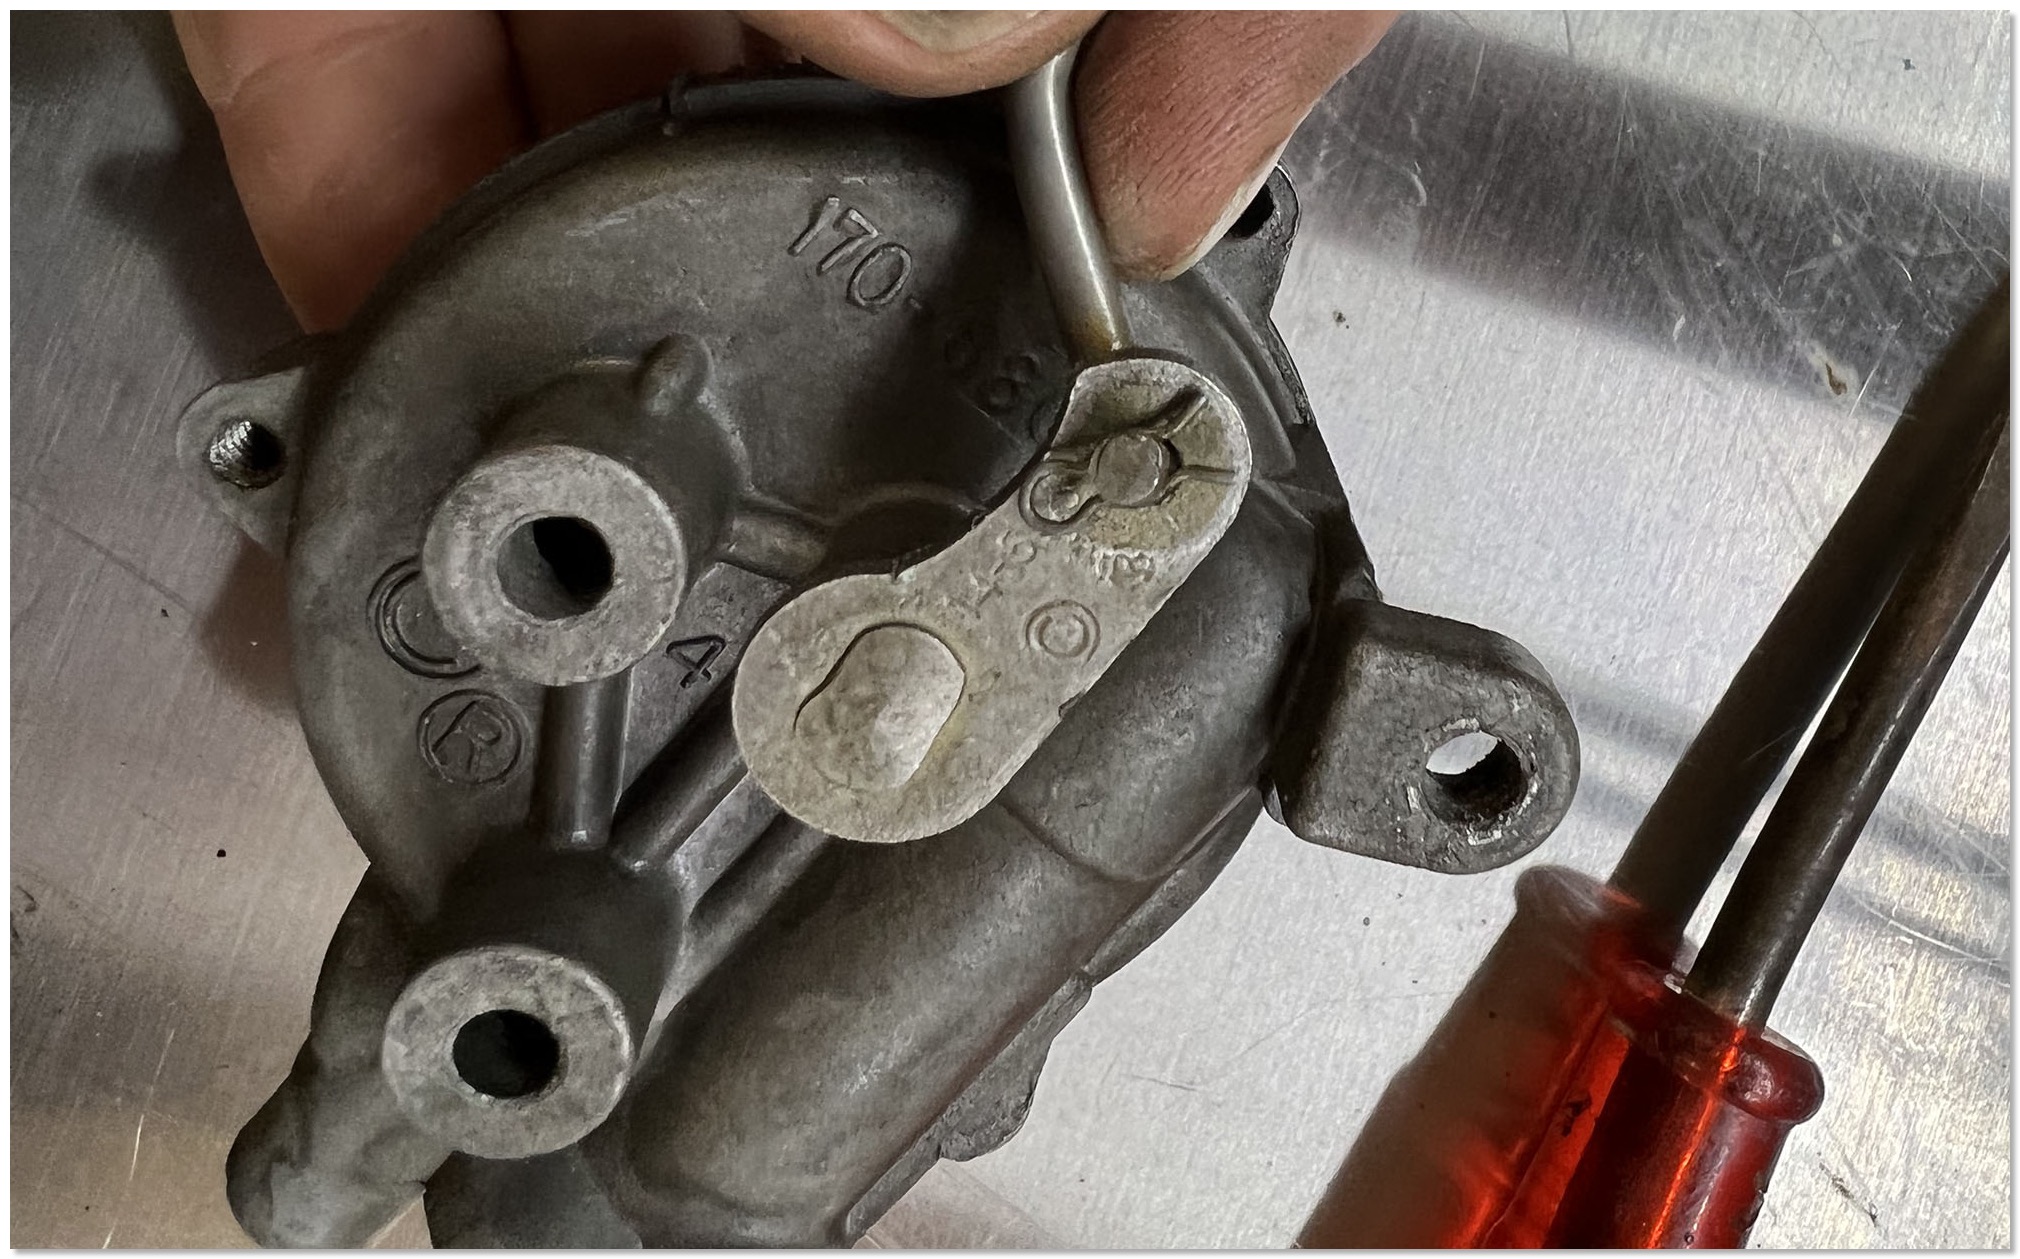
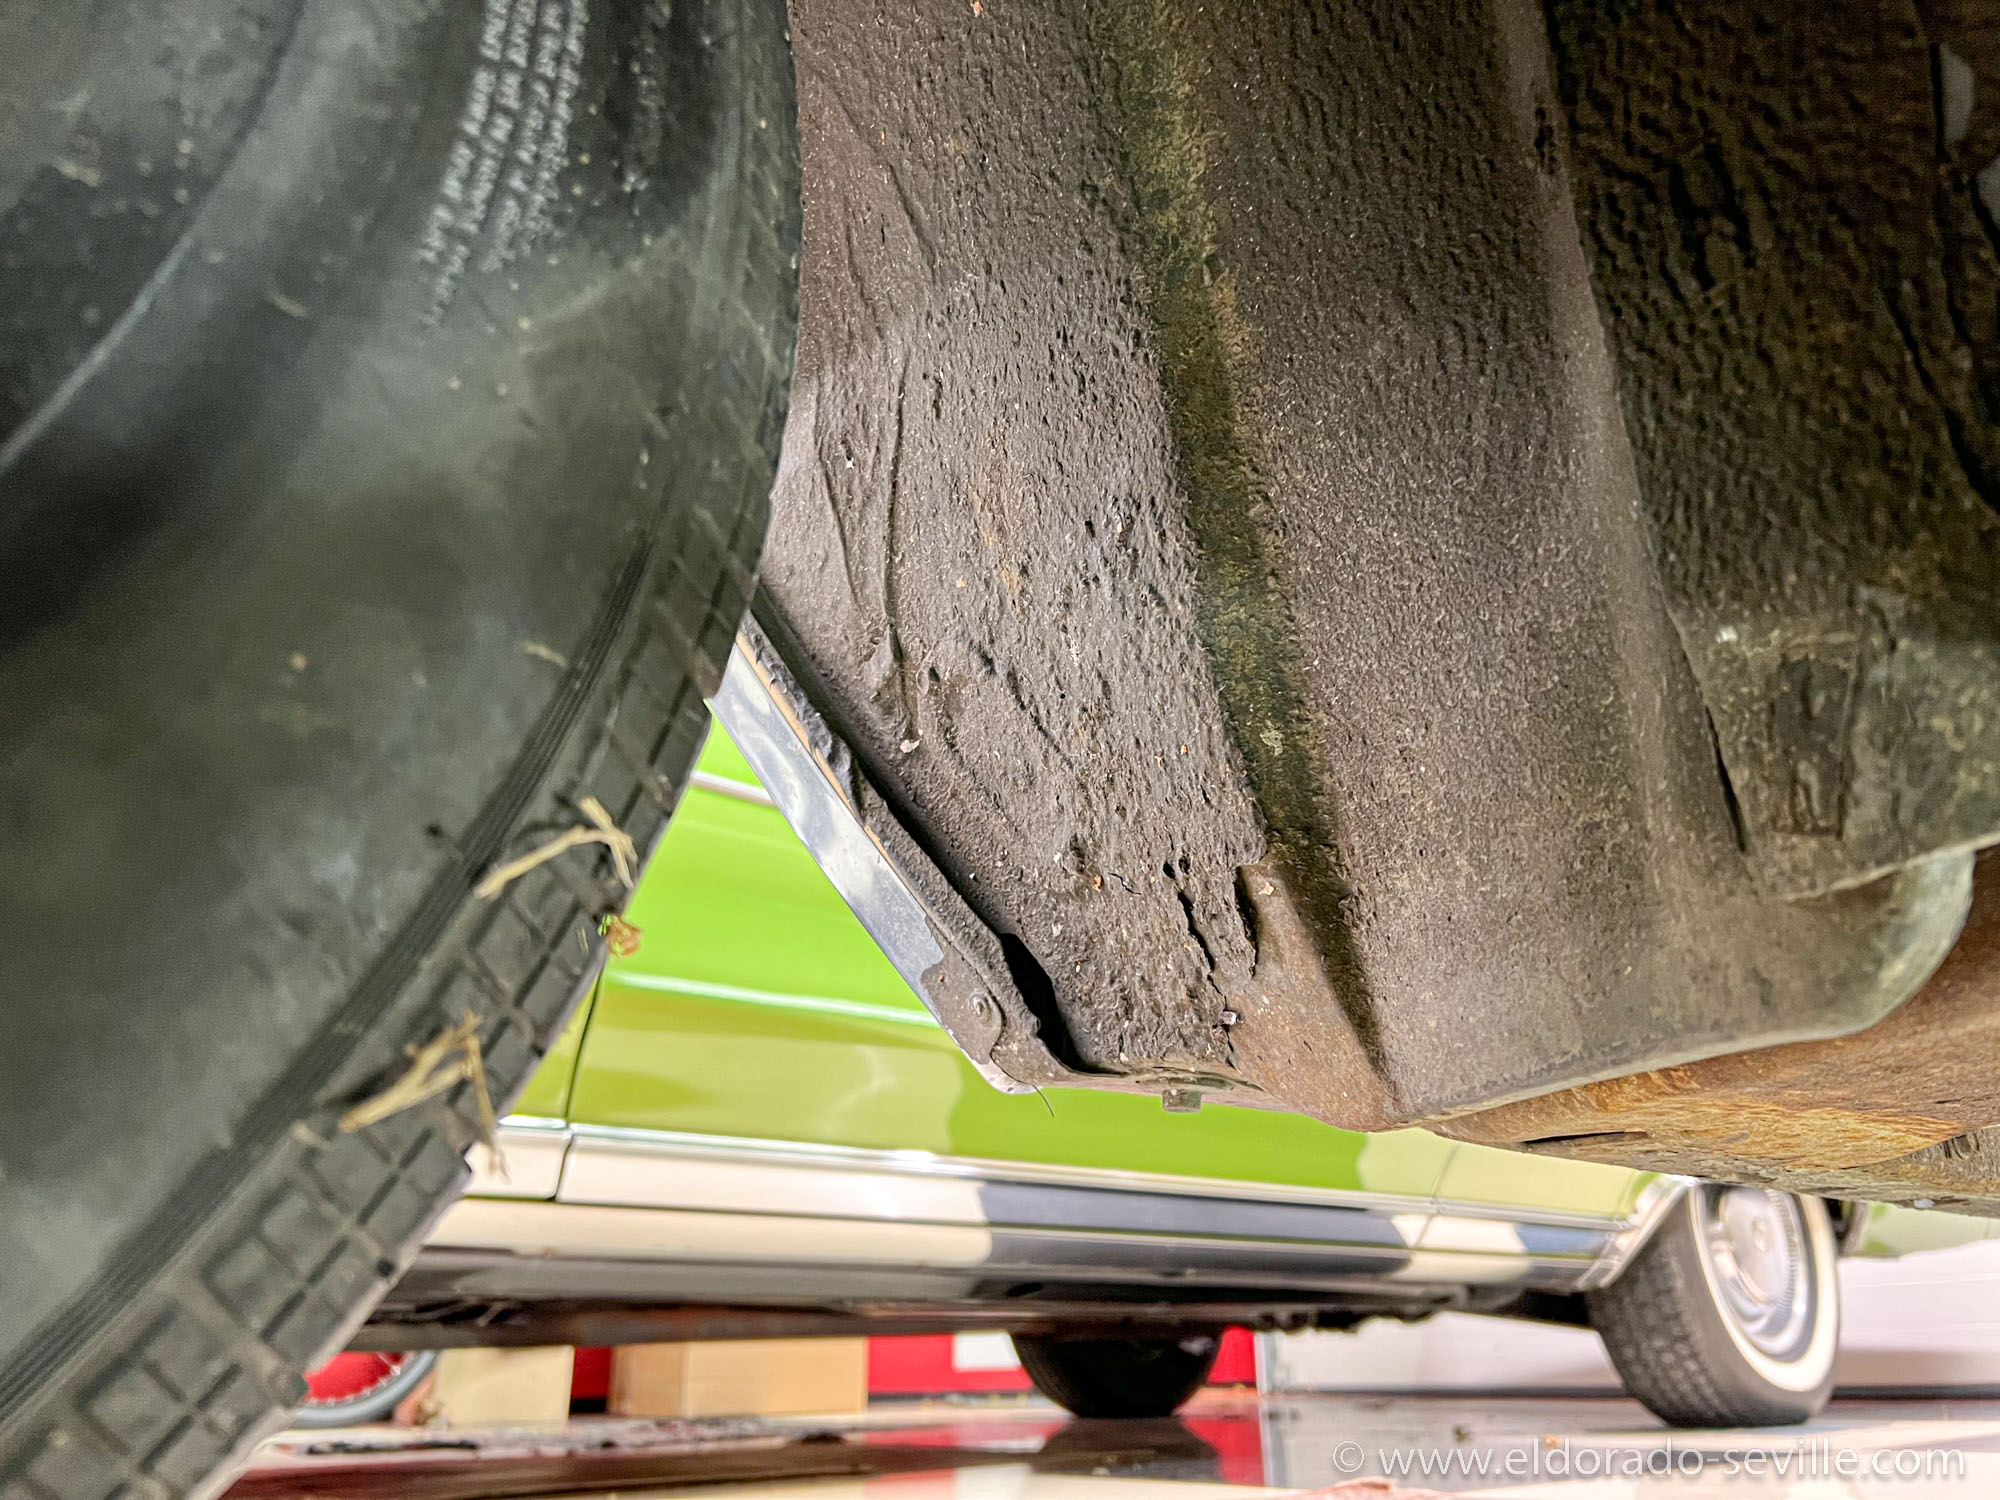
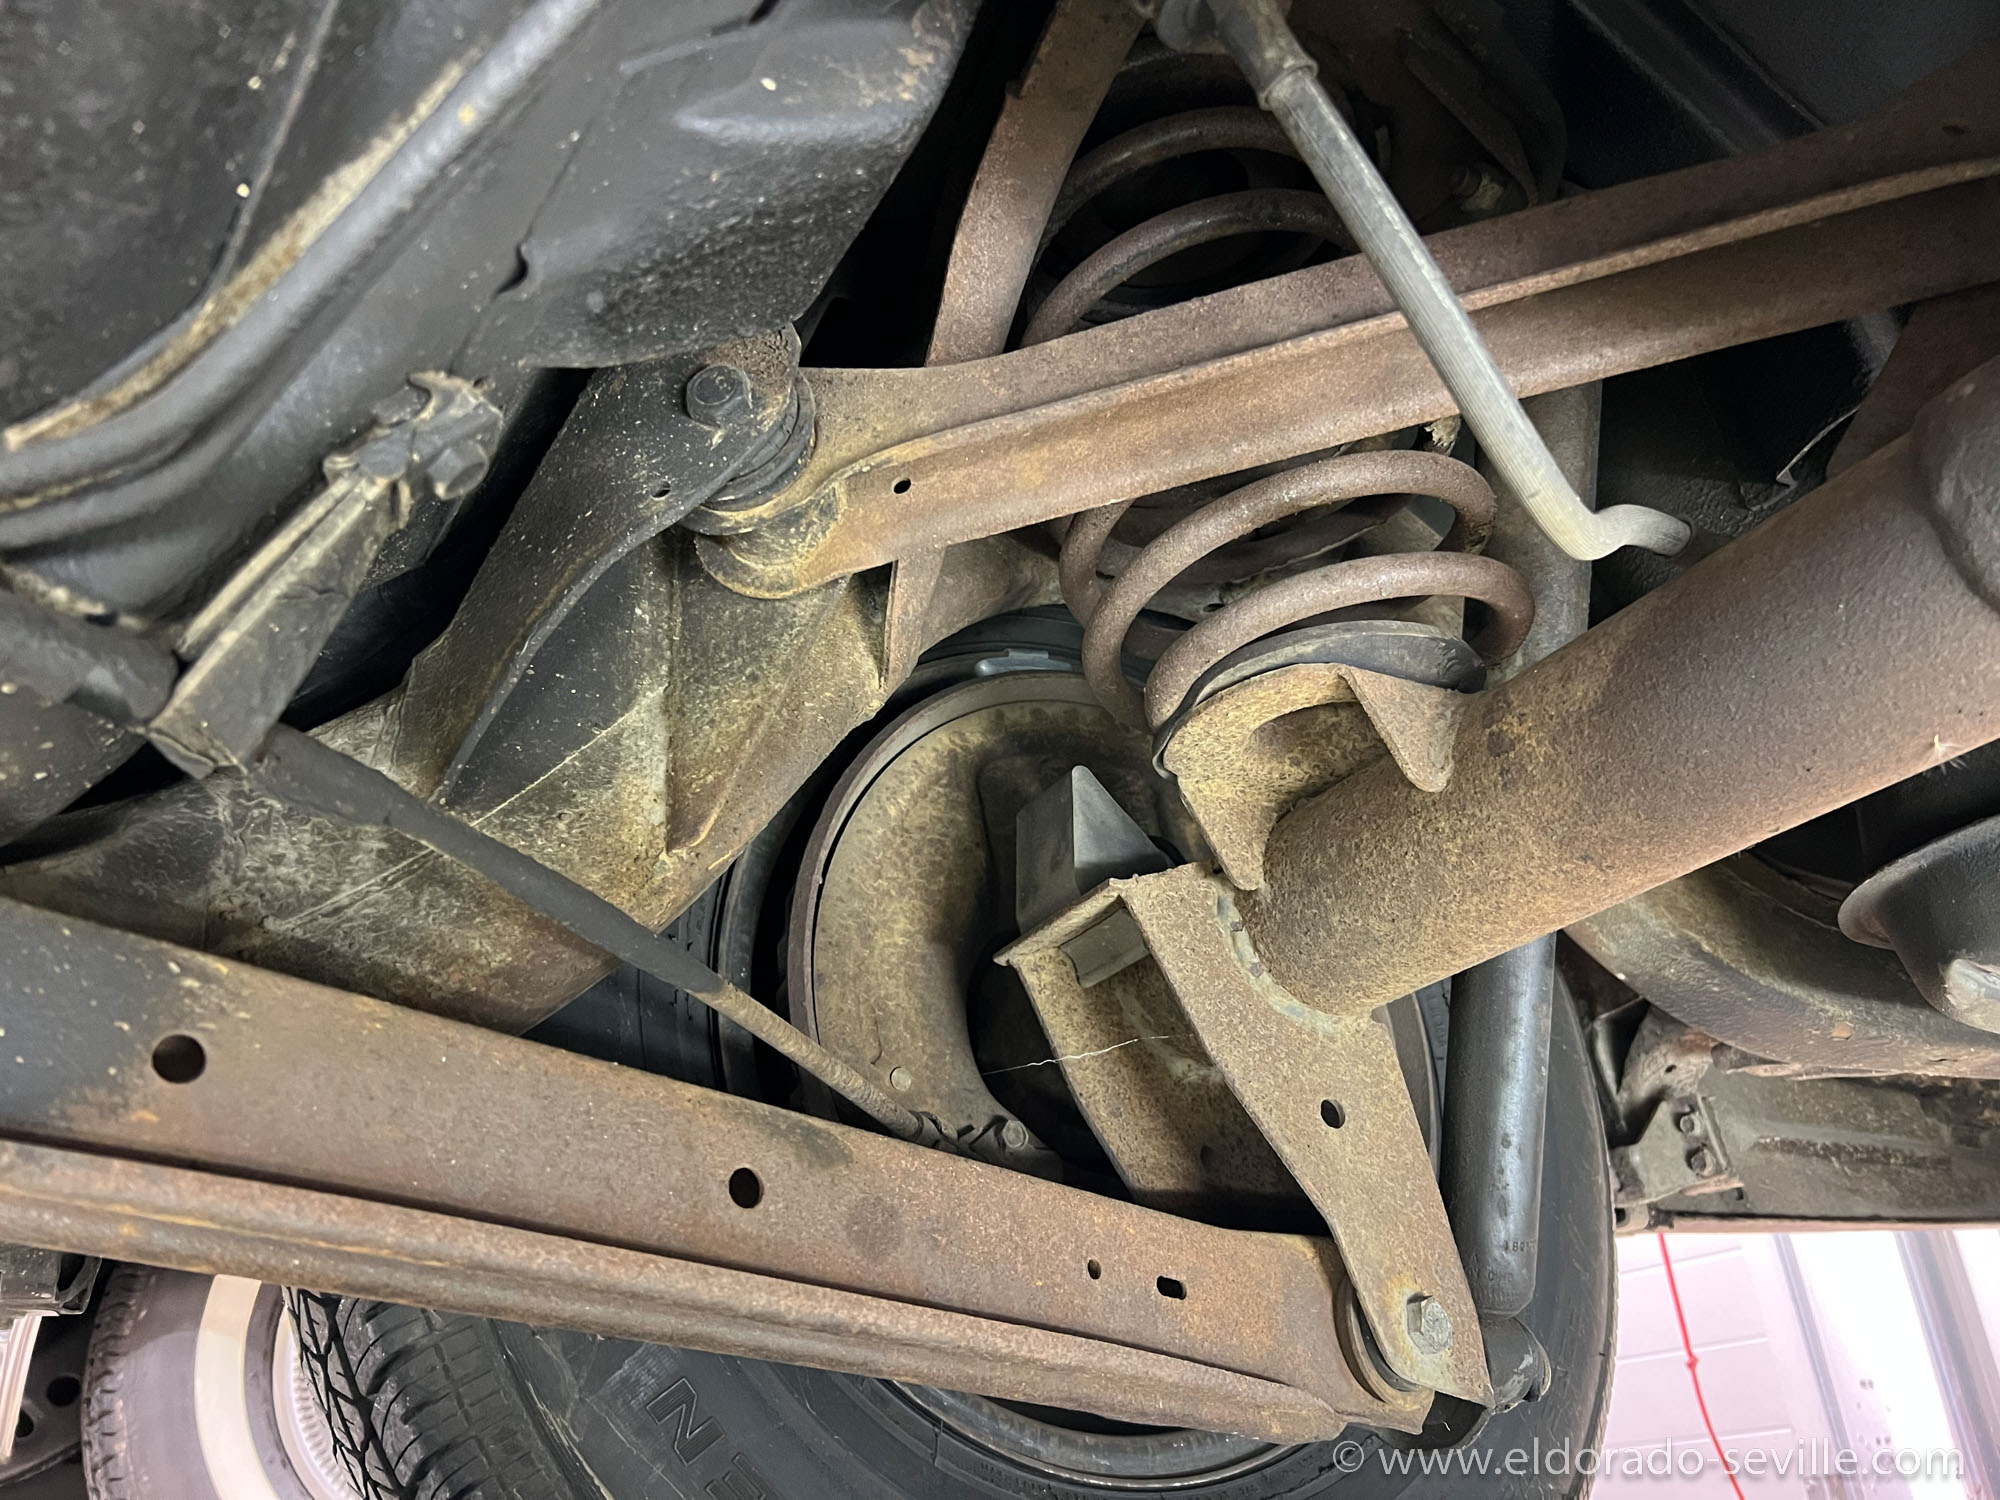
1966 UNDERCARRIAGE CLEAN UP PROJECT
To make the car perfect again I will also dry ice blast the undercarriage and totally clean it up like I did on my 74 and the Roadmaster to preserve it as good as possible.
Today I started to brush some of the surface rust away. After that I will apply some rust remover.
I took some "before" pictures and a video.
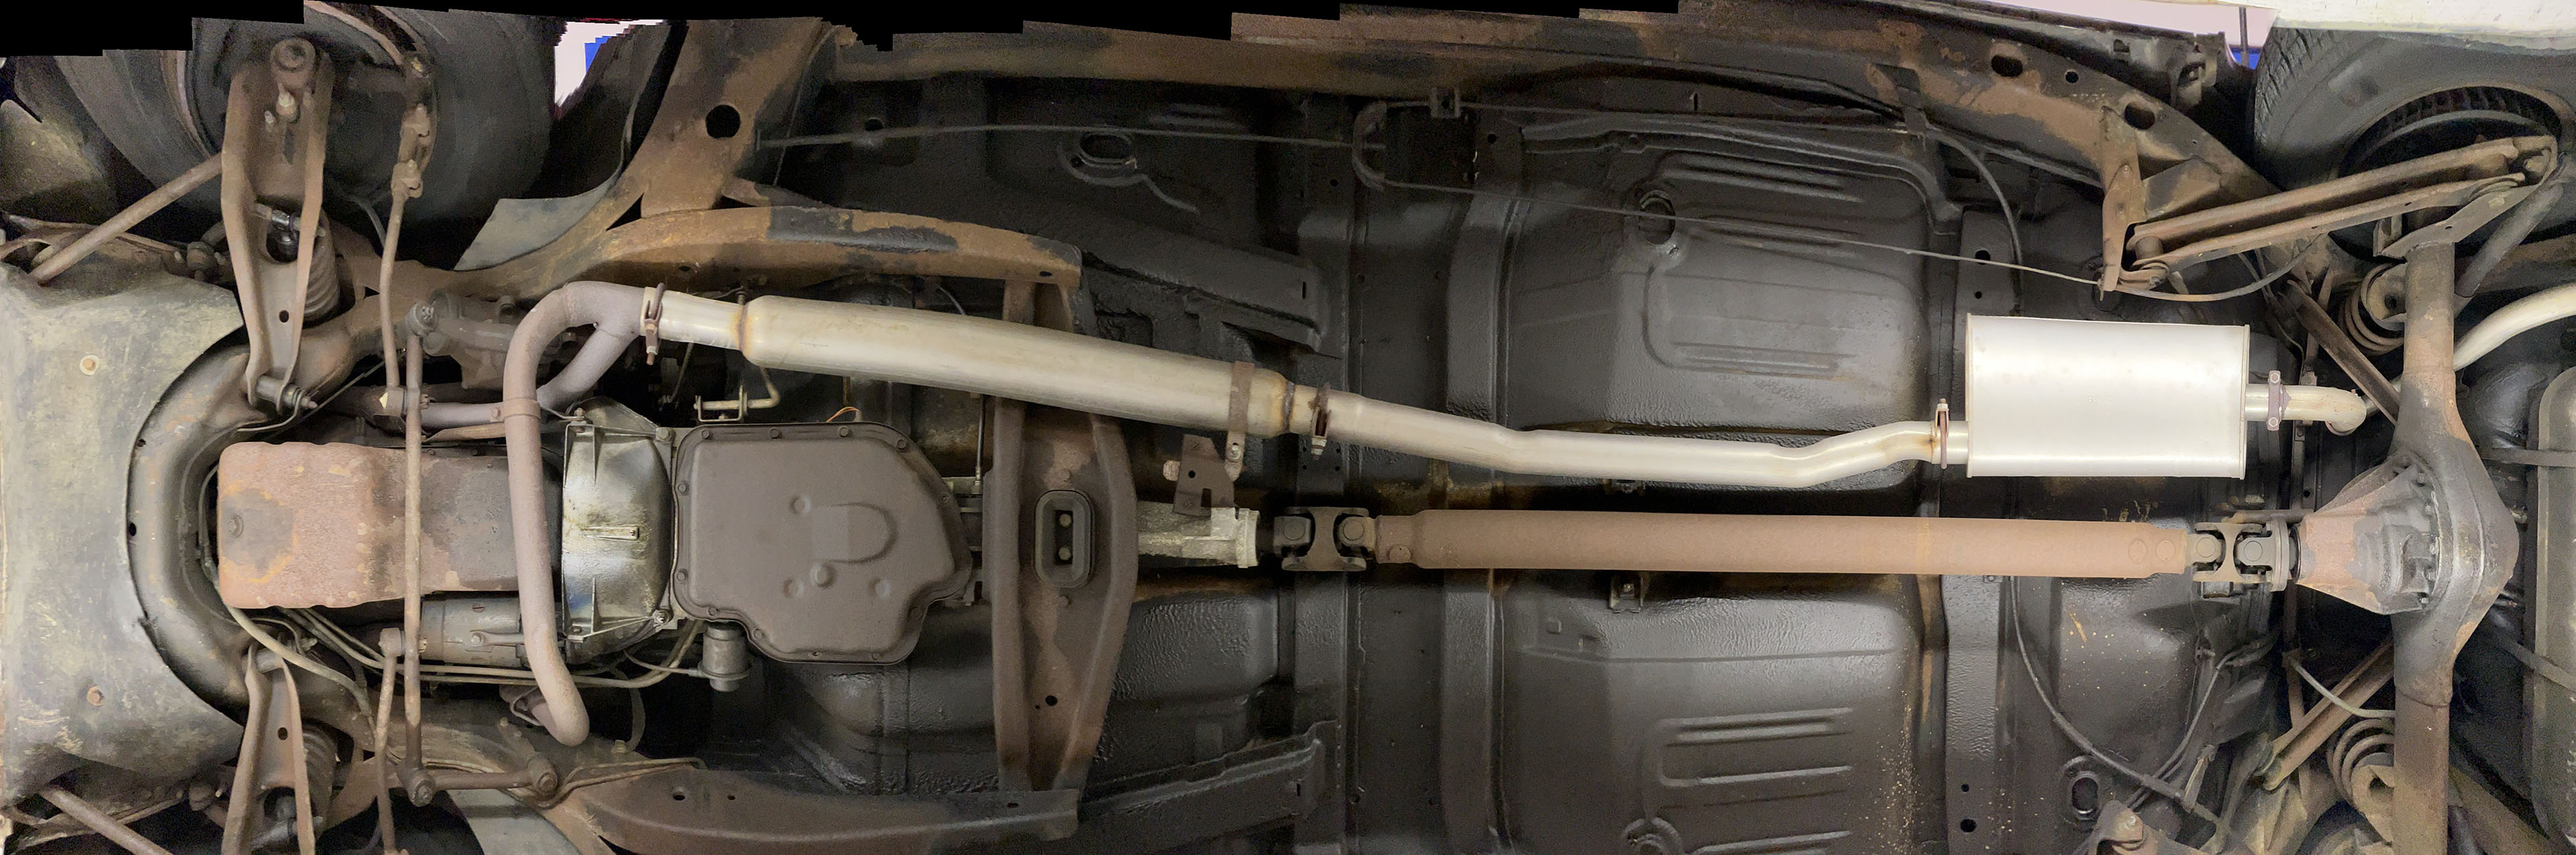
It will be a long and dirty job…
THE 1966 COUPE DEVILLE IS BACK
Through a couple of car trades within my Cadillac friend community, the car became available again, and my dear friend Georg helped me to get it back.
I can't thank Georg enough - without him I would have never gotten the car back!
Today was the day to pick it up at my Georgs garage and drive it home, although I do not really have enough garage space anymore…
READ MORE!
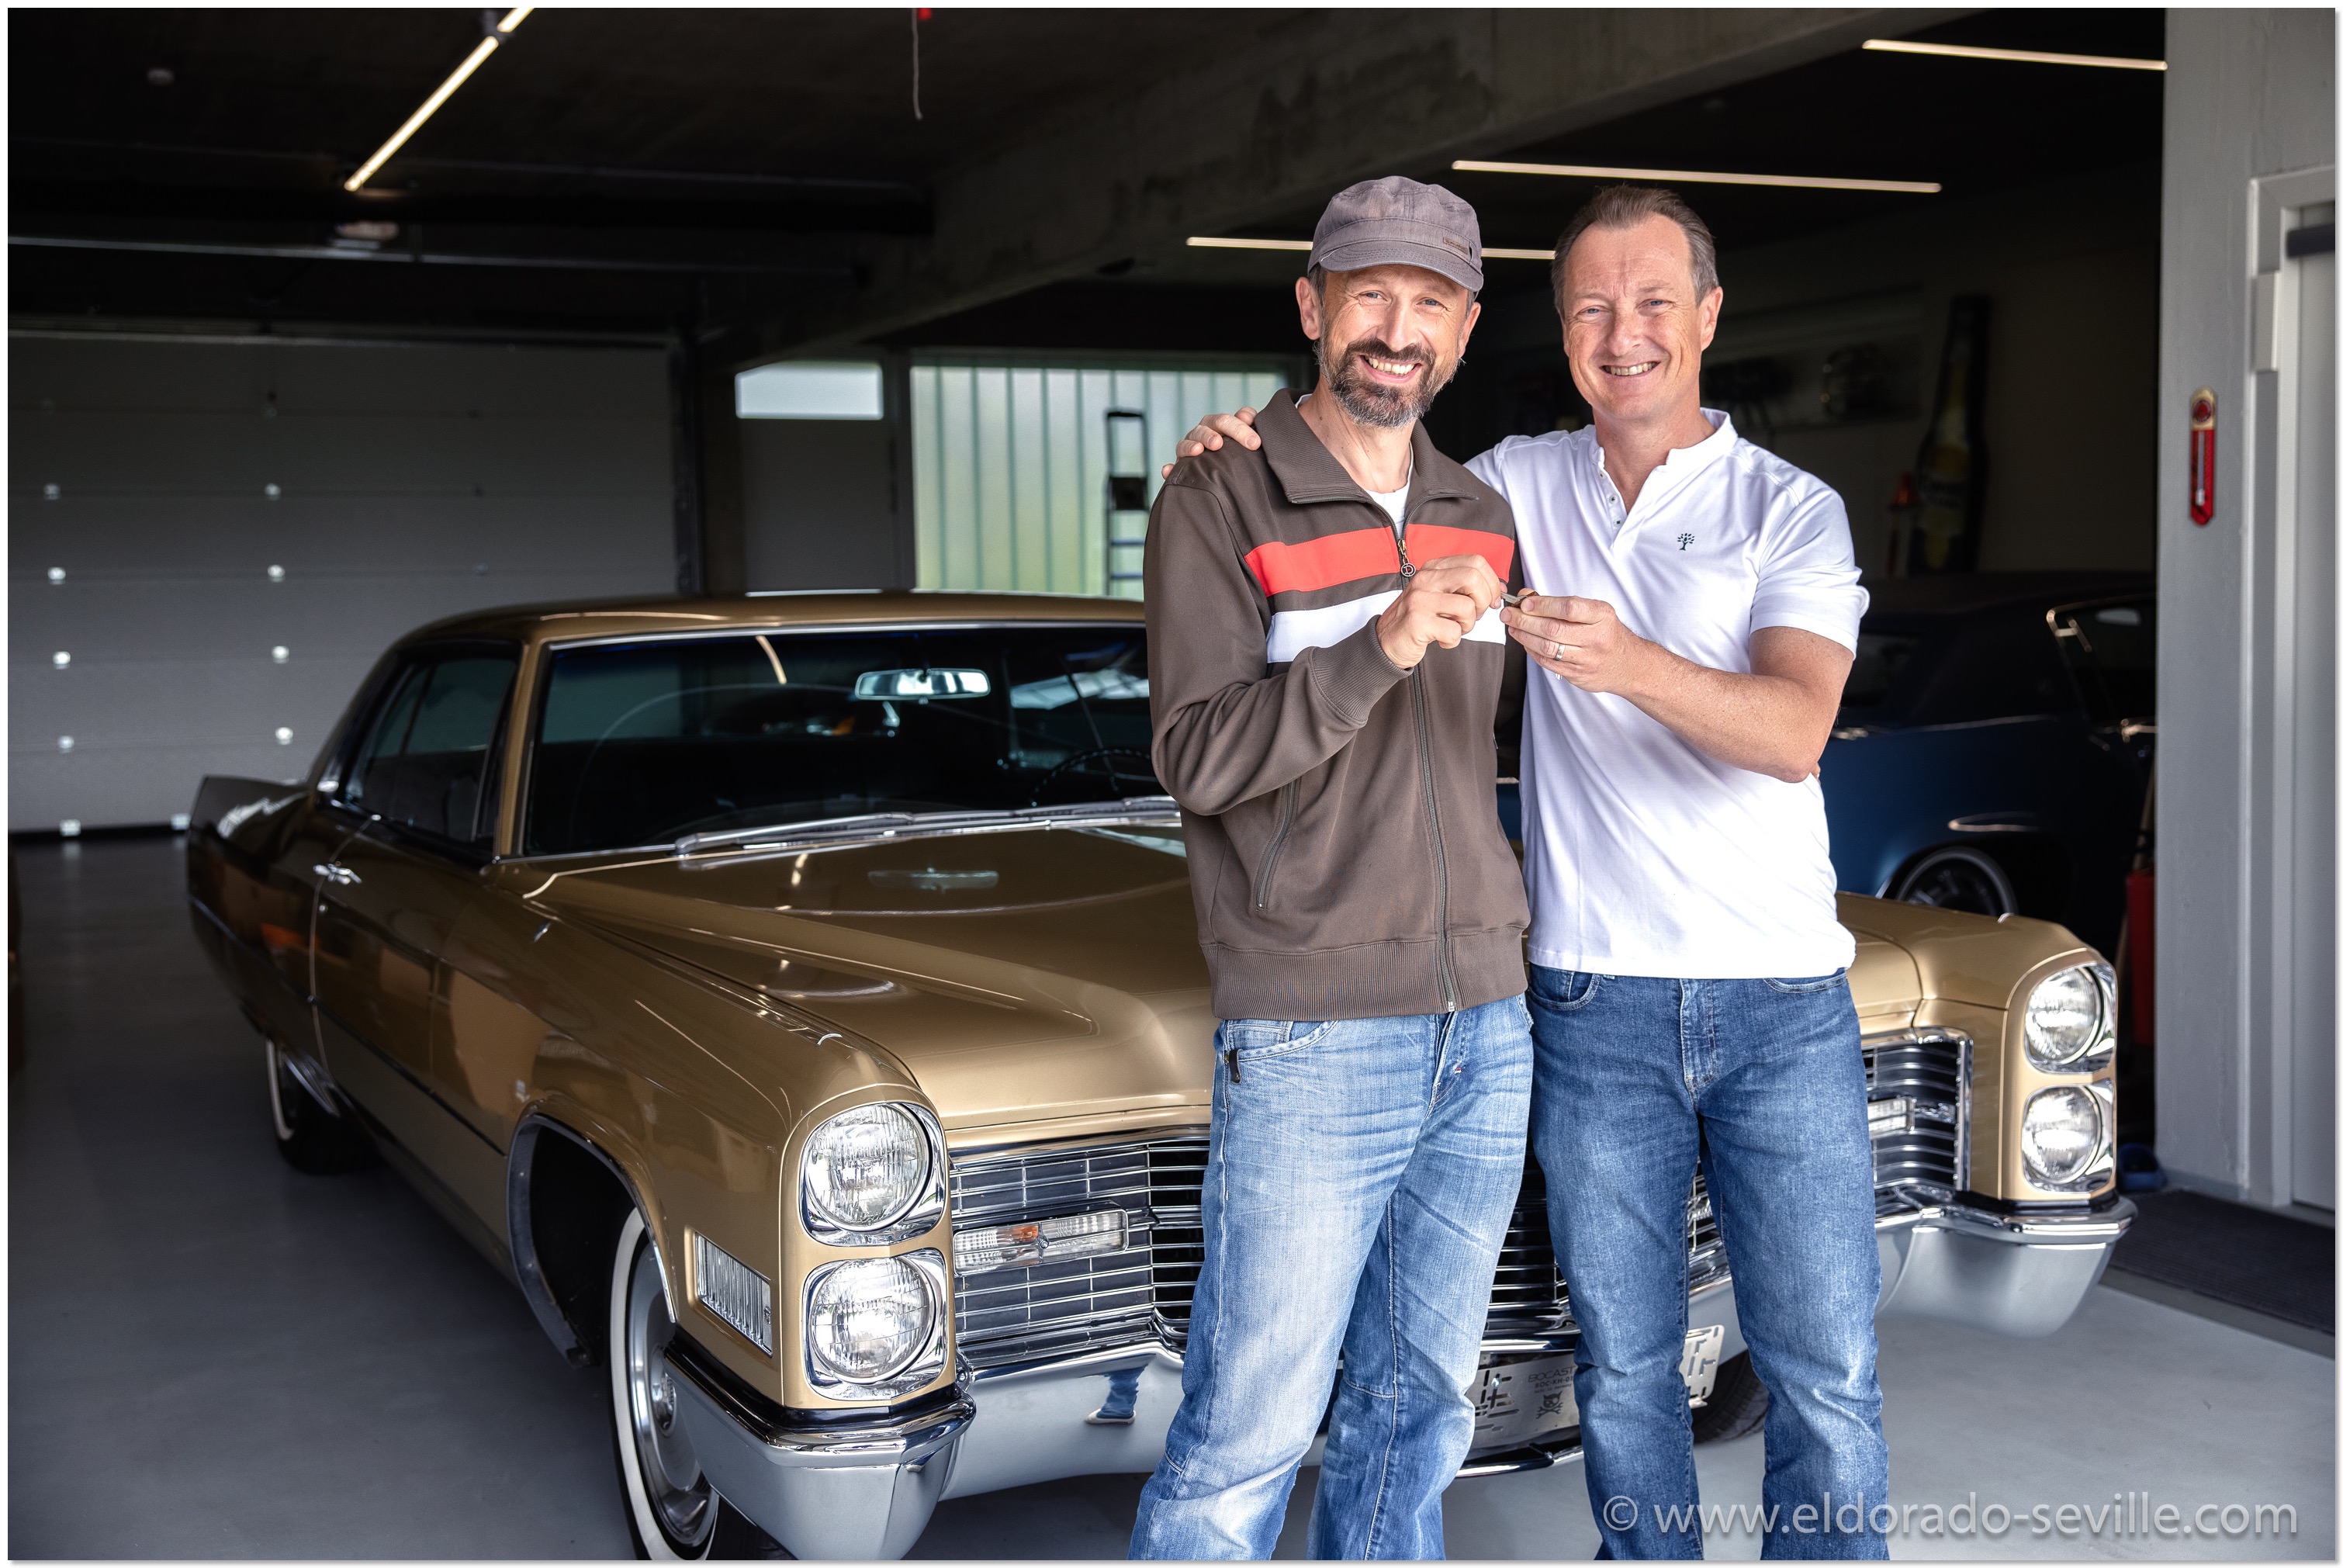
Taking over the keys - THANKS MY FRIEND!!!!
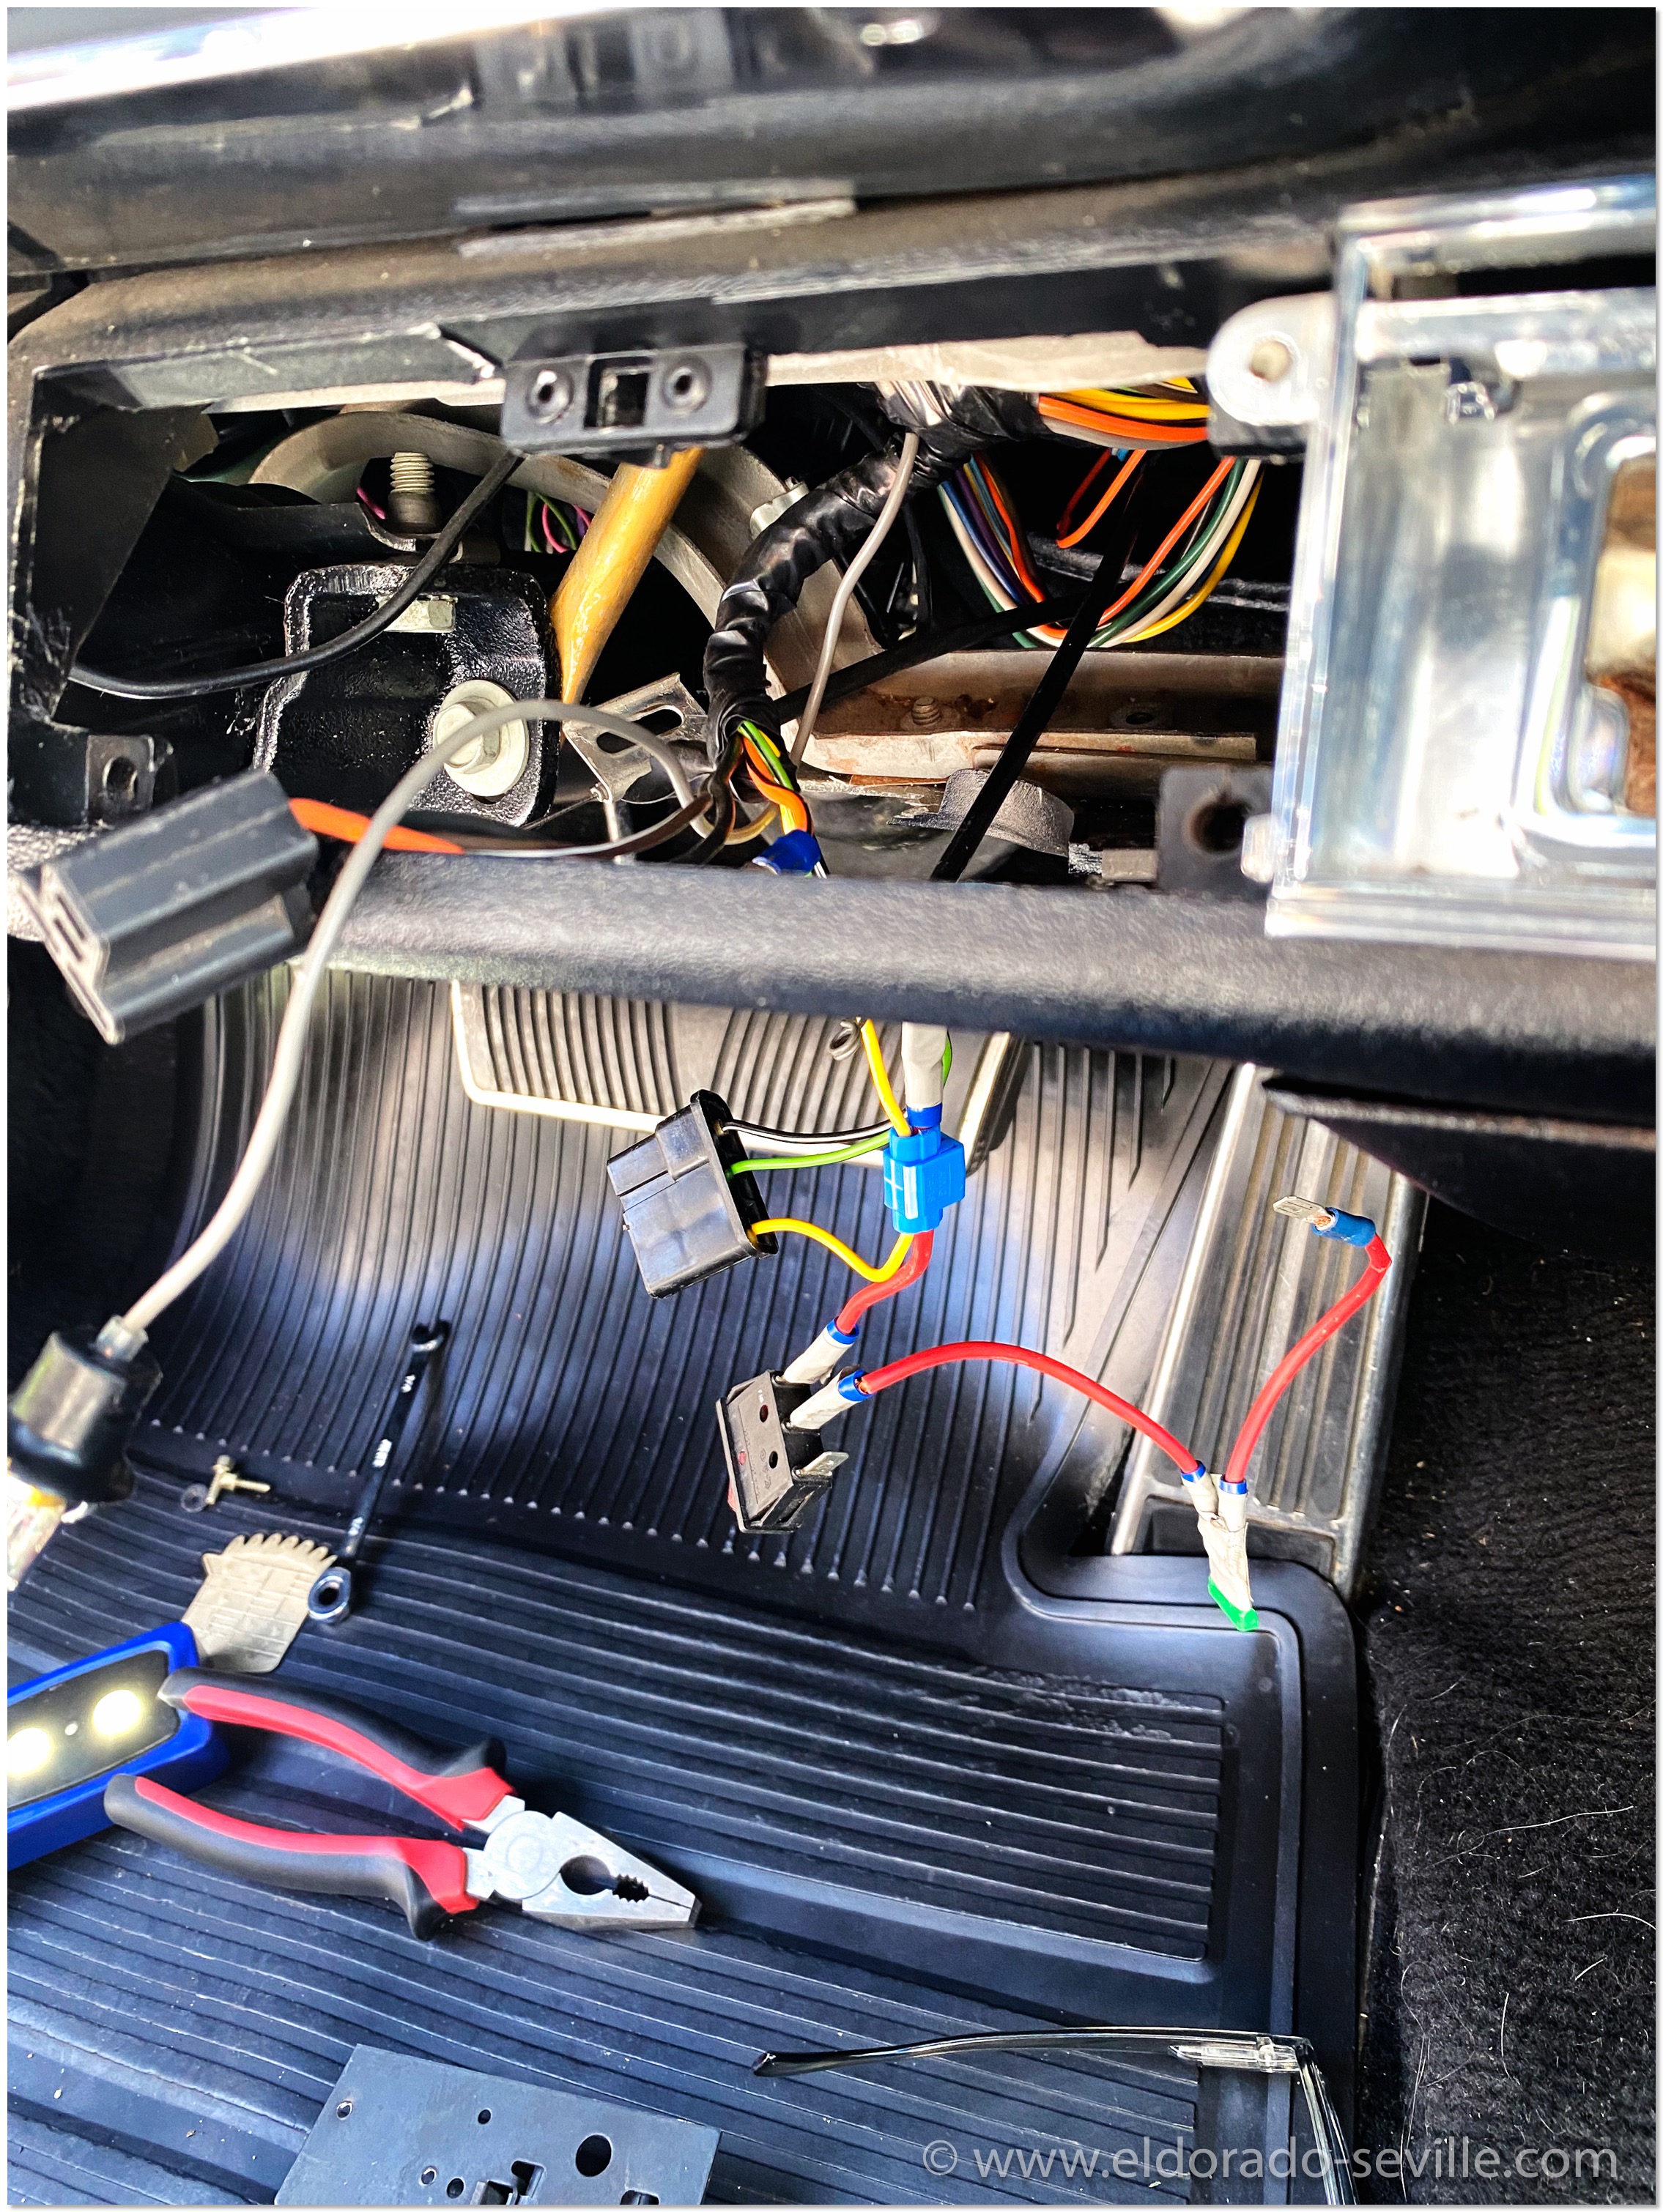
This is how the shop messed up the ATC system of the car… I reversed everything back to original!
READ MORE...COLOR CODED VACUUM HOSES - BEWARE OF TERRIBLE REPRODUCTIONS!
These vacuum hoses unfortunately get extremely hard and brittle over the decades under the harsh conditions in the engine bay. Often they literally break into pieces by just touching them.
On my 67 Eldorado I had to replace most of the vacuum lines when I got it - and it really has a lot of hoses.
When I searched for reproductions I could not find a really good source and I gave up.
At my ongoing project on my 74 another of these original lines fell apart while working in the engine bay. So I started to look for the correct hoses once again.
Soon I found a link on ebay to a well known seller, whose name I do not want to mention, offering the lines in all the colors I needed.
I ordered quite a few Ft of each color.
The seller describes them as factory correct and as a perfect part - see screenshots below.
As they do not ship to Europe, a friend of mine was so kind to forward the hoses to me.
When they arrived I was shocked - I have never ever seen a worse product.
The paint is peeling off or missing at all. As soon as you even slightly bend the hoses, the paint on the stripes just cracks and falls off. It could not be worse.
Also the hoses are too thick and the walls are to thick. The original hoses are quite a bit slimmer than these crappy reproduction hoses.
They also charged me for 15ft of red striped hoses but only sent 10ft. This was about the worst buying experience ever.
I´m trying to return the hoses at the moment - but communication with this seller is terrible.
I normally never criticize sellers here on my website and never leave any negative comments on ebay - but this is the worst I have ever experienced.
Shipping back these hoses will cost me at least $50 and I already paid $60 for having them shipped to me in Europe - with the import tax I will have lost $160.- for this BS… Money I would urgently need for some other parts… :-(
I´m now trying to find another good source for quality reproduction hoses. There is one Corvette parts dealer which looks promising as he offers some great kits for Corvettes, but they are all pre-cut… I hope he can send me some ft. of the hoses I will need - I hope that I will get a positive reply.
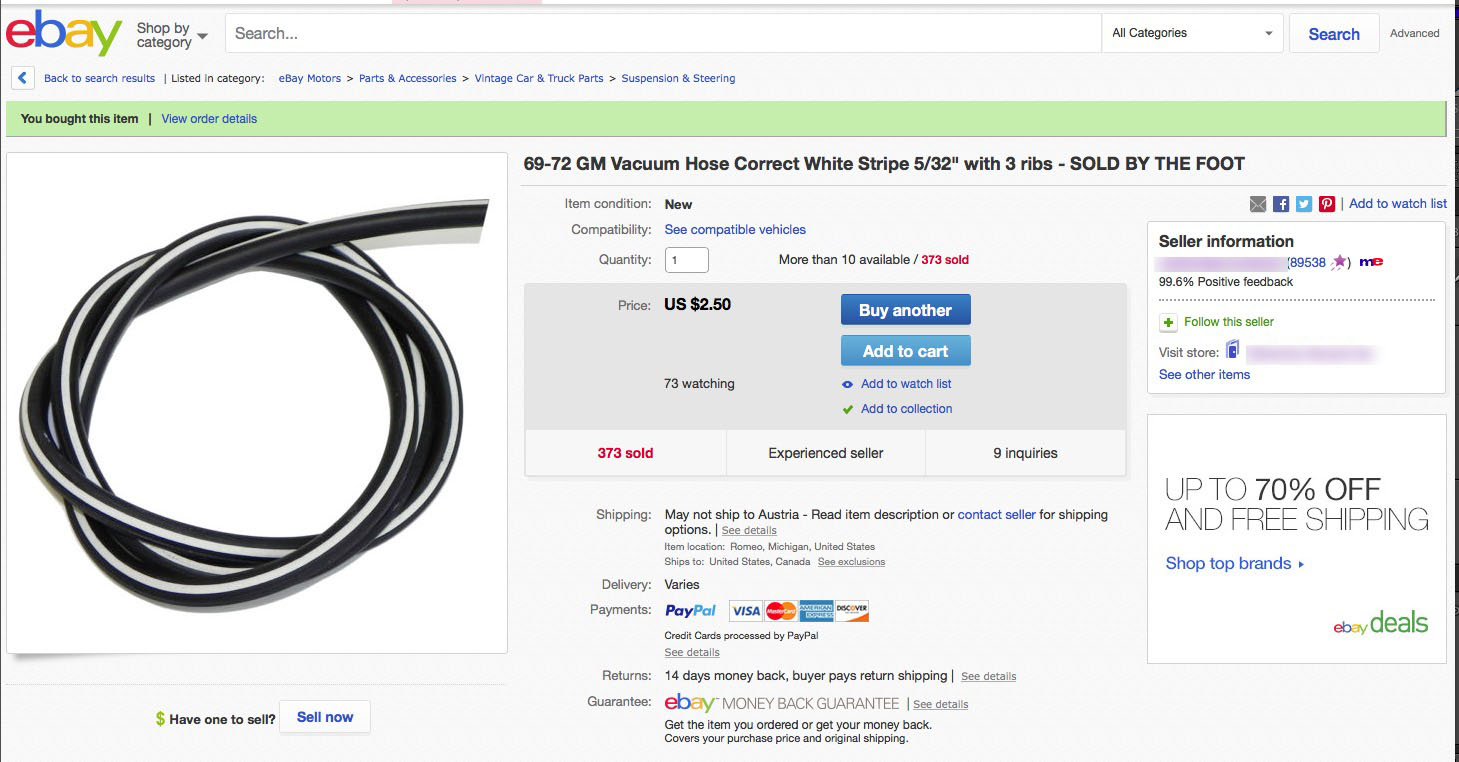

Ebay seller screenshot - this is how they describe the hoses…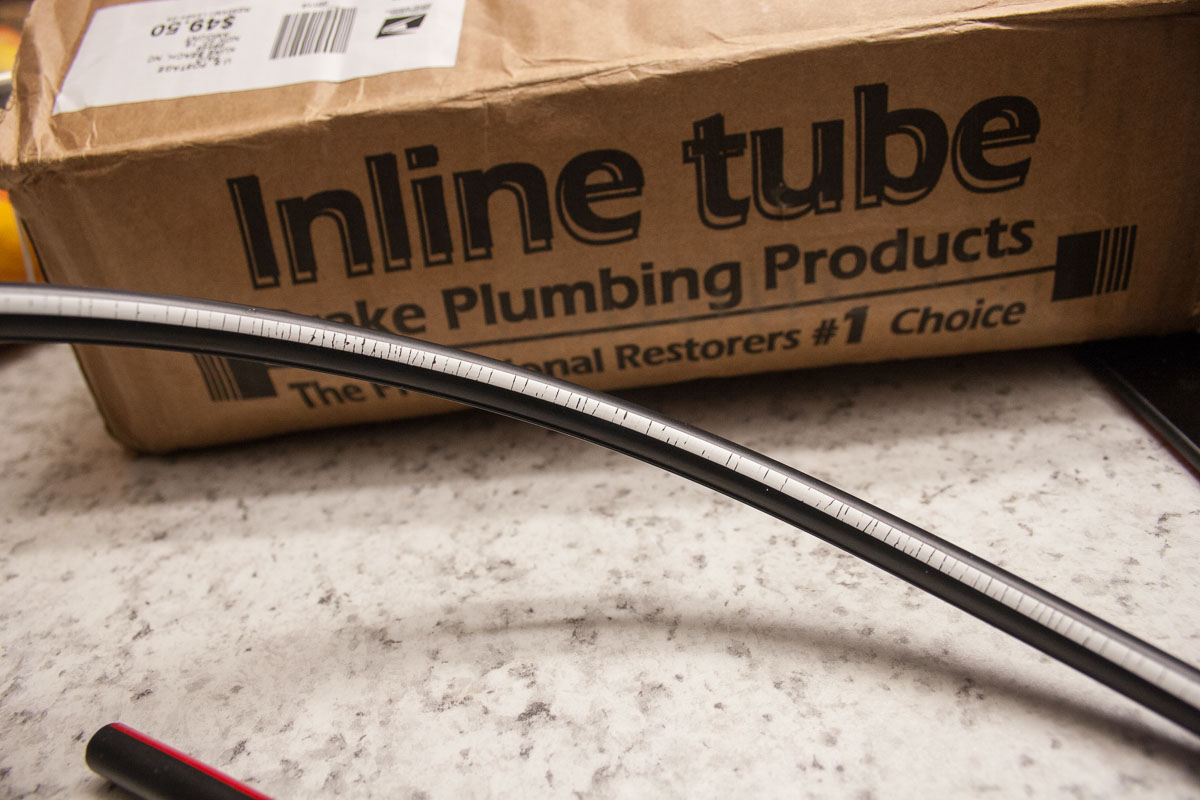
As you can see the paint stripe is just cracking everywhere.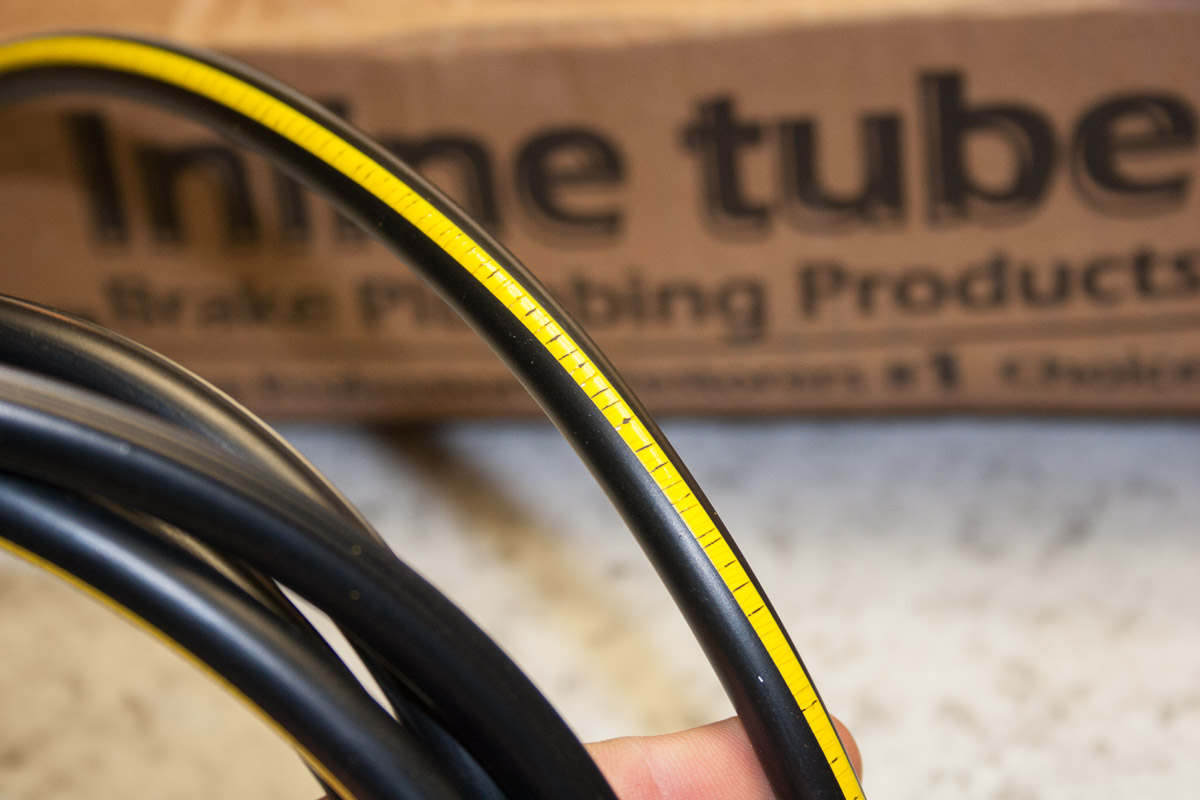
As you can see the paint stripe is just cracking everywhere.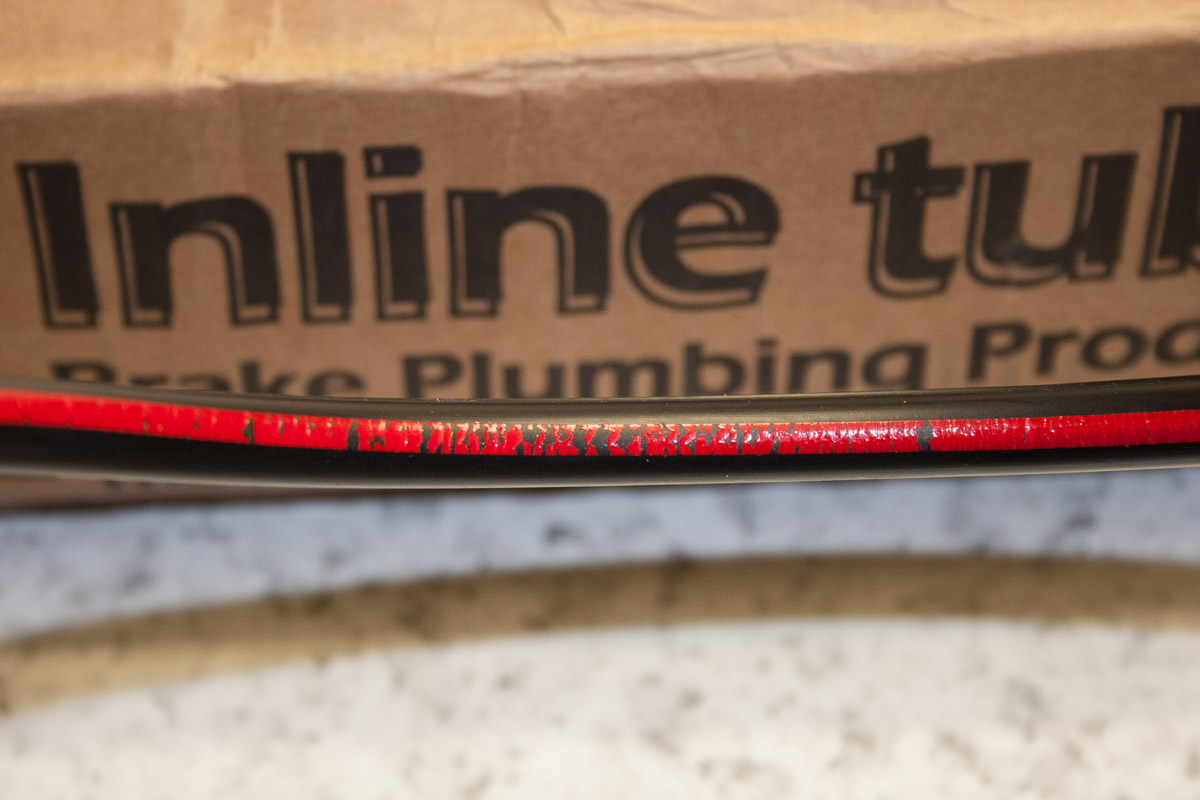
As you can see the paint stripe is just cracking everywhere.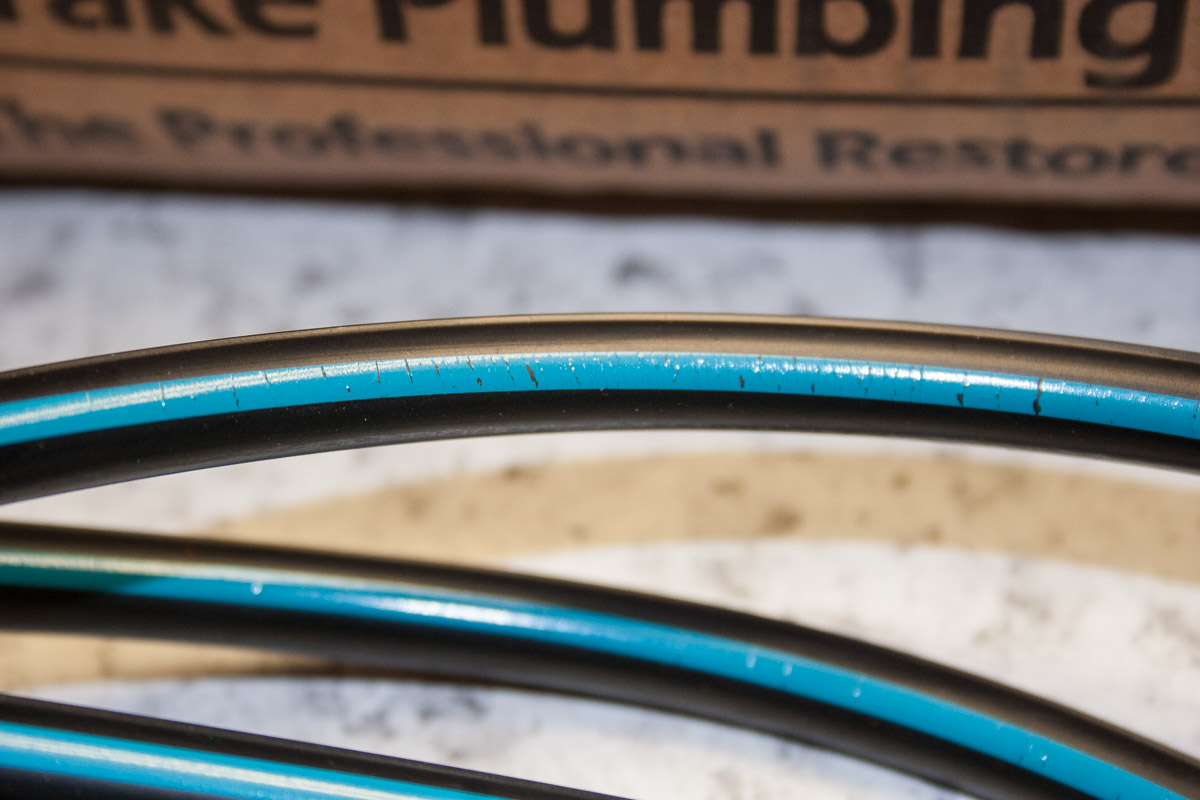
As you can see the paint stripe is just cracking everywhere.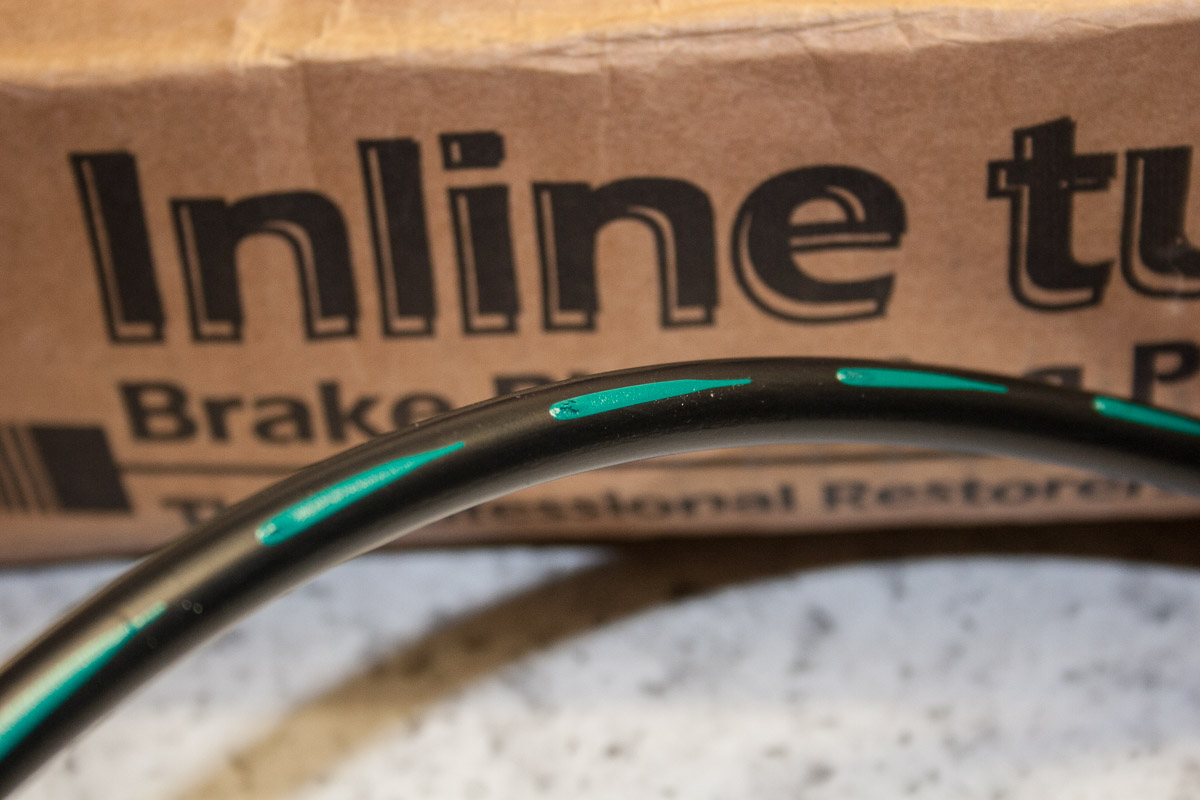
As you can see the paint stripe was not even painted correctly on the green hose…
REPAIRING THE CLOCKS OF THE 1958, 1966 AND 1967 CADILLAC
So it was time to service some of the clocks which stopped working over the years.
The clock in the 66 did not work at all.
It's extremely simple to remove on the 66 as you can get it out of the instrument panel by just unscrewing one bolt.
The clock was very dirty in the clock work and needed a good cleaning and some good lubrication. Also the contact of the coil was a little worn and this was fixed. It then happily ticked back to life and now works perfectly.
The clock on my 58 stopped working a couple of years ago. So it came out as well. It's a little more complicated to get it out though...
When it was finally out - it could be seen that the coil was burnt and that it needed some very good cleaning as well. Some of the melted insulation material was all over the clock mechanism and of course I had no spare coil for it - so the original one had to be rewound with some good wire from a left over light solenoid...
Wow - this really took a while - but now the clock works perfectly again!
I was not so lucky with the clock on the 67 Eldorado which only worked when the car was warm. To take it out you have to remove the upper dash and then get out some light bulbs and disconnect it from the printed circuit.
It was also cleaned and lubricated and the clock worked, but it made a very loud noise when the coil rewound the spring of the clock.
The sound got better over night, but then the clock stopped working completely... It's a Westcox clock which uses a double coil and is much more complicated to rebuild than the Borg clocks. Its also almost impossible to find parts for it, as Borg clocks are much more widely used.
Looks like I will need a new 1967 clock and replace it with a Borg unit :-(
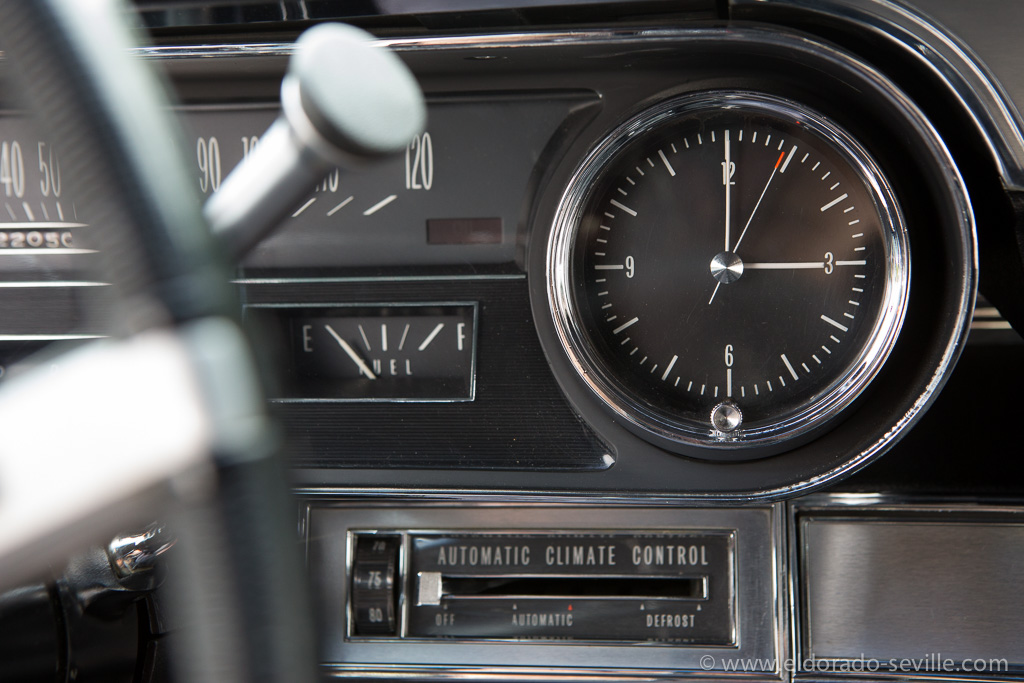
The clock in the 66 is now working perfectly again.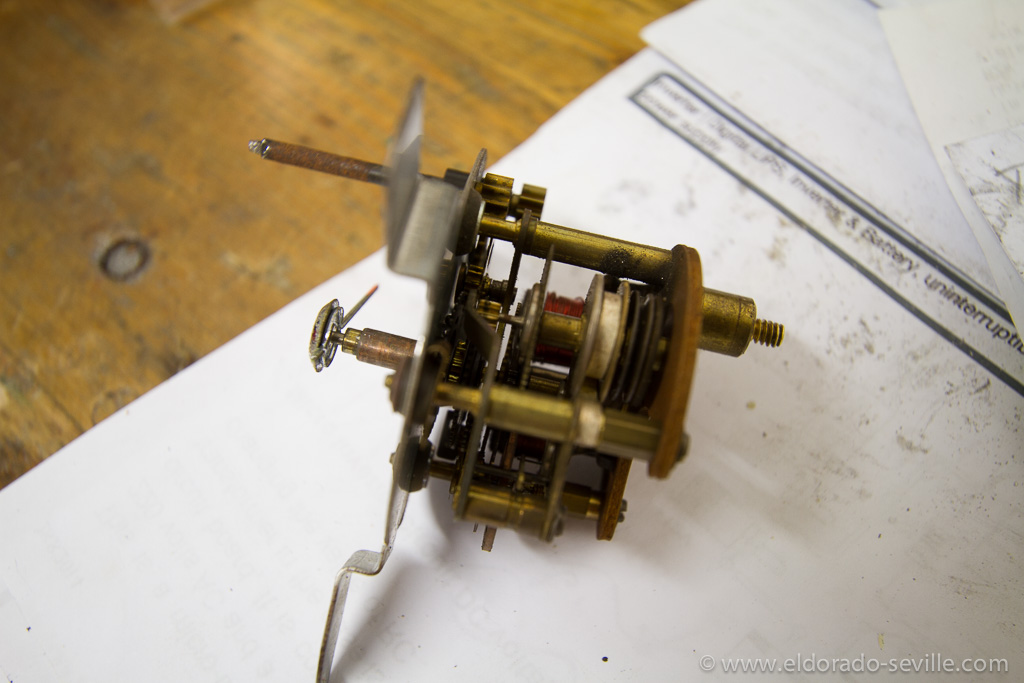
The disassembled clock of the 58 Eldorado.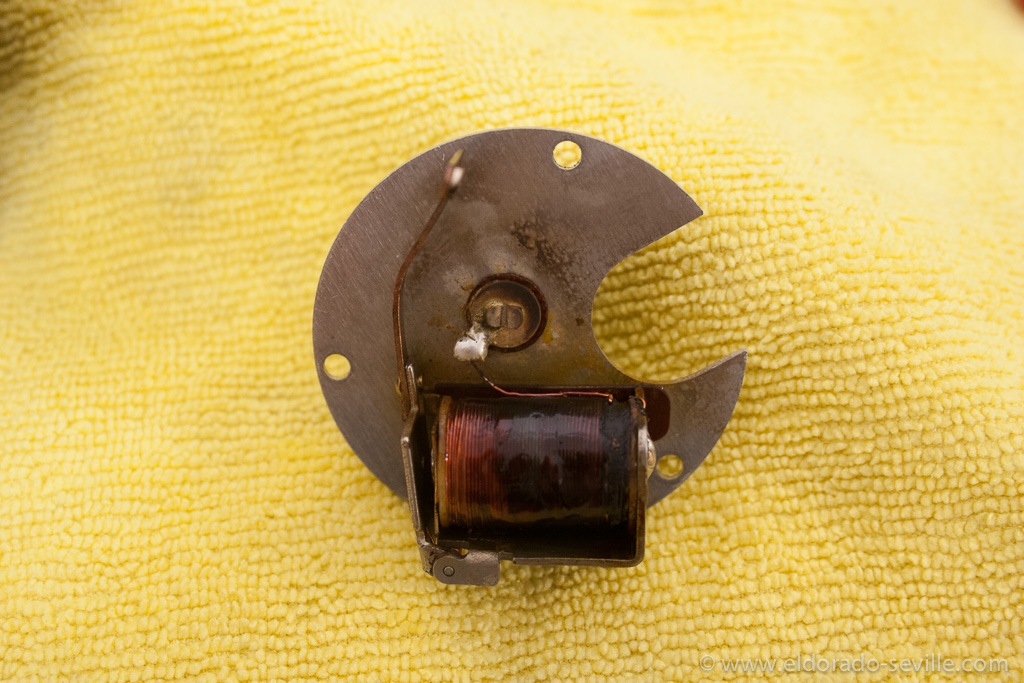
The coil was burnt on the 58 clock.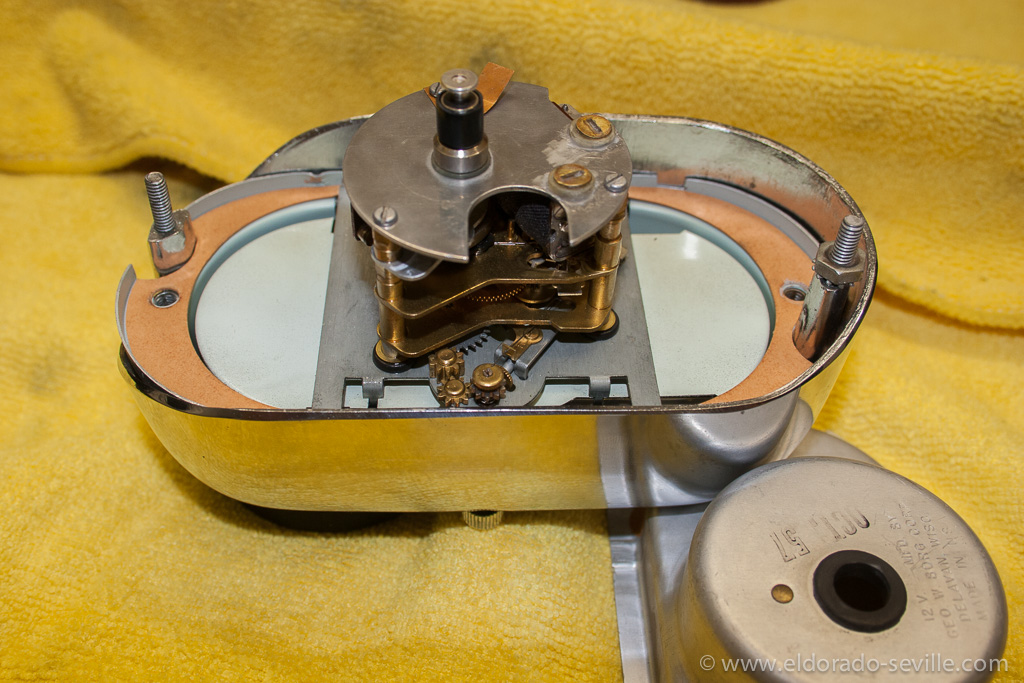
Fully cleaned clock. 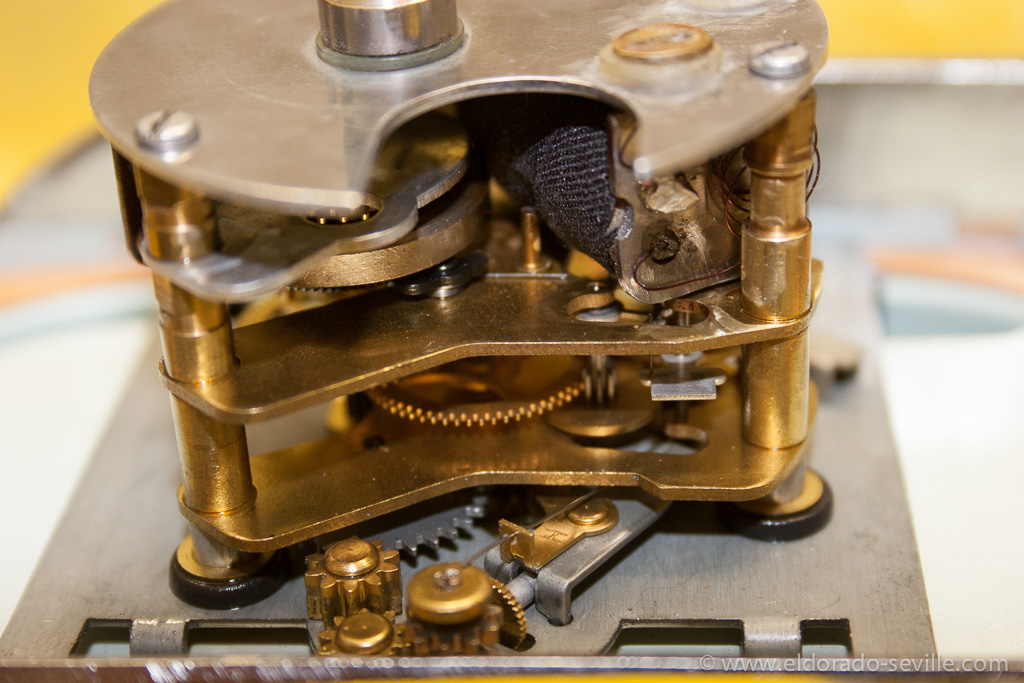
Back together with a rewound coil.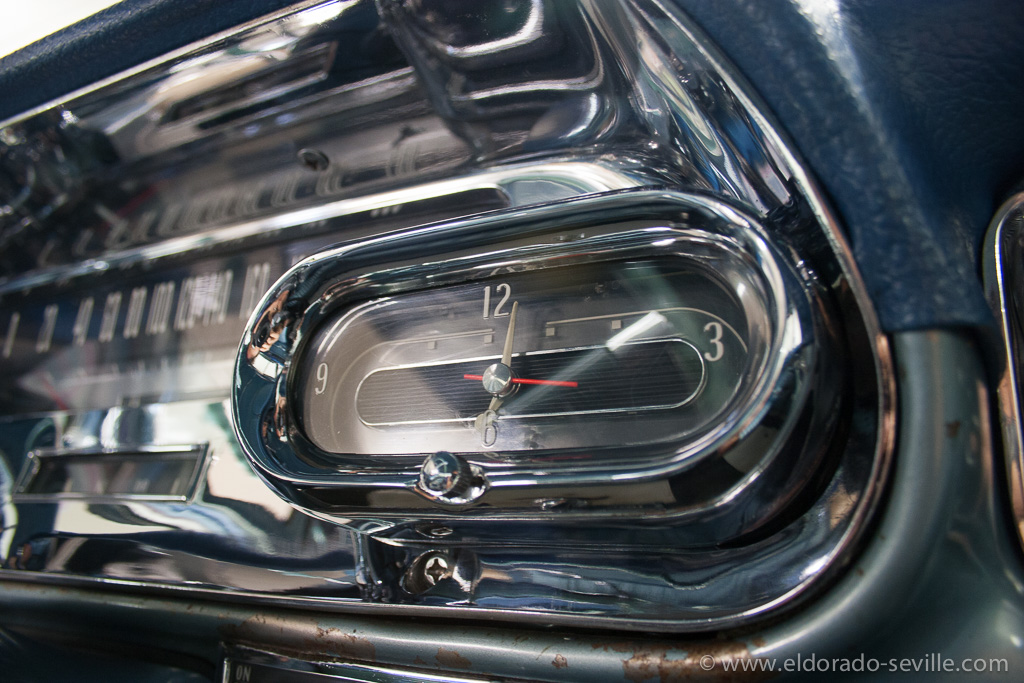
Back in the car - working perfectly again.
REBUILDING THE CRUISE CONTROL OF THE 1966 CADILLAC
Too bad that almost nothing worked when I got the car.
Of course I do not accept any non working things on my cars.
So with the help of another Cadillac aficionado who likes to work with anything electric - we took on the big challenge to repair the “Perfect Circle Cruise Control“ of the 66.
We had no idea how it worked and only had the shop manual as a reference.
The speed reminder function did kind of work, but the cruise control function was completely inoperative.
It took us a couple of days to fix it properly and now it works like the day the car left the factory!
We encountered a multitude of problems:
- 1) The dash mounted switch was defective - the plastic gear to set the desired speed was broken.
- 2) Most of the contacts inside the unit were oxidized
- 3) We had to adjust the contacts inside the unit properly and calibrate the system to the speed set on the dial
- 4) As it turned out later the brake switch was not properly adjusted (we should have checked this first and read the shop manual properly...)
After a lot of trial and error we eventually learned how the system works and we finally could adjust it correctly. It's a very nice system when it works properly, but you really have to calibrate it correctly. It's a fascinating option and there is some great engineering behind it. As it is rather complicated to repair you will see a lot of 60s car without a working cruise control.
Luckily its pretty well described how to adjust the contact points in the shop manual and I should have read it more thoroughly before we started to work on it - it would have saved a lot of time troubleshooting.
UPDATE: Here is the chapter about the Cruise Control from the 1967 Cadillac Shop Manual as a downloadable pdf file. I do no longer have the 1966 manual - thats why I have this document for 67 only. Its very similar to 1966 and differs mainly from the set switch.
inside the system - still on the car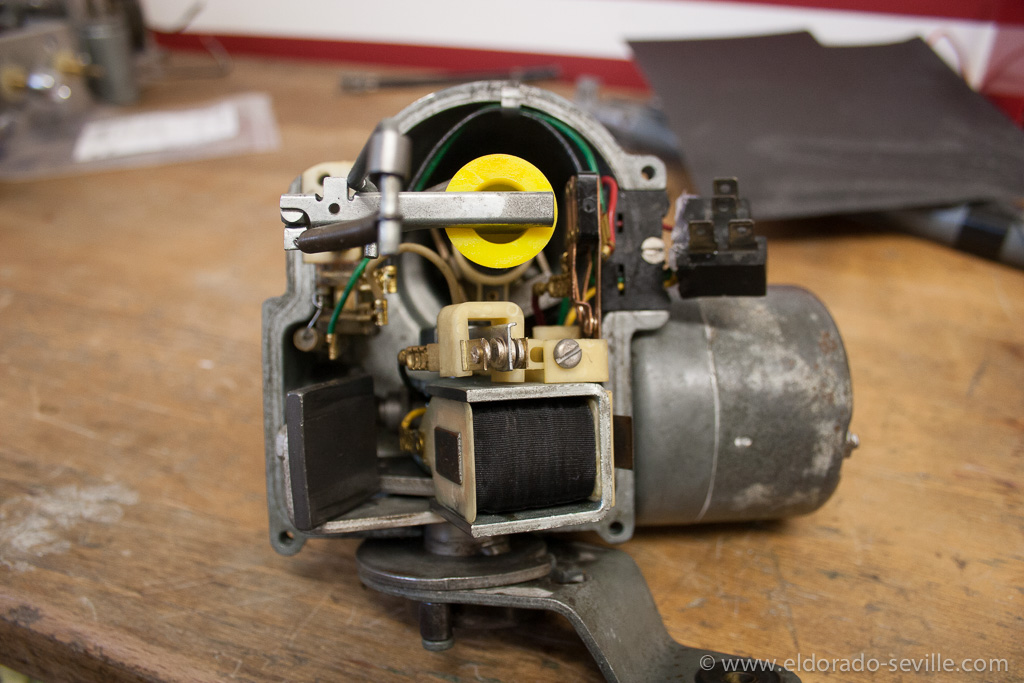
the “perfect circle“ unit on the bench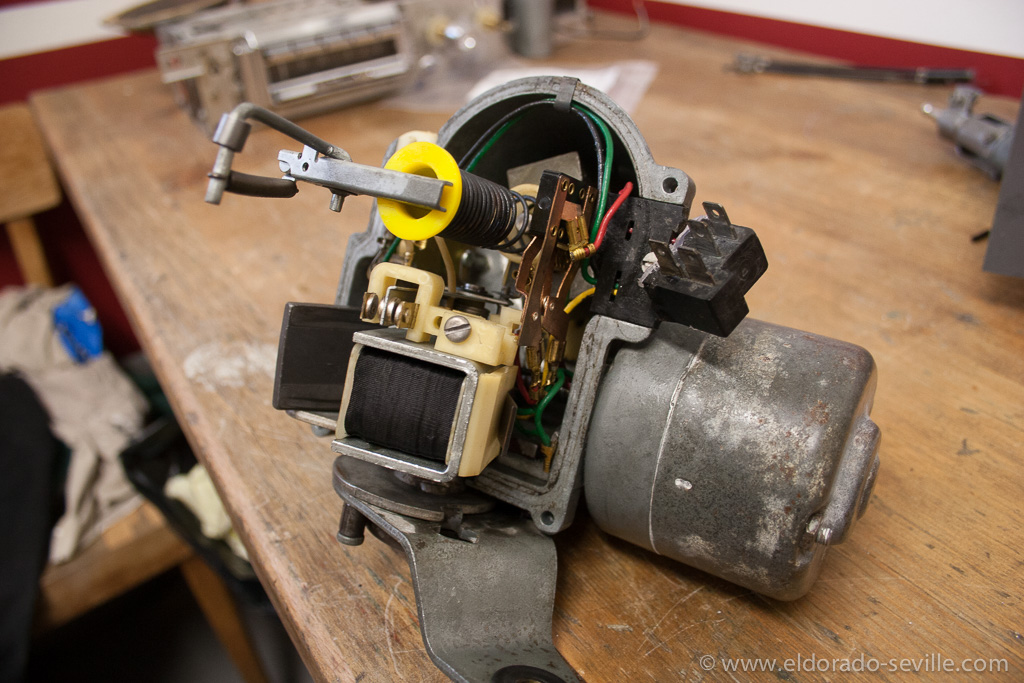
on the bench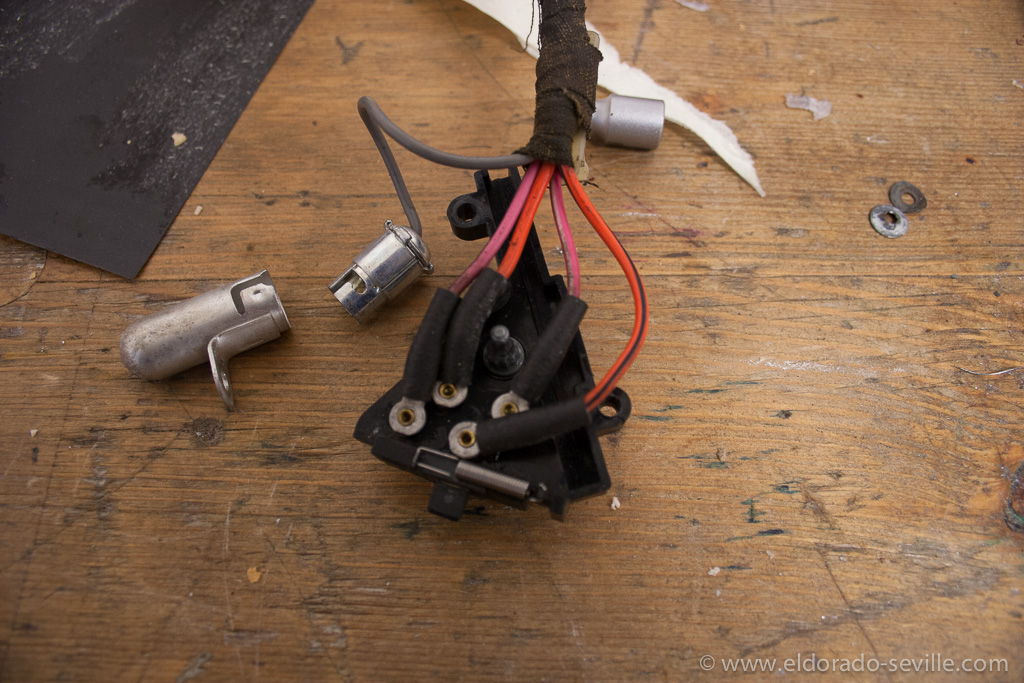
the dash mounted control switch disassembled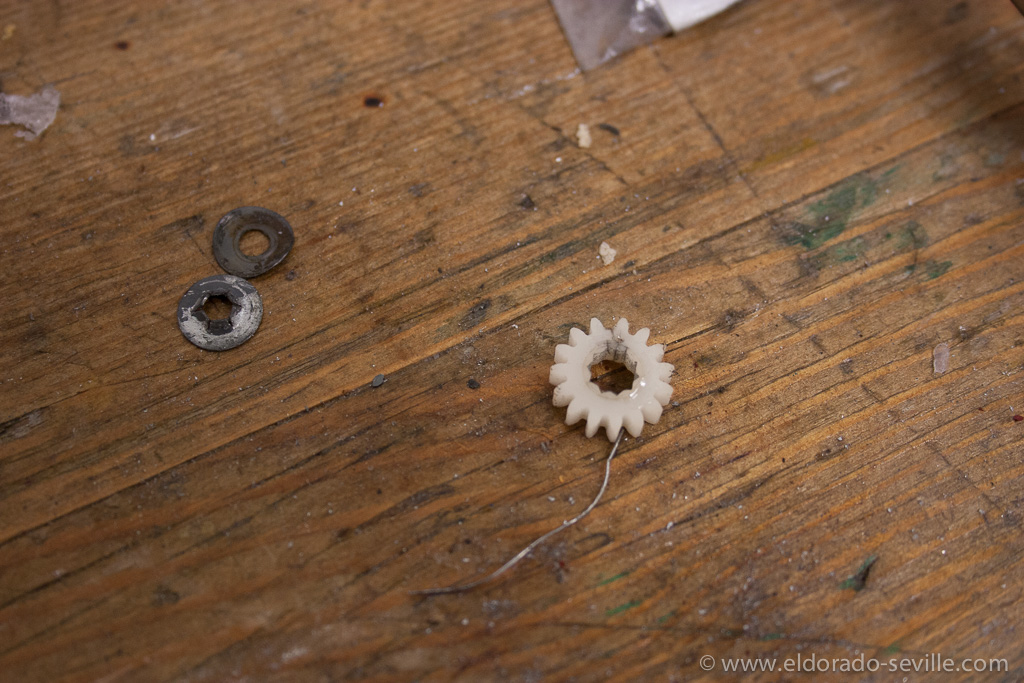
the broken plastic gear before we repaired it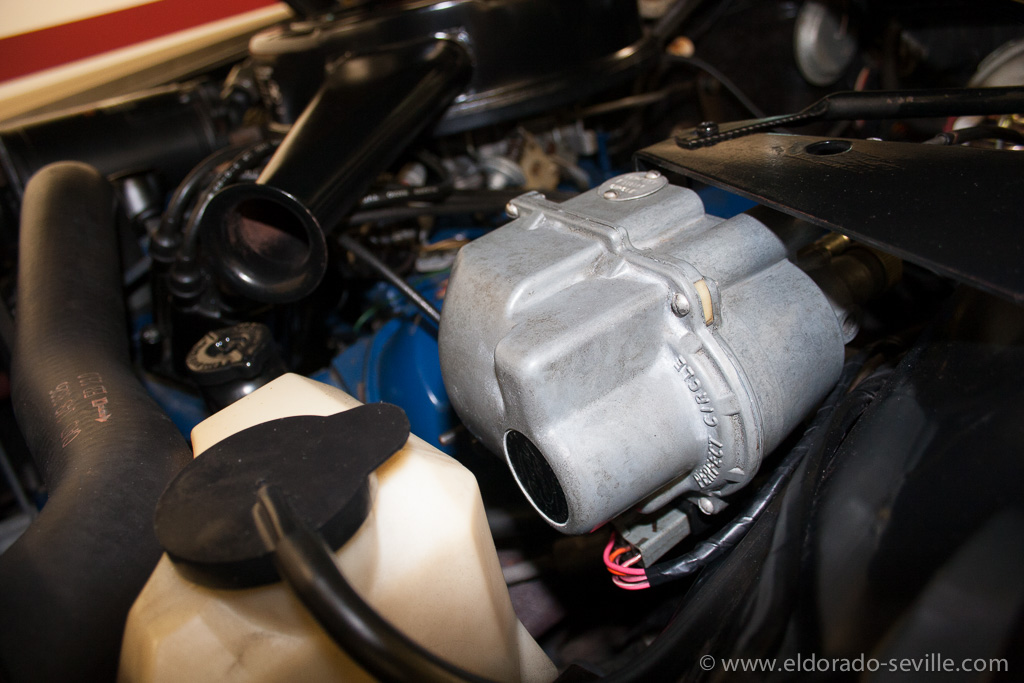
the rebuilt and perfectly cleaned unit - back in the car
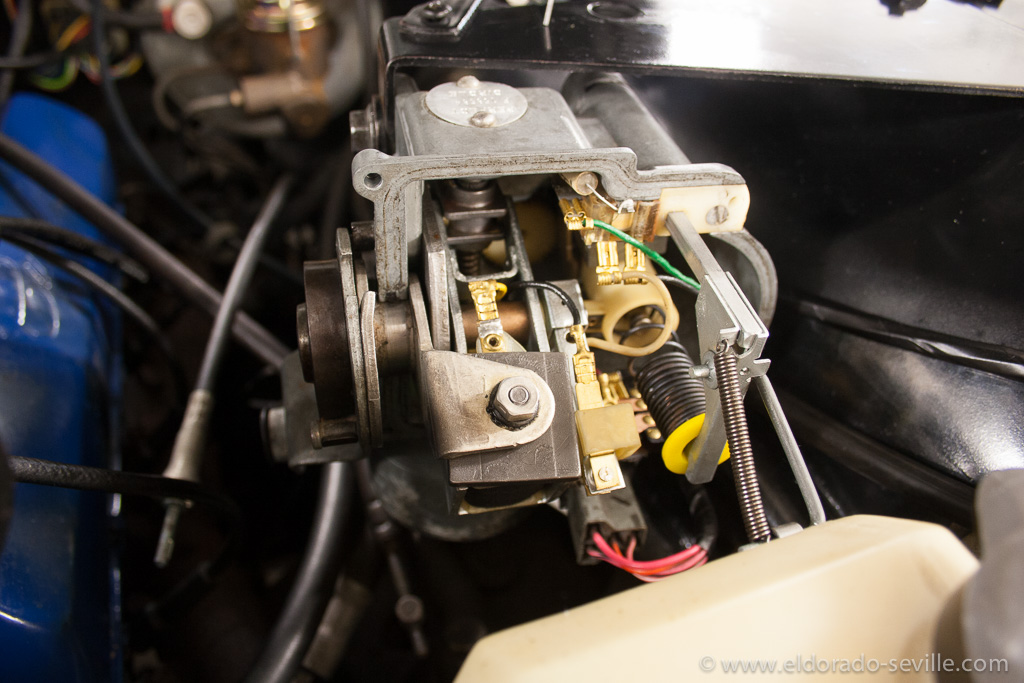
REPAIRING THE AIRCONDITION OF THE 1966 COUPE DEVILLE
So I started to search for the cause of the problem.
Everything seemed to be fine on the vacuum side. When the lever on the control panel was moved all the vacuum actuated doors operated and the master vacuum switch also seemed to work.
After some searching I found out that no current was flowing through the master vacuum switch on the firewall.
So the switch was taken apart.
If you do this you have to be very careful not to damage the membrane.
The contacts inside the switch were oxidized and so no more current could flow through.
The contacts were also adjusted so that the switch could engage properly when vacuum was applied.
When everything was put back together the whole system once again worked as it should.
It works absolutely perfect now.
*UPDATE 2022* - Check out this article and video as well!
Unfortunately I forgot to take pictures of the switch rebuild but here is a video on youtube where a gentleman explains how this switch works…
A video that explains how this switch works
The original AC system of the 1966 Coupe deVille is now working perfectly again.
Thats the master vacuum switch which was defective.
The rebuilt master vacuum switch.
1966 Cadillac Turn Signal Switch repair
One of the few problems this cars had were some weird issues with the turn signal lights.
I´m a perfectionist and everything has to work on the Cadillacs that are in my garage ;-) - thats one of my rules ;-)
Strange things happened on the right rear and front turn signal lights when the headlights were on or off...
This light switch is made of "unobtainium", so I was pretty scared that it could be broken.
The switch is located underneath the dash and is screwed onto the steering column and is controlled and actuated by a steel cable that is coming from the turn signal lever.
On this car the cable was out of alignment and did not engage the switch correctly on the right side position and this intermediate position of the switch caused the various problems.
It took me quite a while to get the adjustment of the cable right again, as you carefully have to shorten or lengthen it with a nose-plier to get the right length.
I also adjusted the spring you can see on the picture below. This makes the switch more snappy. It now works perfectly and the lever moves much nicer!
the 1966 Cadillac turn signal switch as seen from underneath the dash - already removed from the steering column.
1966 Cadillac Coupe deVille (15)
1967 Cadillac DeVille (54)
1967 Cadillac Eldorado (71)
1971 Lincoln Continental Mark III (23)
1974 Cadillac Coupe deVille (45)
1978 Cadillac Eldorado Biarritz (24)
1996 Buick Roadmaster (19)
Car Shows (53)
Cruising (4)
For Sale (3)
Garage Stuff (32)
Pacer (1)
Restoration (137)
Various (55)
Video (16)
Website News (30)
- 6 way power seat
- 8-track
- 10 Ohm
- 429
- 1932
- 1957
- 1958
- 1958 Cadillac Eldorado Seville
- 1958 Cadillac Repair Tip
- 1959 Cadillac Eldorado Seville
- 1964
- 1965
- 1966
- 1966 Cadillac Coupe deVille
- 1966 Cadillac Repair Tips
- 1967
- 1967 Cadillac DeVille
- 1967 Cadillac Eldorado Repair Tip
- 1967 Cadillac Repair Tip
- 1967 Eldorado
- 1968
- 1970 Cadillac Eldorado
- 1971
- 1971 Lincoln Continental Mark III
- 1974
- 1974 Cadillac Coupe DeVille
- 1974 Cadillac Repair Tip
- 1976
- 1977
- 1978
- 1978 Cadillac Eldorado Biarritz
- 1978 Cadillac Repair Tip
- 1980 Cadillac Eldorado Biarritz
- 1996
- 2012
- 2014
- 2017
- 2018
- 2019
- 2022
- 2023
- 3063206
- 7027235
- 7800483
- 7805675
- 7805676
- 12355706
- 17058531
- 17059968
- 17059969
- 22010515
- 22010661
- A.I.R
- A6
- AC
- AC Compressor
- AC Electrical Diagram
- ACC
- Accelerator Pump
- Accelorator pump
- Actuators
- Adriatic Blue Metallic
- Ads
- Aftermovie
- Air Pump
- Aircondition
- AIRPUMP
- ALC
- Alternator
- AM
- AM-Transmitter
- Antenna
- Anti Rattle Clips
- Antique Gold
- Arizona Vintage Parts
- Arrival
- Article
- ASC
- Ash Tray removal
- ATC
- Atlantis Blue Firemist
- Austria
- Austro Classic
- Autolite SP-459
- Automatic Seat Back Release
- Award
- Banner
- Barn Find
- Battery
- Battery Tray
- Beach Race
- Bearing
- Bendix
- Biarritz
- Bigfoot
- Bill Hirsch Engine Enamel
- Bleeder Screws
- Blower
- Bolts
- Borg
- Brake Booster
- Brake Fluid
- Brake Gray
- Brakes
- Broken Bolt
- Brougham
- Bucket seats
- Buick
- Bumper End
- Bushings
- Cadillac
- Cadillac BIG Meet
- Cadillac BIG Meet
- Cadillac birthday cake
- Cadillac Blue
- Cadillac Color Selections Dealer Book
- Cadillac Coupe deVille
- Cadillac Dealer
- Cadillac Meeting
- Cadillac Mini Meeting
- Camaro RS
- Caorle
- Car Show
- Carburetor
- Card
- Carpet
- Carter AFB
- Cavalry Twill Vinyl
- CB
- CBM
- CCCD
- Choke
- Christmas
- Citizens Band
- Classic Cadillac Club Deutschland
- Clay Towel
- Cleaning
- Clock
- Clockwork
- Clutch
- Clutch Coil
- Collector
- Colonial Yellow
- Color Coded Springs
- Commercial
- Compound
- Compressor
- Condenser
- Continental Mark III
- Control Head
- Conversion
- Convertible top
- Coolant
- Corona
- Cowl
- Cruise Control
- Cruising
- CV Boots
- CV JOINTS
- D6230
- Dash Trim
- Decal Removal
- Decals
- Decoration
- Dehumidifier
- Delco Moraine
- Der Standard
- detailing
- Deville
- Diagnosis Chart
- Diagram
- Dial
- Digital Rotary Drum Clock
- Diner
- Disc Brakes
- Distributor
- Diverter Valve
- Door Jamb Switch
- Door Rubber Conduit
- Dornbirn
- Dot3
- Drive Shaft
- Driving tour
- Drum brakes
- Dry Ice Blasting
- Dry Ice Cleaning
- DVD
- Eastwood
- Eldorado
- Electric Choke Thermostat
- Electrical schematic
- Elvis
- Engine Bay
- Ep
- Epoxy floor
- Europe
- Evaporator
- Exide
- Factory Markings
- Fender Skirt
- Floor
- Flushing
- Foam
- For Sale
- Front AXLE
- Front brakes
- Front bumper filler
- Front Floor
- Front wheel bearing
- Fuel Filter
- Fuel Pump
- Fuel Sending Unit
- Fusible Link
- Garage
- Garage Cabinets
- Gasket
- GE
- Gear indicator
- General Time
- Glove box light
- Grand European
- H4
- Haus of Hot Rod
- Headlight Actuator
- Headlight doors
- Headlights
- Heater Core
- Heater Hose
- Heater Valve
- High Idle
- Holley
- Honest John
- Hood
- Hood Emblem
- Hood Ornament
- Hose Clamp
- Hot Choke
- Hot Water Valve
- HotRod
- How to
- Hödlmayr
- Ignition Diagram
- Illuminated Entry
- John D‘Agostino
- John Foust
- Klassikwelt Bodensee
- Kremsmünster
- LaSalle
- Leather seats
- Light Switch
- Limited
- Lincoln
- Lincoln Mark III Repair Tip
- Low Mileage
- Magazine
- Marilyn Monroe
- Mark III
- Master Cylinder
- Master Switch
- Master Vacuum Switch
- Media Blasting
- Meeting
- Meguiras
- MK II
- Mobile
- Model
- Moldings
- Mom
- Mopar Nationals
- Mostkost Kustom
- Movie
- Neon
- NOS
- Oberösterreicher des Tages
- oilchange
- ORF
- Overspray
- Pacer
- Paint
- Paint correction
- Paintjob
- Part Number
- Parts
- Patch Panel
- Perfect Circle
- Permabag
- Persian Lime
- Photo shooting
- Photoshooting
- Pictures
- PinUp
- POA Valve
- Power Antenna
- Power Servo
- Power Vent Windows
- Power Window
- Printed Circuit Board
- Programmer
- Pulley
- Quadrajet
- Quarter Panel
- Quartz Conversion
- R134
- Radiator
- Radio
- Rattle
- Rear brakes
- Rebuild
- Recalibrate
- RediRad
- Reed Switch
- Relais
- Relaunch
- Removing Overspray
- Repaint
- Repair
- Restoration
- RIP
- Roadhouse
- Roadmaster
- Rochester
- Rocker Arm Cover
- Rocker Panel Extension Clips
- Rostio
- Rotary Valve
- Rotterdam
- Rupes
- Rust removal
- Rust removal gel
- Sabre Wheels
- Sand Blasting
- Sandblasting
- Screed
- Season Greetings
- Seasons Greetings
- Seat Back Locks
- Seat Padding
- Seat Transmission
- See through ornament
- Self adjusters
- Sepp's Garage
- Seville
- Sheetmetal
- Shocks
- shop manual
- short
- Sign
- Solenoid
- Spark Plug Wire Routing
- Speakers
- Special Award
- Speed Bleeder Screws
- Splash Guard
- Starter Diagram
- Starter Motor
- Steering Column
- Storage
- suction throttling valve
- sunroof
- suspension
- Swirl Mark removal
- Switzerland
- T3
- Taillight Cover
- Texan´s Choice Award
- Thermostat
- Tilt and Telescope
- Time capsule
- Tomsclub
- Torque Specifications
- Tower Hose Clamp
- Towtruck
- Transducer
- Transmission
- transmission control selector
- transmission control selector indicator light
- transmission shift indicator
- Treadle Vac
- Treffen
- Tri-Band
- Troubleshooting
- Trunk Cardboard Kit
- Trunk lining
- Trunk to bumper cover
- Turn Signal Switch
- TV
- Typisierung
- Ultimate Garage
- Underbody
- Undercarriage
- Undercoating
- Undercoating Removal
- Vacuum Booster
- Vacuum diagram
- Vacuum hoses
- Vacuum Master Switch
- Vacuum Schematic
- Vacuum Valve
- Valve Cover
- Various
- Vent Window Switch
- Vibration
- Vibrator
- Vicodec roof
- Video
- Vinegar
- Vinyl Roof
- Visitor
- Washer Fluid Float
- Washer Fluid Low Level Indicator
- Water Pump
- Wax
- Weatherstripping
- Website News
- Westclox
- Wheel Bearings
- Wheel Housing
- Wiesbaden
- Windlace
- Winter
- Wiring
- Wiring Diagram
- Wonderbar
- Workbench
- Zurzach