A6 AC COMPRESSOR REPAIR - BAD BEARING ON THE 1974
Due to all the other projects I never managed to get the AC back in fully working order until now.
Unfortunately the rebuilt AC compressor came with the clutch coil terminals in the wrong position. They are available with the terminals at the correct 10 o clock position or the 2 o clock position, which is correct for other years.
If the terminals are in the wrong position you cant connect the original wires to them as they are too short. With the high shipping costs it was no option to send the incorrect compressor back.
As it turned out the cars original compressor had a bad bearing and that was the reason why it was disconnected.
My friends Lucky and Steve were here to help me with the compressor project and so I took both of my compressors to Lucky´s workshop, as he has all the necessary tools and experience with these compressors from his own cars.
Originally I just wanted to turn the clutch coil on the rebuilt compressor into the correct position, but then we decided to rebuild the original compressor instead, because it still has the original decal, which is not available as a correct reproduction. All the available compressor reproduction decals are TOTALLY incorrect for the 1974 Cadillacs. The 1974 reproduction decals all show the wrong amount of refrigerant! They are also different in many other details. The closest match of reproductions for 1974 are the ones from 1972 Cadillacs…
We still disassembled the rebuilt compressor to "borrow" its pulley bearing to replace the bad one on the original compressor.
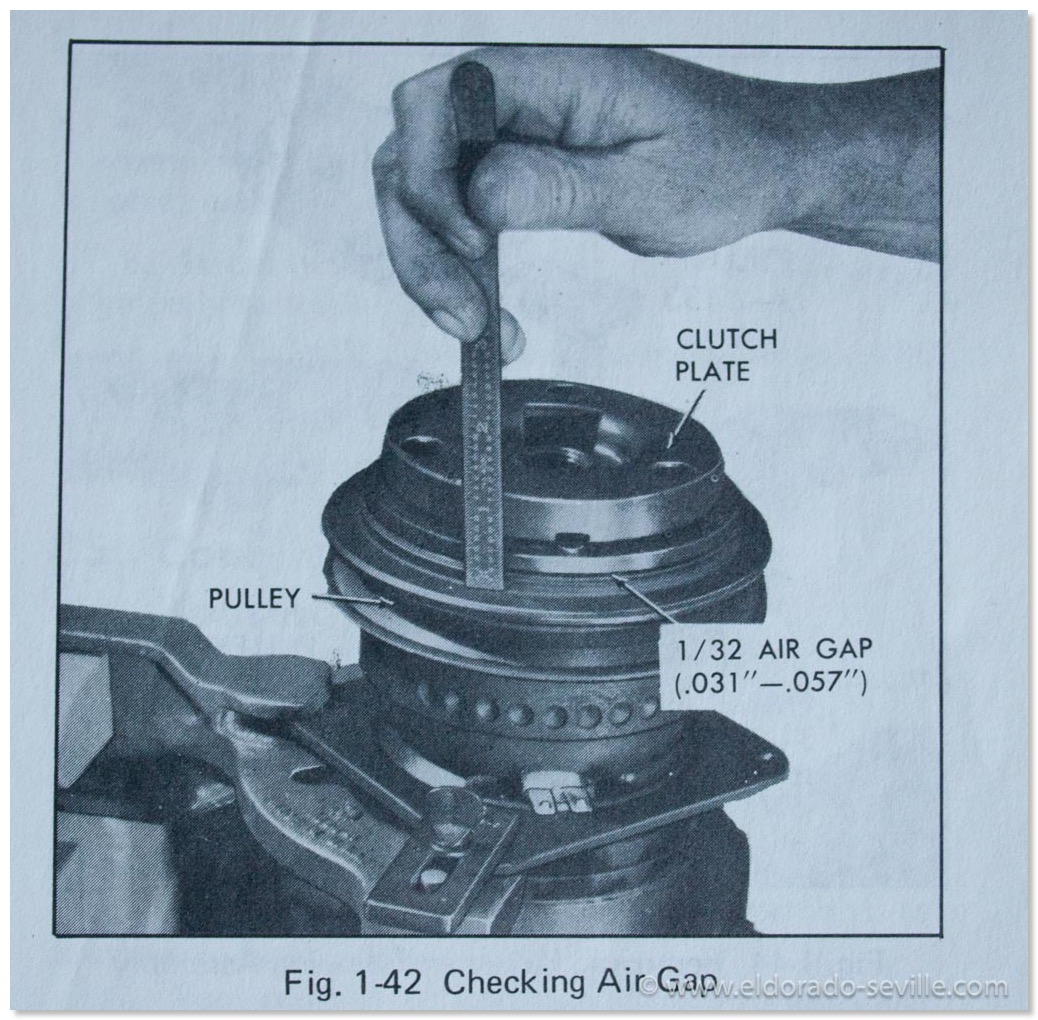
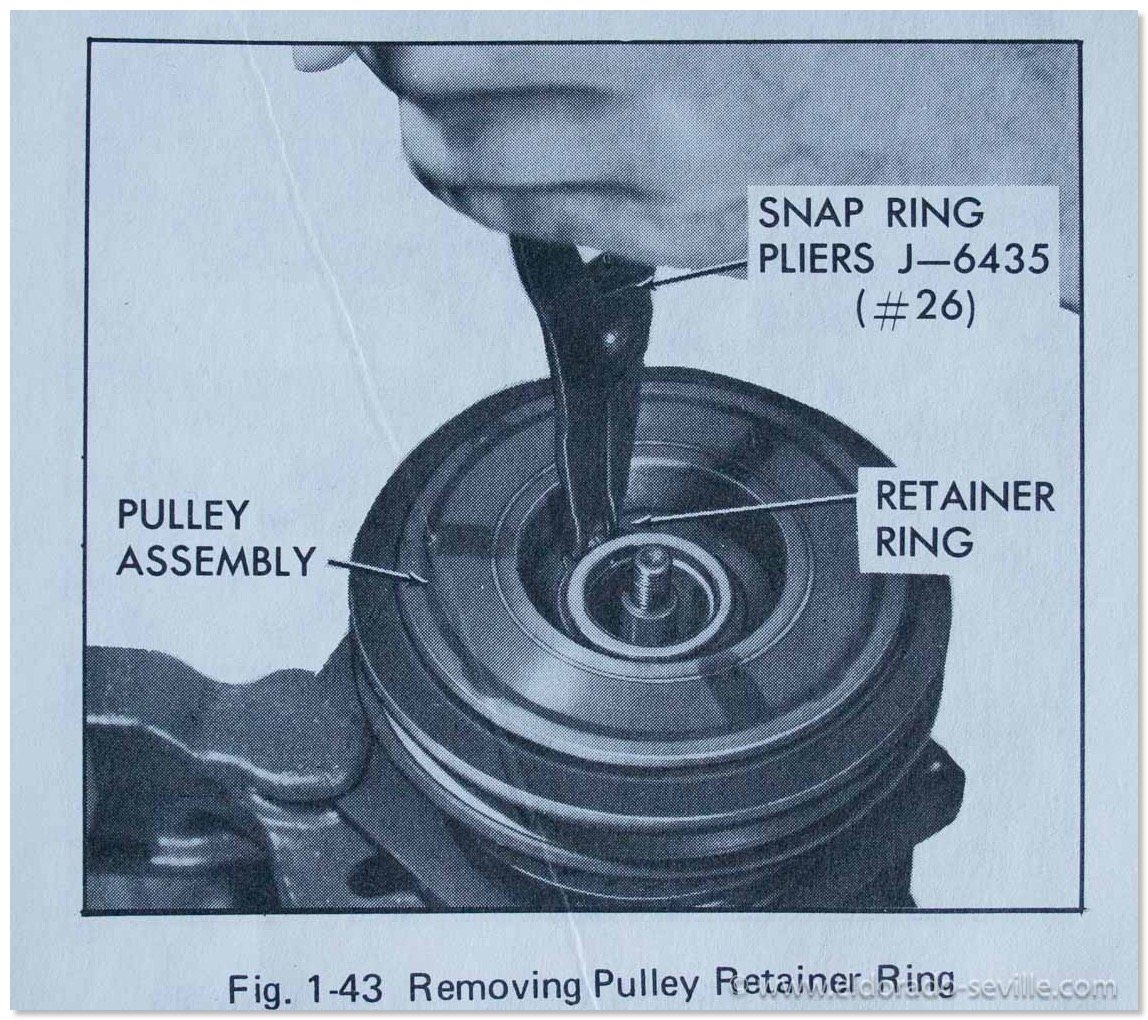
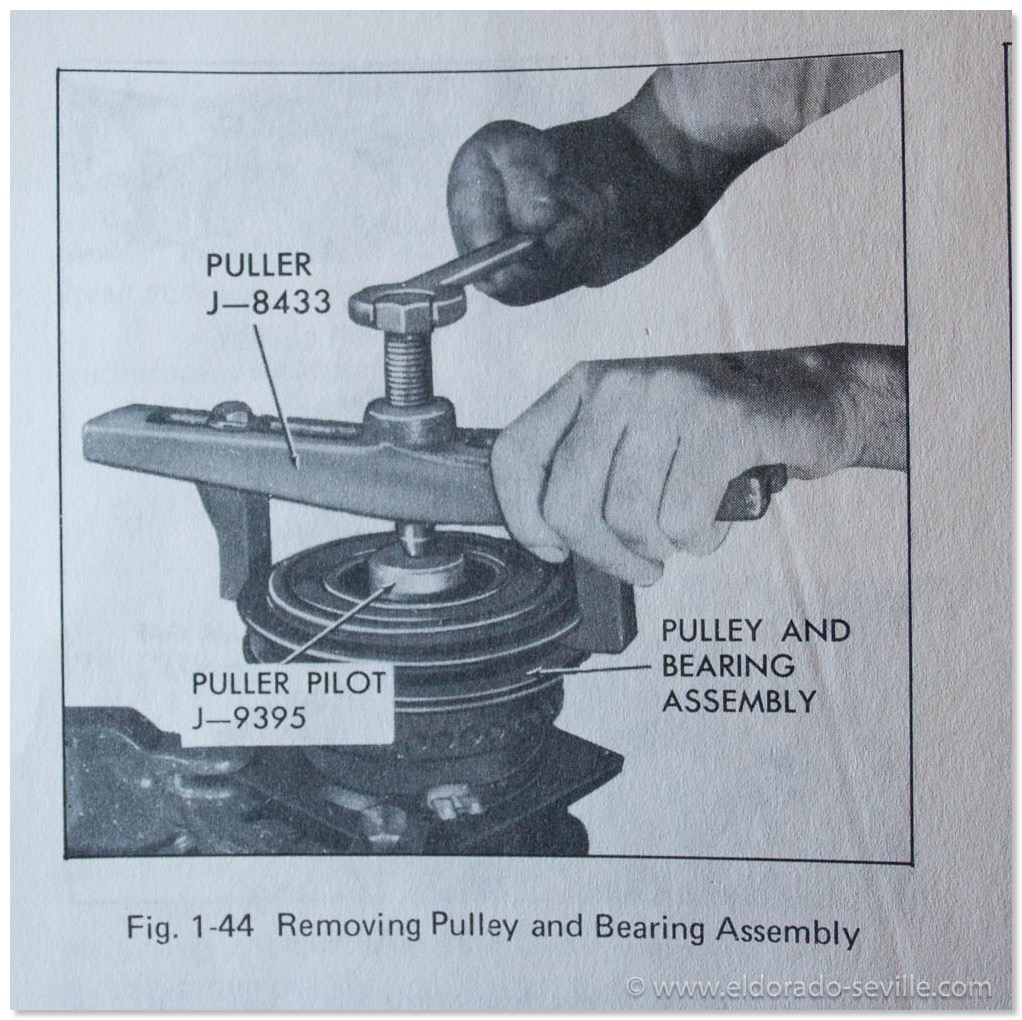
The procedure to be able to replace the bearing and to turn the clutch coil is not too difficult - but you need some special tools. Without those you cant do it. You´ll need a basic clutch puller / installer set for this job and some long nose snap ring pliers to get the retaining rings out.
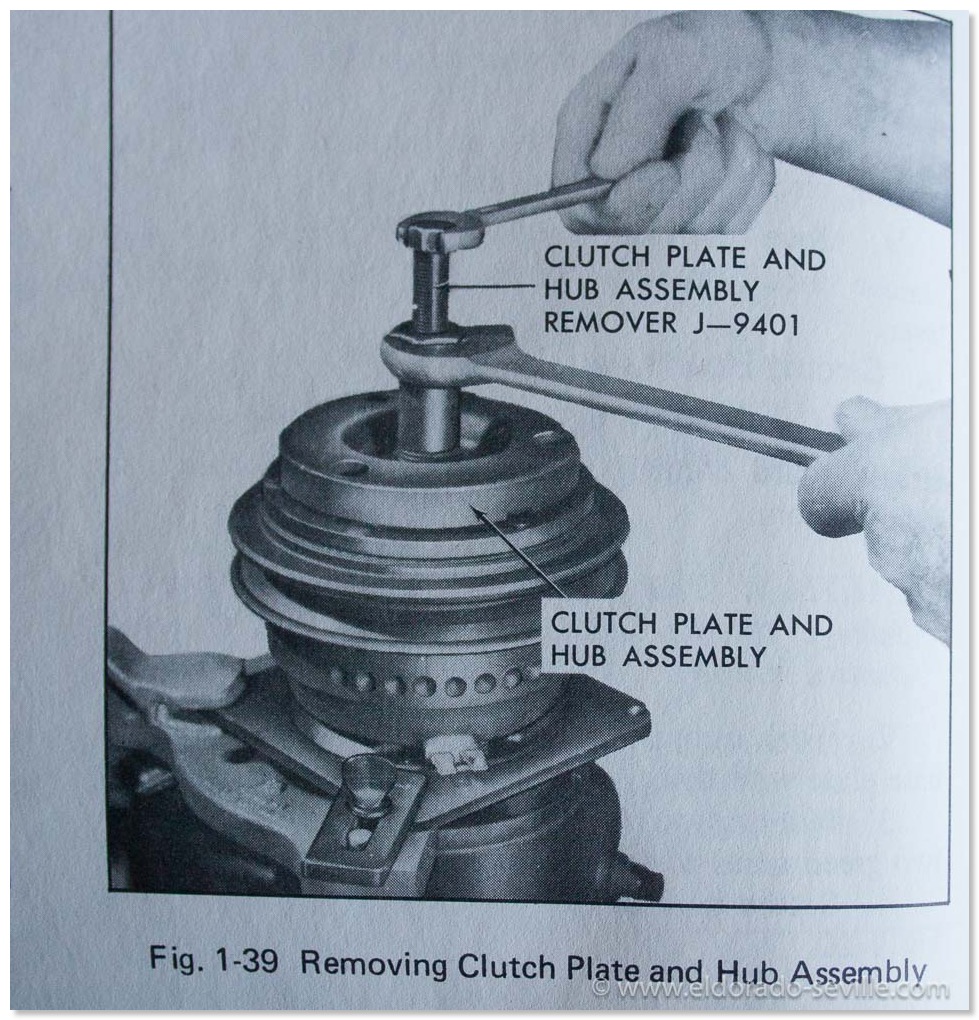
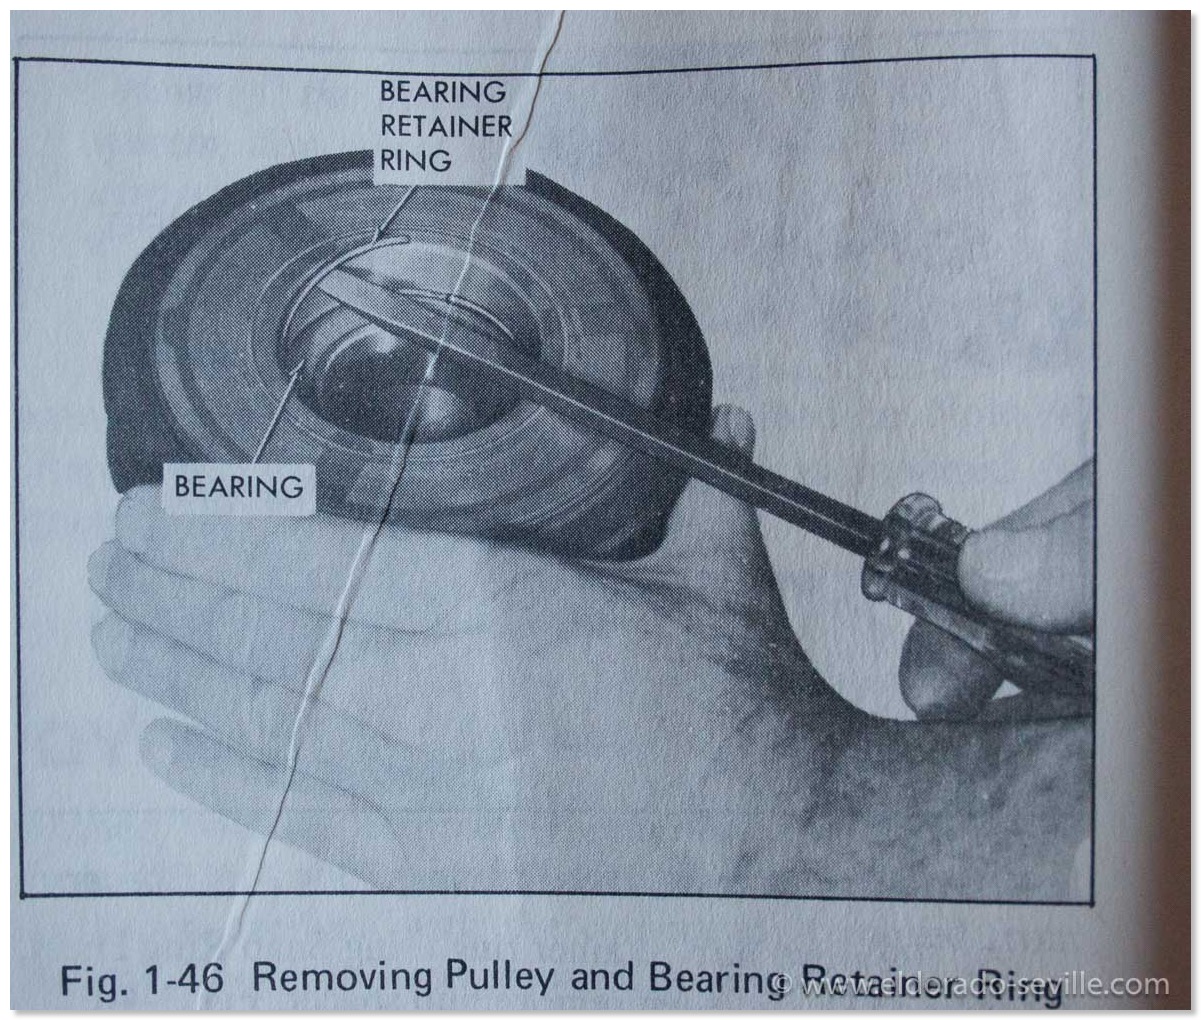
First remove the shaft nut and the snap ring ( the rebuilt compressors always seem to come without this snap ring) and then pull the clutch with the special puller. Pull off the pulley and take the bearing out and replace it with a new one.
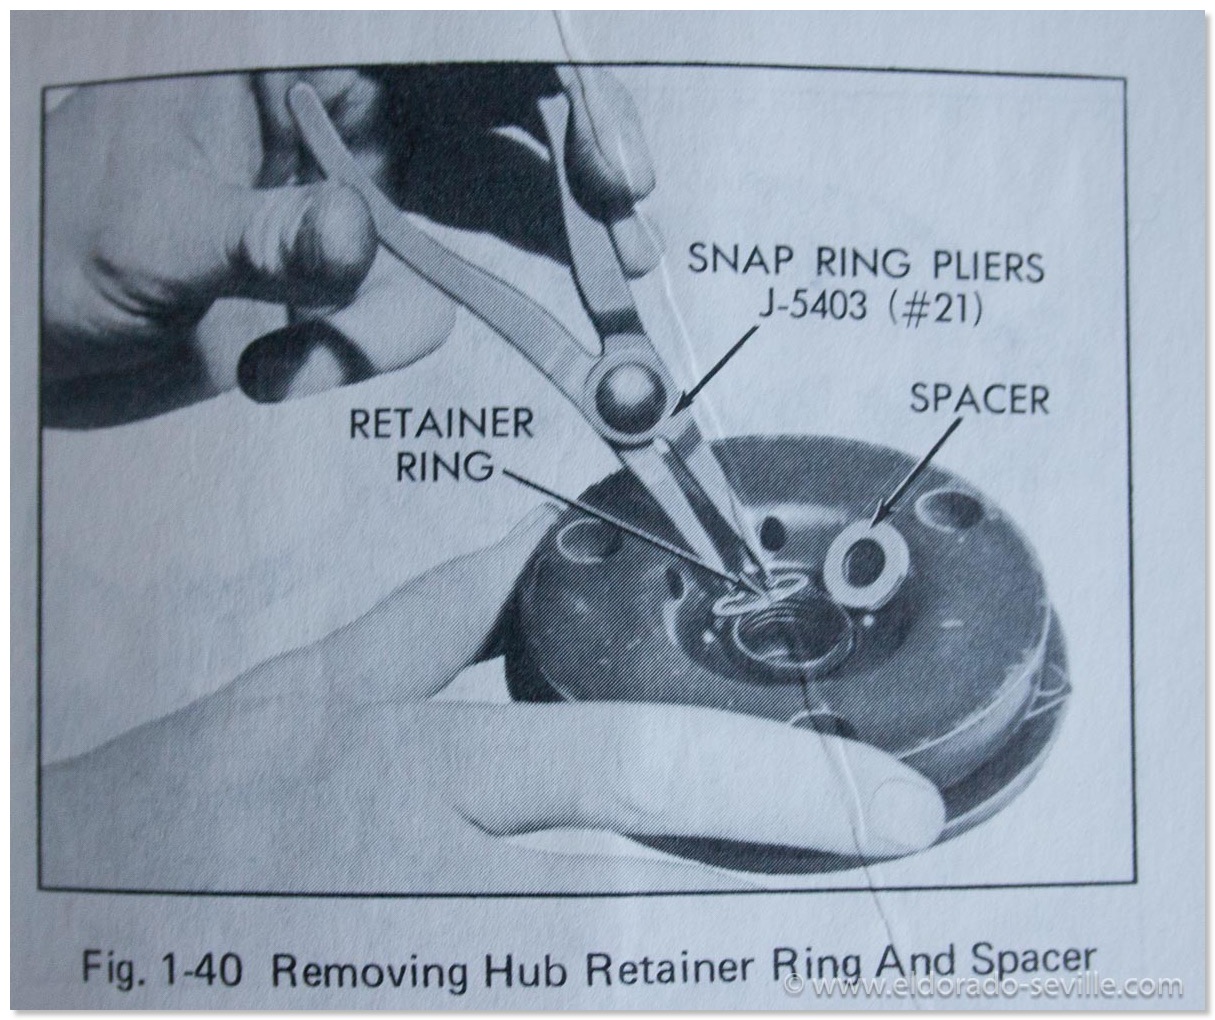
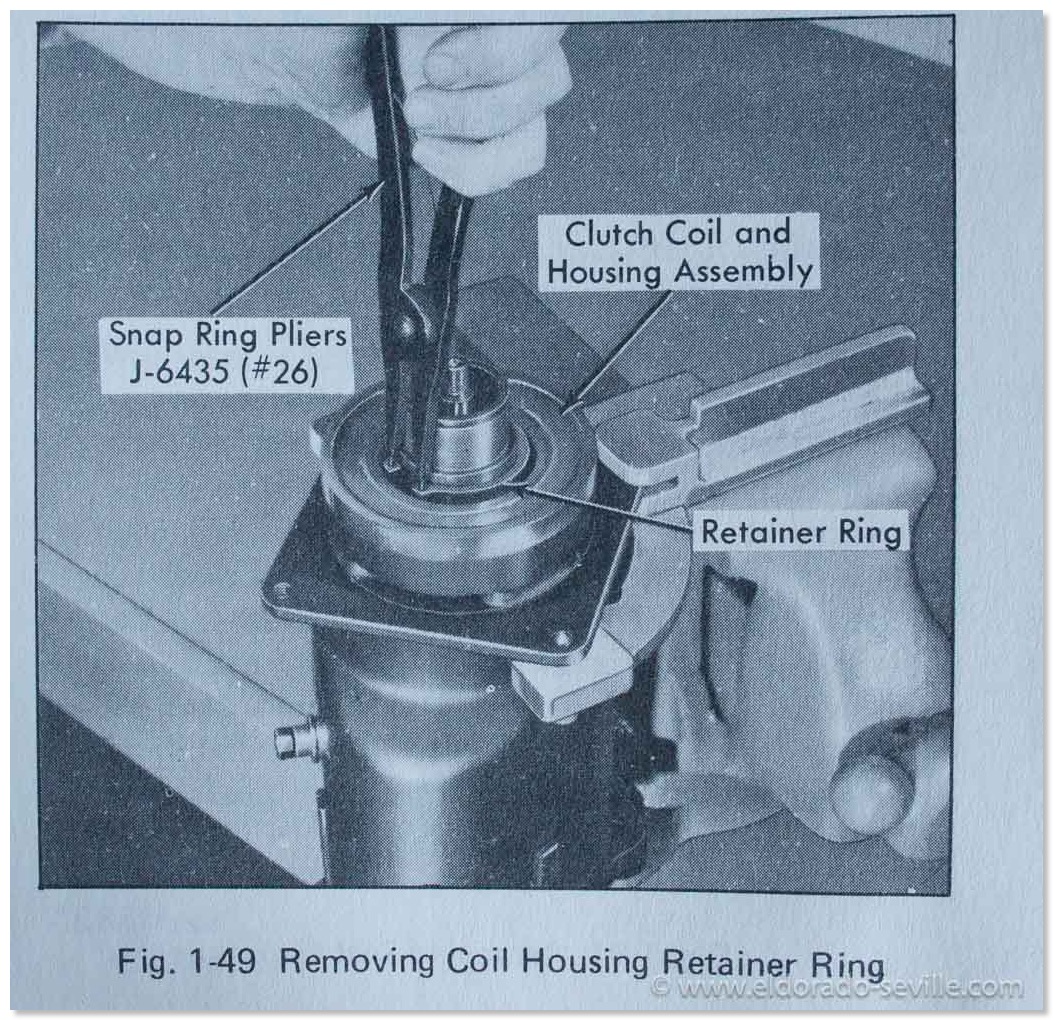
To be able to turn the clutch coil you´ll have to remove another snap ring. This snap ring was the biggest challenge for us. The shop manual lists a special tool for this which we of course did not have… It could be done with a very long nose plier as well, but we did not have these either. So it took us quite a long time to get it out with screwdrivers and self made hooks… You can then simply turn the coil into the correct position.
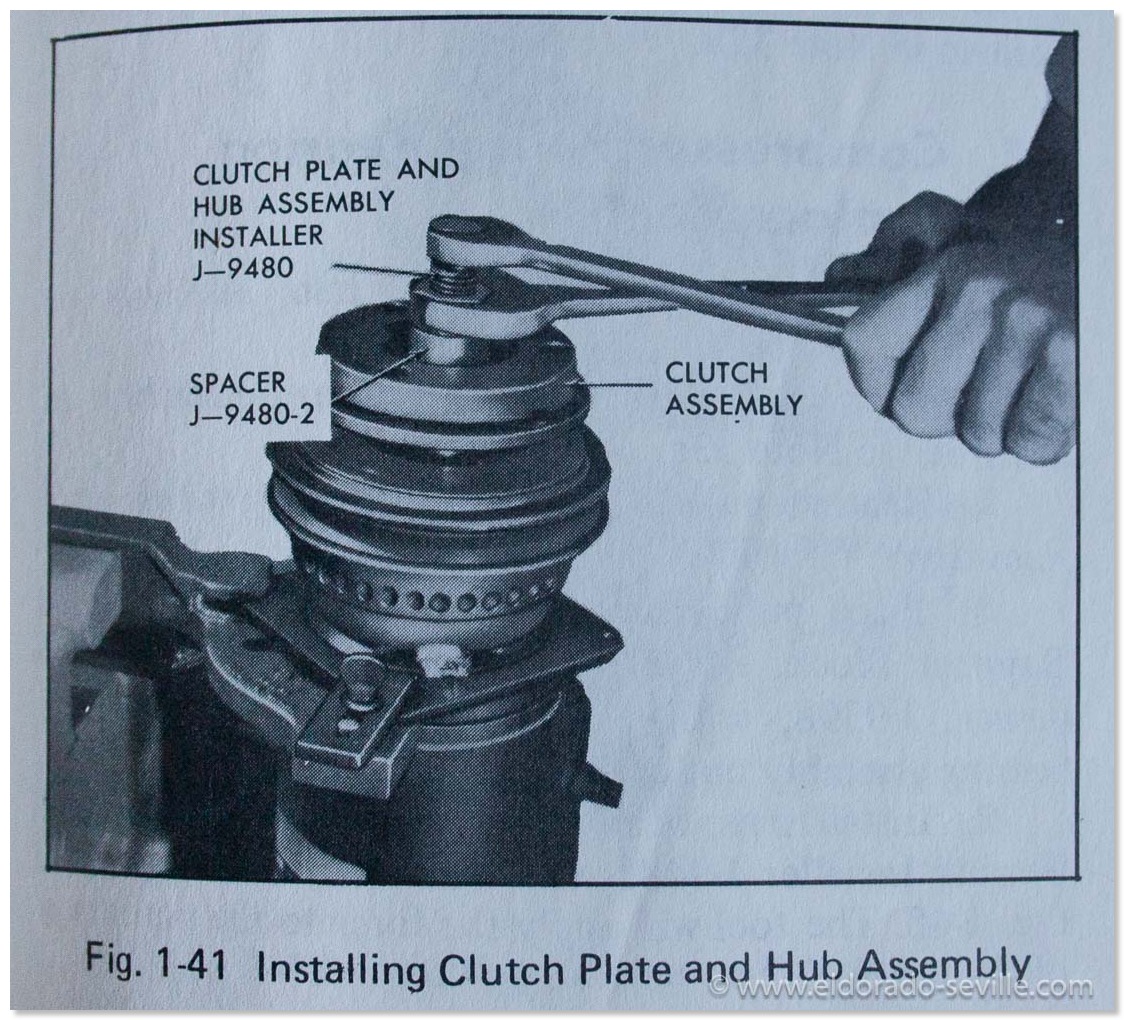
Putting it back together is pretty straightforward as well, but again you need a special installer tool to get the clutch back on and to adjust it properly.
I will now have to buy a new bearing so that I can put the rebuilt compressor back together and have it as a spare.
I have attached some pics from the shop manual which show how to remove the various parts of the compressor to remove the pulley and the clutch coil.
As always you can find ALL the pictures in my restoration gallery!
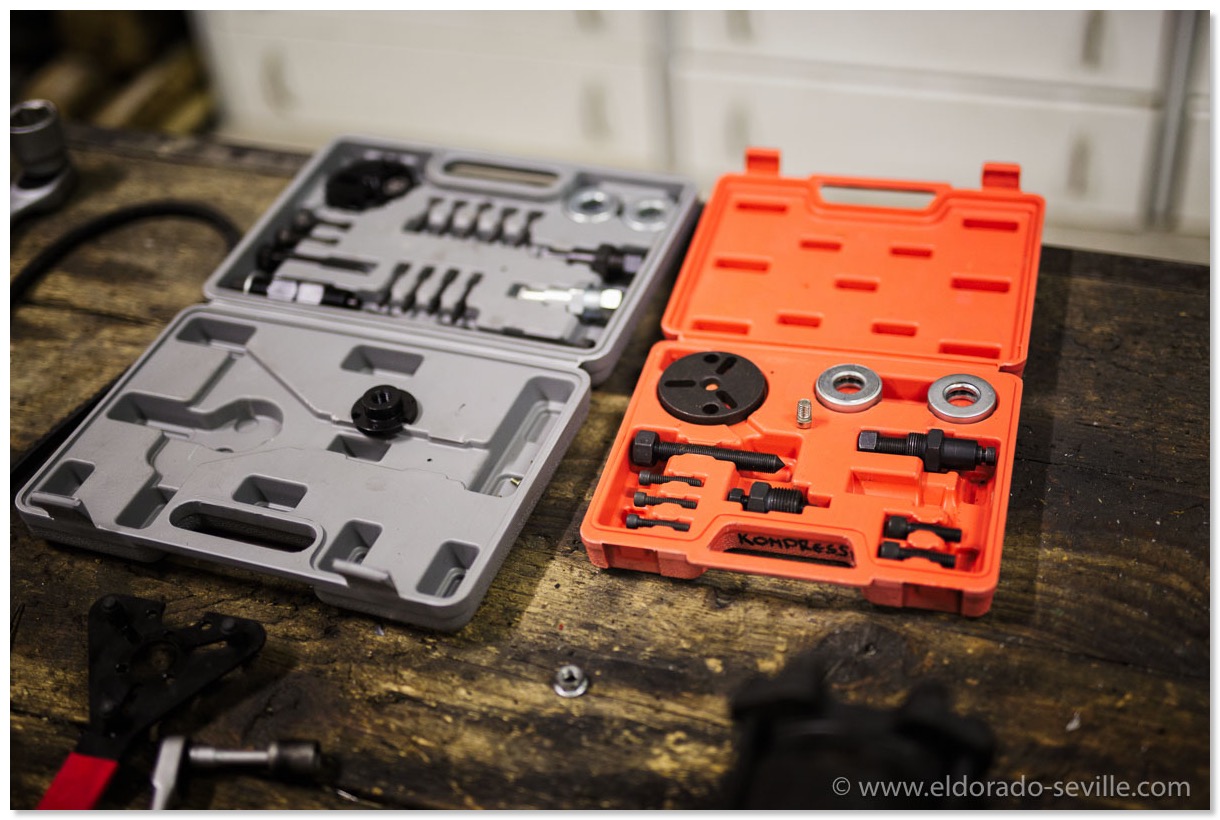
You need some special tools to disassemble the A6 AC compressor.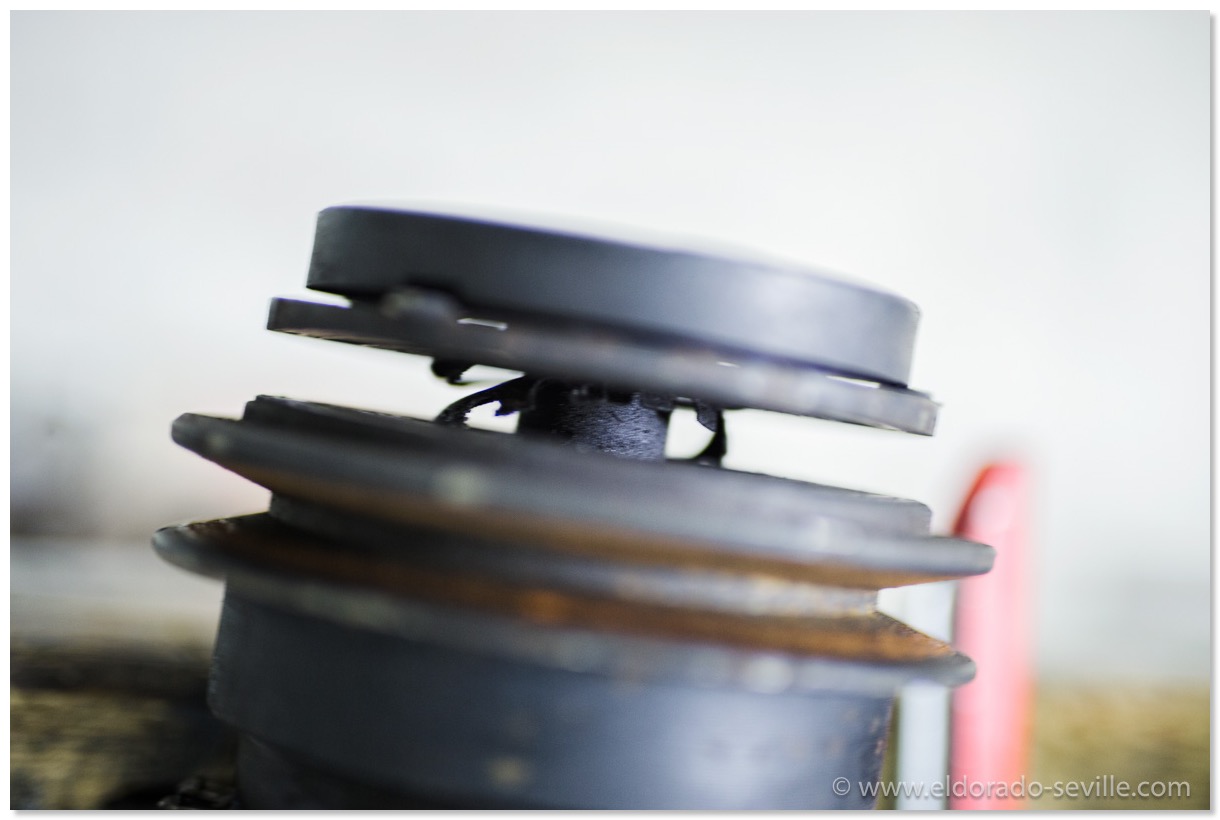
On the 74´s original AC compressor clutch the bearing was bad.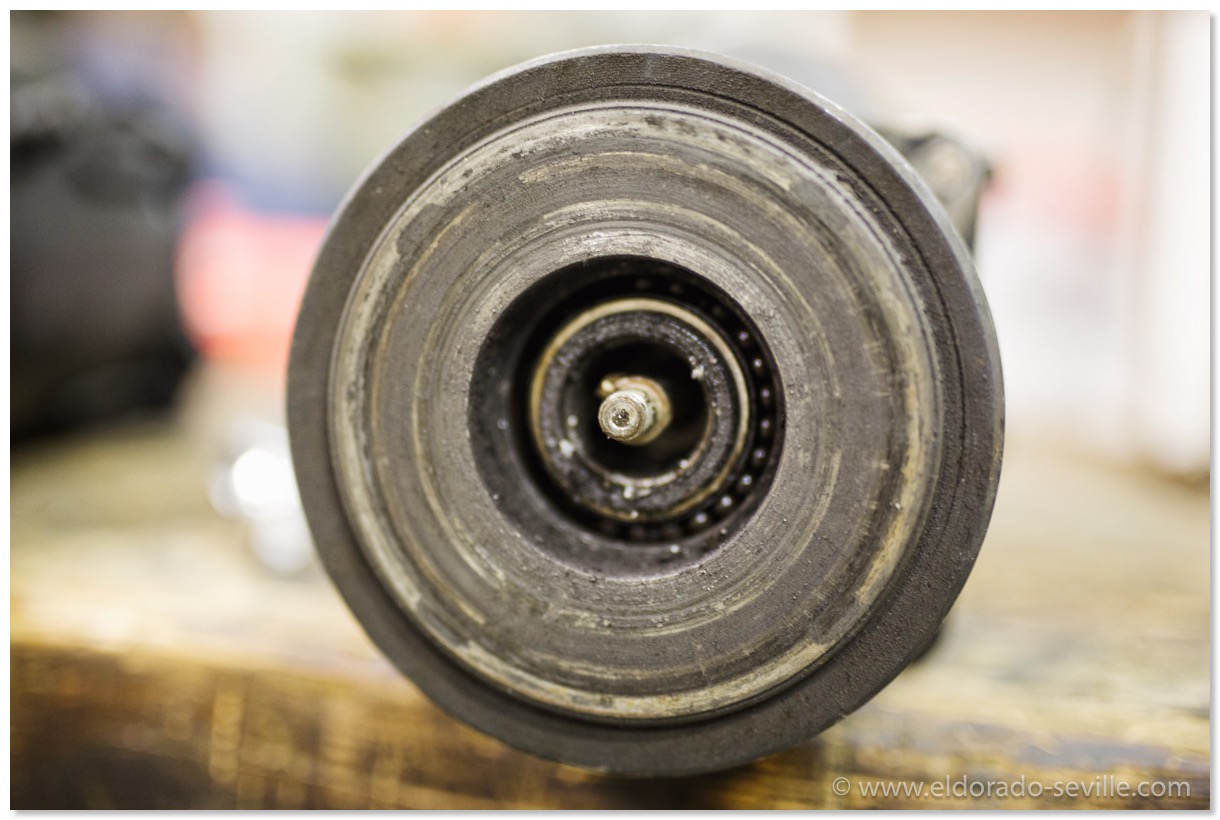
The compressor clutch removed. You can see the bad bearing inside which is normally sealed. Some balls were already missing.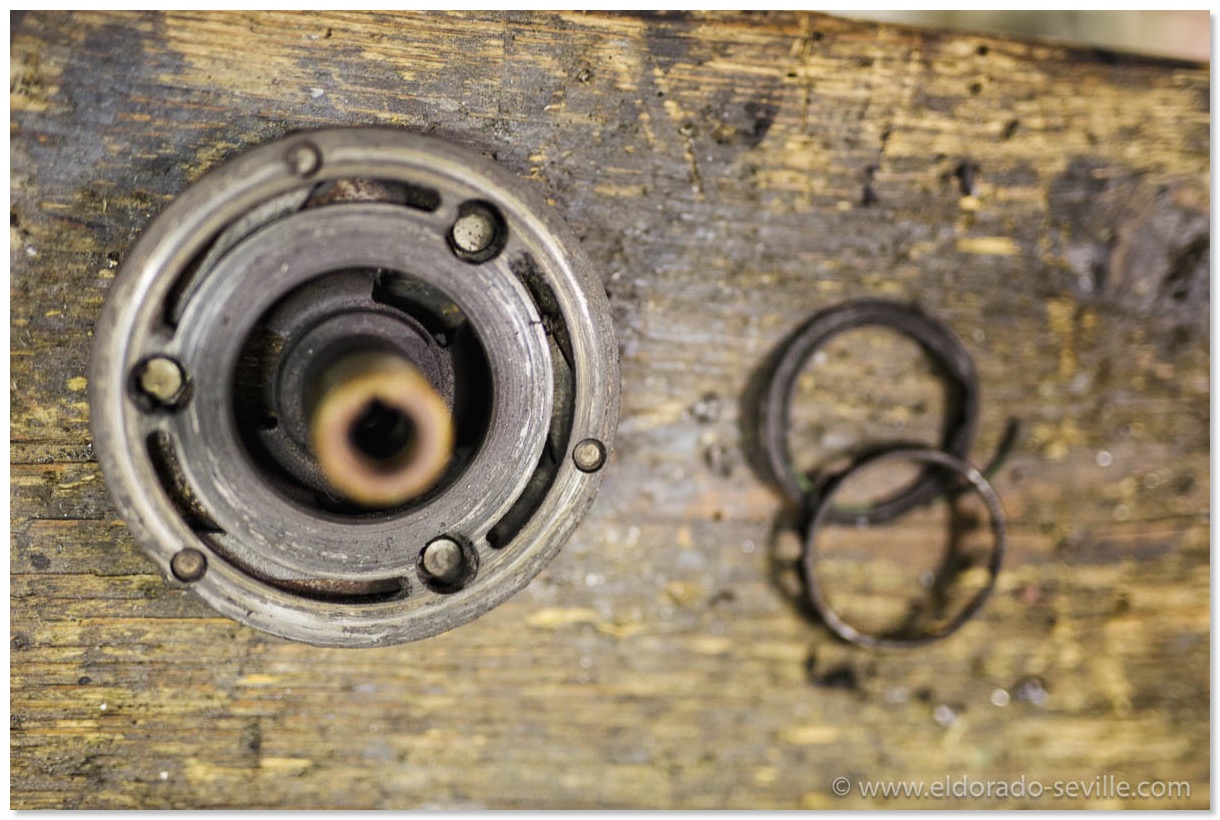
The clutch with some remains of the bearings.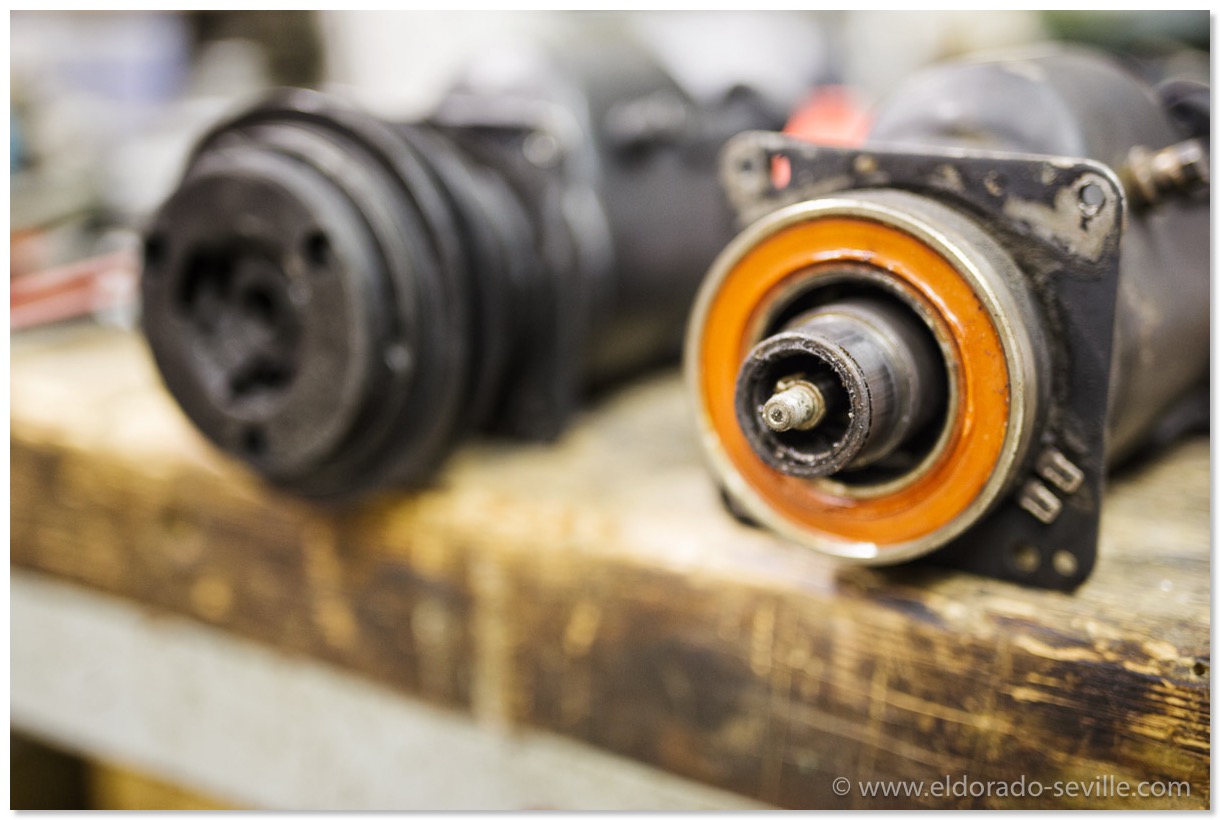
The clutch and pulley removed on the original compressor.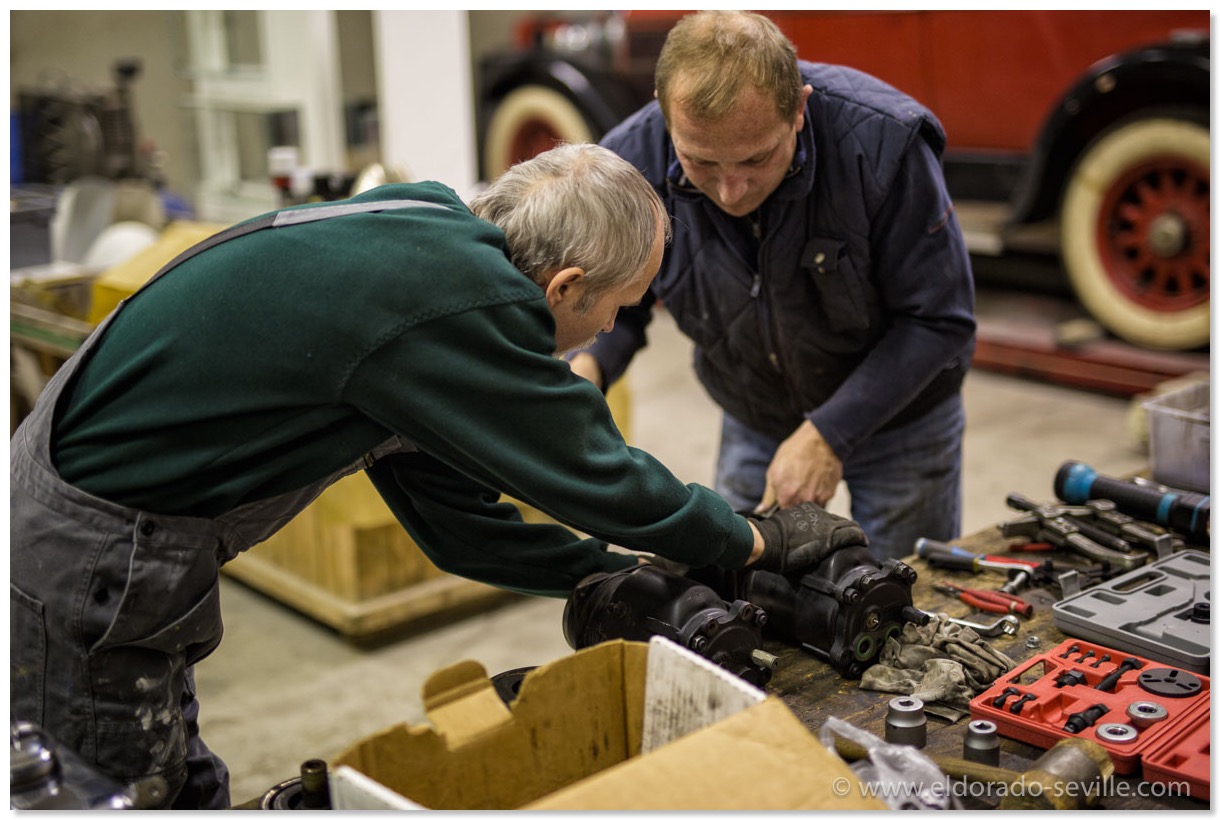
My friends Steve and Lucky at work. We also replaced all the O - rings.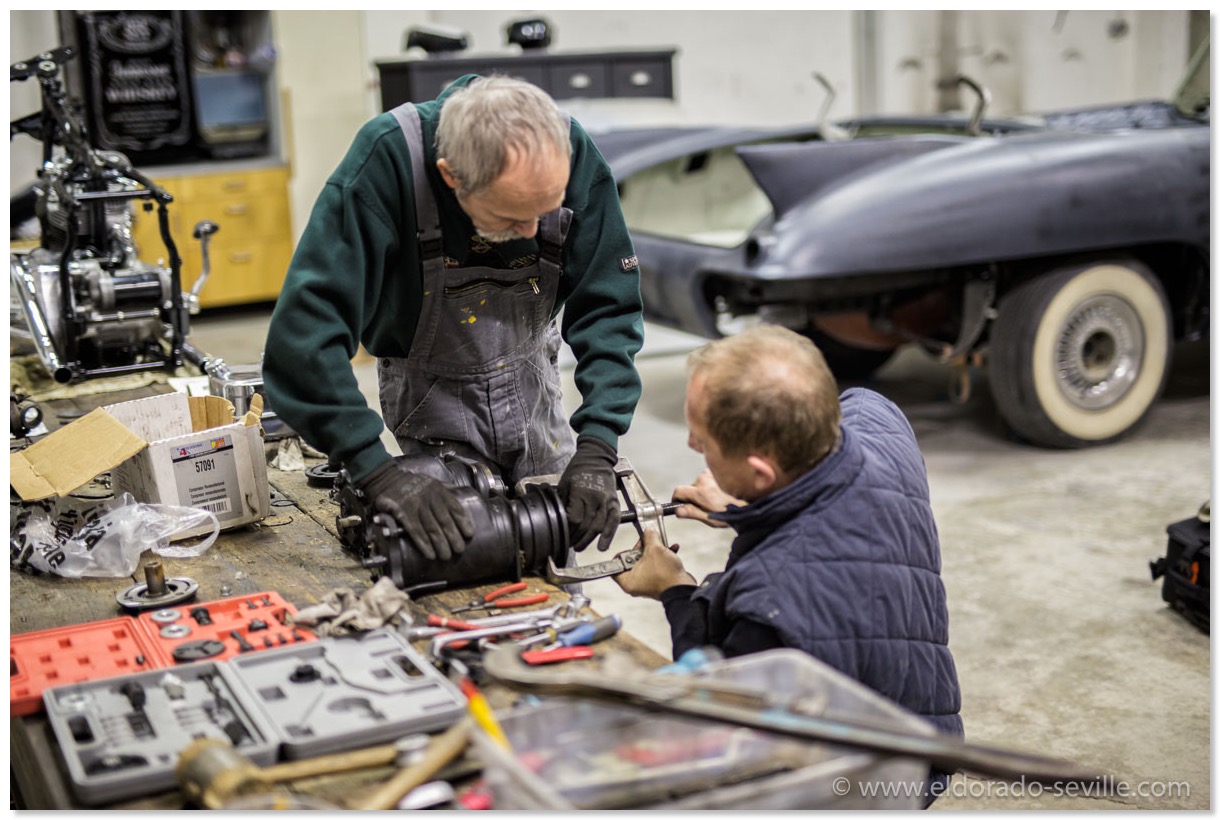
Removing the pulley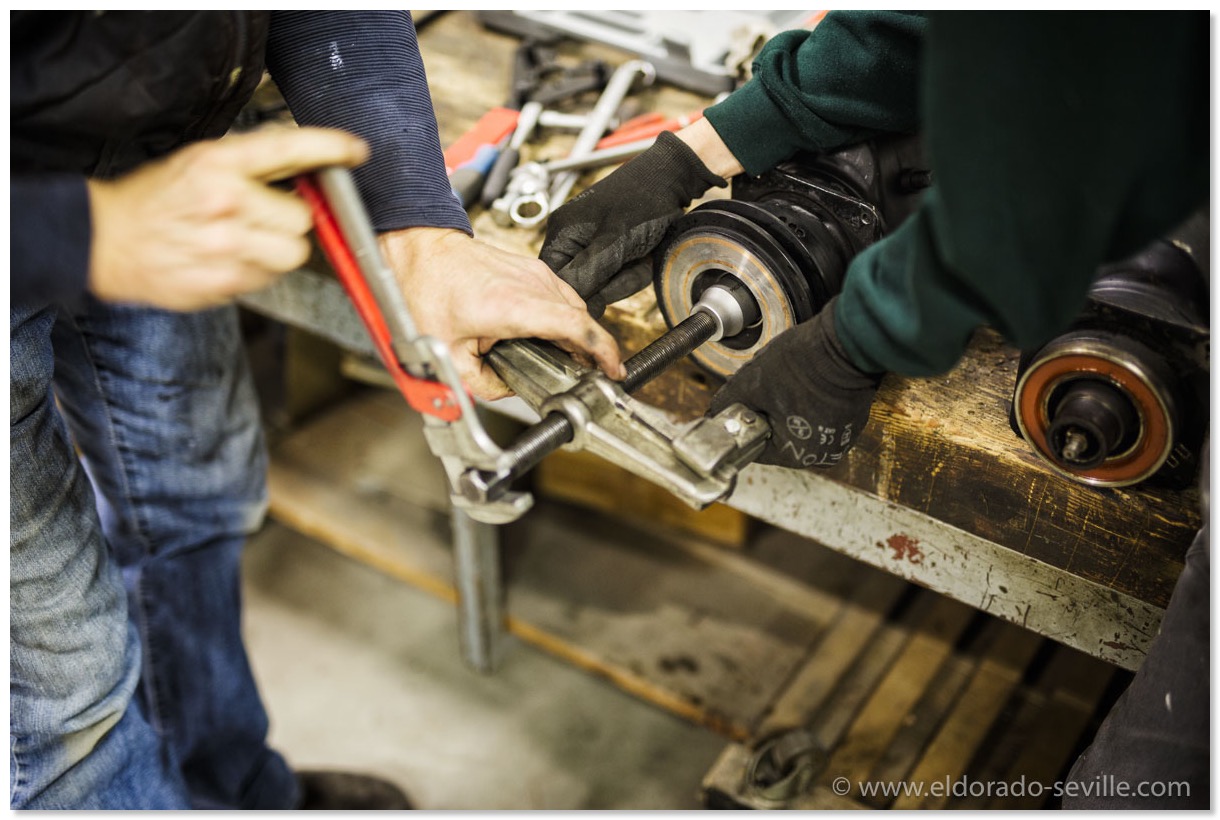
Removing the pulley from the rebuilt compressor.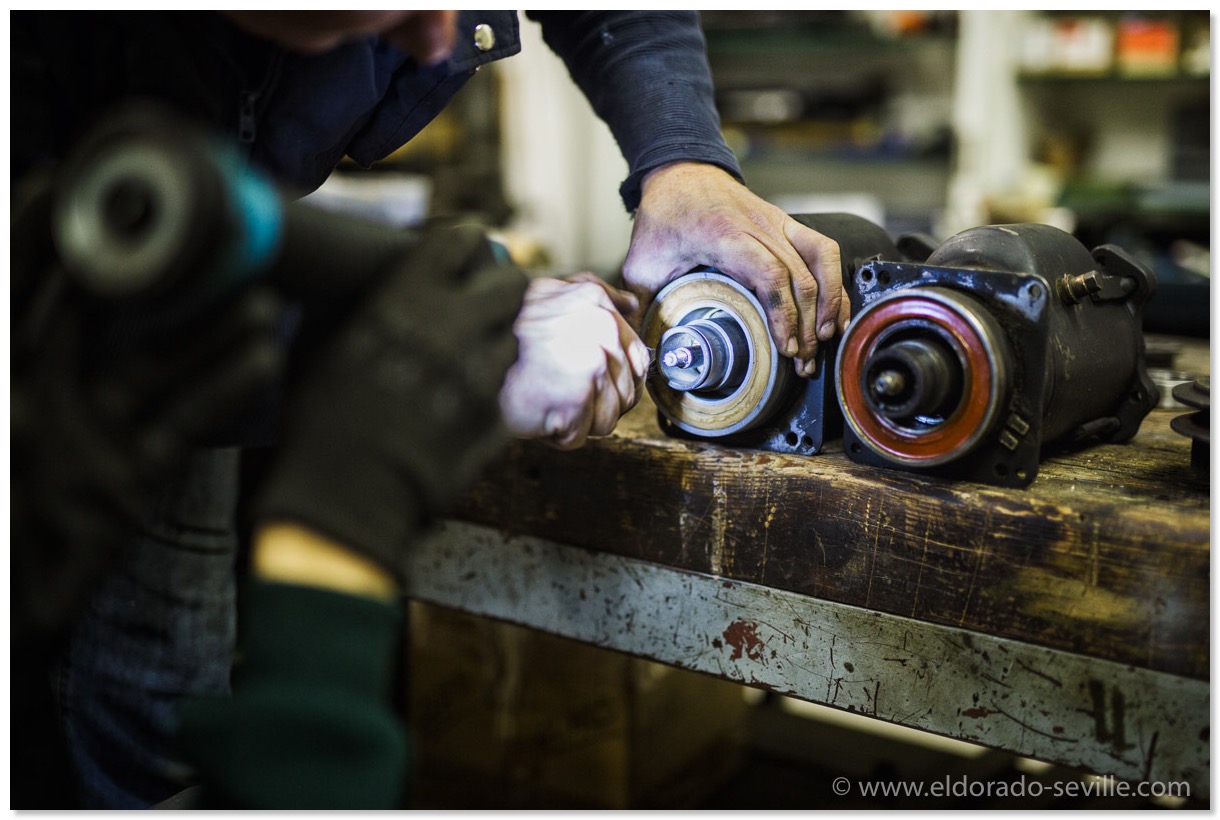
There is this one snap ring we just did not have the right tool for. The shop manual lists a special plier for this. After a lot of fiddling we got it out eventually…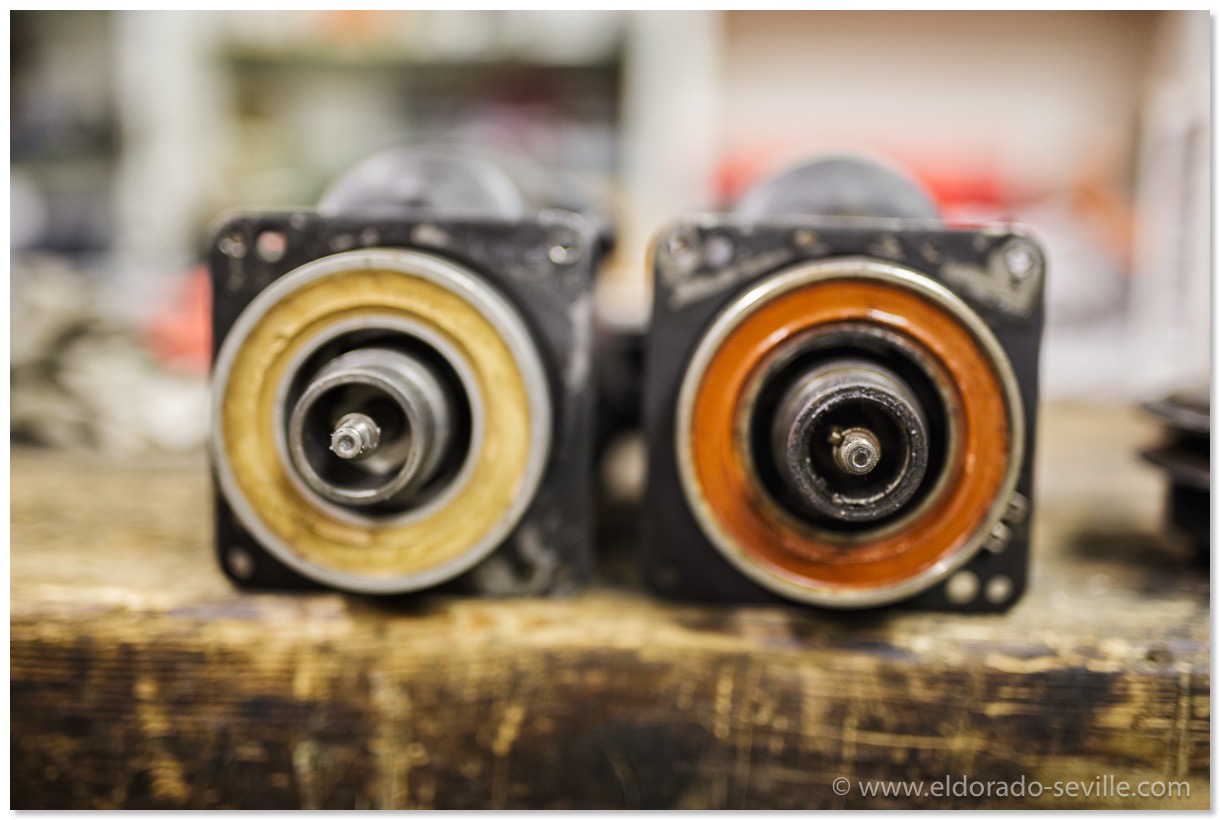
The magnetic coils on the rebuilt and the original compressor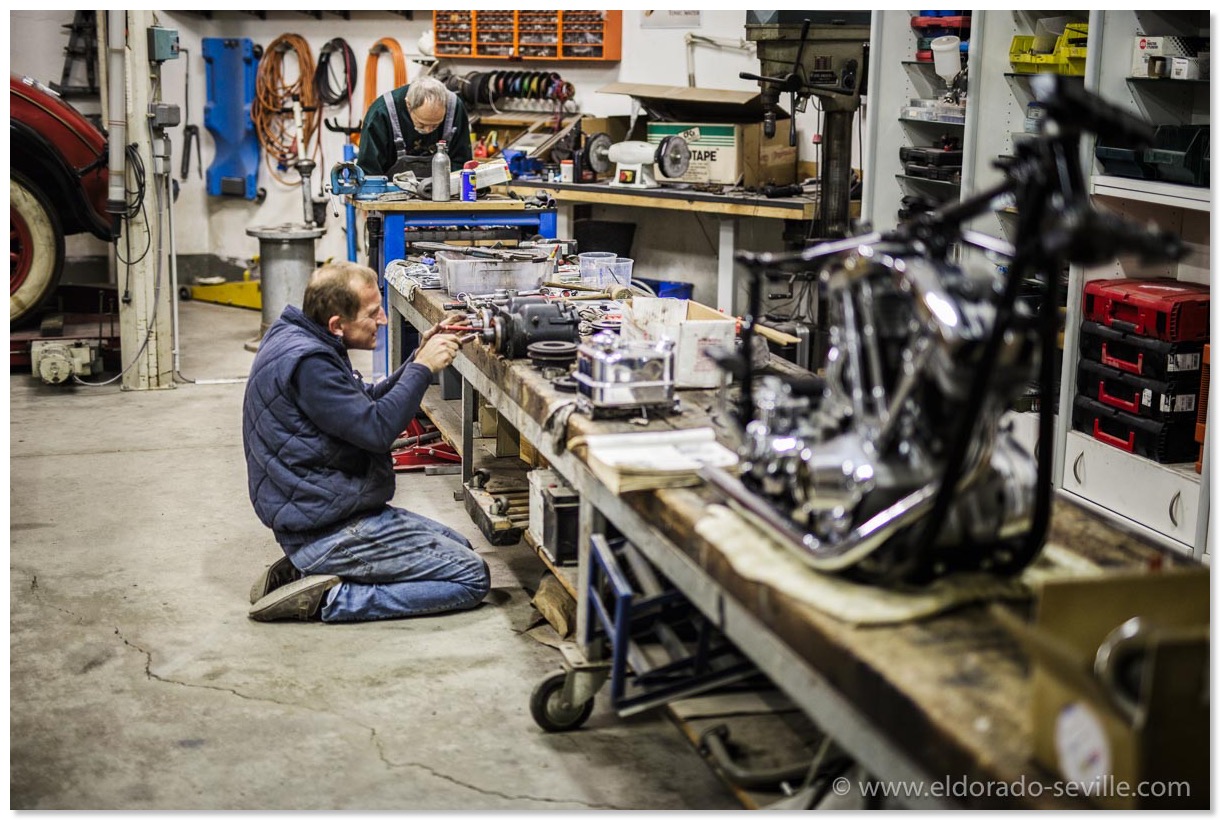
Lucky in action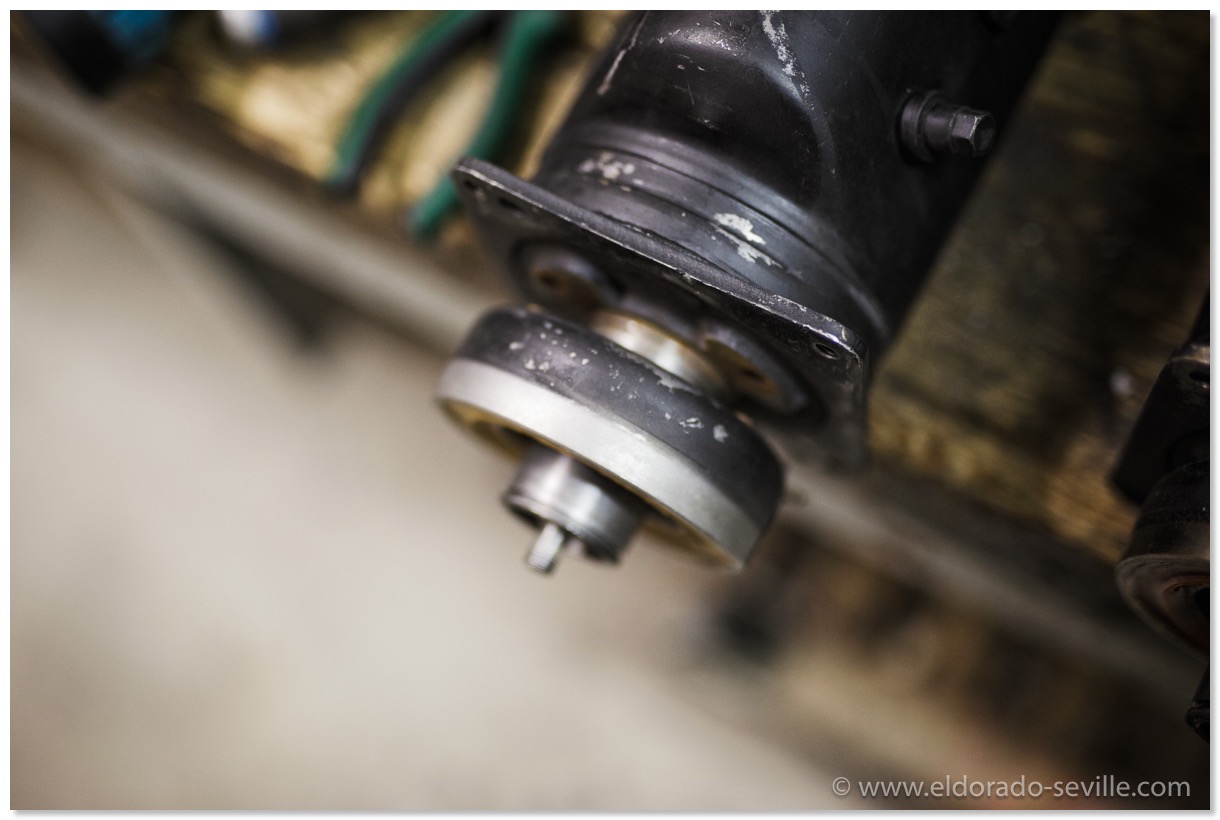
Once the snap ring is out you can turn the coils terminals to the 11o´clock position or the 1 o clock position. On the 74 it has to be at the 10 o clock position, otherwise the connecting wires are too short.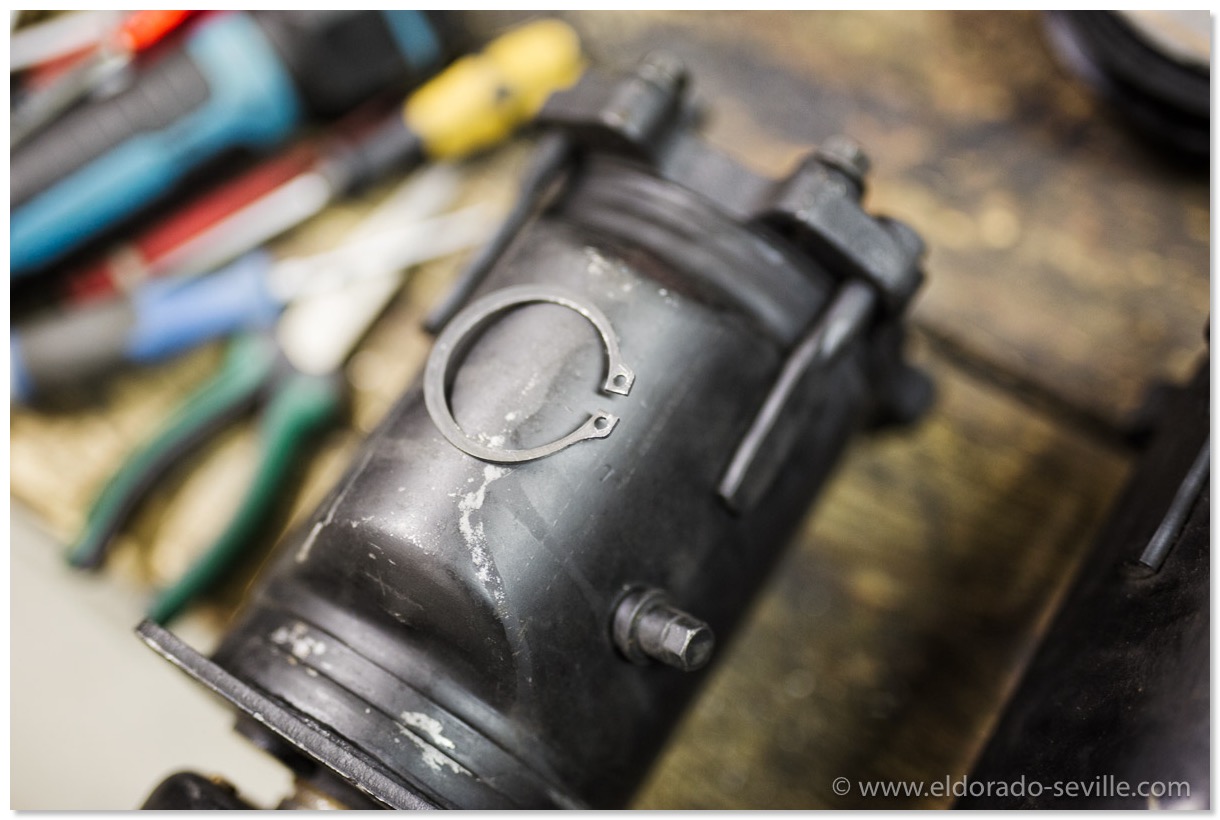
Getting this snap ring out was the hardest part on this job, due to not having the right tool for it.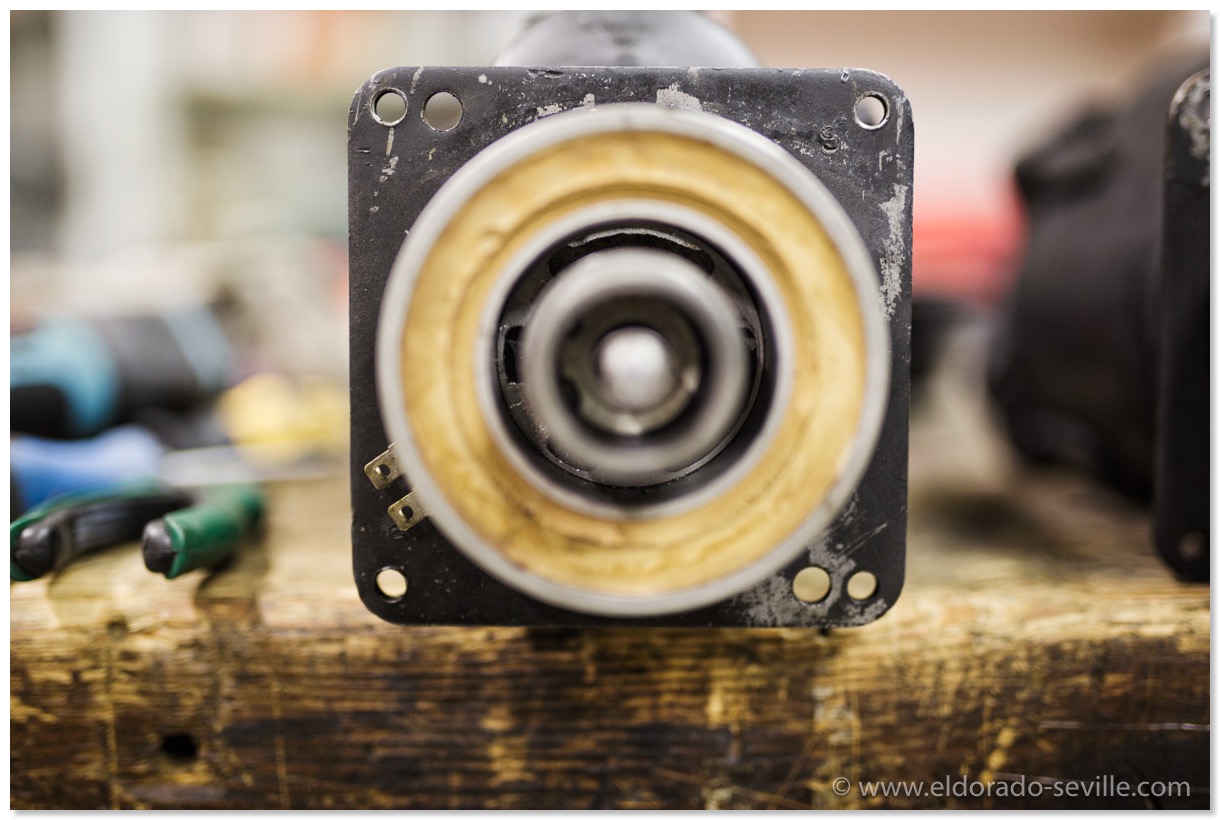
The terminal at the incorrect position at the rebuilt compressor.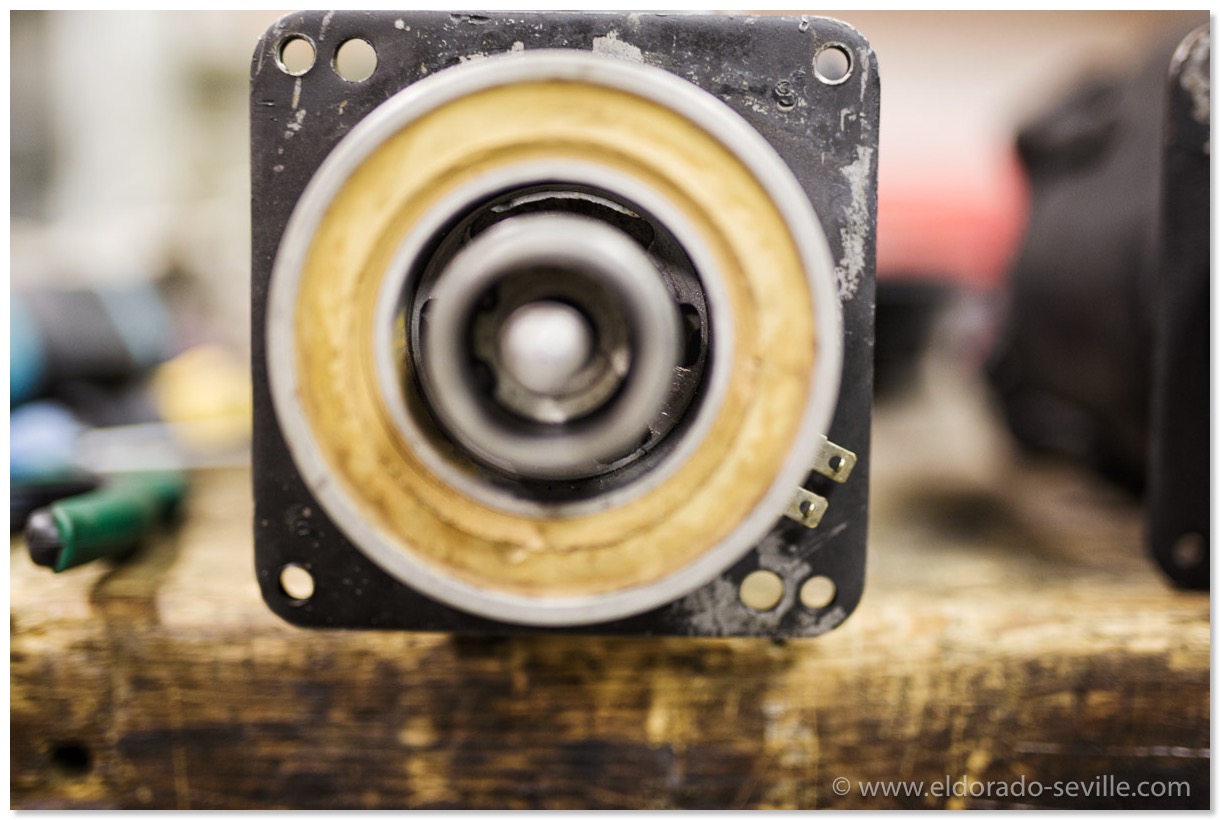
We turned the terminal to the correct position.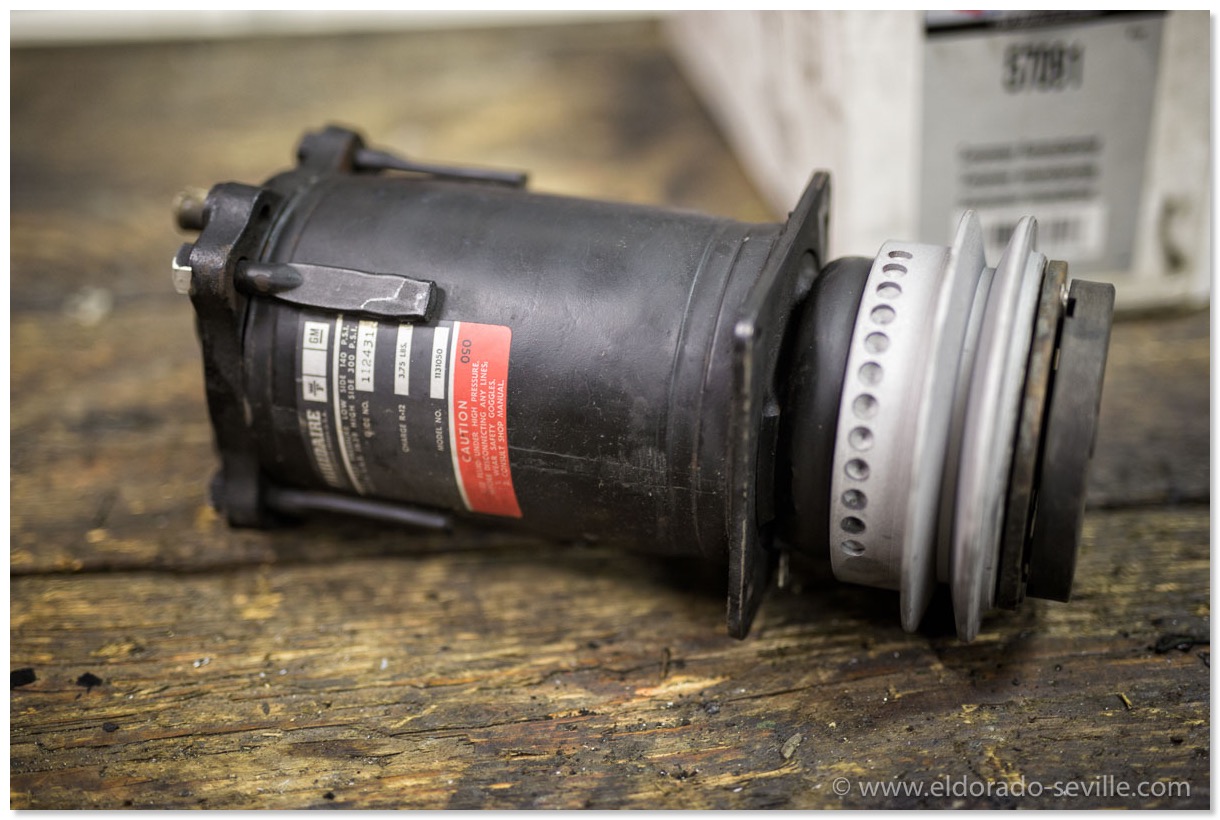
We sandblasted the pulley while it was out of the car so that I can repaint it now. Note the original decal! All the available reproduction decals are totally incorrect for the 1974 Cadillacs. The reproduction decals all show the wrong amount of refrigerant! They are also different in many other details. The closest match of reproduction decals for 1974 are the ones from 1972 Cadillacs…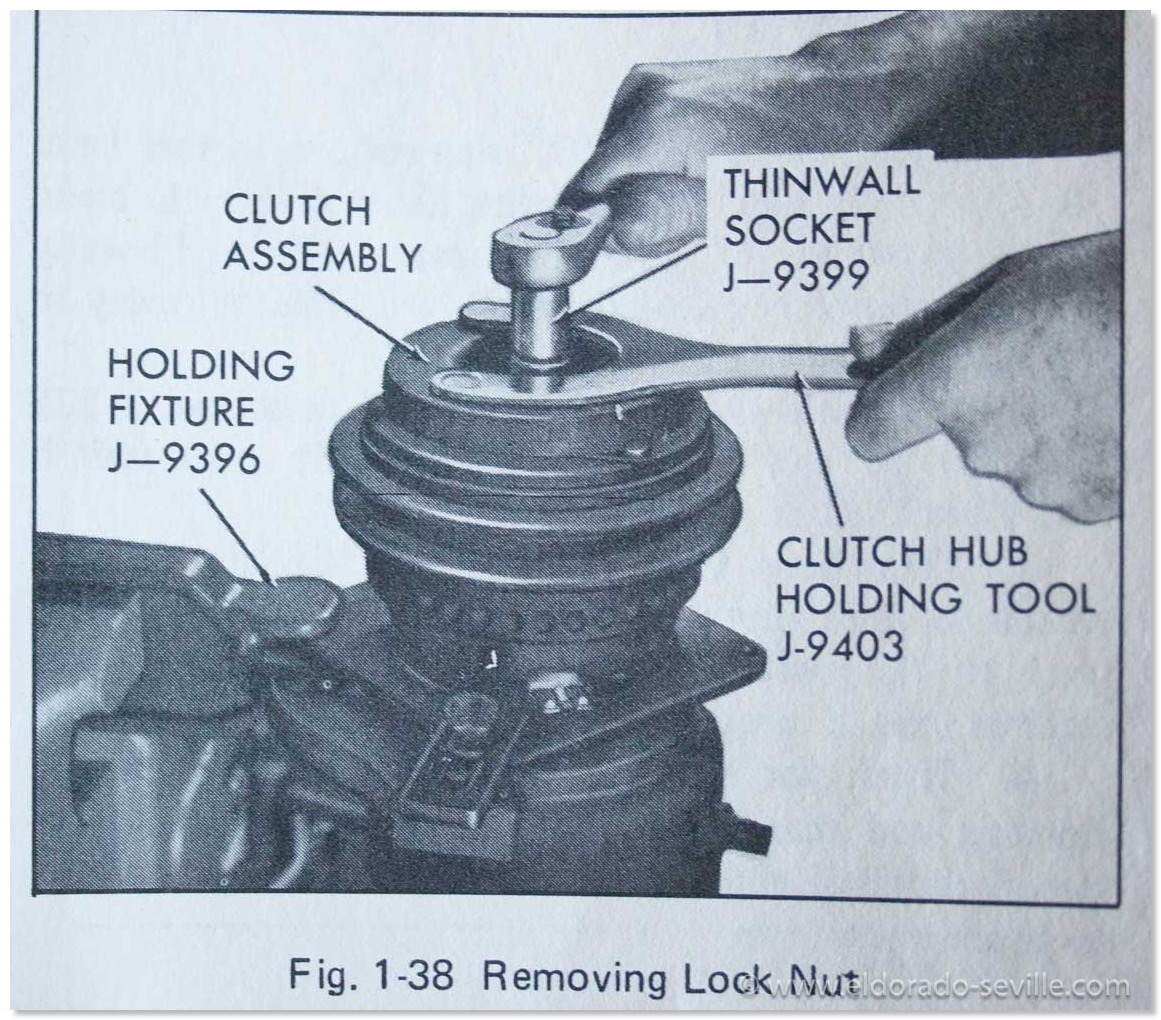
THE 1967 WATERPUMP PROJECT IS COMING TO AN END - DETAILING THE AC COMPRESSOR AND A LEAKING VALVE COVER
The project had a major delay as the reproduction radiator hoses were held by customs for 5 weeks. Its unbelievable…
I could now finally refill the cooling system and start the car again with the new water pump in place.
The car fired right up although I had also removed the distributor and forgot to mark how it was in. So I had to find TDC (top dead center) before I could install the distributor back into the car.
I also bought a cheap timing light and set the timing to 5 degrees. You have to set idling to 480 rpm, disconnect the vacuum hose to the distributor and the parking brake and plug the hoses to set timing correctly
After the first few miles I am quite satisfied with my work. I hope that everything will stay like this and that no leaks will show up.
Only the right valve cover where I had replaced the gasket seemed to have a slight leak with oil dropping on the exhaust manifold... Looks like I will have to take the compressor out again to be able to take the valve cover off again and install another new gasket… But first I will have to find out why it is actually leaking. I hope that the cover itself is not warped as it was already leaking before on exactly the same spot. Often these covers get tightened down too much. All it needs is 28 INCH pounds of torque (3,1 NM) I will also make sure the screw holes have not become dished (usually due to over-tightening of the screws). Use a small block of wood as an anvil and a small hammer to flatten the screw holes back out.
The engine somehow runs and idles better than before and has more power. It seems like the ignition was off before. I had the car tuned by a professional years ago - another thing they did not get right...
The new reproduction hoses I got from Fusik are also in place with the correct tower hose clamps. The hoses have the correct numbers stamped on, but compared to my original hoses the stamping looks different where the numbers are much smaller. The hoses fit very well, only the lower radiator hose had to be cut a little to fit.
I also detailed the replacement AC compressor I installed years ago. I bought a new reproduction decal which is a very good match to the original decal. In general I found out that all the reproduction decals available out there are not a 100% match. They look very similar but they all differ in size, spacing of the numbers, and most of the time the font used is very similar, but not exactly the same. I have no idea why the manufactures did not get it 100% right. Maybe I will have to produce my own decals in the future… Most of the AC compressor labels you can buy are incorrect for the year or model they are offered. If you want to get the correct one for the 67 Deville you will have to buy the one for the 67 Eldorado. Often these reproduction decals have the wrong colors, numbers and R12 capacity on them. So do your research to get the correct one.
Another challenge was to reproduce the O.K. inspection stamp. Years ago I found the stamp on ebay and experimented with different kinds of paint and never got any useable results.
Eventually I found a stamp kit set for Corvettes which included the correct yellow paint and a stamp felt and the Corvette stamp. I could not use the Corvette stamp of course, but the rest of the kit is perfect and finally I could apply the stamp to my AC compressor which now looks factory new again.
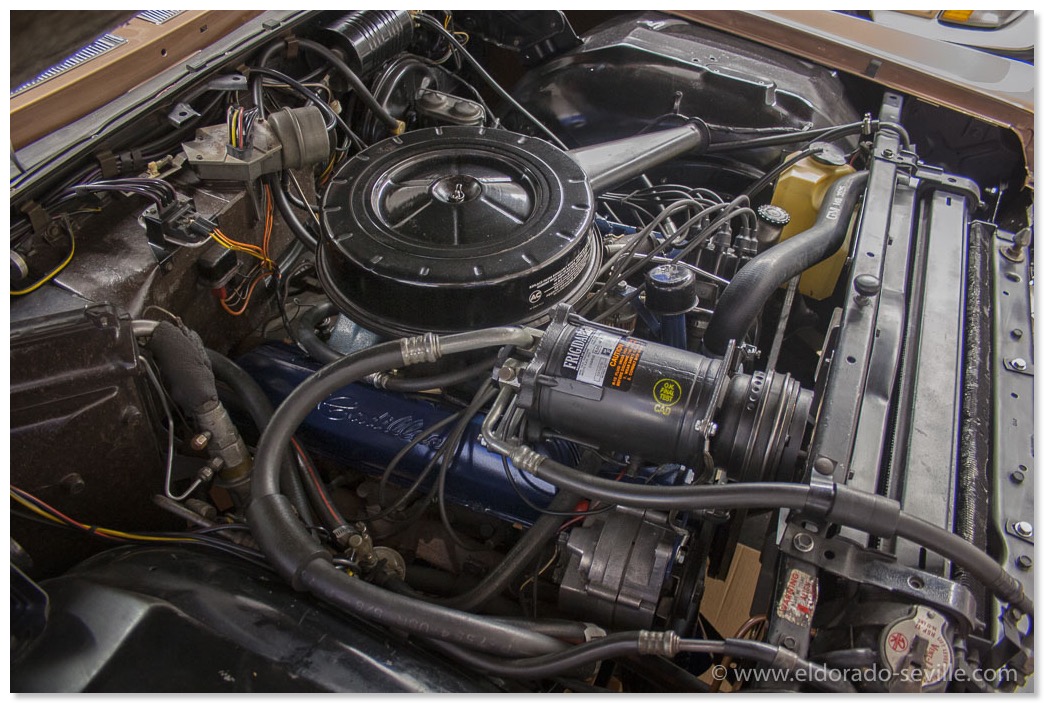
The engine is back together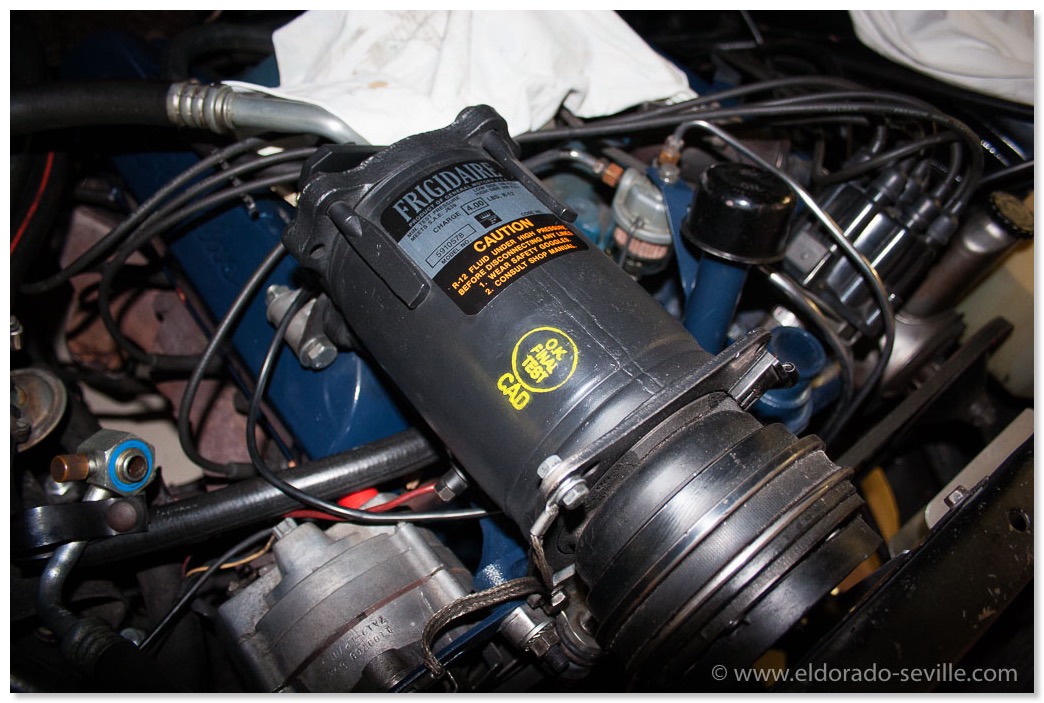
The detailed AC compressor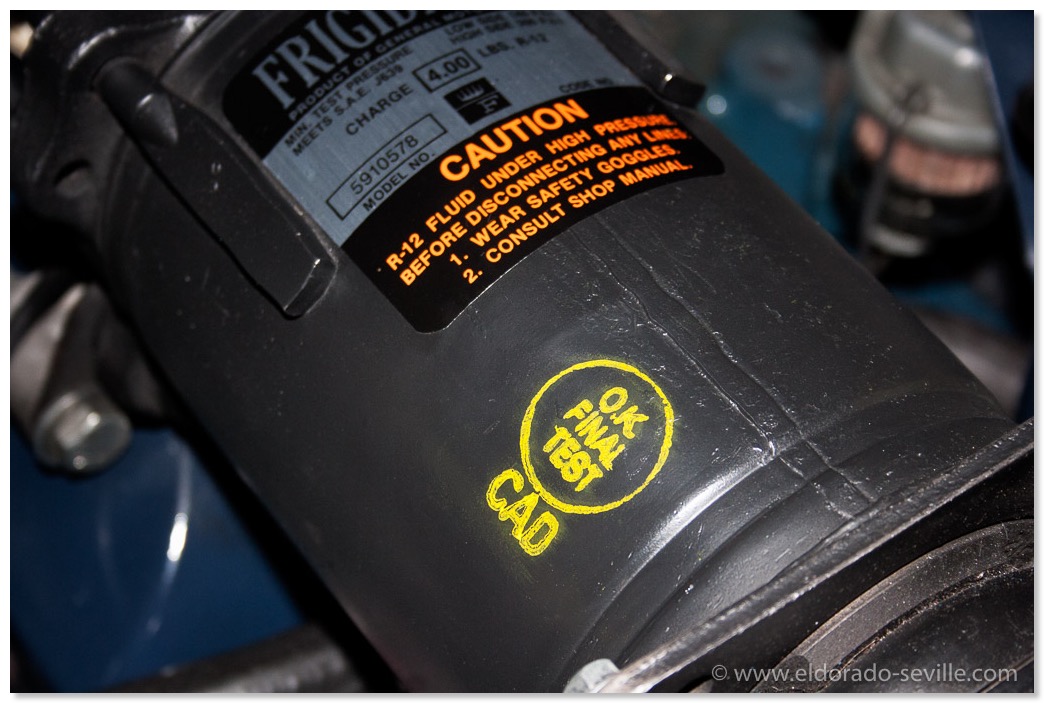
The O.K: final test stamp
Bleeding brakes and spring cleaning
First up was the 1958 Cadillac Eldorado Seville which needed new brake fluid.
So I sucked out the old fluid from the reservoir and flushed all the lines with fresh DOT 3 brake fluid.
I started at the right rear line, the left rear, the right front and left front brake cylinder.
Although I have a pit its still a pain to reach all the bleeding screws. The power brake cylinder itself also needs some good bleeding.
Thanks to my dear wife Afra for gently pumping the brake pedal and helping me out.
When you bleed brakes make sure your assistant does not push the brake pedal all the way through as this could damage your master cylinders membrane.
Next up was a thorough cleaning of the garage floor.
My 3 year old son Elliot also wanted to help his daddy and helped me swiping the floor ;-)
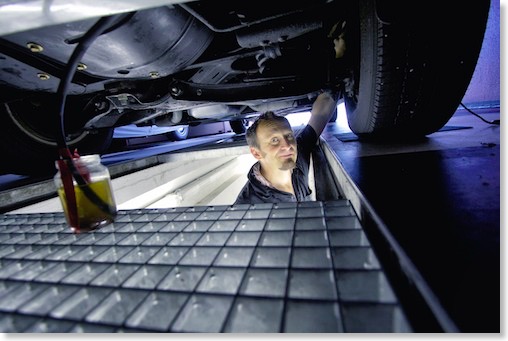
Bleeding and flushing the 58s brake lines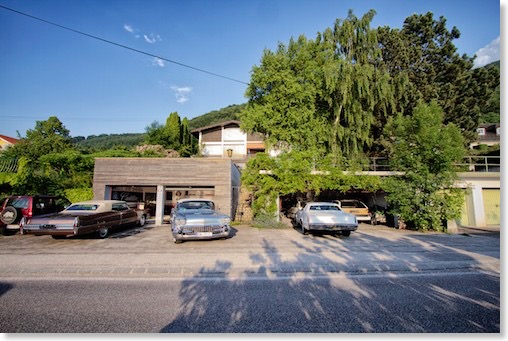
The cars are out for cleaning the garage floor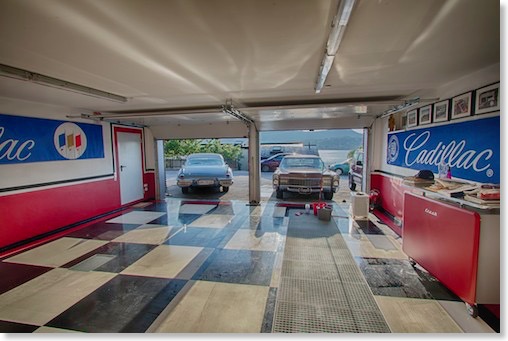
Floor cleaning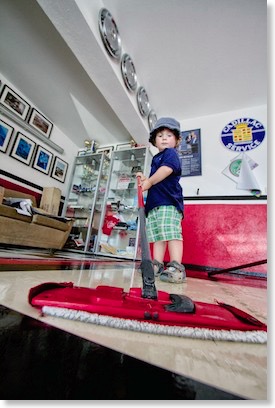
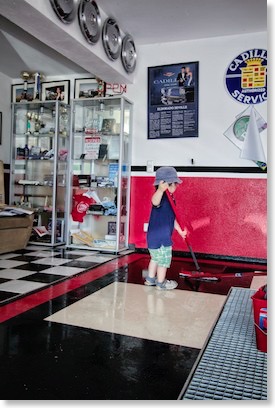
Little Elliot helping out - I´m glad he loves being in the garage.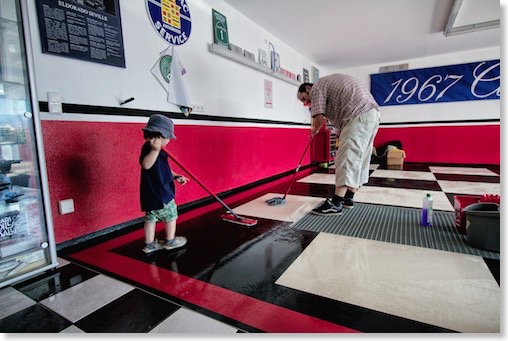
Men at work
The 67 Eldorado is at the shop again
Also the ignition and the rebuilt carburetor were not quite up to my standards yet, and so I decided to ask for some professional help for the last finishing touches. So I delivered the car to the shop, and the experts did some more tweaking. The result is that I finally have a perfectly working AC on my car. It took a while, but finally it's working as it should. When I got the car, a lot of AC parts were defective or torn out, and now everything is back to factory specs.
Also the carburetor is finally working as it should.
From a technical standpoint the car is now in perfect condition - you wont find anything that´s not working as it should.
Great! - next up is a repaint...
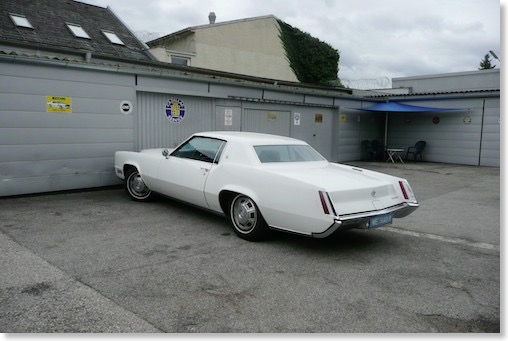
The Eldo at the shop.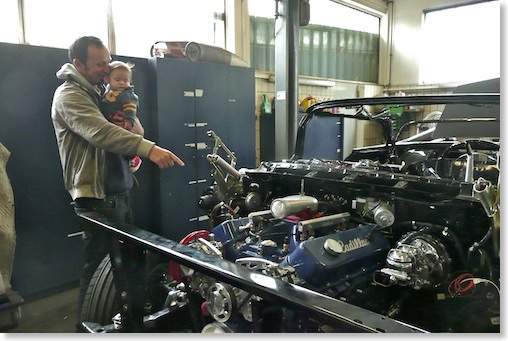
I took my little son with me to show him whats going on in the restoration shop.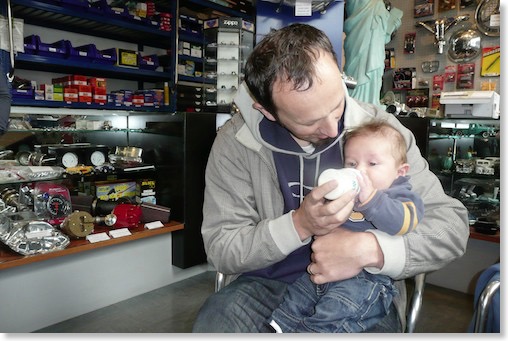
Looking at so many cool cars made little Elliot very thirsty. Here he is having his milk in the shop.
A problem with the 67 Eldorados carburetor
The right headlight door actuator also suddenly no longer works correctly. All hoses are new and it worked perfectly until recently. I can now only make it close if I jiggle on the actuator. Is there any way to rebuild them? A source for new or rebuilt ones? I have heard that the ones from the 1969 Camaro is very similar and only needs some minor modifications to work on the Eldorado as well. So I went ahead and ordered one. But the worst thing was that the freshly rebuilt carburetor made strange ticking noises and sounded like a tractor while accelerating. It worked well though, but the sound was unbearable. Could it be a defective gasket? It was also idling quite badly. Acceleration was superb though, its much more powerful than before, but still something was wrong... The ignition also was completely rebuilt. So I played around with the ignition first, but the ticking sound did not go away, no matter in which direction I changed the timing... Almost sounded like an exhaust leak, but there seemed to be none... It was LOUD! Before I had the carb and ignition rebuilt, it was extremely quiet and idling smoothly but had misses while accelerating.
I got some very valuable tips from fellow Cadillac aficionados and the previous owner of this Eldorado even called me from the USA to give me some tips to solve this issue, and he was spot on with his diagnosis...
With a hose held to my ear and the other end to the carburetor, I was able to locate the source of the noise. It came from the carburetor below the choke assembly. So I took the freshly rebuilt Rochester Quadrajet out again, only to find out that the gasket and the metal shim were installed the wrong way around. This burned a hole into the brand new gasket where the exhaust gases from the heat crossover passage could escape and make this noise.
Of course I did not have a new gasket at hand, so I carefully removed the old one from my spare engine, which was in pretty good shape and installed it.
No more ticking - no more noises, no more bad idling.
The car now drives amazingly good and is silky smooth. It could not be any better.
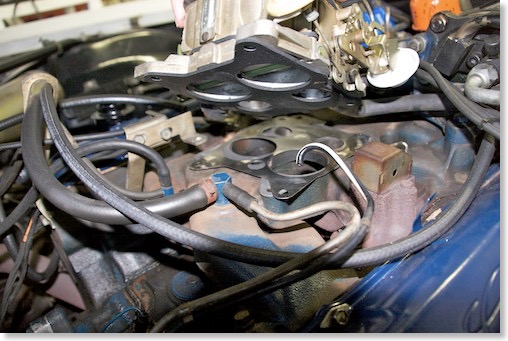
The shim was installed first and then the carb - thats wrong! The gasket has to go on the intake manifold first - then comes the metal shim.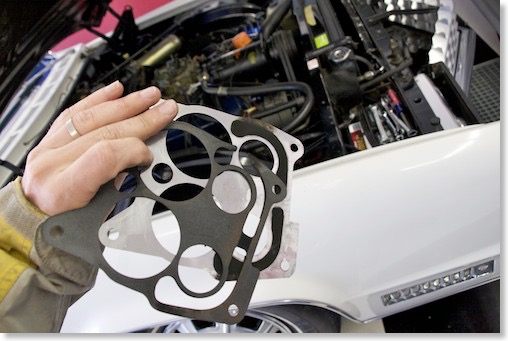
Here you can see the burnt gasket and the metal shim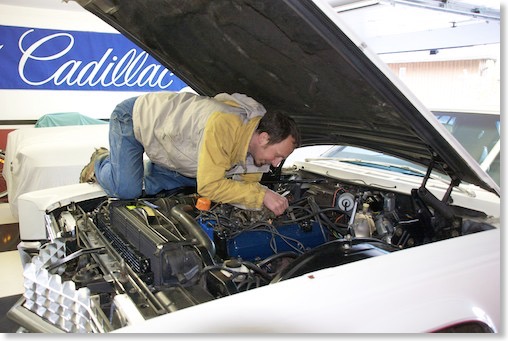
Putting everything back together again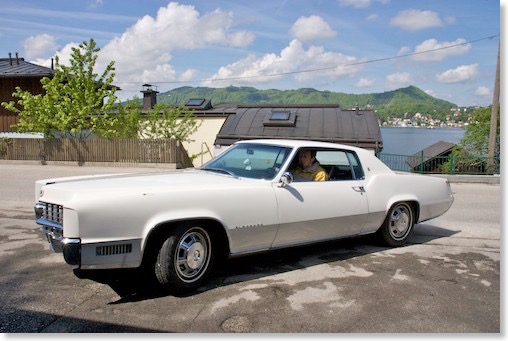
Test drive after the repair - perfect!
1966 Cadillac Coupe deVille (15)
1967 Cadillac DeVille (54)
1967 Cadillac Eldorado (71)
1971 Lincoln Continental Mark III (23)
1974 Cadillac Coupe deVille (45)
1978 Cadillac Eldorado Biarritz (24)
1996 Buick Roadmaster (19)
Car Shows (53)
Cruising (4)
For Sale (3)
Garage Stuff (32)
Pacer (1)
Restoration (137)
Various (55)
Video (16)
Website News (30)
- 6 way power seat
- 8-track
- 10 Ohm
- 429
- 1932
- 1957
- 1958
- 1958 Cadillac Eldorado Seville
- 1958 Cadillac Repair Tip
- 1959 Cadillac Eldorado Seville
- 1964
- 1965
- 1966
- 1966 Cadillac Coupe deVille
- 1966 Cadillac Repair Tips
- 1967
- 1967 Cadillac DeVille
- 1967 Cadillac Eldorado Repair Tip
- 1967 Cadillac Repair Tip
- 1967 Eldorado
- 1968
- 1970 Cadillac Eldorado
- 1971
- 1971 Lincoln Continental Mark III
- 1974
- 1974 Cadillac Coupe DeVille
- 1974 Cadillac Repair Tip
- 1976
- 1977
- 1978
- 1978 Cadillac Eldorado Biarritz
- 1978 Cadillac Repair Tip
- 1980 Cadillac Eldorado Biarritz
- 1996
- 2012
- 2014
- 2017
- 2018
- 2019
- 2022
- 2023
- 3063206
- 7027235
- 7800483
- 7805675
- 7805676
- 12355706
- 17058531
- 17059968
- 17059969
- 22010515
- 22010661
- A.I.R
- A6
- AC
- AC Compressor
- AC Electrical Diagram
- ACC
- Accelerator Pump
- Accelorator pump
- Actuators
- Adriatic Blue Metallic
- Ads
- Aftermovie
- Air Pump
- Aircondition
- AIRPUMP
- ALC
- Alternator
- AM
- AM-Transmitter
- Antenna
- Anti Rattle Clips
- Antique Gold
- Arizona Vintage Parts
- Arrival
- Article
- ASC
- Ash Tray removal
- ATC
- Atlantis Blue Firemist
- Austria
- Austro Classic
- Autolite SP-459
- Automatic Seat Back Release
- Award
- Banner
- Barn Find
- Battery
- Battery Tray
- Beach Race
- Bearing
- Bendix
- Biarritz
- Bigfoot
- Bill Hirsch Engine Enamel
- Bleeder Screws
- Blower
- Bolts
- Borg
- Brake Booster
- Brake Fluid
- Brake Gray
- Brakes
- Broken Bolt
- Brougham
- Bucket seats
- Buick
- Bumper End
- Bushings
- Cadillac
- Cadillac BIG Meet
- Cadillac BIG Meet
- Cadillac birthday cake
- Cadillac Blue
- Cadillac Color Selections Dealer Book
- Cadillac Coupe deVille
- Cadillac Dealer
- Cadillac Meeting
- Cadillac Mini Meeting
- Camaro RS
- Caorle
- Car Show
- Carburetor
- Card
- Carpet
- Carter AFB
- Cavalry Twill Vinyl
- CB
- CBM
- CCCD
- Choke
- Christmas
- Citizens Band
- Classic Cadillac Club Deutschland
- Clay Towel
- Cleaning
- Clock
- Clockwork
- Clutch
- Clutch Coil
- Collector
- Colonial Yellow
- Color Coded Springs
- Commercial
- Compound
- Compressor
- Condenser
- Continental Mark III
- Control Head
- Conversion
- Convertible top
- Coolant
- Corona
- Cowl
- Cruise Control
- Cruising
- CV Boots
- CV JOINTS
- D6230
- Dash Trim
- Decal Removal
- Decals
- Decoration
- Dehumidifier
- Delco Moraine
- Der Standard
- detailing
- Deville
- Diagnosis Chart
- Diagram
- Dial
- Digital Rotary Drum Clock
- Diner
- Disc Brakes
- Distributor
- Diverter Valve
- Door Jamb Switch
- Door Rubber Conduit
- Dornbirn
- Dot3
- Drive Shaft
- Driving tour
- Drum brakes
- Dry Ice Blasting
- Dry Ice Cleaning
- DVD
- Eastwood
- Eldorado
- Electric Choke Thermostat
- Electrical schematic
- Elvis
- Engine Bay
- Ep
- Epoxy floor
- Europe
- Evaporator
- Exide
- Factory Markings
- Fender Skirt
- Floor
- Flushing
- Foam
- For Sale
- Front AXLE
- Front brakes
- Front bumper filler
- Front Floor
- Front wheel bearing
- Fuel Filter
- Fuel Pump
- Fuel Sending Unit
- Fusible Link
- Garage
- Garage Cabinets
- Gasket
- GE
- Gear indicator
- General Time
- Glove box light
- Grand European
- H4
- Haus of Hot Rod
- Headlight Actuator
- Headlight doors
- Headlights
- Heater Core
- Heater Hose
- Heater Valve
- High Idle
- Holley
- Honest John
- Hood
- Hood Emblem
- Hood Ornament
- Hose Clamp
- Hot Choke
- Hot Water Valve
- HotRod
- How to
- Hödlmayr
- Ignition Diagram
- Illuminated Entry
- John D‘Agostino
- John Foust
- Klassikwelt Bodensee
- Kremsmünster
- LaSalle
- Leather seats
- Light Switch
- Limited
- Lincoln
- Lincoln Mark III Repair Tip
- Low Mileage
- Magazine
- Marilyn Monroe
- Mark III
- Master Cylinder
- Master Switch
- Master Vacuum Switch
- Media Blasting
- Meeting
- Meguiras
- MK II
- Mobile
- Model
- Moldings
- Mom
- Mopar Nationals
- Mostkost Kustom
- Movie
- Neon
- NOS
- Oberösterreicher des Tages
- oilchange
- ORF
- Overspray
- Pacer
- Paint
- Paint correction
- Paintjob
- Part Number
- Parts
- Patch Panel
- Perfect Circle
- Permabag
- Persian Lime
- Photo shooting
- Photoshooting
- Pictures
- PinUp
- POA Valve
- Power Antenna
- Power Servo
- Power Vent Windows
- Power Window
- Printed Circuit Board
- Programmer
- Pulley
- Quadrajet
- Quarter Panel
- Quartz Conversion
- R134
- Radiator
- Radio
- Rattle
- Rear brakes
- Rebuild
- Recalibrate
- RediRad
- Reed Switch
- Relais
- Relaunch
- Removing Overspray
- Repaint
- Repair
- Restoration
- RIP
- Roadhouse
- Roadmaster
- Rochester
- Rocker Arm Cover
- Rocker Panel Extension Clips
- Rostio
- Rotary Valve
- Rotterdam
- Rupes
- Rust removal
- Rust removal gel
- Sabre Wheels
- Sand Blasting
- Sandblasting
- Screed
- Season Greetings
- Seasons Greetings
- Seat Back Locks
- Seat Padding
- Seat Transmission
- See through ornament
- Self adjusters
- Sepp's Garage
- Seville
- Sheetmetal
- Shocks
- shop manual
- short
- Sign
- Solenoid
- Spark Plug Wire Routing
- Speakers
- Special Award
- Speed Bleeder Screws
- Splash Guard
- Starter Diagram
- Starter Motor
- Steering Column
- Storage
- suction throttling valve
- sunroof
- suspension
- Swirl Mark removal
- Switzerland
- T3
- Taillight Cover
- Texan´s Choice Award
- Thermostat
- Tilt and Telescope
- Time capsule
- Tomsclub
- Torque Specifications
- Tower Hose Clamp
- Towtruck
- Transducer
- Transmission
- transmission control selector
- transmission control selector indicator light
- transmission shift indicator
- Treadle Vac
- Treffen
- Tri-Band
- Troubleshooting
- Trunk Cardboard Kit
- Trunk lining
- Trunk to bumper cover
- Turn Signal Switch
- TV
- Typisierung
- Ultimate Garage
- Underbody
- Undercarriage
- Undercoating
- Undercoating Removal
- Vacuum Booster
- Vacuum diagram
- Vacuum hoses
- Vacuum Master Switch
- Vacuum Schematic
- Vacuum Valve
- Valve Cover
- Various
- Vent Window Switch
- Vibration
- Vibrator
- Vicodec roof
- Video
- Vinegar
- Vinyl Roof
- Visitor
- Washer Fluid Float
- Washer Fluid Low Level Indicator
- Water Pump
- Wax
- Weatherstripping
- Website News
- Westclox
- Wheel Bearings
- Wheel Housing
- Wiesbaden
- Windlace
- Winter
- Wiring
- Wiring Diagram
- Wonderbar
- Workbench
- Zurzach
 GERALD´S CADILLACS - NEWS