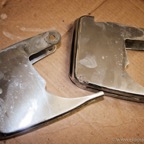
Repairing the seat back locks
Repairing the seat back locks
Repairing the seat back locks
Repairing the seat back locks
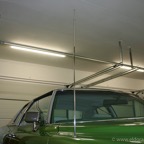
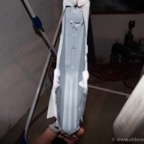
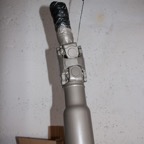
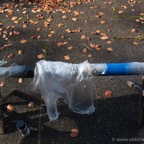
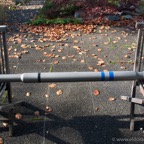
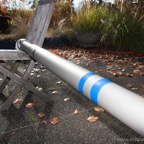
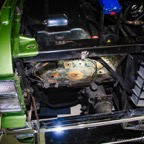
Rebuilt power antenna installed
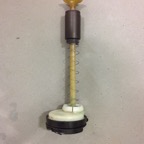
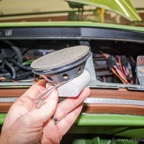
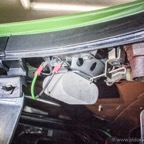
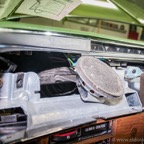
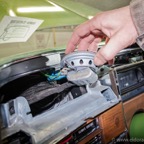
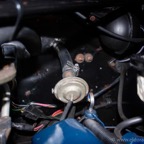
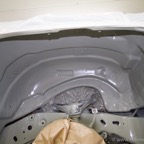
Repairing the washer fluid sensor
Repairing the washer fluid sensor
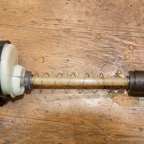
Repairing the washer fluid sensor
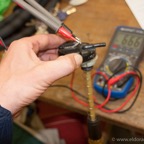
Repairing the washer fluid sensor

Repairing the washer fluid sensor
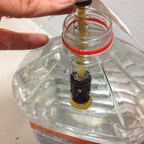
Repairing the washer fluid sensor
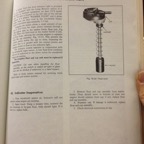
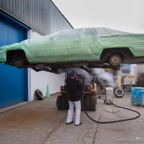
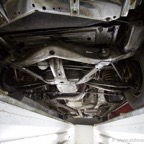
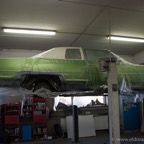
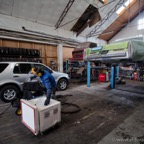
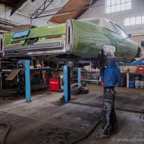
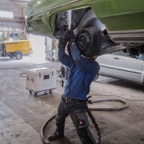
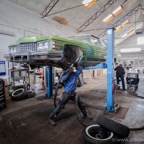
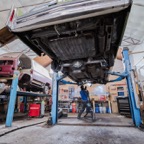
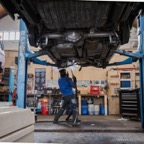
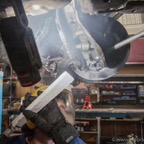
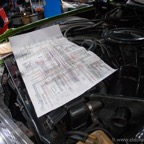
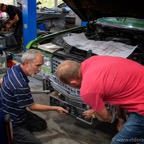
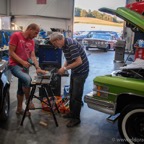
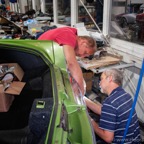
Technical inspection at a shop
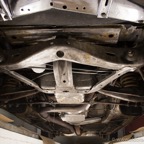
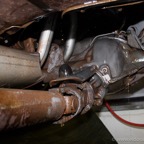
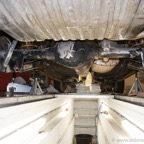
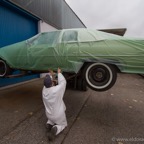
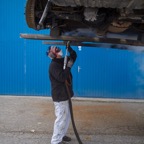
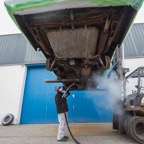
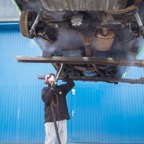
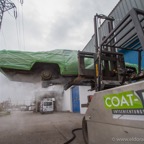
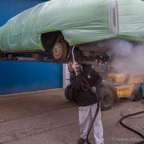
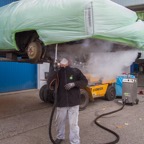
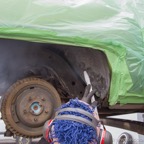
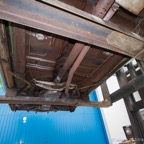
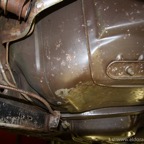
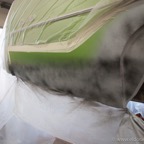
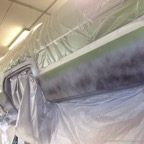
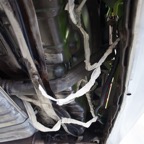
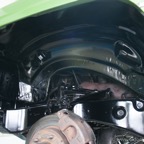
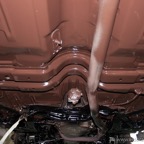
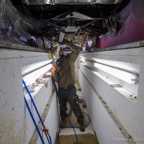
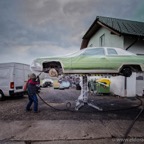
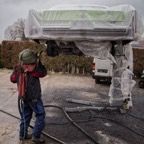
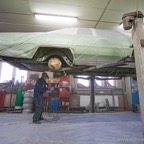
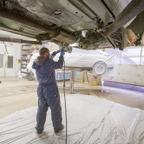
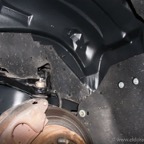
Steam cleaning the undercarriage
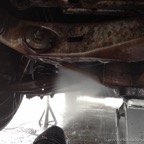
Steam cleaning the undercarriage
Steam cleaning the undercarriage
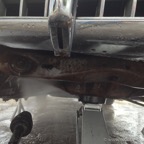
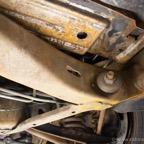
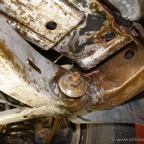
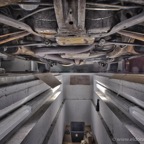
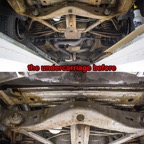
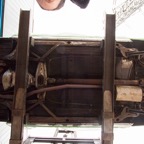
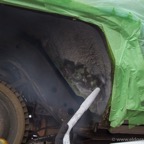
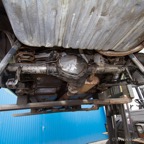
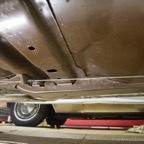
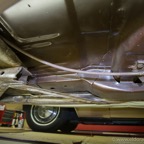
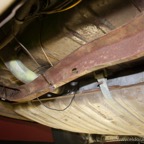
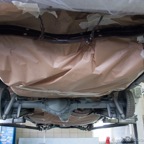
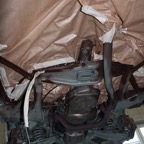
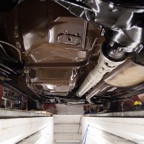
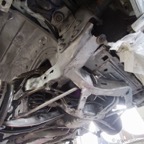
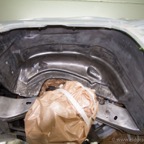
Fall 2015 - before cleaning up the undercarriage.
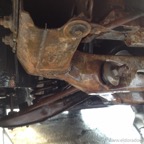
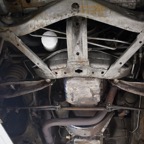
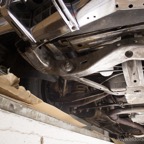
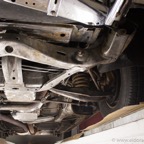
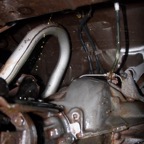
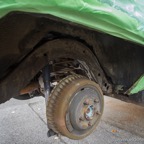
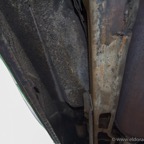
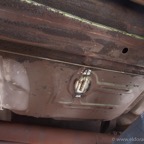
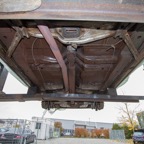
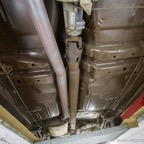
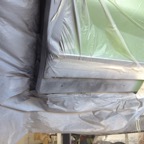
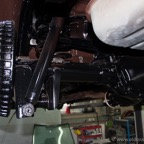
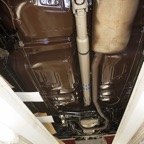
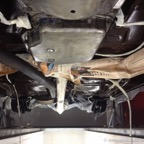
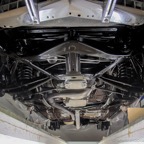
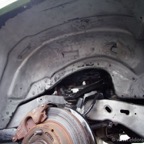
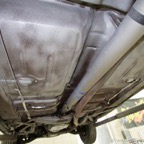
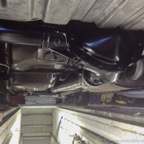
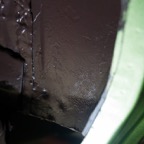
Undercarriage clean up
Undercarriage clean up
Undercarriage clean up

Undercarriage clean up
Undercarriage clean up
Undercarriage clean up
Undercarriage clean up
Undercarriage clean up
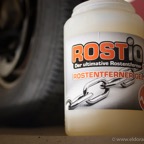
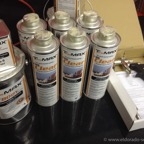
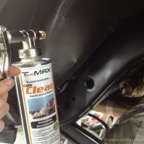
Rust remover gel
Undercarriage clean up
Rust remover gel
Rust remover gel
Rust remover gel
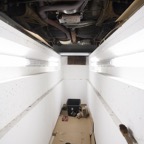
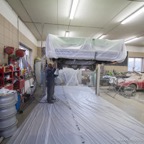
my workspace for the next weeks
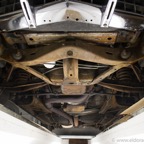
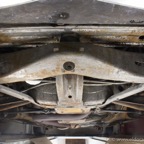
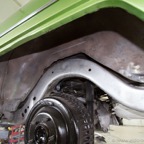
before the clean up began
test spot after the first application of the rust remover gel
Rust remover gel in action
Some of the rust is already gone after the first application of the rust remover gel
Some of the rust is already gone after the first application of the rust remover gel
Some of the rust is already gone after the first application of the rust remover gel
Some of the rust is already gone after the first application of the rust remover gel
Some of the rust is already gone after the first application of the rust remover gel
Some of the rust is already gone after the first application of the rust remover gel
Some of the rust is already gone after the first application of the rust remover gel
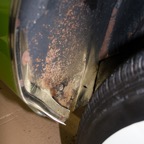
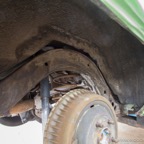
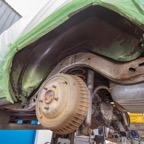
The area around the fender skirts is always a trap for moisture
I will clean up the fender skirts as well and protect them properly.
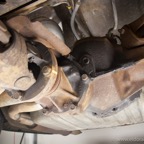
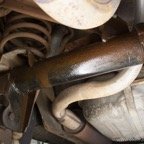
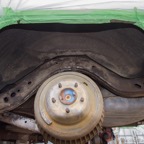
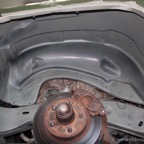
The wheel housing needs some attention as well. Nothing serious though
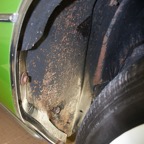
The wheel housing needs some attention as well
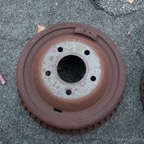
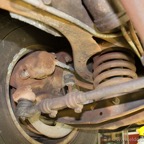
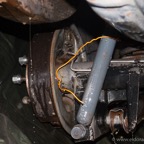
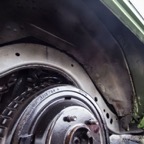
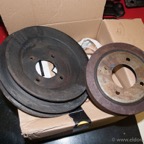
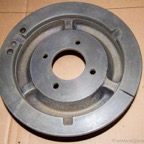
Before removing the rust on the rear brake drums.
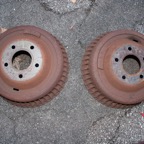
Before removing the rust on the rear brake drums.
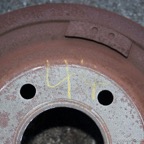
Original factory markings. Before removing the rust on the rear brake drums.
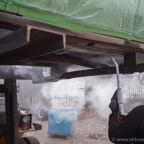
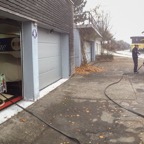
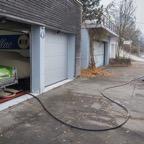
I have now set up a system where I can spray rust remover liquid onto the rusty parts permanently. I´m using a recirculating pump to spray on the rust remover. I can let it run for days until all the surface rust is gone. The advantage is that the liquid can now get everywhere and should remove the last little piece of rust.
I have now set up a system where I can spray rust remover liquid onto the rusty parts permanently. I´m using a recirculating pump to spray on the rust remover. I can let it run for days until all the surface rust is gone. The advantage is that the liquid can now get everywhere and should remove the last little piece of rust.
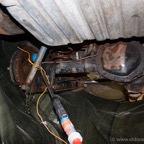
I have now set up a system where I can spray rust remover liquid onto the rusty parts permanently. I´m using a recirculating pump to spray on the rust remover. I can let it run for days until all the surface rust is gone. The advantage is that the liquid can now get everywhere and should remove the last little piece of rust.
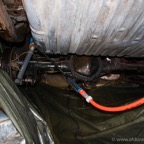
I have now set up a system where I can spray rust remover liquid onto the rusty parts permanently. I´m using a recirculating pump to spray on the rust remover. I can let it run for days until all the surface rust is gone. The advantage is that the liquid can now get everywhere and should remove the last little piece of rust.
I have now set up a system where I can spray rust remover liquid onto the rusty parts permanently. I´m using a recirculating pump to spray on the rust remover. I can let it run for days until all the surface rust is gone. The advantage is that the liquid can now get everywhere and should remove the last little piece of rust.
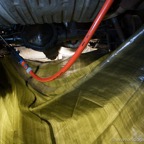
I have now set up a system where I can spray rust remover liquid onto the rusty parts permanently. I´m using a recirculating pump to spray on the rust remover. I can let it run for days until all the surface rust is gone. The advantage is that the liquid can now get everywhere and should remove the last little piece of rust.
I have now set up a system where I can spray rust remover liquid onto the rusty parts permanently. I´m using a recirculating pump to spray on the rust remover. I can let it run for days until all the surface rust is gone. The advantage is that the liquid can now get everywhere and should remove the last little piece of rust.
I have now set up a system where I can spray rust remover liquid onto the rusty parts permanently. I´m using a recirculating pump to spray on the rust remover. I can let it run for days until all the surface rust is gone. The advantage is that the liquid can now get everywhere and should remove the last little piece of rust.
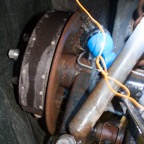
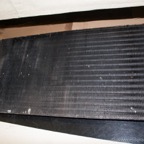
The brakes before cleaning
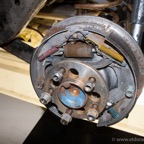
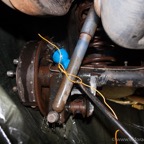
The brakes after cleaning
I have now set up a system where I can spray rust remover liquid onto the rusty parts permanently. I´m using a recirculating pump to spray on the rust remover. I can let it run for days until all the surface rust is gone. The advantage is that the liquid can now get everywhere and should remove the last little piece of rust.
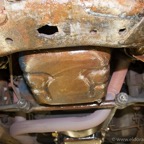
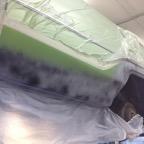
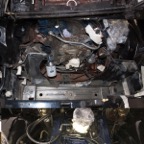
I had the undercarriage dry ice blasted to remove all the undercoating
I had the undercarriage dry ice blasted to remove all the undercoating
I had the undercarriage dry ice blasted to remove all the undercoating
I had the undercarriage dry ice blasted to remove all the undercoating
BEFORE - I had the undercarriage dry ice blasted to remove all the undercoating
BEFORE I had the undercarriage dry ice blasted to remove all the undercoating
BEFORE - I had the undercarriage dry ice blasted to remove all the undercoating
I had the undercarriage dry ice blasted to remove all the undercoating
I had the undercarriage dry ice blasted to remove all the undercoating
I had the undercarriage dry ice blasted to remove all the undercoating
I had the undercarriage dry ice blasted to remove all the undercoating
I had the undercarriage dry ice blasted to remove all the undercoating
The original paint appeared underneath the undercoating while blasting
I had the undercarriage dry ice blasted to remove all the undercoating
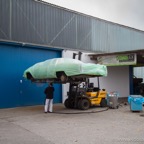
I had the undercarriage dry ice blasted to remove all the undercoating
I had the undercarriage dry ice blasted to remove all the undercoating
I had the undercarriage dry ice blasted to remove all the undercoating
I had the undercarriage dry ice blasted to remove all the undercoating
I had the undercarriage dry ice blasted to remove all the undercoating
I had the undercarriage dry ice blasted to remove all the undercoating
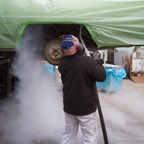
I had the undercarriage dry ice blasted to remove all the undercoating
I had the undercarriage dry ice blasted to remove all the undercoating

I had the undercarriage dry ice blasted to remove all the undercoating
I had the undercarriage dry ice blasted to remove all the undercoating
I had the undercarriage dry ice blasted to remove all the undercoating
I had the undercarriage dry ice blasted to remove all the undercoating
I had the undercarriage dry ice blasted to remove all the undercoating
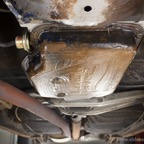
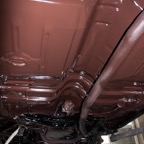
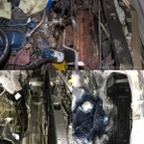
After the underoating was removed
After the underoating was removed
After the underoating was removed
After the underoating was removed
After the underoating was removed
After the underoating was removed
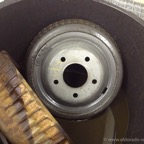
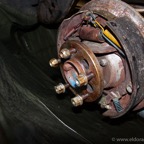
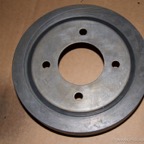
The drum after de-rusting - the original factory markings are still there.
After the underoating was removed
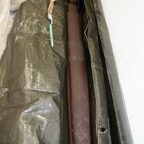
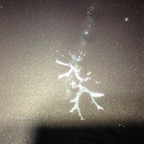
The driveshaft is soaking in rust remover liquid. It revealed the original factory markings. It will take about 48 hours until all the rust is completely gone...
After the underoating was removed
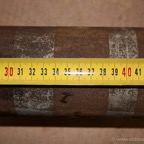
The location of the factory markings. I measured them to make sure that I can replicate them when I will paint the driveshaft. The first two markings were (light) blue. They are too far gone unfortunately.
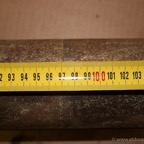
The driveshaft is soaking in rust remover liquid. It revealed the original factory markings. It will take about 48 hours until all the rust is completely gone...
I got new front center bumper ends and painted them on the inside after I had removed all the rust.
I got new front center bumper ends and painted them on the inside after I had removed all the rust.
The driveshaft after the rust remover “bath“
The driveshaft after the rust was removed
I re-applied the factory markings to the driveshaft at the correct place
I re-applied the factory markings to the driveshaft at the correct place
The finished driveshaft
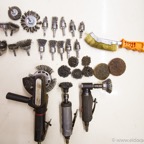
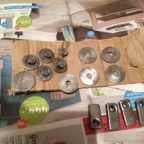
This were the tools I used to de-rust the undercarriage of my car. My friend Richard borrowed me his cool pneumatic tools.
I removed all the rust.
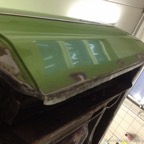
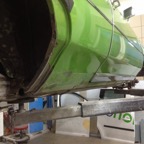
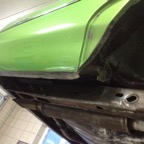
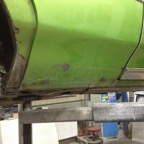
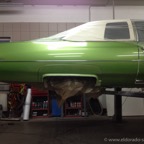
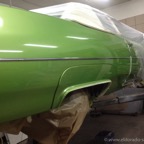
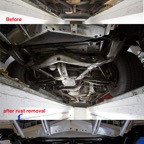
In the paintshop. The lower edge behind the rear wheels had suffered a bit over the last 41 years... I decided to have it fixed properly and sacrifice a little of the original paint for this „frown“-Emoticon Also the area around the fender skirts needed a little attention to look like new again. No real severe rust issue, but more of a preventive and cosmetic measure... Fenderskirts will be repainted as well... These areas are now in primer and filler and will be painted soon
In the paintshop. The lower edge behind the rear wheels had suffered a bit over the last 41 years... I decided to have it fixed properly and sacrifice a little of the original paint for this „frown“-Emoticon Also the area around the fender skirts needed a little attention to look like new again. No real severe rust issue, but more of a preventive and cosmetic measure... Fenderskirts will be repainted as well... These areas are now in primer and filler and will be painted soon
Finding the right color for the under carriage. We eventually found the right color based on “Chocolate Brown"
In the paintshop. The lower edge behind the rear wheels had suffered a bit over the last 41 years... I decided to have it fixed properly and sacrifice a little of the original paint for this „frown“-Emoticon Also the area around the fender skirts needed a little attention to look like new again. No real severe rust issue, but more of a preventive and cosmetic measure... Fenderskirts will be repainted as well... These areas are now in primer and filler and will be painted soon
In the paintshop. The lower edge behind the rear wheels had suffered a bit over the last 41 years... I decided to have it fixed properly and sacrifice a little of the original paint for this „frown“-Emoticon Also the area around the fender skirts needed a little attention to look like new again. No real severe rust issue, but more of a preventive and cosmetic measure... Fenderskirts will be repainted as well... These areas are now in primer and filler and will be painted soon
In the paintshop. The lower edge behind the rear wheels had suffered a bit over the last 41 years... I decided to have it fixed properly and sacrifice a little of the original paint for this „frown“-Emoticon Also the area around the fender skirts needed a little attention to look like new again. No real severe rust issue, but more of a preventive and cosmetic measure... Fenderskirts will be repainted as well... These areas are now in primer and filler and will be painted soon

Before painting

Before painting
In the paintshop. The lower edge behind the rear wheels had suffered a bit over the last 41 years... I decided to have it fixed properly and sacrifice a little of the original paint for this „frown“-Emoticon Also the area around the fender skirts needed a little attention to look like new again. No real severe rust issue, but more of a preventive and cosmetic measure... Fenderskirts will be repainted as well... These areas are now in primer and filler and will be painted soon
In the paintshop. The lower edge behind the rear wheels had suffered a bit over the last 41 years... I decided to have it fixed properly and sacrifice a little of the original paint for this „frown“-Emoticon Also the area around the fender skirts needed a little attention to look like new again. No real severe rust issue, but more of a preventive and cosmetic measure... Fenderskirts will be repainted as well... These areas are now in primer and filler and will be painted soon
In the paintshop. The lower edge behind the rear wheels had suffered a bit over the last 41 years... I decided to have it fixed properly and sacrifice a little of the original paint for this „frown“-Emoticon Also the area around the fender skirts needed a little attention to look like new again. No real severe rust issue, but more of a preventive and cosmetic measure... Fenderskirts will be repainted as well... These areas are now in primer and filler and will be painted soon
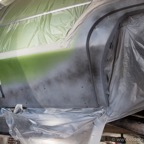
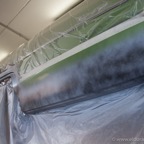
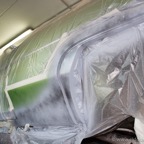
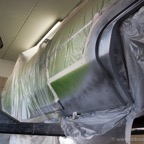
I had to mask off quite a lot before painting
I had to mask off quite a lot before painting
First coat of primer
First coat of primer
Finding the right shade of Persian Lime for a perfect match. The computer had the color in the system and it already was a very good match.
The floor pans are now repainted in the correct shade of brown.
The floor pans are now repainted in the correct shade of brown.
First coat of black.
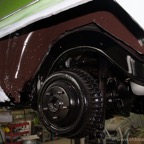
The rear axle is back in black. I will paint the rear brake drums in a bare metal look later once the car is back home. I will also install new shocks and paint the tank with Eastwood Tank Tone paint.
The floor pans are now repainted in the correct shade of brown.
In the paintshop. The lower edge behind the rear wheels had suffered a bit over the last 41 years... I decided to have it fixed properly and sacrifice a little of the original paint for this „frown“-Emoticon Also the area around the fender skirts needed a little attention to look like new again. No real severe rust issue, but more of a preventive and cosmetic measure... Fenderskirts will be repainted as well... These areas are now in primer and filler and will be painted soon
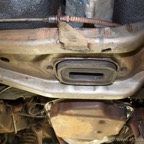
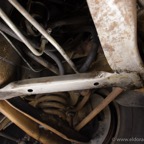
This are the areas on the sheet metal that needed some attention. Nothing serious - but better to fix it now before a problem arises eventually in the future.

This are the areas on the sheet metal that needed some attention. Nothing serious - but better to fix it now before a problem arises eventually in the future.
This are the areas on the sheet metal that needed some attention. Nothing serious - but better to fix it now before a problem arises eventually in the future.
This are the areas on the sheet metal that needed some attention. Nothing serious - but better to fix it now before a problem arises eventually in the future.
This are the areas on the sheet metal that needed some attention. Nothing serious - but better to fix it now before a problem arises eventually in the future.
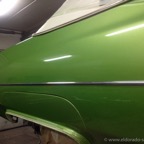
The paintshop did a perfect color match!
The paintshop did a perfect color match!
The paintshop did a perfect color match!
I forgot some of the fasteners for the rubber splash guards in the rust dissolver solution. It ate away the zinc plating. So I had to remove the remains of the zinc plating with a wire brush.
The cleaned fasteners. I spray painted them afterwards with Eastwood zinc paint.
After painting
After painting
Masking for the undercoating
After painting
The paint flaked off again
The paint flaked off again
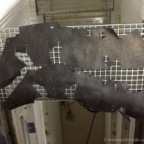
74undercarriage-BG-74beforeandafter.jpg
After painting
The dry ice blaster is trying to remove the paint again so that I can start all over again
74undercarriage-BG-74beforeinbetweenandafter.jpg
The clear undercoating I´m planning to use.
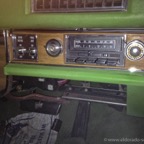
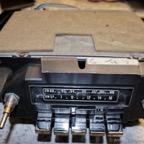
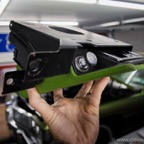
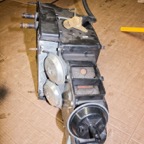
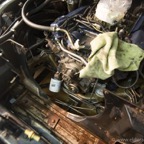
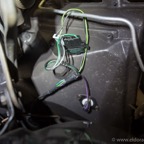
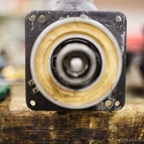
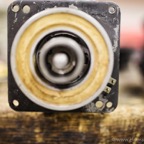
Repairing the radio
74restoration2016_MG_8885-Bearbeitet.jpg
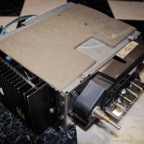
Repairing the radio
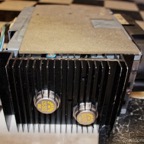
Repairing the radio
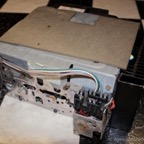
Repairing the radio
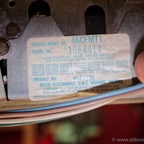
Repairing the radio
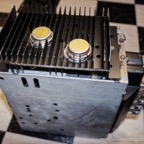
Repairing the radio
Repairing the radio
Repairing the ashtray mechanism
Repairing the ashtray mechanism
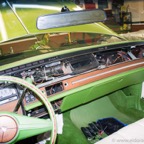
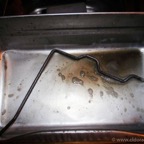
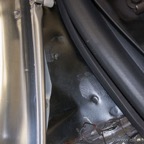
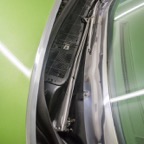
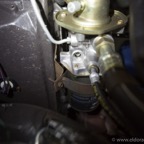
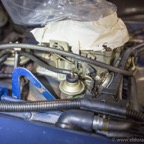
Repairing the leaky heater core
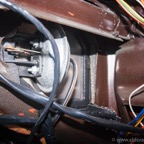
Repairing the leaky heater core
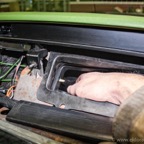
Repairing the leaky heater core
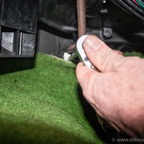
Repairing the leaky heater core
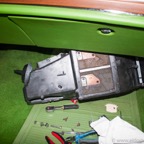
Repairing the leaky heater core
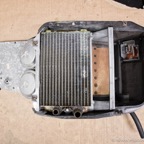
Repairing the leaky heater core
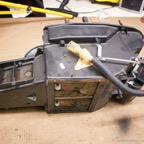
Repairing the leaky heater core
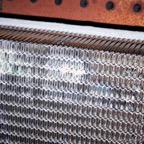
Repairing the leaky heater core
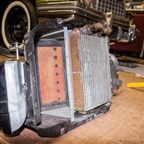
Repairing the leaky heater core
Repairing the leaky heater core
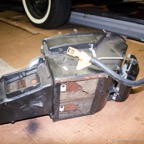
Repairing the leaky heater core
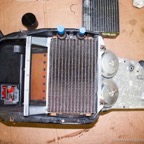
Repairing the leaky heater core
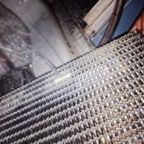
Repairing the leaky heater core
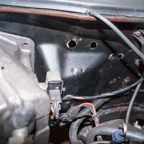
Repairing the leaky heater core
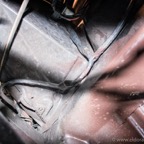
Repairing the leaky heater core
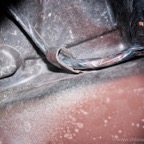
Repairing the leaky heater core

Repairing the leaky heater core
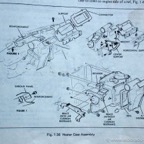
Repairing the leaky heater core
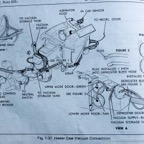
Repairing the leaky heater core
Repairing the leaky heater core
74restoration2016_MG_8952-Bearbeitet.jpg
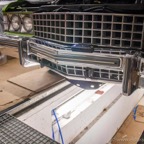
Replaced the center front bumper ends
Replaced the center front bumper ends
Replaced the center front bumper ends
Replaced the center front bumper ends
Replaced the center front bumper ends
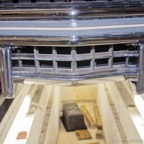
Replaced the center front bumper ends
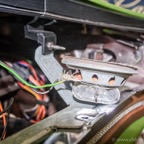
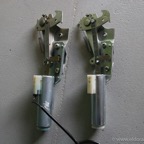
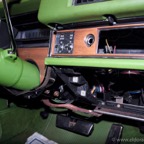
I had to replace all the speakers
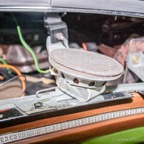
I had to replace all the speakers
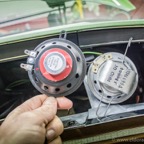
I had to replace all the speakers
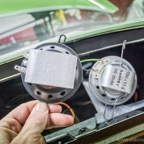
I had to replace all the speakers
I had to replace all the speakers
I had to replace all the speakers
I had to replace all the speakers
I had to replace all the speakers
I had to replace all the speakers

I had to replace all the speakers
I had to replace all the speakers
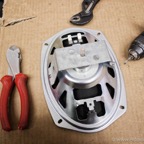
I had to replace all the speakers
I had to replace all the speakers
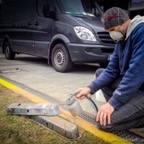
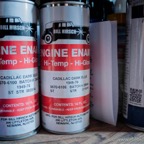
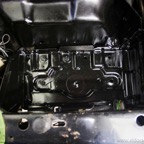
Repainted the valve covers
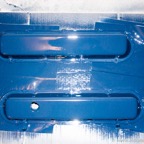
Repainted the valve covers
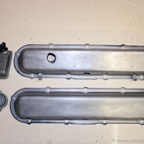
Repainted the valve covers
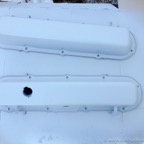
Repainted the valve covers
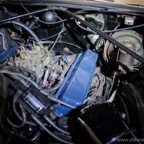
Repainted the valve covers
Repainted the valve covers
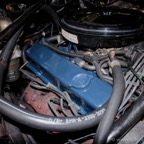
Repainted the valve covers
74restoration2016_MG_9029-Bearbeitet.jpg
74restoration2016_MG_9030-Bearbeitet.jpg
74restoration2016_MG_9031-Bearbeitet.jpg
Had to remove all the paint once again
Had to remove all the paint once again
Had to remove all the paint once again
Had to remove all the paint once again
Had to remove all the paint once again
Had to remove all the paint once again
Had to remove all the paint once again
Had to remove all the paint once again
Had to remove all the paint once again
Had to remove all the paint once again
Had to remove all the paint once again
Had to remove all the paint once again
Had to remove all the paint once again
Had to remove all the paint once again
74restoration2016_MG_4722-Bearbeitet.jpg

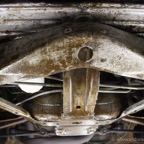
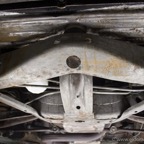
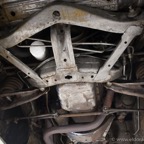
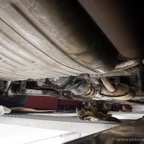
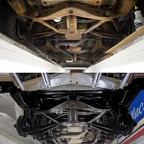
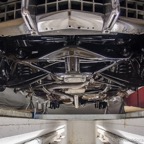
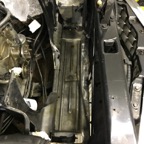
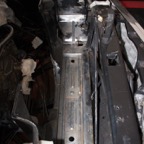
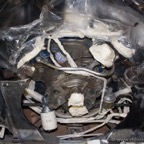
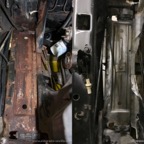
The undercarriage project

The undercarriage project
The undercarriage project
The undercarriage project
The undercarriage project
The undercarriage project
The undercarriage project

The undercarriage project
The undercarriage project
The undercarriage project
The undercarriage project - the paint reacted with the stone guard
The undercarriage project - the paint reacted with the stone guard
74restoration2016IMG_6418.jpg
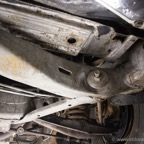
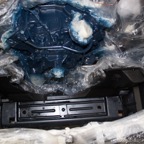
The undercarriage project
The undercarriage project
The undercarriage project
The undercarriage project
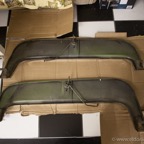
The undercarriage project - the fender skirts before cleaning
The undercarriage project - the fender skirts before cleaning
The undercarriage project - the fender skirts before cleaning
The undercarriage project - the fender skirts before cleaning
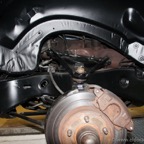
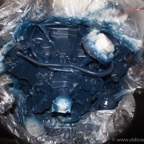
The undercarriage project
The undercarriage project
The undercarriage project
The undercarriage project
The undercarriage project
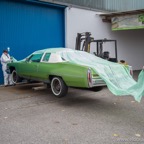
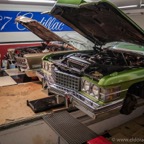
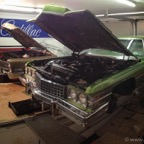
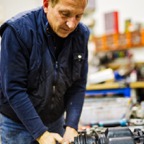
Getting the car ready with my friends Steve and Lucky
Getting the car ready with my friends Steve and Lucky
Getting the car ready with my friends Steve and Lucky
Getting the car ready with my friends Steve and Lucky
Getting the car ready with my friends Steve and Lucky
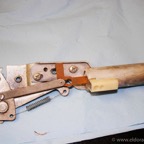
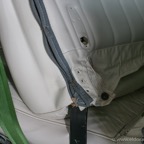
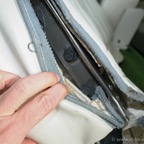
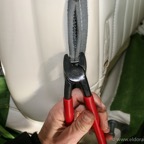
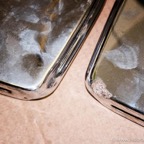
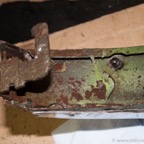
Seat Back Lock repair

Seat Back Lock repair
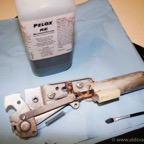
Seat Back Lock repair
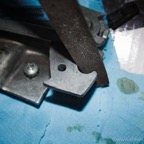
Seat Back Lock repair
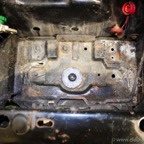
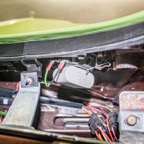
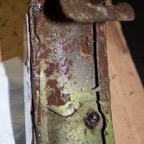
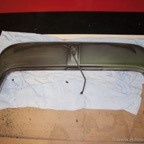
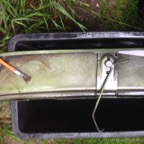
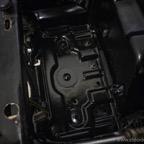
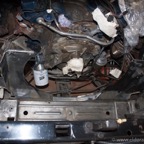
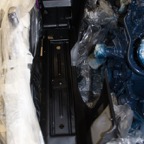
Battery tray restoration
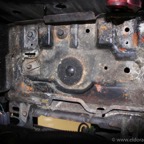
Battery tray restoration

Battery tray restoration
Battery tray restoration
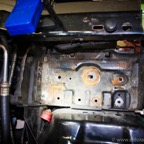
Battery tray restoration
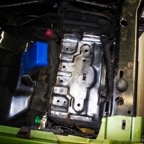
Battery tray restoration
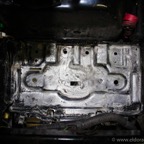
Battery tray restoration
Battery tray restoration
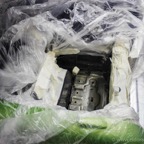
Battery tray restoration
Battery tray restoration
Battery tray restoration
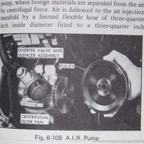
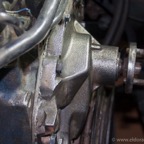
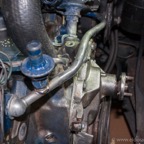
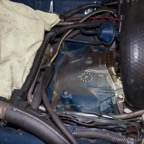
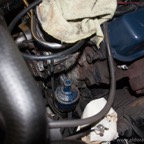
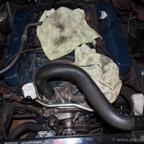
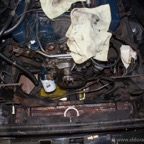
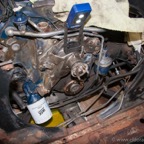
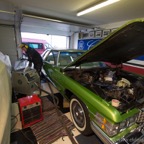
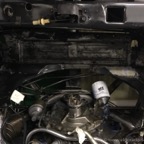
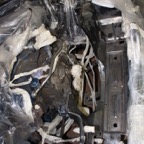
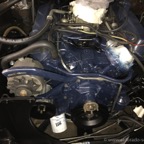
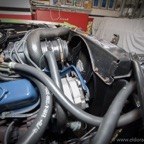
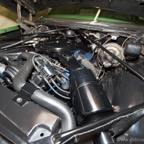
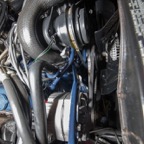
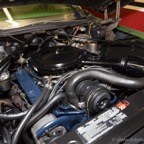
AIR Pump and Engine Detailing project. Fall 2016
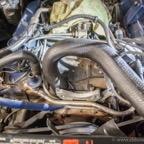
AIR Pump and Engine Detailing project. Fall 2016
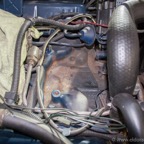
AIR Pump and Engine Detailing project. Fall 2016
AIR Pump and Engine Detailing project. I had a broken bolt at the pulley.
AIR Pump and Engine Detailing project. Fall 2016
AIR Pump and Engine Detailing project. Fall 2016
AIR Pump and Engine Detailing project. Fall 2016
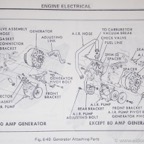
AIR Pump and Engine Detailing project. Fall 2016
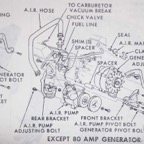
AIR Pump and Engine Detailing project. Fall 2016
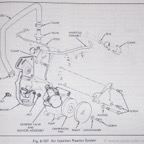
AIR Pump and Engine Detailing project. Fall 2016
AIR Pump and Engine Detailing project. Fall 2016
AIR Pump and Engine Detailing project. Fall 2016
AIR Pump and Engine Detailing project. Fall 2016
AIR Pump and Engine Detailing project. Fall 2016
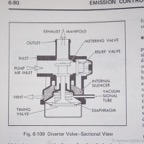
AIR Pump and Engine Detailing project. Fall 2016
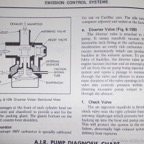
AIR Pump and Engine Detailing project. Fall 2016
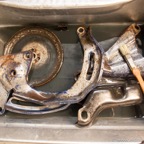
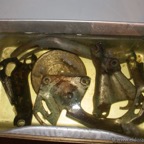
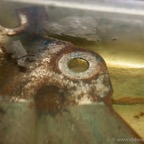
Rust removal
Rust removal
Rust removal
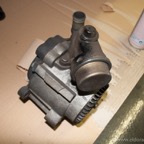
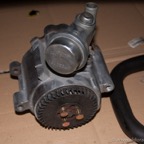
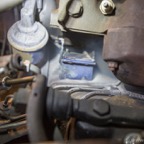
The power steering pump before cleaning
PS pump removed
AIR Pump and Engine Detailing project. Fall 2016
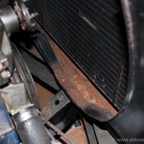
I will remove the radiator as well to clean up the rust underneath
Power Steering Pump is out for detailing
AIR Pump almost finished
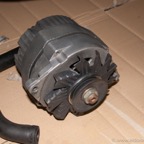
Generator cleaned
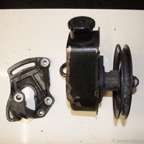
Painted pulley
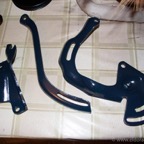
Painted brackets
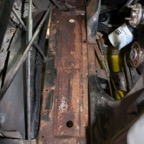
I took out the radiator to clean the rust underneath
I took out the radiator to clean the rust underneath
I took out the radiator to clean the rust underneath

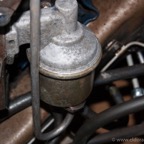
The power steering pump right after painting with wet paint... I took it down to bare metal before painting, but I forgot to take a picture..
74condenser_MG_9437.jpg
74condenser_MG_9439.jpg
74condenser_MG_9441.jpg
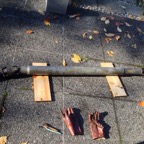
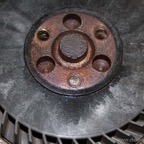
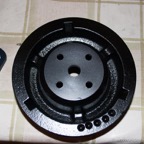
Harmonic Balancer and Crankshaft pulley before cleaning
Condenser before cleaning
Harmonic Balancer after rust removal
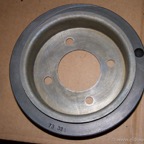
Crankshaft pulley after cleaning
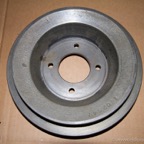
Crankshaft pulley after cleaning
Harmonic Balancer after rust removal
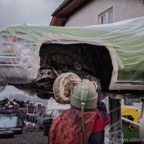
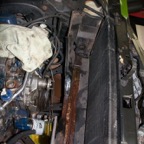
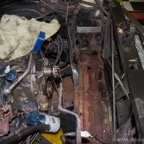
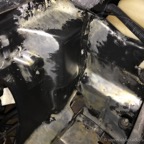
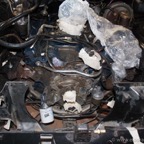
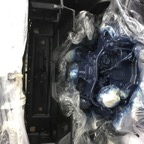
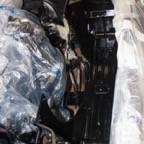
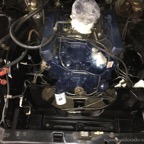
Dry Ice Cleaning the engine bay - Nov 2016
Dry Ice Cleaning the engine bay - Nov 2016
Dry Ice Cleaning the engine bay - Nov 2016
Dry Ice Cleaning the engine bay - Nov 2016

Dry Ice Cleaning the engine bay - Nov 2016

Dry Ice Cleaning the engine bay - Nov 2016

Dry Ice Cleaning the engine bay - Nov 2016
Dry Ice Cleaning the engine bay - Nov 2016
Dry Ice Cleaning the engine bay - Nov 2016
Dry Ice Cleaning the engine bay - Nov 2016
Dry Ice Cleaning the engine bay - Nov 2016
Dry Ice Cleaning the engine bay - Nov 2016

Dry Ice Cleaning the engine bay - Nov 2016
Dry Ice Cleaning the engine bay - Nov 2016
Dry Ice Cleaning the engine bay - Nov 2016
Dry Ice Cleaning the engine bay - Nov 2016
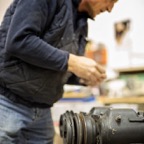
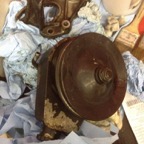
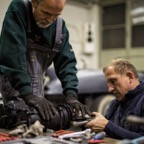
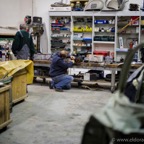
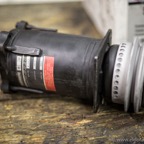
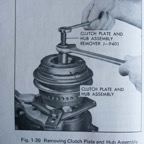
Repairing the A6 AC Compressor. My friend Lucky at work.
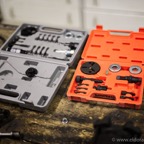
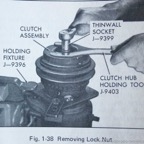
Special tools for the AC Compressor
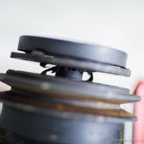
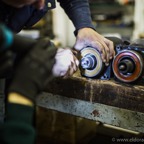
The bearing on the original compressor was bad
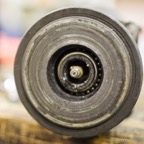
The bearing on the original compressor was bad
The clutch removed
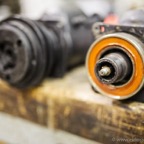
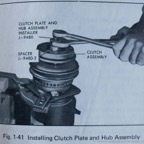
The rebuilt and the original compressor
Repairing the A6 AC Compressor. My friend Lucky at work.
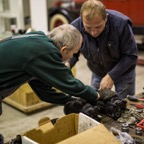
My friends Steve and Lucky at work
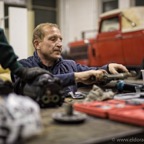
Lucky in his workshop
My friends Steve and Lucky at work
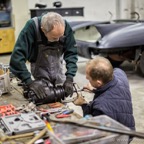
My friends Steve and Lucky at work
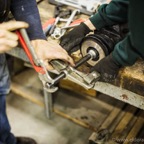
Repairing the A6 AC Compressor.
Repairing the A6 AC Compressor.
The rebuilt and the original compressor
Lucky in his workshop
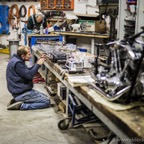
Lucky in his workshop
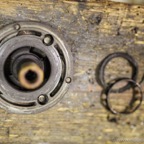
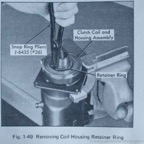
Clutch coil can now be turned to the correct position
Lucky in his workshop
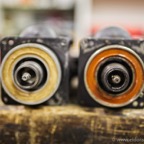
The coil terminal in the incorrect position
The coil terminal in the correct position
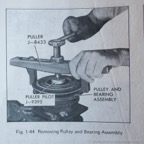
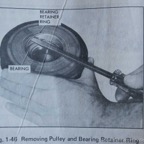
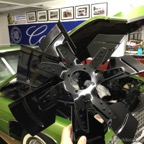
The sandblasted pulley on the original rebuilt compressor
Repairing the A6 AC Compressor.
Repairing the A6 AC Compressor.
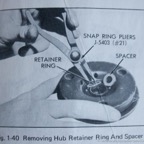
Repairing the A6 AC Compressor.
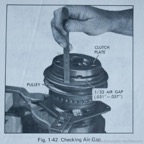
Repairing the A6 AC Compressor.
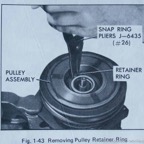
Repairing the A6 AC Compressor.
Repairing the A6 AC Compressor.
Repairing the A6 AC Compressor.
Repairing the A6 AC Compressor.
Repairing the A6 AC Compressor.
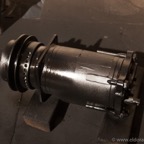
Repairing the A6 AC Compressor.
I had some parts powder coated
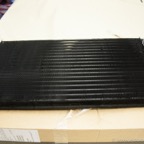
Condenser before
Condenser before
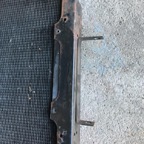
Condenser before
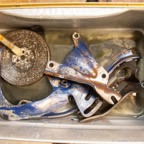
Condeser mountings soaking in rust remover liquid
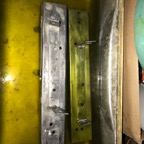
Restoring the condenser
Restoring the condenser

Restoring the condenser

Restoring the condenser
Restoring the condenser
Restoring the condenser

Restoring the condenser
Restoring the condenser
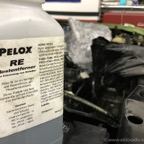
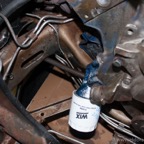
Rust removing liquid
All the rust is gone

All the rust is gone

All the rust is gone
All the rust is gone
All the rust is gone

All the rust is gone
Removing all the rust
Removing all the rust
Removing all the rust
Preparing for paint
Preparing for paint
Preparing for paint

Preparing for paint
Preparing for paint
Preparing for paint
Preparing for paint
Preparing for paint
Preparing for paint
Preparing for paint
Preparing for paint
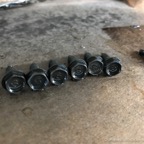
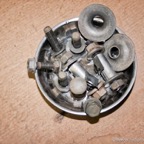
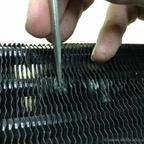
Also cleaned all the bolts
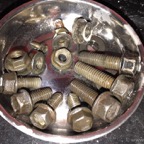
Also cleaned all the bolts
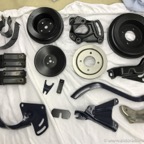
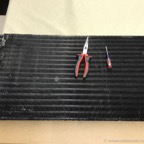
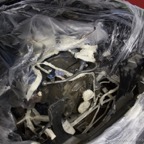
All the detailed parts

All the detailed parts
After painting
After painting
After painting - finished
After painting - finished
After painting - finished
Before and After
Before and After
Before and After
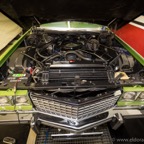
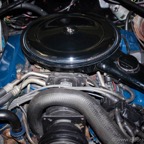
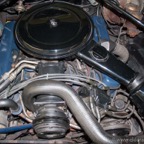
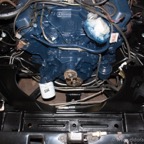
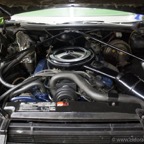
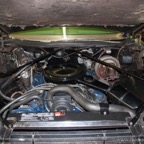
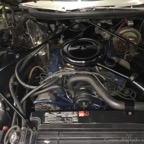
The finished engine bay

The finished engine bay
The finished engine bay

The finished engine bay
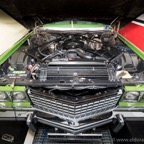
The finished engine bay
The finished engine bay
The finished engine bay
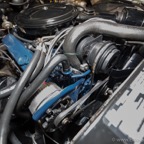
The finished engine bay
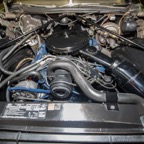
The finished engine bay
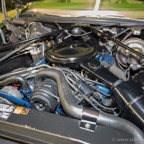
The finished engine bay
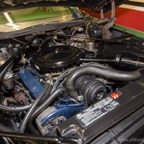
The finished engine bay
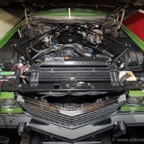
The finished engine bay
The finished engine bay